Fabric Free December?

Bali BatiksThis post appeared on the So Sew Easy Chatroom facebook page today;

Good morning ladies,
I posted a challenge yesterday about no fabric buying December and got an overwhelming response so I decided to make up some rules for it. Remember this is all in good fun,here we go: Continue reading

Posted in Fabric shops | Tagged , , | 6 Comments

Quilt for James

QuiltDespite having decided only last week that I need more clothes for the winter, common sense won over and I realised it would be less stress on myself if I made various presents first, I’ve got a cardigan, a shirt and some mini bags to make, plus a few Christmas decorations….first on my list however was a quilt for James, my son. It’s his birthday in the middle of January so you just get Christmas and New Year out of the way and all of a sudden it’s next week so a bit of advance planning is required. It’s actually his 21stbirthday. He celebrated his 18th bigtime and in our family you get the big celebration for one or the other, so he won’t be expecting anything major. He asked me last year to make him a quilt after he saw Helen’s black and white one. The problem was he couldn’t decide what colour he wanted and didn’t particularly enthuse about any design I showed him.

Sunny and Hazy QuiltA couple of months ago I ordered a book on Amazon called Say it with Quilts, I bought it for a gorgeous pansy quilt design, but another quilt design I liked was called Sunny and Hazy, it’s a chevron design, I love the way it was quilted down the chevron pattern. I immediately thought of James as it’s not a traditional quilt style.

Bali BatiksThe next issue was fabric, he’s a typical 20 year old lad, into cars and loud music (well he calls it music…) he certainly wouldn’t want your typical flowery quilt fabric! I decided to look at batiks, I realised that the pattern was made from triangles cut from 10 3/8″ squares, so a layer cake would be near enough with a few fat quarters to top it up. At the Harrogate Quilt show in August I chose a gorgeous layer cake from Bali Batiks and a co-ordinating set of six fat quarters, Helen helped choose the colours we thought her brother would like, I love them, sea blues and greens with browns too.

First Layout!This week I decided to set to and start it. I cut out all the triangles and then started arranging them on the floor as it’s the only flat space big enough. At first I spread out the very light ones and the very dark, but it just didn’t look right, then I tried having a chevron of light triangles, still not happy, it just didn’t sit easy on the eye. In the end I took all the very light ones out and arranged the chevrons in colourways and I’m much happier with it.

Final layout

Final layout

I’ve just started sewing it. I ended up posting a question on a quilting facebook page as although the book gives instructions, they’re not aimed at a novice! What concerned me was how to sew the triangles in such a way that when I stitched the lengths together, I won’t lose the points of the chevron. Someone finally explained how I need to line up the seam line, not the edges, so I end up with little ‘tails’ at either end! It’s worked most of the time, they’re not all perfect but I’m getting better! I’ve stitched three lengths so far, I’ve about 8 to go before I stitch the lengths together to make the quilt top.

James's QuiltIt’s going together fairly quickly, what’s delaying it now is Bonfire Night (5th November) so there’s lots of fireworks going off and my old dog Zac hates anything that goes bang, my sewing room is upstairs which is out of bounds for the dogs, I haven’t got the heart to leave him downstairs on his own so it’s hand-sewing this evening with him sat as near to me as possible!

Zac

Posted in Quilting, Sewing | Tagged , , | 7 Comments

Not a Woodland Stroll Cape

Woodland Stroll CapeLast week Ali (AKA Thimberlina) blogged about her Woodland Stroll Cape, it looked lovely and so easy to wear. It’s a pattern designed by Liesl & Co and available to download from Oliver & S. I must admit I’ve not used a digital clothes pattern before, I’ve done little things like bags, but not garments. I purchased it straight away and printed off the pattern. So thanks Ali for the inspiration!

I spent an enjoyable 10 minutes with scissors and sticky tape, sticking the pattern together, though I was rather puzzled at the end that I had one piece left!! Still not sussed that one out! The instructions were great, easy to follow with just enough pictures!

Woodland Stroll Cape
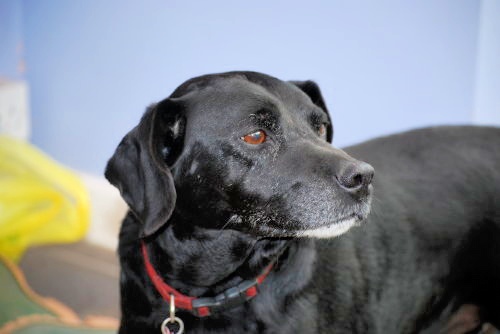
The pattern recommends wool, corduroy, velveteen for the outside and something silky for the lining. Last year at Goldhawk Road I bought some corduroy, it is beautiful, with a very fine cord, but you know when you buy something on impulse and then think Why oh why?? What was I thinking? Don’t get me wrong, it’s gorgeous, but it’s cream…with cording and sequins on…I have dogs and chickens…I just don’t have the lifestyle for say a cream winter skirt! I decided it would make a perfect cape, maybe more for a stroll to the theatre than a woodland stroll though! The lining is one of the few remnants I’ve bought on ebay that I’ve been disappointed with, it just wasn’t as pretty as it looked on screen. It was cheap so it wasn’t worth returning but it’s sat in my stash ever since. This was it’s moment to shine!!

Corduroy

I cut the corduroy out first. I was very careful to position the pieces so I didn’t have sequins and cording along the hem, or where the buttonholes would be (that was more tricky!) I also cut the back neck facing from the very edge where there wasn’t any embroidery. I removed all the sequins and excess cording from the seams, the sequins are clear ones, not too blingy but very well stitched on with three stitches each, none of this one snip and four fall off!

Woodland Stroll CapeThe lining proved a very slippery customer! It was one of those fabrics that moved every time you looked at it, never mind when you tried to cut it! It was such a slippery customer that having stay-stitched the necklines and shoulders, I returned to it having stitched the outer fabric together. The two fronts had completely disappeared! I searched the sewing room, the overflow on the landing, the ironing board area…in the end I cut another two fronts out! And no, they still haven’t appeared!

Stitching the outer fabric to the lining is the tricky bit with this pattern, it recommends lots of pins, I nearly ran out, it’s a very long seam!! I laid it out on the floor to get it as smooth as possible then checked the hang on Florence, my muse!

Woodland Stroll CapeIt’s turned the right way through the shoulder seam in the lining, I decided to edge-stitch round to reduce the risk of the lining peeping through. The pattern calls for 1″ buttons, mine are about 3/4″ as I couldn’t find any I liked the right size at a price I was prepared to pay! £1.30 per button was a step too far! 30p for these was much more like it!

Woodland Stroll CapeI have a buttonhole attachment for my sewing machine which does make life easier. I always have a debate with myself as to which buttonhole to do first, obvious ones, or less noticeable. I usually plump to do the obvious ones last, thinking I’ll be in the swing of it by then, inevitably they are the ones I make the mistake on as I’m so into the swing of it I lose my concentration! So it was today! The final buttonhole, the bottom one on the front, it looks perfect from the front, but  the lining decided to move and ruck up, I said it was a slippery customer! Very frustrating!

I’m really pleased with it, although I think I need to get used to the look, I feel somewhat large in it at the moment, maybe it needs a straight skirt with it. I think it’s be rather nice to wear on my next trip to  the theatre to see the musical Calendar Girls next month.
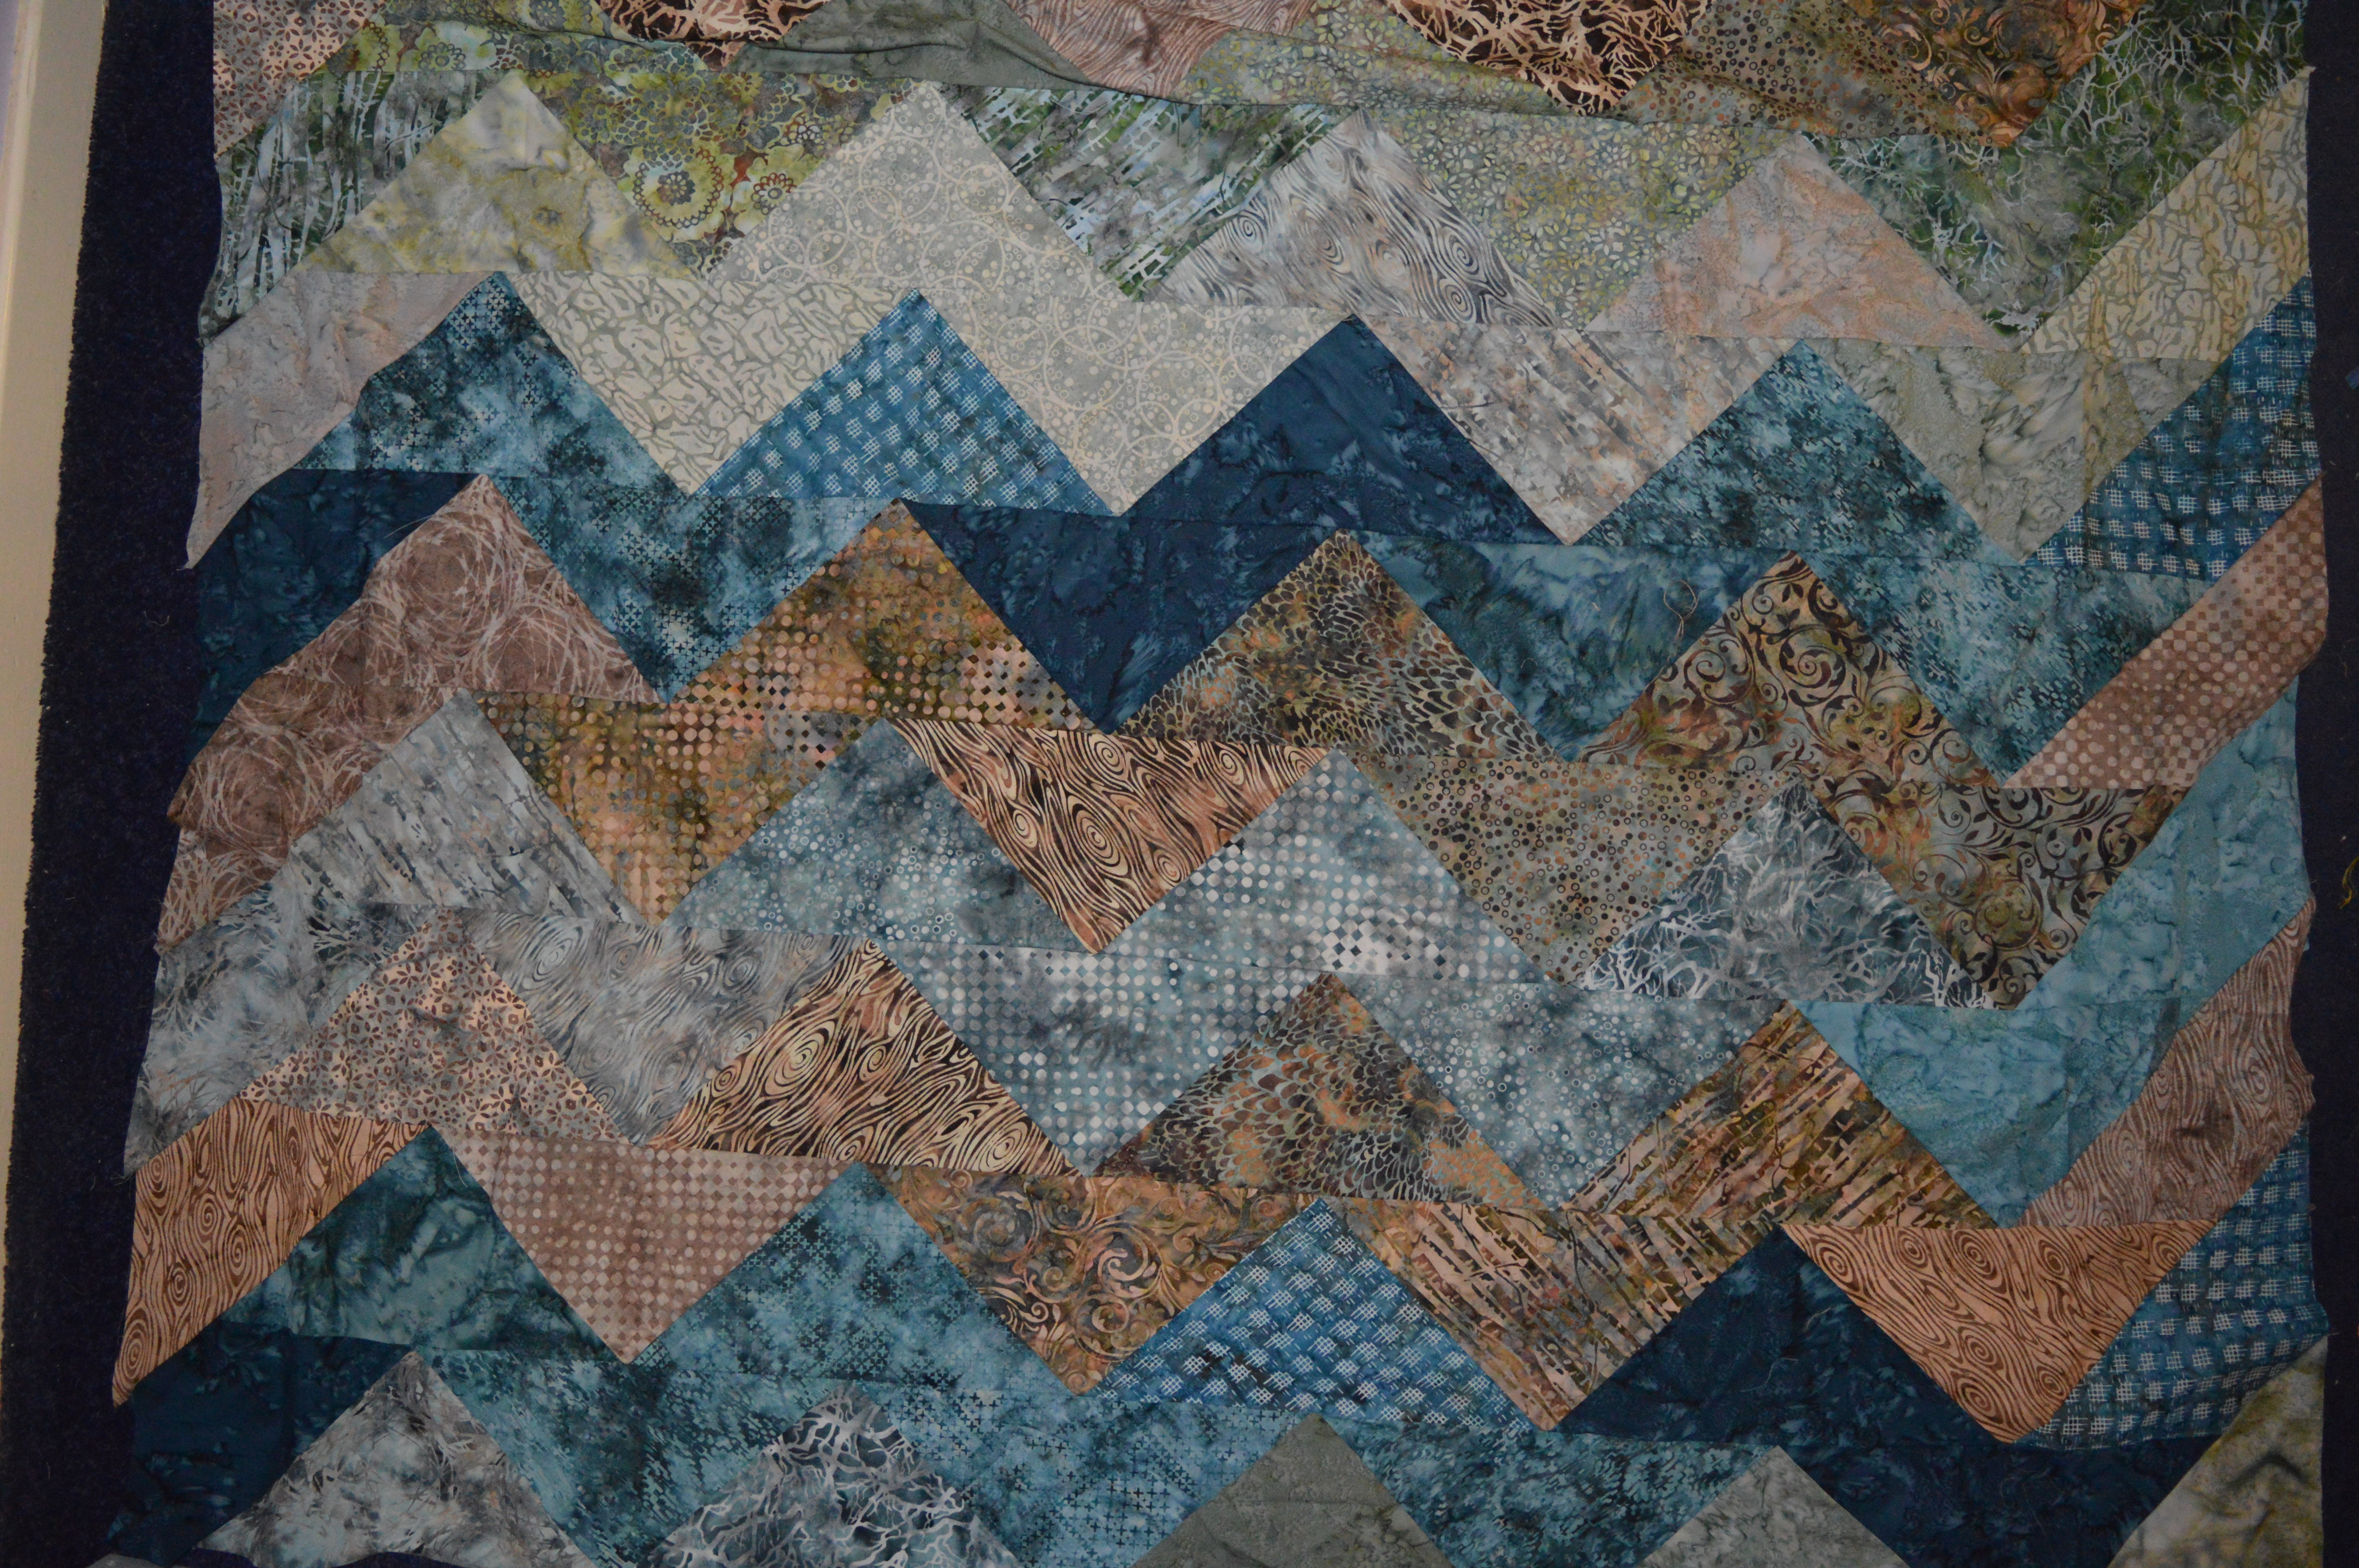
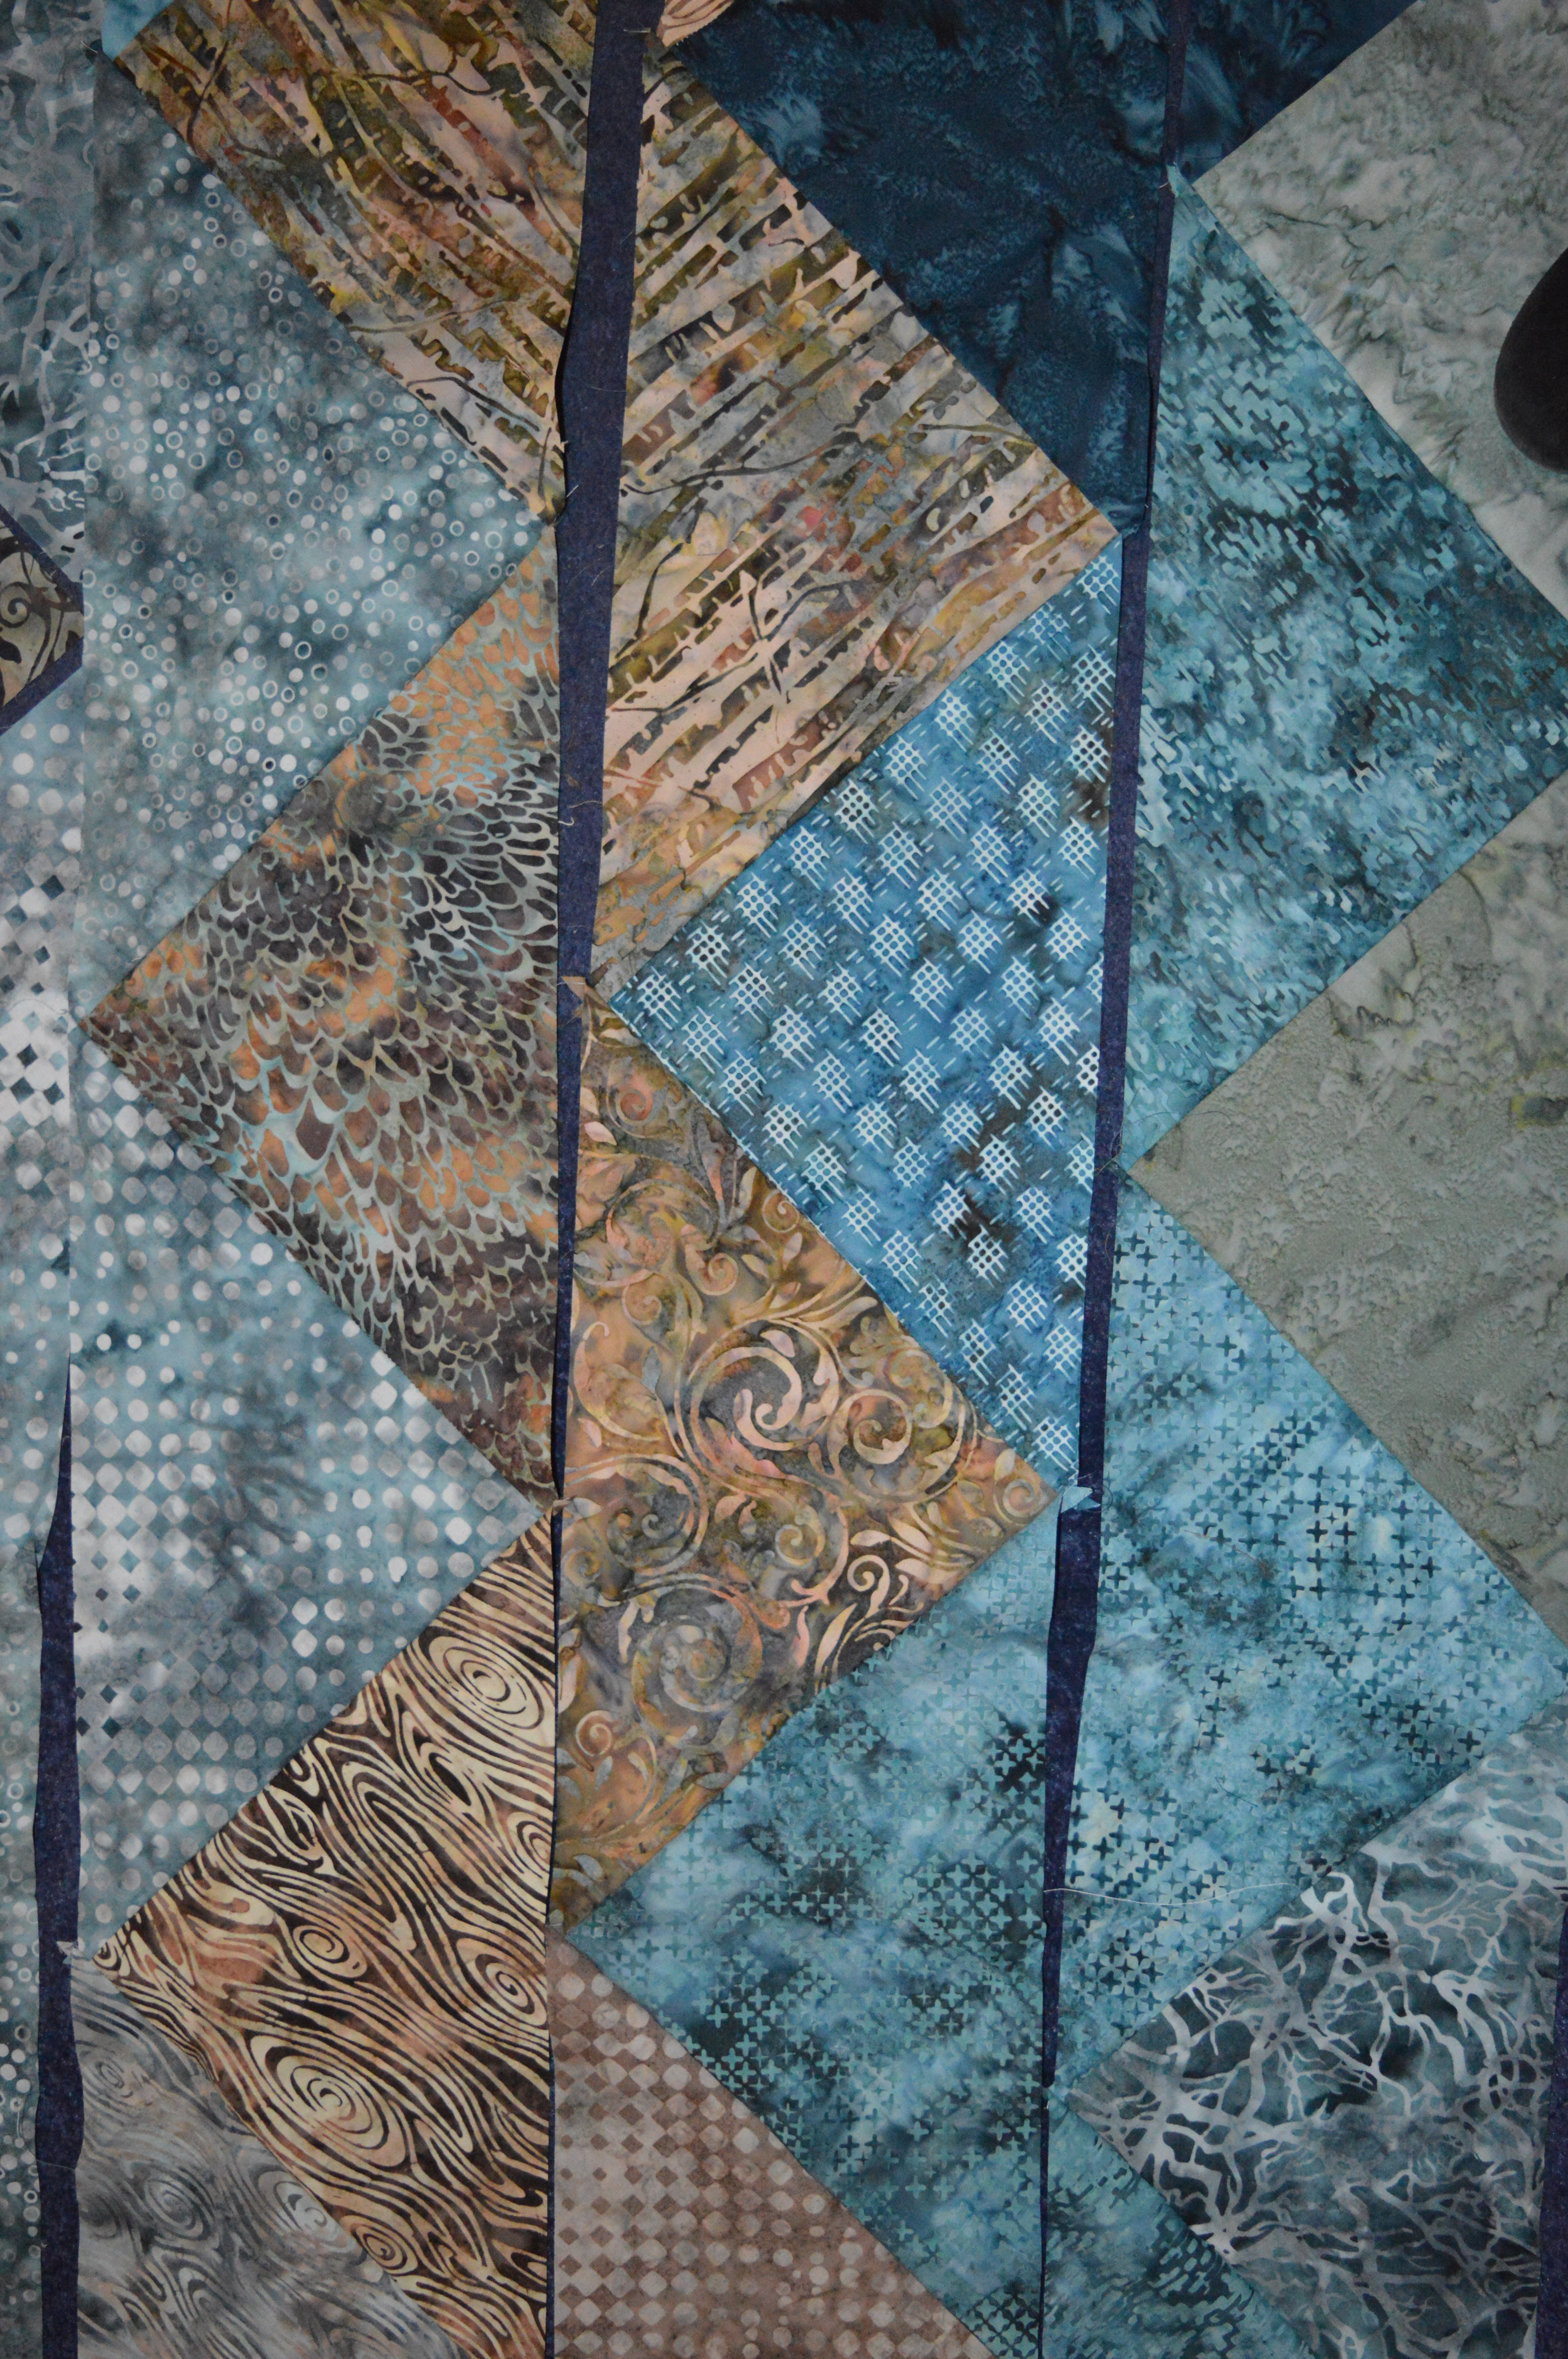
Woodland Stroll Cape

Posted in Dressmaking, Serendipity, Sewing | Tagged , | 11 Comments

Winter Skirt Time

DSC_0001I was sorting out my wardrobe the other day (which doesn’t take long as I actually don’t have that many clothes!) all the summer stuff got packed away and all the winter woolies etc brought out. It gave me chance to have a long hard look at my wardrobe and decide where the gaps are. I decided I need more winter skirts and shirts…and cardigans!

I went to my sewing room and pulled out a length of purple wool from my stash, I think I bought it in Goldhawk Road last year. I must admit on the shelf it didn’t look that exciting, even a bit drab, but actually once I pulled it out and looked at it it’s a lovely length of wool, it has a ‘running stitch stripe’ in grey, but like many wools the purple is made up of lots of different shades of purple which give it a beautiful depth to the colour. Continue reading

Posted in Dressmaking, Serendipity, Sewing | Tagged , | Leave a comment

Rainy Day Binding

Rain!It’s raining cats and dogs outside today, we’ve had a lovely dry autumn so far this year in Yorkshire, but last night the rain arrived big time, this is the view outside, misty and murky, a perfect sewing day really!!

I’m in binding mood at the moment. It started when I was quilting and binding my Vacation Time quilt. I managed to drop the cover of my bobbin holder on my sewing machine when I was changing the bobbin, I heard it drop, but could I find it!!! I ended up getting one off my spare sewing machine! This was compounded by my sewing machine breaking down so I had to find where I had stashed the foot and cable for my spare one…a major tidy up was required!!

Once I’d found the offending articles I then started looking at my stash…it’s quite big! I spotted a beautiful length of furnishing fabric I bought for £10 as a remnant. It’s a soft gold with gorgeous embroidered red flowers on it. I bought it with the idea of making a throw. All it needed was edging!

BindingI decided to bind it rather than hemming it, as with the embroidery it would have been too bulky. As it was quite a rich fabric, it needed a rich binding so I looked in my silk scraps drawer. I used to make lots of ball gowns and evening dresses for friends back in the 80’s and 90’s and my rule on scraps was if it was big enough to cover a padded coat-hanger, it was kept! I had several pieces of a beautiful red silk dupion, it was obviously the bits left from cutting the skirt out as they were long and tapered! It matched perfectly and I had just enough.

BindingAs I’ve mentioned before, I don’t really understand the maths or geometry behind the binding of quilts with perfect mitred corners, I follow the instructions and 2 1/2″ strips become a perfect 1/4″ binding with perfect mitred corners. Having not quite followed the instructions, I now understand when it doesn’t work so perfectly!

I cut 3″ strips to give me a slightly deeper binding. I decided instead of stitching with the edges together, I would place my binding just slightly in from the edge of the throw, thinking it would give me a  even deeper binding. It did give me deeper binding, but I realised later it meant my mitred corners were slightly off. They look fine, but I know they’re not perfect! I hand stitched the binding down as I still wasn’t sure about machine stitching it down whilst keeping it neat on the other side.Binding

I’m really pleased with the finished throw, it’s in the lounge where we have a red feature wall, so it co-ordinates nicely, I’m not sure my OH ‘gets’ throws so I don’t think he’s quite sure about it, especially as I’ve put it over his old chair!

Once the throw was completed I turned my attentions to an old blanket. When my in-laws come and stay they do like blankets on the bed rather than duvets. I think they like the weight. I read in a magazine some time ago about backing and binding blankets, so they’re softer and not as scratchy. I thought it was a nice idea.

Binding Having measured the blanket and discovered it was 2m x 2.20m I abandoned the idea of backing it, I just couldn’t face trying to baste it and tie such a big blanket. I still liked the idea of binding the edges though with a pretty cotton. Such a big blanket still takes a lot of fabric just to bind it! I found two lengths of Liberty lawn which my mother passed on to me years ago, I know the sale she bought it in so it must be about 25 years old. Half of me felt guilty using a Liberty lawn for a blanket, but I rationalised that it wasn’t a design I particularly liked and that it was more of a waste having sitting in a stash unlikely to ever be used.

BindingI wanted a traditional deep blanket binding. I had enough to cut 8″ strips, folded in half to a 4″ binding strip. At that point I still hadn’t quite realised the link with positioning of the edges and perfect mitred corners…so I stitched with the binding about 1/2″ in from the edge! I’ve got a lovely deep binding, but I’ve rounded the corners as the mitres definitely don’t work unless you stitch edge to edge! I still don’t understand the geometry behind stitching perfect mitres with the double fold method, but at least now I understand how it doesn’t work!

I machine stitched the binding down as the thought of hand stitching over 8m was somewhat off-putting! It’s not perfect and it has confirmed to me that I’m better hand-stitching a quilt edge down. It does make a difference having a nice soft cotton edge to the blanket and it looks pretty too, I still prefer duvets with a quilt on top though !

So that’s three lengths of fabric out of my stash, I might have a look what other quick projects are in there waiting for an afternoon’s sewing.

Binding

Posted in Sewing | Tagged , | 3 Comments

Quilting and Binding

My Vacation Time quilt is finished, it’s quilted and bound, just got loose threads to trim and it’s ready for giving at Christmas!

I started this quilt in January as it’s a Block of the Month designed by Pat Sloan. At the beginning of each month she released instructions for another block on her website. This month we got the instructions for filler blocks and putting it all together. It’s been a great learning experience, I can see the improvements in my blocks as the months go by.

Vacation Time QuiltI made the quilt with fabrics from my stash, some of them probably getting on for 25 years old. As the quilt was a surprise one, I didn’t know if I would like it so I didn’t want to spend a fortune on fabric on a quilt I may not like. I ended up having to buy one length of dark blue cotton from Samuel Taylors, as I didn’t have enough dark fabric for the last border and the binding. The backing is from leftovers too, I’ve used three different cottons going from light blue to dark, I like the effect.

Over the weekend I quilted it. Now I’m pretty new to quilting on my machine and this is certainly the biggest one I’ve tackled so far. I got quite a few tips at the WI Centenary Fair as I went to a talk by Stuart Hillard of the Great British Sewing Bee. He was so enthusiastic and helpful when we went and chatted afterwards. He got me onto spray basting and I’m definitely converted!

Stuart HillardIn the past (like two others!) I’ve hand tacked the layers of the quilt (backing, wadding and top) before quilting it, it was never perfect, the loops of the tacking stitches would get caught…He reassured me that with spray basting you can adjust it until you’re happy, so I tried it. It was so much easier to get a smooth finish and it held it firm throughout quilting.

Vacation TimeThis is only my third attempt at free motion quilting and the other two were much smaller! I decided that my wobble point is when I have to stop stitching to change my grip, so I decided to stitch a design round the border that was like waves that ended with a point! It meant I could stop at the point and it wasn’t so obvious if I had a wiggle! By the time I got to the centre area I gained a bit more confidence so I quilted in a meandering pattern. You can guarantee that any major wobble would be when I was stitching over a dark square so it showed up, it’s a bit like butter-side down! Half way though the quilting my sewing machine decided to breakdown! I think the timing has gone as the needle goes down at the wrong time! It must be in the same union as my overlocker, a sympathy strike (looks like my dishwashers in the same union as that’s broken down too!!) I swapped over to my spare machine which was my mothers sewing machine, luckily it’s identical to mine. I think it’s a bit shell-shocked though after 10 years retirement sitting on a shelf to stitching all weekend!

Vacation TimeI’m pretty pleased with my quilting, I’ve got a Craftsy class on FMQ waiting to watch as soon as I get a new computer (that has sound!!)

I was amazed how much thread you use quilting, this is not densely quilted at all, but I filled bobbins two at a time and I went through five or six altogether! I’d love a sewing machine that alarmed when I was about to run out of thread, a 6″ to go alarm, it can’t be too difficult!

I bound the quilt with what I think is called the double fold method, 2 1/2″ strips, folded in half before stitching on and folding over to get a 1/4″ bound edge, it sounds like it would be really bulky, but in reality it’s not, it makes a nice edge. I always hand stitch the binding down. I know a lot of quilters hate binding quilts, but as I’m still pretty new to this I enjoy it as the last piece of stitching for the quilt. It may take a while to hand-stitch right round a quilt, but I also don’t trust myself to machine stitch it neatly, I would hate to ruin a quilt on the last stage for the sake of a couple of hours hand-sewing!

I took my sewing machine to the repair shop today in Leeds Market, yes the same one I took my overlocker to last week! it’s not good when the sales staff in a repair shop greet you by name! Great service though, my overlocker was ready to  collect 🙂

Vacation Time

Posted in Quilting, Sewing | Tagged , , | 8 Comments

Fall out with Overlocker!

Cable knit fabricI’ve had a fruitful but frustrating few days sewing! I fell out with my overlocker!! Last week I made a cardigan from knitted fabric, I was so pleased with it I cut out another almost straight away. The pattern is Butterick 6258, it’s a very simple jacket style, which is just what I wanted. I bought the material at B&M Fabrics in Leeds, it was £5 per metre and it feels gorgeous, lovely and thick and soft to touch.

I was careful to line the cable pattern up when I was pinning my pattern on, though with hindsight I should have cut the two collar sections out separately as they didn’t quite line up, I had to do a few adjustments there!

Overlocker cartoonIt was going together beautifully when my overlocker decided to play up, it was skipping the odd stitch which I could cope with. The thread broke a couple of times, which was fustrating as anyone with an overlocker knows, they are not easy to thread! Then the needle broke. I changed the needle, with difficulty, then it just wouldn’t make a stitch, the loopers wouldn’t loop! In the end I abandoned my overlocker and went back to my usual sewing machine! Luckily I’d stitched most of the seams already, so it was mainly things like hems left to do.

My cardigan looks great, it is so warm! My mother is obviously impressed as she wants me to make her one, I think that could be a Christmas present sorted, so long as I can get some more fabric!

My overlocker is now at the sewing machine repair shop in Leeds Market!

Burda Cardigan

Posted in Dressmaking, Sewing | Tagged , , | 10 Comments

Love and Hugs Quilt

One of my friends is going through a tough time at the moment, it seems whenever she dares to hope that things are going to get better, life throws more bad things at her. I decided to make her a quilt, for the times when she needs a hug but no one’s there to give her one. Quilts always have names, so I called this one the Love and Hugs quilt, for all the love and hugs that are stitched within it.Love and Hugs Quilt

It’s not a quilt of great beauty, but fabrics are there because they mean something. My starting point was a cute quilt I saw on facebook with chickens on, they all had little name boards too, my friend keeps chickens, very pampered chucks! I went to stay for a weekend one cold winter, she was down to one chicken at that point, so it was in the spare room clucking around as it was too cold outside (there was also an injured seagull in the downstairs toilet, but that’s another story!)

I found a second fabric in Leeds market with cockerels on which co-ordinated colour wise. My friend is also a crazy cat lady, so there is another print with some crazy cats! Her beloved dog was called Blue, he died earlier this year, so the blue squares are for him. The ladybird fabric is left from one of my daughters dresses, so that one represents family. The red just made it ‘pop’ but is also the colour of a big hat she wore to a wedding in the summer.

Love and Hugs QuiltI needed a quilt I could make quickly, on facebook that day someone asked for a quick quilt design, disappearing nine patches was suggested. I found the instructions and decided that was the one. I made twelve different blocks, each with 9 squares in. Each block is then cut into quarters and rearranged. I decided to put the red one in the middle of each one so that would be the one cut into four. There are several ways to arrange a disappearing nine patch, I chose to have the little red squares going diagonally across the quilt. Once I’d arranged it the quilt went together fairly quickly.Love and Hugs Quilt

I backed it with a cotton batik I’d bought to make a top with, it had sat in my stash for ages as it’s really pretty fabric, but it really isn’t my colour! It’s very soft pinky beige colours with a chain-stich meander running over it. This chain stitch did mean I could cheat a bit with free motion quilting, I just followed the chain-stitch!! I decided the stitching wasn’t done automatically on a pre-set machine, there was no pattern to it. The first couple of lines I followed went diagonally across the corner, one more before tea I thought…the next line covered 75% of the quilt!!

LabelI hand-stitched the binding and then embroidered a label, following the curves of the chain-stitch. I popped it in the post last week, so I can tell you about it now as I know she’s received it.

Hopefully she will appreciate the love that has gone into it and the meaning that comes with this quilt, because as I keep telling her, she’s worth it.

Posted in Quilting, Serendipity, Sewing | Tagged , | 6 Comments

Bouquet Sampler nearly there!

Sampler Aux Bouquets

Jardin priveeI’ve just finished the last alphabet on my Bouquet Sampler. There are three altogether on the sampler, this one is the only one in lower case. It’s a lovely relaxed font, the only thing I changed was the letter ‘m’, I’m not sure if it’s how the French write their ‘m’s but it looked like it had four legs and three humps!! You can just about see it on this photo from Jardin Privee. I just omitted two stitches from the first leg!

Sampler Aux BouquetsI rather like the hare too, I made a couple of mistakes on him, it was a lesson in how to not do cross-stitch when tired and grumpy! His thigh is meant to be more pronounced, but I think he looks just fine as he is! I’m half way through what I think is a black swan at the moment.

I’ve just got one large flower arrangement to do now and my Sampler Aux Bouquets is complete, there’s about 3″ more design to stitch. I’ve really enjoyed stitching this one and it’s grown a lot quicker than I thought it would.

Linking up with Kathy’s Quilts and Super Mom no Cape, have a look what hand sewing others have been busy with.

Sampler Aux Bouquets

Posted in Crafts, Sewing | Tagged , , , | 4 Comments

Burda 8765, a skirt to match my cardigan

Burda 8765Straight after making my red cardigan I cut out the co-ordinating green and red plaid wool for a skirt. Now usually my skirts are about 3″ above my ankles, but just occasionally I push myself out of my comfort zone and make a short skirt. It’s got to be just above the knee, as knee length just doesn’t work on me. This fabric definitely wanted to be a short skirt!

I bought the fabric a couple of weeks ago from B&M Fabrics in Leeds, I seem to recall it was £5 per metre, I just bought one metre for a skirt to go with my cardigan.

Burda 8765My favourite pattern at the moment for straight skirts is Burda 8765, I’ve already used it twice in the last 12 months for a wool skirt and a heavy cotton summer skirt. It’s a good basic straight lined skirt with a kick pleat at the back. One advantage of writing a sewing blog is that it is a useful record of any problems encountered with patterns, this is only helpful if you’re patient enough to go back and read it…I just jumped straight in! Ooh, it’s cut to a size 12, well the skirt fits fine so that’s fine, size 12 cut! If I had read my entry I would have seen that in cotton the 12 was too small, I had to unpick and stitch a narrower seam!

Burda 8765By the skin of my teeth I’ve got away with it! The wool is a little snug but with the give available from wool, it’s comfortable. I stitched the lining with a narrower seam to give me a little ease, this seems to have worked!

I was very careful to match the pattern across the seams which has worked well, though I still haven’t mastered cutting out the back so the pattern matches both ways across the zip, I’m always very impressed when people do that!

Burda 8765It’s a very quick skirt to make, it went together very easily. I lined it in black, I have to confess that I couldn’t be bothered to change the thread to black from the dark red I was using for the wool. I decided the only place it would really be noticeable was the hem, so I used a pretty decorative stitch, so if anyone gets a peek of my lining, it looks like it’s meant to be red!

I’ve worn my skirt and cardigan combination a couple of times now, together with one of the shirts I made earlier, it is a nice feeling to know you’ve made your whole outfit.

I’ve now put a note on the outside of the pattern regarding the sizes! I’m just about to cut out another cardigan and I’ve got my eye on another skirt length in my stash which will co-ordinate nicely!

Sewing knits

Posted in Dressmaking, Sewing | Tagged , | 7 Comments