
I’m sitting at Paphos airport in Cyprus waiting to board our plane home, stitching a Faby Reilly design. With four hours on the plane I’ll hopefully make good progress.

I’m sitting at Paphos airport in Cyprus waiting to board our plane home, stitching a Faby Reilly design. With four hours on the plane I’ll hopefully make good progress.

It’s six weeks since I posted about my progress with the Postcards from the Hedge, so I’ve managed a fair bit of stitching since then. It was early December and I had just finished the foxglove postcard…

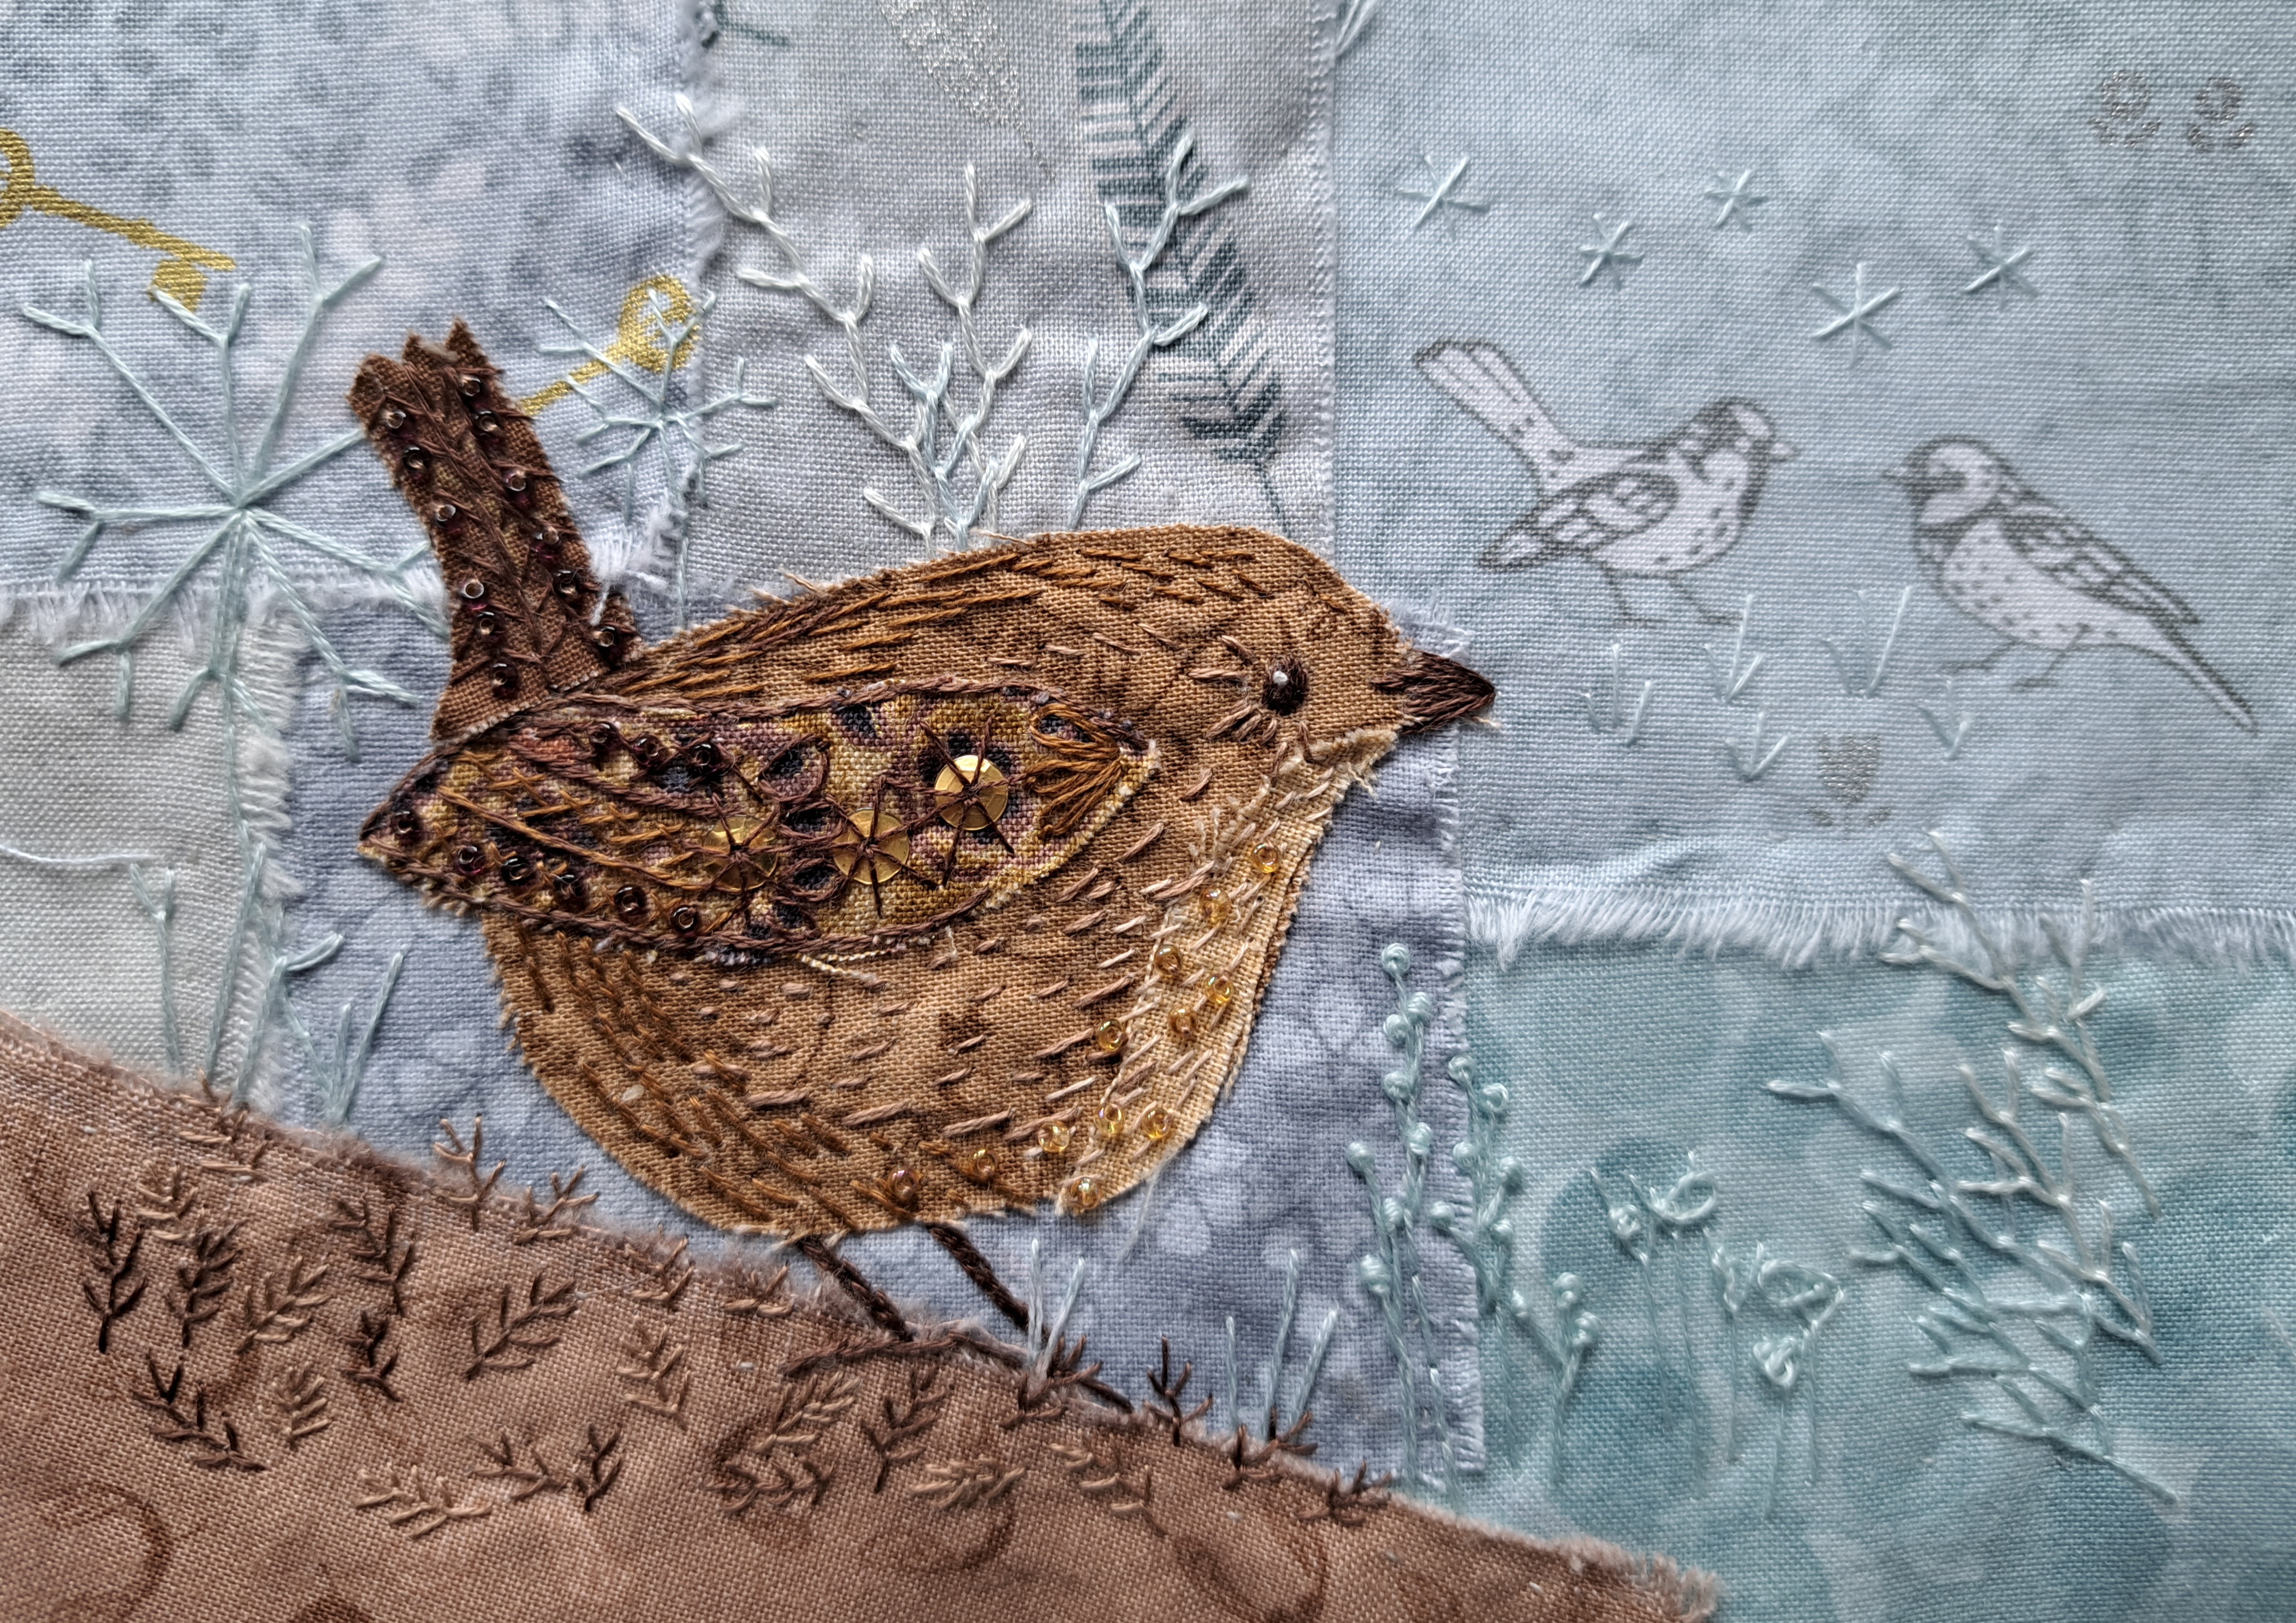
I decided to do the thrush next. We quite often see them in our garden and frequently hear their beautiful song on the back lane. First task was to make the background. This is done by weaving strips of cotton and then doing some slow stitching on it. I did a mixture of stitches, feather, fly, herringbone, cross and running stitch. With hindsight it would have been better a little less busy but I was thinking of blossom trees! Doing all the stitching does make it feel like one piece of fabric rather than a weaving.
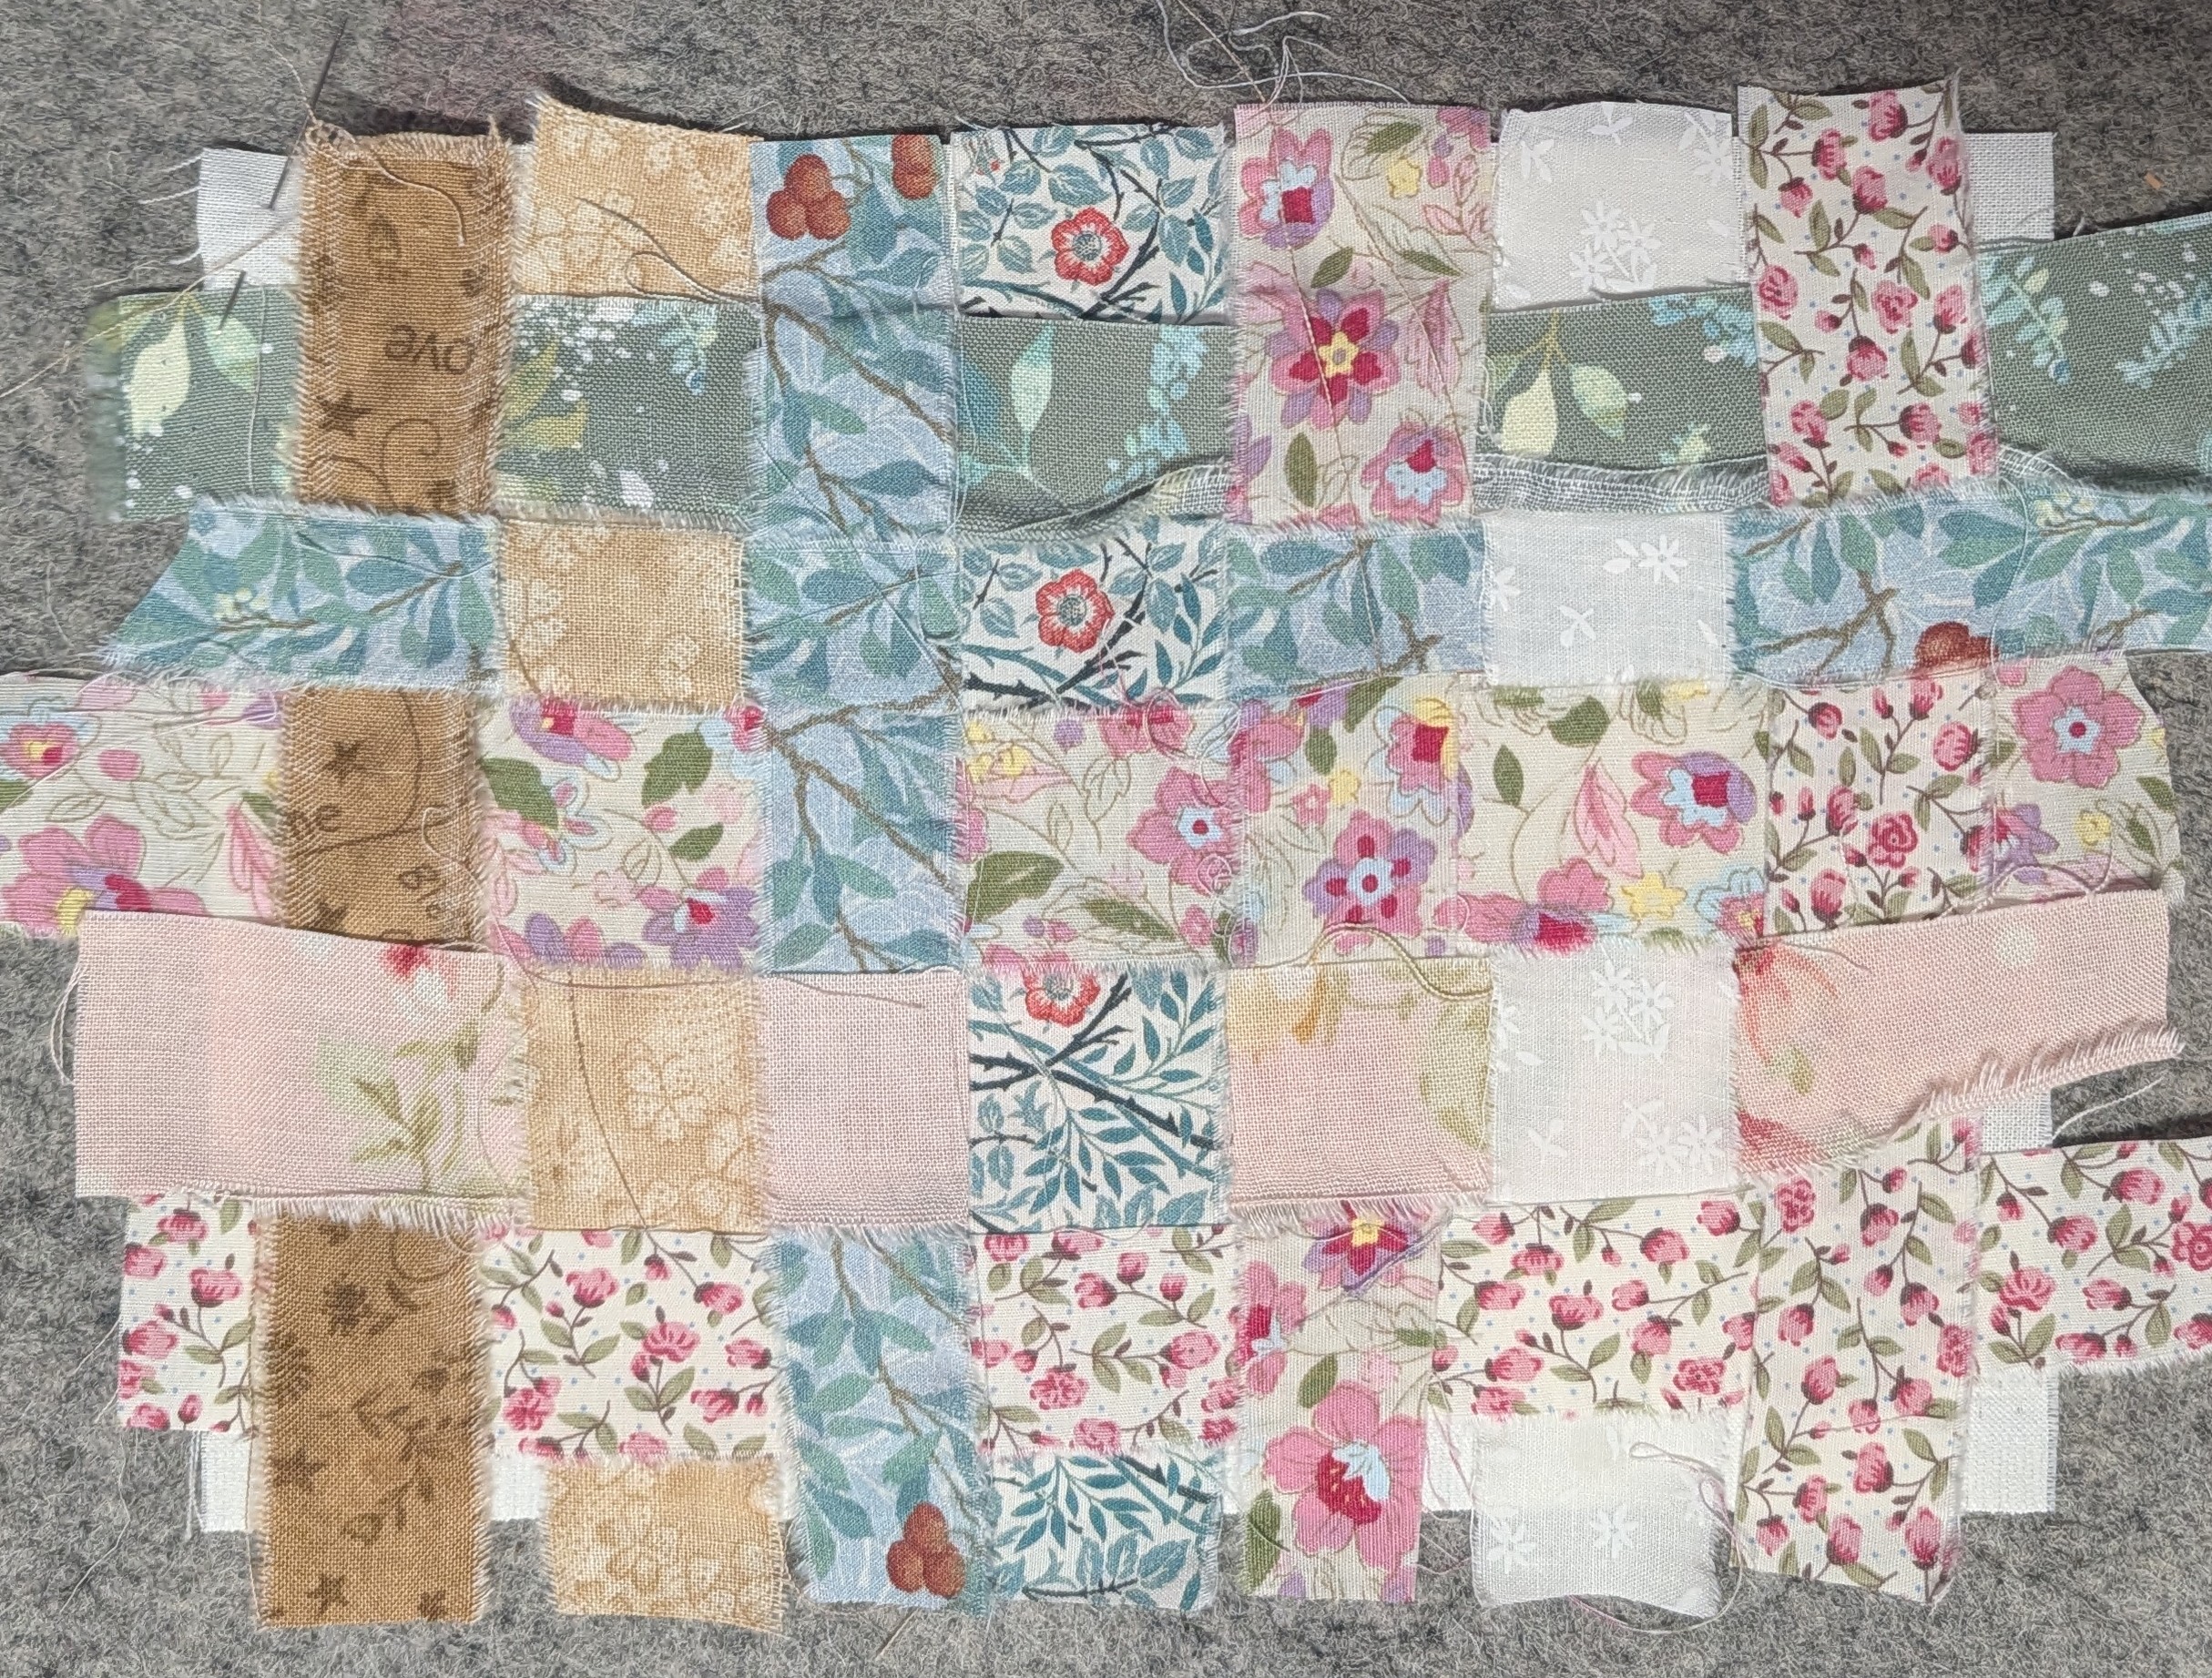
To give the speckled breast feathers, Rebecca (from Featherstone House) recommended wax crayons, in particular a box of skin tone ones from crayola. I managed to get a box, Basically, fine shavings off the crayons were sprinkled onto cotton, this was covered with brown paper and then ironed. The wax is absorbed by the brown paper, leaving the pigment. It’s one of those techniques where you don’t really know how it’s going to come out, some splodges seem bigger than anticipated! I used a patterned brown cotton for the rest with a few wisps of grey fely to help merge the colours a bit.
The thrush is cut out using bondaweb and then embroidered fairly simply with mainly straight stitches and a few fly stitches. I do like the finished result.

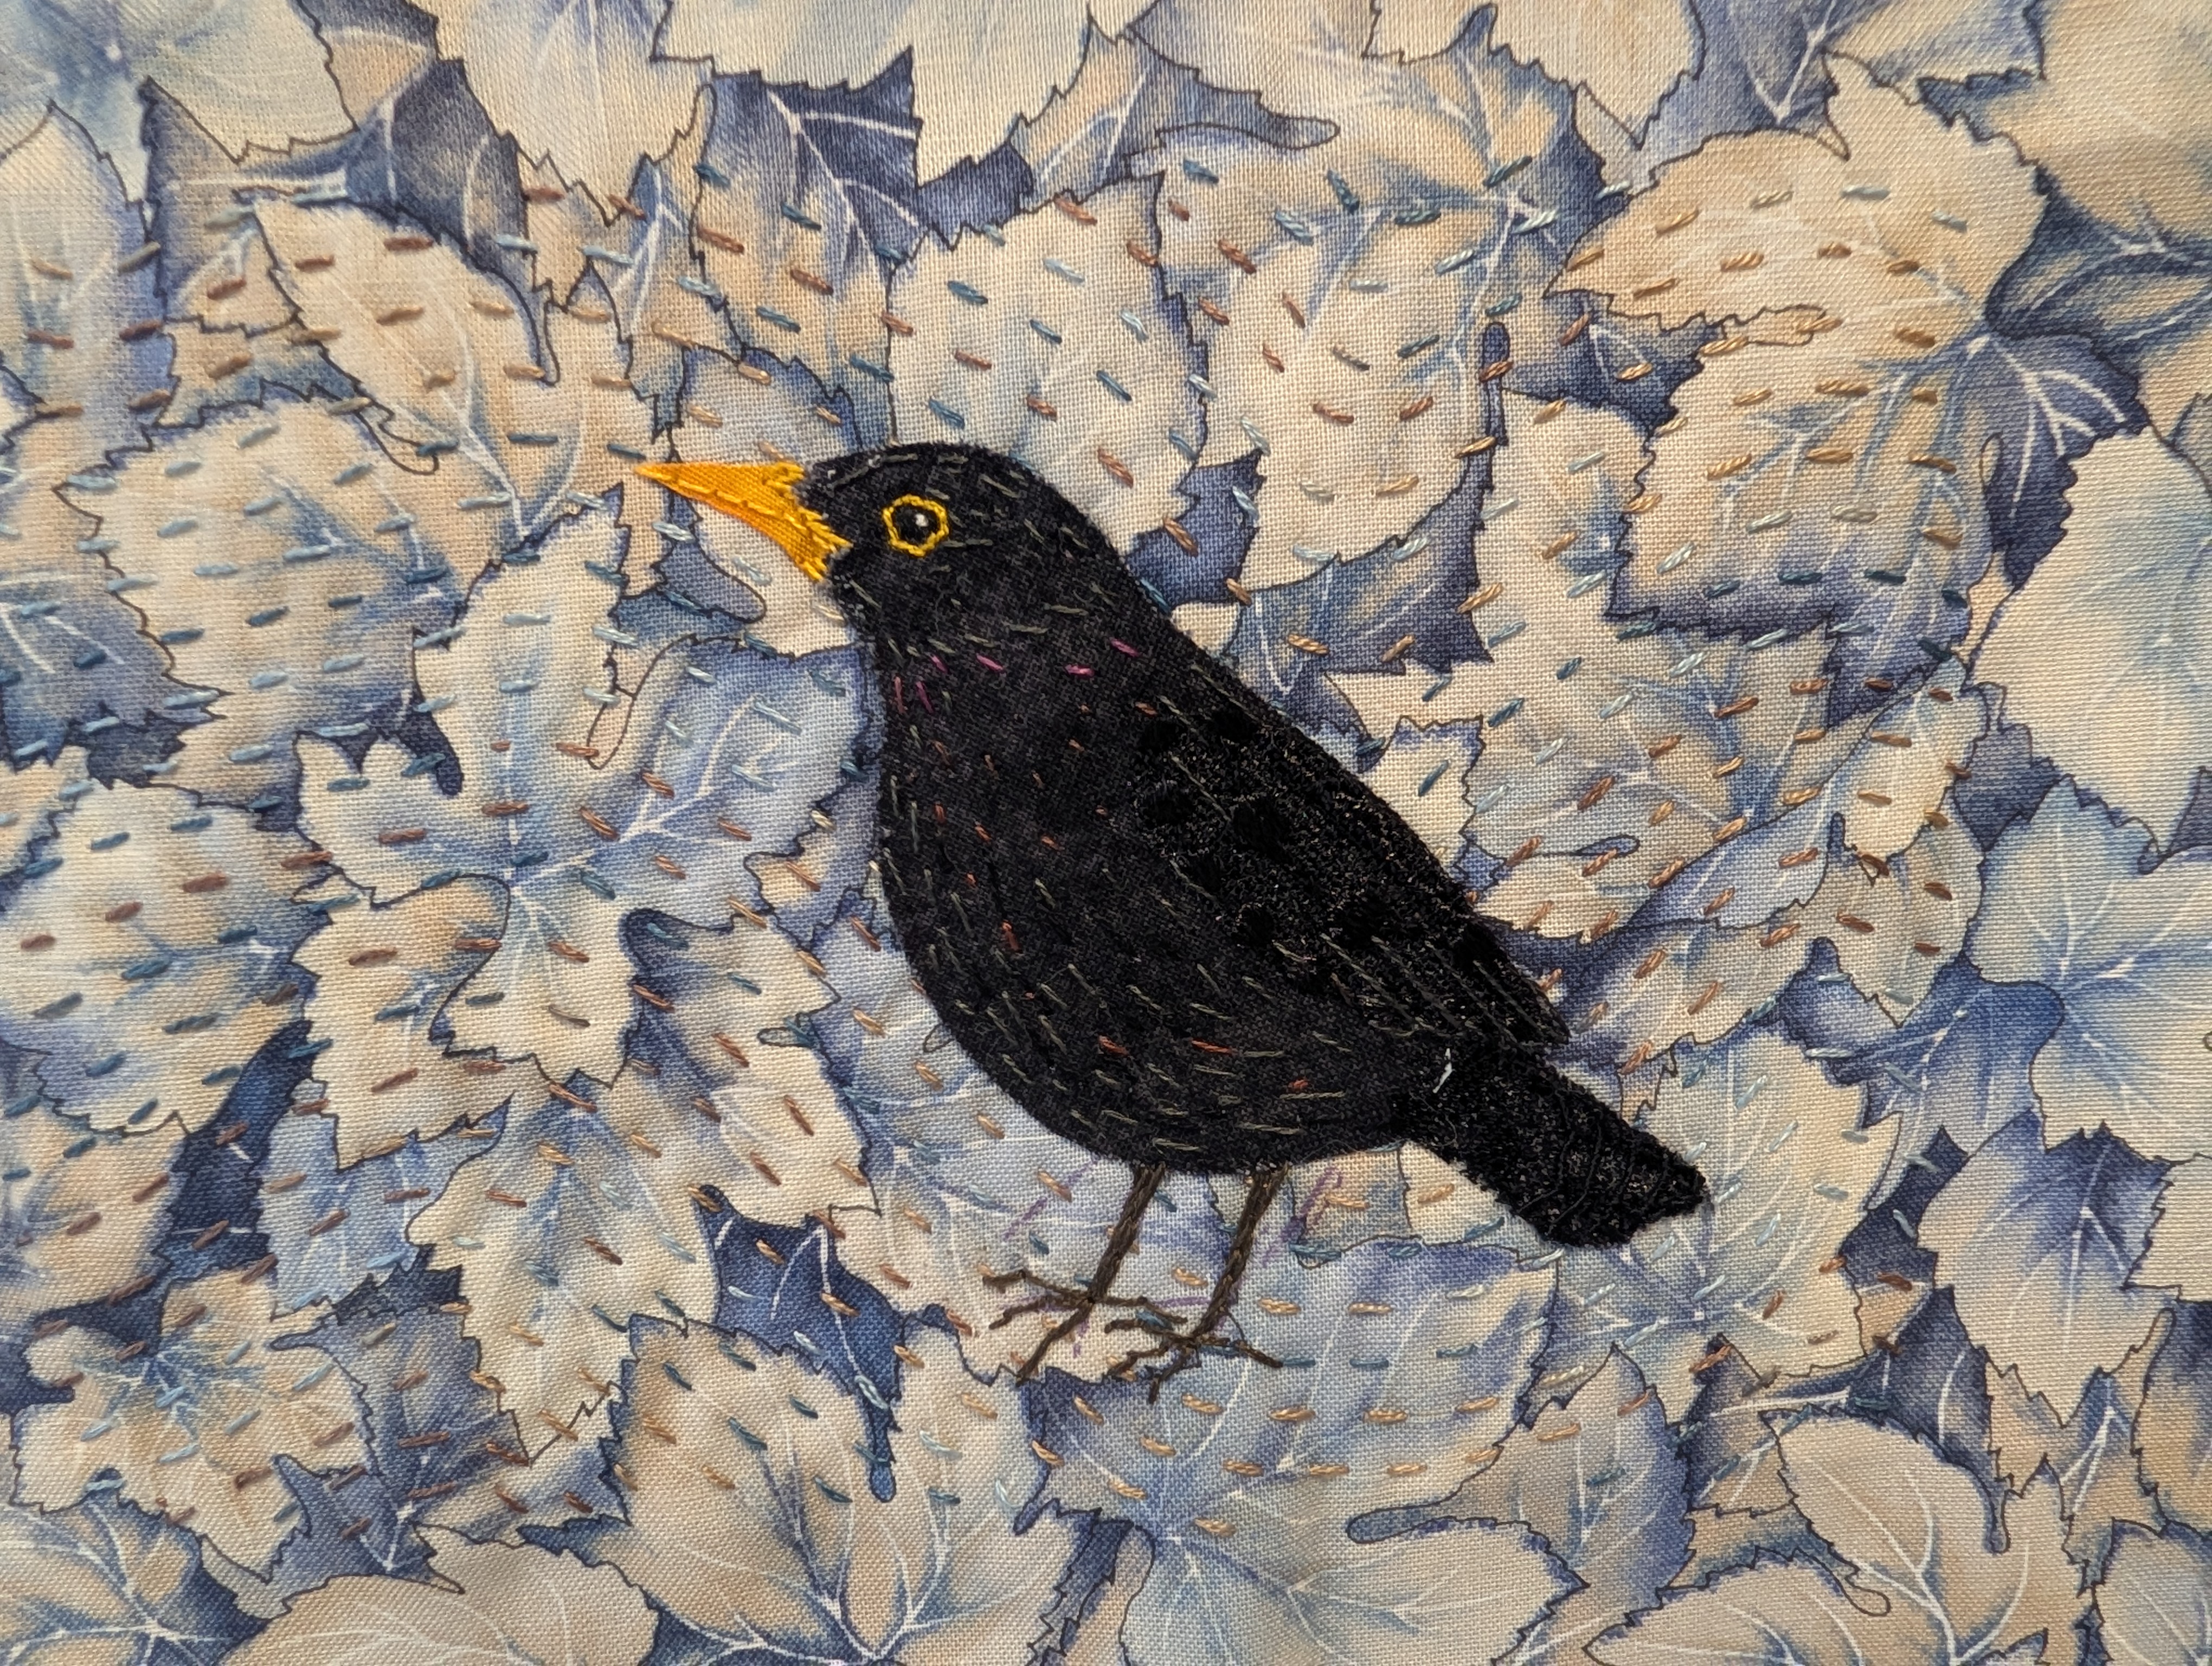
Next to be stitched was a blackbird. The pattern had the blackbird sitting on a branch, I often hear the blackbirds down the back lane as they’re rustling through the fallen leaves. I happened to have a fabric that looked like frosty leaves, so I did a little slow-stitching with a variegated DMC thread just based around a wavy line.
The blackbird is also attached using bondaweb. What isn’t clear from the photo is the lace overlay used for the wing and the tail, it does give a nice bit of texture. Again the stitching is kept fairly simple with mainly straight stitches using a mixture of very dark grey, black and a dark variegated thread which has greens and purples in. I love him!
Next I’m going to do some flowers. I think I’ll just do two or three more embroideries and then work out how to put them in a book. Here’s the other ones I’ve already done..

Please visit the other blogs that are also taking part in this SAL. There are so many different projects to enjoy. The participants live all over the world so you may need to allow for time differences. We’re posting today at local time. Click the links to their blogs below and see what they’re up to.
Avis, Claire, Kathy, Sunny, Megan, Deborah, Sharon, Daisy, Cathie,
Linda, MaryMargaret, Cindy, Helen

This week I finished my concertina book. Last time I posted about it I had finished the strip of pages, I just had to work out how to do a cover…
These strips can be left to have the front and back pages as the cover, but I wanted a cover to protect it and keep it neat. I’d left one end of the strip open so I could easily stitch it into a cover. I folded the book and measured it, adding a quarter inch to the edges for a slight overhang.
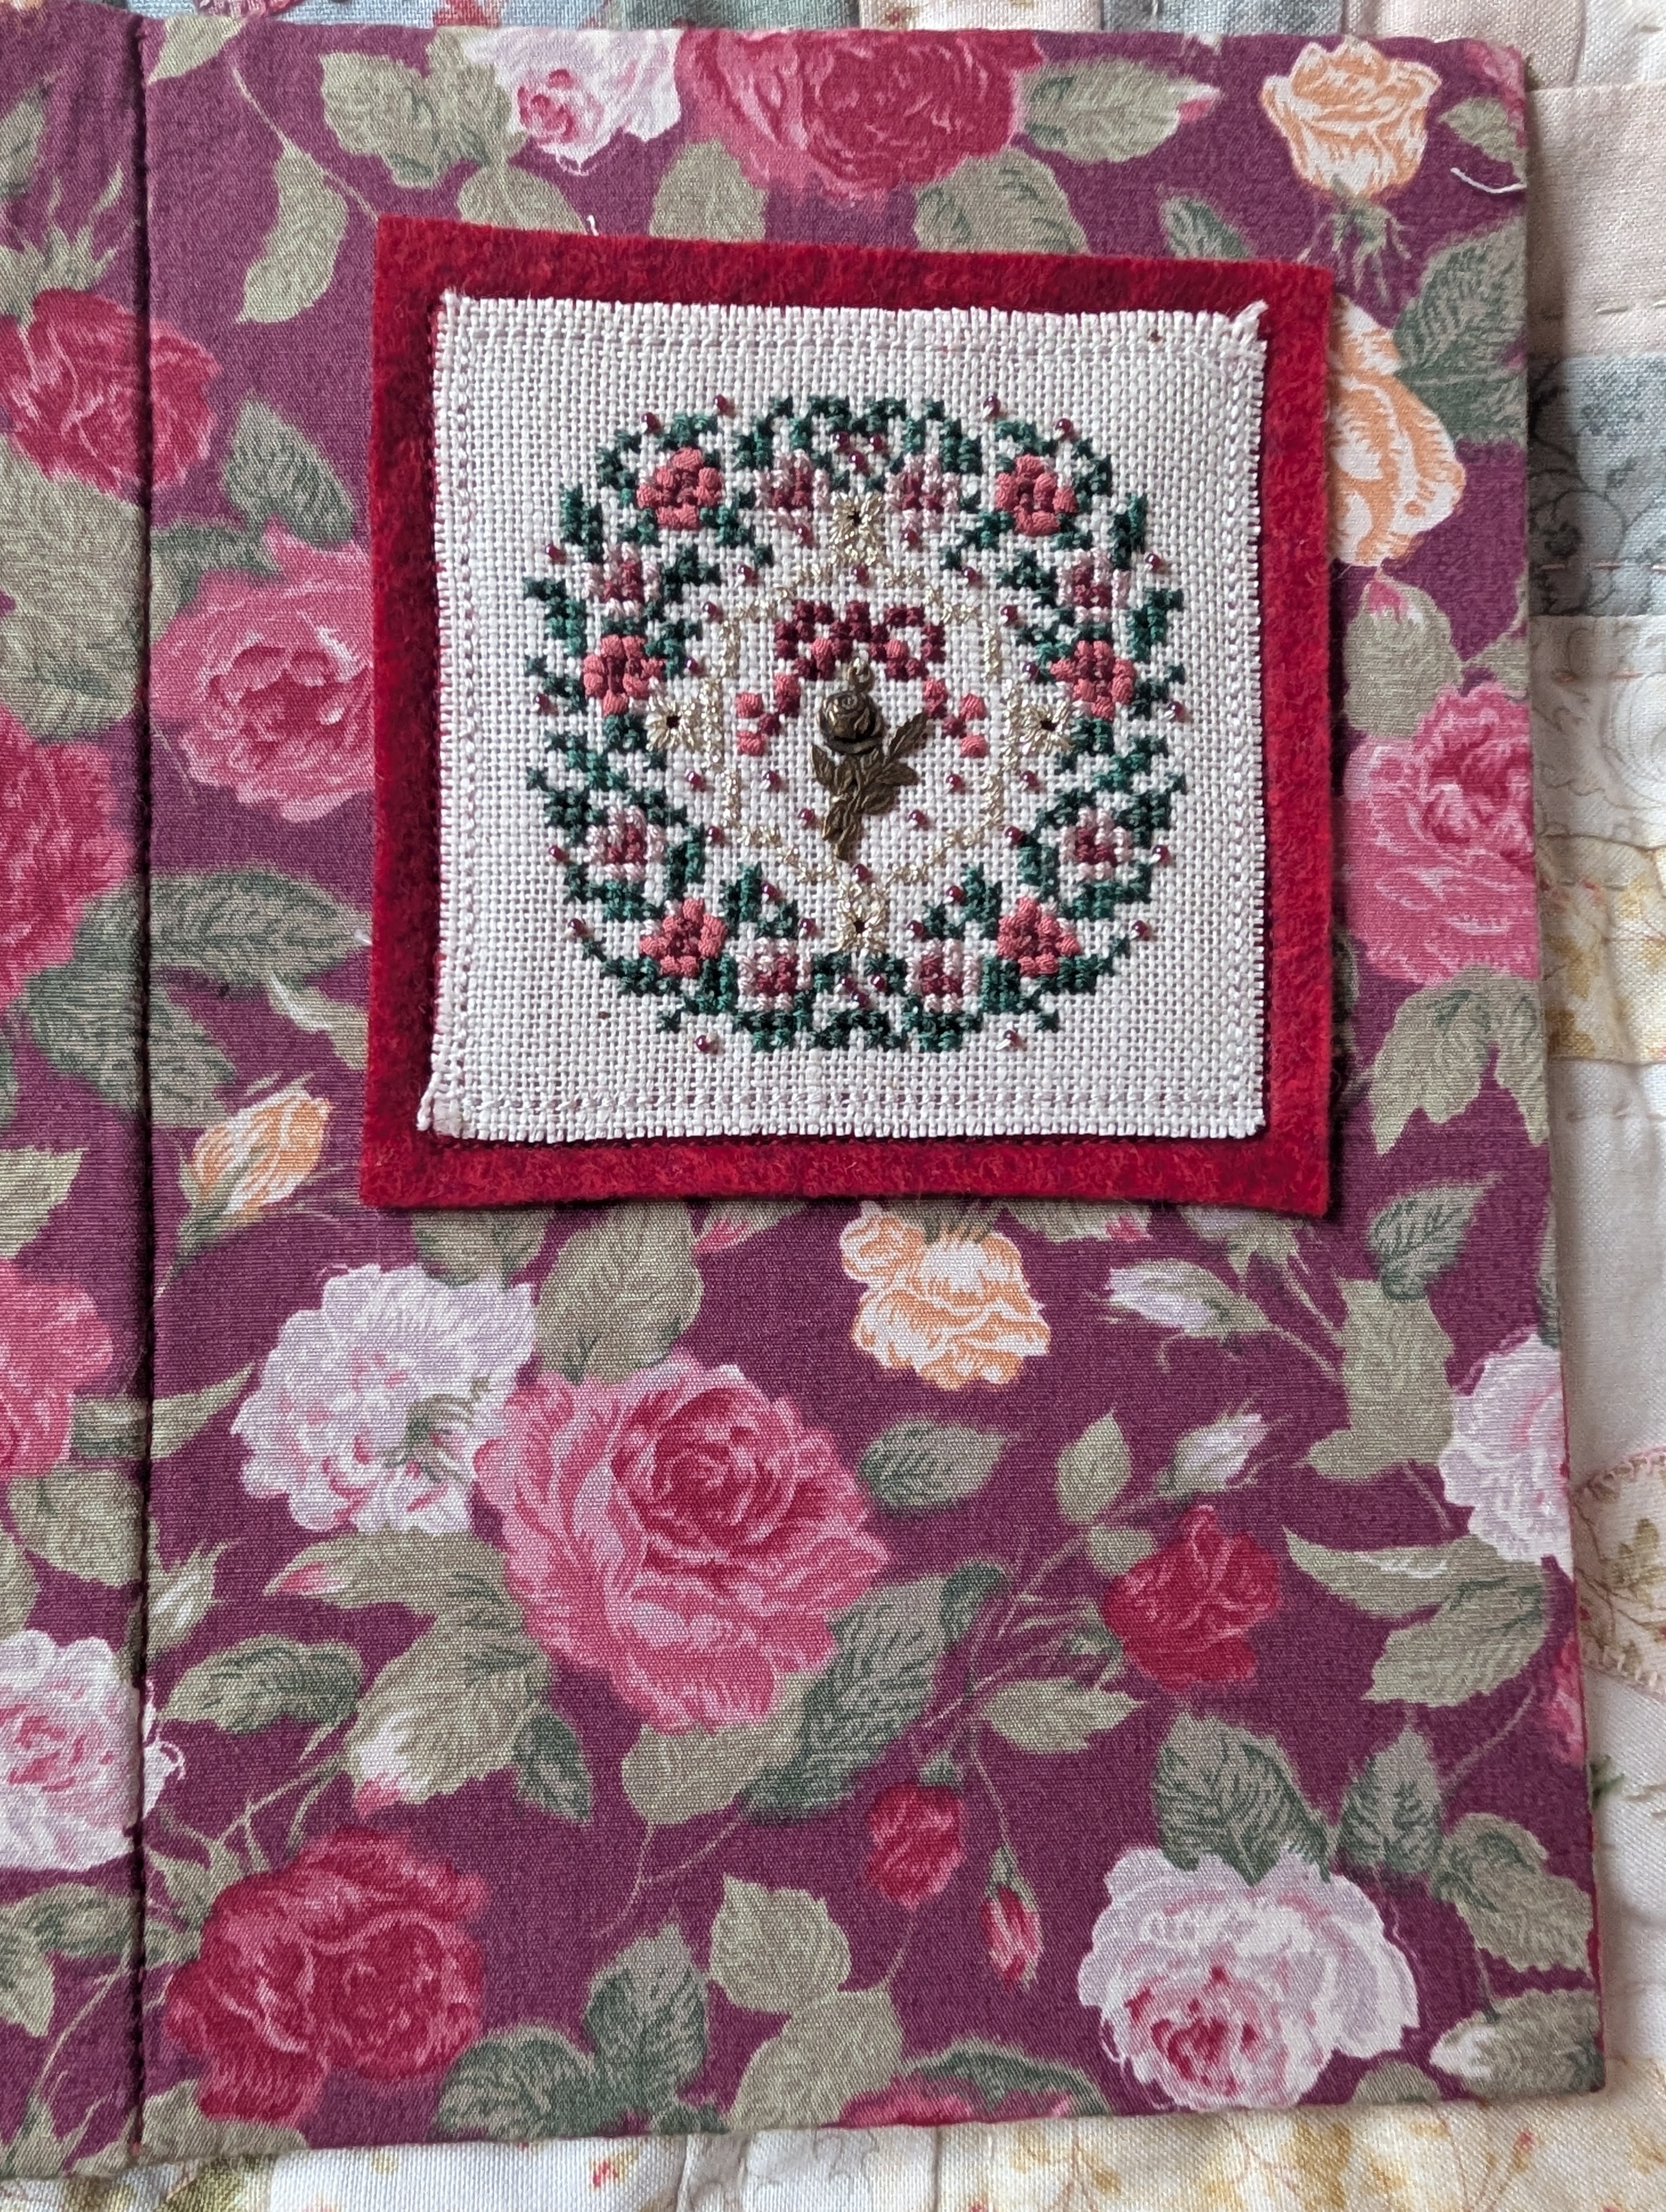
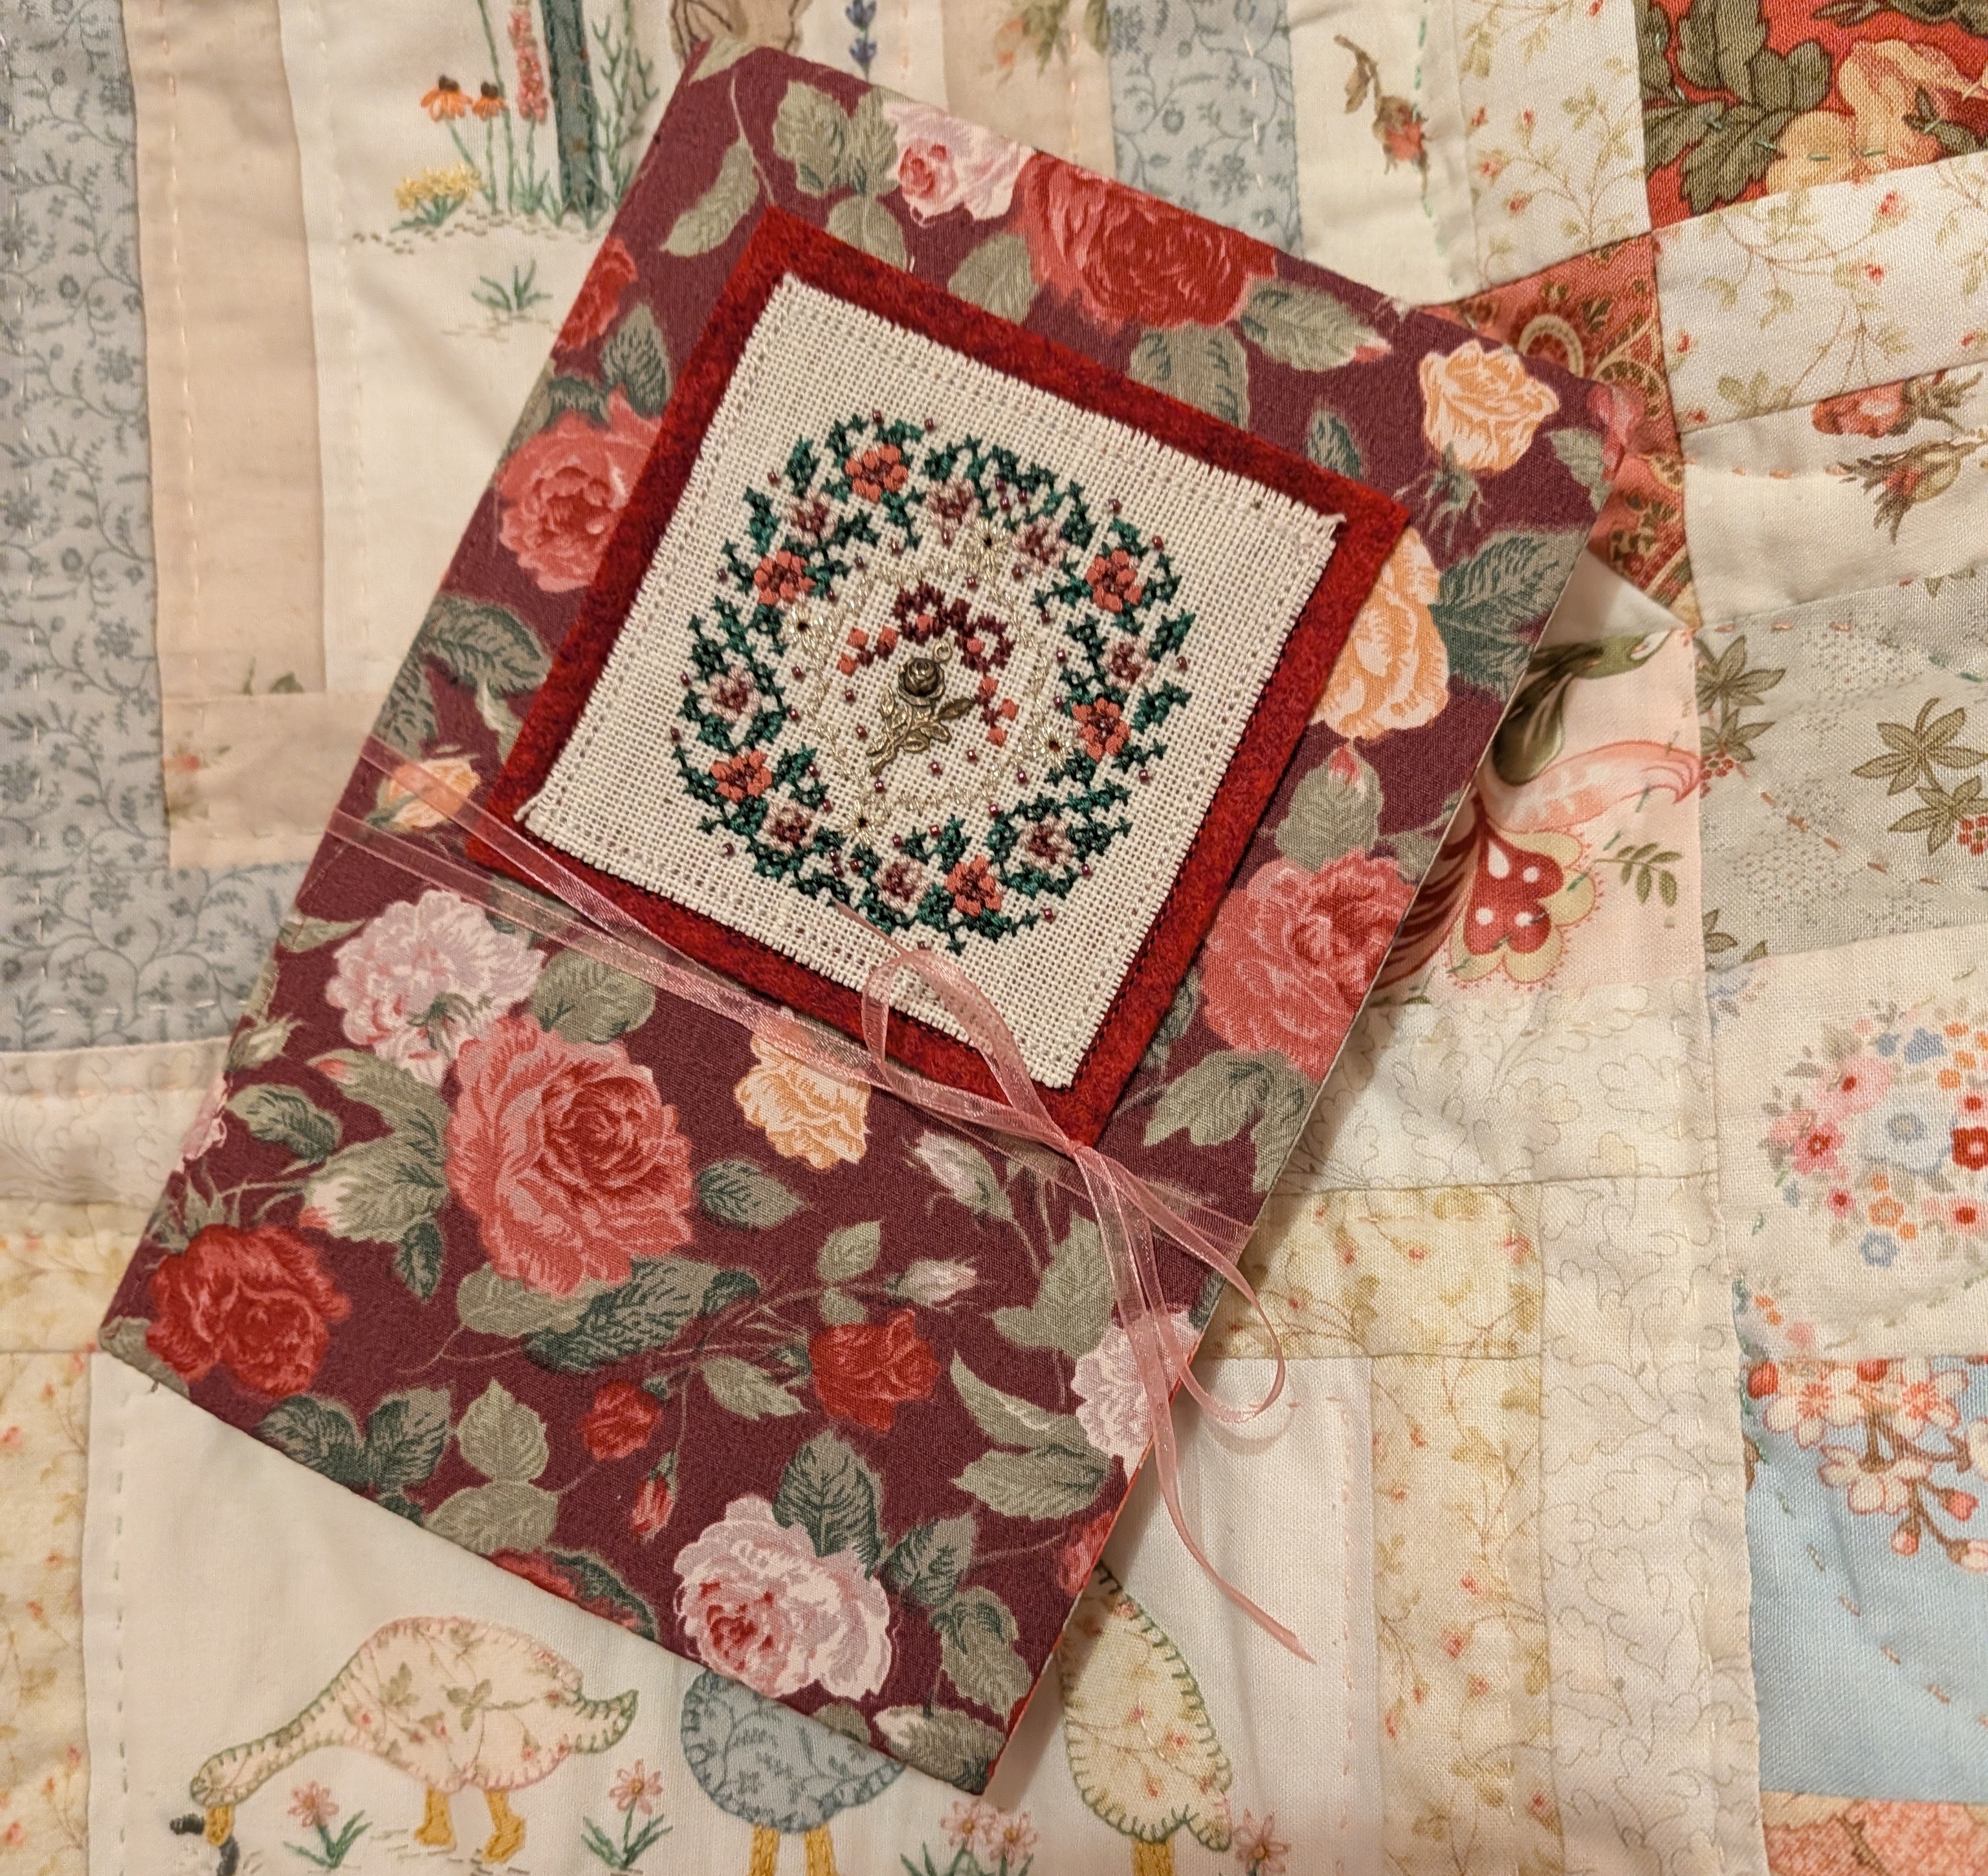
I had a darker floral quilting cotton which actually went pretty well with the strip and also went well with the cross-stitch I wanted to put on the front. This little piece was one I made for my mum years ago, as I had one myself too I decided this one could adorn the front of the book. I used pellon to stiffen the cover, I’ve used pellon a few times as its reasonably stiff, it has some body to it and it creases OK for the spine. The main disadvantage is that it’s a so and so to hand-stitch! I stitched the cross-stitch onto some red felt, drew round the square onto the background with a frixion pen and then used my sewing machine to stitch close to the linen. I use a frixion pen to mark the edge rather than pinning it as I find they tend to move with just pins and for a front cover I need it as straight as possible.
The strip was going to be stitched to the cover just in front of the spine. I used a dress-making cotton for the lining which ideally could have done with being a bit heavier but it went really well and I’d used it a few times on the strip. I cut one piece long enough to generously cover the back and spine and another for the front. I machine stitched the outer edges and then slip-stitched the upper and lower edges of the back. I positioned the strip inside and machine-stitched down the fold of the front fold of the spine.

With the pages in place I could then stitch down the front lining, covering the machine stitching with the folded edge of the lining. The basic cover was complete.
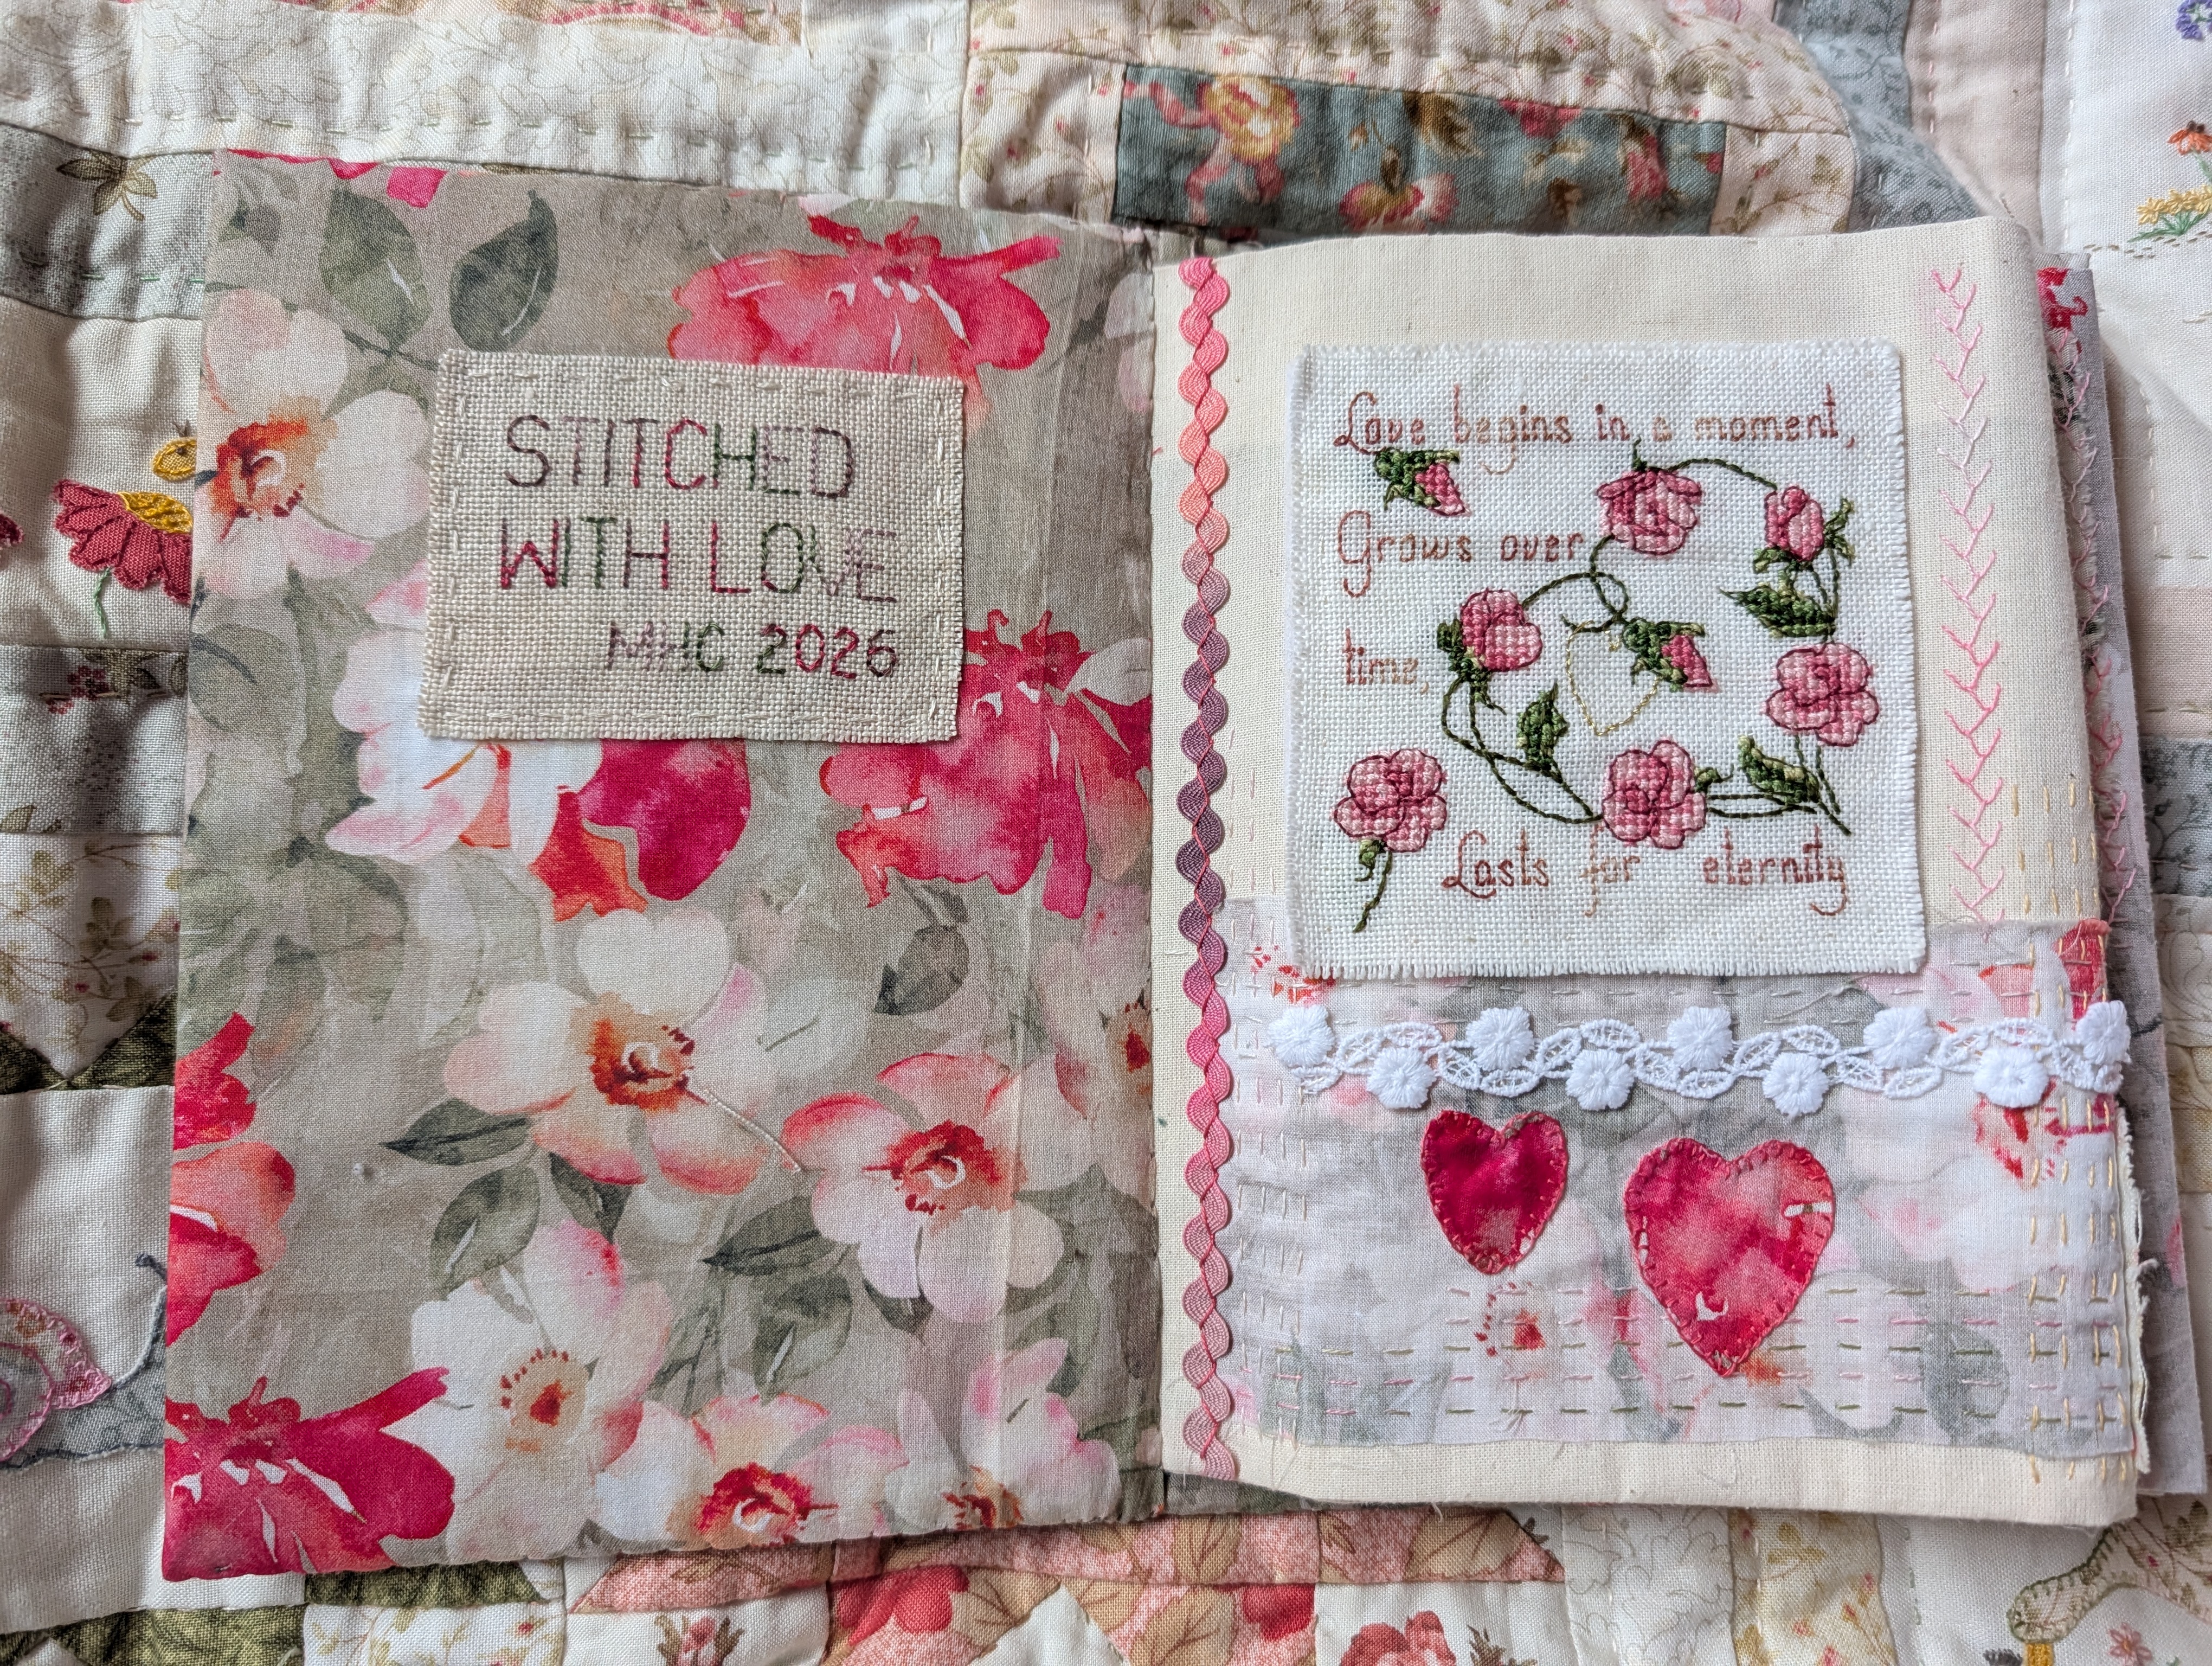
I still hadn’t stitched a title or my details in the book. I decided to call it Stitched with Love as there’s a mixture of cross-stitches made for wedding anniversaries, mothers day etc. I stitched it on a piece of linen and I added my initials and the date. I could then just stitch it to the inside cover with a running stitch.
I often have a ribbon round my fabric books, partly because I think it looks nice. With this book I also wanted a ribbon to keep it all neatly folded inside. I usually put a button on the front to wrap the ribbon round, but with the front cross-stitch going below the centre line, it didn’t look right. Whilst tidying my ribbons drawer as part of the 2026 Declutter Challenge, I found a length of narrow pink organza ribbon. It was inobtrusive enough to sit at the bottom of the cross-stitch. I decided to just tie it round with a pretty bow.
I’m pleased with this book, it’s actually a pretty quick make for me too! It feels nice with all the stitching on it and I like that you can either open it out into a strip to look at it as a whole, or leaf through the folded pages one by one. It’s given me ideas for another strip book I want to stitch during a BIG trip in May too.

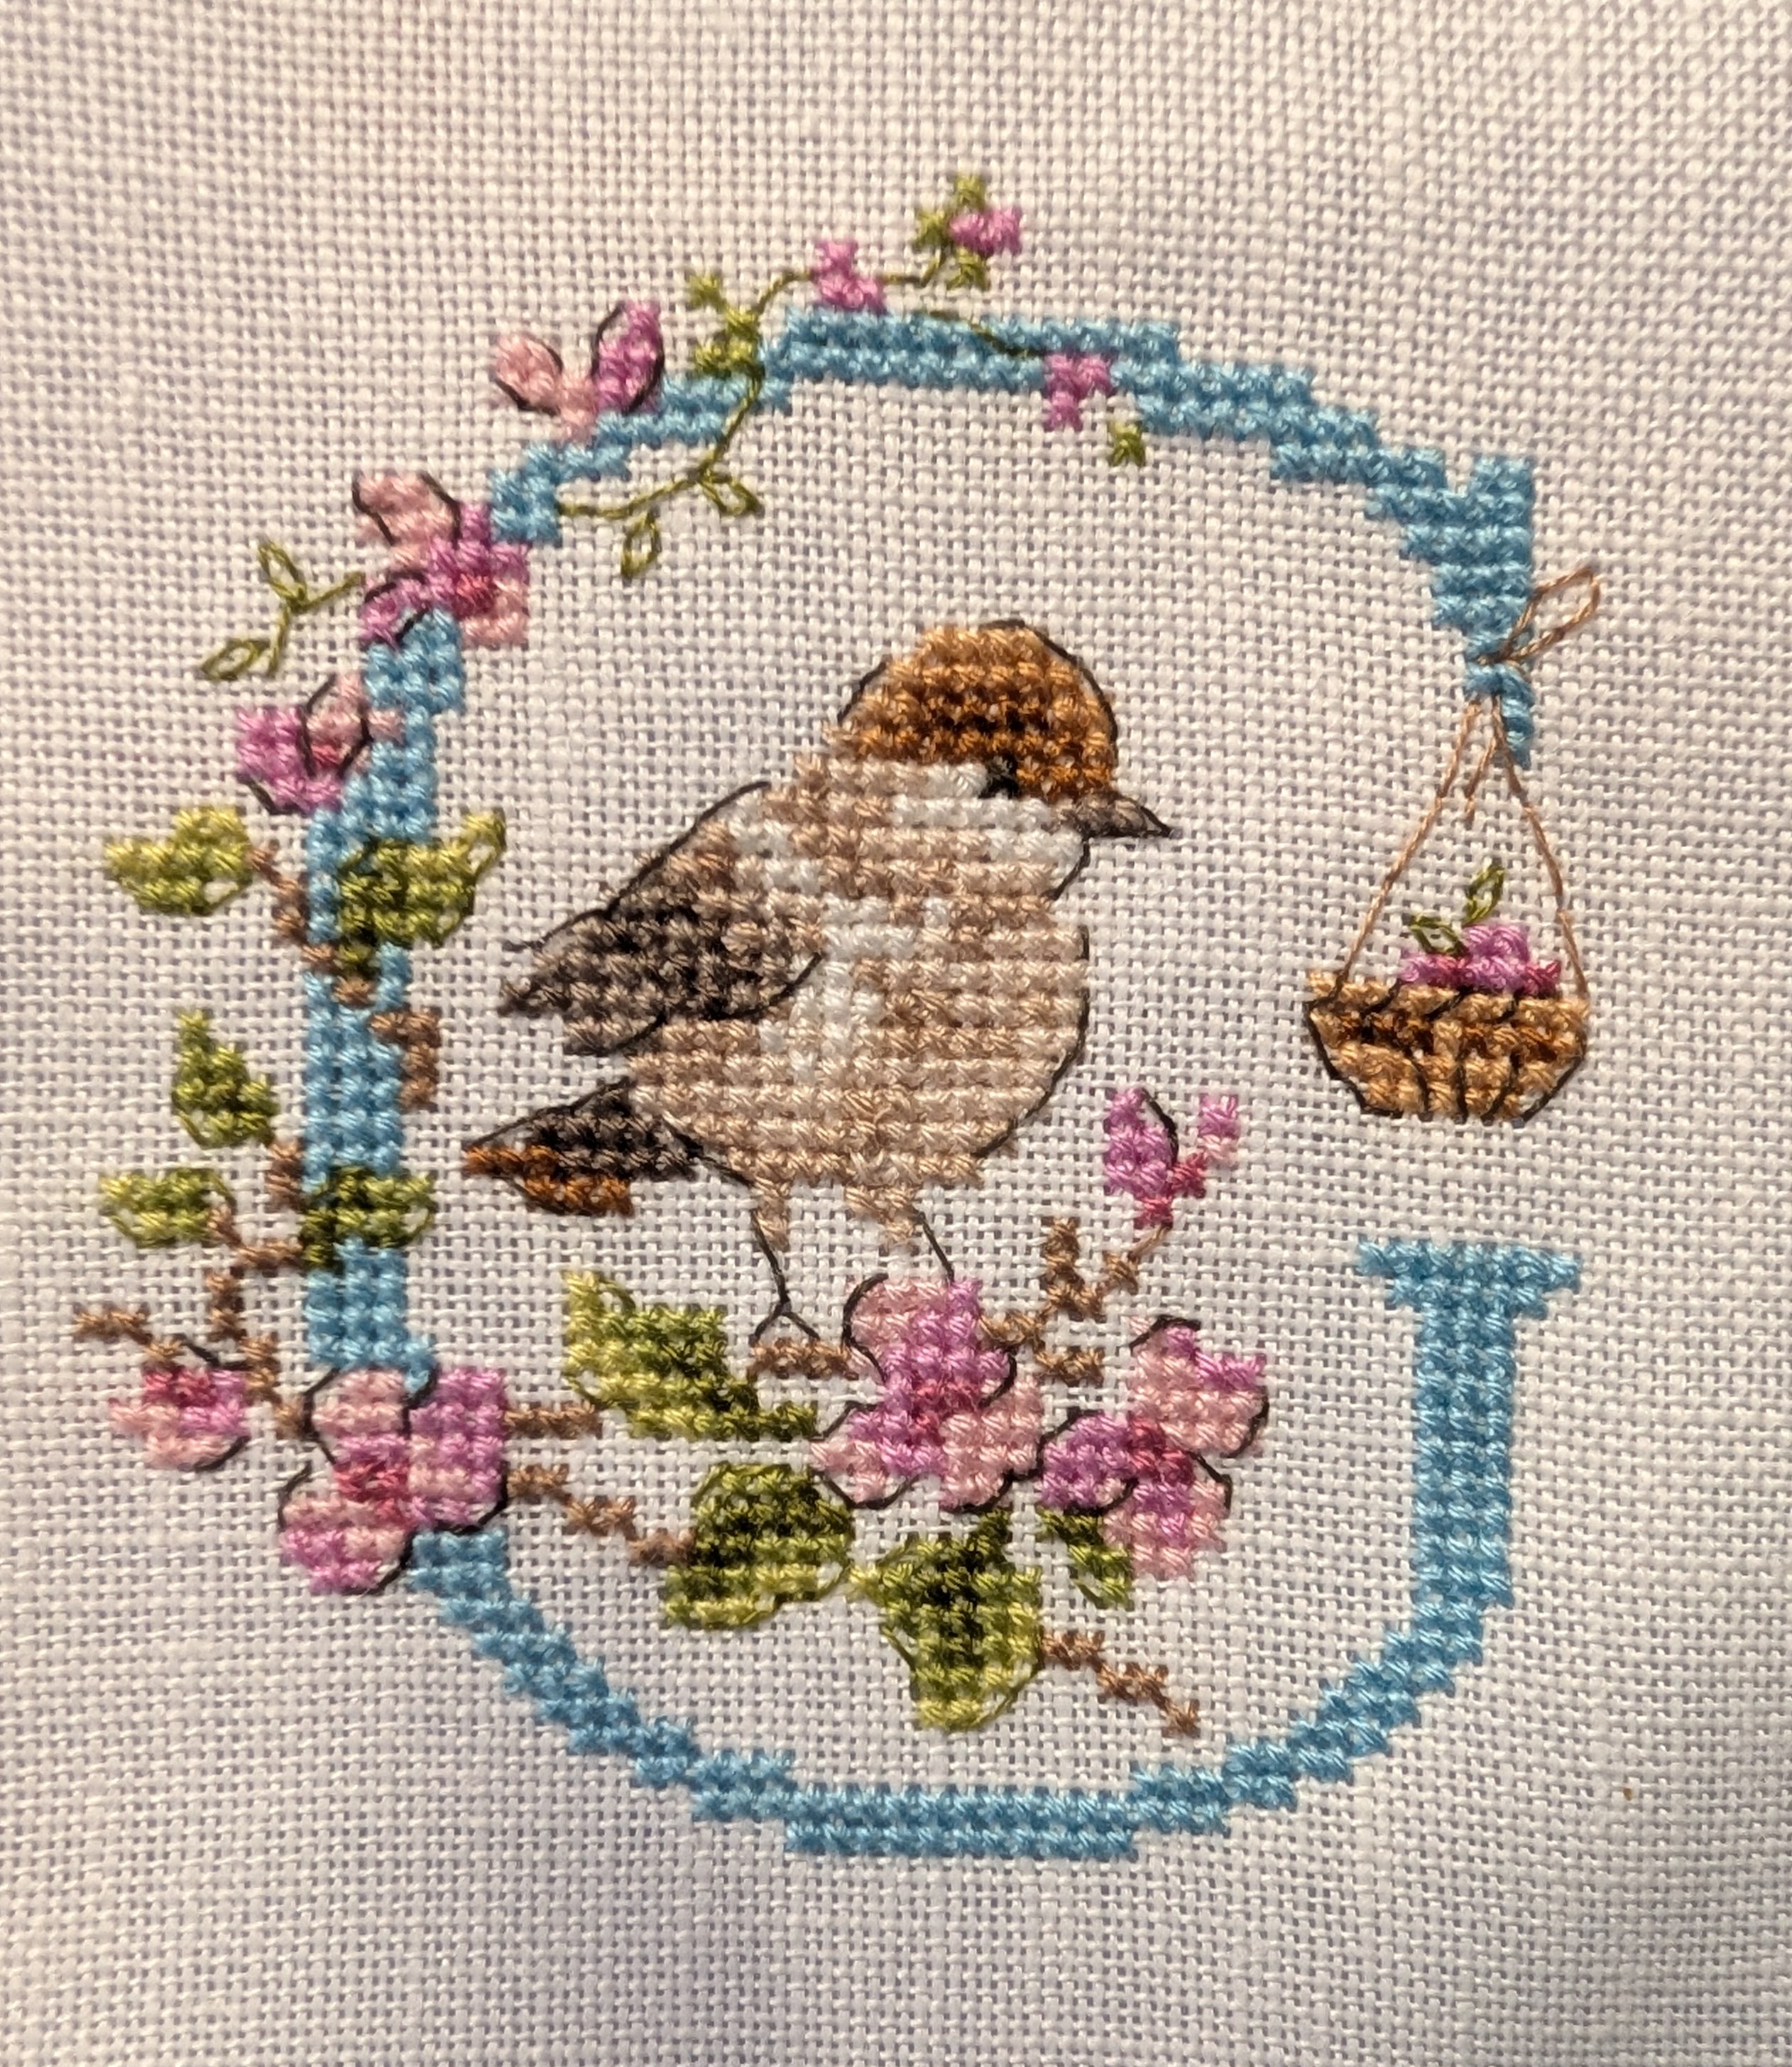
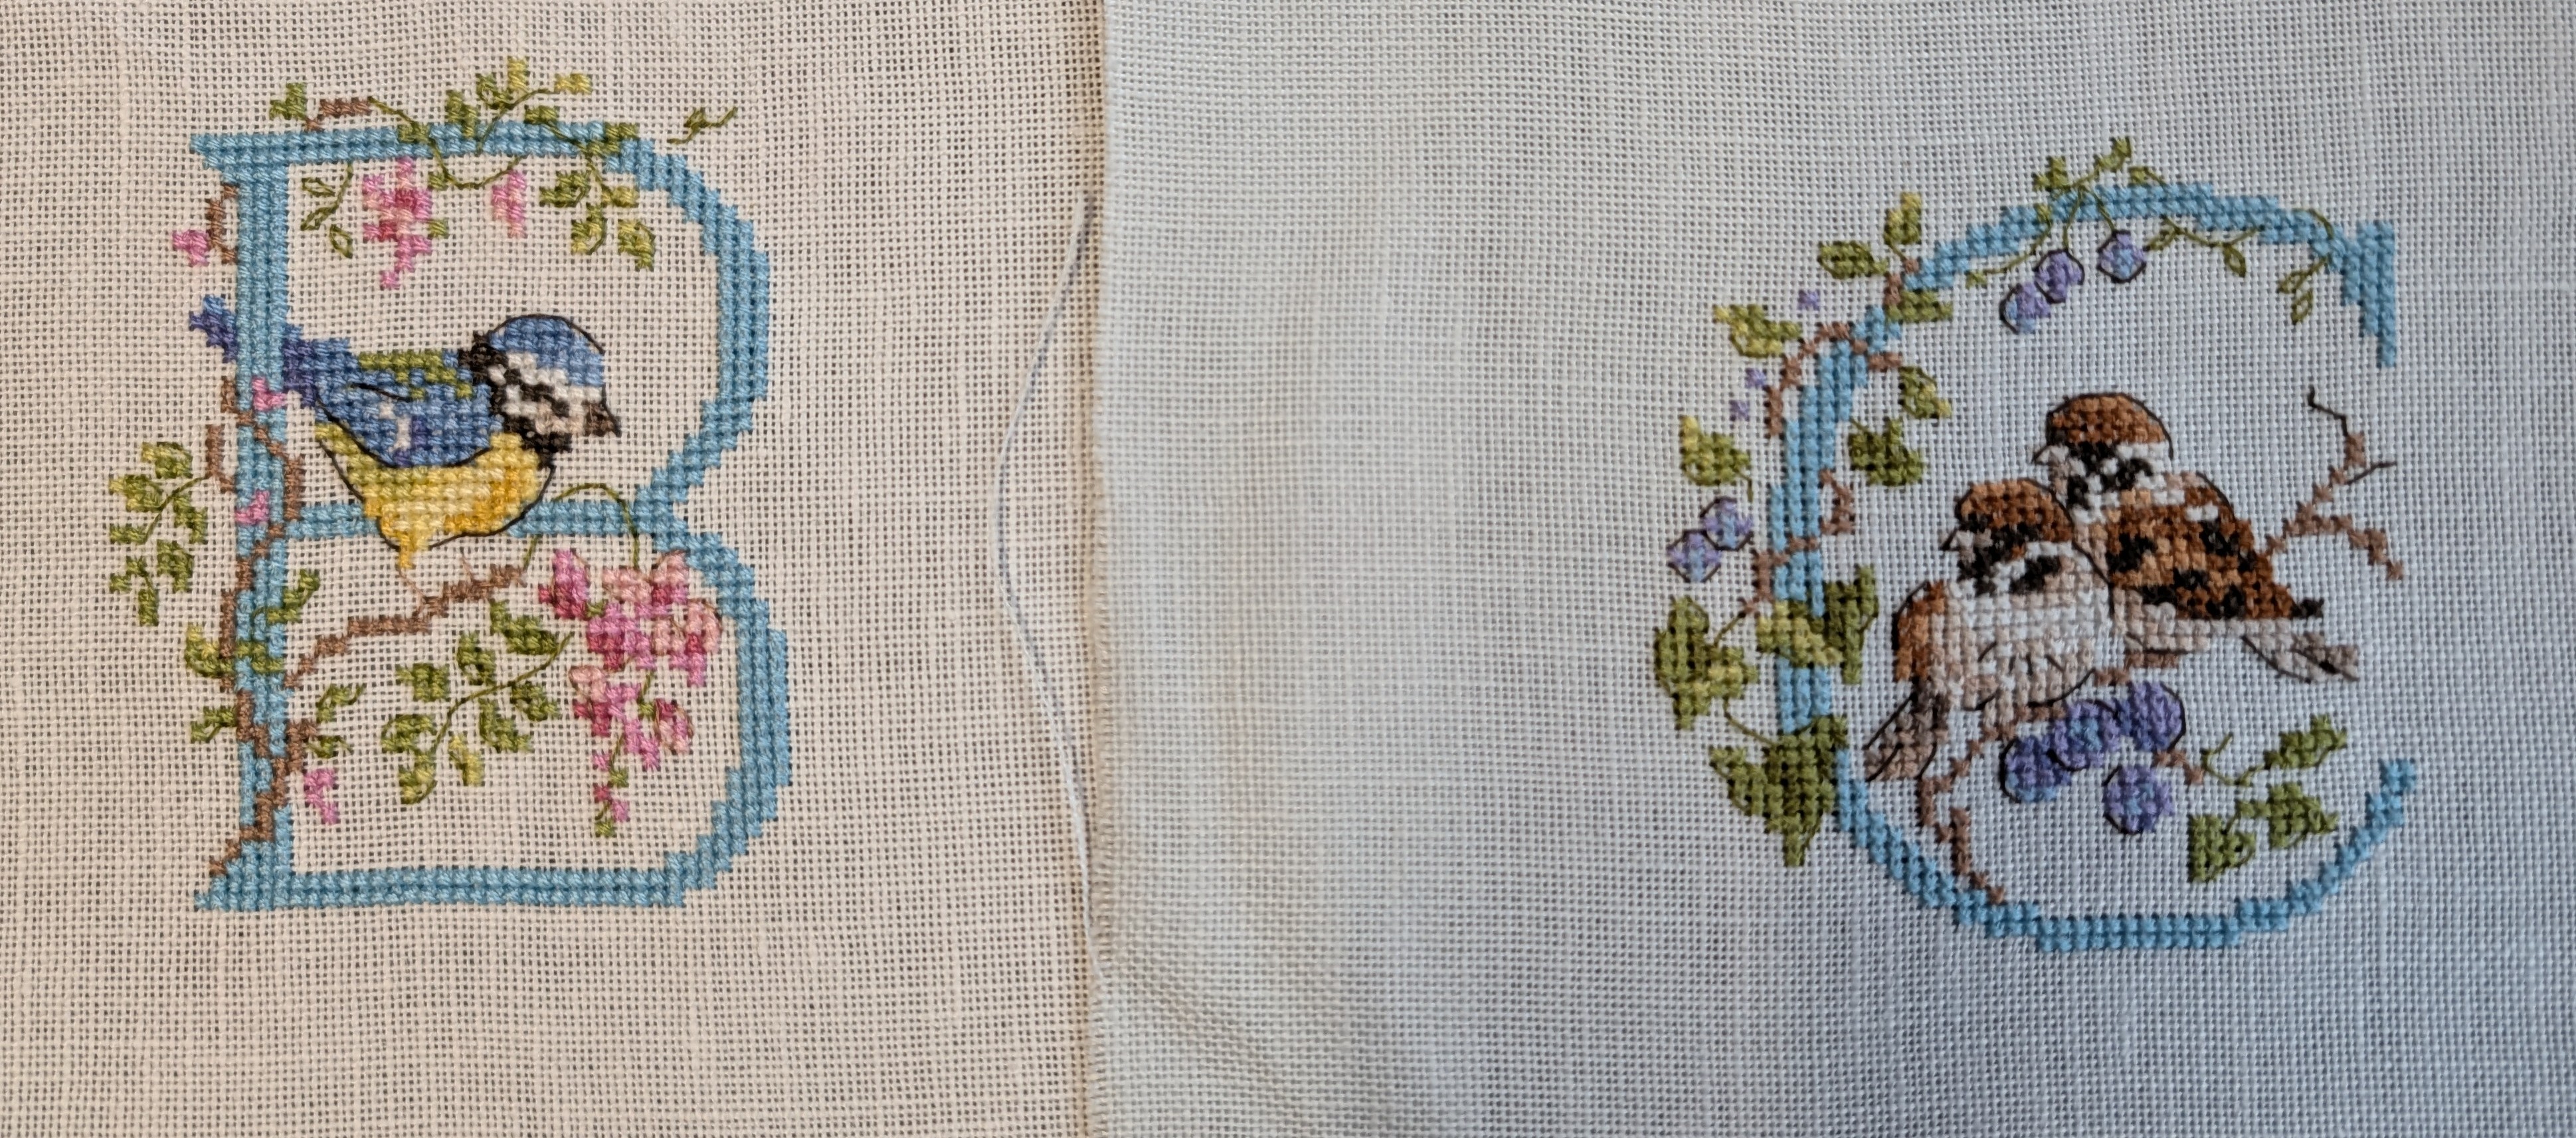
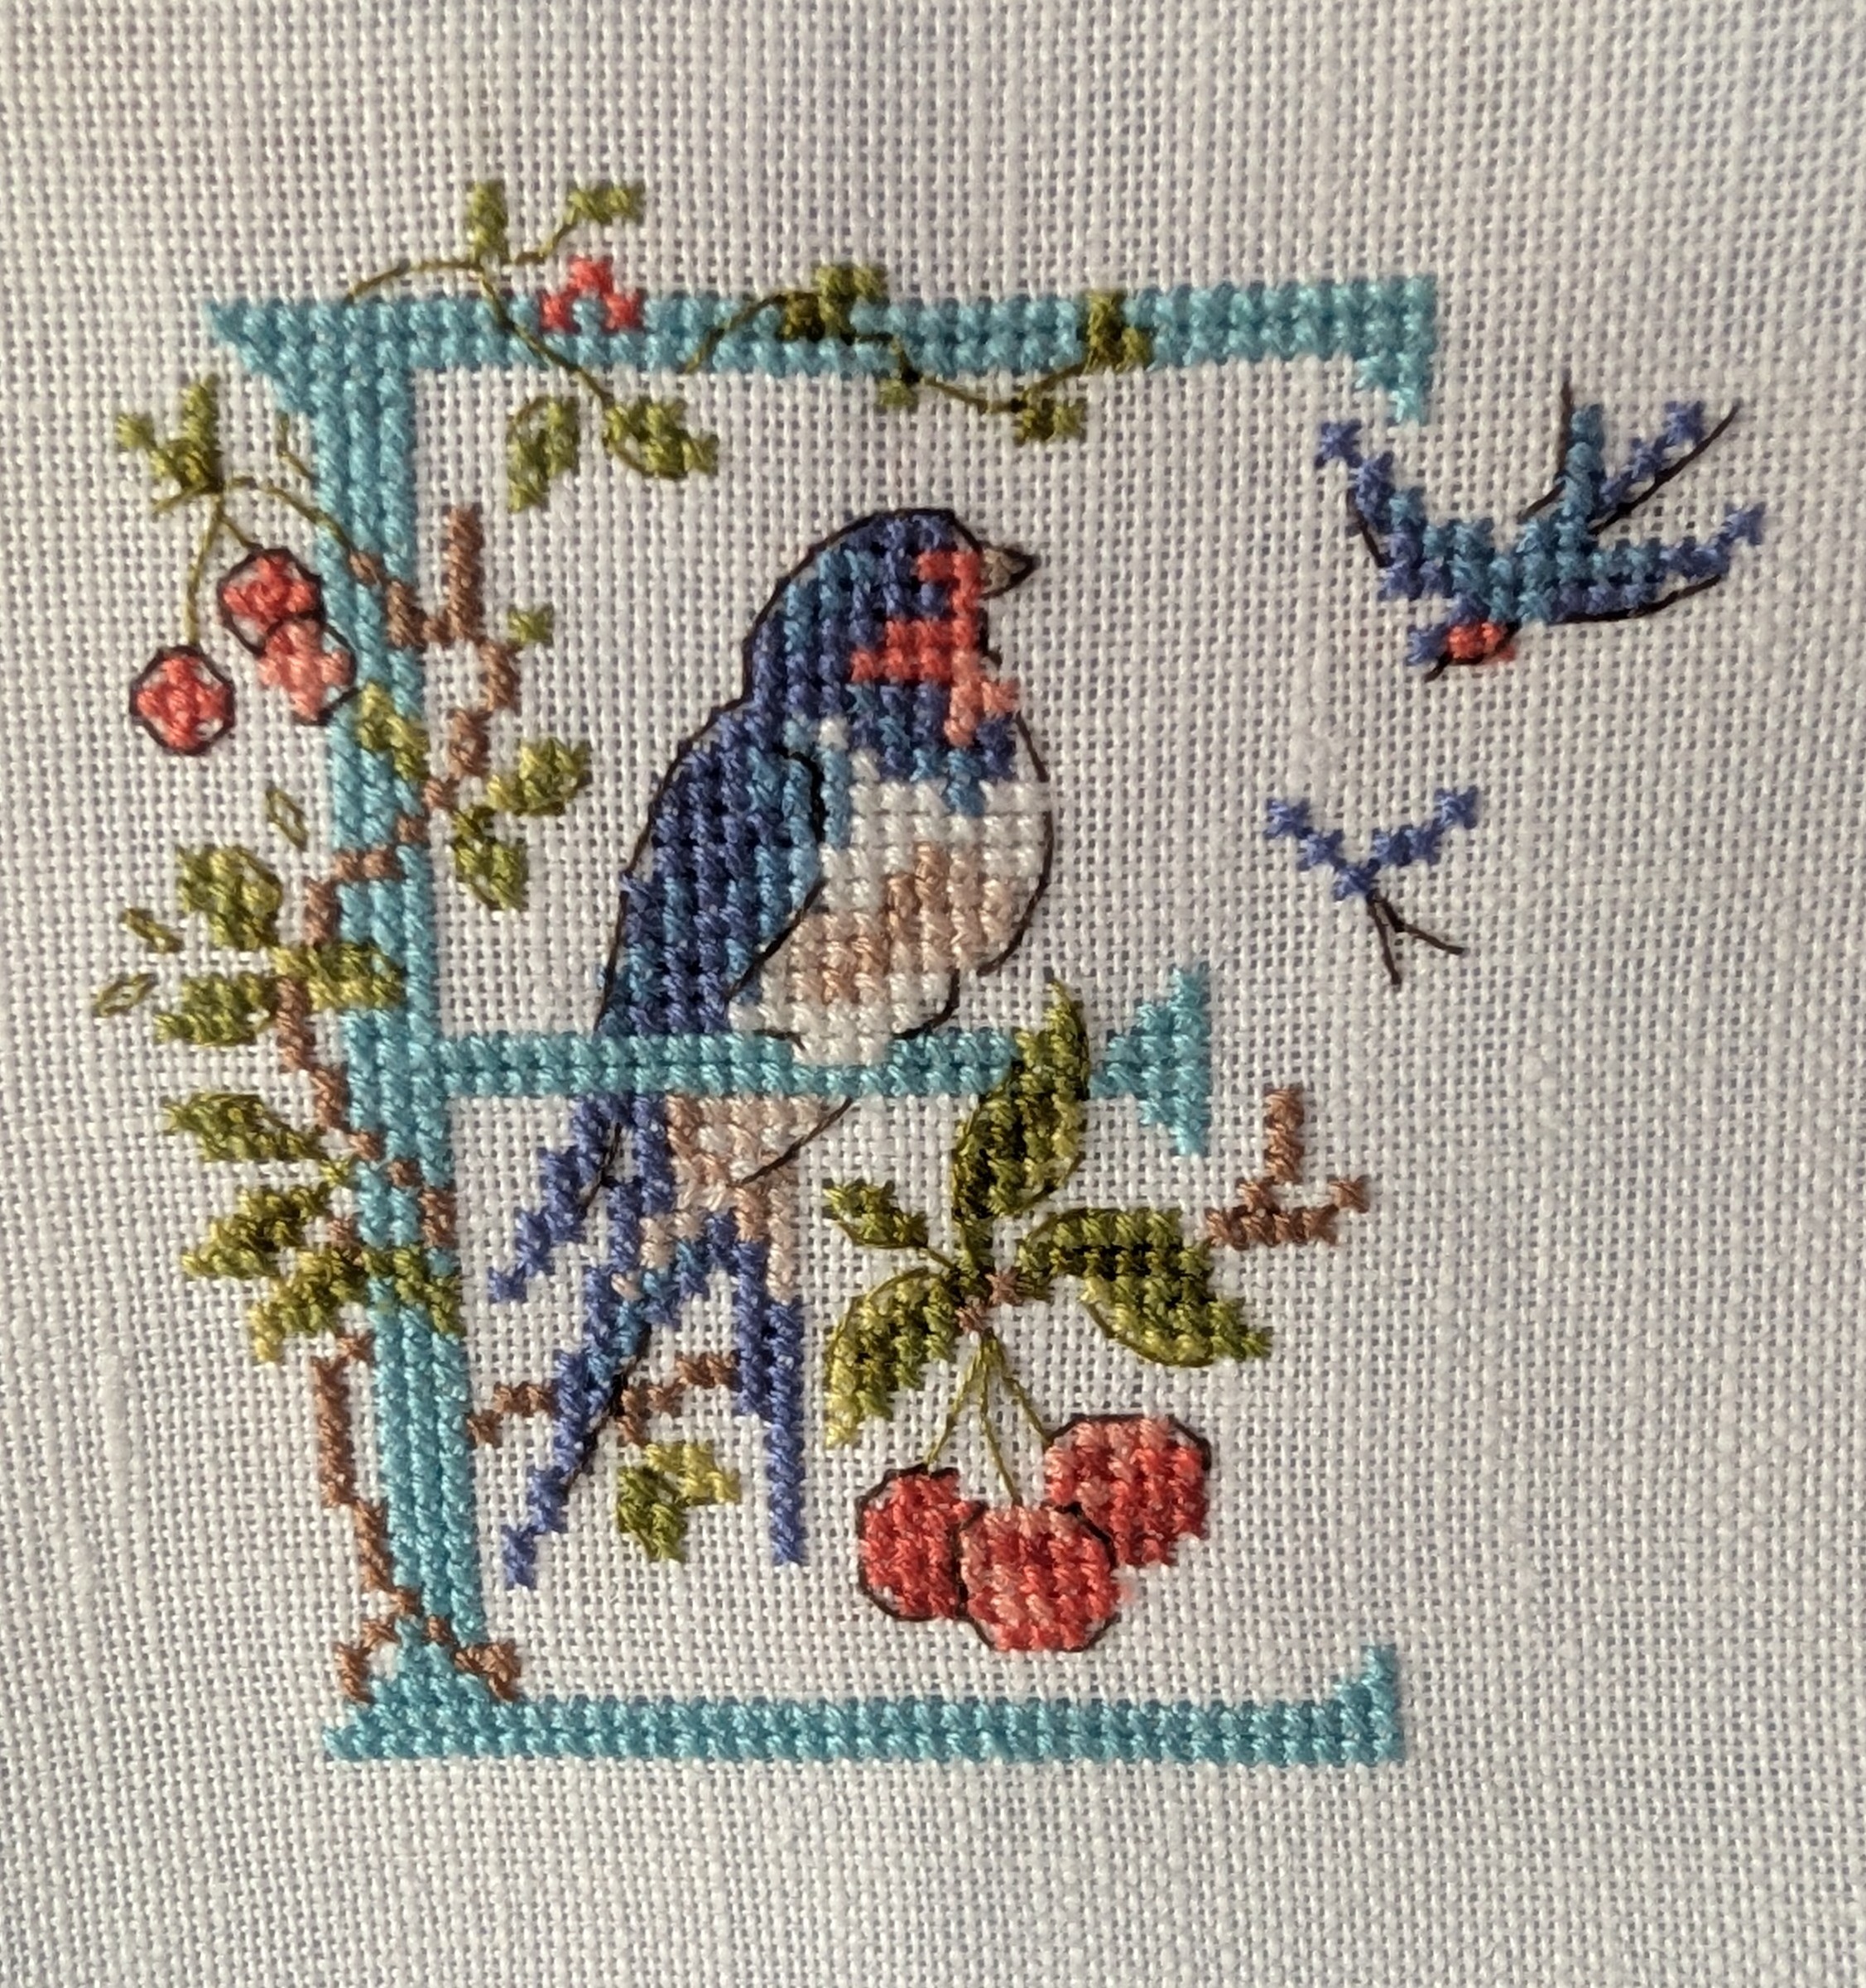
I’ve just finished another letter of my alphabet of birds. This one I think is a female blackcap – the male has the black cap, females have a brown one.
These are delightful to stitch and don’t really take long to do. However I’m going to have to have a bit of a break as I’ve just started another alphabet – a birth sampler, which is going to be part of my grandson’s first birthday present in March. It’s a very sweet design with Winnie the Pooh sat in the corner. I’m having a few days away in Cyprus this week so I think this will be my stitching project.

I’ve almost finished my little book of love. This is a concertina style book so it opens out into a long strip. The original strip of calico and the basic instructions and inspiration came from a kit I’ve had in my stash for years.
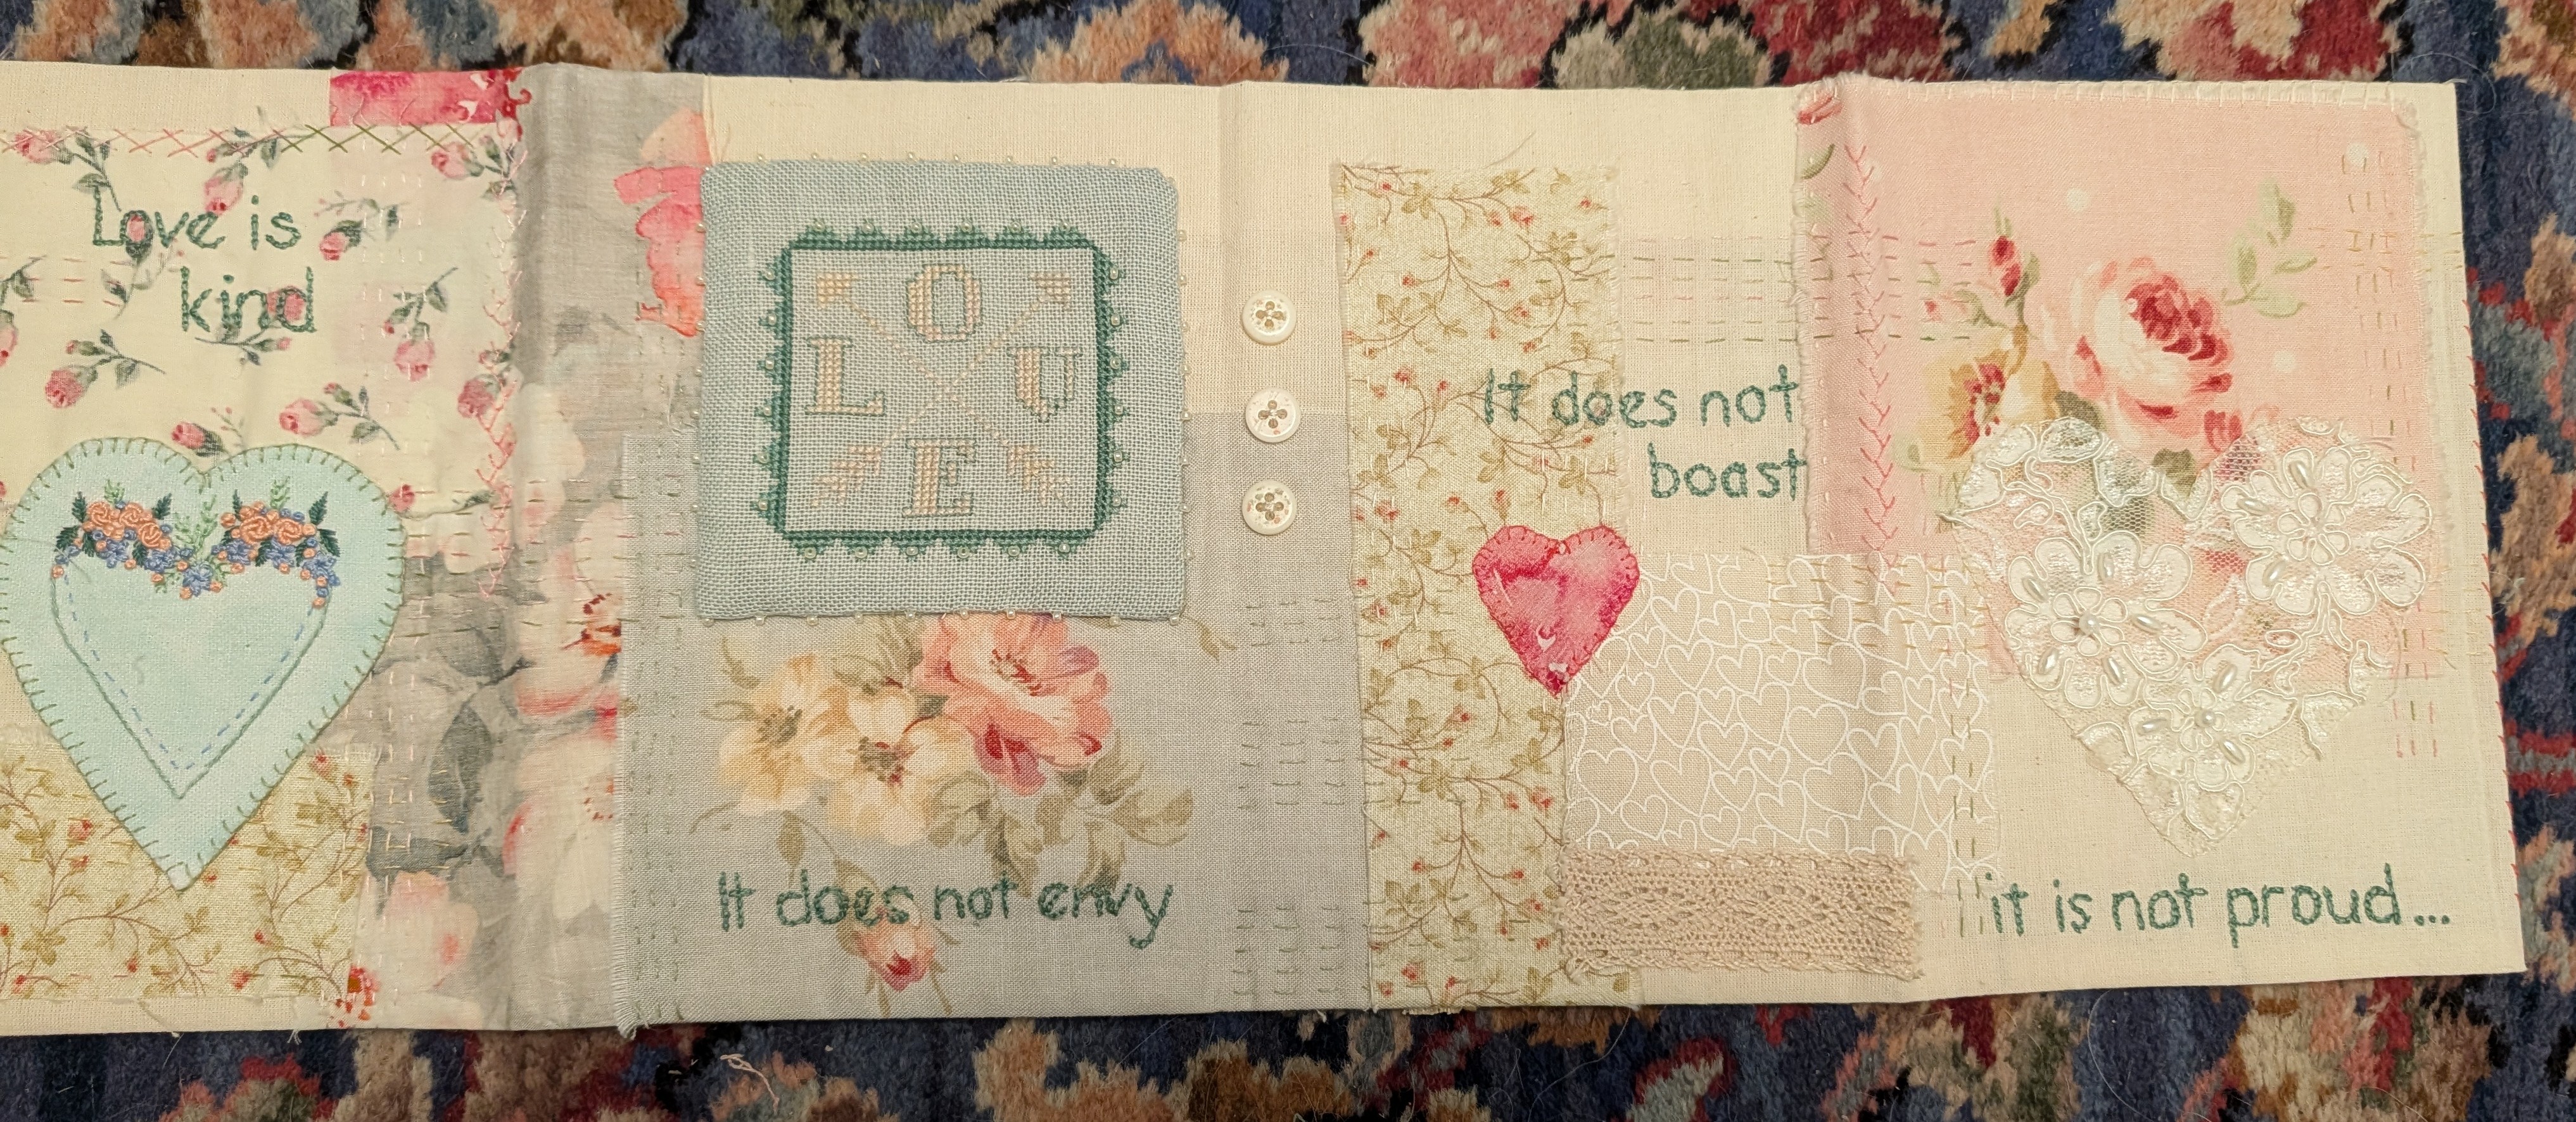
The strip of calico is the width of the fabric so it’s about 150cm, it’s then folded in half so the book has two sides to decorate, I did this book in sort of layers of stitch…
The first layer I showed you a couple of weeks ago, layering pieces of fabric on and doing lots of running stitch both to hold them in place and for embellishment. It does give a lovely feel to the piece as well.

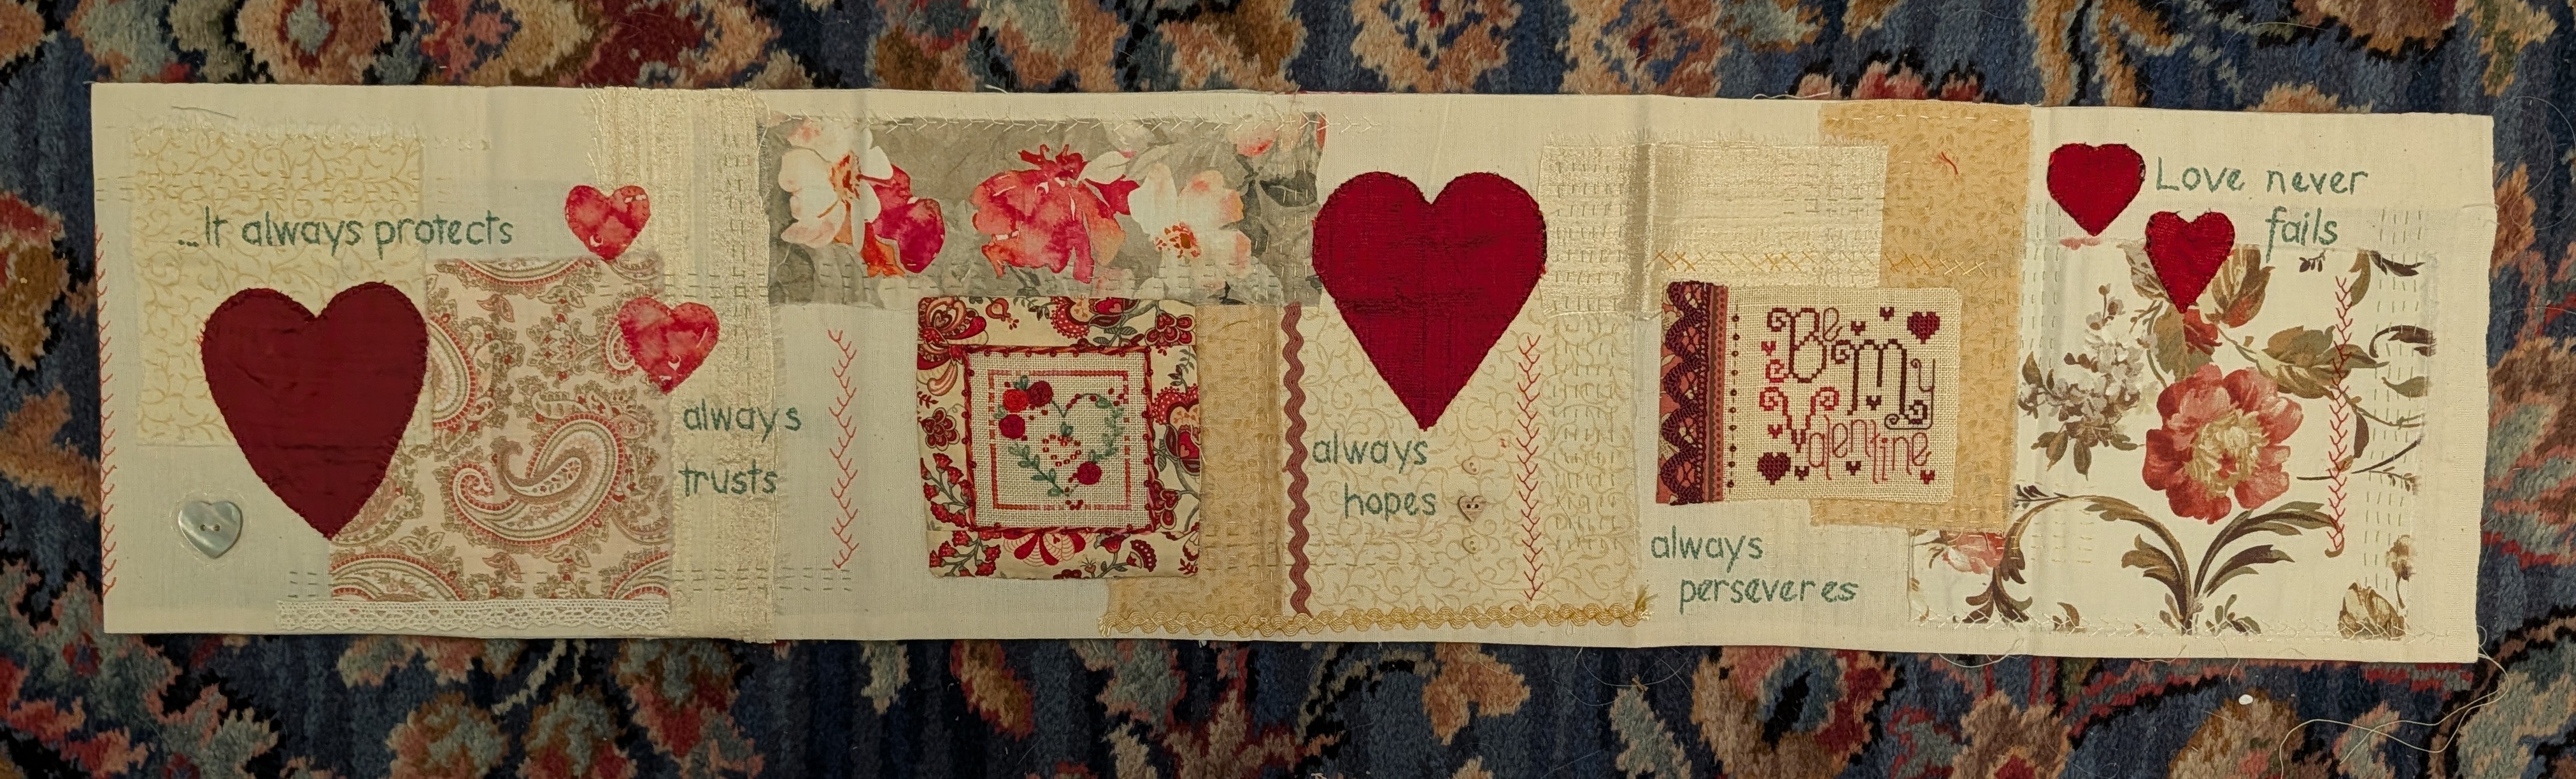
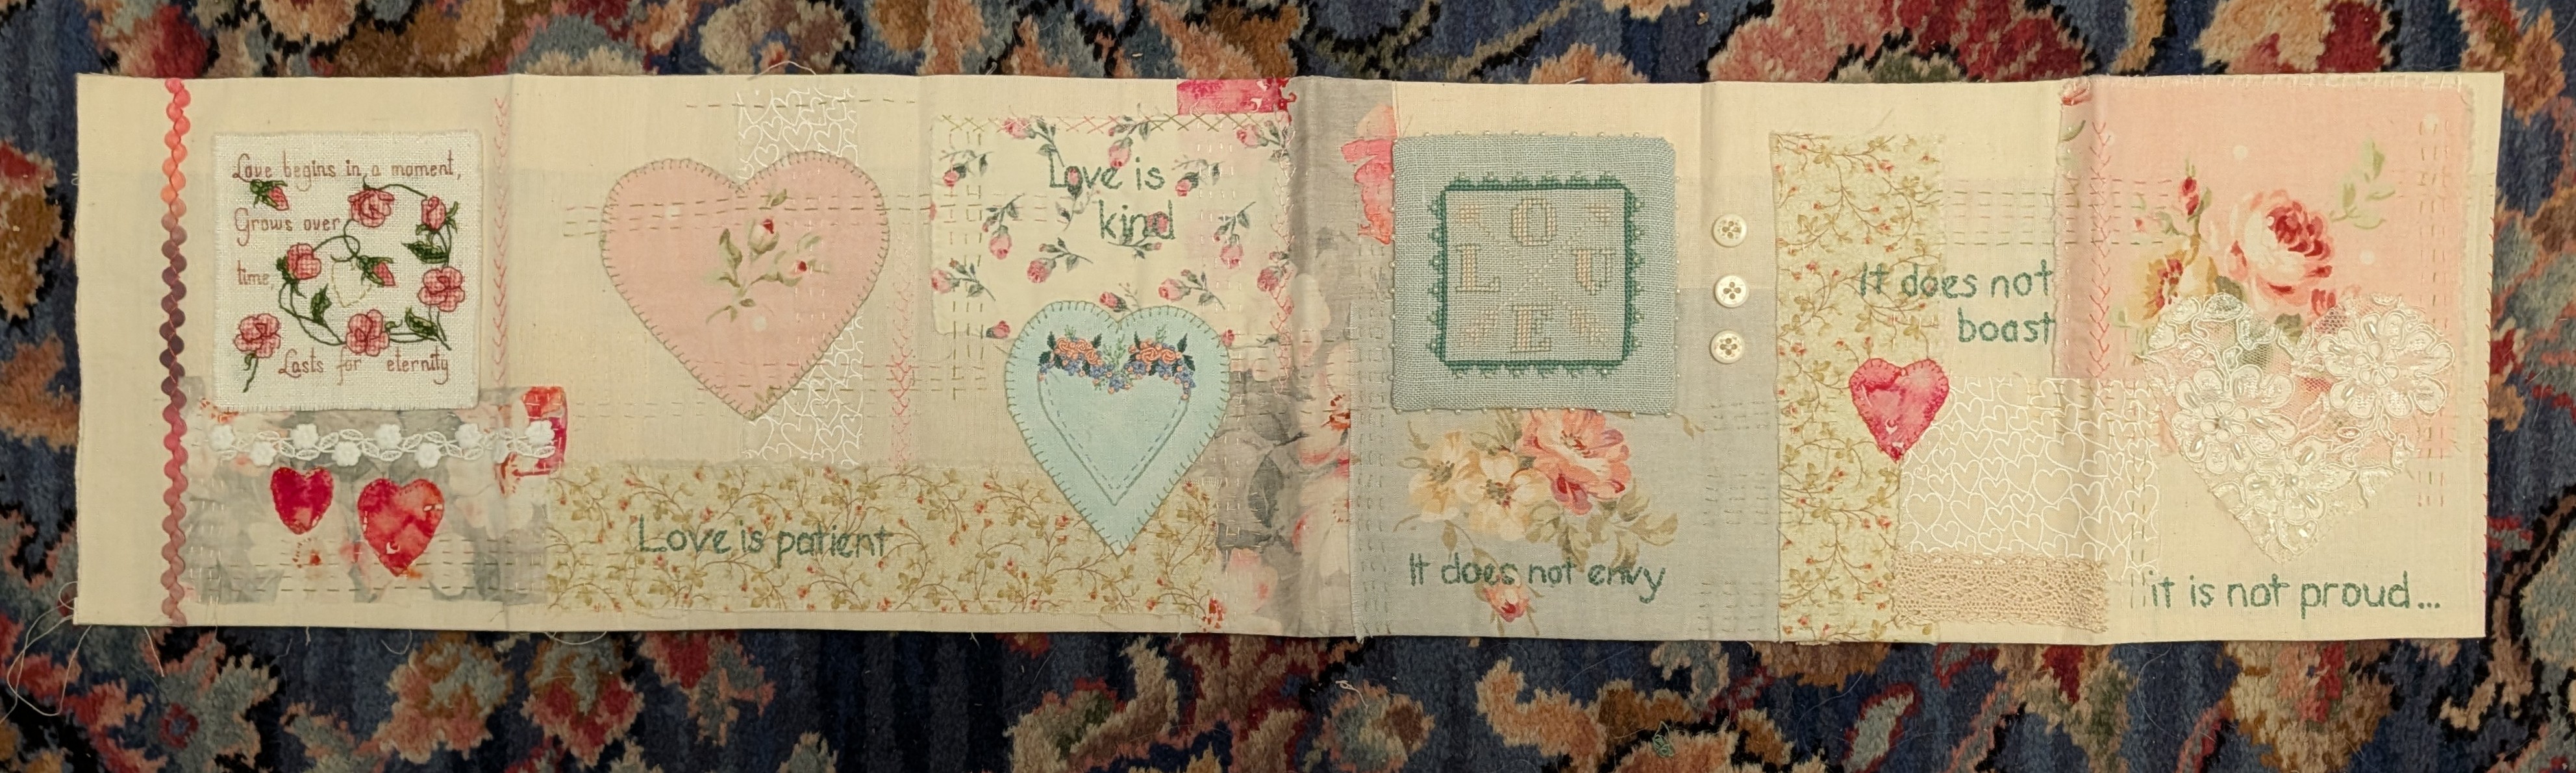
This side is more pastel coloured, the other side has more red on it. The next phase was to arrange various small pieces of embroidery and cross-stitch. Some of these I’d made into Valentine cards, some were cross-stitch smalls and some, like the embroidered heart, I wasn’t completely happy with it when I made it so it sat in a box. At the same time I cut out some large and small hearts from different fabrics such as taffeta, silk and lace from my wedding dress.
Once they were stitched on I wanted to add some words. My original plan was to type some poems or quotes onto cotton paper but the vintage type-writer I’ve borrowed from my daughter needed a new ink reel and of course I couldn’t wait for it to arrive! Instead I decided to stitch the words from the poem ‘Love is patient, love is kind’, there’s about four lines in the middle that I missed out as I didn’t have enough pages (and they were quite long lines!) I wrote the words on the fabric with a frixion pen and then embroidered them with a single strand of DMC in chain stitch. I did ponder for a while what colour to use, having decided on green I realised whatever I chose wasn’t going to go with all the greens on the fabrics, so I picked on shade and went for it. With hindsight I might have been better with a nice brown, but I didn’t think of that.
Having stitched the letters I then went along and embroidered lines of different stitches were I felt they were needed, using feather stitch, cross-stitch etc. I added ric-rac and a few pieces of lace too. Once I was reasonably happy, I stitched the seam along the bottom and one end.
Before I stitched the top seam, I put a few more stitches in, fixing down fabric where I thought it was needed, sometimes with a decorative stitch, sometimes a tiny running stitch so it wasn’t to obvious. I also added the buttons at this point, stitching round the large heart button to fill the space. Three little buttons are actually upside-down, they were fairly boring cream button, but the back for some reason has tiny flecks of pink and green, which went beautifully with the fabrics.
Once I was happy, I slip-stitched the top edges together and pressed it well, especially the folds where I want it to make the pages.
All I have to do now is make a cover for it. It is designed to have the front and back cover as part of the concertina, but I prefer to have it tucked in a cover…I have a plan!

I’ve just finished another of the letters for the bird alphabet book. The letter F has a very sweet little chaffinch.
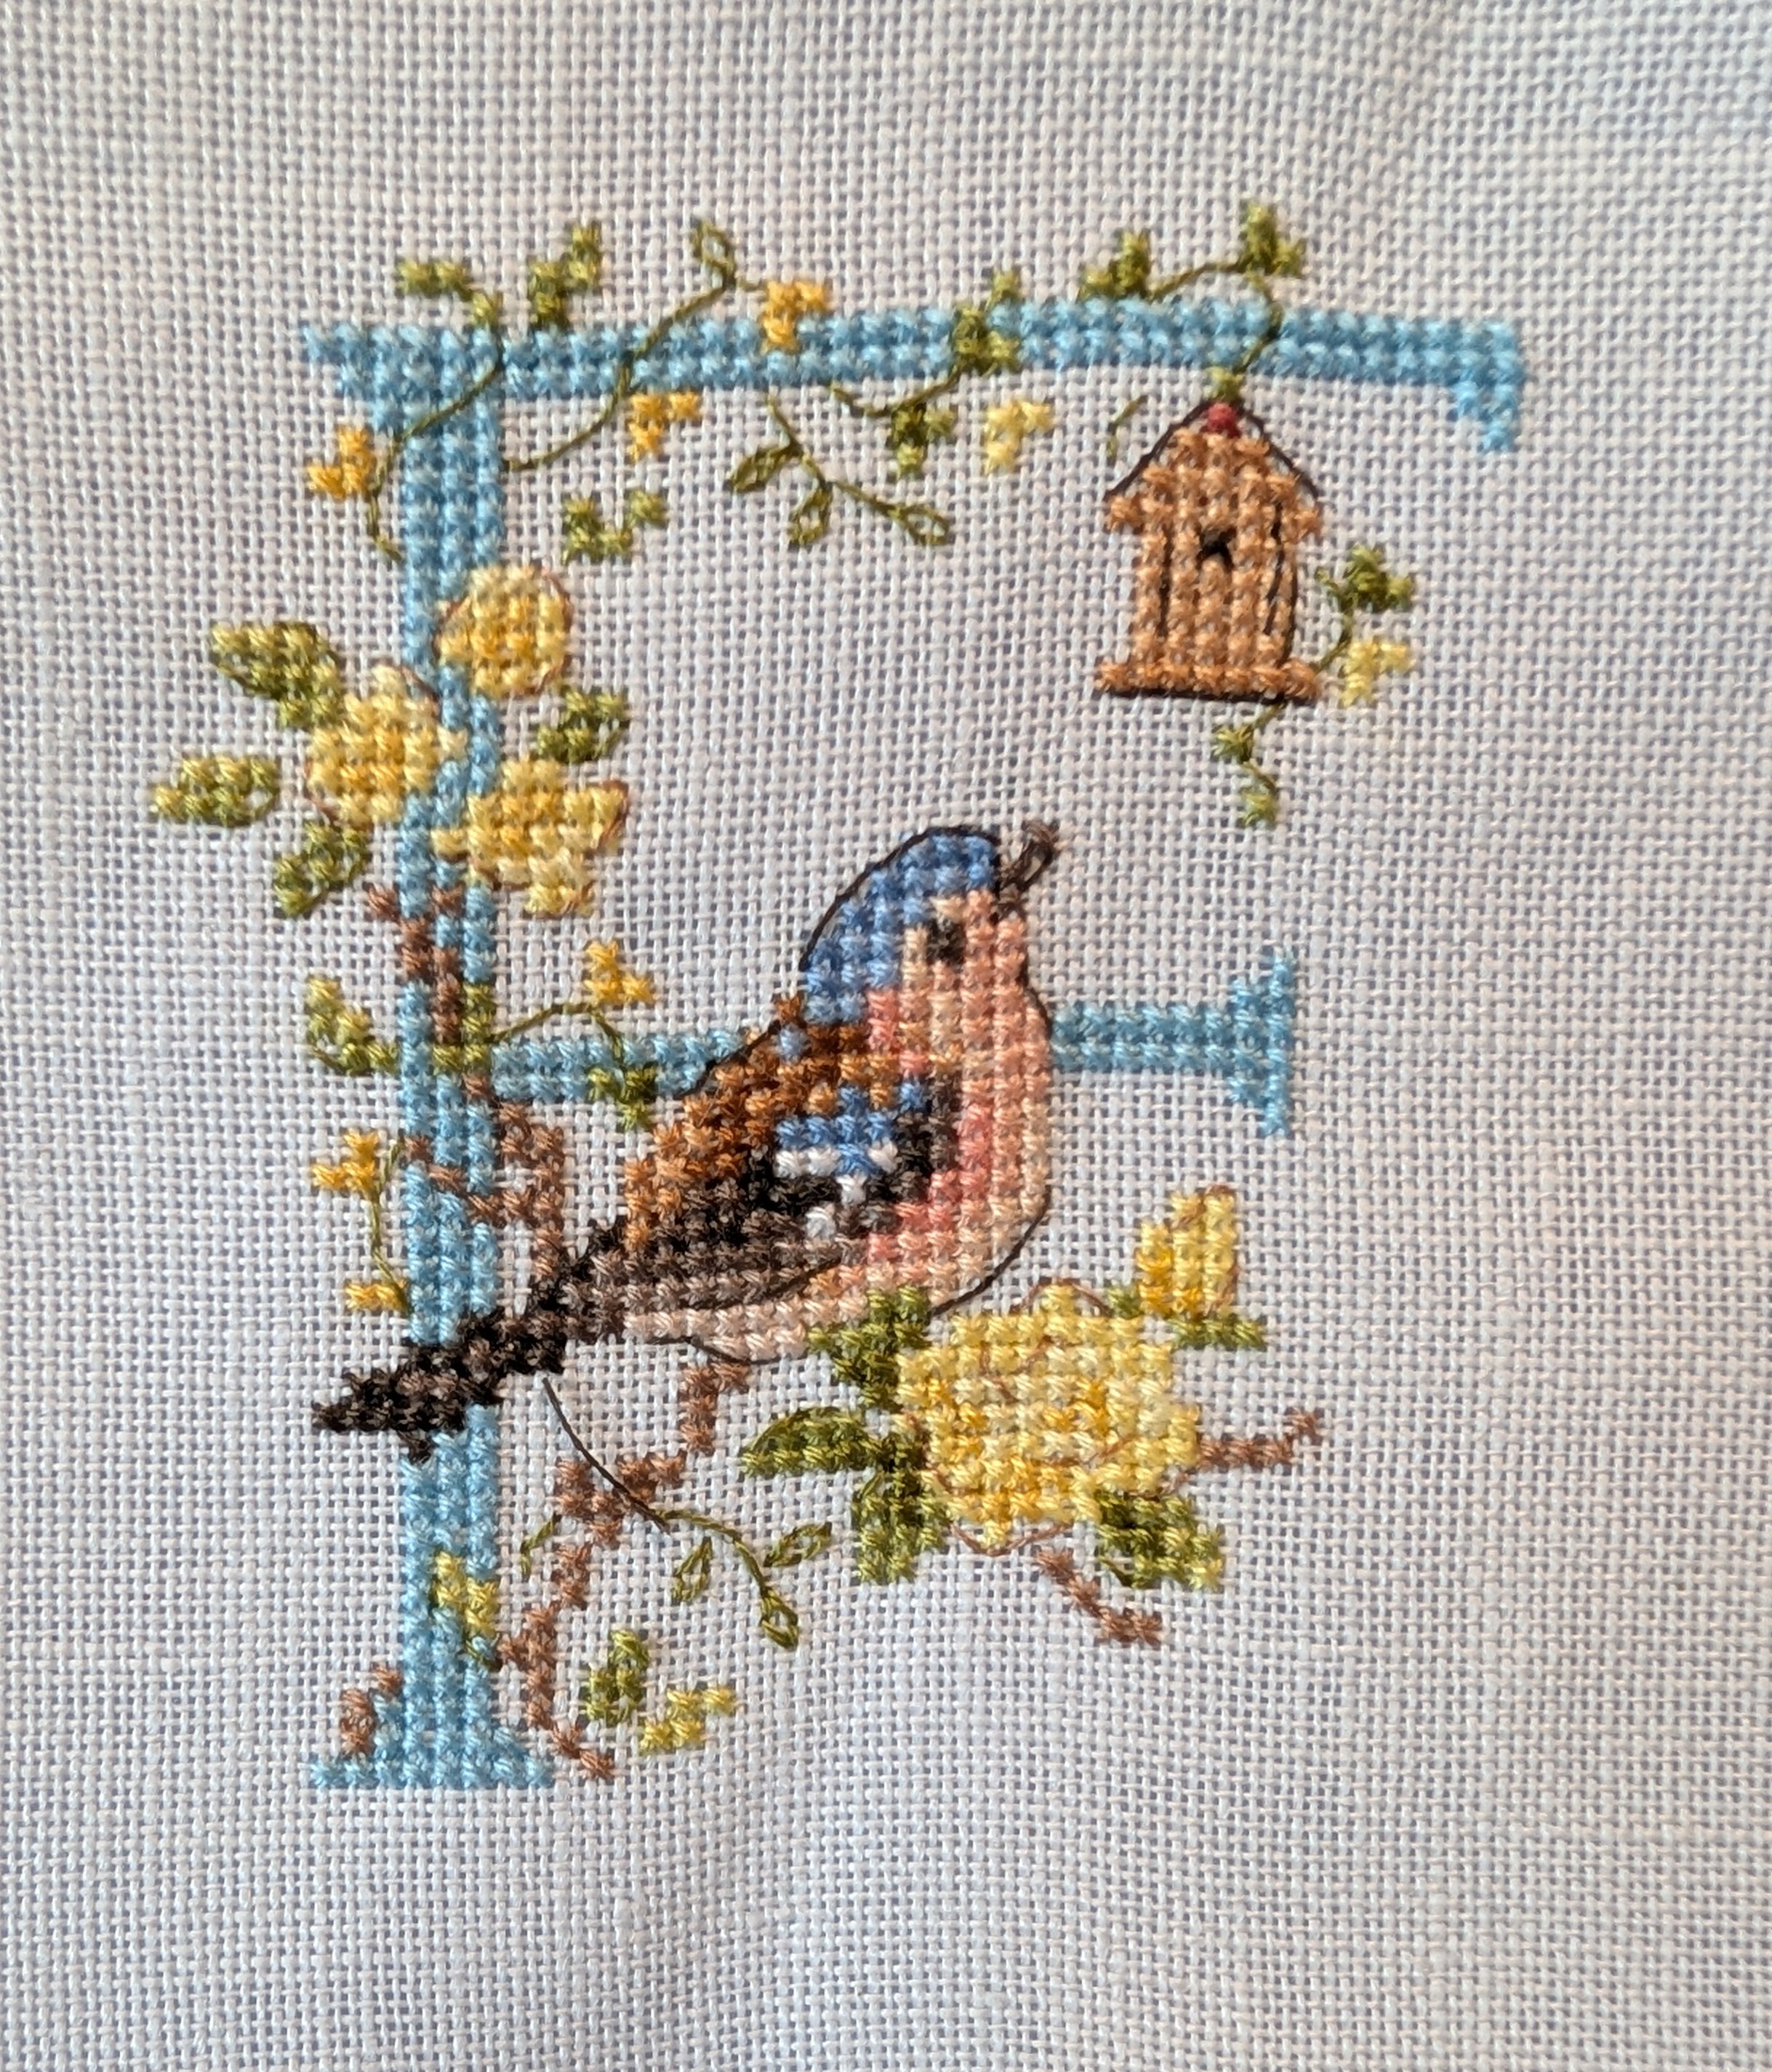
Now I’ve completed A to F, I’m nearly a quarter of the way through the alphabet. I’ve started G which has what I think is a female black cap. I’m still trying to work out what size to finish the pages as I could do with starting to back-stitch round the edge as I go, rather than leaving them all to the end, I could even start to stitch the pages together. Although the letters are around the same size, the foliage around them does make some wider, I think I need to have a play with the letter’s I’ve done and make a decision.
Here’s the first six letters of the bird alphabet…


New Year to me is a time both to look back and look forward, I look back at what I’ve made, what’s worked and what hasn’t, things I’ve done and plans for things to make or do in the coming year. This time there’s a lot of change with retirement, finding a new routine and making sure I don’t fritter away this extra time. So, here’s my thoughts…
Quilts;
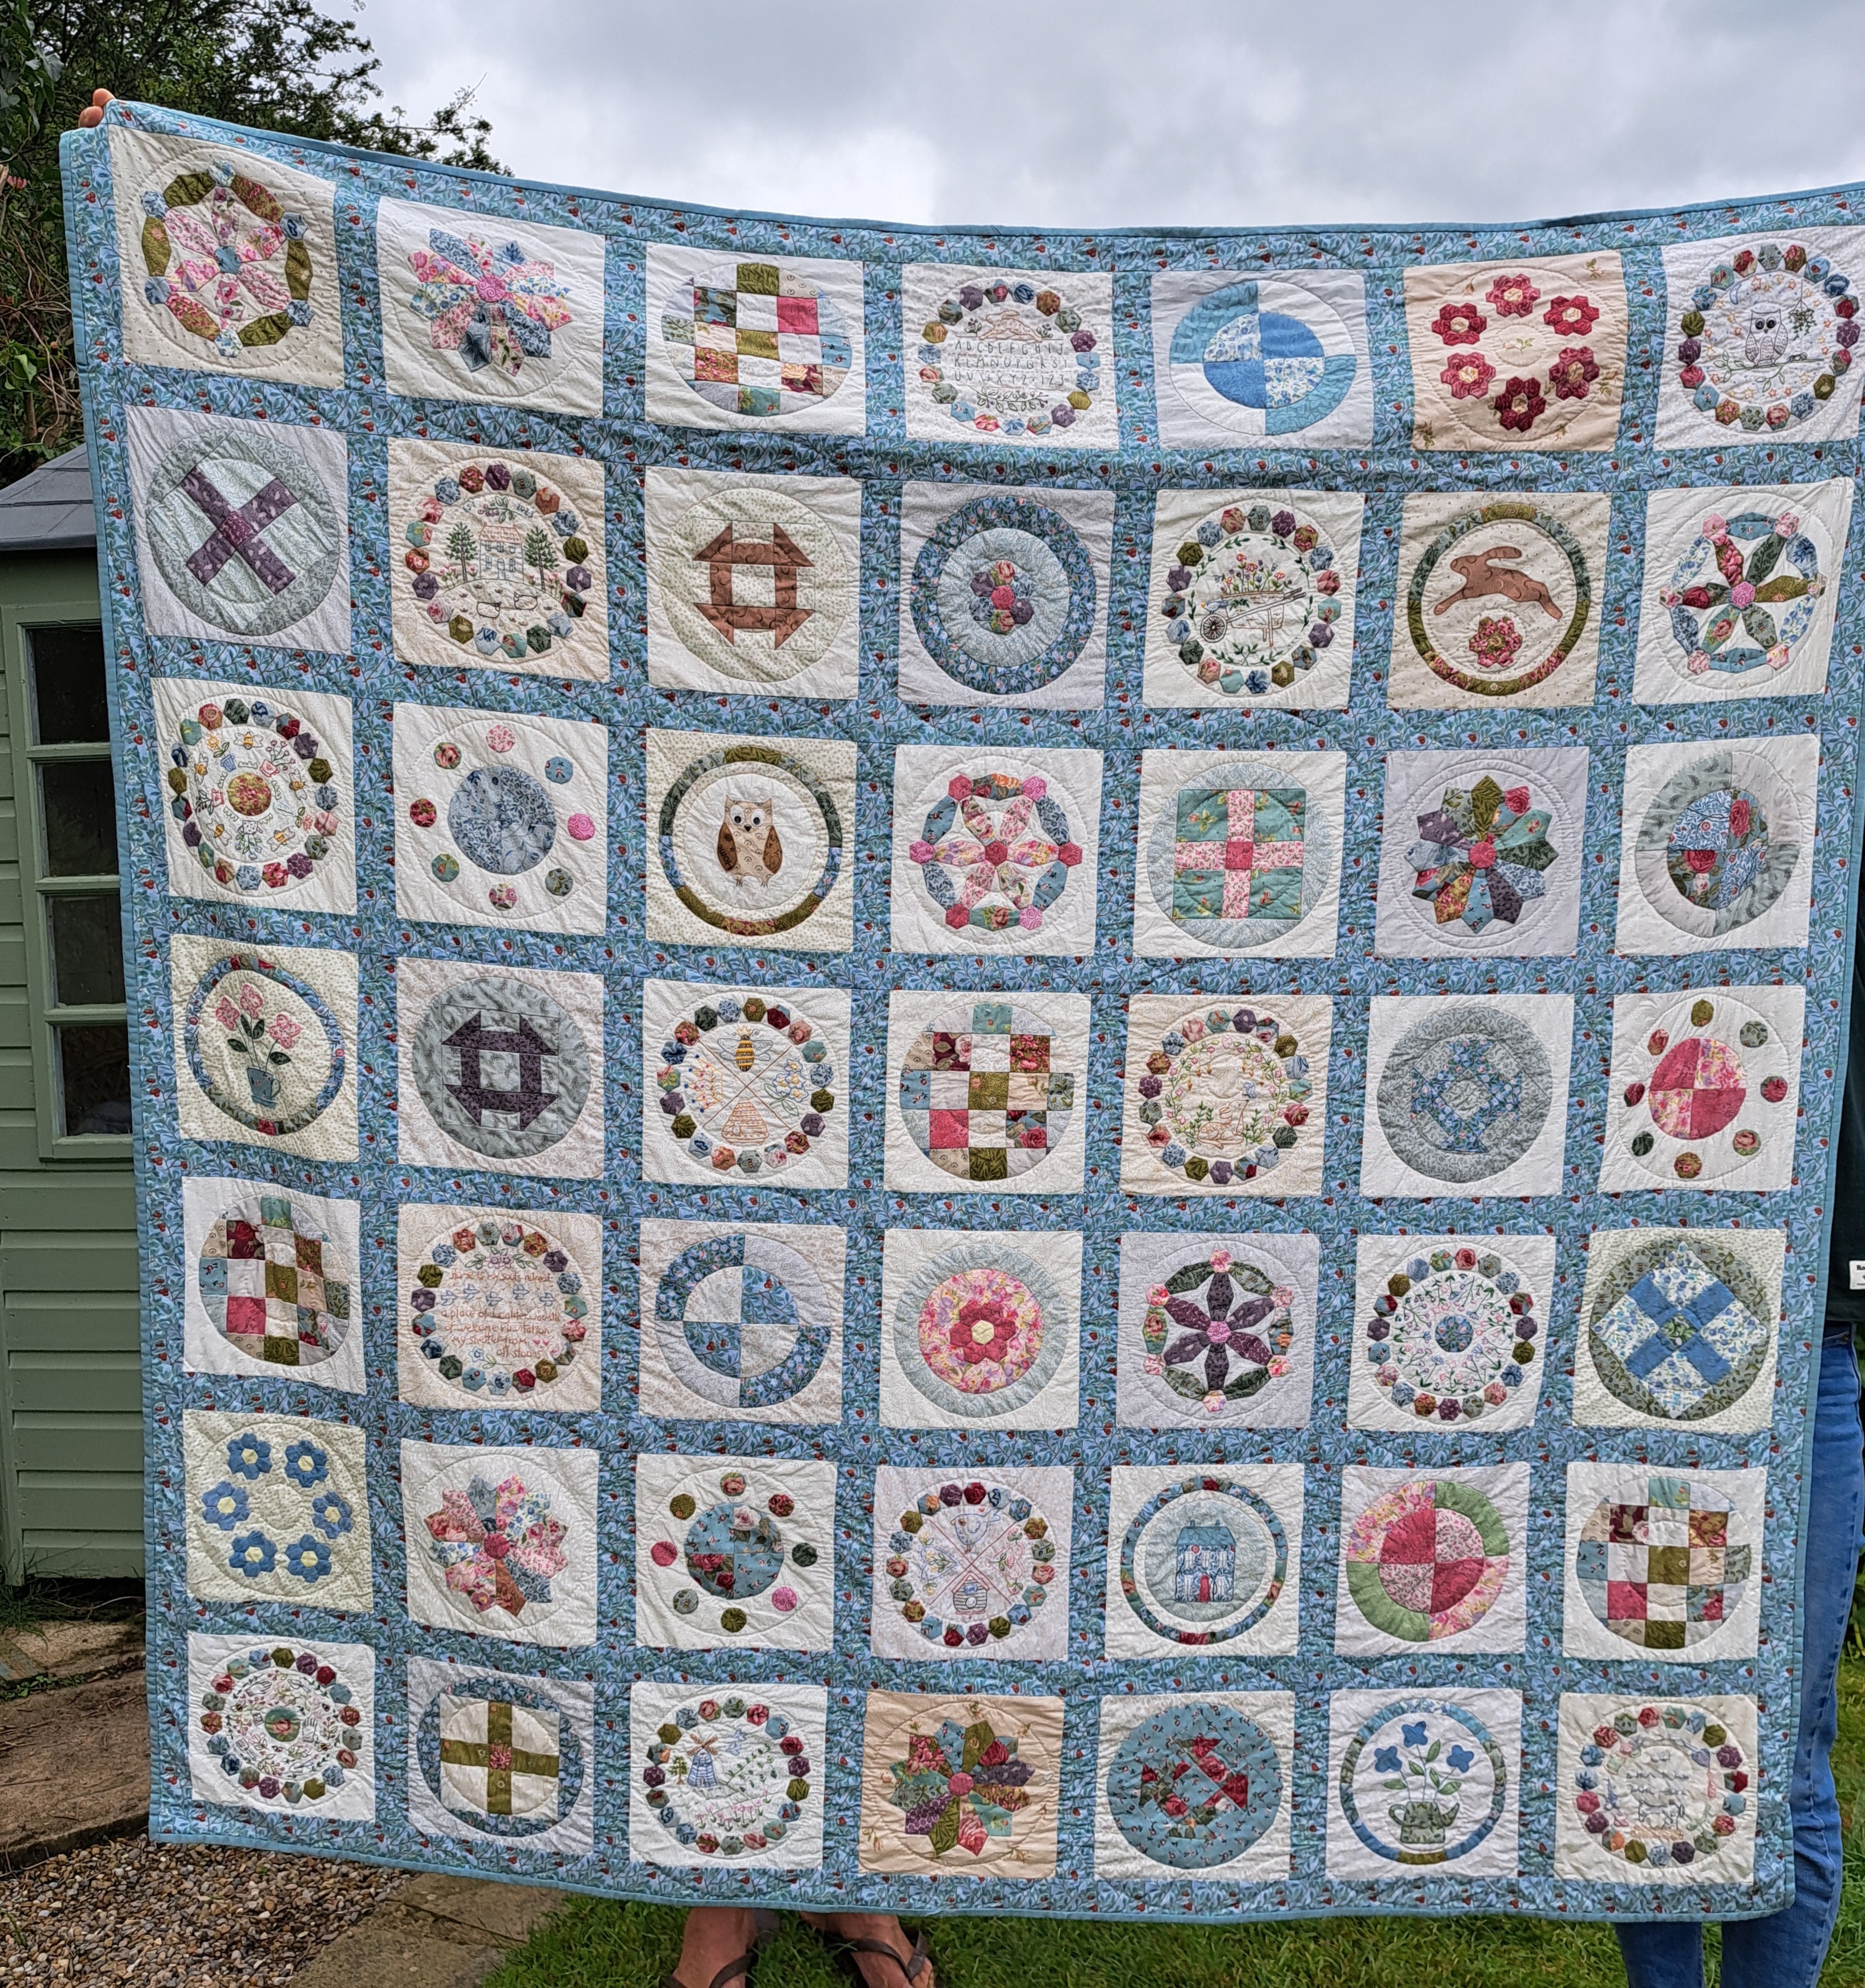
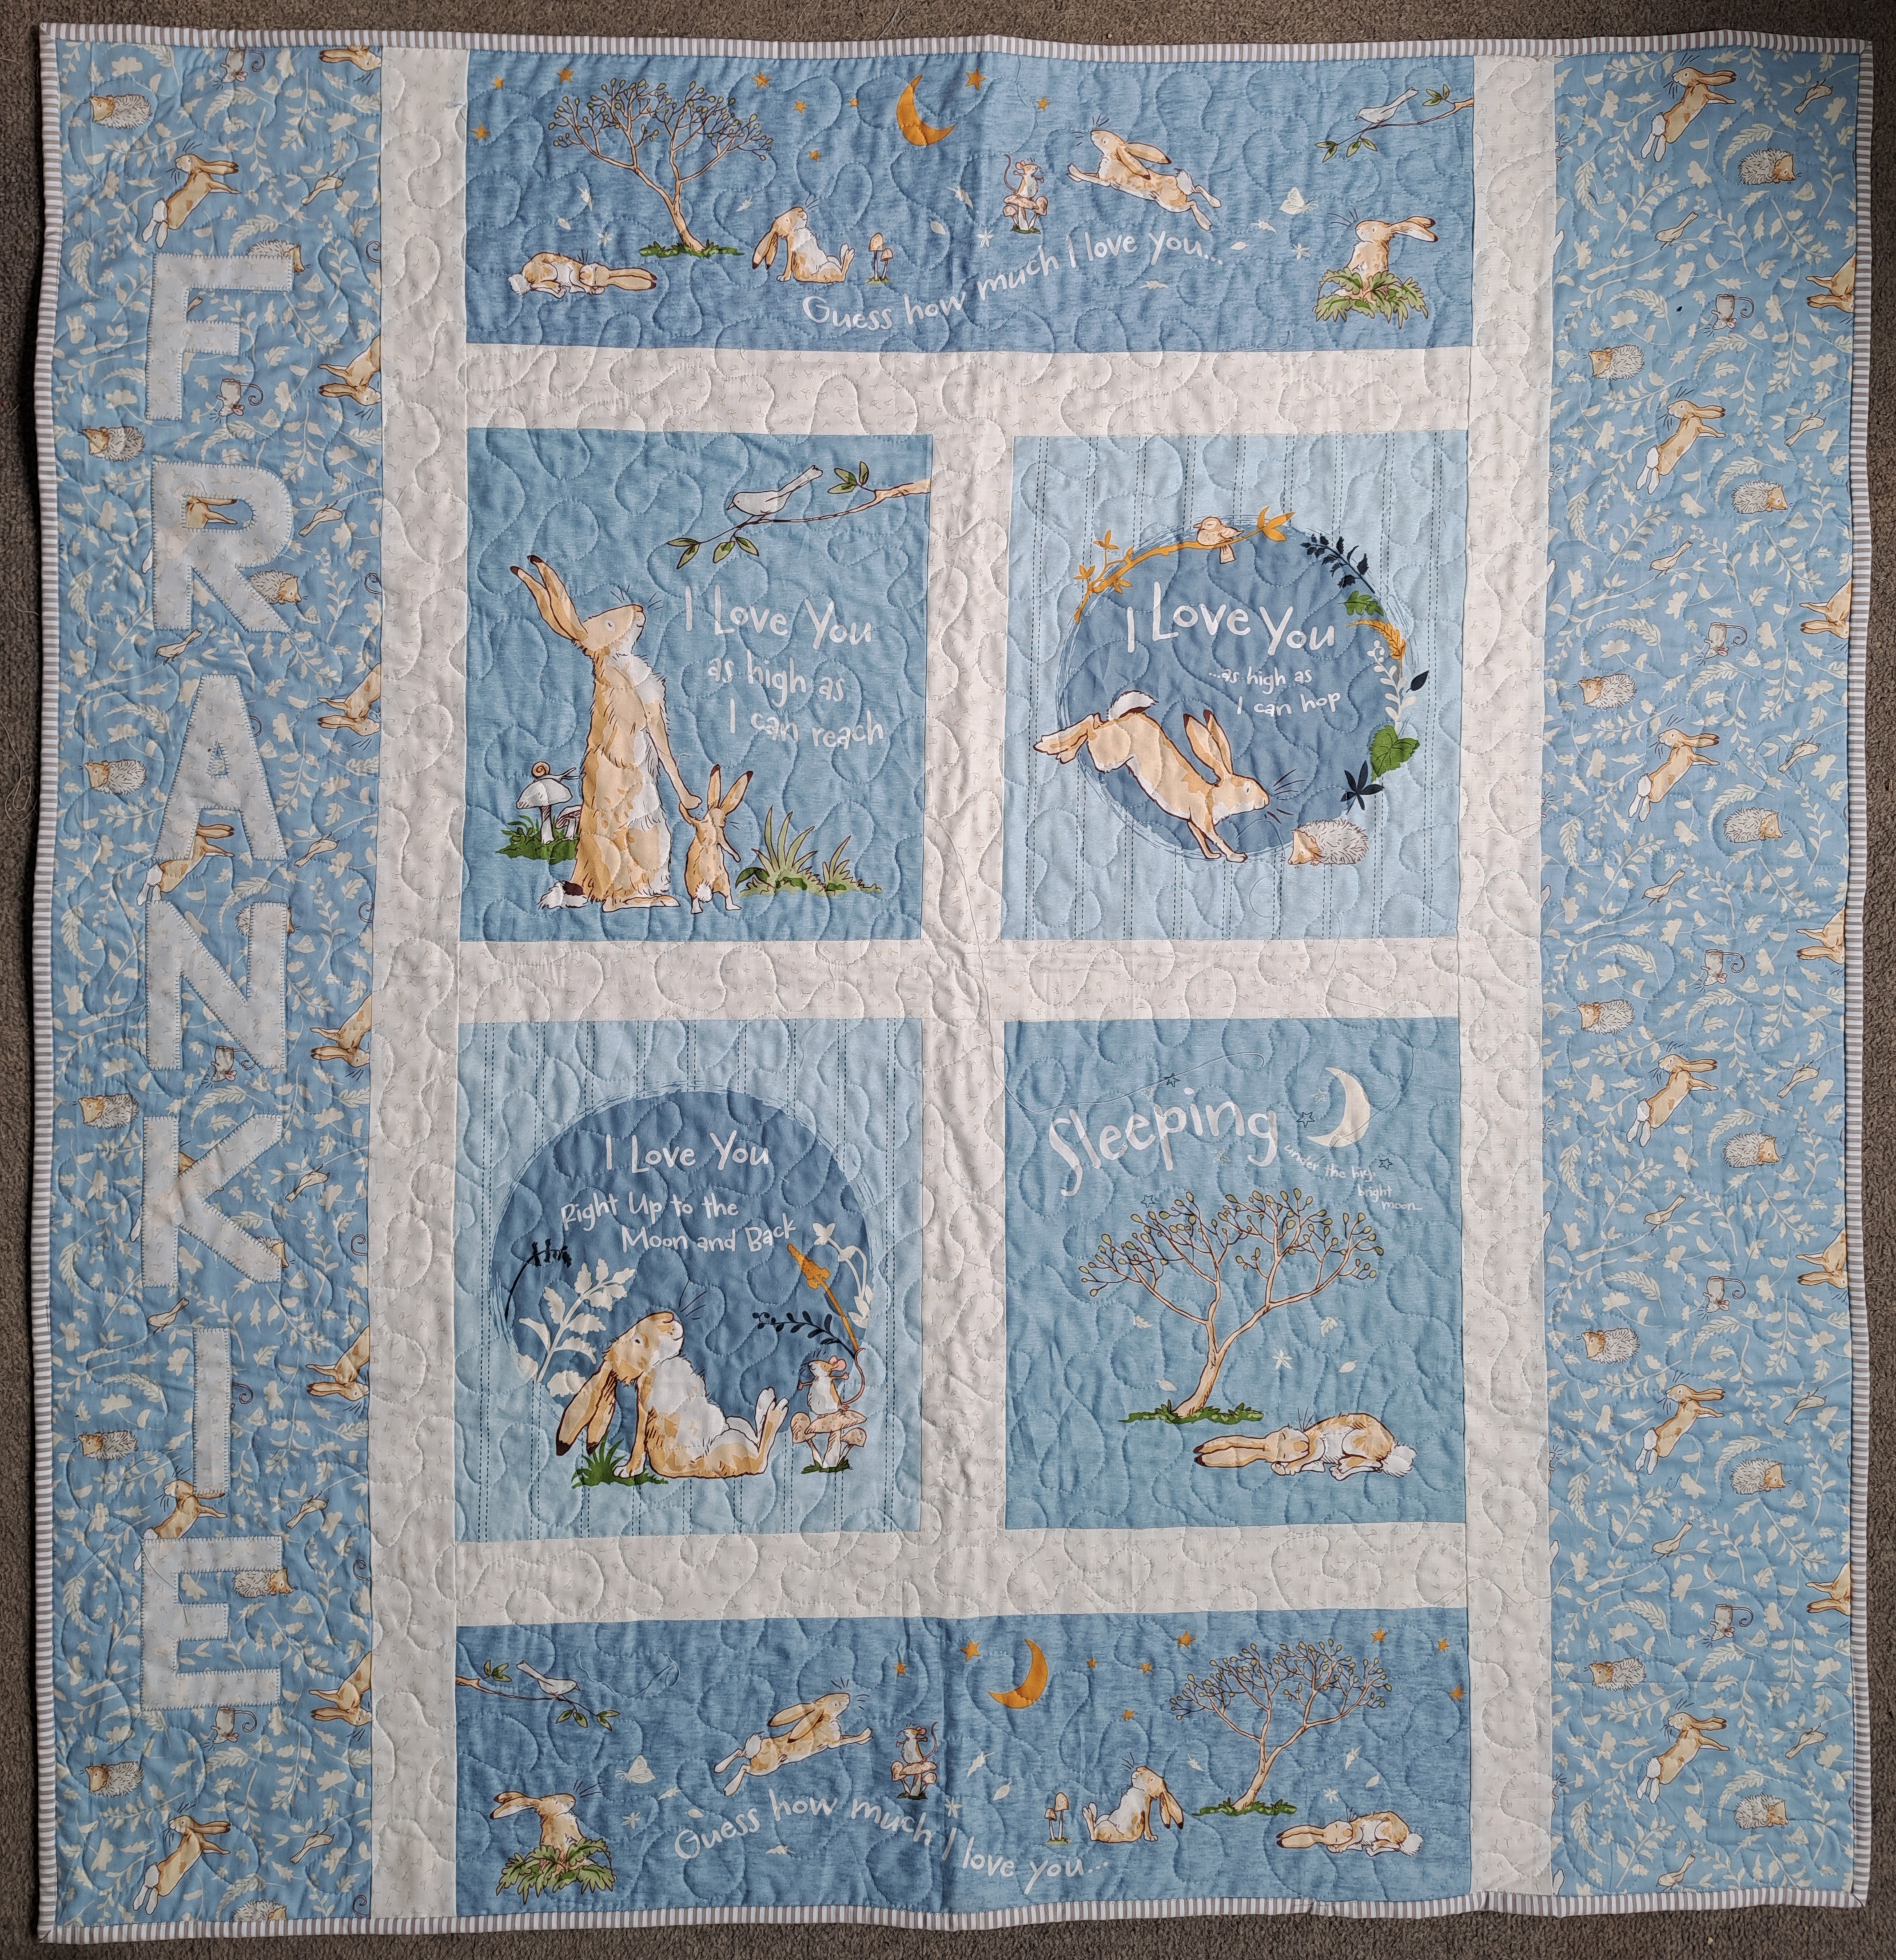
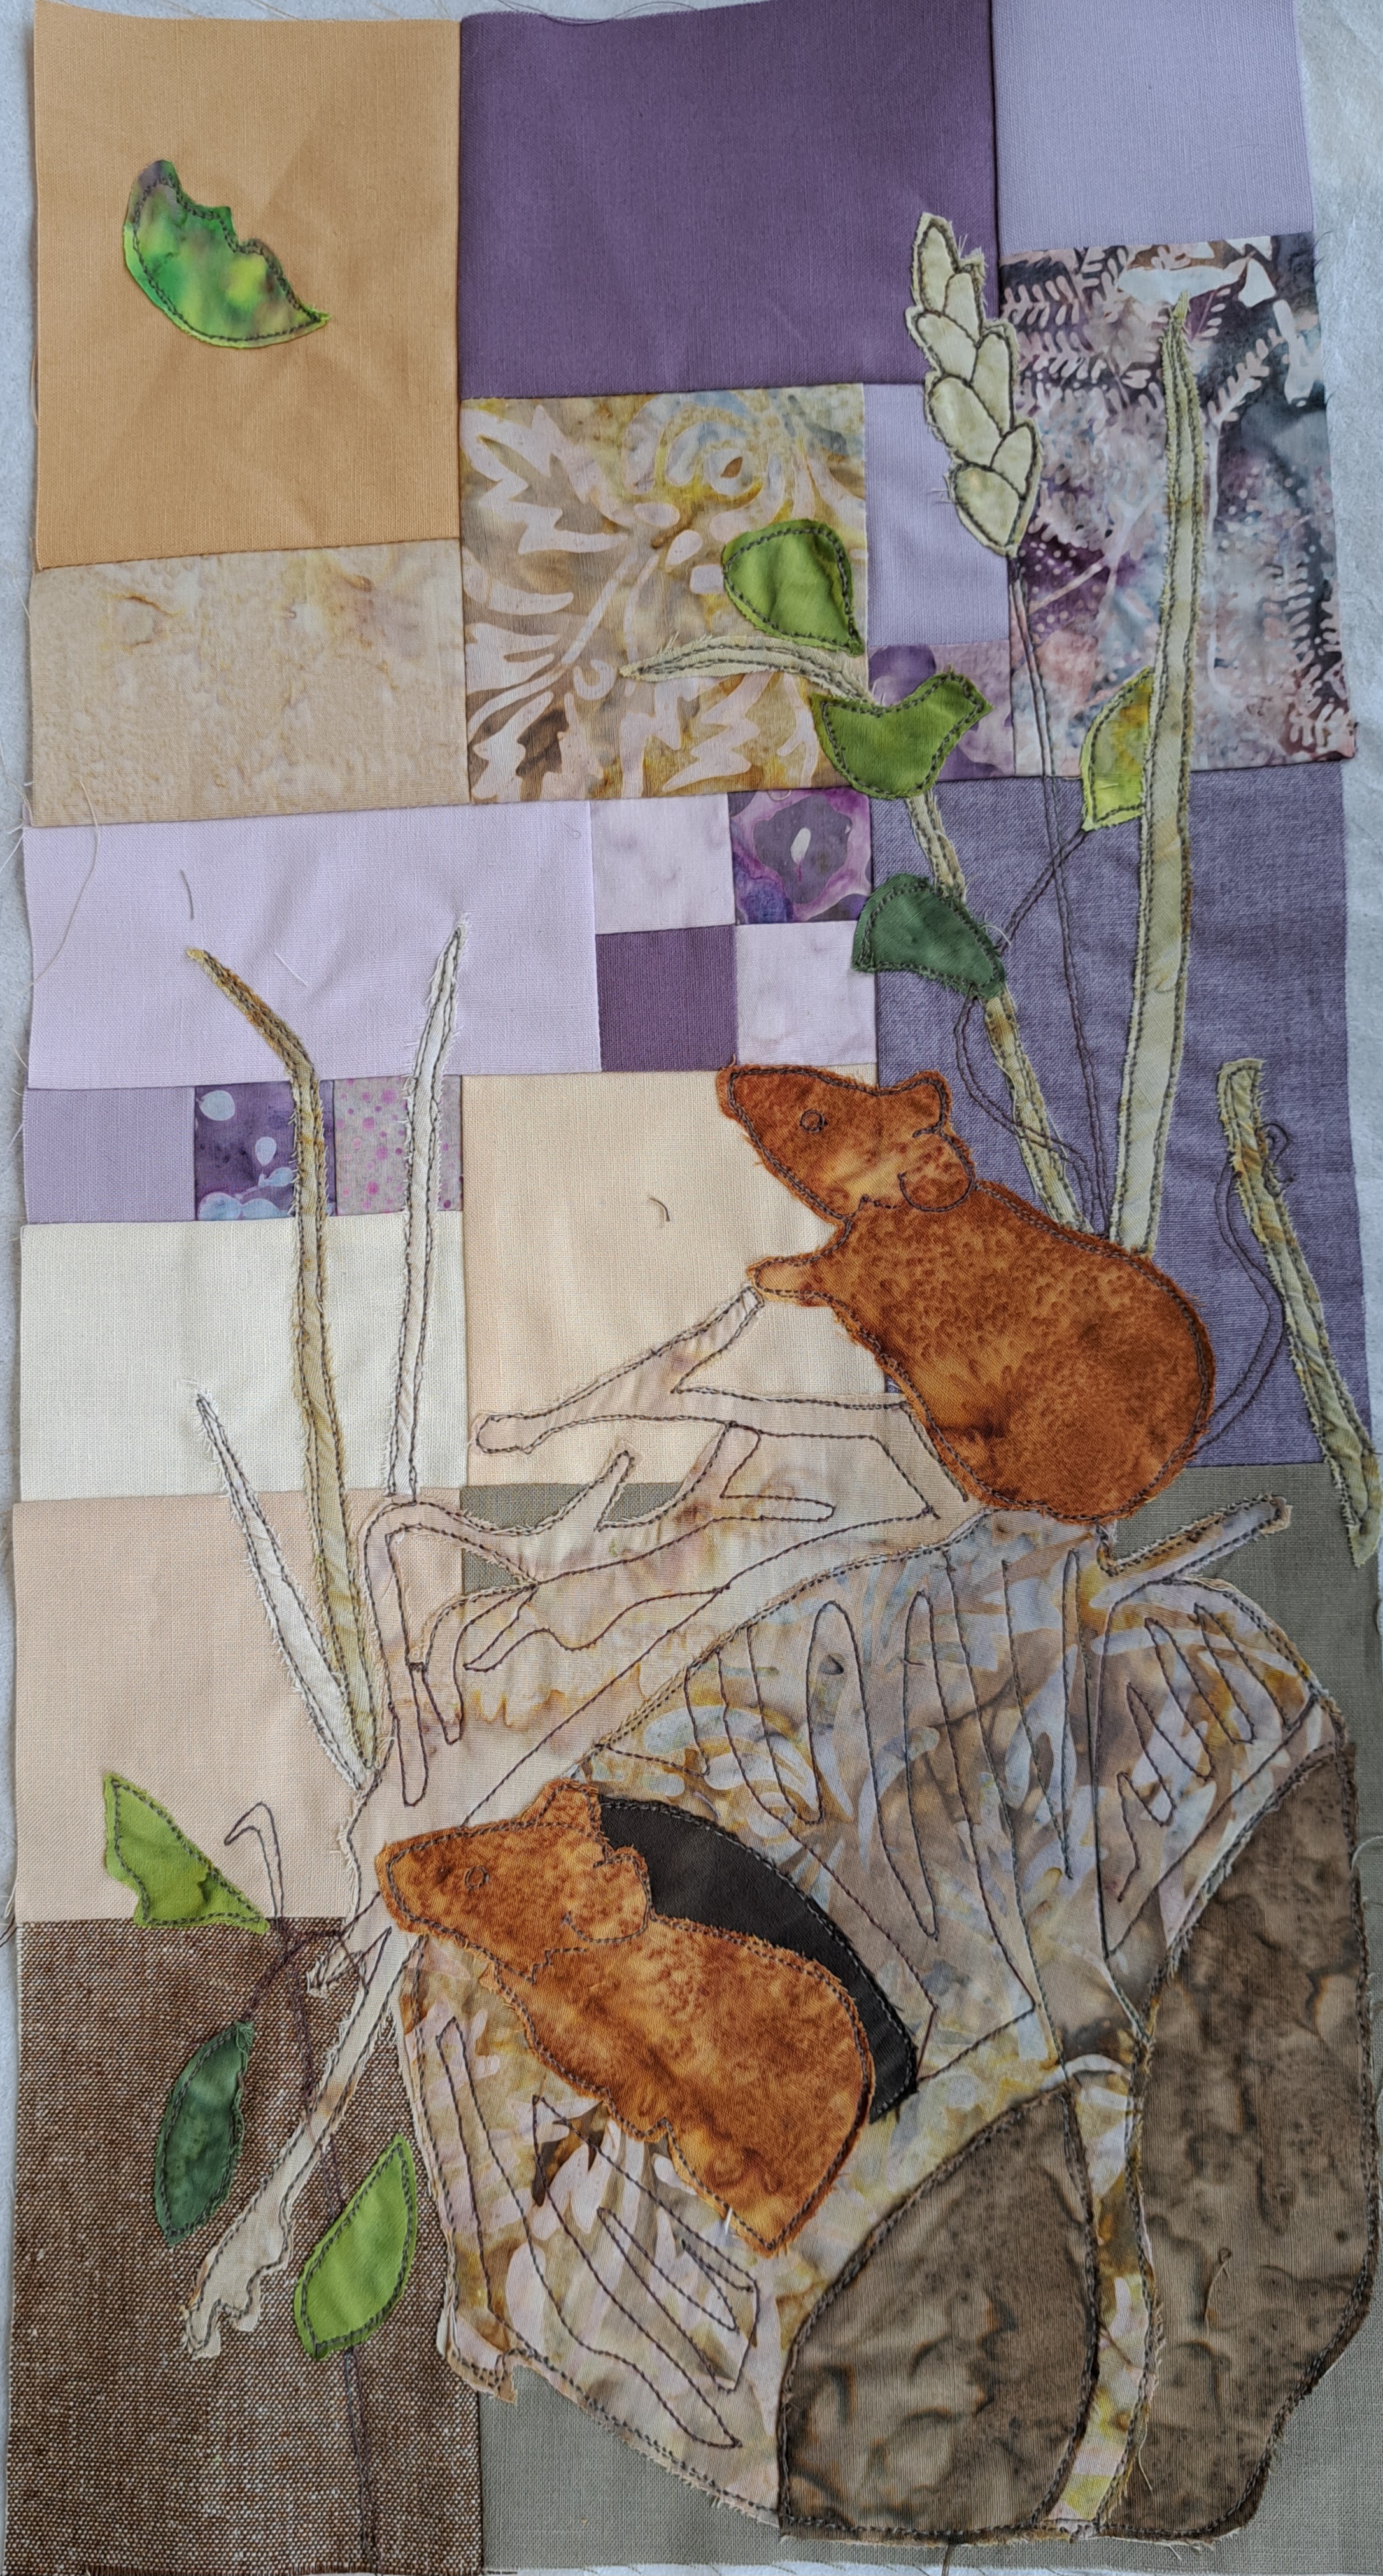
My biggest finish was my Owl and Hare Hollow quilt, fairly quick makes were a baby quilt for my new grandson and another for my friend’s grandson. A UFO from 2020 was finally finished with a little quilting on the Christmas runner, it looked very nice on the side in the dining room this year. I started the dormice wall hanging last January, it was my project to do whilst I did the declutter challenge, the other half of it is my project for this year’s Declutter Challenge!


Quilts I’m planning this year; first one has got to be a single bed quilt for my niece’s eldest, I’ve been promising him one for about three years now, but I now have lots of Spiderman fabric to make him a superhero quilt. I also want to make one from batiks in my stash, using a pattern I bought last year.
Embroidery
Most of my stitching last year was to go in fabric books, I made four last year. I’ve three in progress at the moment (Postcards from the Hedge, the bird alphabet and my little book of love.) I’ve lot’s of ideas for future books, a Christmas tree one, a waterfall style one, a book of trees, songs…


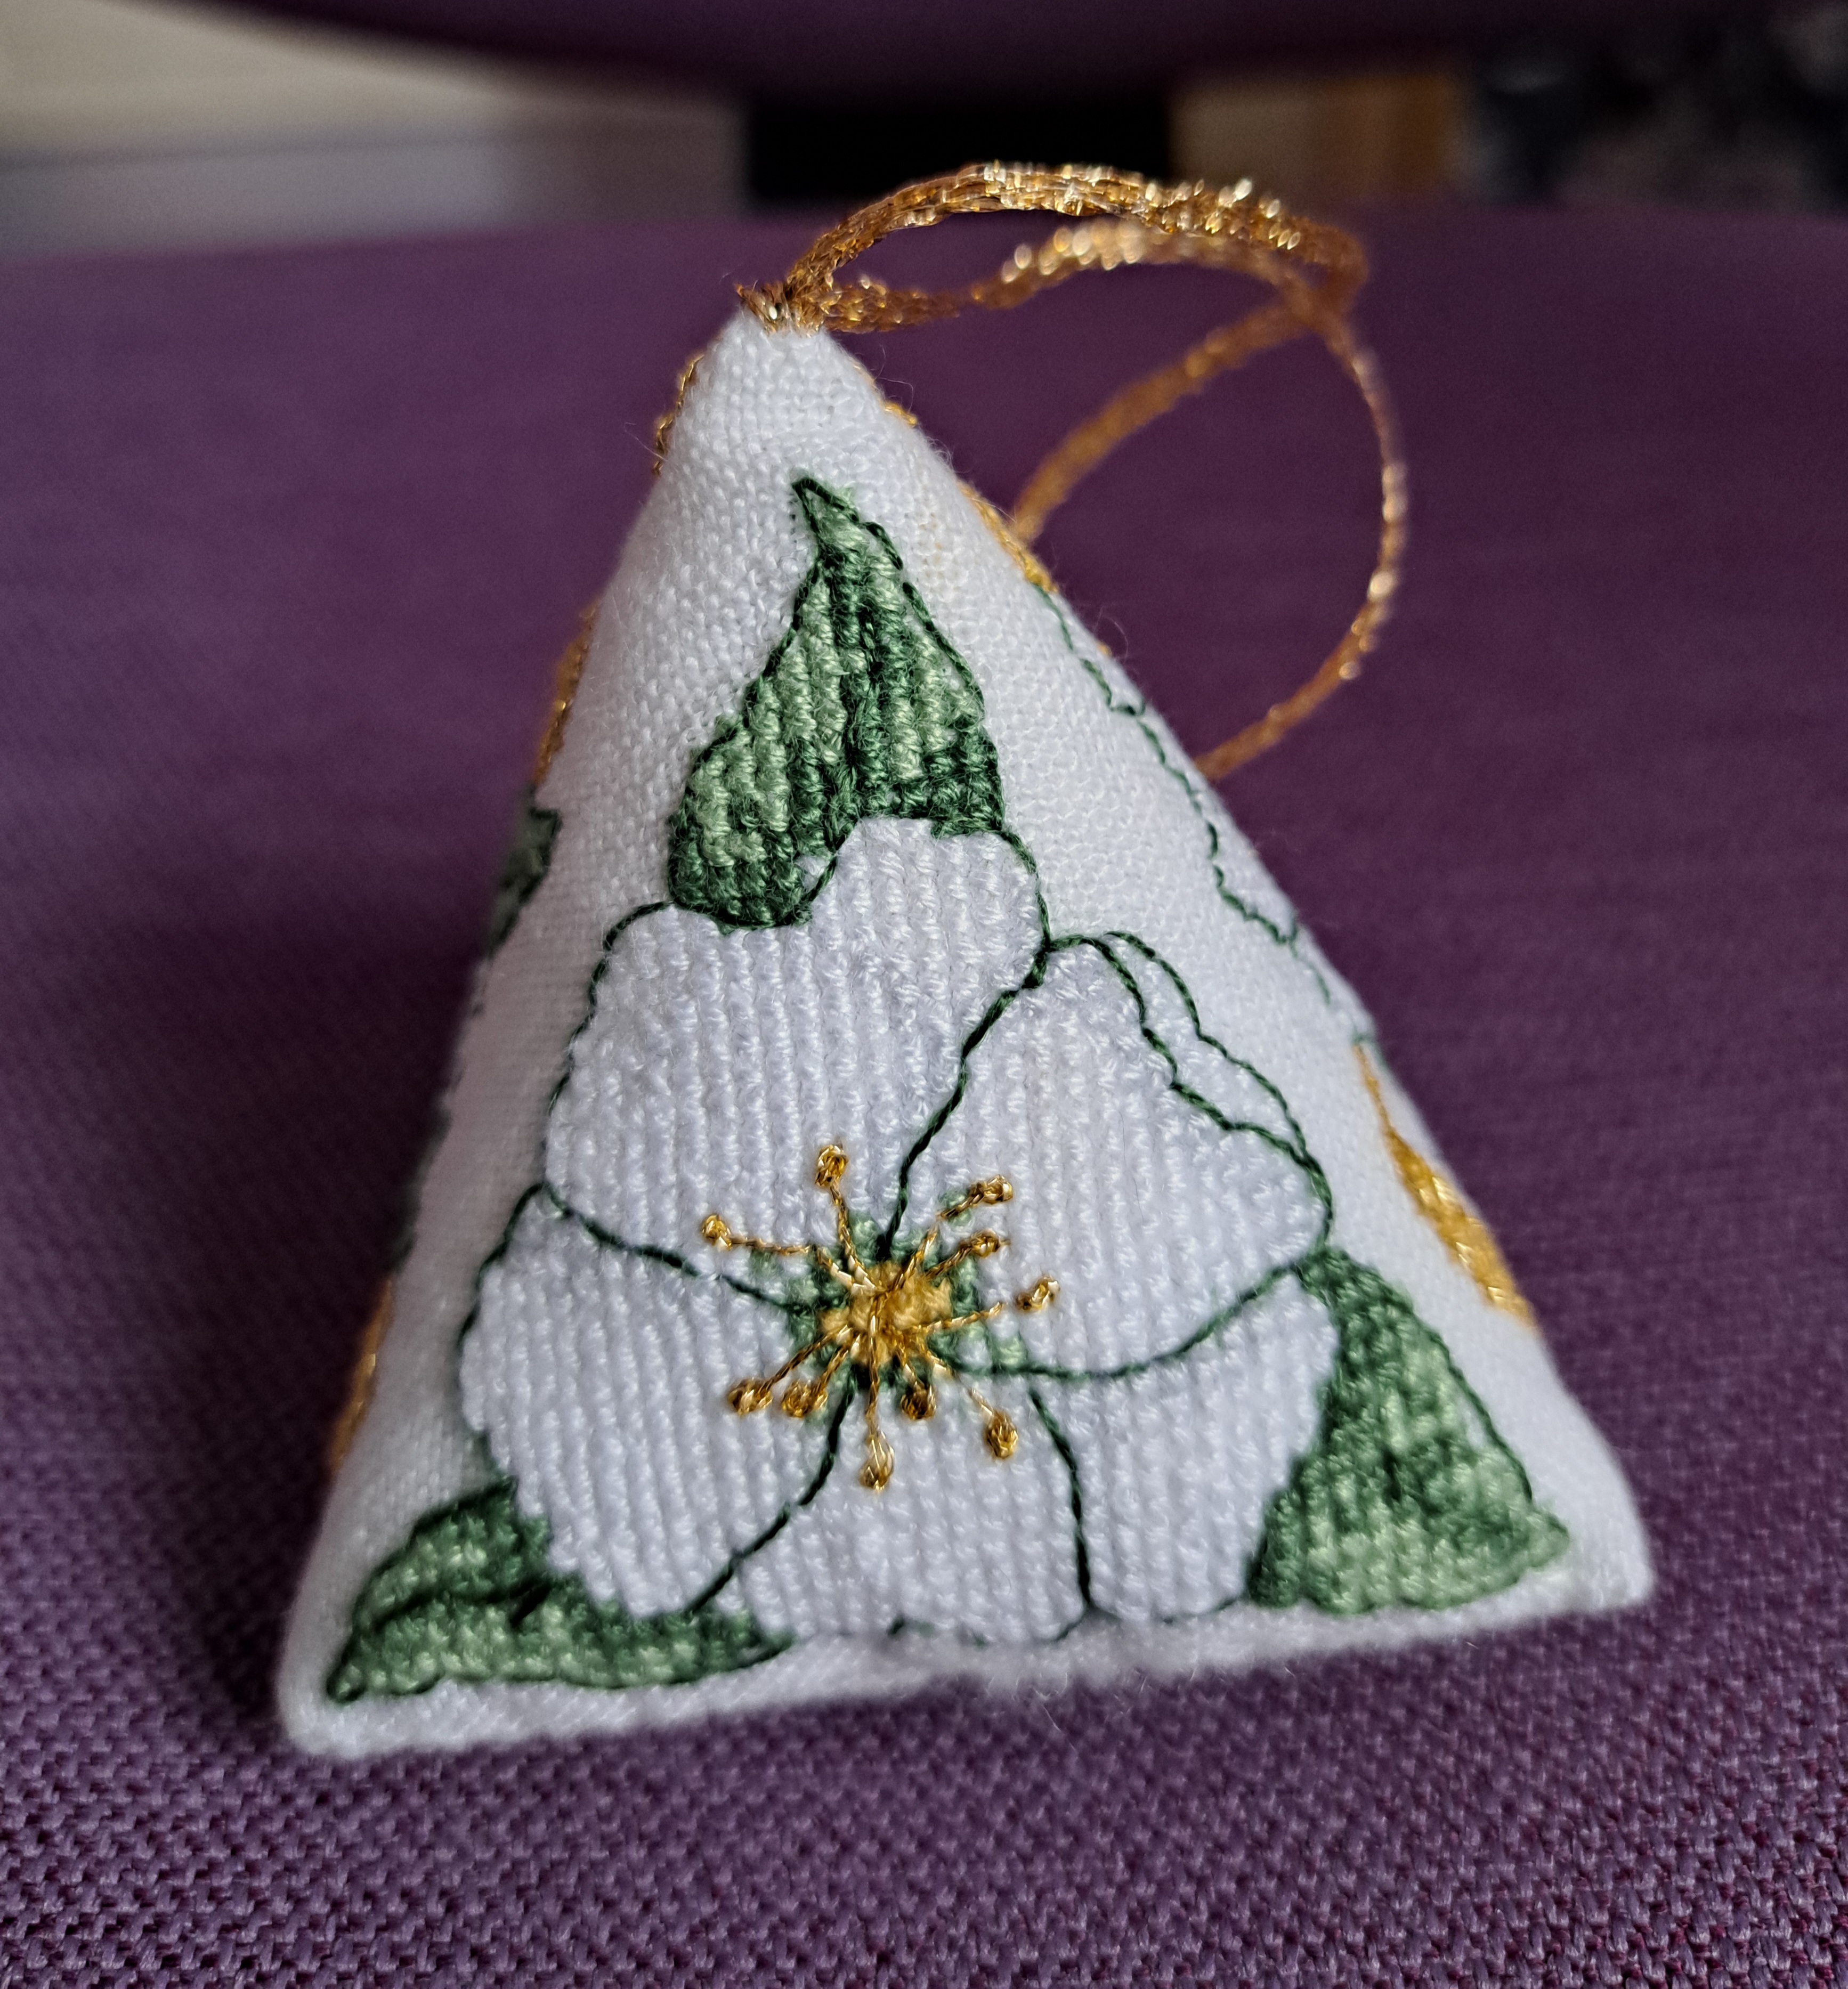
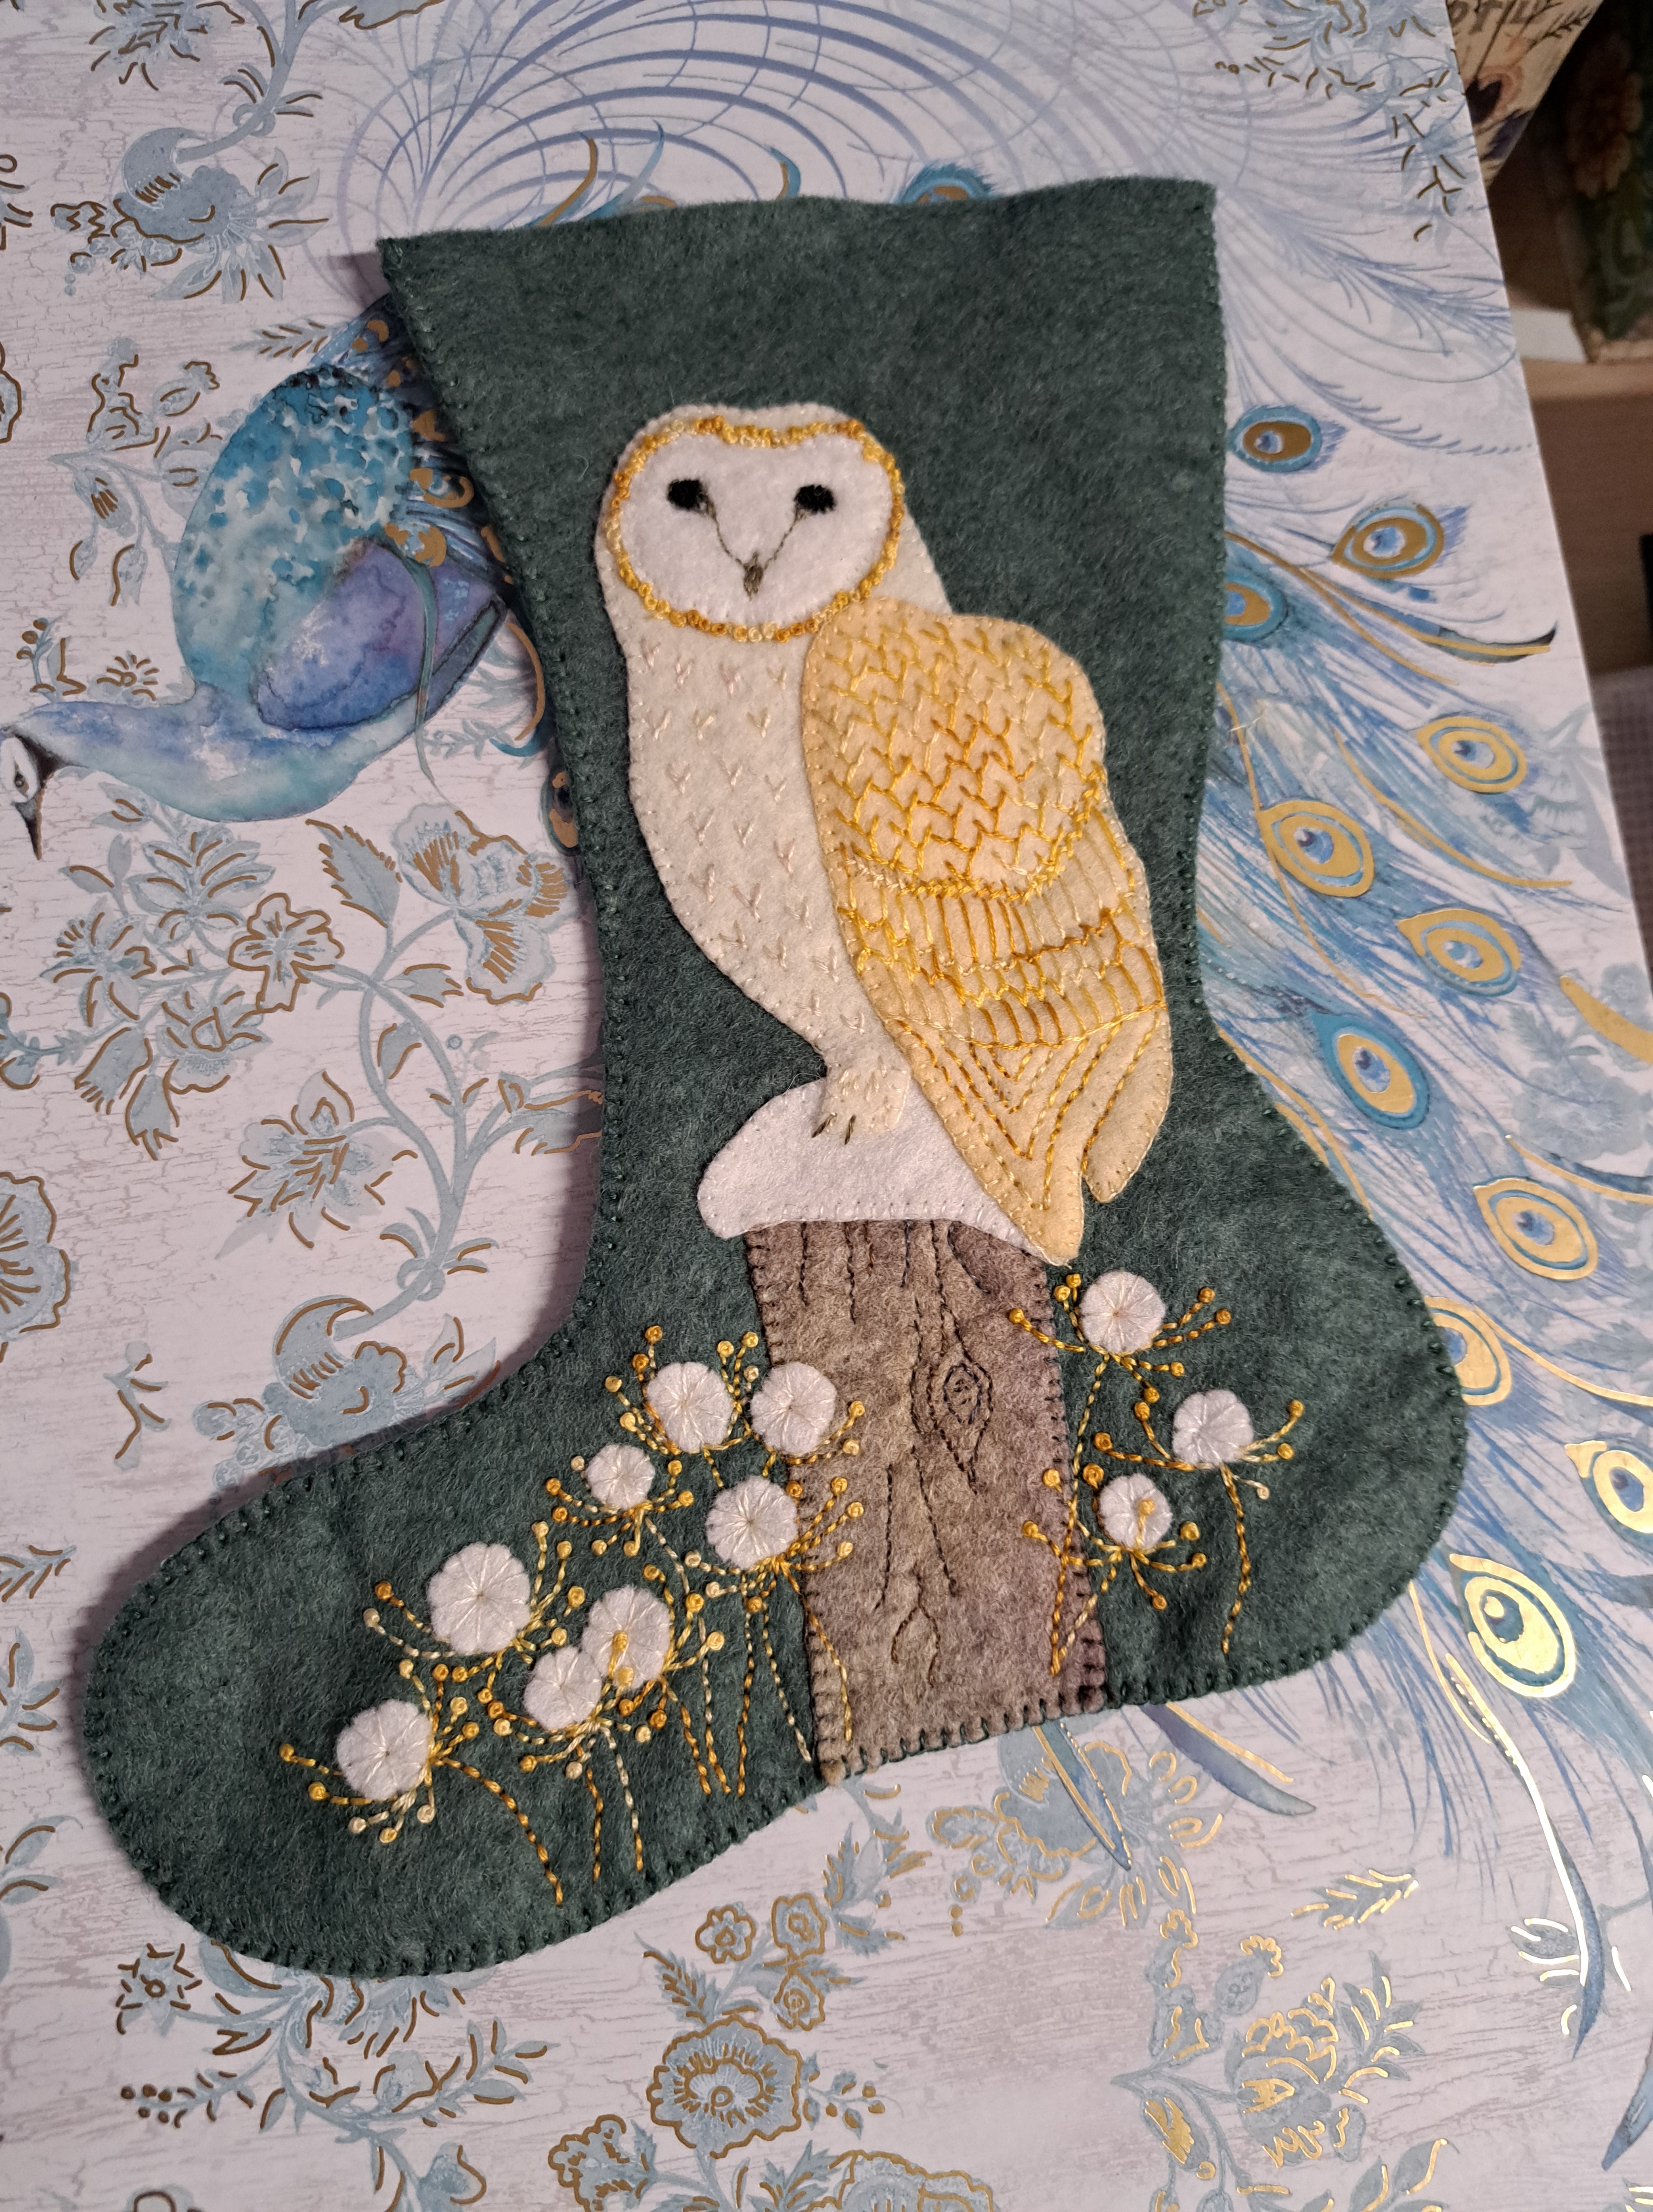
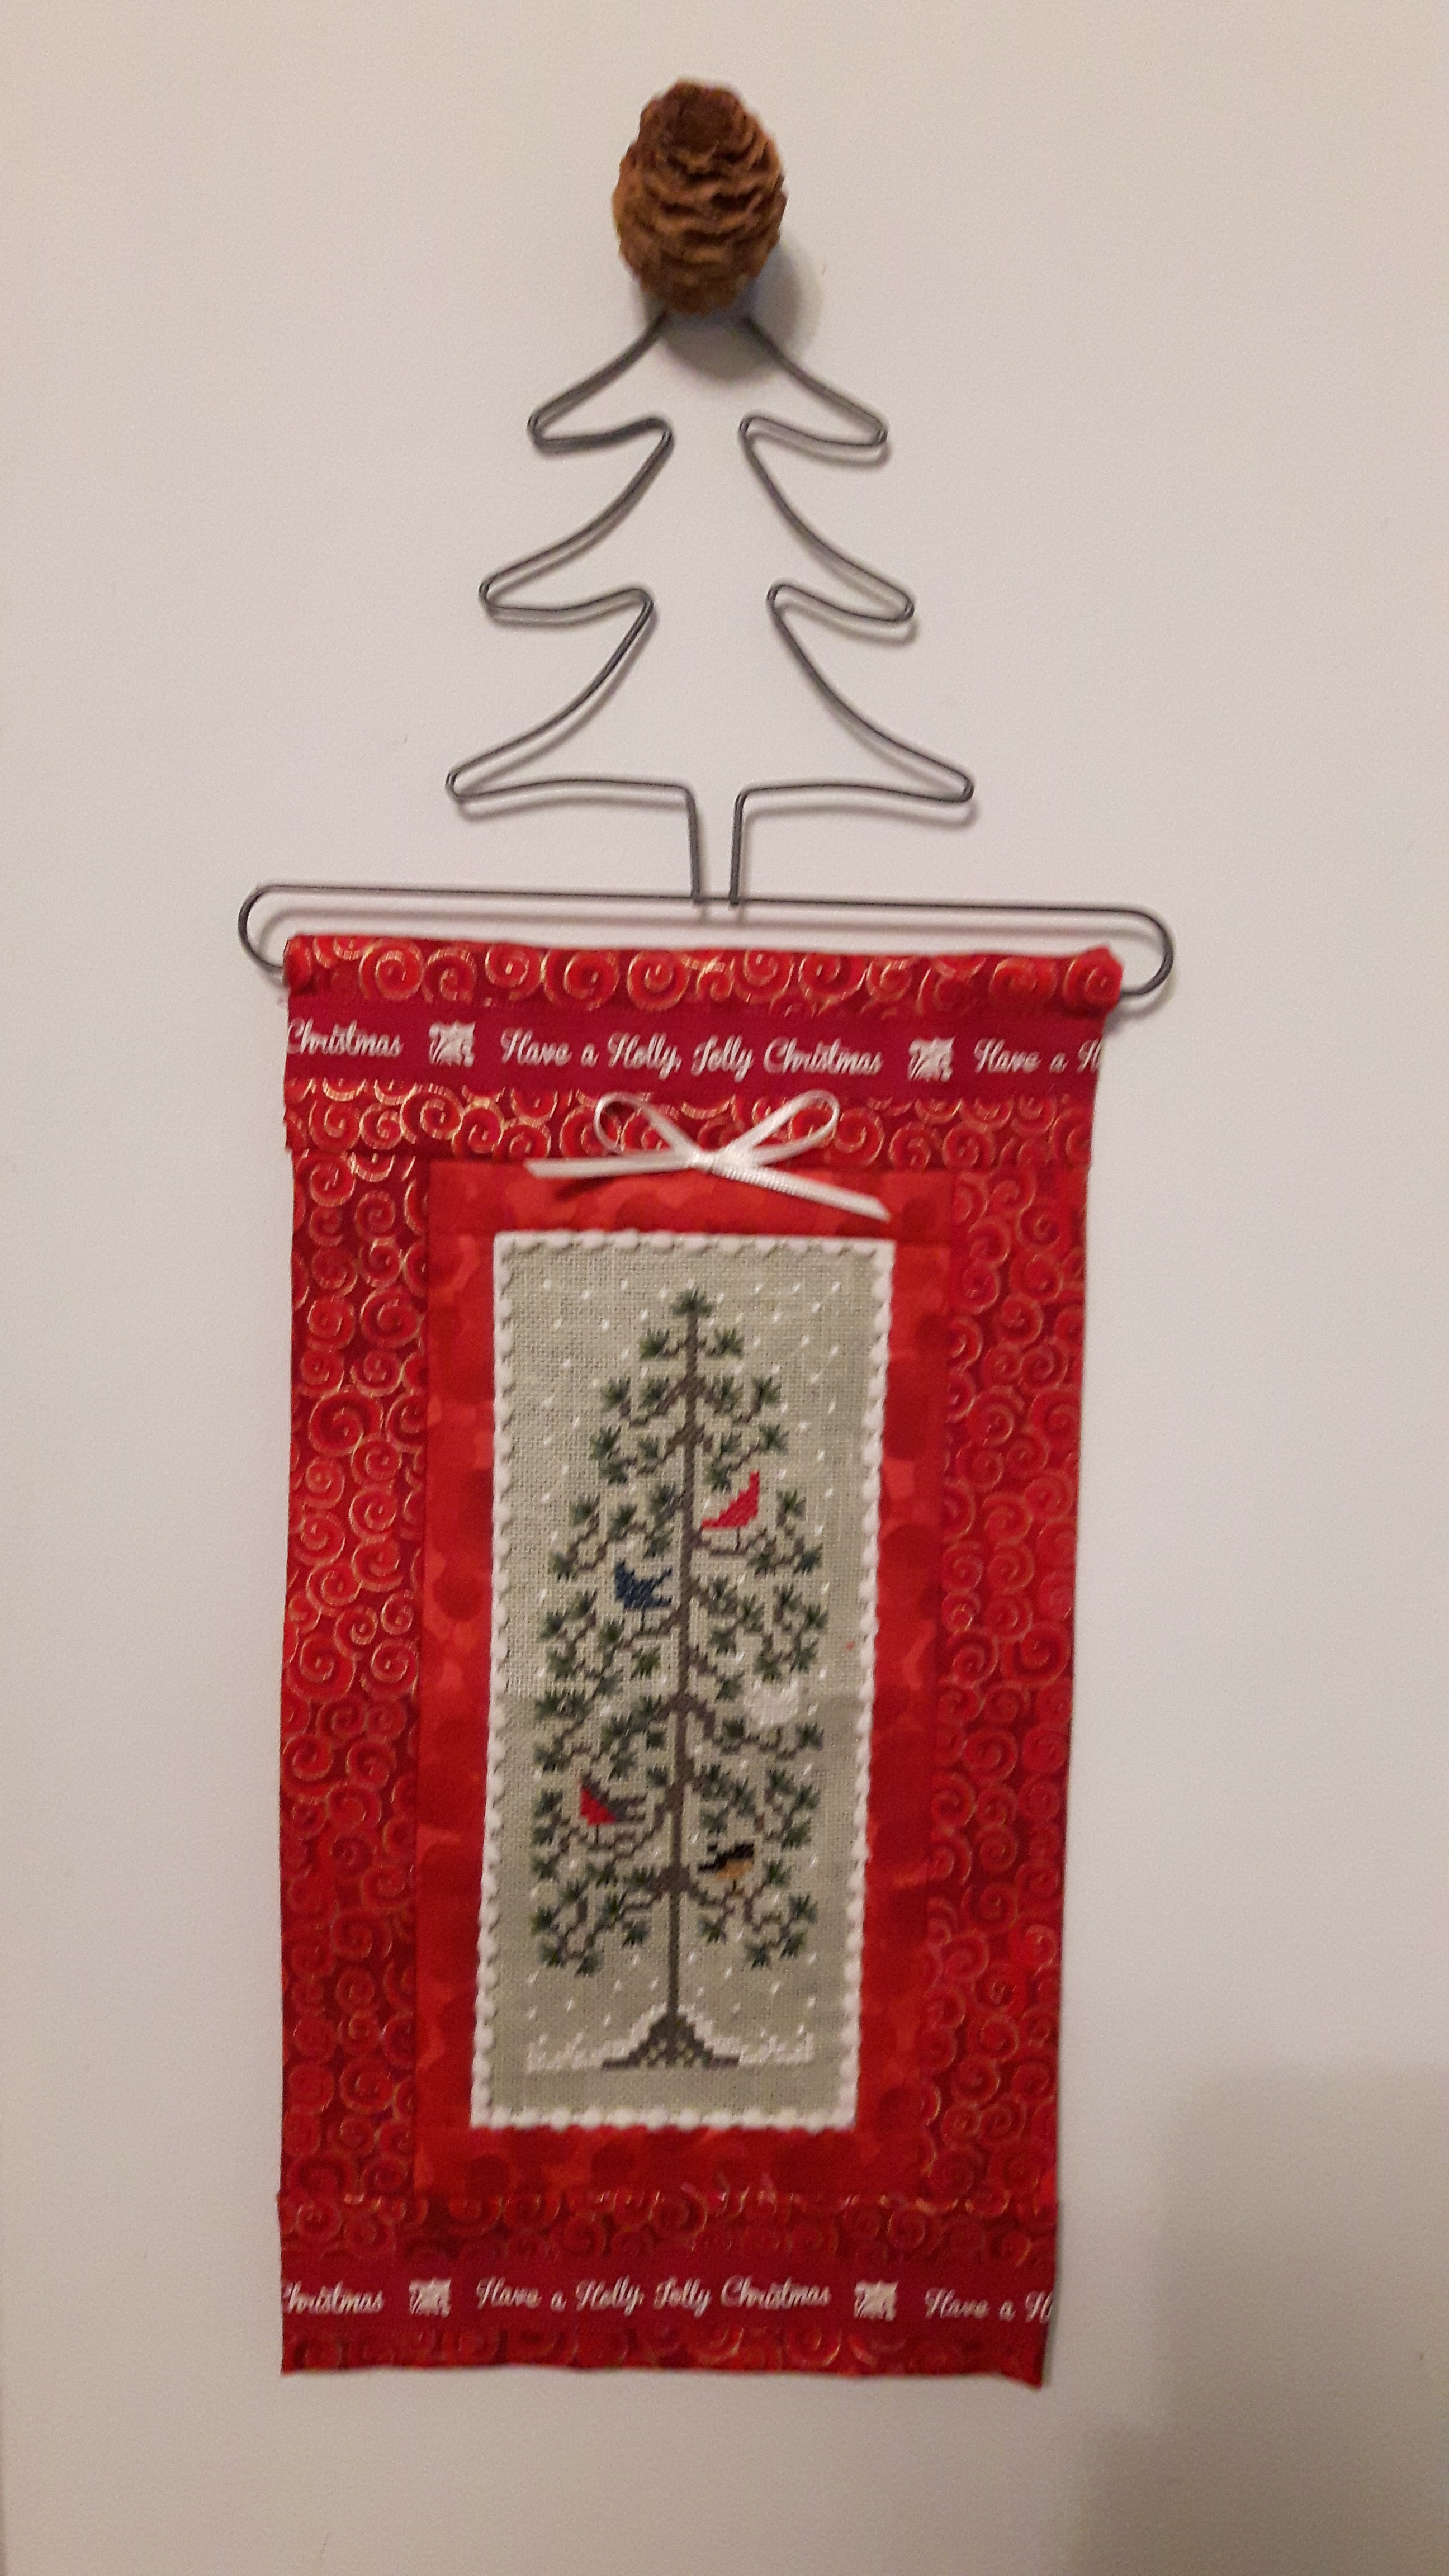
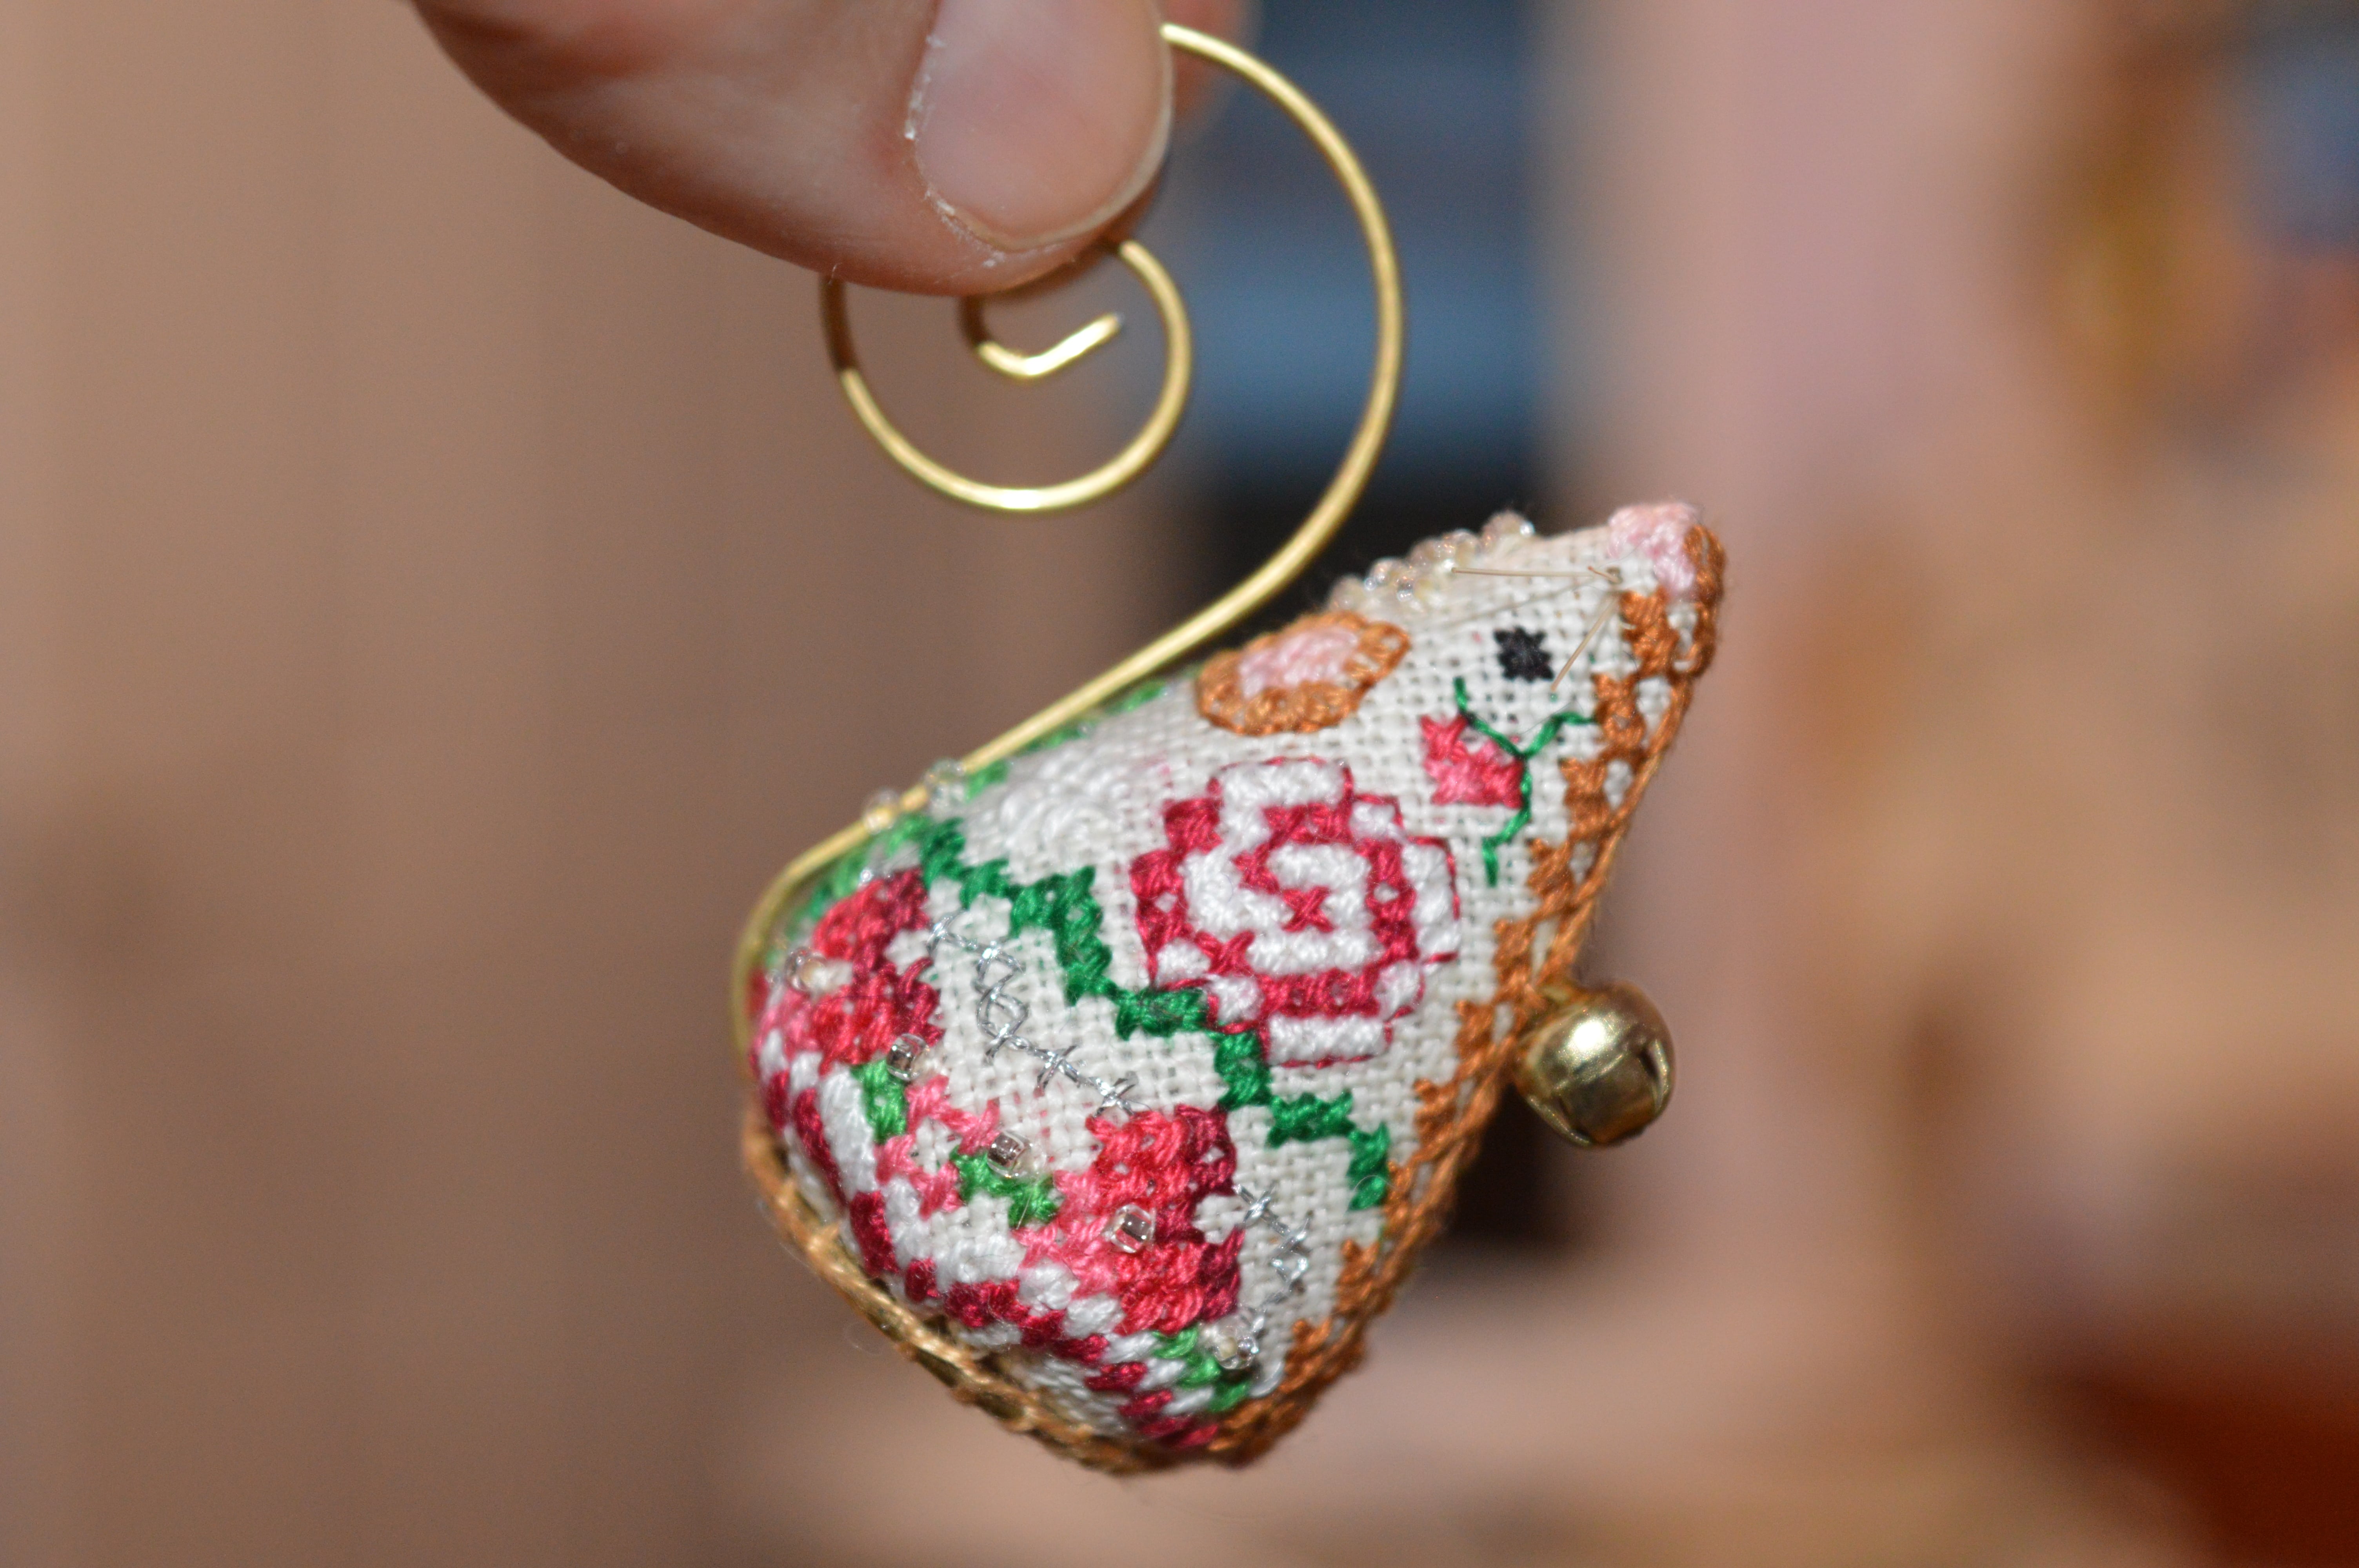
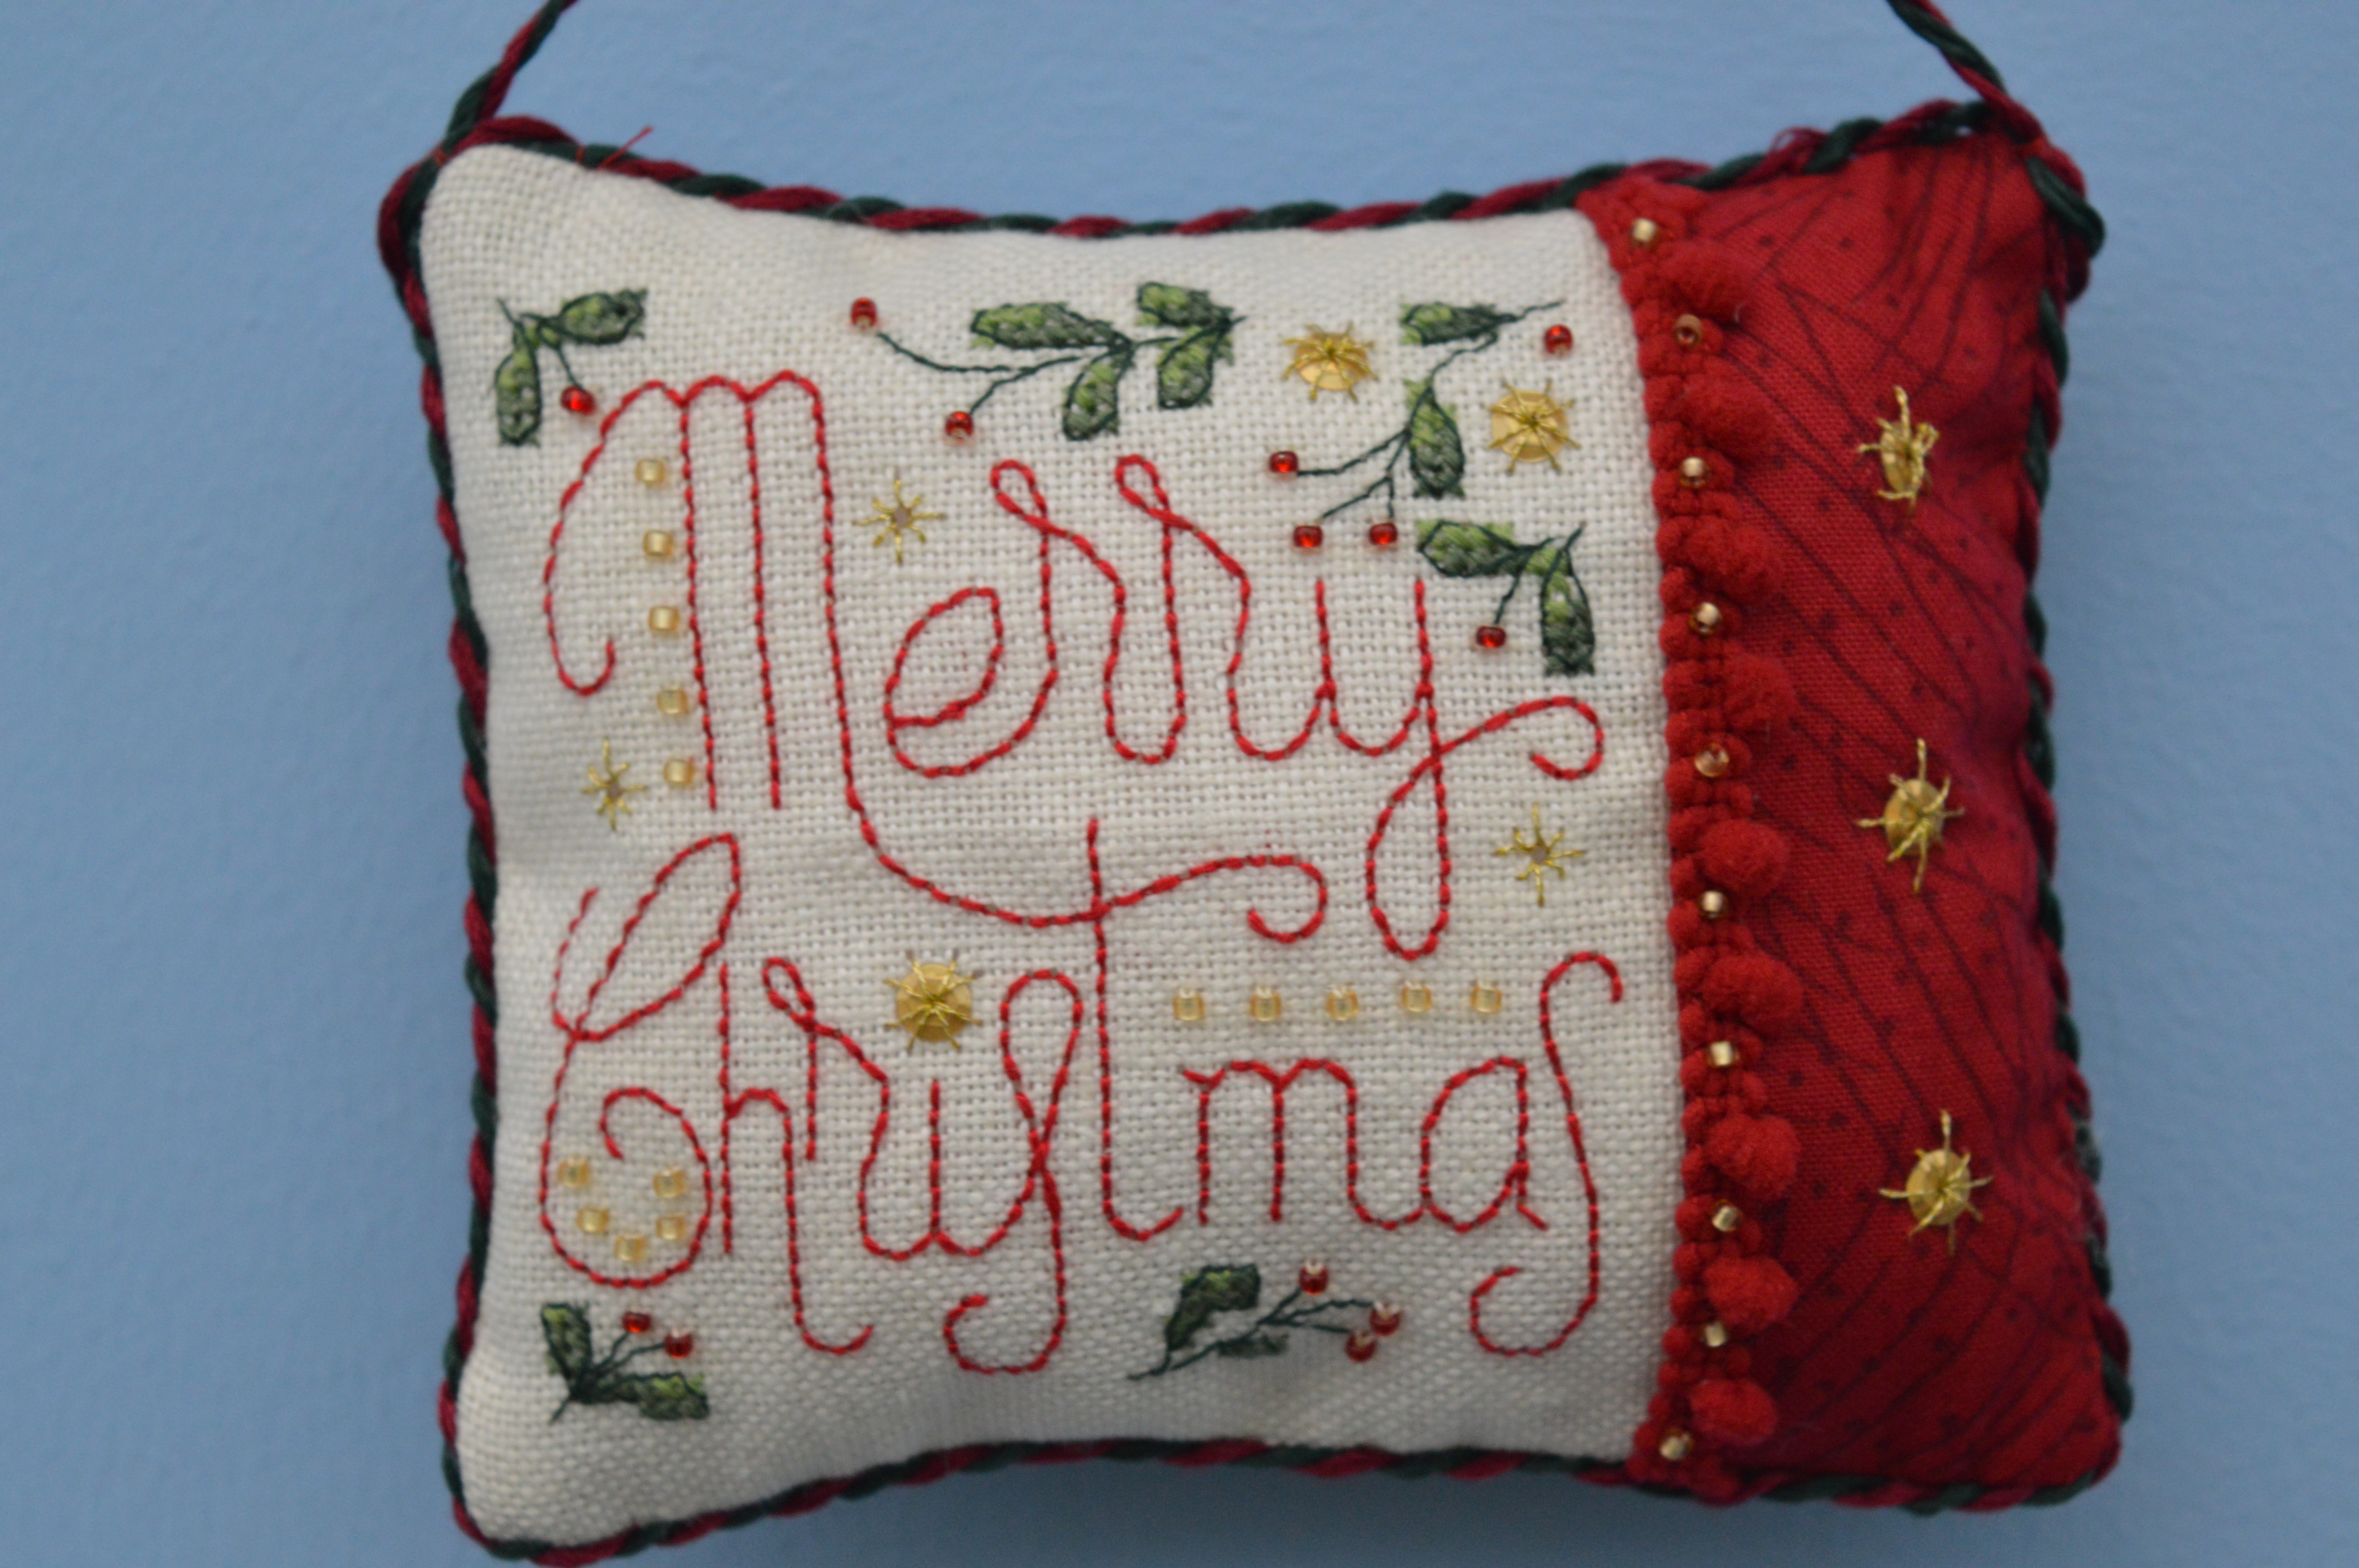
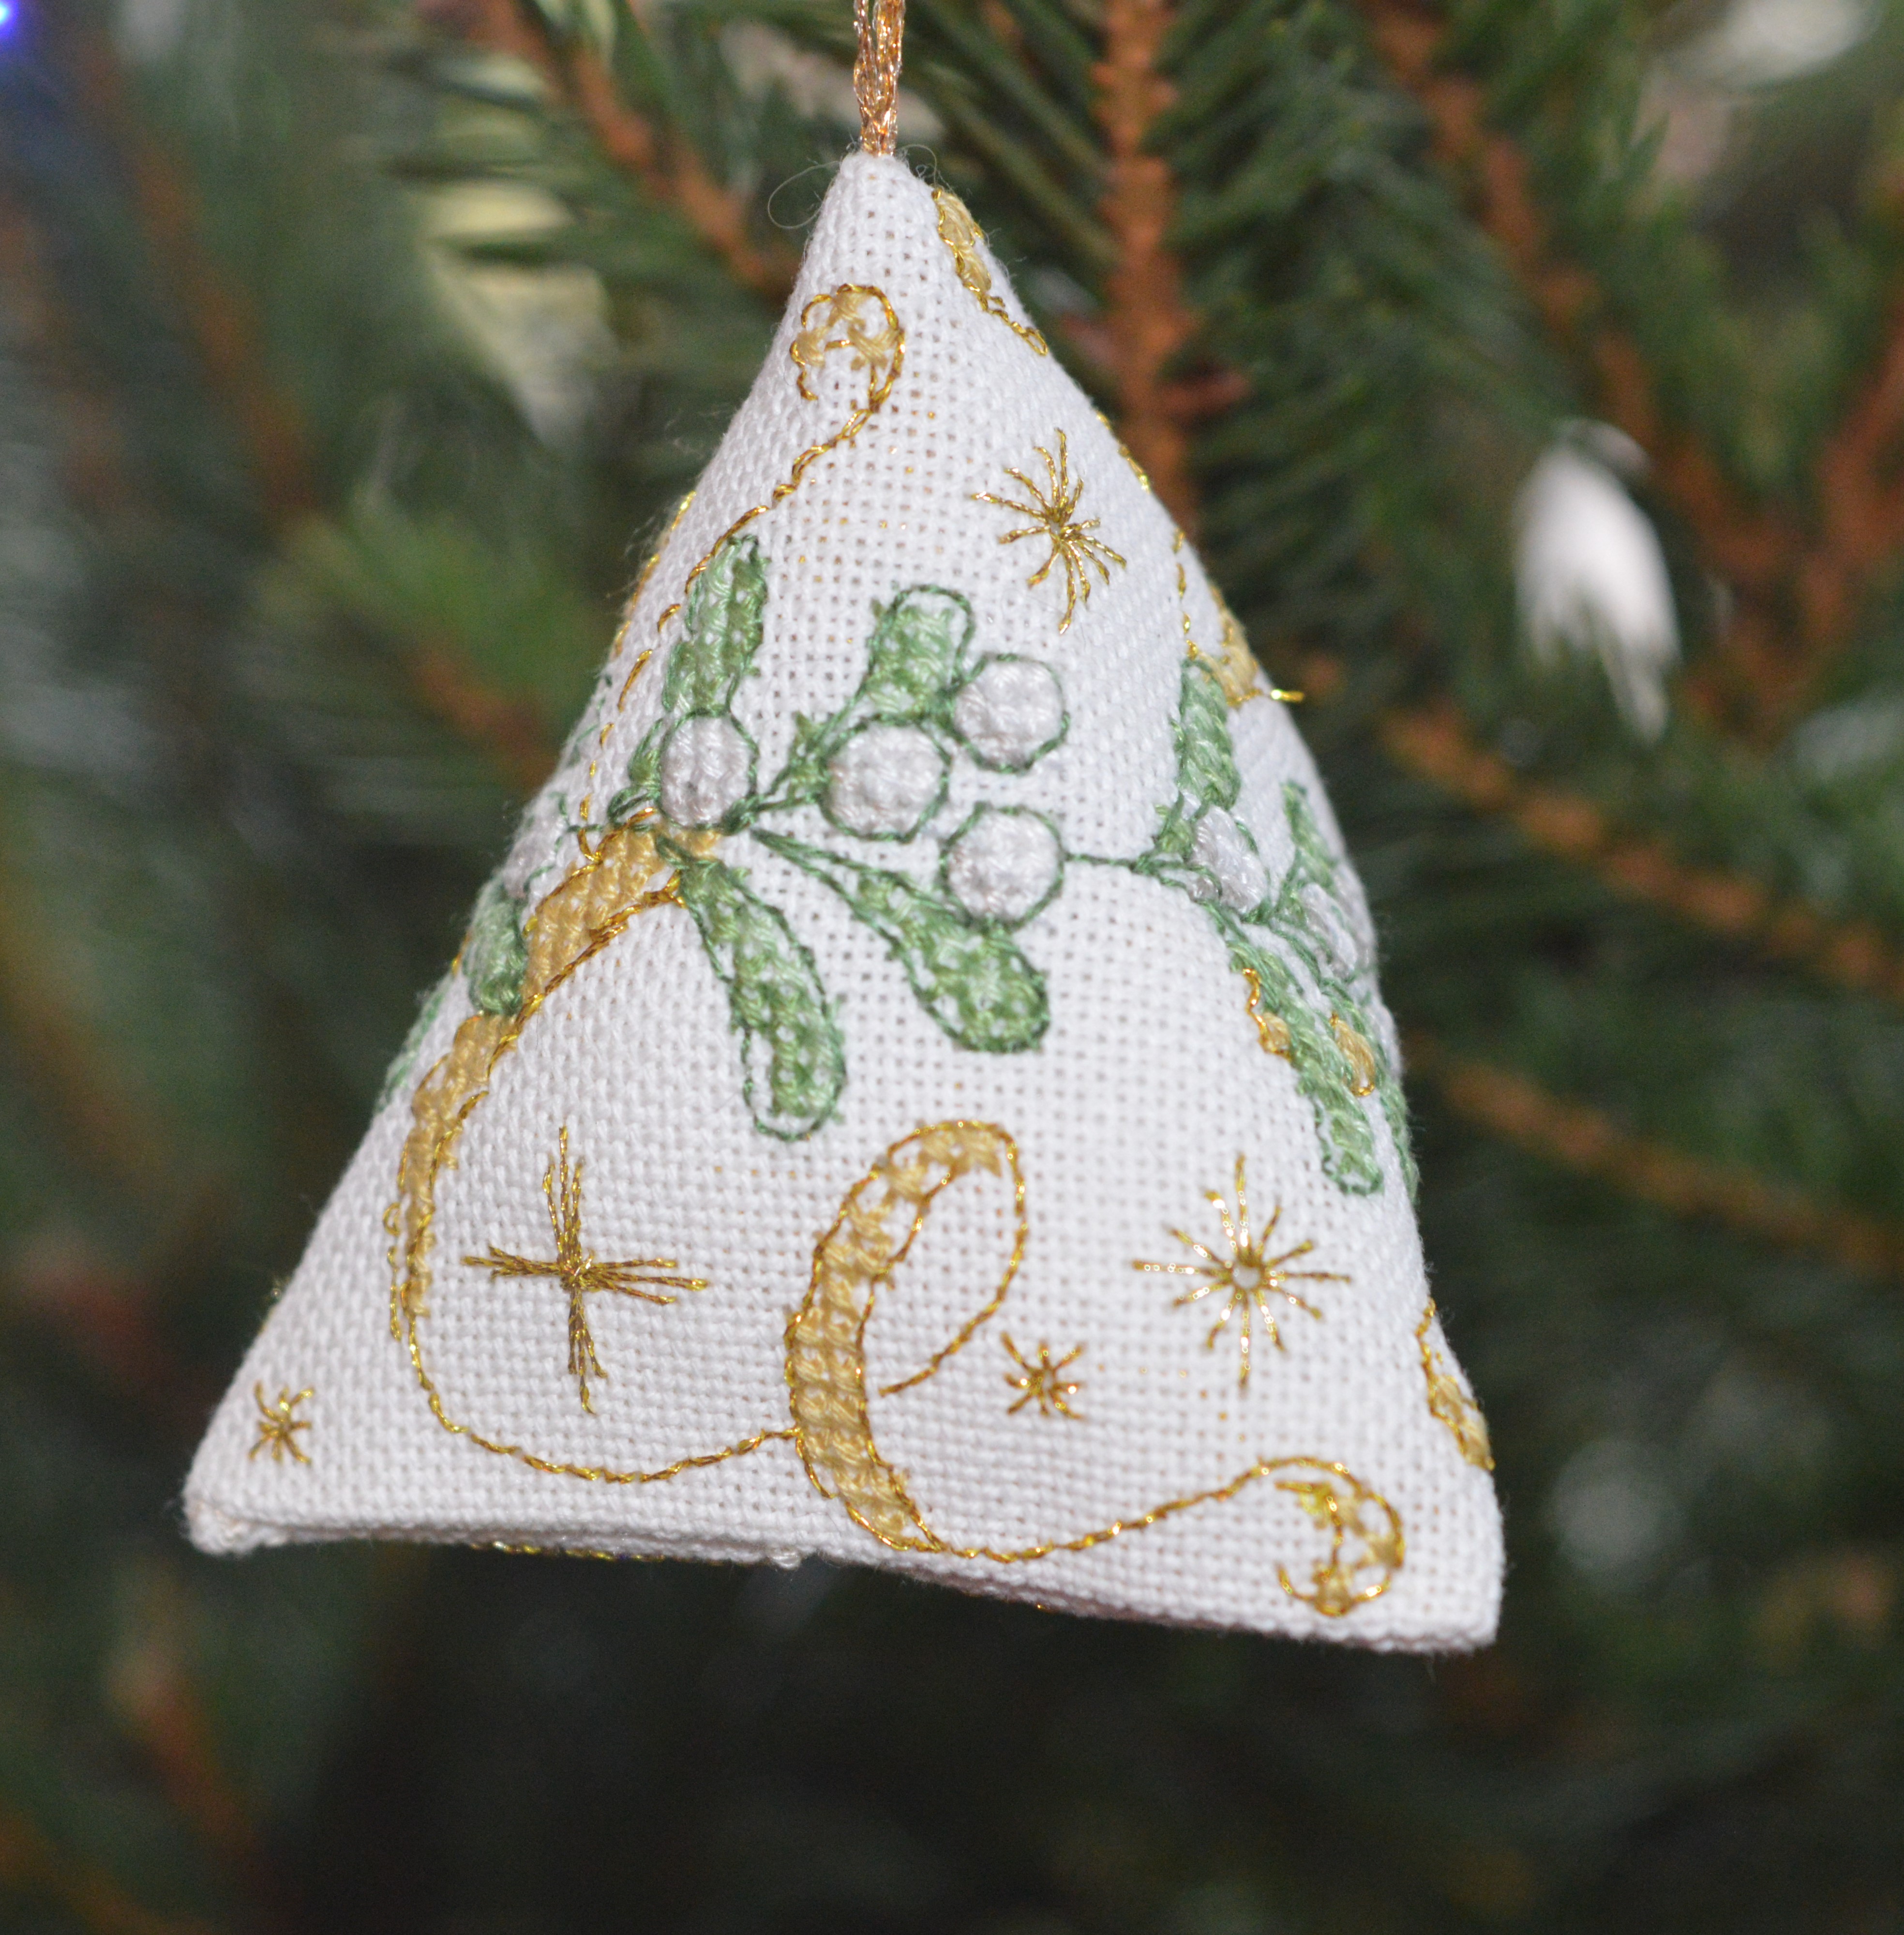
Other stitching included the butterfly alphabet which is now framed and hanging in my daughters bedroom, a golden coneflower for Skipton Stitchers 50th birthday and a Christmas humbug which is now hanging on my tree.
A priority this year is a birth sampler for my grandson – he’s one in March so I would like to get it done for then. I’ve two monthly SAL’s planned, one is for an embroidered book and the other is a phrenology wheel, I’ve been thinking of stitching one for a few years so I was delighted when Skipton Stitchers decided to do them as a group project.


Dress-making
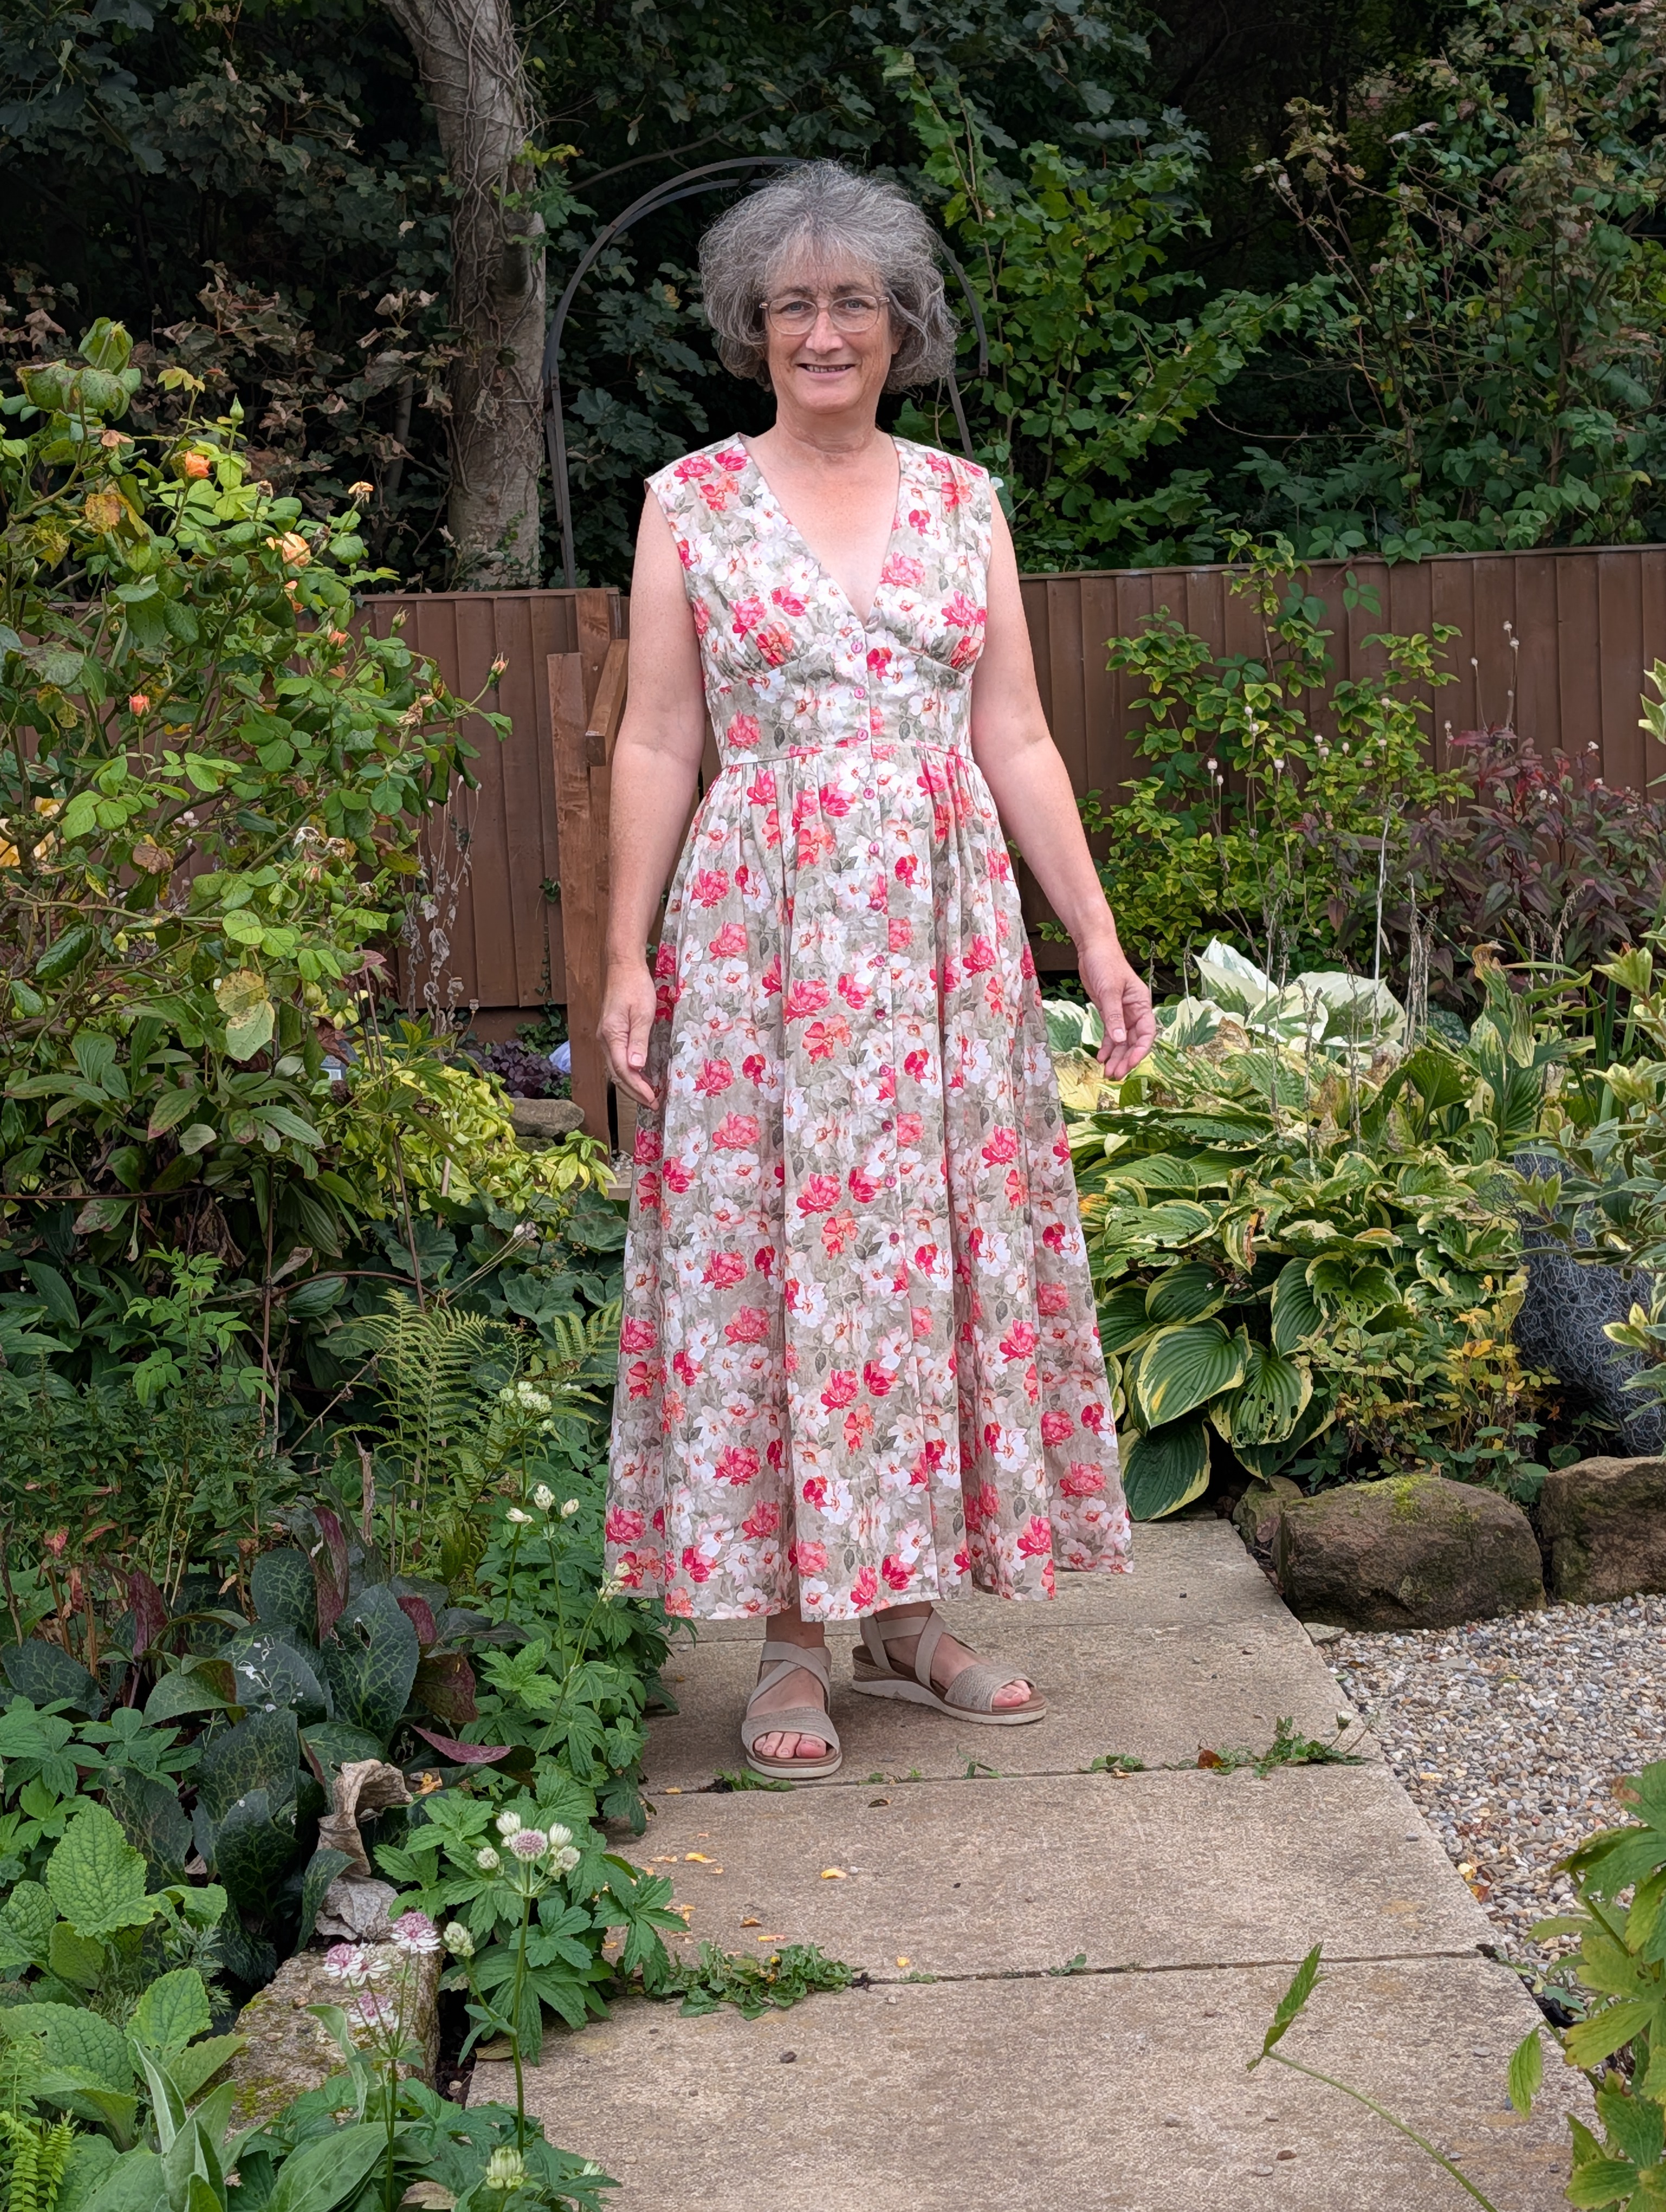
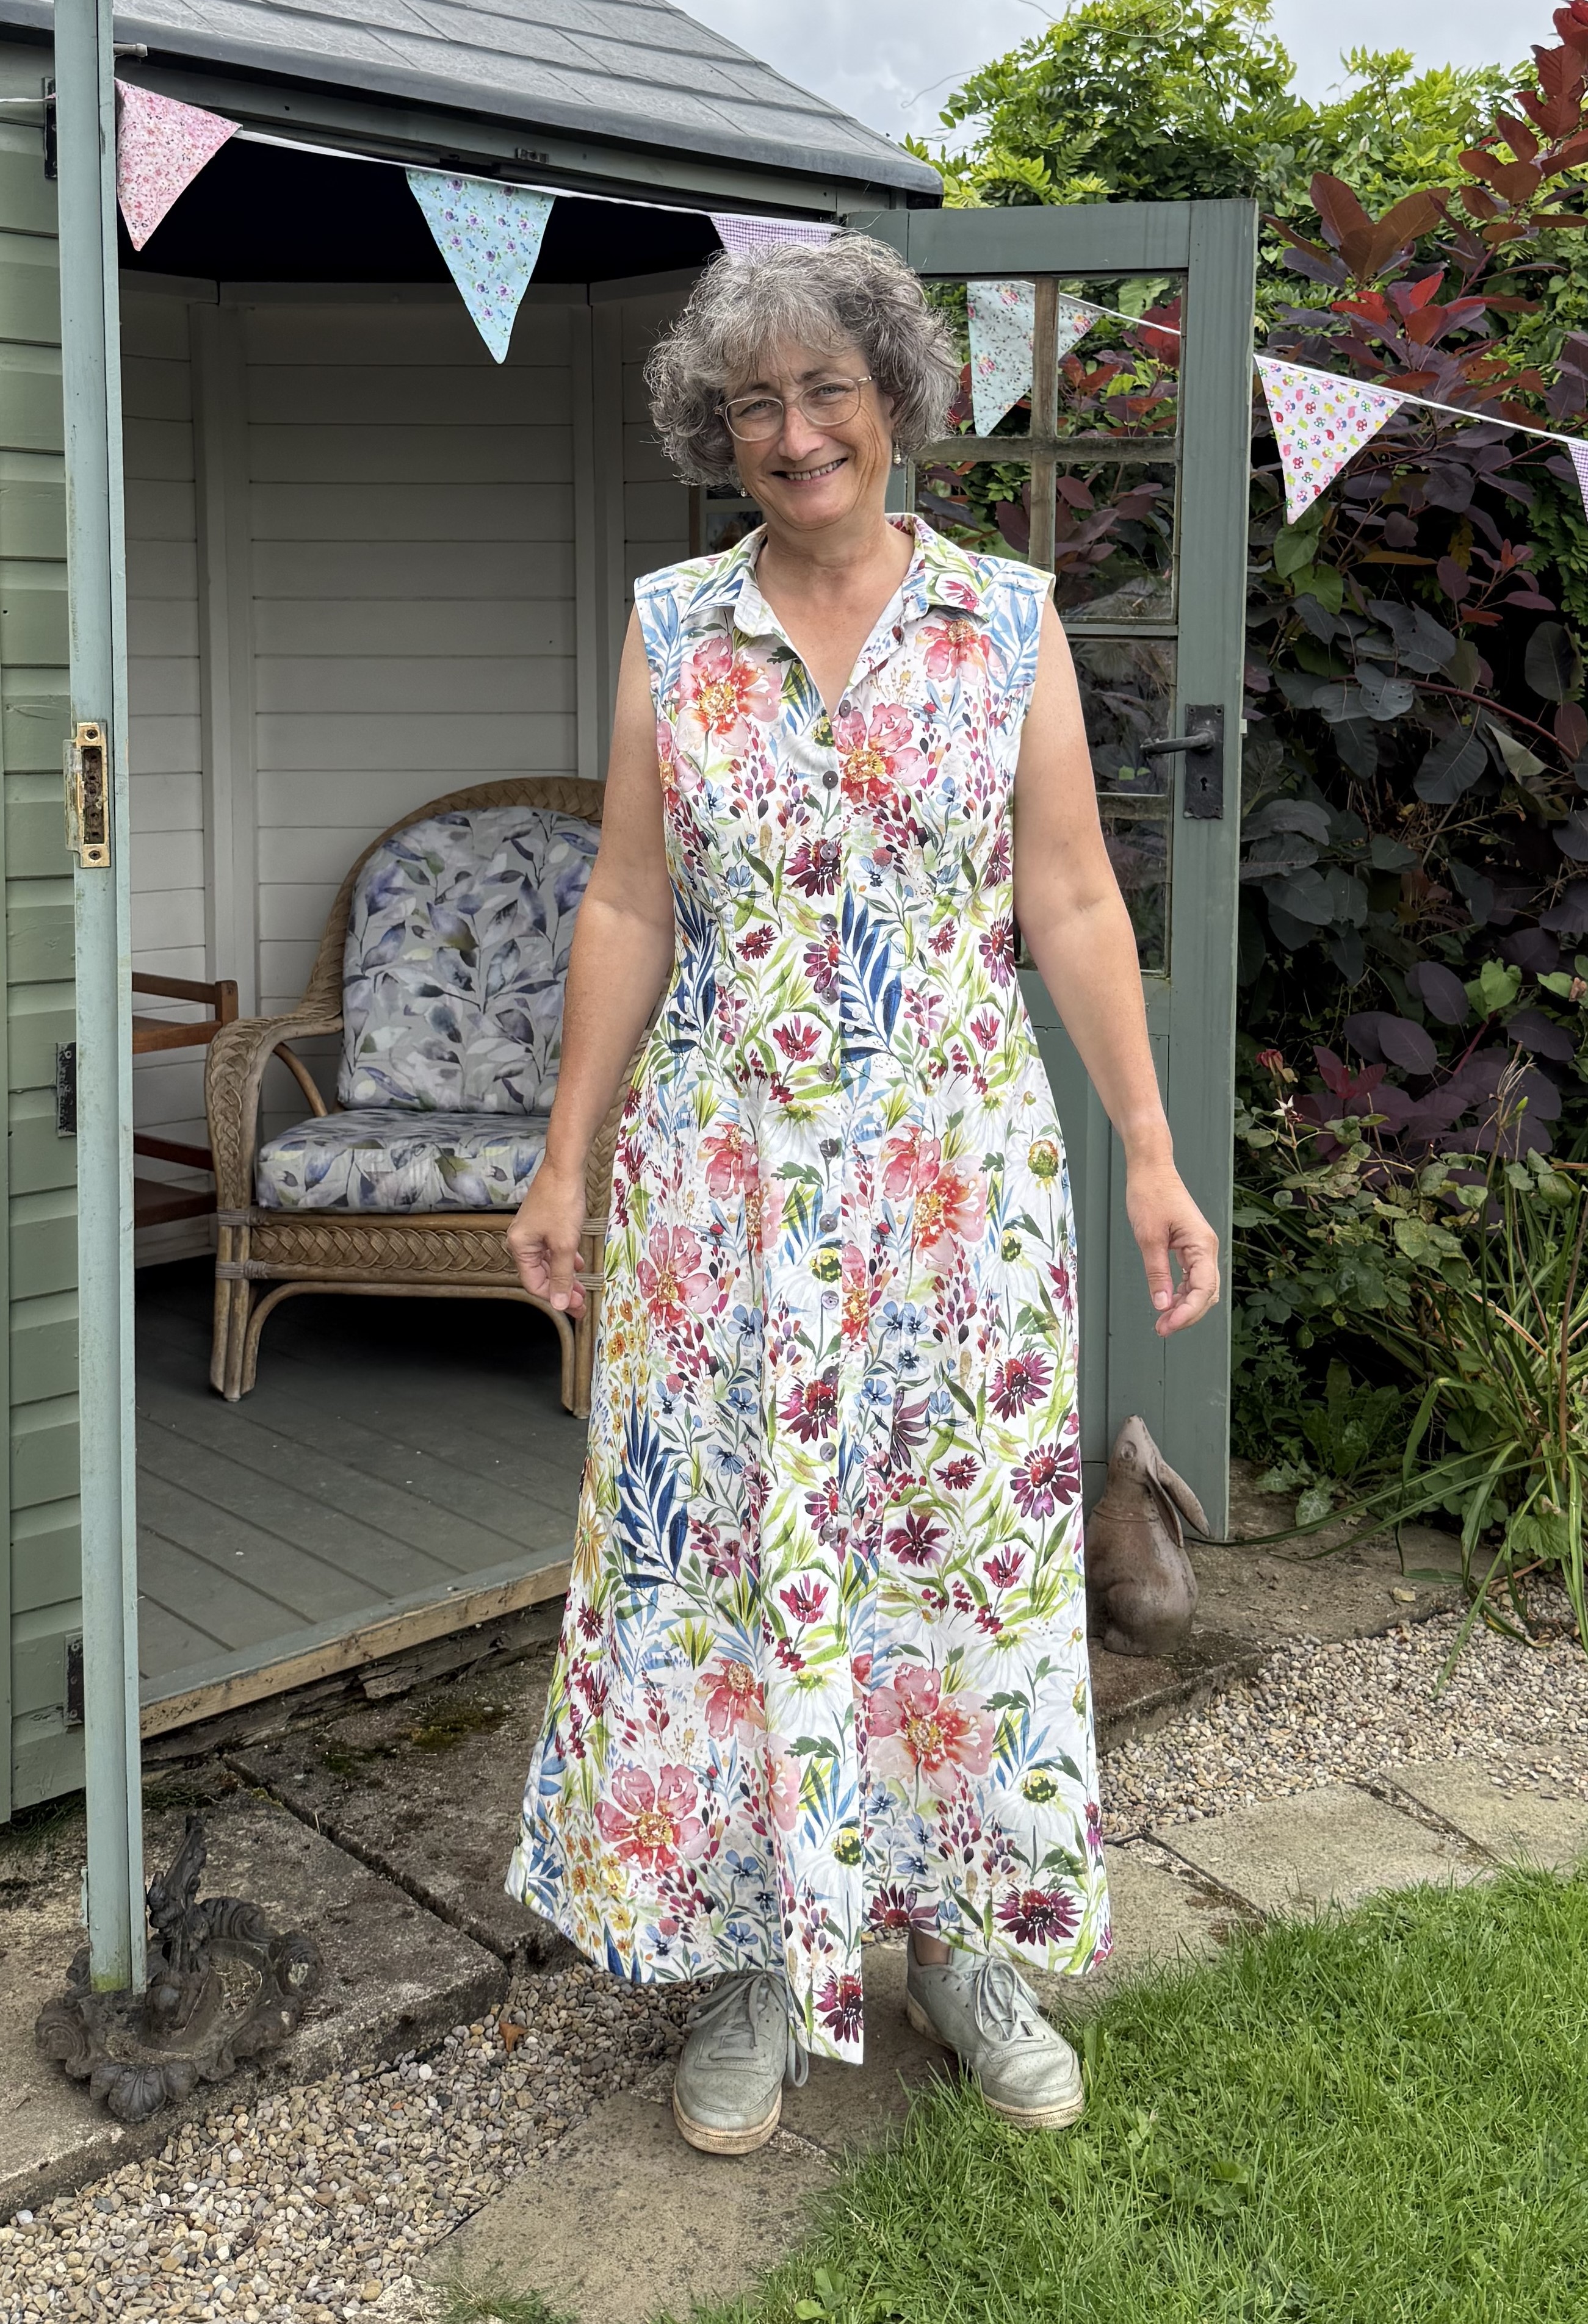
I feel like I haven’t done much dress-making recently, but I have made three dresses below and I’ve actually made about three summer skirts which I made last minute for the holiday and didn’t have time to post.

I do need to start doing a lot more dress-making, firstly I need the clothes as my current wardrobe is well worn and many don’t fit since I lost weight. I also need to reduce my stash as it is getting somewhat large, my stash hub app reckons I have 248m in 114 lengths!!! I also want to start making underwear as I was remeasured last year and I’m a 30F! It’s very difficult to find pretty, affordable bras in that size, even if I go to the sister size of 32E, so I’ve bought all the fabrics, I just need to start sewing.
Last year I walked the Swale Way with my walking buddy, we’ve lots of plans for walks this year as she’s retiring too in March. We’ve also decided to do the 1000 mile challenge, aiming to walk 1000 miles over the year. I’ve a big holiday in May and June when I go interrailing round Europe with my daughter for six weeks, I’m so excited! We’ve still to finalise the route but we’re looking at visiting about ten countries!

So 2026 looks to be a busy year…how did I ever have time to work!
Happy New Year everyone.

Last night I finished my Bobbin Along book, this is the one from the weekly word prompts from Anne Brooke of H-Anne-Made. Everything was meant to be on one 18″ hoop but I knew I had no where to put one so I made a book instead.
My fabric books tend to morph as they go along, I rarely set out with a firm idea of how I want to finish the book, however with this one I wanted from the start to do what I call a properly bound book.
With this in mind I stitched on lengths of linen which would make two double pages each with the idea that I could then fold them in half to make one ‘signature’, a double page spread. As it was, I realised fairly early on that I had stitched a design across two pages, twice, on the same length of fabric. So when I was organising the pages I cut this one in half so each double page spread could be in the centre fold. I decided to join the pages with a simple blanket stitch in a perle thread, it meant the pages stayed soft and somehow I felt it suited the designs.
I wanted to make a bound book, one that was stitched down the centre of the pages onto the spine. Having perused pinterest I also fancied more decorative stitching on the outside. I did briefly fancy an exposed spine through a window, but I wisely decided that was a bit too much!
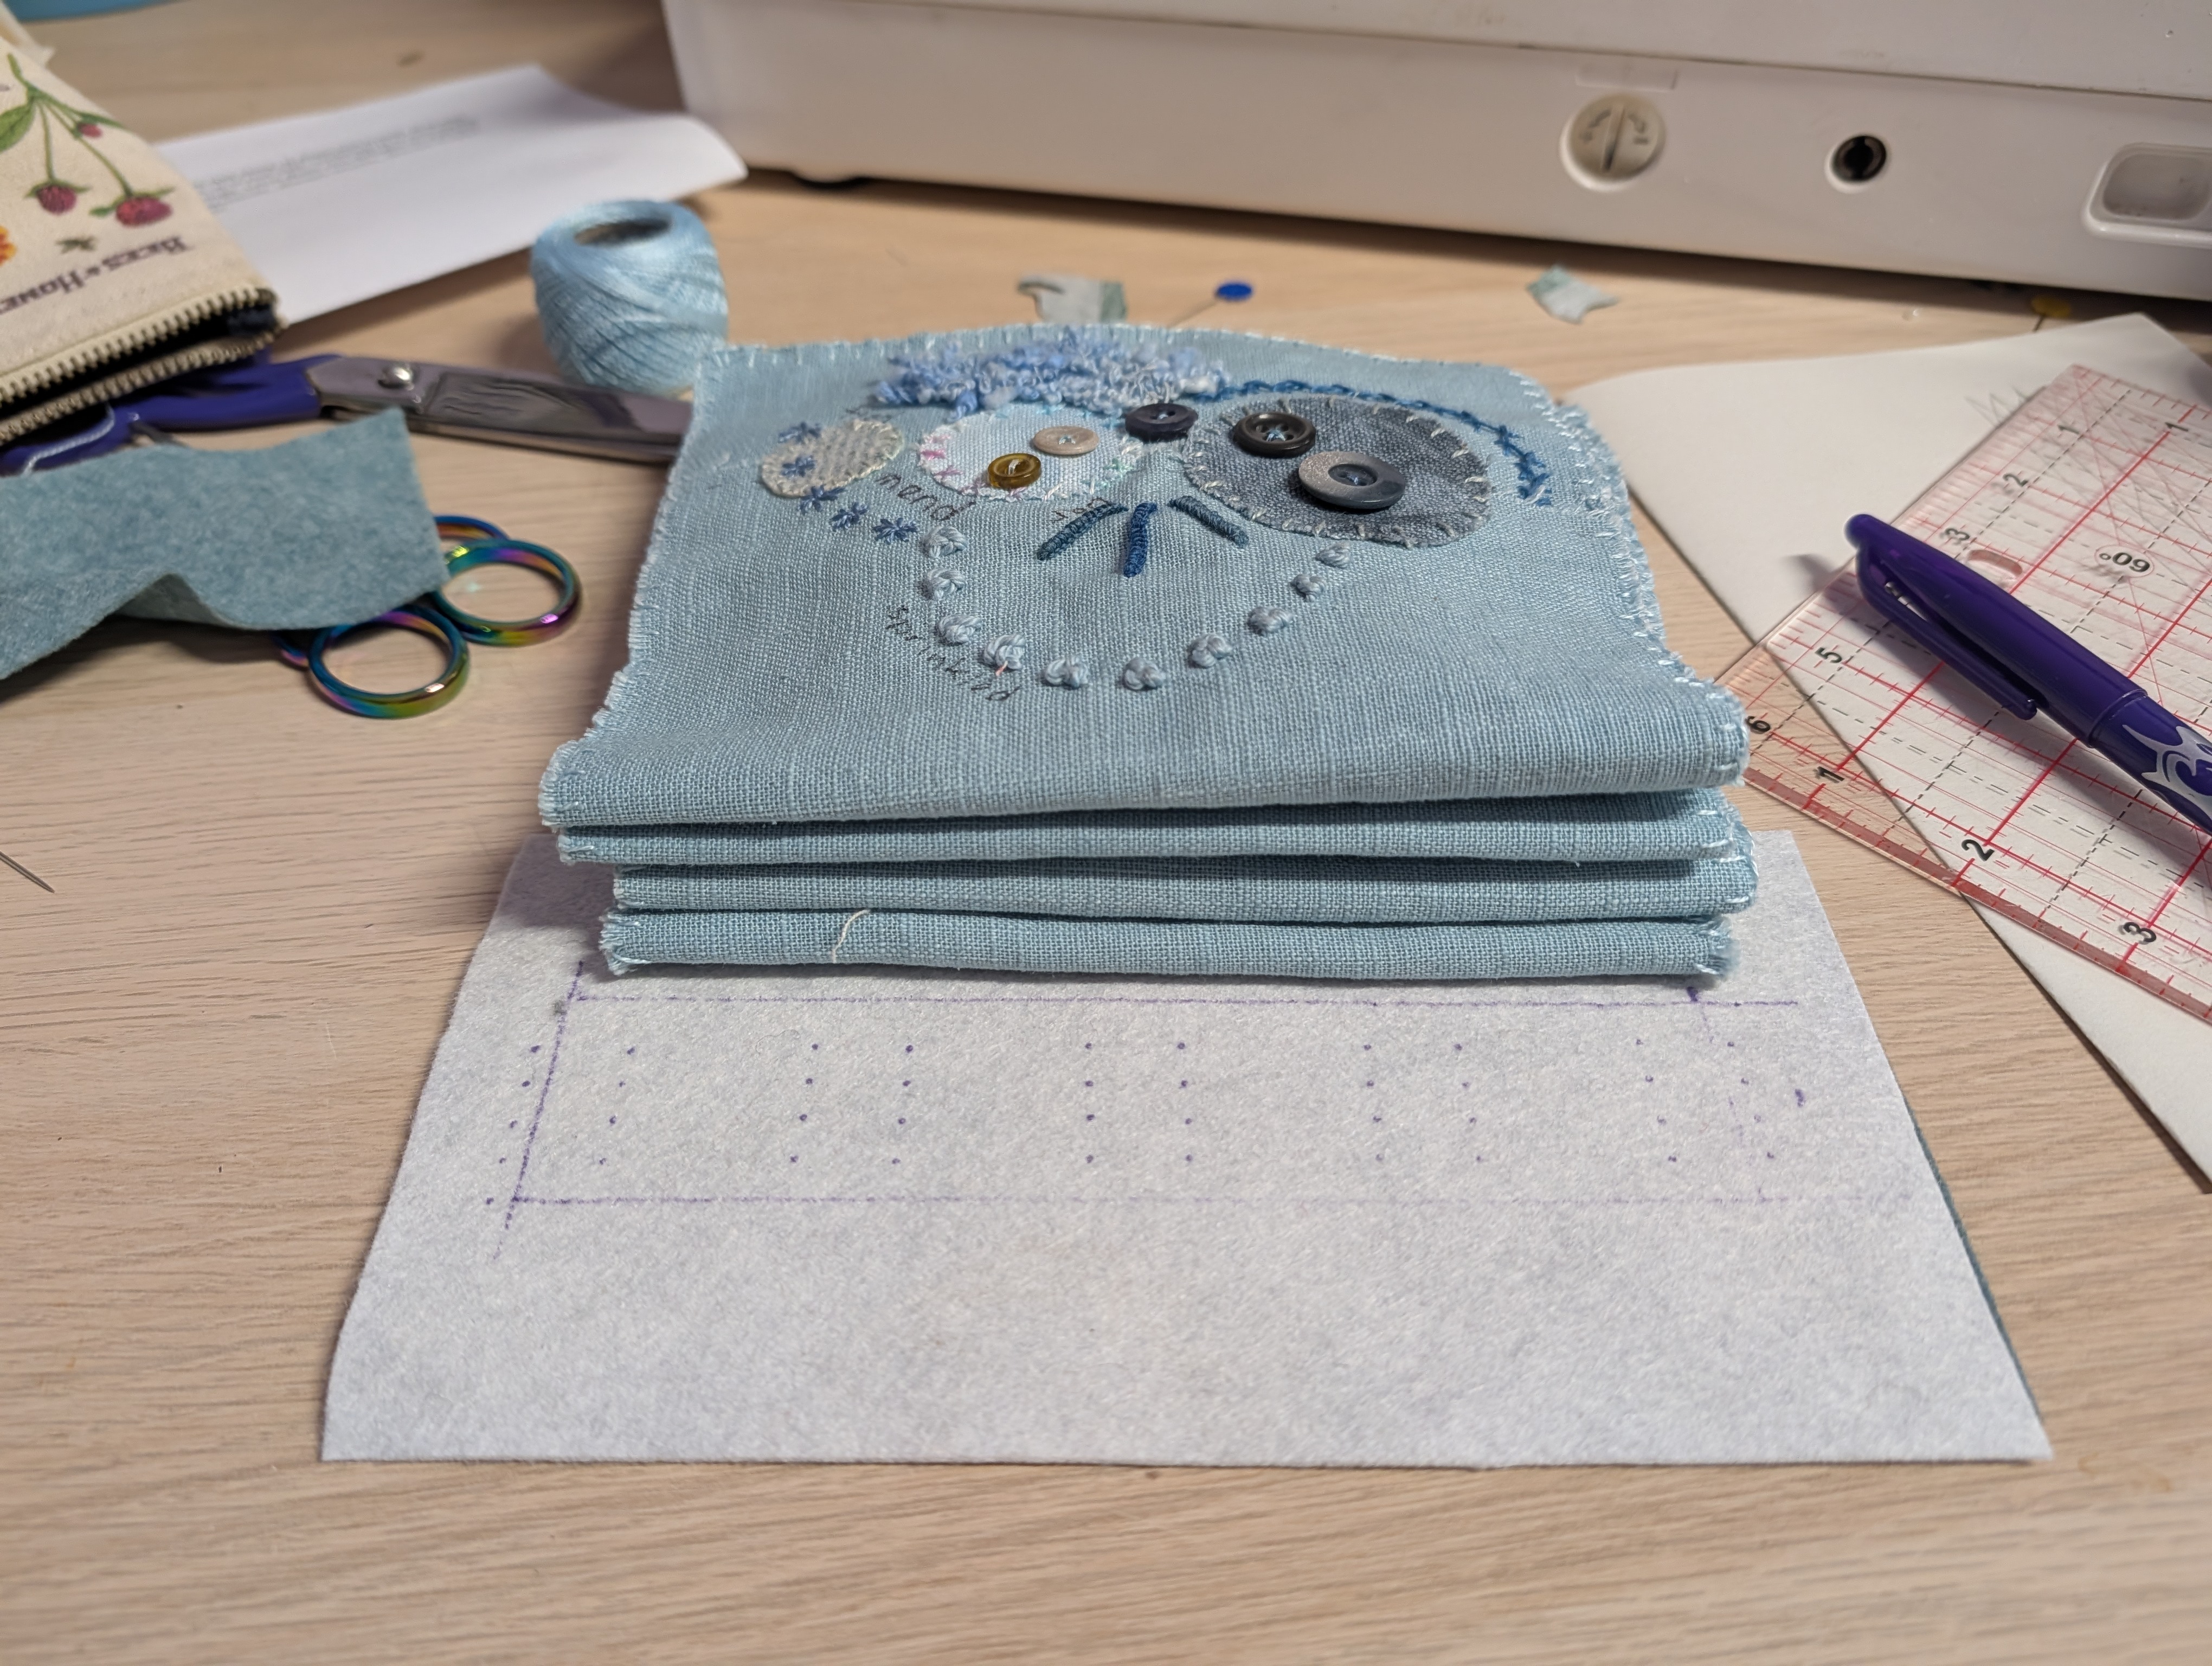
I had two shades of felt in my stash which went nicely with the colour scheme of the book. Unfortunately neither was quite big enough to do the whole book cover in one piece! I also felt it might be easier to do my first binding without the covers getting in the way. I cut a strip for the spine in a dark green felt for the outside, I used a light grey for the inside, mainly because I didn’t have enough light green felt, but this was also easier for me to mark where the binding would go. I thought the felt would need some support so I put a piece of iron-on buckram in between, just the width that I wanted the spine.
I did some careful measurements and drew my plan out on paper before transferring the dots to the felt. I knew some of my pages were fairly bulky so I did my lines 1/4″ apart. The buckram is fairly tough so I made holes with an awl first both for neatness and to save my fingers.
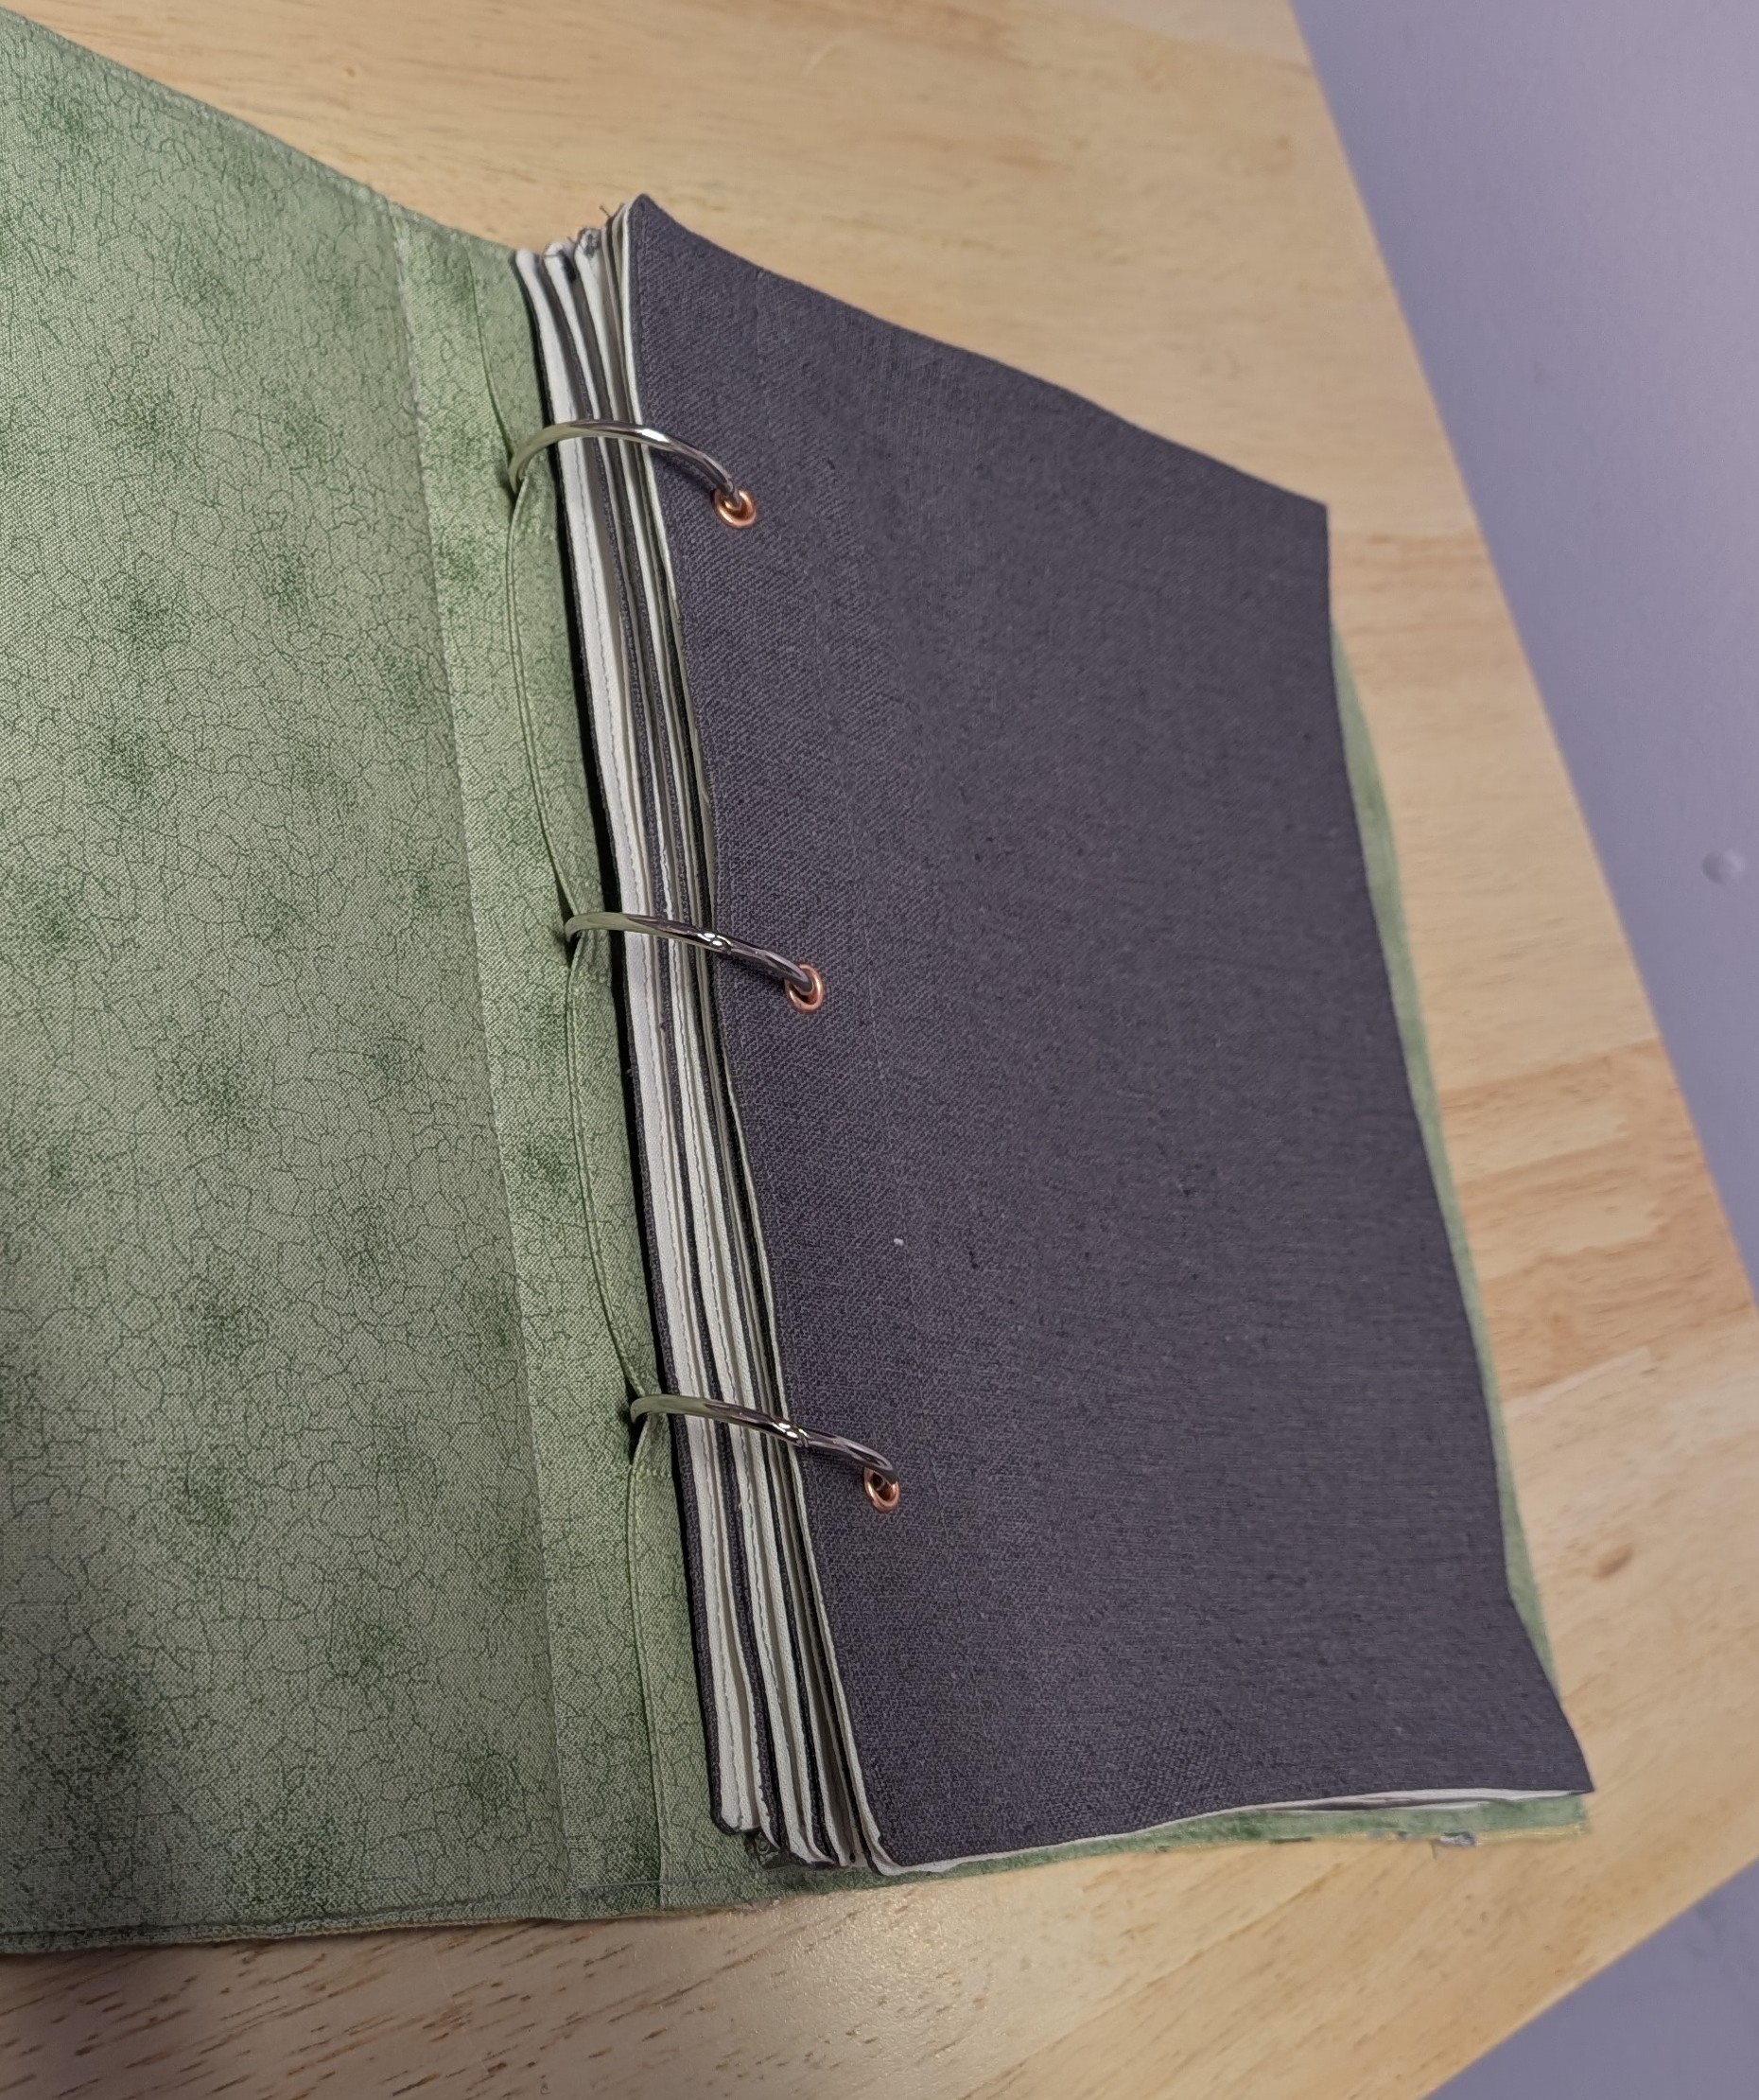
I used a thicker perle thread as it seems fairly strong, I threaded a needle on each end and worked on two sets of pages at once. I worked a cross-stitch, then went through the pages, then back for another cross-stitch. I tied the two ends with a knot at the bottom. It actually wasn’t as fiddly as I thought it might be.

I then had to make the front and back cover. I used two rectangles of felt, blanket-stitched together with some pellon in between to give it a bit of body. My original plan was to stitch both layers of the spine to the outside of the book, but I wasn’t convinced I could get a neat finish and I also thought it could be very fiddly trying to stitch the inside edge down. So I tucked the cover in between the two spine felts and blanket stitched each side.
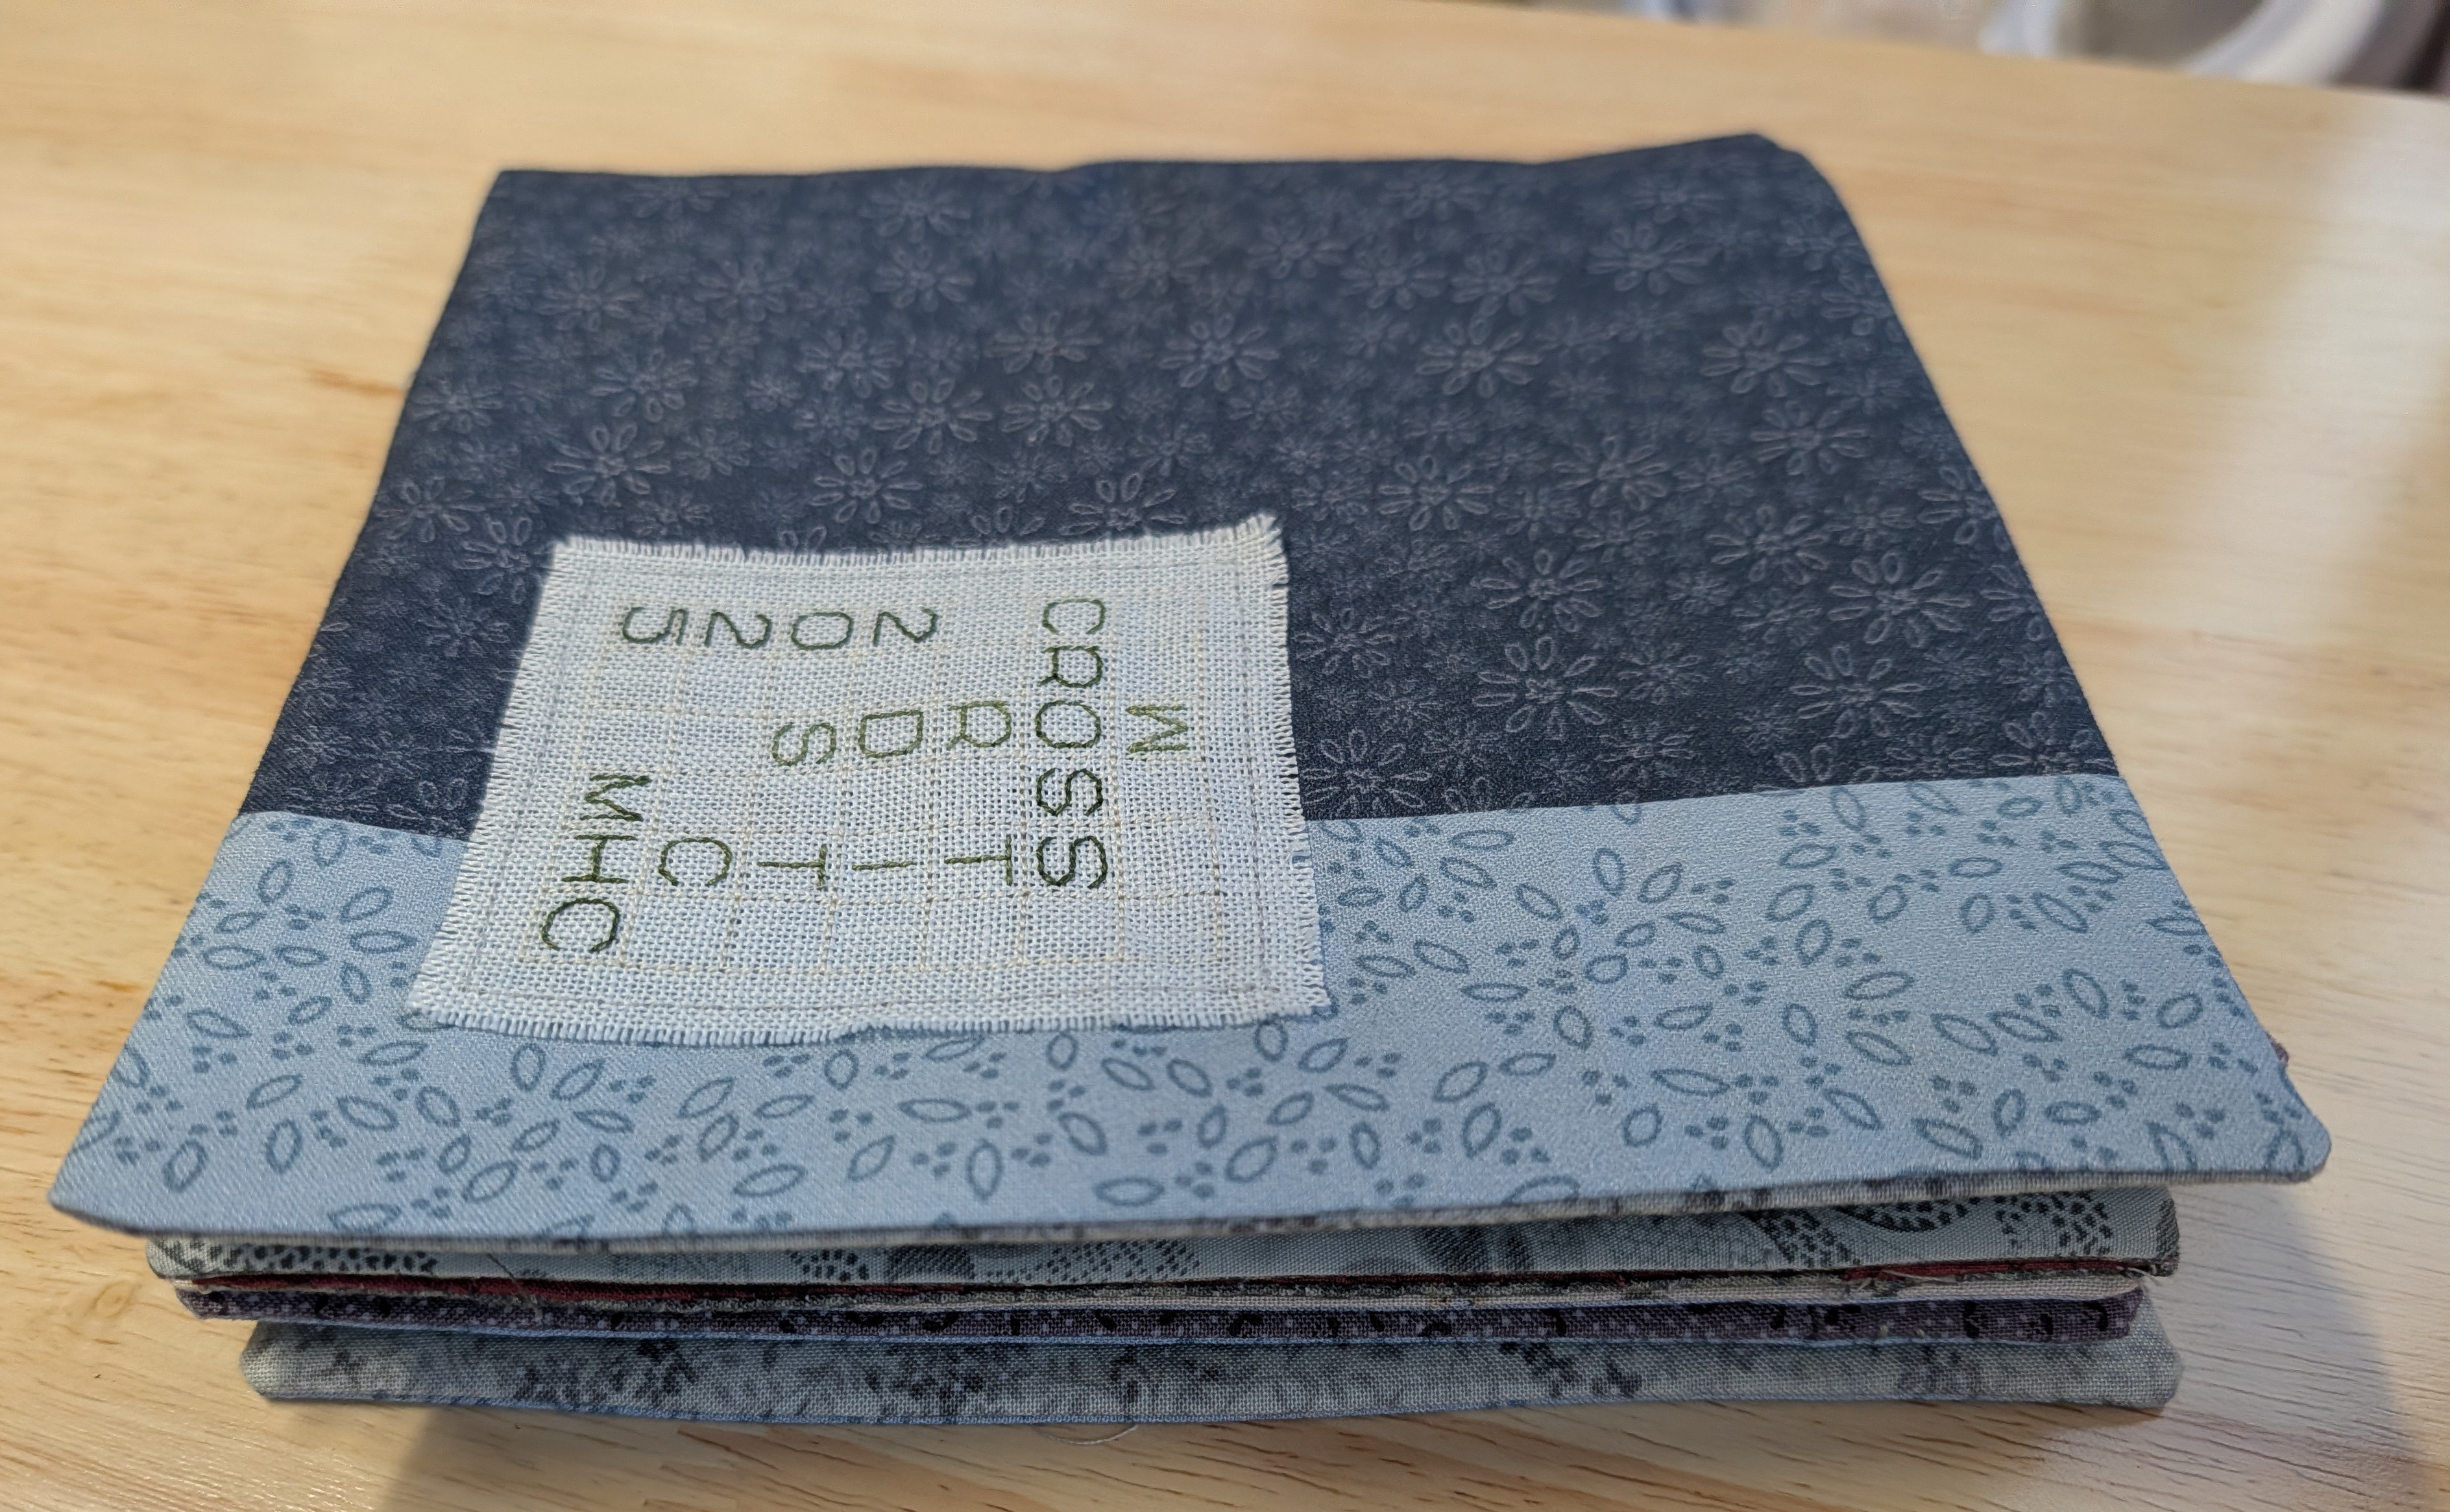
I stitched the label using chain-stitch, the cover ring was left over from the SAL and I found a button in my stash for the other O. I do like how it has turned out.
I felt the light grey felt stood out too much on the inside cover so I added two strips of lace which just helps to break it up.
I’ve made a video of my book and put it on Youtube, hope it works…here’s the link, hope you enjoy it. If you’ve any questions on how I put the book together, feel free to ask.

Merry Christmas everyone! Hope we all have a happy New Year with lots of time for stitching and creating!


Over the last few days I’ve started a new embroidery project, clearly three projects with another two due to start isn’t quite enough!! In my defence, this should be a relatively quick stitch and my Bobbin Along book is in the last stages.
This is going to be a concertina book, it’s a slow-stitch kit I bought a few years ago from Helen Bellingham of Untangled Threads. I think it was called Made with Love, the kit included the base calico, some threads and fabric pieces to add to the calico. It’s then really up to the maker to create whatever they want.
The calico strip is the width of fabric, so about 160cm. It’s turned under at one edge and then the other three edges are stitched together and then the piece turned, leaving a double sided strip which can be stitched before or after. I’m stitching it before as I think that’ll be much easier. It folds into six pages, so twelve sides to be decorated.
I gathered some pretty cotton pieces from my scrap box and started laying them on the strip. I’ve decided to use some cross-stitch and embroidery pieces I’ve done over the years, some have gone onto cards, others made into mini cushions. I played about for a while with the fabric and the embroideries, in the end I’ve one side more muted than the other, one will have more pink, softer embroideries, the other will have the red hearts and darker pieces. Some fabrics I’ve used twice as they were too strong for the muted side but I realised the wrong side was still pretty, so some are upside down.
I’ve used raw edges most of the time to soften the look. I then stitched them all down just using rows of running stitch, I used about five muted shades of DMC thread, usually stitching three to five rows either vertical or horizontal . I stitched over onto the calico too to help blend the background fabrics. I’m pretty pleased with the effect so far, its taken about three evenings to stitch as obviously it’s quite long!
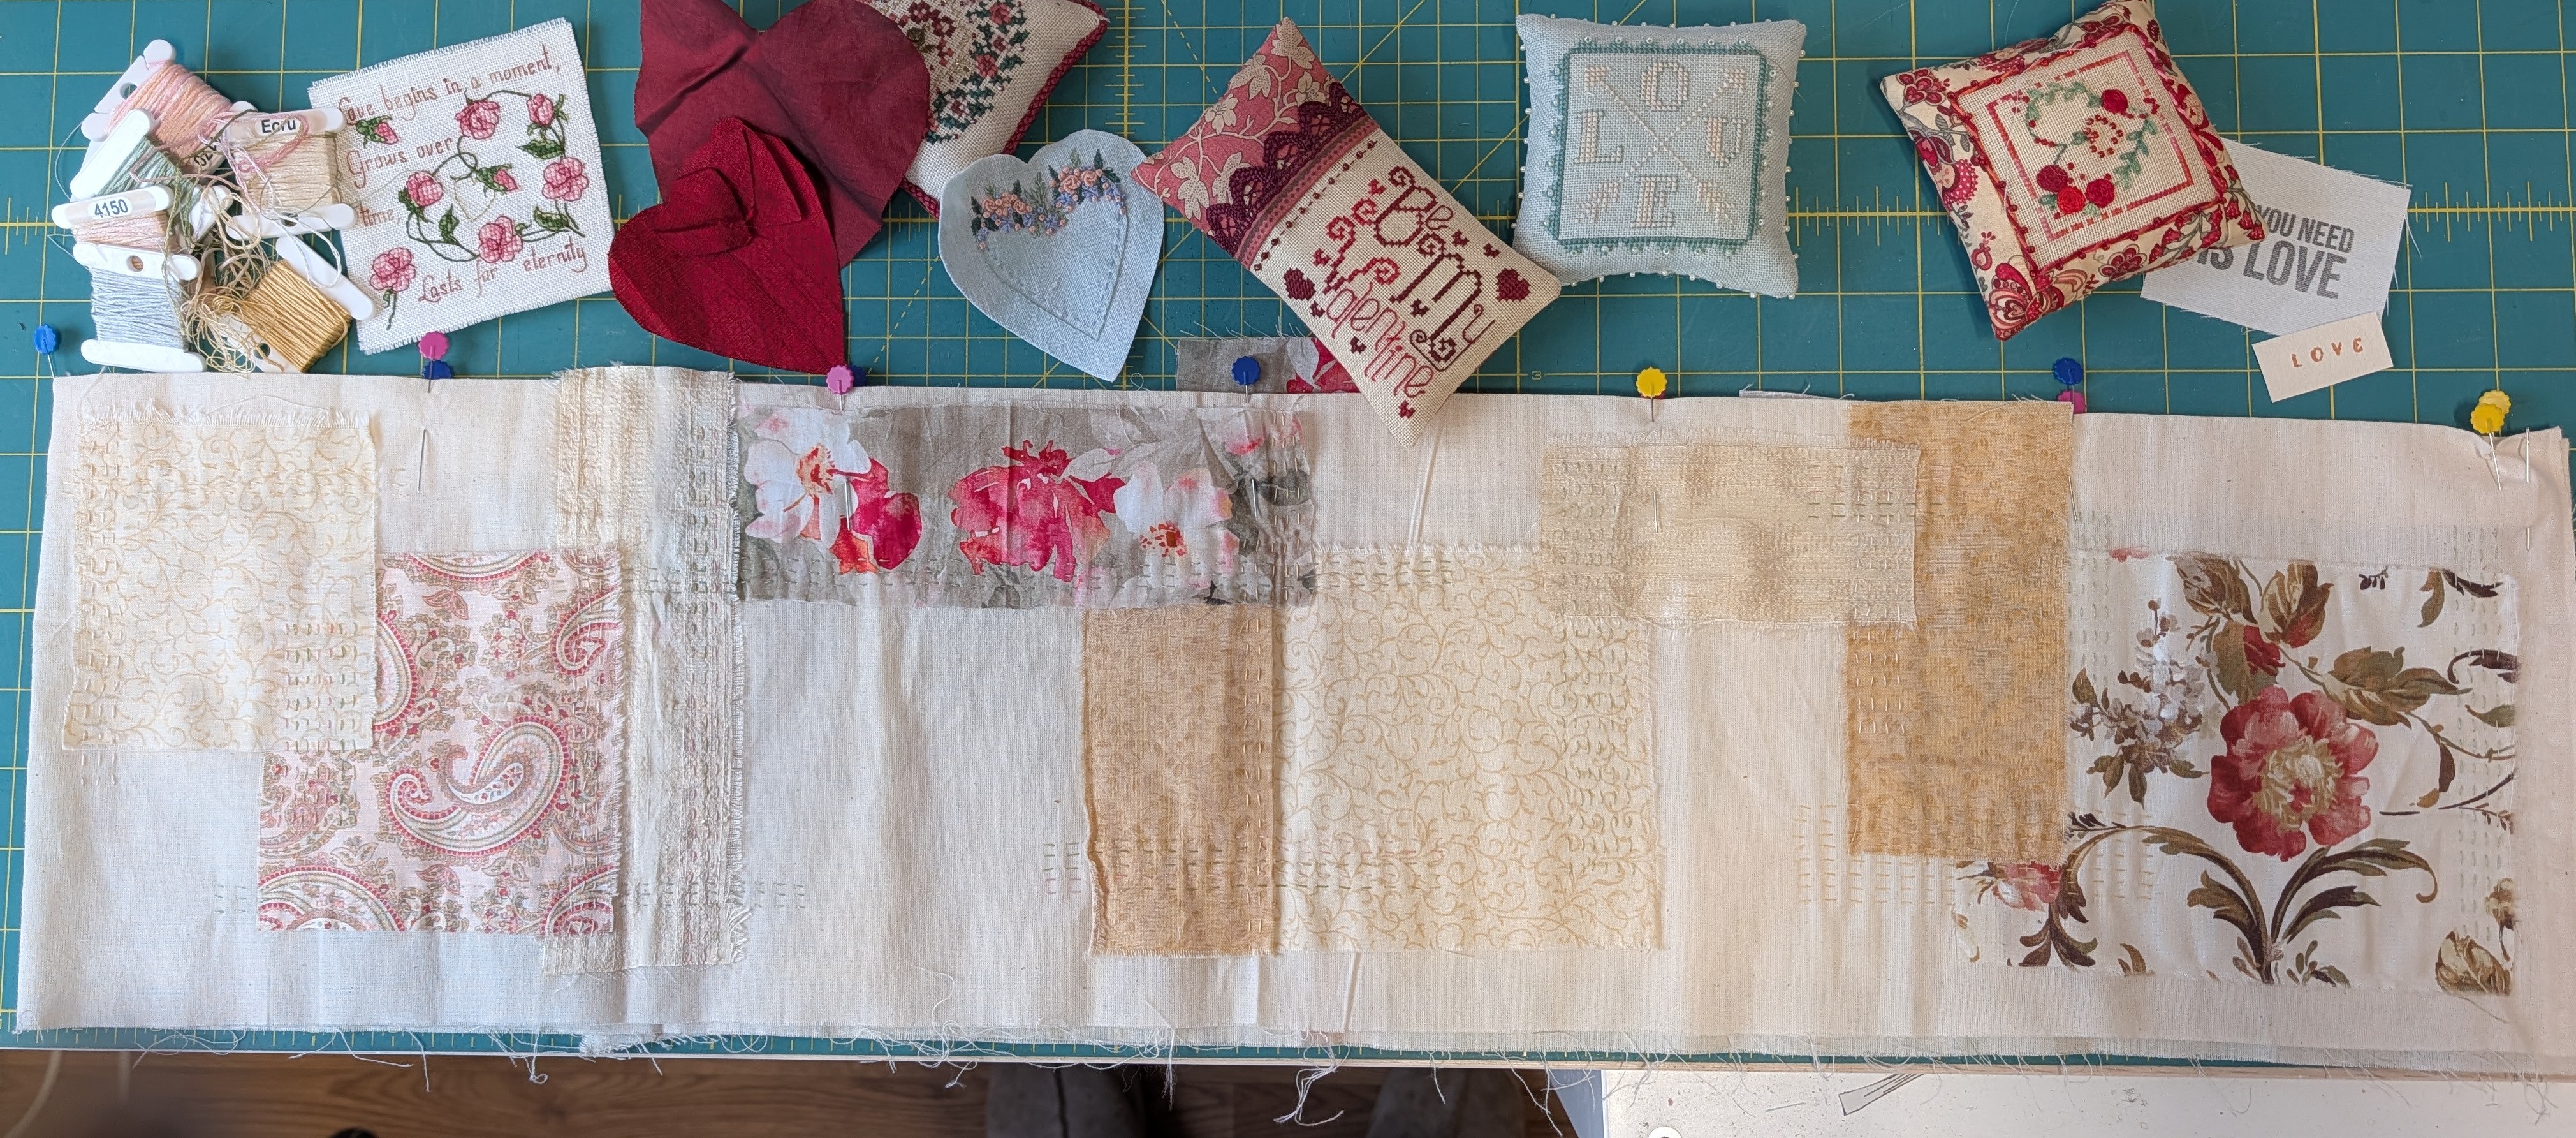
I’m really pleased how the stitching has worked out, it’s very simple but it does give the fabric a love soft feel, a bit like the difference between a hand-quilted quilt and one quilted on the machine.
All I have to do now is arrange the rest of the decoration and stitch them accordingly.


