Stitch-a-long time

Over the last couple of months I noticed a couple of blogs I follow were taking part in a stitch-a-long, sharing their progress on embroideries. I finally sussed out who the organiser was, it was Avis from Sewing Beside the Sea…so I have joined the stitch-a-long!

It’s a great linky party, every three weeks we share our progress on our latest stitching project. Three weeks is perfect time I think, particularly with things like cross-stitch, it takes a while to get a noticeable difference that’s worth blogging about, but three weeks isn’t so long that everyone has forgotten about it (I hope!!)

Anyway, I’ve just started a new embroidery project which I will be sharing with you every three weeks for some considerable time!!

Ribbon EmbroideryIn May I went to Denman College (WI college in Oxfordshire) where I did a course on ribbon embroidery. I loved it, so much so I booked another course next May with the same tutor!

At a recent Embroiderers Guild Day, there was a half price book sale, I spotted a book on ribbon embroidery. I bought it! I have to confess that when I initially flicked through it I thought it was a how-to-do lots of different flowers book. When I got it home I realised it was the instructions to make a panel of several little diamonds of flowers.

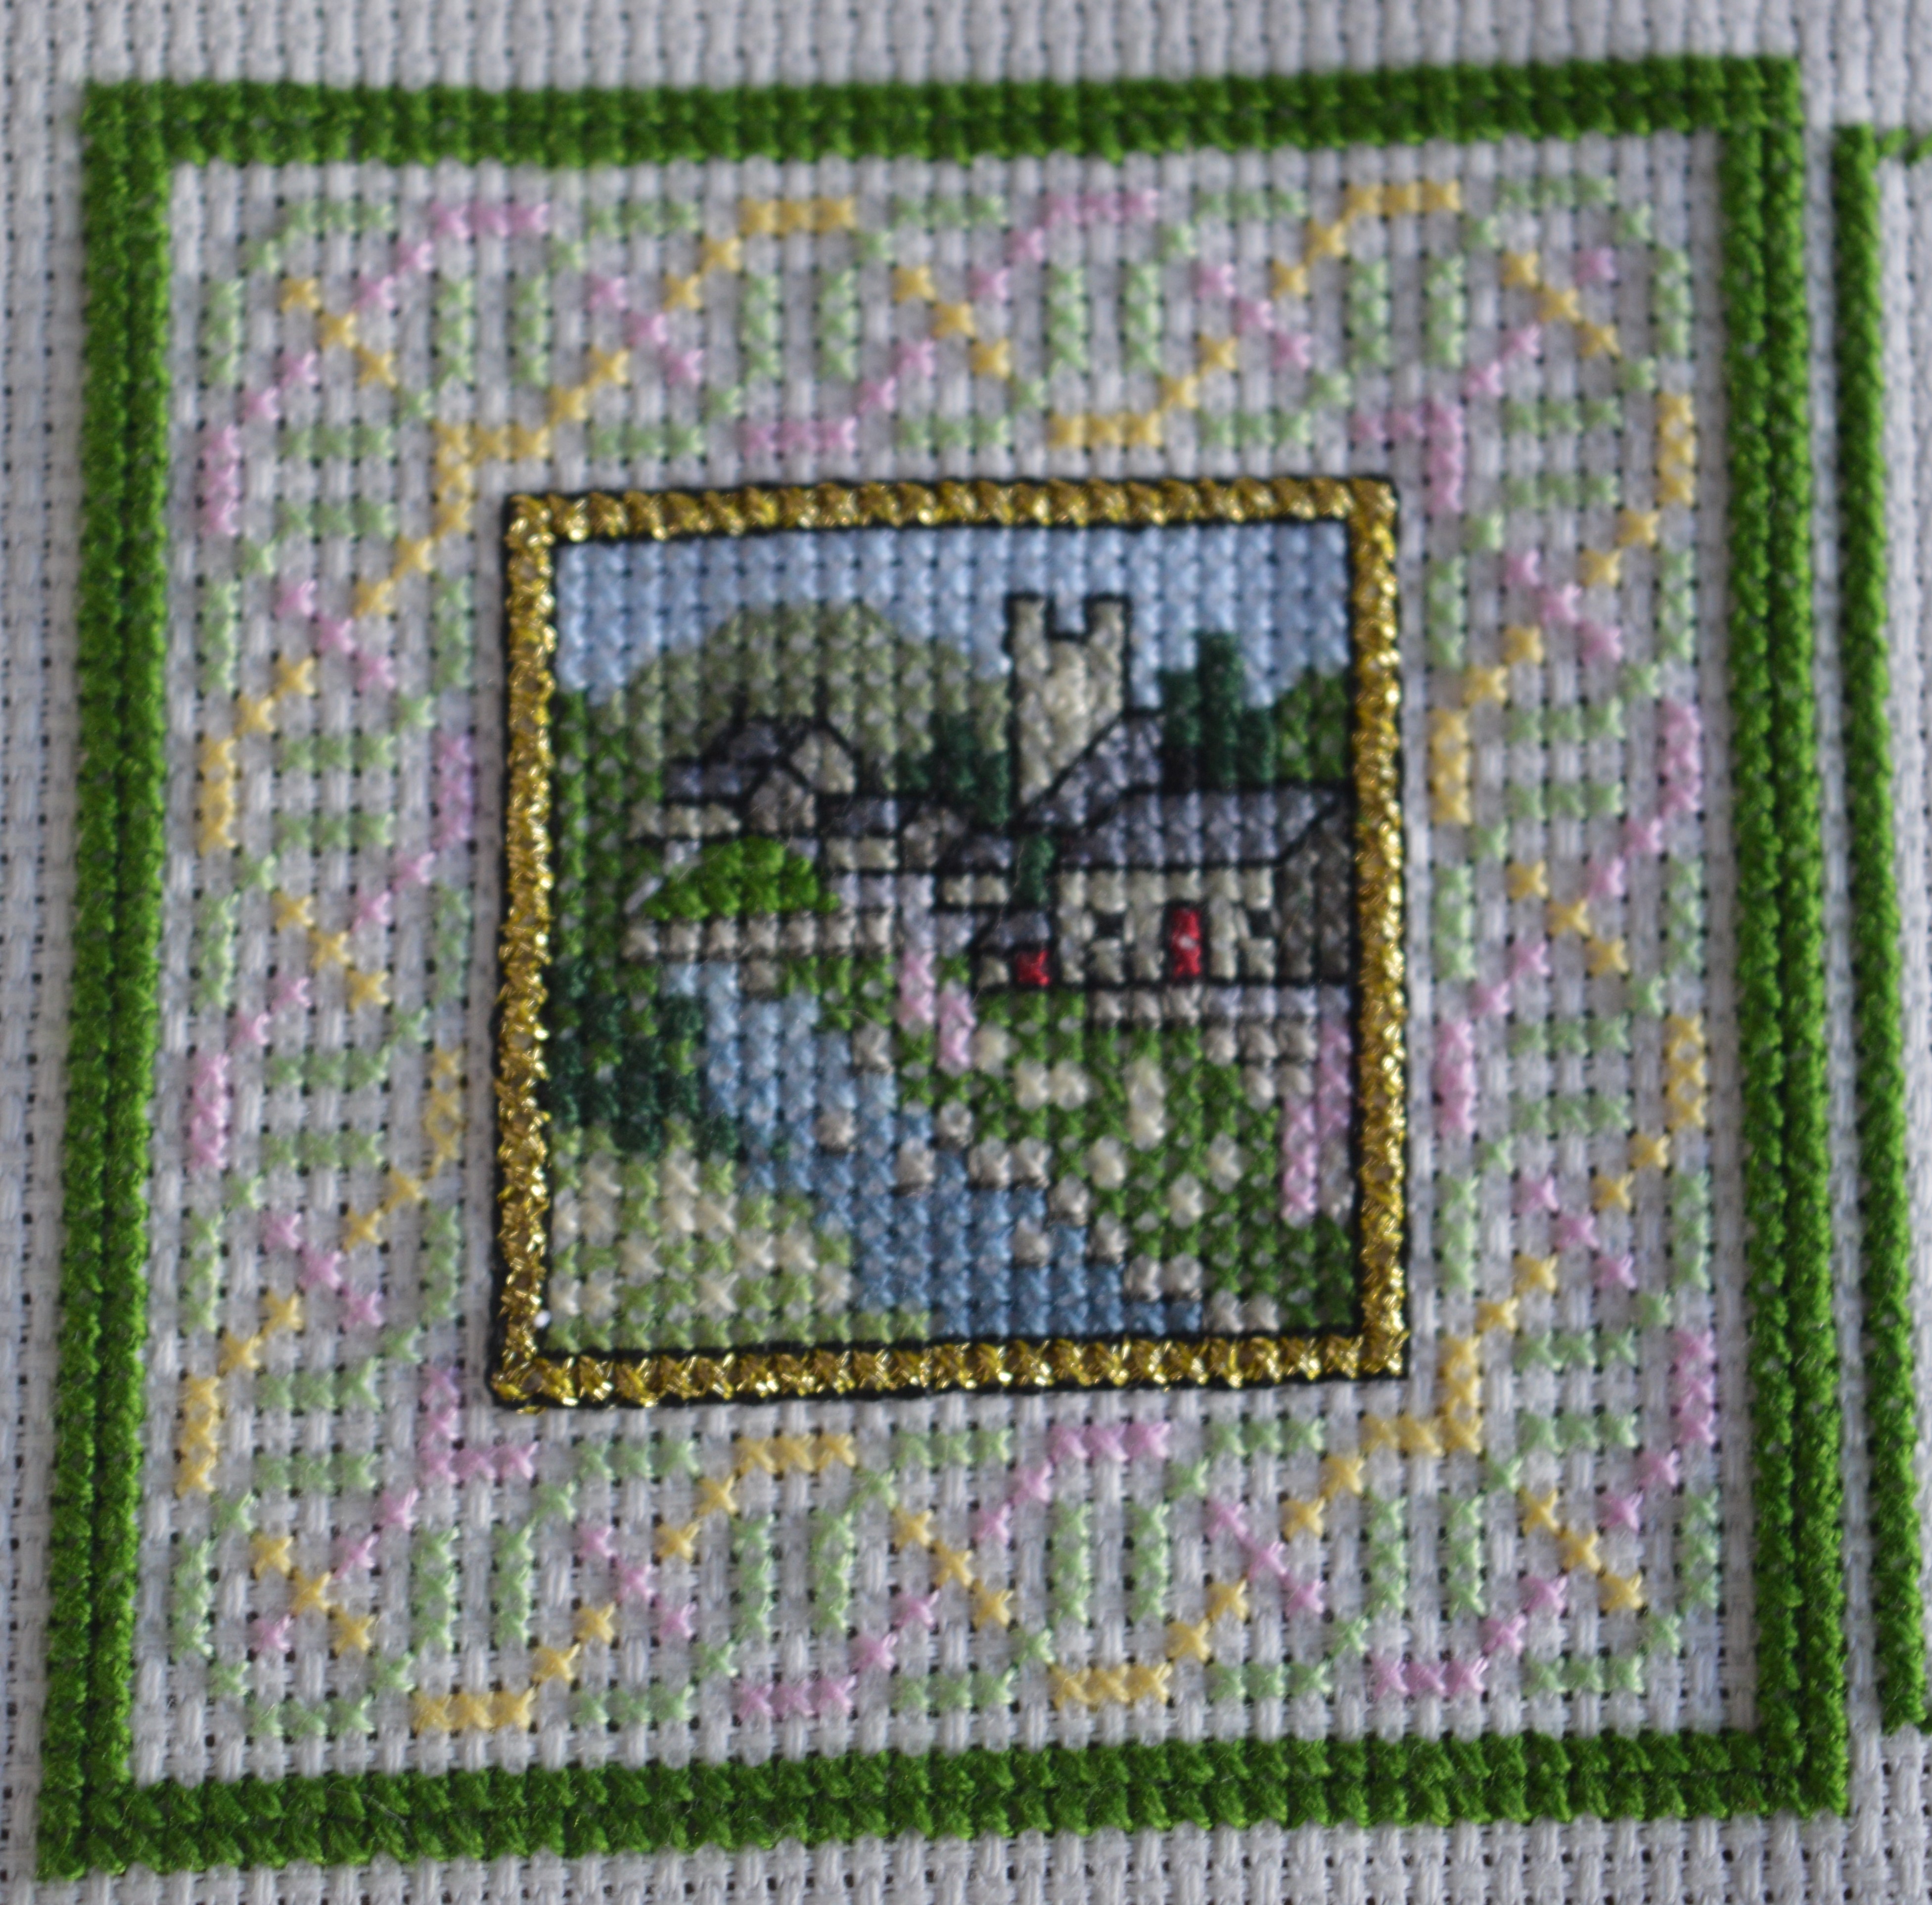
It’s a book by Di Van Niekerk called Ribbon Embroidery and Stumpwork. The panel is stunning and after a quick flick on Etsy I was lucky enough to find the background panel still for sale. The idea is that the pre-printed panel gives the outline and also a bit of depth, it is then embroidered with ribbons and stumpwork. Isn’t it gorgeous!!

ribbon-embroidery-and-stumpwork-by-di-van-niekerk

I’ve never done stumpwork before and I’ve only done a little ribbon embroidery so it’s going to be a huge learning curve but the instructions look pretty good! Di uses her hand dyed threads, silk and perle threads as well as the usual six strand floss. My budget wouldn’t quite stretch to those so I’ll mainly be using DMC together with a few treats I bought in Delicate Stitches last week. Yesterday we had a ribbon embroidery workshop with Skipton Embroiderers Guild (more of that later!) so I took the opportunity to be some lengths of silk ribbon. I do have some plain silkribbon too so I think I may be dying some of my own with my silk paints.

Embroidery Threads

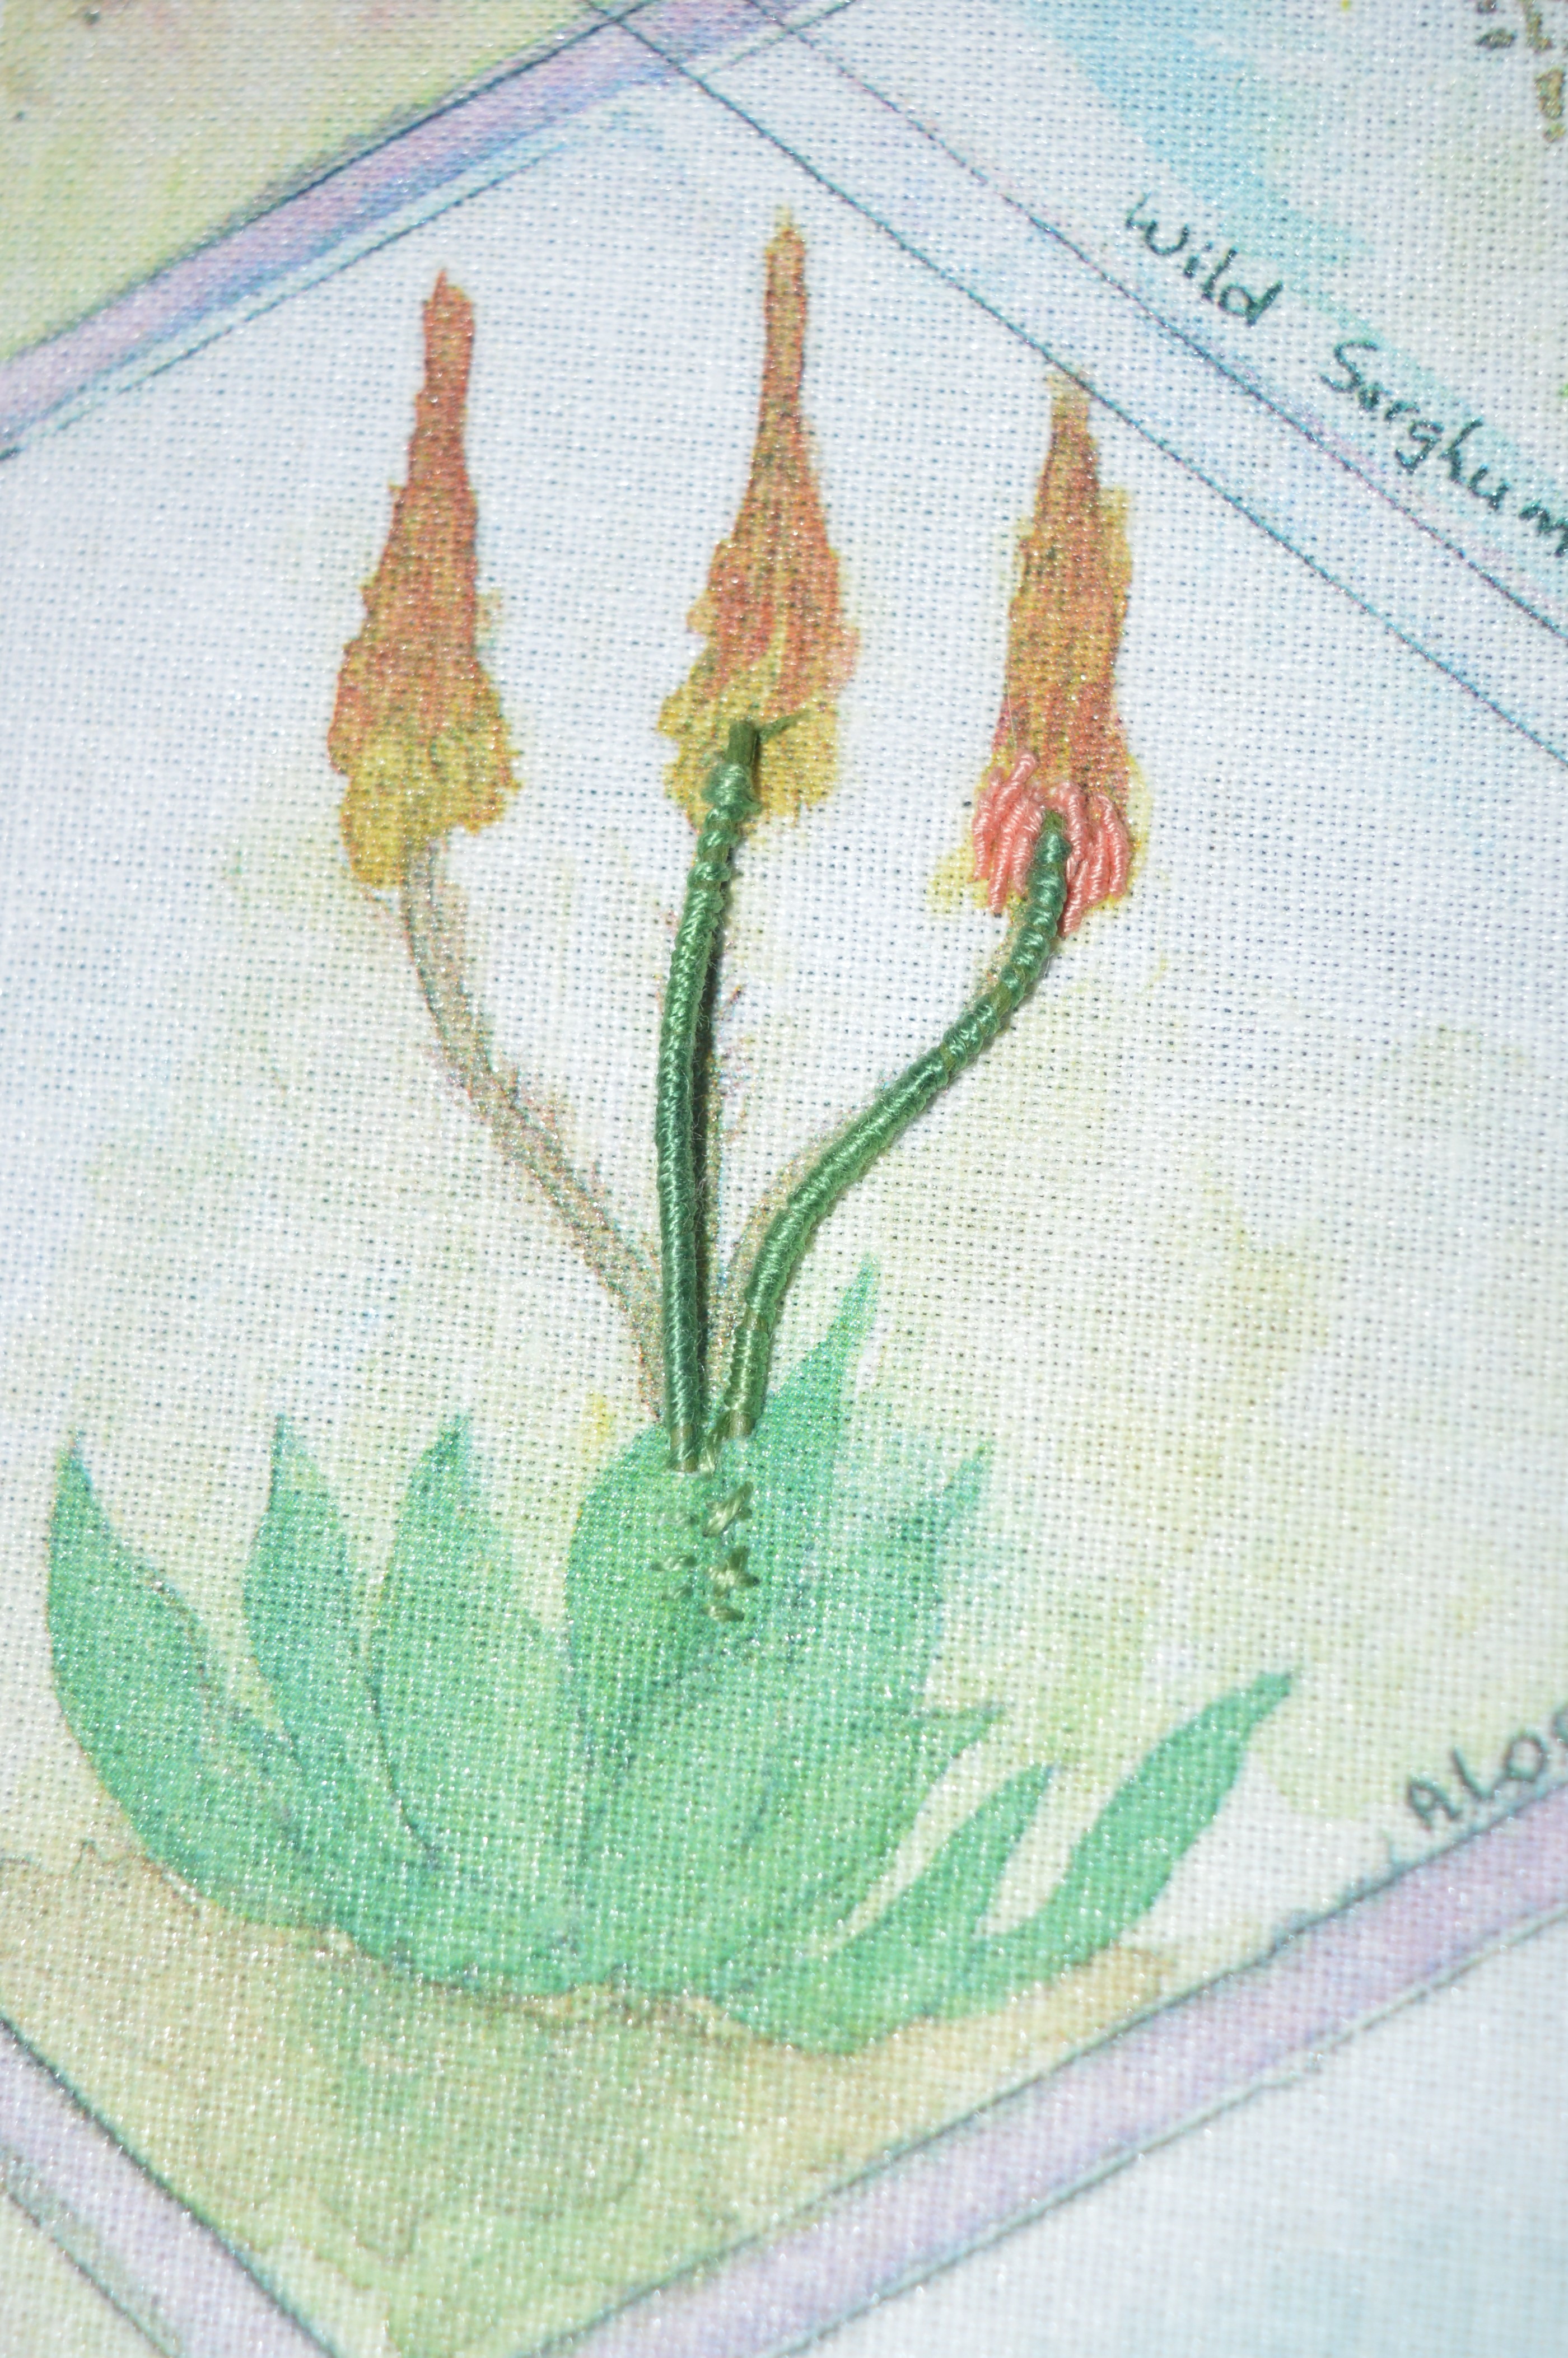
I’m being strict with myself and starting at panel one and working my way through the book. The first panel is of ‘An Aloe & a Spider’s Web’. The stems of the aloe are actually proud of the fabric, they are made with cake decorating wire bound with embroidery floss. It’s pushed through to the back at the bottom, but just laid on top by the flower. It does give a nice 3d effect. I’ve started with the bullion bars for the flower. The instructions call for one strand of silk thread, I’ve just used one strand of DMC so far, but I must admit I’m tempted to change to 2 strands to get a bit more structure.

Ribbon Embroidery

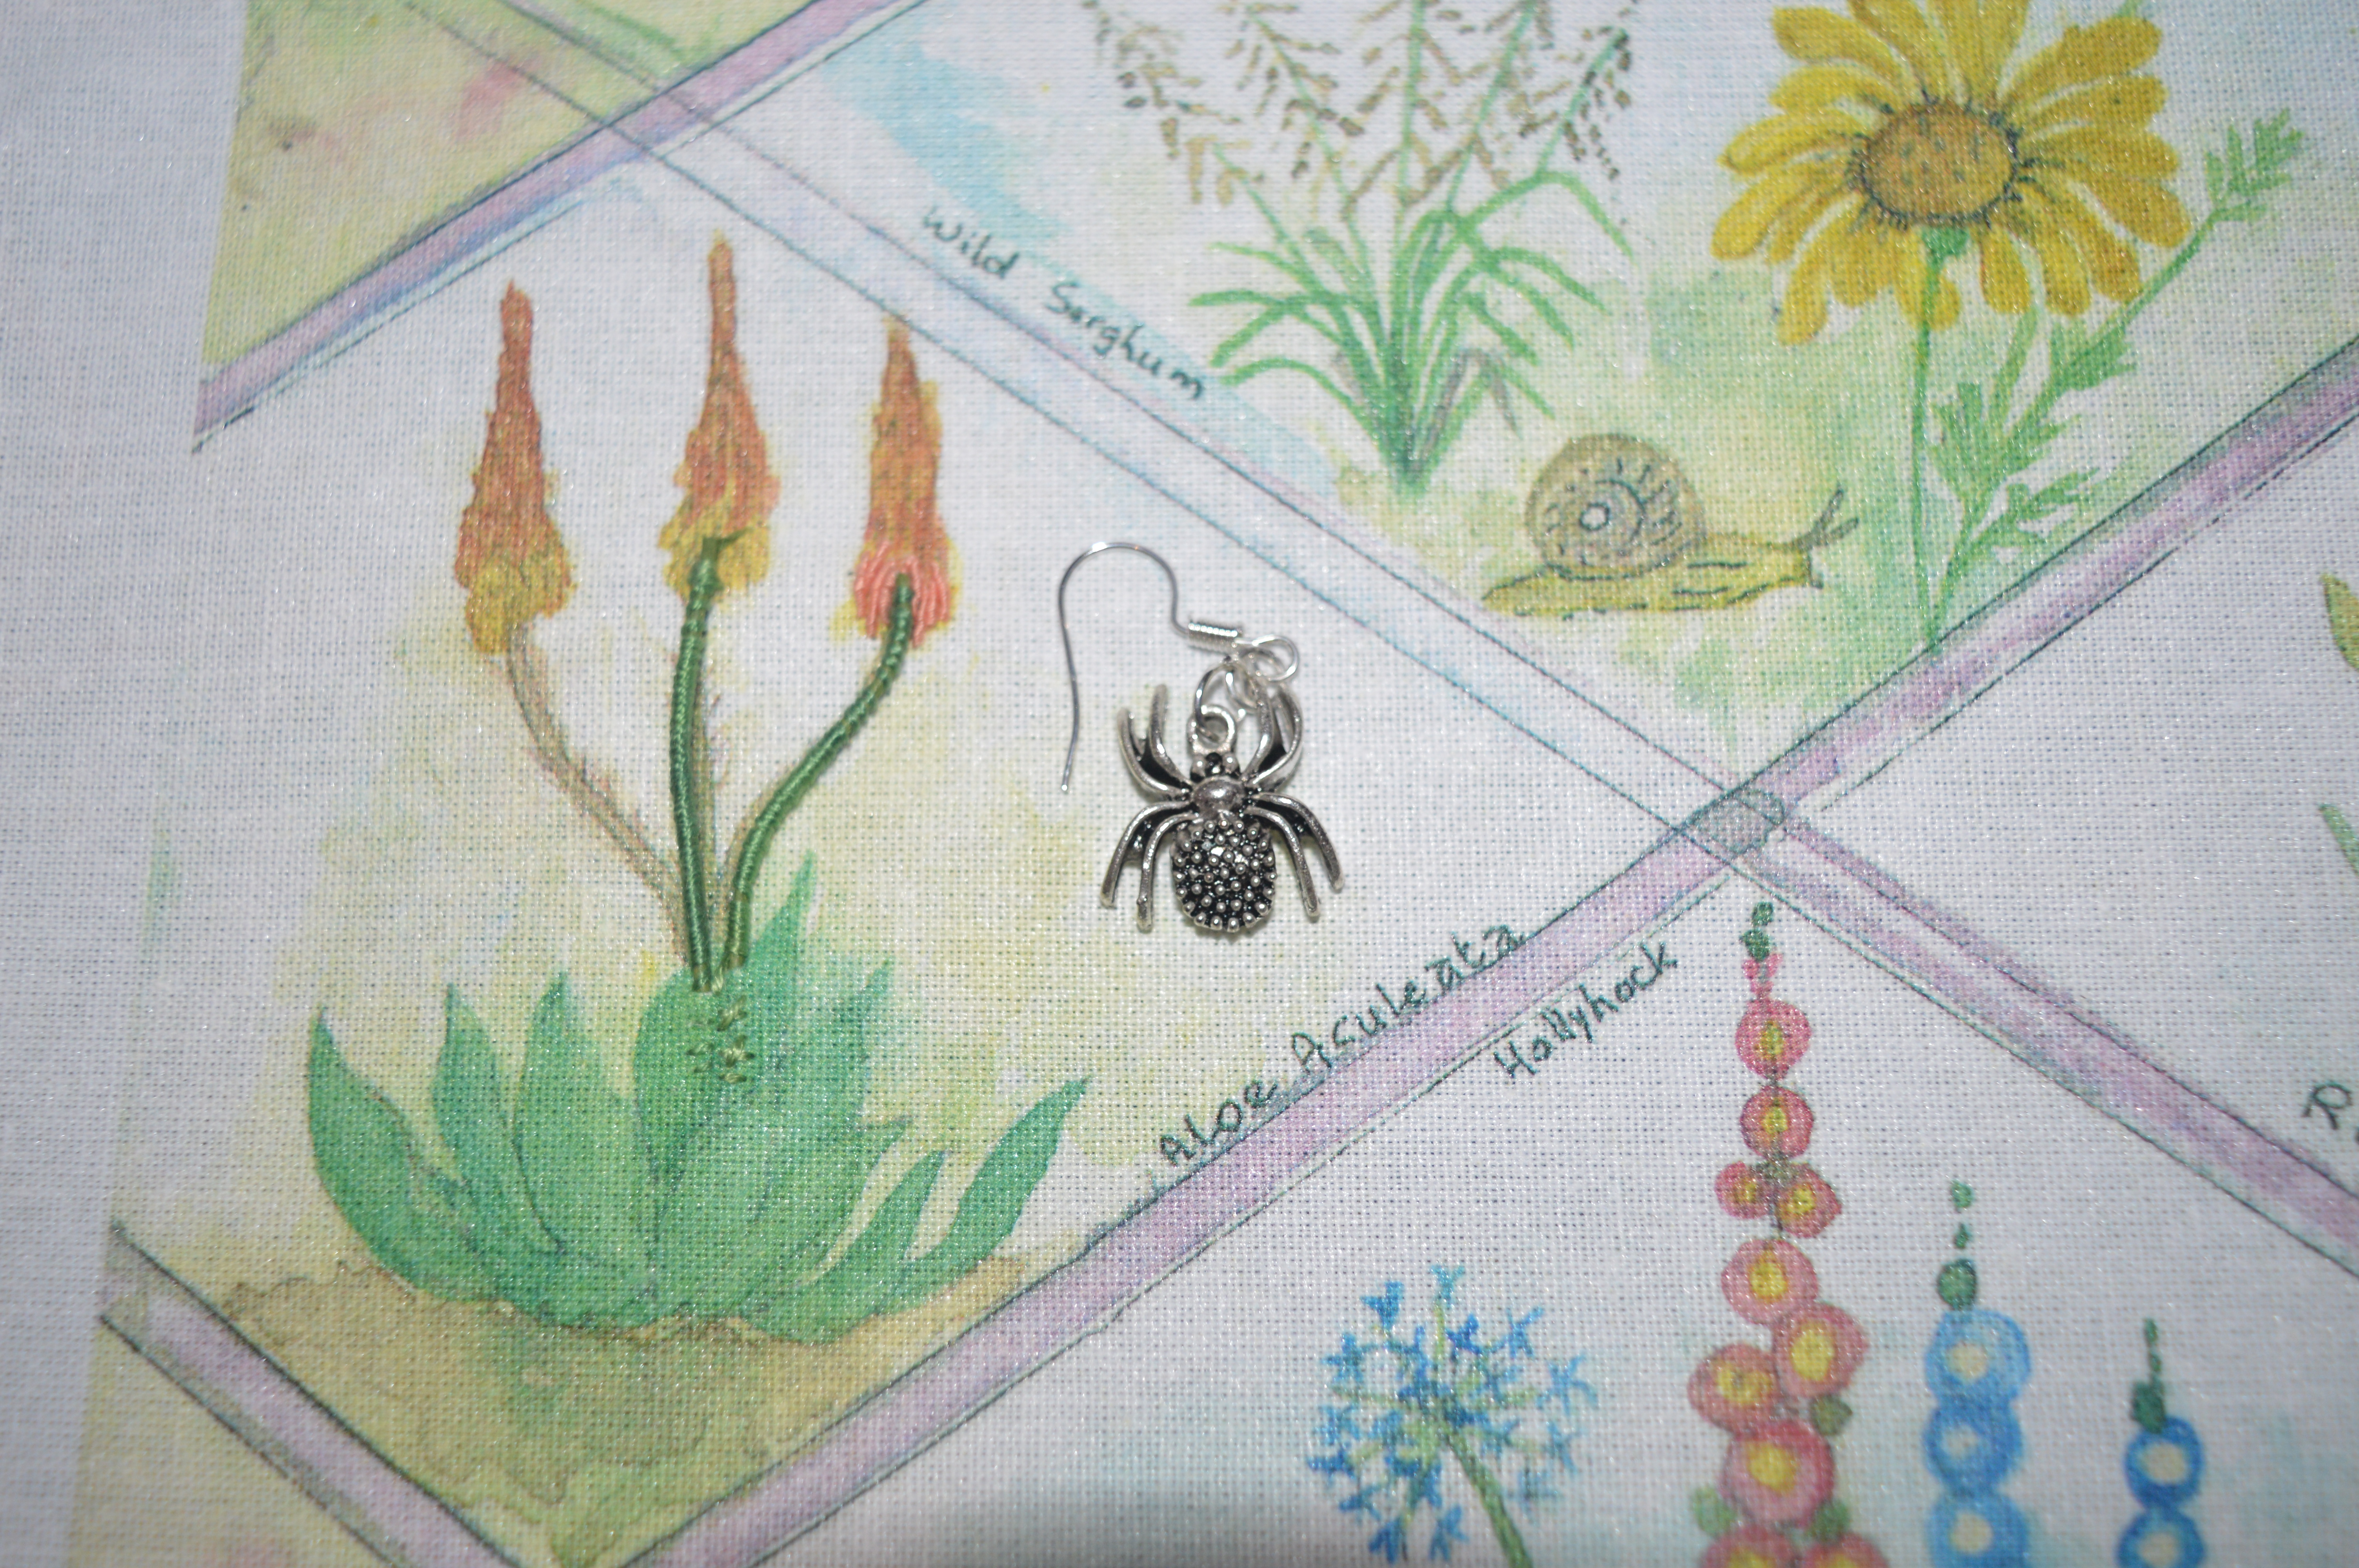
The silver spider’s web has a tiny spider in the middle for which she recommends an earring. I did think that just before Halloween I would have a fair chance of finding some tiny ones. I spotted a pair on ebay, ordered them (they were only about £1.80) but I think it will be too big, so I might be using a black bead and embroidering eight legs!

Ribbon Embroidery

Hopefully over the next three weeks I’ll make some progress, I might even get the spider embroidered in time for Halloween!

Why not have a look what everyone else is stitching, just follow the links to see some stunning projects;

AvisGunCaroleWendyLucyAnnKateJessSueConstanzeDebbieroseChristinaSusanKathy

Everyone is in different time scales, so if there isn’t a post when you first look, check later in the day. If you fancy joining us for the SAL, just send a message to Avis.

Posted in embroidery, Serendipity | Tagged , , , | 28 Comments

It’s a Finish :-)

My Secret Garden

I’ve just finished one of the three Block -of -the-Month quilts that I’ve been stitching this year. I’m really pleased with it, love the design! It’s called ‘My Secret Garden‘ quilt, it’s designed by Pat Sloan and she releases the new block each month, it’s free too! This is the second BOM of her’s I’ve done (plus the Splendid Sampler that’s ongoing!) I find I learn so much from these quilts, they push me gently out of my comfort zone! Her instructions are great too, aimed at the beginner, which is fine by me!

I finished all the blocks last week and stitched them together, using all my scraps to make the border, any fabric left was used to patch up the backing fabric after I didn’t buy anywhere near enough to back it. All I had to do was quilt it…

My Secret Garden

As there were both very light and very dark fabrics in green, cream and purple I decided to go for a variegated grey Gutermann quilting cotton. I hoped it would blend in nicely with all the colours. Typically the lightest bits of thread seem to be on the darkest fabrics and visa versa! Overall though I’m pretty pleased with the effect. My quilting is definitely improving, either that or I have developed a pattern that suits my limitations! Basically I stitch like a meandering wave or leaf – a wiggle or a wave that finishes at a point. This allows me a space to stop and regroup.  I tried to meander on previous quilts but I found it was when I stopped that the stitching became uneven, this way my stops are planned! I still haven’t quite got the tension right underneath, I put a fresh needle in after a few minutes which did help but the top thread is showing through underneath quite a lot. Any suggestions welcome!

My Secret Garden

I bound the edges with dark green. I always hand stitch my binding down, I know a lot of people hate doing the binding, even put it off for months!! I actually quite like it, I can sit and relax  and let my mind wander! I’ve decide the one job I really don’t like with quilting is cutting all the loose threads off!! I always miss some (as you’ve probably noticed from my photos!!)

I’m going to give the quilt to my mum for Christmas, she has seen it whilst I was making it but she doesn’t know she’s getting it! I embroidered a label in purple and green variegated thread and stitched it on the back.

My Secret Garden

I’m so pleased to have finished one of the BOM’s, the Anderson Farm one should finish next month I think, then I’ve just got the Splendid Sampler to concentrate on…mind you, I’ve another quilt top that needs quilting and another quilt to make before then…

My Secret Garden

Posted in Crafts, Quilting | Tagged , | 7 Comments

Cross-stitch on the move!

Summer in the DalesI went down to London on Monday for a study day at Harefield Hospital, I packed a little cross-stitch kit in my handbag to keep myself amused! I started it last week, it’s cross-stitch box called Summer in the Dales by The Nutmeg Company.

I traveled down by train which takes just over two hours, I managed quite a bit of my cross-stitch! I concentrated on the border which is fairly repetitive as I wasn’t convinced I would manage the fiddlier centre picture, not quite smooth enough for that!

Summer in the Dales

I had a few hours to spare in London and I had planned out where I wanted to go. I was very good and avoided the danger areas like Goldhawk Road or Walthamstow High Streeet! First stop was Kentish Town, straight opposite the station is Delicate Stitches or The London Bead Shop. I remember going there twenty years ago with my mother and I don’t think it’s changed much since, it’s a fascinating shop! In the front part are all the beads, I made my way straight into the back half of the shop which is all embroidery threads.

They have an amazing selection of embroidery threads; flosses, silk thread, perle, hand-dyed silks, tapestry wools..I was looking for some variegated ones mainly for a new project, an embroidered panel by Di Van Niekerk, it’s going to be a huge learning curve as there’s lots of different types of embroidery, particularly ribbon and stumpwork. I’ll show the start of it next weekend, in the meantime, here’s my new flosses.

Embroidery Threads

Next I caught the bus to Oxford Street to have a nosey round John Lewis, we’ve got a John Lewis opening any day now in Leeds, so I was looking to see what I could expect in their haberdashery and fabric department. Whilst it’s nothing like it used to be when I lived in London in the 1980’s it’s still has a pretty good selection.

material-shopI wandered down to Liberty’s, it’s just such a beautiful shop. I then mosied round to Berwick Street in Soho, mainly for old times sake. When I lived in London I used to go to Borovicks for ballgown fabric, it was an amazing shop, they had a big cutting out table in the middle and they would pull rolls of fabric off the shelves and pull a couple of yards for you to look at and feel. I took my mother once, I think she was a bit shocked at first being taken to Soho, I had to reassure her that it was very different during the day to the seedy area (in the 1980’s) at night time. I remember afterwards I took her in a great coffee shop where everyone sat together round big refrectory tables. The waitresses kept coming out with piles of fresh croissants and jugs of coffee. When you went to pay they just asked ‘How many croissants did you have? How much coffee?’ Memories…

I missed Borovicks this time, I think I turned up towards Oxford Street too early, next time…

I had to catch a train from Marylebone Station so I meandered my way through the streets and by chance found the Button Queen, I’d seen it on the internet but it was by chance that I found it. It wasn’t quite what I was expecting, I was thinking something along  the lines of Duttons for Buttons, jam-packed full of buttons of every colour. The Button Queen is a very different shop, the two gentlemen who run it sell vintage buttons, all neatly stitched onto satin covered cards. There were some beautiful buttons there from about 1900 which did tempt me, but I resisted!

dsc_0007

Just round the corner I spotted VV Rouleaux, now that is a gorgeous shop. They sell trimmings of every kind and in every colour, all beautifully displayed. I bought a trim which I hoped would coordinate with my bedroom curtain fabric. I’ve enough fabric left to cover a small chair and this will trim the edge. Luckily it matches perfectly! I’ll definitely be going back there another day!

Summer in the DalesI had two nights in Denham village, I was staying at the pub, a lovely old timber-framed building, my bedroom was on the top floor with open rafters, lovely! I spent the evenings working on my cross-stitch. I finished the picture of the Dales which will be the top of the box and on the train on the way home I finished the border around the picture.

I’ve just got the inside picture and the lid sides to stitch now. I’ve got another night away this week as we’re off to collect Helen from Army Training Camp in Pirbright, we’ve to be there for 9am so we’ve booked into a hotel the night before, so I might just get a bit more done!

I’m linking in with Kathy’s Quilts for Slow-Stitching Sunday, why not have a look what everyone else is stitching?

Summer in the Dales

Posted in embroidery, Fabric shops, Serendipity | Tagged , , | 9 Comments

My Secret Garden Quilt

My Secret Garden

The final block of My Secret Garden quilt-a-long was due out on 1st October. A few days before I decided to cut out a jacket, after all, I was up to date on all three quilt-a-longs…unfortunately Pat Sloan, the designer, had other ideas, she released the final block a few days early!!!

Well I couldn’t resist could I, so the jacket is cut out but unstitched!

The final block was fairly straight forward, which is probably why I made a major mistake! I needed a 5″ square to make the two large triangles, my die cutter only goes up to 4.5″ so it was a job for the ruler and rotary cutter. I have one fabric which was my starting point when choosing my palette at the beginning, it’s the dark aubergine coloured one with dark gold flowers. I’ve included it in most of the blocks to give a bit of continuity. I only had a small piece left, but I measured it and found I had just enough for all the triangles in the middle.Everything was going swimmingly until I cut one side to 4.5″!!! I realised the second I had done it and I definately didn’t have enough for a second 5″ square…so I pieced it along the bottom!!! Luckily you can hardly tell!

My Secret Garden Block 10

Pat designed a lovely deep border with 9 square cornerstones. Unfortunately I didn’t have a big enough piece of fabric to do the deep border and I was reluctant to buy any more. I decided to cut up my leftovers into 2.5″ strips, I stitched these together in groups of three and then trimmed them to 2.5″  squares so I could sew them altogether to have a scrappy border of squares round the quilt. I’m really pleased with the effect. I’m going to bind it in the dark green which will finish it off nicely.

I called into B&M fabrics in Leeds to get some backing. I spotted some dark cream patterned cotton which matched beautifully. When I was working out how much I need I was in a magical place where you could buy two metres, cut it in half to get double the width…but you still had two metres in length!!!….I know, it was a lovely place!!! The result being I only bought 2m to back a single quilt.

Quilt backWhat a ninnie!!! As soon as I got home and looked at the piece I realised I didn’t have anywhere near enough. I had two options, I either delayed finishing the quilt until I could get back into Leeds, which could be another two weeks, or I pieced the back, so I chose the latter.

I pulled out every piece of fabric I had left from the quilt, plus all the leftover squares from the front. I arranged them on the back and had just enough to back the quilt. This pile is all I have left of all the fabric I started with!!

Scraps!

I think I rather like fancy backs! It adds another interest…and it uses up all the scraps too.

I sandwiched the quilt on my lounge floor, it’s the only place big enough. I’ve spray basted with 505, I love that smooth effect when you first baste the quilt top.

All I’ve got to do now is quilt it and bind it!

My Secret Garden

Posted in Quilting, Serendipity | Tagged , | 4 Comments

Cross-Stitch Box

Having caught up on my Anderson Farm quilt and the Splendid Sampler quilt I found myself with no embroidery project to do, well I can’t be doing with no hand-sewing to do, I mean, what would I do on a two hour train journey to London tomorrow, never mind two evenings on my tod in a hotel…there was nothing for it, I would have to start a new project!!!

Forget-me not box

I have a project box, it’s got all those quilt patterns, Santa kits, box kits that I fall for at shows, just waiting for the right moment. This was the moment!! I had a rummage round and found a cross-stitch design by The Nutmeg Company, they are based in Reeth in Swaledale, one of the more northerly Yorkshire Dales. I made a Periwinkle box by them last year, I bought this kit at the same time.

Summer in the DalesIt’s a small box that is part of a set of four, one for each season. What particularly appealed to me (apart from the fact that I love boxes!) was that the inside of the lid has a short quote embroidered along it. I bought the summer box, inside it says ‘Summer in the Dales, the swallows are back’ On the top and inside the lid is a typical summer Dales scene of green hills, a river and a village.

I’ve started with the sides, it has a pretty pink and green pattern along it with a bit of gold on, I’m not so sure about the gold yet, but I’m sure it will grow on me.

Summer in the Dales

As I mentioned tomorrow I’m off to London for a study day at Harefield Hospital on Tuesday, I’ve a bit of time in London to peruse the shops. I’m being very controlled and not going to my usual haunt of Goldhawk Road, I really am trying to reduce my stash! Instead I’m off to Delicate Stitches in North London, I’ve been once before many years ago, it is more of an embroidery and bead shop. My next big embroidery project needs some special threads so I might just be able to find something suitable here.

Linking up with Kathy’s Quilts for Slow-Stitching Sunday, why not have a look what everyone else is stitching today.


Posted in embroidery, Serendipity | Tagged | 7 Comments

Soft Furnishing Time

dsc_0006

Last month I spent my two weeks annual leave completely redecorating our bedroom (and bathroom!) whilst my OH was away on cadet camp. It’s easier to decorate when he’s not around as he hates all the disruption and gets very grumpy!

I just about managed to sew a new set of curtains for when he came back…well they were sewn enough to hang up to keep the light out, but they needed hemming and titivating. Over the last two days I’ve finally got round to finishing them.

s-l1600
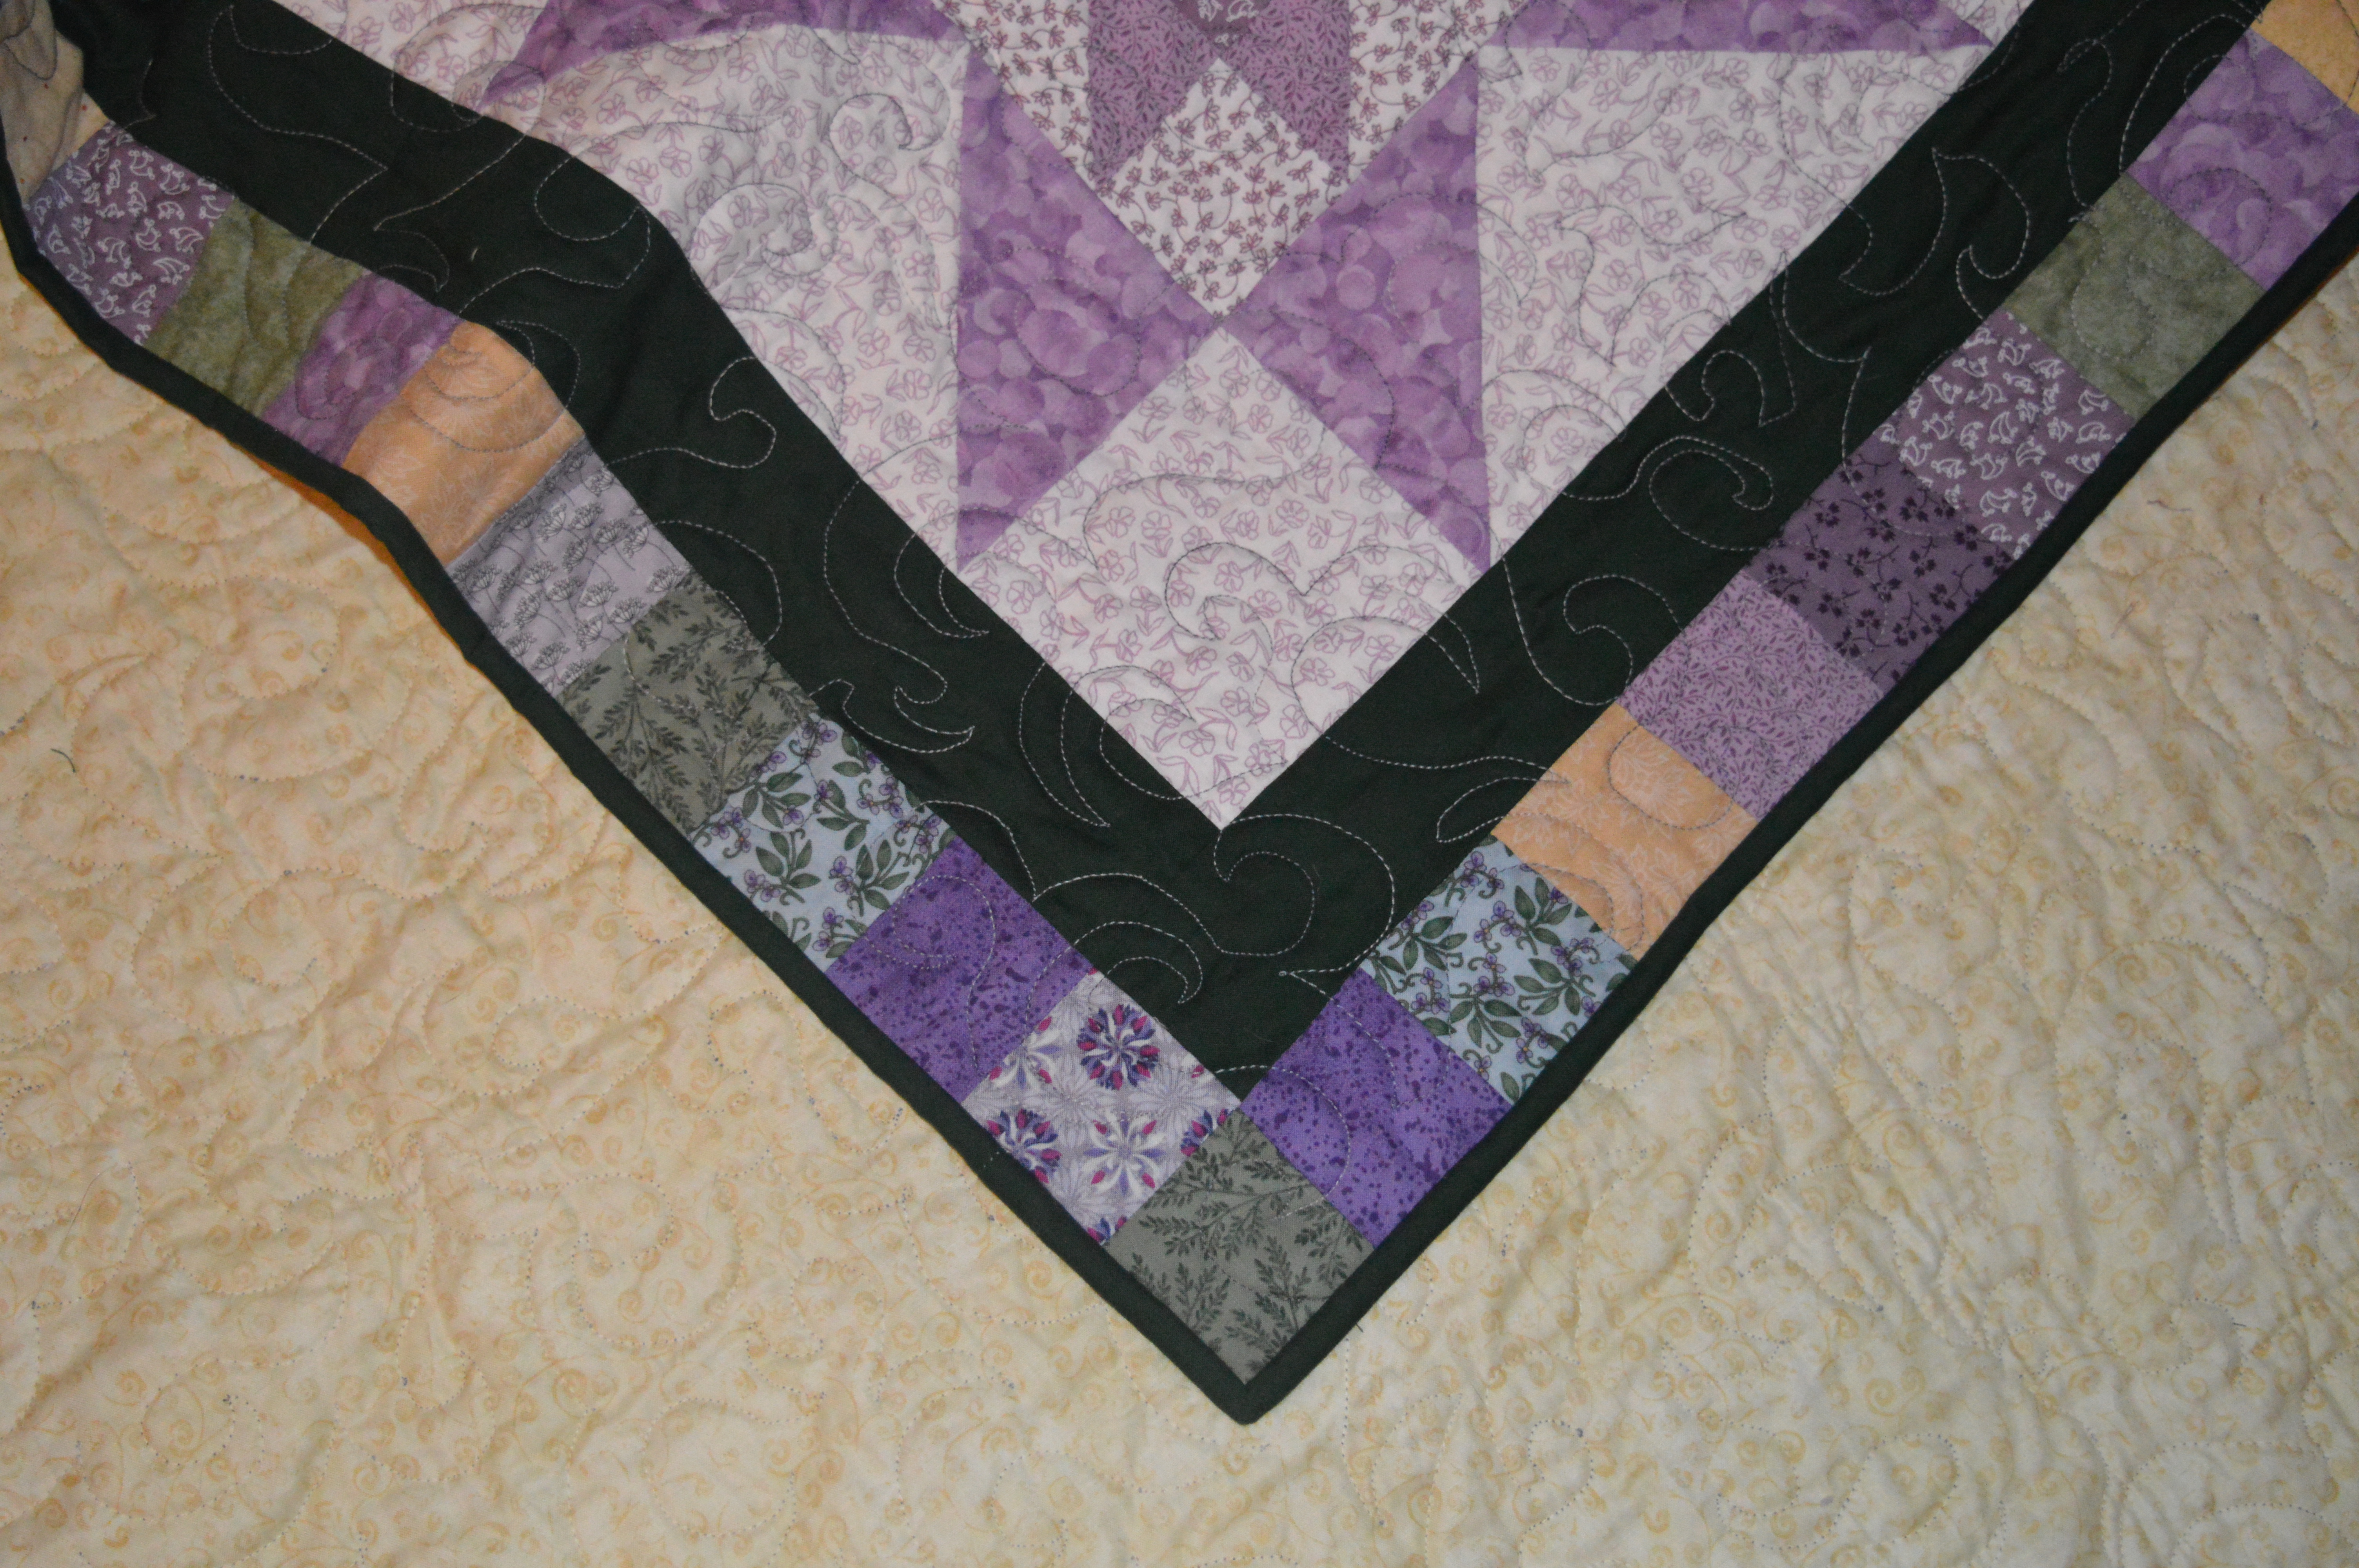
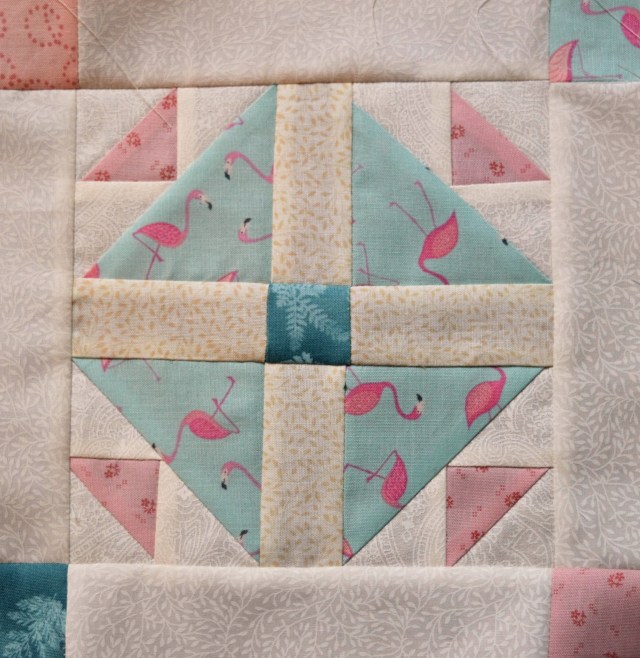
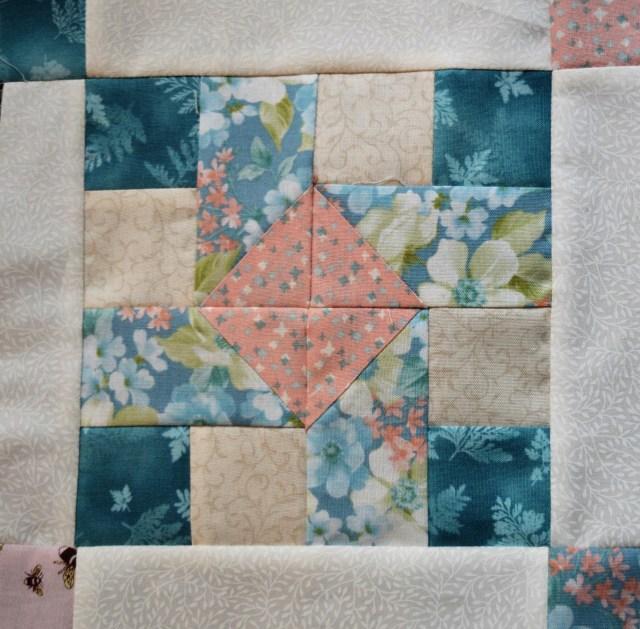
The fabric is a gorgeous linen weight by Porter and Stone called Isabelle, it’s got beautiful magnolia blooms with a background of duck-egg blue. I bought it on eBay, I just ordered a metre to start with, just in case it wasn’t what I wanted, but I loved it as soon as I saw it. My colour scheme was duck-egg blue and plum and this included them both. I’ve had a feature wall in dark plum for a few years and I wanted to keep that with the rest of the walls in the duck-egg. I wanted a calm, restful bedroom.

The pattern has quite a big pattern repeat of 24″, I think this must have been the traditional size of the printing rollers as I’ve had quite a few this size. I just meant I potentially wasted a fair bit as my curtains were 71″ deep, so I needed about 78″ for a decent hem and the top turnover. Don’t worry, I have plans for my waste!!

As the fabric is light in colour I used a blackout lining, it feels funny on the inside and does make the stitches look a bit dark (I think the ‘rubber’ comes through) but it does the job at keeping the bedroom dark.

dsc_0002

I like triple pleats on curtains, I bought some special curtain tape which gathers them into triple pleats automatically. If I’d sussed it out a bit better first I would have centred the pleats better.I still had the triple hooks left from the old set of curtains, I like these ones with the four prongs as they hold the pleat nicely.

The curtains went together pretty easily, the patterns matched up fairly well, I just had two lengths in each curtain so it was straight forward to sew. Yesterday I started hemming. I bought some bias binding to hem with a couple of weeks ago (it avoids the bulky turnover) and it is hiding somewhere in my sewing room, all 6m of it! So I turned under the fabric instead and hand-stitched the hem. As it’s a linen weight it has pressed pretty neatly. I made a 4″ hem to give a bit of weight to the bottom.

dsc_0001

I like buttons on my triple peats, I think they neaten it up and add a bit of interest. Ideally I’ll have tassels as well, hanging down from the buttons… I wanted just the right shade of plum for the buttons, not too harsh but enough to make a feature. I couldn’t find the right shade so I covered the buttons with the Isabelle, choosing bits that had the most purple on. I might have been better just going for plain duck-egg as they do seem to disappear now the curtains are  up. I’ll keep my eye open for the right shade of plum, maybe at the Knitting and Stitching Show in November, then I would like duck-egg blue tassels with glass plum beads on….

dsc_0003

Whilst I was stitching the buttons on I also stitched through the triple pleat to make it neat. It makes a big difference but it is hard work. Stitching through a triple pleat you don’t just have six layers of fabric and six layers of lining you also have six layers of curtain tape…don’t you just hate it when the eye end of a needle goes through your finger!! My mosquito’s (artery forceps) came in very useful for pulling the needle through!

dsc_0004

With the curtains hung I turned my eye to the first length of wastage…last year at Tea & Tents I made a lampshade at a workshop run by Kirsten Clark from Make & Do, I decided to make another, so after a few messages on facebook I found the link to order the kit. They are very simple to make, the fabric is attached to some sticky-back PVC and then stuck on the rings using sticky back tape. It does help for this to have a second pair of eyes as you have to roll the two shaping rings along the very edge of the fabric strip. Once the basic drum shape is made you then spend half an hour tucking the ends in and it’s finished! It sounds a bit Blue Peter-ish but the finished effect is very good and the last one is 18 months old and still looking fine.

dsc_0001-1

I’ve still got my 1m sample length left which will hopefully cover a little chair seat, the leftovers I’m thinking of making a bag with as my current bag is getting a bit worn…so you haven’t seen the last of this fabric!

dsc_0007

Posted in Home, Serendipity | Tagged , | 17 Comments

Fruits of labour from the Farm and the Garden

Since I decided to put the Splendid Sampler on one side for a couple of weeks to concentrate on my other two BOM’s I’ve made great progress…

My Secret Garden quilt is almost there now, this is a BOM from Pat Sloan (she’s one busy lady!!), we’re just waiting for the final block at the beginning of October and I can finish it. A couple of blocks were repeats of earlier blocks but with different colour combinations, it was amazing the difference it made, though I did find I had to really concentrate to work out which fabric was needed for each block. I decided to start sashing, I took a block with me to the Northern Quilt Festival and tried it against a few different greens. I always have problems with plain green as it seems the colour I want isn’t available!! I found a dark green that would suffice.My Secret Garden

I cut 2.5″ strips and also cut 2.5″ squares in different shades of gold for the corner stones. The sashing went on pretty well and I like the effect of the dark green, it really shows off the blocks. As soon as the next block comes out I can get this quilt finished. I’m thinking of giving it to my mum for Christmas, it crossed my mind that she had asked two or three times what I was going to do with it and I gave last years BOM to my in-laws, so she can have this one.

Andersons FarmI turned my attention to my Anderson Farm quilt, this BOM is by Lynette Anderson. I got a bit behind with it when I was struggling with needle turn applique, things improved when I decided to use bondaweb instead, but I still felt quite a bit behind.

I’ve been embroidering block 6 which is a red barn with two cats on the roof, this block just needs the decorative button adding. This month the button is a barn quilt of one of the mini pieced blocks. I’ve stopped stitching on the buttons straight away as I can see they will cause problems with quilting.

Anderson's Farm

I pulled all my completed blocks out of my workbox and realised I’d done more than I thought I had. I methodically went through each month, stitching the bits I’d missed. The main blocks missing were the little hearts, I’d done one with needle-turn quite successfully at the beginning but none since, mainly because I wasn’t sure whether to use bondaweb like all the other blocks (apart from the first one) or whether to do it properly! I decided to stitch them with needleturn applique and actually they didn’t take long. I could then stitch the block groups together, which made me feel a lot happier about my progress.

Anderson's Farm

Anderson's FarmThis week I’ve been stitching ‘First Love’ which has two cute rabbits on, I just need to add the button for the second rabbit, isn’t it a gorgeous button! ‘Peace Offering’ is the fox one, I’ve just to finish the embroidery on this one. These two go opposite each other, I realised when I started ironing on the shapes that I had forgotten to reverse the image, so mine is the other way round, I had to remember to stitch the ‘other’ bunny as obviously I couldn’t reverse the button!

Anderson's Farm

I’ve just two strips of squares to stitch together and I’m up to date and feeling smug 🙂 I’ve no idea what the layout is like, but having arranged my blocks together it is growing on me, I like it! I think the next installment is the last one, so that will be two quilts finished!

I’m linking up with Kathy for Slow Sunday Stitching and Super Mom No Cape for Vintage Embroidery Monday, why not have a look what everyone else has been stitching.

Anderson's Farm

Posted in embroidery, Quilting, Serendipity | Tagged , , , | 16 Comments

Pattern Shame!

I’ve been having a bit of a sort out and tidy up in my sewing room this afternoon, I decided to tackle my pattern shelves. All my patterns are on a billy book case, I have plans to make fabric boxes, so I can have one for skirt patterns, one for shirts…you get the drift! As a short term measure I thought it might help if I put them into some spare baskets that were cluttering up the landing.

I decided to have one basket for independent pattern designers, another for popular patterns and one for the rest.

I realised just how many patterns on the shelves were not actually for me, lots of children’s patterns and ballgown patterns! The kids ones were mainly ones I’d sewn for my own family, with a few bridesmaid dresses made along the way. I don’t want to throw them away as one day I might have little people to sew for again! The ballgowns are mainly from the 1980’s when I was a student nurse in London, we had a hospital ball every year and no money, so I used to get the job of making every one a ballgown! When I came back to Yorkshire, I joined Rotaract where we regularly had black tie dinners, well you needed at least one new one a year!  I made a few wedding dresses along the way (only two of them were mine!!) So I’ve ended up with a big pile of evening wear patterns. I’ve put them all in the box with the kids patterns in the box room. Some of them I’m keeping for sentimental reasons…seems a bit daft getting sentimental over a pattern, but this was my first ballgown pattern!

dsc_0380

My ‘shame’ is realising just how many patterns have never actually been used!!! I’ve fallen for patterns but not yet got round to making them up. The worst culprits seem to be the independent patterns! Indie month on My Monthly Stitch has a lot to answer for, they would showcase a designer, I’d click over to the website and before I knew what was happening I’d bought another pattern or two!! I’ve just counted up and I’ve fifteen indie patterns waiting to be used!! Yet others, like the Fumeterre skirt and the Gabriola skirt I’ve made several times!

dsc_0385

I think I really need to make a concerted effort to try all these patterns! I’ve probably just as many unused patterns from the big four! It’s not like I haven’t got them fabric to make alot of them up! Please tell me it’s not just me 🙂

With a bit more shelf space available, I’ve been able to put my project boxes on the shelves. I’ve a box for the fabric for each of my quilt-a-longs, and one for the finished blocks of the Spendid Sampler Quilt. I do like things to be organised, I’m just not very good at keeping them that way!

dsc_0386


Posted in Home, Serendipity | Tagged , | 6 Comments

Itchy Feet

We’re about two thirds of the way through Splendid Sampler now and I think I’ve just got three blocks left to embroider with my Anderson’s Farm quilt as I’ve two on the shelf untouched and I’m expecting one in the post pretty soon. I’m beginning to get itchy feet to start an embroidery project I can get my teeth into..

I know quilts are a pretty big project (well three big projects actually!!) but I seem to have spent the last six months stitching lots of little blocks, I’m missing the continuity and progress of bigger embroidery projects…I’ve a couple planned but I’ve decided to concentrate on finishing the Anderson Farm quilt and let the Splendid Sampler take second place for a while. My third quilt-a-long is just waiting it’s final block.

As it is I’m pretty much up to date with the Splendid Sampler. Whilst I was decorating cakes (and rooms) they were perfect little evening projects when I just had an hour or two to spare;

dsc_0383-5

This pretty embroidered one kept me quiet during a long hospital appointment! It’s designed by Fiona Ransey and called ‘Hearts and Flowers’ The instructions called for chainstitch round the heart and back-stitch for everything else, but an example by Lynette Anderson used blanket stitch, I rather liked the effect so that’s how I stitched it. I used a variegated DMC thread for the whole block which did make life easier!

dsc_0380-7

This block by Heidi Kaisand is called Hen and Chicks but I decided mine is Flamingo and chicks, I like the cleanness and simplicity of this block. However it wasn’t quite so simple to make as the instructions used lots of triangles with all the inherent problems of stretch that they can cause. I treated myself to a bottle of Best Press at the Quilt Show last month, it came in very useful with this block!

dsc_0381-7

This one is called Traveller by Pat Sloan, she’s one of the organisers of the whole project. It was nice to have a fairly simple quick block.

dsc_0379-9

‘Circle of Friendship’ by Michele Muska was a bit of a challenge, particularly as all the pieces had to be cut from a template. What I like about this block though is that I’ve managed to include nearly all my fabrics.I was really pleased with how this one came out.

dsc_0382-5

This is the latest block, it’s called ‘The Icing on the Cake’ It’s just waiting to be embroidered now.

I’ve been trying to decide which fabric to use to join the QAYG blocks together. I took photographs of four blocks on different fabrics, green, blue and cream. I put them on facebook to see what people thought, blue seems to be the favourite by a long stretch. If I use this blue I think I’ll have to get a bit more, just to make sure I’ve got enough! What do you think?

Posted in embroidery, Quilting, Serendipity, Splendid Sampler Quilt | Tagged , , | 3 Comments

Rose and Cherry Blossom Wedding Cake

In April one of our WI ladies got engaged, it was rather special as she was getting married for the first time in her 70’s. She’s an amazing lady, always laughing and smiling. In a rash moment I offered to make the wedding cake, if anyone hears me do that again, feel free to kick my shins sharply! She accepted my offer!

Wedding CakeWhen we discussed what she wanted, it was royal icing and figures on the top. I said from the start, I don’t do figures, I do flowers, if you want figures then you’ll have to buy them ready made to put on top. Royal icing…I’ve done it before, stressful but I did it, deep breath, I can do this!

Lucky for me her fiance didn’t like the idea of figures, so she was then in a quandary. She wanted something personal so I suggested something along the lines of the wedding cake I did for friends last year with a flower to represent each of them. Her fiance is a professor in Japanese culture, so I suggested cherry blossom to represent him along the bottom tier, white roses (of Yorkshire) to represent the bride along the middle, and both united in an arrangement on the top.

She loved the idea so we were all happy!

Making sugar paste rosesI made about ten white roses. I use flowerpaste to get the delicate look of flowers. It should be rolled out thin enough to read print through. The centre is slightly creamier to give a bit of depth. I wrapped the stems in green florist tape and made a few rose leaves to add a bit of colour to the arrangements.

I’d not made cherry blossom before but I found a good video on u-tube, they’re pretty similar to primroses really and I’ve done a few of those. I used micro-stamens for the centre and gently dusted the edges in a light purply-pink. The buds were very easy to make, I wrapped all the stems in brown florist tape to make it look like a twig.

Cherry blossom on Wedding Cake

I’d made the rich fruit cakes earlier in the summer as they need at least 6 weeks to mature. There was a 9″ cake and a 6″ cake which should provide plenty for their fifty guests. I marzipanned the cakes in August, all I had to do was flat ice them!

What I hadn’t bargained on was the effect the weather would have. The week I chose to royal ice the cakes it was really humid and the icing took forever to dry!With royal icing you have to ice the sides one day, let it dry, ice the top the next day, then second coats….as you can see it’s 4-6 evenings work depending on how many coats you need. My icing was taking a couple of days to get even vaguely dry! My second coat on the sides looked pretty good when I put it on…the next morning it was a disaster zone!! The icing had sunk into a puddle round the bottom!

After more than a few minutes panic I decided to cut the puddle off and I would basically cover the bottom edge with ribbon. I managed to get a neat enough finish on the tops of the cakes, especially as one would be mainly covered by the top cake, and there would be flowers on the top!

Cover up time!

Once everything was dry (after about a week!!) I used a fine nozzle to pipe filigree over the sides of the cake, it’s great is filigree, it covers a multitude of sins and is actually quite easy to do! I piped shells round the top edges to neaten that bit up. I decided I needed a bigger base than the 12″ board it was on so I ‘double-mounted’ it with a 14″ board, I used mauve ribbon around the boards and piped a fine line of shells round the 12″ one. I really like the double board effect.

Wedding Cake

This week I just had to put the arrangements together and ‘finish’ the cakes. I taped three roses together with a  couple of leaves and sprigs of filler flowers. I did it a bit like a button-hole, I wrapped the stems in ribbon and tied a bow with long dangling ends. This sat on the middle ledge, secured with a wire hook.

Wedding Cake roses

The cherry blossom needed to be a bit longer so it would curve around the cake. I used quite a few buds and flowers to get the effect I wanted. It nicely draped over the two tiered base boards.

Cherry blossom on Wedding Cake

On the top of the cake the bride didn’t want too many flowers so I did a ‘corsage’ style arrangement with about five roses and several sprigs of cherry blossom. A couple of sprigs of filler flowers just helped to soften it. Again I trimmed the wires and wrapped them in ribbon with a nice bow at the top.

Wedding Cake

I still had to sort out the bottom half inch of the cakes where the icing had puddled. My plan was to cover it with a nice, wide ribbon. I pinned it on only to find that because the cake wasn’t perfectly flat with perfectly straight sides, the ribbon wouldn’t lie flat, it looked awful. I tried the little diamond pins like I used on the diamond wedding cake…it still looked like a dogs dinner! In the end I piped a line of shells big enough to cover the offending area. I was happy again!The Cherry on the Cake

The final touch was a request from the bride, she wanted a ‘cherry on the cake’, a reference I think to conversations with her close friends about the relationship and the forthcoming wedding. It was ‘the cherry on the cake’

I could only pipe round the bottom layer in advance. The top layer had to wait until I was at the venue! I took the cakes to the venue yesterday afternoon, stacked them, piped round the top layer and pinned on the arrangements. It was the first time it had all been together so I was pleased to see it looked fine, ok I could see all the faults in it, but I’m happy with the overall effect.

Wedding Cake

It was the wedding today, the sun shone, the bride looked beautiful and they both looked so happy, it was a beautiful service and I was glad to have been part of their day.

dsc_0424-1


Posted in Serendipity, Wedding | Tagged , , | 16 Comments