The Seaside Quilt HQAL

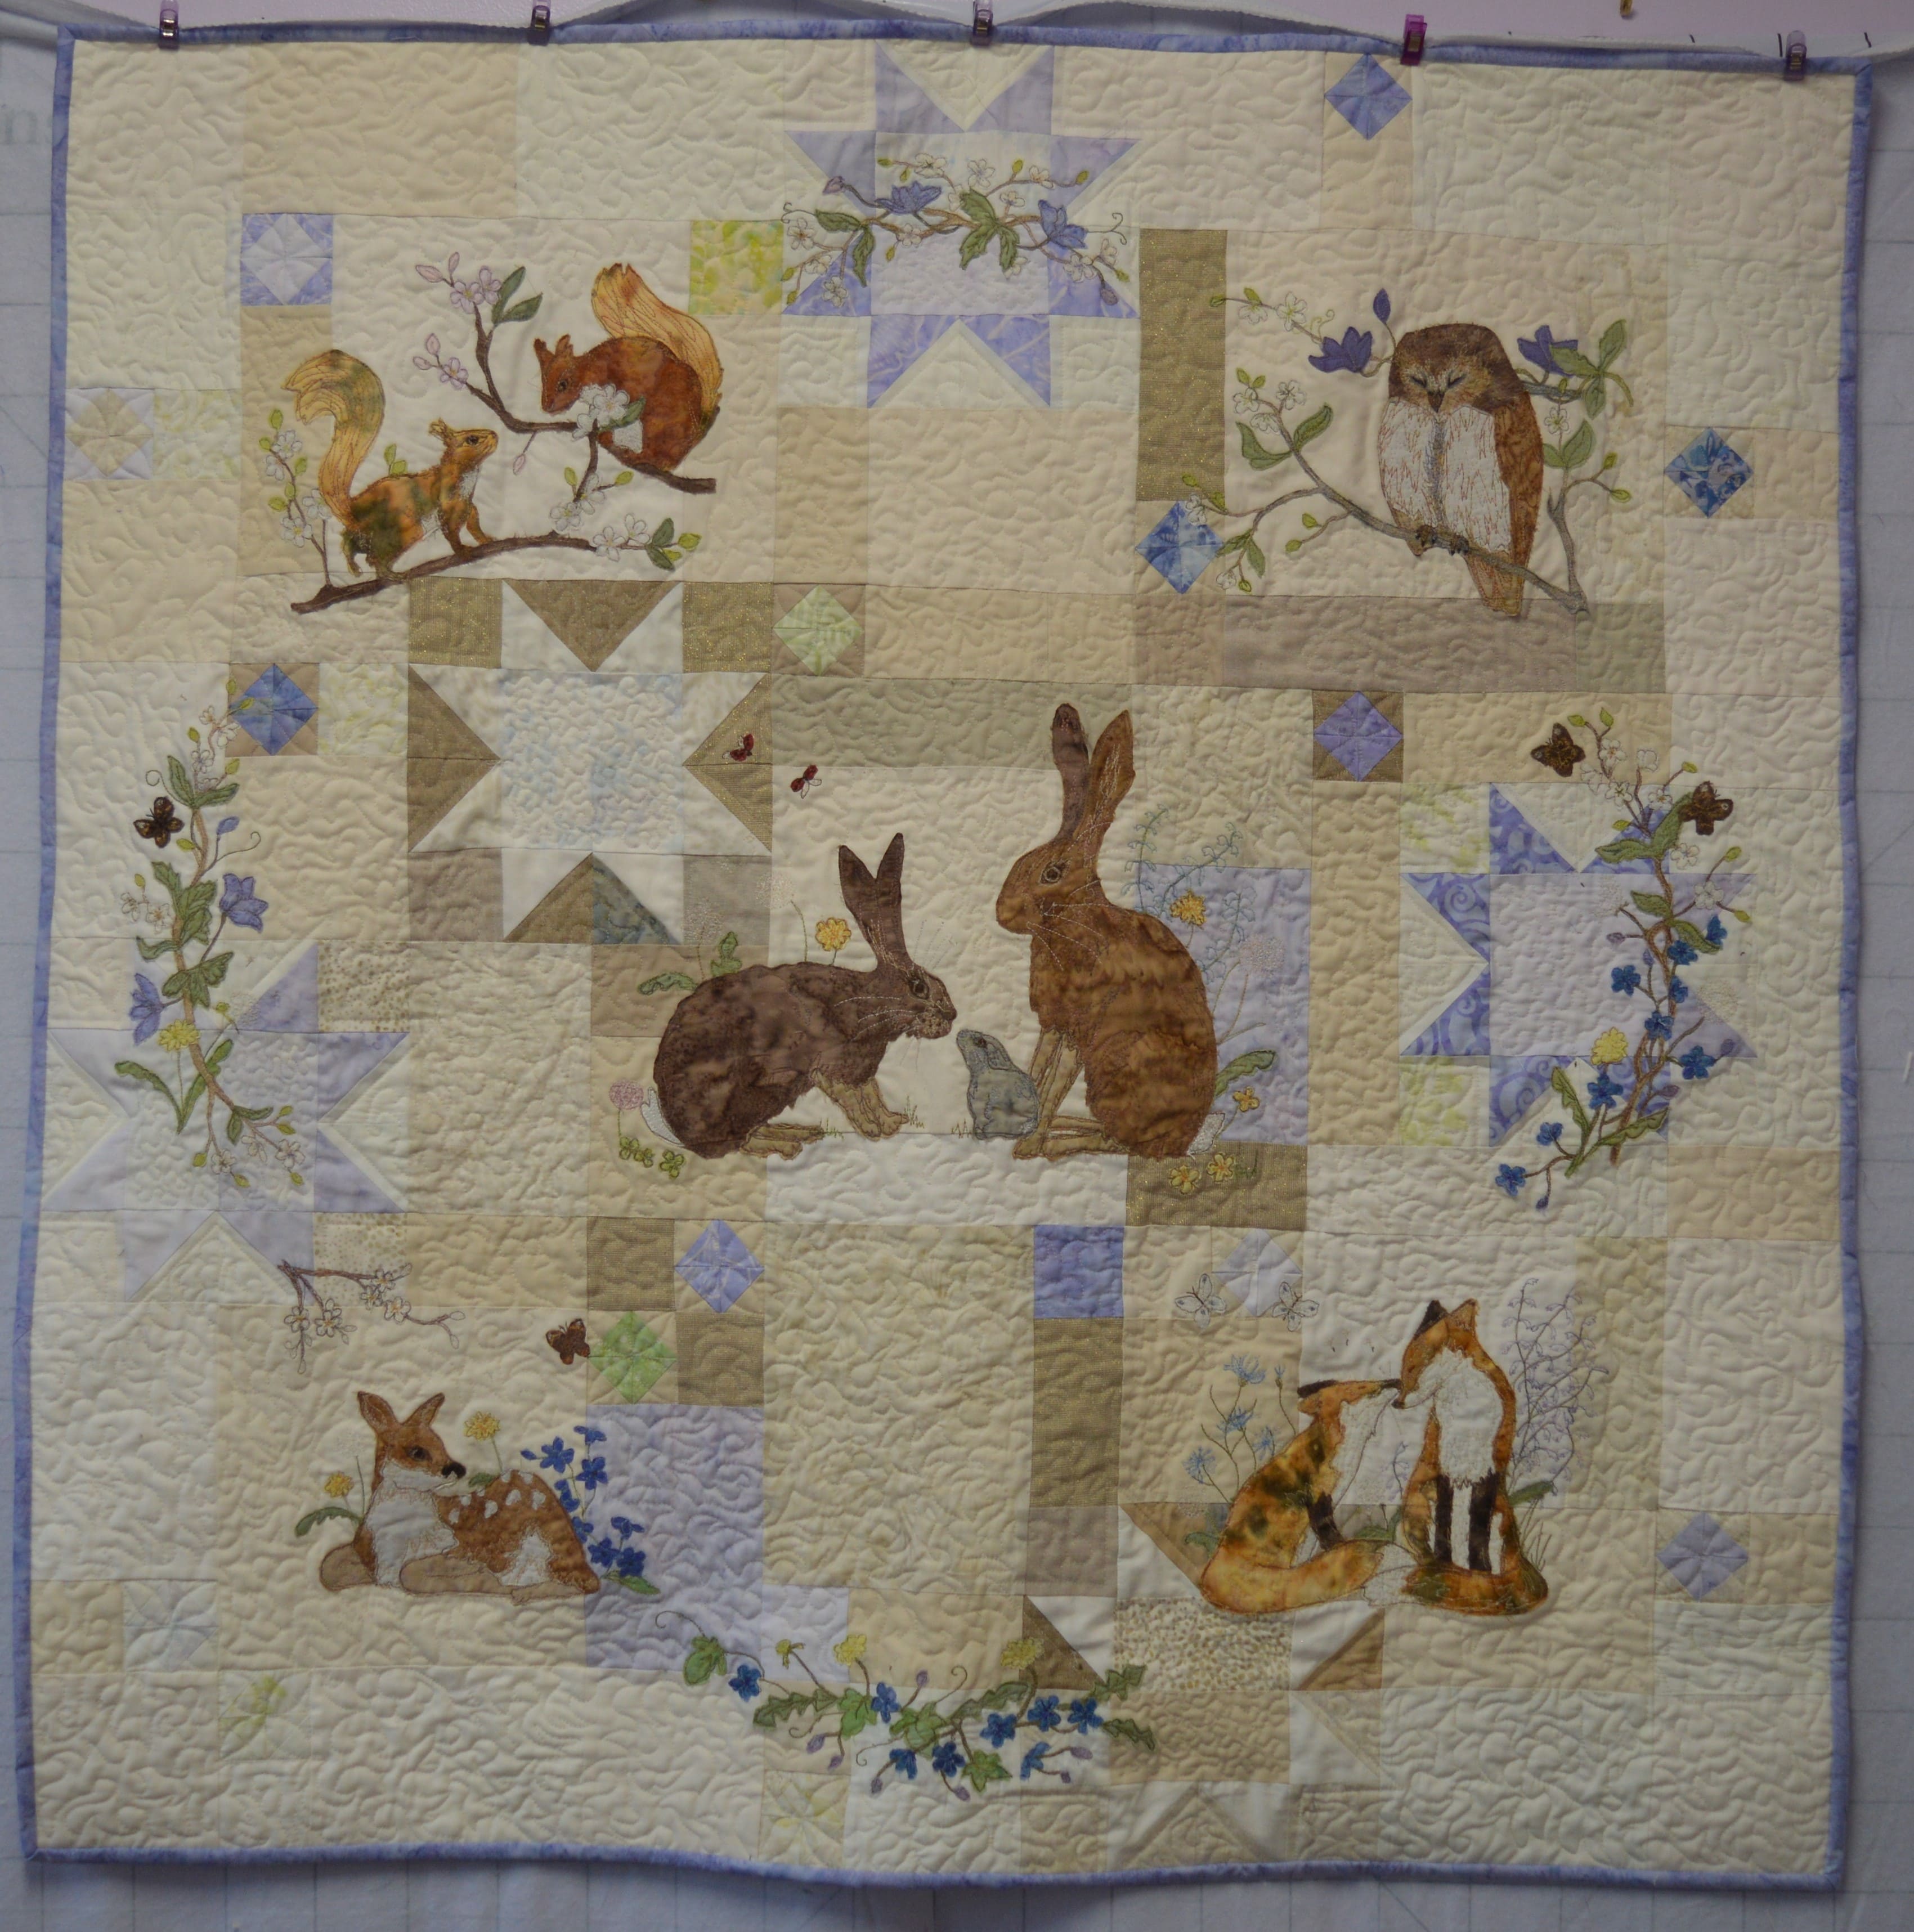
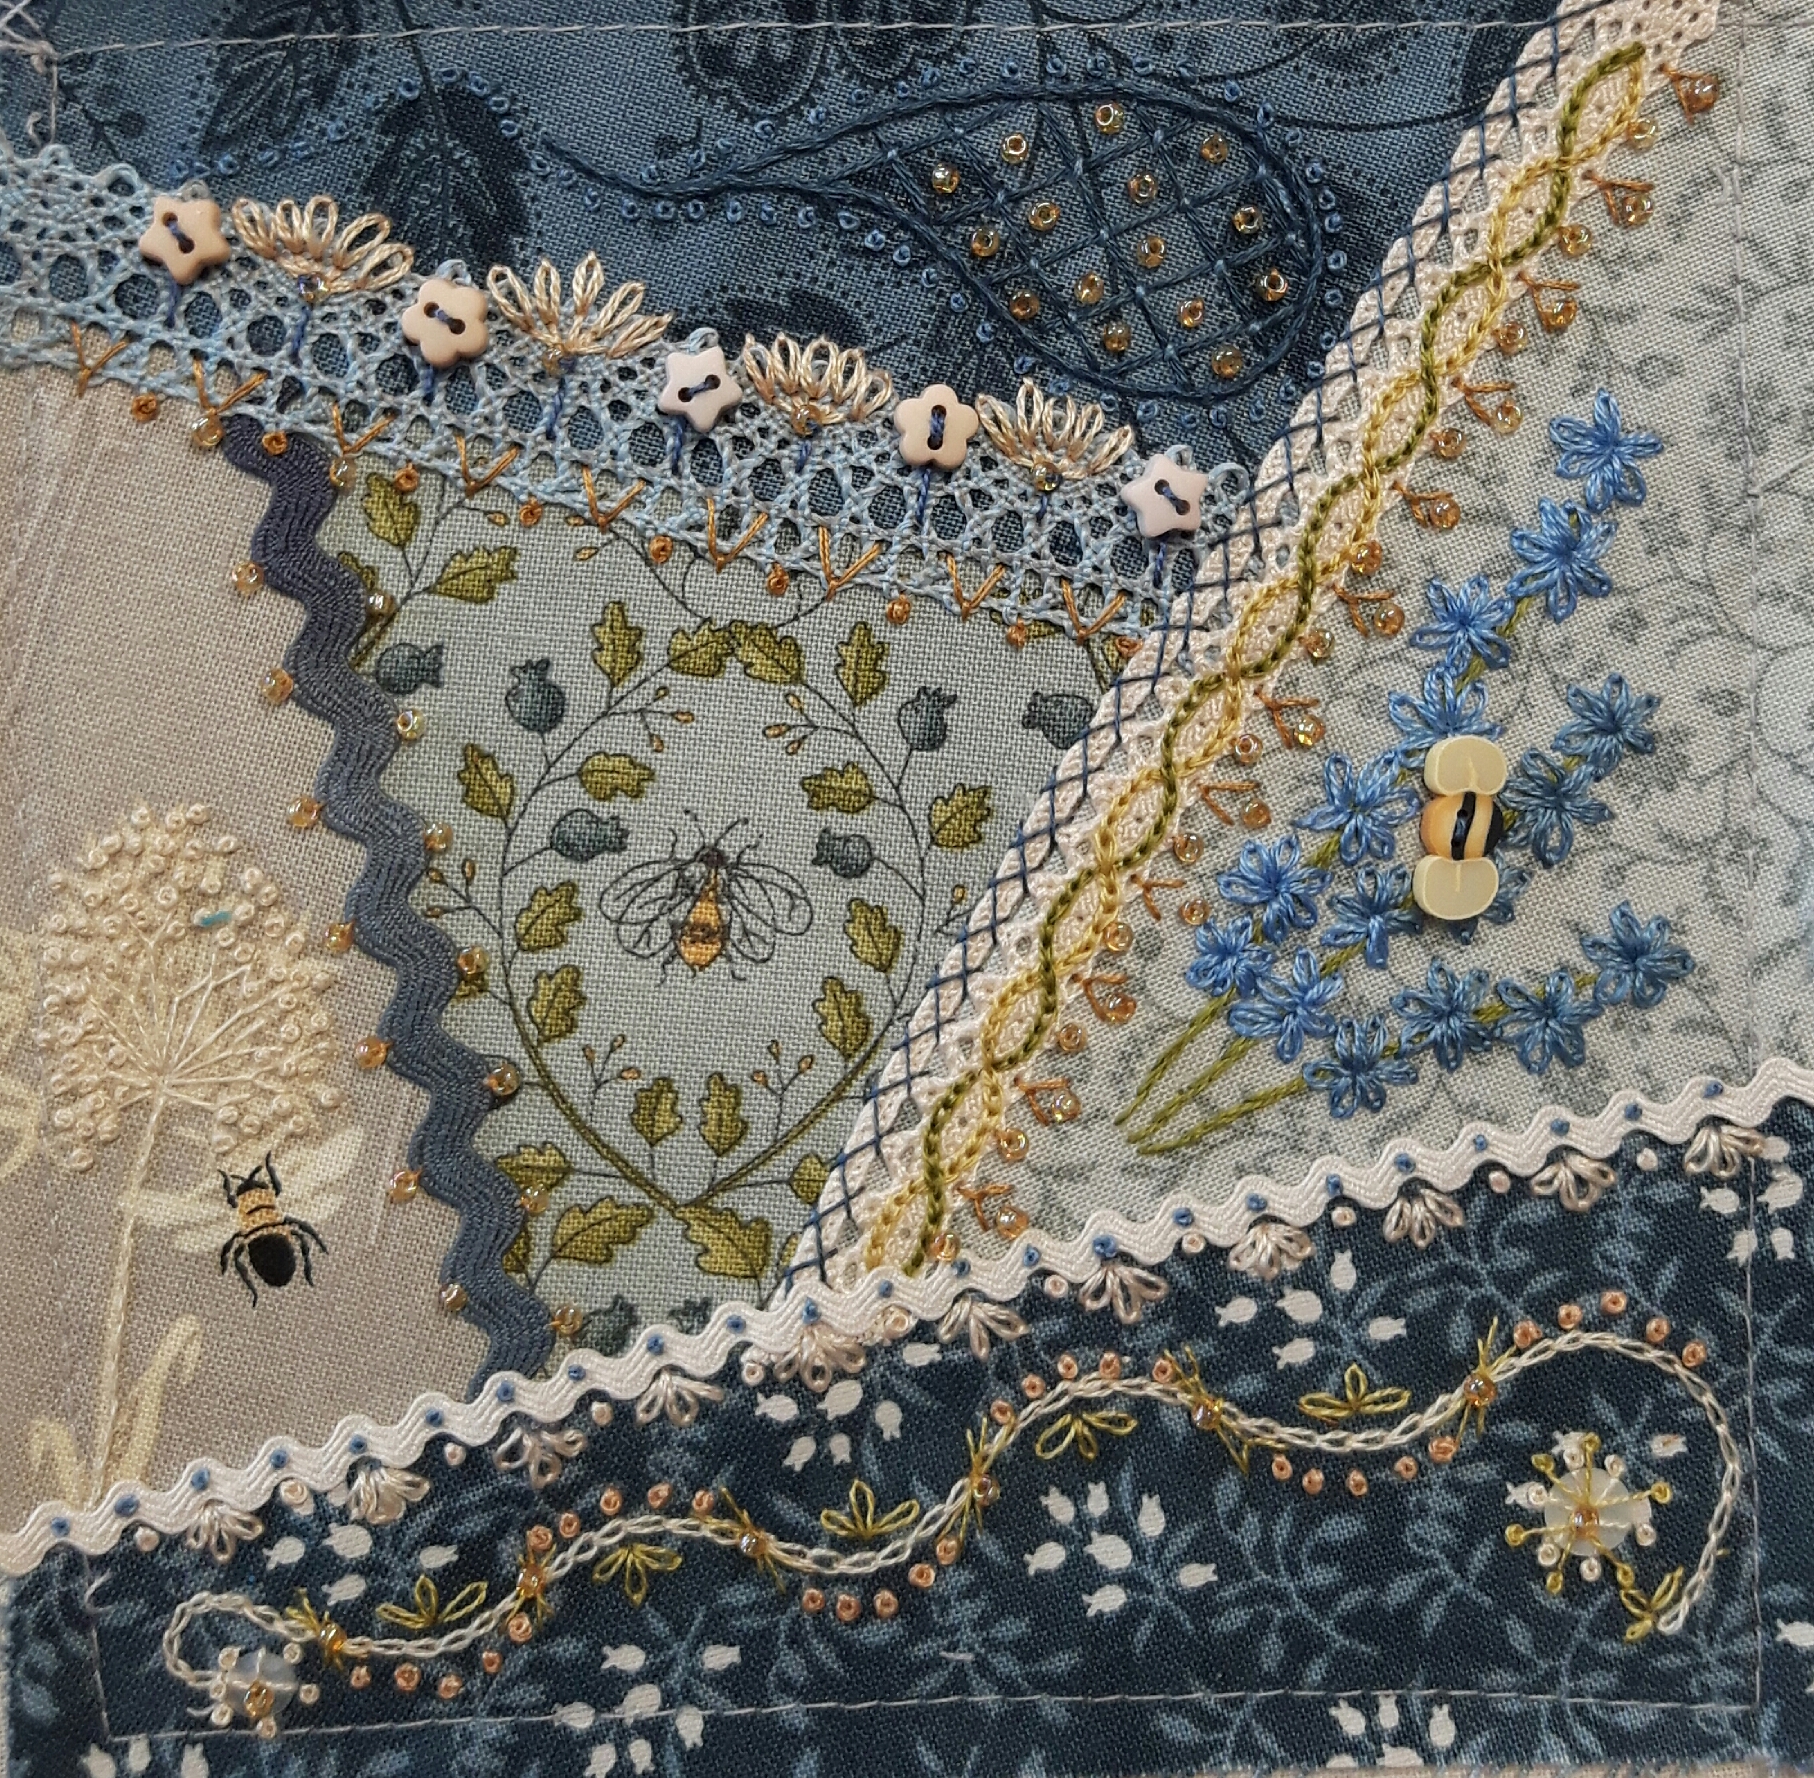
Over the last week I’ve managed to find a nice routine with my hand-quilting, I’m using a large lap hoop and I can nicely sit with it whilst watching TV on an evening with my OH. Three weeks ago I’d just started hand-quilting my seaside quilt having planned to do a ‘sea’ shape but settled on a clamshell shape when I realised my ‘waves’ were creating the clam shell and both were apt really for a seaside quilt. This was my ‘progress’ last time, as you can see I had just started outlining the central lighthouse block…

I’ve had a slight change of plan since then, I’ve stitched half way round both borders of the lighthouse block using a dark blue and a stone coloured sulky thread but somehow it just didn’t work for me. I started on the clamshells which can be easily stitched with rows of ‘waves’, all in one direction which I find much easier to quilt. I’m quilting straight across blocks like the friendship star or the pinwheels, just leaving the central embroidered or fussycut squares to quilt round just inside the seam.

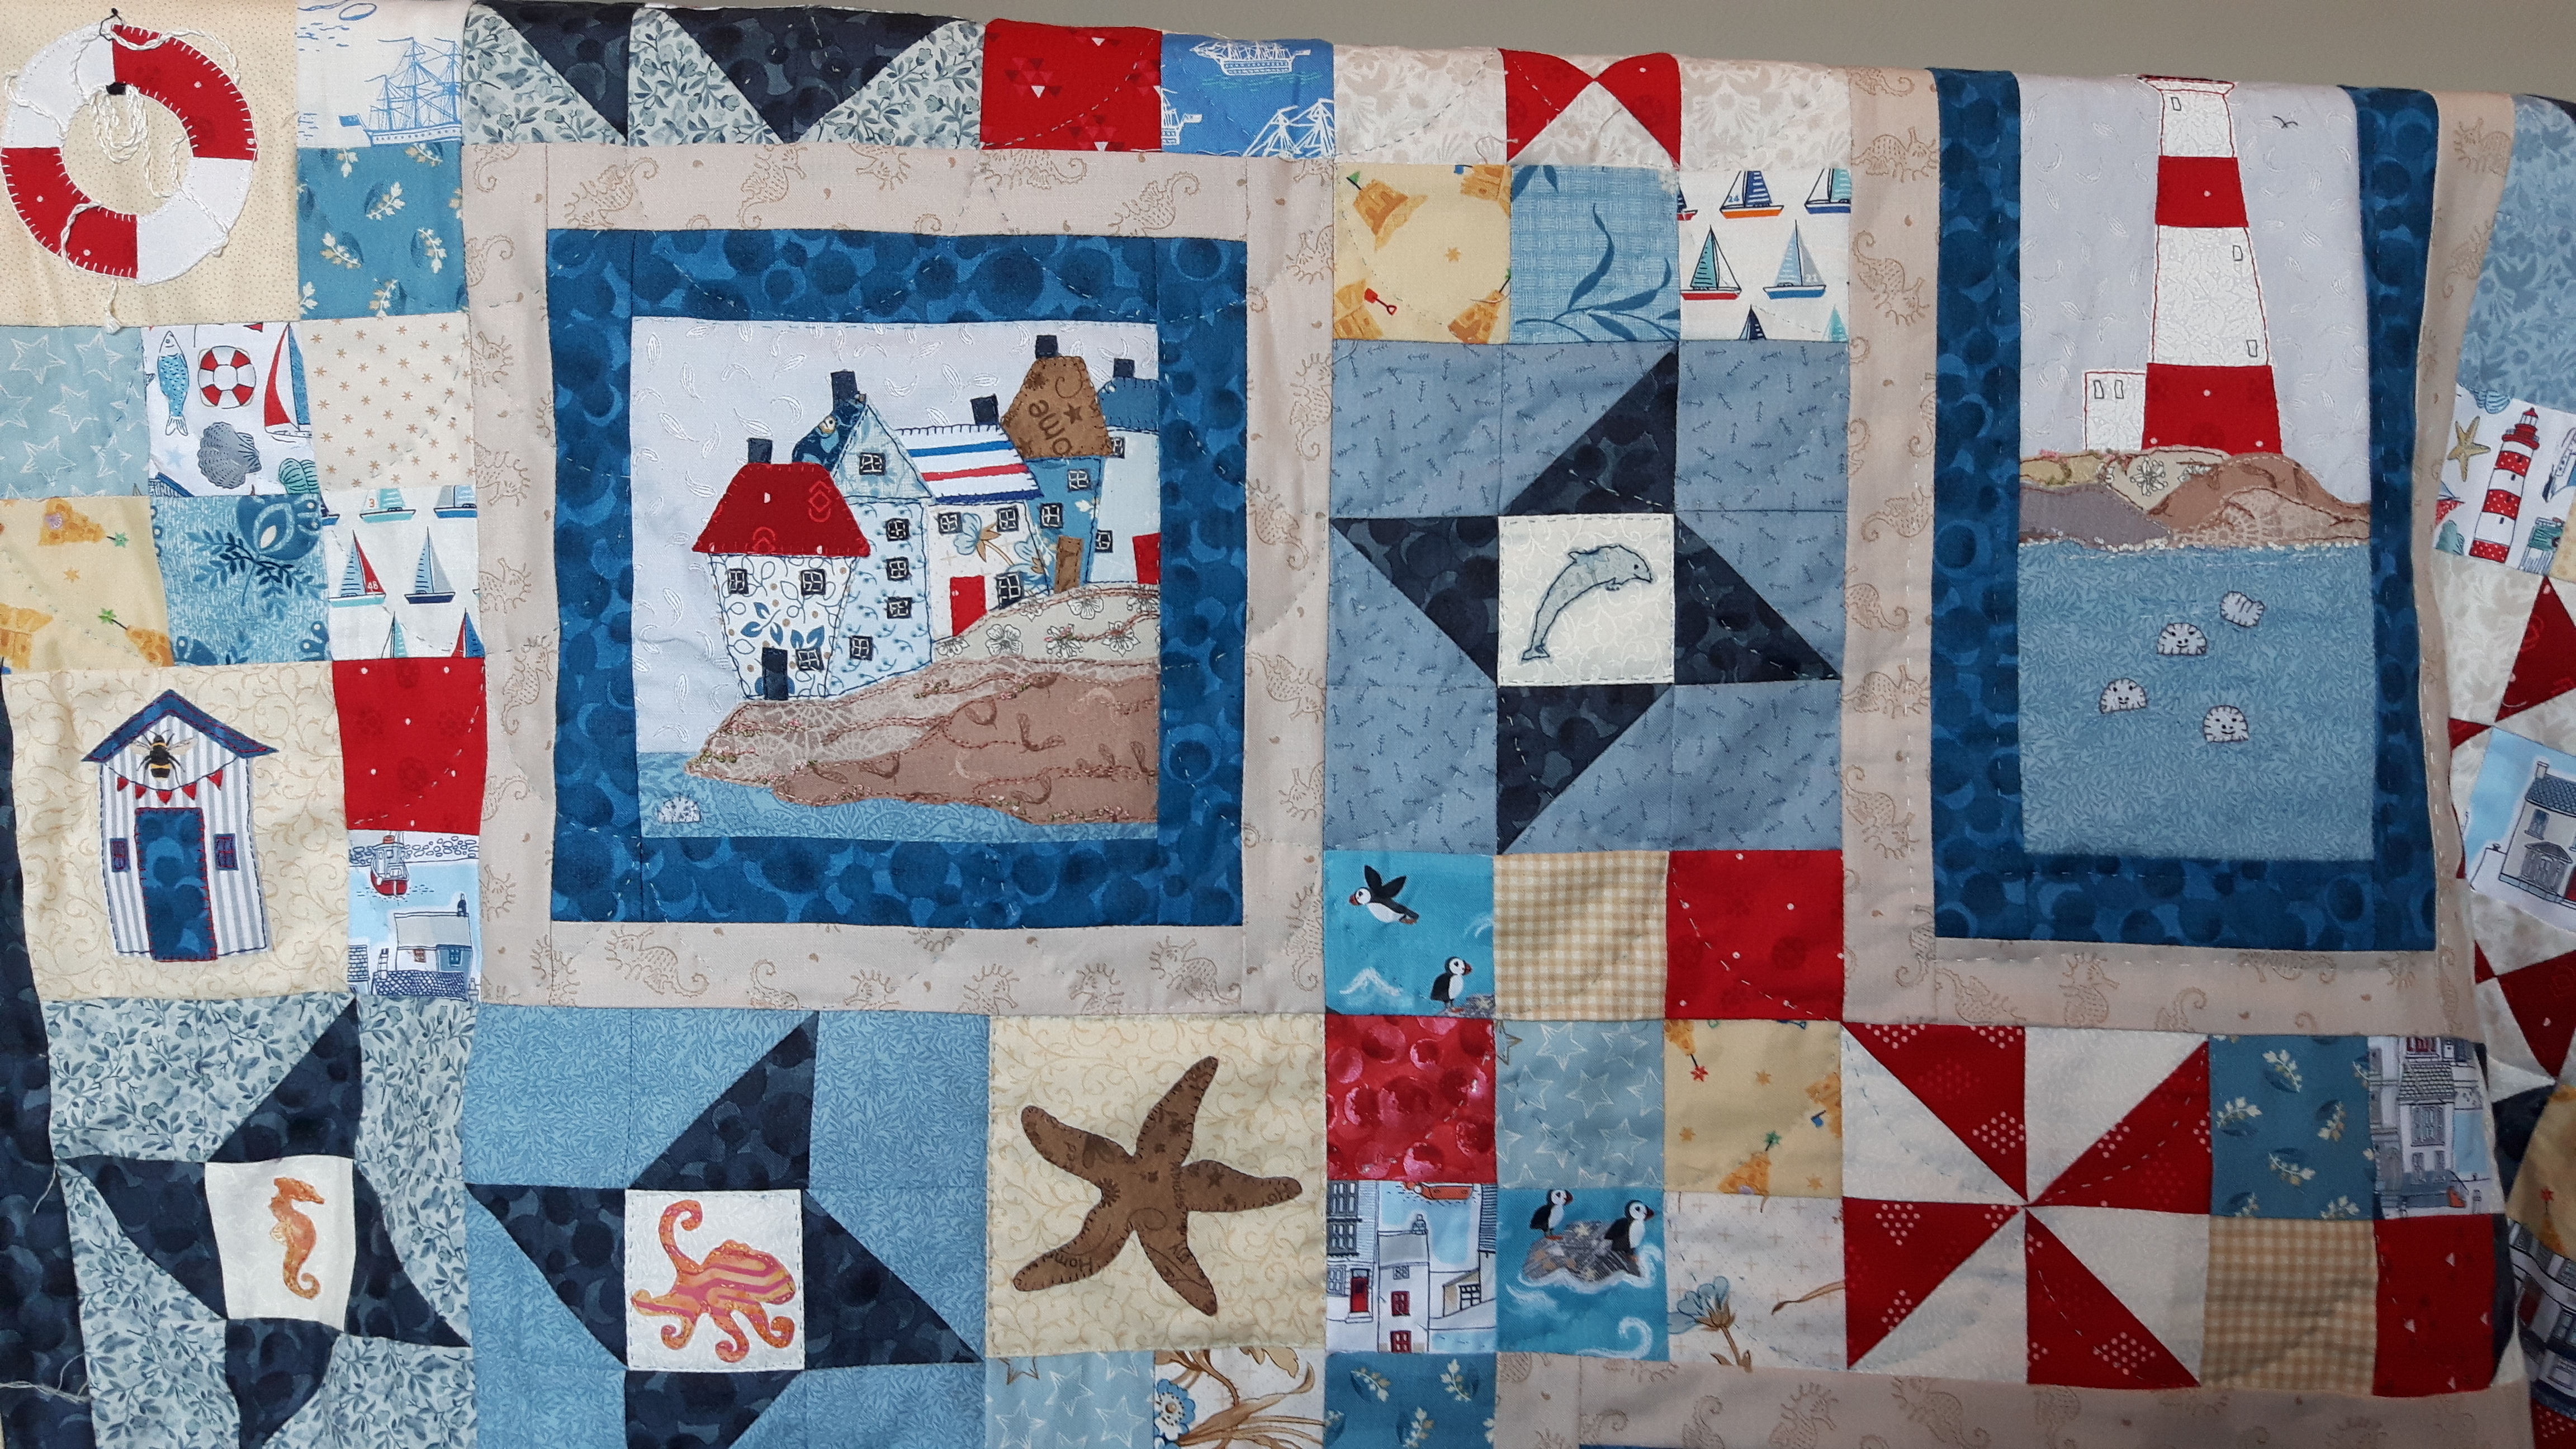
It’s such a busy, cheerful quilt that it’s not easy to see the quilting, but I’ve continued the clamshells across the double borders and then just quilted just in from the applique blocks such as the cottages, starfish and dolphin.

I’m not finding this quilt as easy to actually stitch as the cottage garden one and I’m blaming the wadding. This one has Hobbs 82/20 which is what I usually use for my quilts. For the cottage garden quilt I thought I had ordered the same on line but when it arrived it felt lighter so I wasn’t sure what it would be like. It turned out to be a dream for hand quilting, malleable and easy to stitch with a nice loft to give a cosy, cuddly finish. It’s a shame I don’t know what it’s called!! I’ve still got some scraps so I might send some to a couple of suppliers to find out what it’s called so I can use it next time I hand quilt.

As it hasn’t been as easy to actually stitch I’ve done a fair amount of stab-stitching to try and get the stitches anywhere near small enough (and I’m more of a big stitch quilter!!) so I was quite pleased that it still looks reasonable on the back…

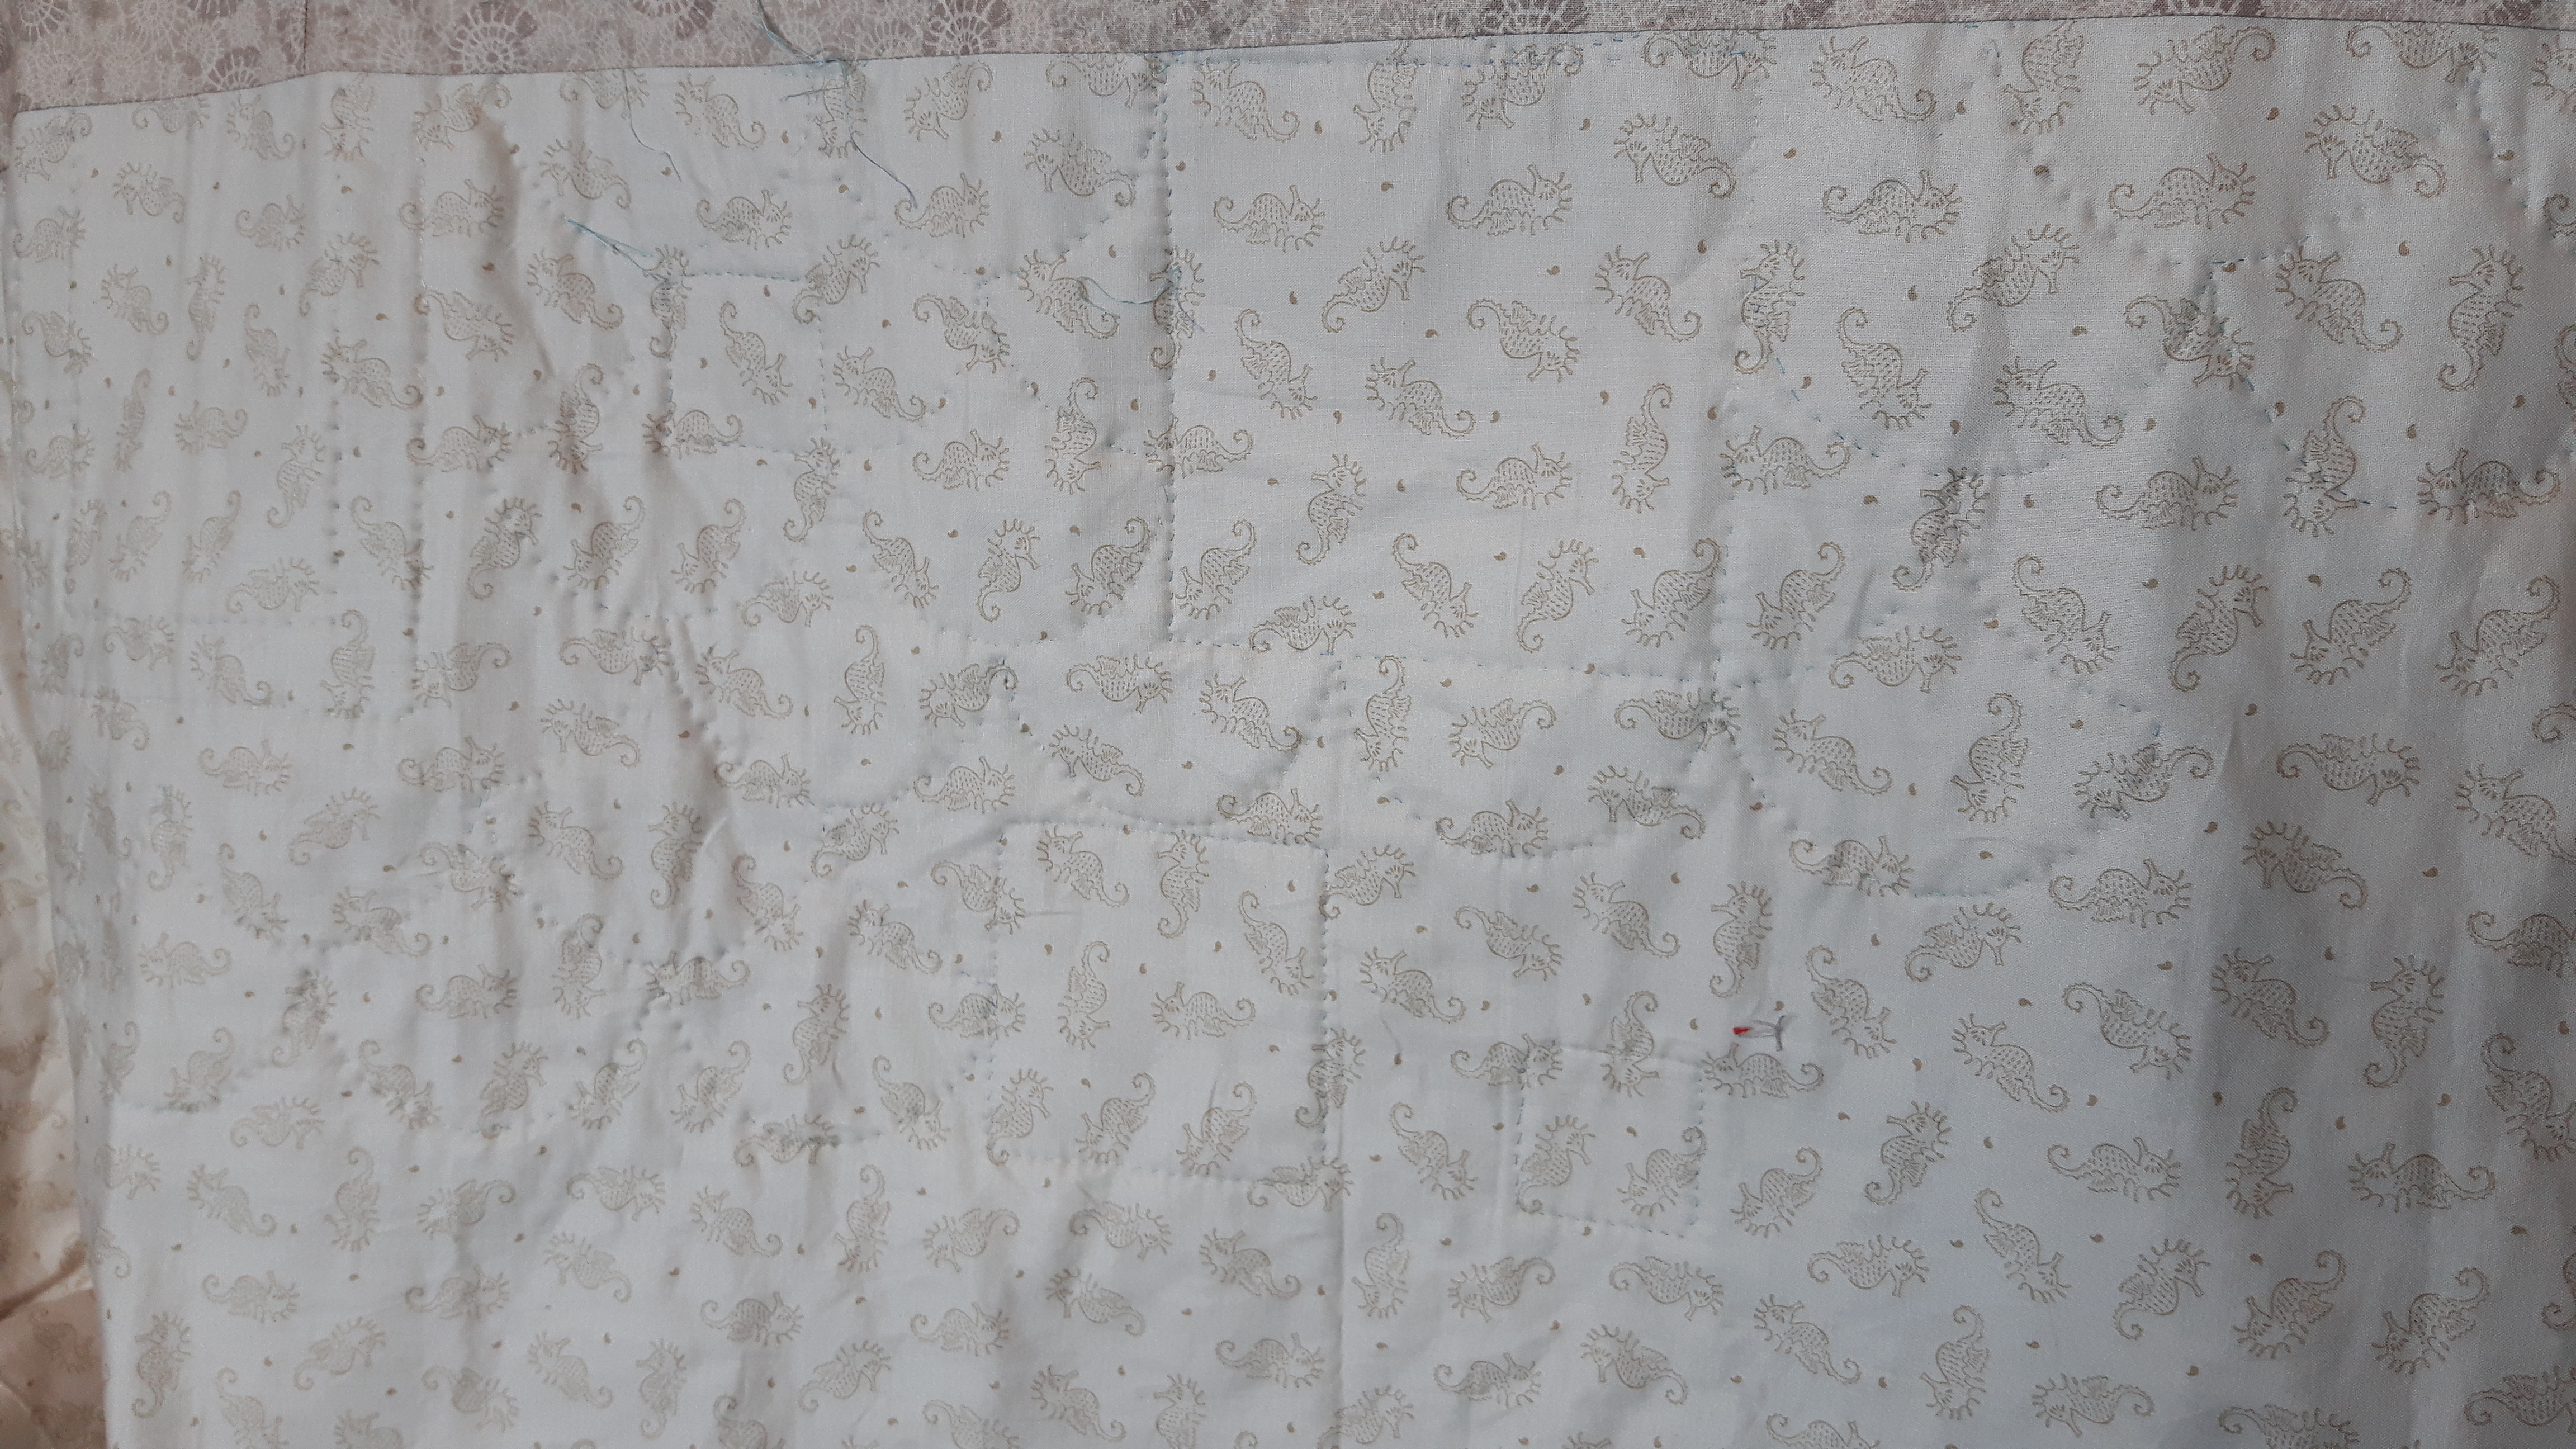
…the wave effect seems to show more on the back!

I’m just using one colour a variegated Sulky thread now, it’s mid blues and greens and so far it’s blended in nicely with everything. I’ll pull out those first couple of threads round the lighthouse and carry on with the clamshells.

If you fancy making this cheerful quilt, it’s from the book by Kathryn Whittingham of Patchwork Katy called the Seaside Quilt. It’s written for beginners and hand-stitching so the instructions are really nice and clear. I’ve machine pieced and hand embroidered it but you could even do free machine embroidery if you prefer.

Hopefully next time I share this quilt I’ll have done more of a definite area, now I know what I’m doing !

Hand Quilt Along Links

This Hand Quilt Along is an opportunity for hand quilters and piecers to share and motivate one another. We post every three weeks, to show our progress and encourage one another.  If you have a hand quilting project and would like to join our group contact Kathy at the link below.

KathyMargaretDebNanetteSharonKarrin, Daisy and Theresa

I’ll also be linking up with Kathy’s Quilts for Slow Stitching Sunday, so please follow the links for lots of hand-stitched inspiration.

Posted in Quilt-a-long, Quilting, Stitch-a-long | Tagged , , | 9 Comments

Secret Garden

Last month I fell for another quilt design by Andrea Walpole of Raggedy Ruff Designs, I made her Spring Wreath quilt a couple of years back and I still love it. A few weeks ago she showed on facebook the first central block of the winter wreath and I was hooked immediately, it’s a beautiful barn owl in flight. I’ve signed up for the monthly kit which will start in a few weeks.

This is my Spring Wreath quilt to give you an idea of what it will be like…

In the meantime I thought I really ought to start another Raggedy Ruff quilt kit I had in my stash, the Secret Garden. This is a very colourful and busy quilt with lots of flowers and birds. I’m going to try to make this quilt top before I start the next one, or at least get ahead with this one and then alternate between the two! I don’t want to end up with two quilt kits in my stash!!

With this in mind, yesterday I pulled out Block 1 of the Secret Garden quilt from my to-do box…

One thing I particularly love with Andrea’s quilts is the backgrounds, they’re always such a wonderful mix of blocks, colours and textures with linen’s mixed with batiks and little pops of colour.

The first task was to make the background. I find these fairly straight forward as Andrea’s instructions are pretty clear with written instructions and diagrams. I do have to concentrate though, the seam ripper usually comes out at some point, as it did with this block – it’s so easy to put something the wrong way round.

With the background complete I could then turn my attention to the applique design. The individual shapes are traced onto freezer paper, which can then by ironed on to the batik fabric, this makes it much easier to cut out the fiddly shapes but afterwards it just peels off the fabric without leaving any residue.

The only bit I changed was the tail of the wren, to me a wren’s tail has to be pointing upwards. As it’s such a busy design I numbered the shapes so I could work out which was which once they were cut out, I did get a bit muddled trying to work out which rose was pink and which was peach, in the end I decided it didn’t really matter and just went with what I thought looked right from the photos.

With everything cut out I then laid them in position on the fabric. The instructions include photos of all the important stages, I often find these easier to follow than the diagram as you can see how the applique lies on the quilt background.

Andrea just holds the pieces in place while she stitches round each bit, I’m not that brave so I put a tiny blob of fabric glue on each piece so at least if I sneeze the whole lot won’t fly away!

Hopefully tomorrow I will start the free-motion embroidery which brings these designs to life. If you fancy having a go at one of these quilt then have a look on the Raggedy Ruff website, there’s lots of designs and kits.

Posted in Quilt-a-long, Quilting, Raggedy Ruff Designs | Tagged , , , , | 8 Comments

Stitch-a-Garden

Just before Christmas I fell for a series of on line classes by Nicki Franklin of The Stitchery. I’d admired her work for quite a while on instagram, she does beautiful, pretty embroideries of flowers, country scenes, cottages…this was an on line course to stitch a garden, you can stitch any garden, she’s doing the garden at Hilltop where Beatrix Potter used to live as an example. I’m going to stitch our garden.

The first few classes dealt with places to get inspiration, how to sketch your design out, transferring it from paper to fabric, painting fabric with watercolours, mixing colours. Here’s my watercolour sample, this will be used for applique…

I haven’t as yet finalised my sketch, the last couple of weeks I’ve been mulling ideas over. I want to make my embroidery into a textile book, I have enough pictures round the house and it would be rather nice to have a stitched record of the garden at the moment. We have a choice of either doing a flat plan of the garden, or doing a raised viewpoint. After much thought I’ve decided to stitch a flat plan and then stitch features and scenes within the garden as separate little embroideries which can then go in the book, possibly embellished with some crazy patchwork!

Our back garden is divided into three quite separate areas, the patio at the bottom, the Amber & Amethyst garden (AKA the beer garden!!) and the lawn with the summerhouse and pond at the top. I’m planning to do an embroidery of each area as a flat plan and then do little embroideries of say the summerhouse, the arches, seats, pond, birdbath.

During the last class she showed us different ways of stitching trees and shrubs, some are for adding texture to an appliqued area such as seed stitch or French knots. She had stitched a little sampler which looked a lovely way of displaying them.

I found a nice piece of old linen in my stash (I’ve been collecting little bits for a while) it was pretty fine so I backed it with some calico to give a bit of stability, it also makes it easier to finish threads off at the back. I stitched the grid with a simple running stitch making 1 3/4″ squares.

I really enjoyed trying different stitches and different threads too. I’ve recently been trying to sort out my embroidery threads, the non DMC ones, I’m putting them all on bobbins and sorting them according to colour. There’s perle threads, linen threads, hand-dyed threads, I’m hoping that I’ll now use a wider variety of threads rather than just reaching for the conveniently placed DMC.

The first row id French knots, chain stitch in a heap and seed stitch, I tried four different threads with the seed stitch in particular and also tried the double seed stitch which Cathy Reavy had suggested, I think I prefer the single stitch! The next row are bullion knots and two leaves, one in satin stitch and one in fishbone stitch which is my favourite for leaves.

On the third row there is feather stitch, mini trees from French knots and straight stitch, then fly stitch trees. As the fly-stitch is basically upside down to make a tree, I had to turn the work upside down to stitch it! I was particularly please with the taller tree as I used different sizes of stitches to give the effect of the boughs of a fir tree.

The bottom row is bigger tree embroideries, the autumn one is little chain-stitches, I found that one more tricky to stitch but I do like the effect. The fir tree in the middle is just straight stitch and the cute blossom tree is French knots with a variegated green and pink DMC thread.

This nicely gives me a working size for my book pages of about 8″ by 6″.

I think I’m going enjoy this stitch-a-long.

Posted in embroidery, Garden, Stitch-a-long, Workshops | Tagged , , , | 8 Comments

Purple Ombre Cake

When my kids were growing up I always made their birthday cakes, we had a couple of cake decorating books and they would leaf through the pages and choose which one they wanted, I did My Little Pony, Football, the worst one was Super Mario as his head was a huge round cake which kept falling off his tiny body!!

Roll on quite a few years and I got a message a few weeks ago from James asking if I could make his partner’s daughter (my new to me granddaughter) a birthday cake, pretty please…he sent me a photo of what she was after, a tall purple ombre cake with drippy decoration. Of course I agreed…and quickly went on google and youtube for hints and tips. Youtube should be banned! They make it all look so easy!

Have you ever felt thwarted at every stage!!

Luckily I decided to make the cakes in advance, I could always freeze them for a few days. I made four cakes, they went in the oven a lovely shade of purple…and came out looked mucky teal! I made two into a cake with a bit of buttercream and took it into work. One of the doctors asked me what the celebration was, I told him it was a disaster cake, these were rejects! It actually tasted really nice and was all eaten by 8.45am. Every one knows at work that if you don’t take cake when it first appears, by the time you have a break it will have gone, so eating cake at 8.30 am is the norm! Inside the cake was a deep purple, but not a nice shade…

I posted the photo on the WI page, the WI is renown for it’s baking so I was sure someone could help. They did. Apparently I needed a white cake. I googled white cakes. Cakes here in the UK are traditionally made with equal weights of eggs, sugar, flour and butter, the butter and the eggs make it quite a yellowish, fluffy mixture, especially when your free range eggs have lovely orange yolks. In my limited experience, they do taste different to the American cakes. American recipes often seem to include oil instead of butter or buttermilk and the mixture is much more of a liquid, apologies to all over the pond for this generalisation! I found a Betty Crocket white cake mix, I’ve never used a cake mix before but I ordered four boxes for next day delivery!

James brought round some food colouring they’d used before called Progel by Rainbow Dust. They were right when they said you only need a small amount! My cakes came out in lovely shades of purple…

They’re a lot ‘holier’ than cakes I’ve made the usual way, I’m not sure if that was me or that’s how they are, but they were purple and that’s all that mattered! I trimmed the tops off to level them and then put them in the freezer overnight. This is a tip I gleaned from youtube as it makes them easier to stack.

On Saturday morning I made a huge batch of butter icing and started to stack them. This is about the only bit of the cake that went without a hitch!!

I coloured a corner of the icing bowl with purple and started to cover the sides, a bit of white, then a bit of purple, so it had a nice marbled effect. I had the bright idea of holding the cake firmly by putting the cake tin base on the top so I could give a bit of even pressure, it did seem to help a lot. At this stage I was pretty pleased with myself…

The next task was the drippy top, you know, where they have nice even drips which drip down the cake so perfectly. I watched youtube. The cake bakers at work had convinced me it would be a white chocolate ganache rather than icing so I made up a runnier ganache to the recipe given on youtube. It went on easily enough, but promptly ran off and puddled at the bottom. Even worse it just gave the cake a sort of yellowy hue.

After exchanging photos with James I decided to scrape as much of the white chocolate off as I could, add some more purple to make it a bit more marbled and then tried white royal icing instead. It still wasn’t perfect but it was a lot better. I left it for about an hour before I did the final touch of big purple iced twirls on the top. It looked great…for about half an hour, then half of the purple blobs decided to sliver over the edge!

At this point I had several large gins and decided I would fix it in the morning!

First thing Sunday morning I scraped off the offending purple twirls, made another batch of icing as close to the same shade of purple as I could, and redecorated the top, adding a bit more to some of the earlier ones so they looked even. I piped a line of purple shells round the base to tidy it all up and sprinkled some gold stars on the top.

It looked OK, though obviously where the purple blobs had jumped off, the sides were a bit messy, but it was the best I could do. James picked it up and took it straight to the party.

We didn’t go to the party as it was being held in a busy public place, but apparently she loved it and said it was the best cake ever!

And it was beautifully purple inside.

Posted in Baking | Tagged , , | 14 Comments

Peppermint Purple SAL

I’ve made pretty good progress with my blackwork over the last couple of weeks, it’s surprising how much you can do when you focus on something!

Three weeks ago I was still stitching the blocks in the lake, trying to make the reflection of Catbells a little clearer,,,

I’ve finished the blackwork blocks and I started the inner border, this is the border which squares it off. I’d been pondering for a while how to stitch the border colourwise, do I continue the skyline across or just fill in with one colour? I decided to continue the line across, I had a dark green/brown Weeks thread in just the right shade, Weeks are overdyed threads so there is a lovely subtle variation. I used this thread at both sides of Catbells and decided to outline Catbells with it too. Using the same thread I think helped to bring it all together. I also then had the dilemma of whether to back-stitch inbetween the blocks…I decided not to, I can always add them later if I feel it need it.

The sky is stitched with another Weeks thread, called appropriately Sky!

I looked through my limited stash of Weeks threads and decided to stick to DMC for the reflection of Catbells. I used 926 which is a nice blue/green/grey colour. I’ve still to back-stitch most of the outline of the reflection, it doesn’t show up as much, especially on the right, but I’m fine with that, reflections are often intermittent.

The rest of the lake is being stitched with Blue Heron. Once that is complete I just have a final border to stitch, I’m not quite decided on my border design yet, but I’m thinking about stitching the names of the area with leaves in between, possibly in a dark grey.

Hopefully by next time I’ll be on to my final border. This design is a free SAL from Claire of Peppermint Purple, the blocks were released weekly on facebook ( and I presume on her website) last year. She has just started the 2022 version so if you fancy having a go at blackwork then follow the link to her website or search on facebook. It’s a great way of trying lots of patterns and deciding if blackwork is for you. The facebook page is very friendly and without the dramas of some groups!

This stitch-a-long is organised by Avis from Stitching by the Sea, please follow the links to see what everyone else is stitching.

AvisClaireGunConstanzeChristinaKathyMargaretCindyHeidiJackieSunnyMeganDeborahReneeCarmelaSharonDaisyAJCathieLindaHelen

Posted in embroidery, Stitch-a-long | Tagged , , , , | 14 Comments

Crazy Patchwork

I’ve been trying to finish a few projects this week, tidying up loose ends before I start my next big project. Last Monday at my Skipton Stitchers meeting we had a workshop on Crazy Patchwork, we had to prepare a square before hand using a pattern provided…

We then took a selection of trims and threads to the meeting to start embellishing the square, this was my selection, as you can see I went with a bee theme and a range of buttons, beads, trims and threads in blue and gold mainly.

Our first task was to embroider and trim the seams. I really enjoyed this, picking out the detail in the trim to guide my embroidery. Having stitched all day, I then carried on at home and by the end of Monday evening I’d finished the seams…

Next to stitch was the shapes themselves, I found this more difficult. trying to decide how to embellish it. ..

The bee in the centre I left unstitched as I liked the bee and the leaves as it was. The bee to the left I embroidered over the flower head with French knots, stitching the stems with stem stitch and fly stitch at the top. It’s embroidered but it keeps the feel of the original fabric.

The other three fabrics took a bit more thinking about. I decided to stitch a chain weaving round the white flowers. I added the French knots and then the wheatsheaf stitch in between. I used chain stitch for the little leaf clusters and then found some matt sequins for either end. The beads were added right at the end.

Next to be stitched was the soft spriggy one on the right. This one was the hardest and actually it’s probably the only one I would change if I did it again. I stitched three sprays of flowers to fill the triangular shape and then added the bee button. These buttons are made by JABCO and they’re rather pricey over here in the UK so I only have a couple, but they are sweet, it’s that small I needed a beading needle to stitch it on!

For the final dark blue shape I decided to do some more subtle embroidery, keeping the colours similar so the whole piece didn’t get too busy. I split stitched and then whipped the outline and then wove the grid with tiny stitches to hold the crosses in place. The outline of French knots picks up the dots around the leaves of the fabric. It needed a little something so I stitched a bead in each square, it’s just enough.

So here’s my finished square…

I found two books really useful, the first one is Hand Stitched Crazy Patchwork by Hazel Blomcamp which was already on my bookshelf. The second one was recommended by the member who was teaching us, Joyful Daily Stitching Seam by Seam by Valerie Bothell, I ordered it on line and I love it, full of different stitch combinations, nothing complicated, just pretty standard stitches, but put together in an effective way.

I’m hoping to use my square either inside or on the cover of a textile book I’m planning on bees.

I’m linking upiwith Kathy’s Quilts for Slow Stitching Sunday, please follow the link to see what others have been stitching,

Posted in embroidery, Skipton Stitchers, Textile Books, Workshops | Tagged , , , , | 20 Comments

Stitch Club

I’ve been on annual leave this week so it was perfect timing when textileartist.org announced a week long free workshop with Gwen Hadley. I did a couple of their free workshops last year and it certainly pushes me out of my comfort zone and this was no exception.

Each day a ten minute video was released where Gwen explained each step. The first day was making marks on fabric, basically painting and stamping to create abstract designs. Mine were very abstract and random!…

We then had to cut them up and mix them together to make a new design, hopefully finding connections between blocks which we could then embroider. Whilst I liked the darker blue one as a piece, I just couldn’t get it to work with the other colours, it was too dominant. In the end I just used four of the lighter ones as I liked the way the swirls could be linked up.

Our next task was to embroider to link pieces together, often just simple straight stitch or running stitch.

As you can see I started with running stitch along some of the swirls, linking them together and adding extra loops. I also put wadding behind the piece both to give a bit of support and to add texture to the stitching.

Gwen then started to add other textiles to create the effect she wanted. Her style is very much abstract with colours, shapes and textures. I’m not very good with total abstract!

I then had an idea and ran with it…

Our next exhibition with Skipton Stitchers is called ‘There is no Planet B’ I’ve been thinking about various embroideries I could do about bees, as without bees there is no food and therefore no us, so we need to look after them more. I’ve planted a rose hedge on the side of our drive as a sort of nature pathway, there is much talk these days that we need nature corridors that will link one natural area to another, so birds and insects can easily forage along them. I decided that the yellow ribbon could represent a nectar path which we need to join up by planting nectar rich flowers.

I stem stitched the yellow ribbon and then just used running stitch to connect the two ends. I tried embroidering petals onto the yellow spots to make flowers but I didn’t like the effect. I then found the pattern from Raggedy Ruff which includes echinacea like flowers and cut several out of gold quilting fabric. I arranged them so the gold spots became the flower centres. I was originally thinking of trying to make the dark spots into bumble bees. It then came to me that I have some bee fabric…and they were perfect size. I did some free motion embroidery on the flowers and the bees and my piece was complete!

I trimmed the wadding and backed the piece with a dark blue batik and added a bee ribbon and a charm to roll it up and secure.

If I spot a suitable wooden reel I might stitch it on there, in the meantime it can roll up neatly and sit in my sewing room.

This workshop was a perfect example of trying a workshop that’s a style you wouldn’t usually try, it’s good to be pushed occasionally into a different style, even if you then retreat back to comfort. Textile Artist .org run a stitch club where every fortnight a different tutor releases an on-line workshop, several of our Skipton Stitchers members are in the Stitch Club and they love it. Membership is only opened every so often, usually preceded by a free one such as Gwen’s. I’d love to do it but I think at the moment I’ve too much on to be able to give it the commitment it requires to balance with the monthly cost. If you fancy being pushed and trying lots of new techniques and ideas, do have a look at it and follow the link.

Posted in embroidery, Skipton Stitchers, Workshops | Tagged , , , | 13 Comments

Silver Linings

They say every cloud has a silver lining…my OH tested positive to covid on New Years Day, luckily we had celebrated New Year on zoom, rather than meeting up with friends. I was banished to upstairs to reduce the risk of me catching it.

We live in a dormer bungalow, so our main bedroom and bathroom are downstairs but we have three further bedrooms and a shower room upstairs…and one of the bedrooms is my sewing room! So I spent a week in my sewing room, such a hardship as you can imagine! Luckily he wasn’t too poorly with it and, touchwood, I haven’t caught it.

I did manage to make two skirts. At the Knitting and Stitch show in November I picked a remnant of cotton ponte, it feels really nice (especially compared to synthetic ponte) and it’s a lovely weight too, really drapey. I decided to make a skirt.

I went to my pattern boxes, looking for my favourite jersey skirt pattern, Simplicity 8474, I’ve made it up a few times now and they’re lovely to wear…

Instead I found a different pattern, Newlook 6269 which on the surface looked very similar. I decided to try it. I even got my newly serviced overlocker to work!

Everything looked fine until it came to the deep waistband. It was too big and bulky, even for allowing it to be an inch below the natural waist. I was very disappointed as the fabric is so nice. I decided to try and rescue it by recutting the waist and the top of the skirt pieces using the tried and tested pattern.

It looks 100% better, it’s not as full as the other two skirts and the waistband is deeper, but with the right top on it looks fine and I like wearing it. I’m getting brutal with my patterns though, the Newlook one is already in the bin!

The second skirt was made from some fabric my sister gave me a few years ago when she was clearing out a lot of her stash. I’m not sure what fabric it is, it feels like a fine suede on one side and satin finish on the other. My first decision was which was the right side, I couldn’t even tell by looking at the black embroidered pattern! I decided the suede side was more me.

I decided to use Vogue pattern 9090. It’s one of their Very Easy Very Vogue range. I made it in the summer in a cotton poplin and it turned out really nice, the picture on the envelope really isn’t very inspiring but it’s actually a lovely pattern. Here’s my summer version…

…I really need to start varying the tops I wear for photo’s! I’ve also realised the difference between my OH taking photos and my daughter. Helen will suggest I pull my cardigan down a bit or jumper up a bit…or comb my hair! Whereas my OH at the most says hold your belly in – I’ve found it’s very difficult to hold your belly in and smile at the same time!!

I quite fancy trying it in a light weight wool and this red fabric was a good test of how it would turn out. It went together beautifully, I even had a fair attempt at pattern matching down the back seam though as only the dots have come out on the photo you can’t tell! It fit’s nicely and it even has pockets!!

I love it, I’m just going to have to be careful the first few times I wear and wash it. I’ve never had dye come off fabric just from handling it! I now have a red tinged ironing mat and cloth, even my sewing machine is pink on the corners!! I’m thinking of getting some Retayne or equivalent to soak it before I wear it – I dread to think what could happen if I got caught in the rain, or sat on a light coloured sofa!

Other than the colour issue, it’s worked well in the heavier fabric, so I think I’ll try one of my Abraham Moon fabrics next.

Posted in Dressmaking, Serendipity | Tagged , , , , | 10 Comments

Travelling Pages

I’ve taken part in travelling books several times, both with Skipton Stitchers and internationally, the idea is that you start a book on your chosen theme, put some embroidery in it and pass it on, you take it in turns to do a piece of work for each person’s book. When your book finally come’s back to you it’s full of beautiful embroideries from your friends.

This year at Skipton Stitchers we are doing Travelling Pages. I think it’s a great concept… each month there is a theme, quite deliberately broad but generally along the theme of our next exhibition which is called ‘There is no Planet B’ Those of us who wish to take part do a small embroidery (to fit in an A5 book) on the theme for the month, pop them in a plain envelope and then swap it for another envelope at the meeting. This way we will gradually each have a unique collection of embroideries.

This month the theme was oceans.

When I thought about oceans, I felt that really oceans are still one of the great unknowns, there’s so much under the sea that we have no idea about. I’m very interested in the natural world, I’m always trying to extend my knowledge on birds, trees. flowers etc, but when I thought about it, I know very little about oceans and their creatures. Even something fairly common like shell-fish…how do they make their shells? Do the rings on a shell indicate age like the rings of a tree? Does the shell grow as the fish grows? How long does it take to make a shell?????

I decided to do an embroidery of a scallop shell. I chose some suitable blue fabric for the background and drew the outline of a scallop shell.

I decided to use spiders web stitch in order to get the ridges effect of a shell. I’ve always liked the effect when I’ve stitched them in cross-stitch projects, however this was a much bigger area. I stitched the supporting threads in a fan shape across the shell and started stitching.

What I hadn’t anticipated was that it’s actually a large area to cover with this stitch, and despite using a hoop, it was very difficult to maintain any sort of tension. I persevered, changed thread colours to add interest, included beads and sequins, partly to add texture, but also, if I’m honest, to fill the area a bit – it took a fair bit of stitching.

As it grew, although I was initially disappointed with the effect of the spiders web stitch, I decided it looked a bit like the distortion you get seeing things through moving water. The colour changes, by chance, also looked like a beach and sea scene…

I was fairly pleased with the final piece, I trimmed it to about 5″, backed it with interfacing and blanket-stitched round the edge. I popped it in an envelope ready for the meeting.

It was quite exciting choosing an envelope and looking inside to see what treasures someone had stitched.

My chosen envelope contained a stunning embroidery of coral by Dee Pollitt, it’s gorgeous, I’m in awe of all the French knots and bullion knots, piled on top of each other. It reminds me of a trip we did to the Great Barrier Reef on one of our holidays to Australia.

Next month’s theme is species at risk, so I’ll have to start thinking about that one soon.

Posted in embroidery, Skipton Stitchers, Textile Books | Tagged , , | 8 Comments

Skipton Stitchers

It was my Skipton Stitchers meeting on Monday. We had a workshop held by one of the members on crazy patchwork. We had to prepare a block in advance so we just had the stitching to learn. This was my block. I took along various threads and trims, buttons and beads…

With crazy patchwork the seams are embellished first and then the individual shapes can be stitched. I stitched the seams in the order they were stitched together so I didn’t have to faff around inserting ends into seams. I started off pretty simply with the ric-rac attached with beads on every point.

I then got into the swing of it, using the embroidery to extend the trim out into the piece, following the design of the trim to decide what to stitch. By Monday evening I had embroidered all the seams…

Next I will be embroidering the individual shapes, I’m still pondering how to do each block, but so far I’ve really enjoyed this piece.

Posted in embroidery, Skipton Stitchers, Workshops | Tagged , | 13 Comments