As part of the stitch-a-garden course Nicki Franklyn from The Stitchery has included little samplers of how to stitch different parts of the garden. I stitched a tree and shrub sampler earlier in the course…
It’s useful to see different ways of representing trees or shrubs and how to add some texture to the stitching.
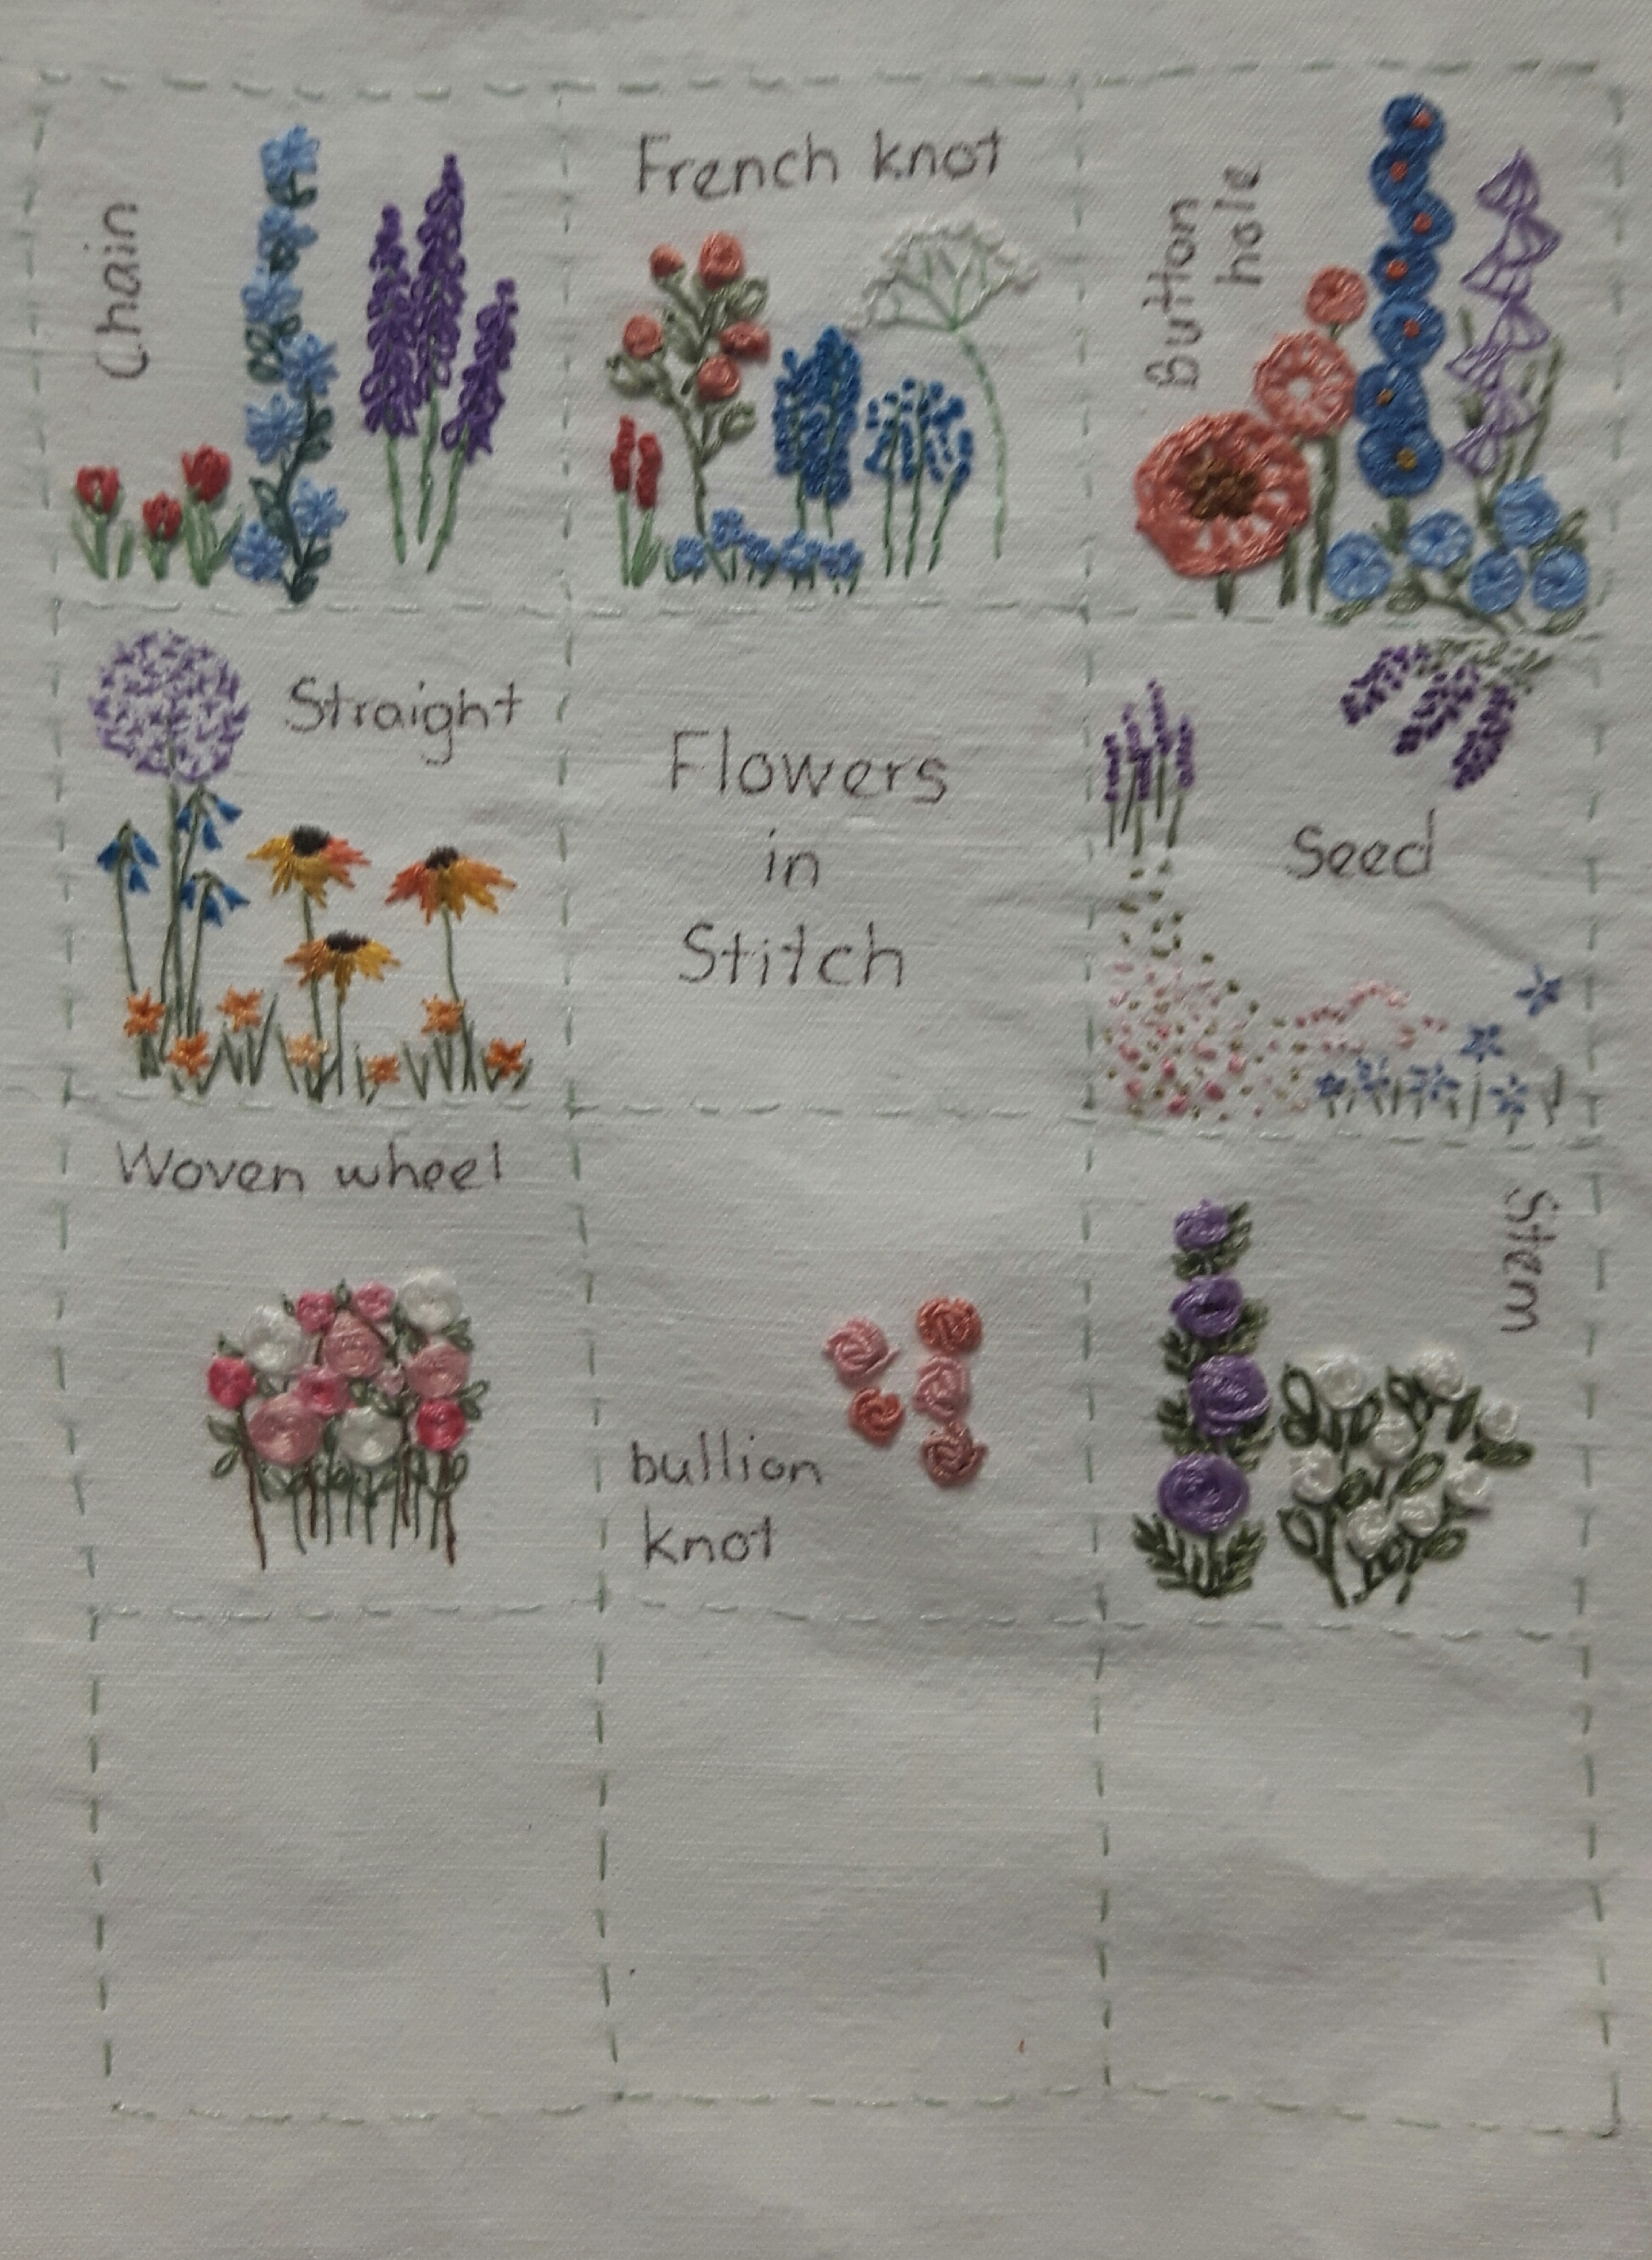
I’m now working on a flower version. Nicki showed different stitches which could be used to create flowers, I’ve tried on the whole to make them like flowers in our garden. It was a useful exercise which has certainly broadened my repetoire of flower stitches, it’s very easy to just use a few easy ones, such as French knots, chain stitch or straight stitch, stitching this sampler is making me think of other ways to give the effect.
I’m stitching on one of the lovely linens I got in a ‘treasure’ pack from Sookie Soo, I like the texture of these fabrics. I started by stitching the outline to make twelve boxes, then I just started concentrating on one stitch for each block, the squares are just under 2×2″. Nicki uses an old fashioned typewriter to write ‘labels’, I did originally plan to have the writing on little pieces of fabric to stitch on, but I couldn’t get it to look right. In the end I just wrote on the square as neatly as I could in a sepia coloured finepoint pen. I still haven’t decided whether to stitch over the title square.
This is the row I’m working on at the moment. I particularly liked the woven wheels and the stem stitch flowers. I’ve not come across stem stitch flowers before but they’re much quicker than bullion knots and really effective. As you can see I’ve a few more bullion knots to do, I’ll do some straight too a bit like veronicas or liatris.
I’ve then got one more row to do, there’s a couple of ways using applique and I thought I might do some raised picot stich, unless someone thinks of another stitch to try.
We’ve had a busy couple of weeks here, hence very few posts! Our house sale has fallen through as our buyers pulled out, luckily before we had incurred costs for purchasing the one we wanted! Other countries seem to have much better systems for house purchase than our protracted method here in the UK which only seems to benefit the solicitors! Up to the point at which contracts are exchanged any side can back out or try and negociate further, this can be the day before the house move is arranged!!…and people wonder why it is so stressful!
Anyway, we have decided to take it off the market for the time being, do some jobs on it over the winter and relaunch it in the spring. It does frustrate me that these days people won’t see beyond the current decor, they want it show room perfect for them too move in, then they wonder why prices are ever rising. As an example, when we sold my mothers bungalow, we had it valued but then painted it all magnolia, put some new carpets down, spent a total of £2000 and the value was increased by £20,000!!!
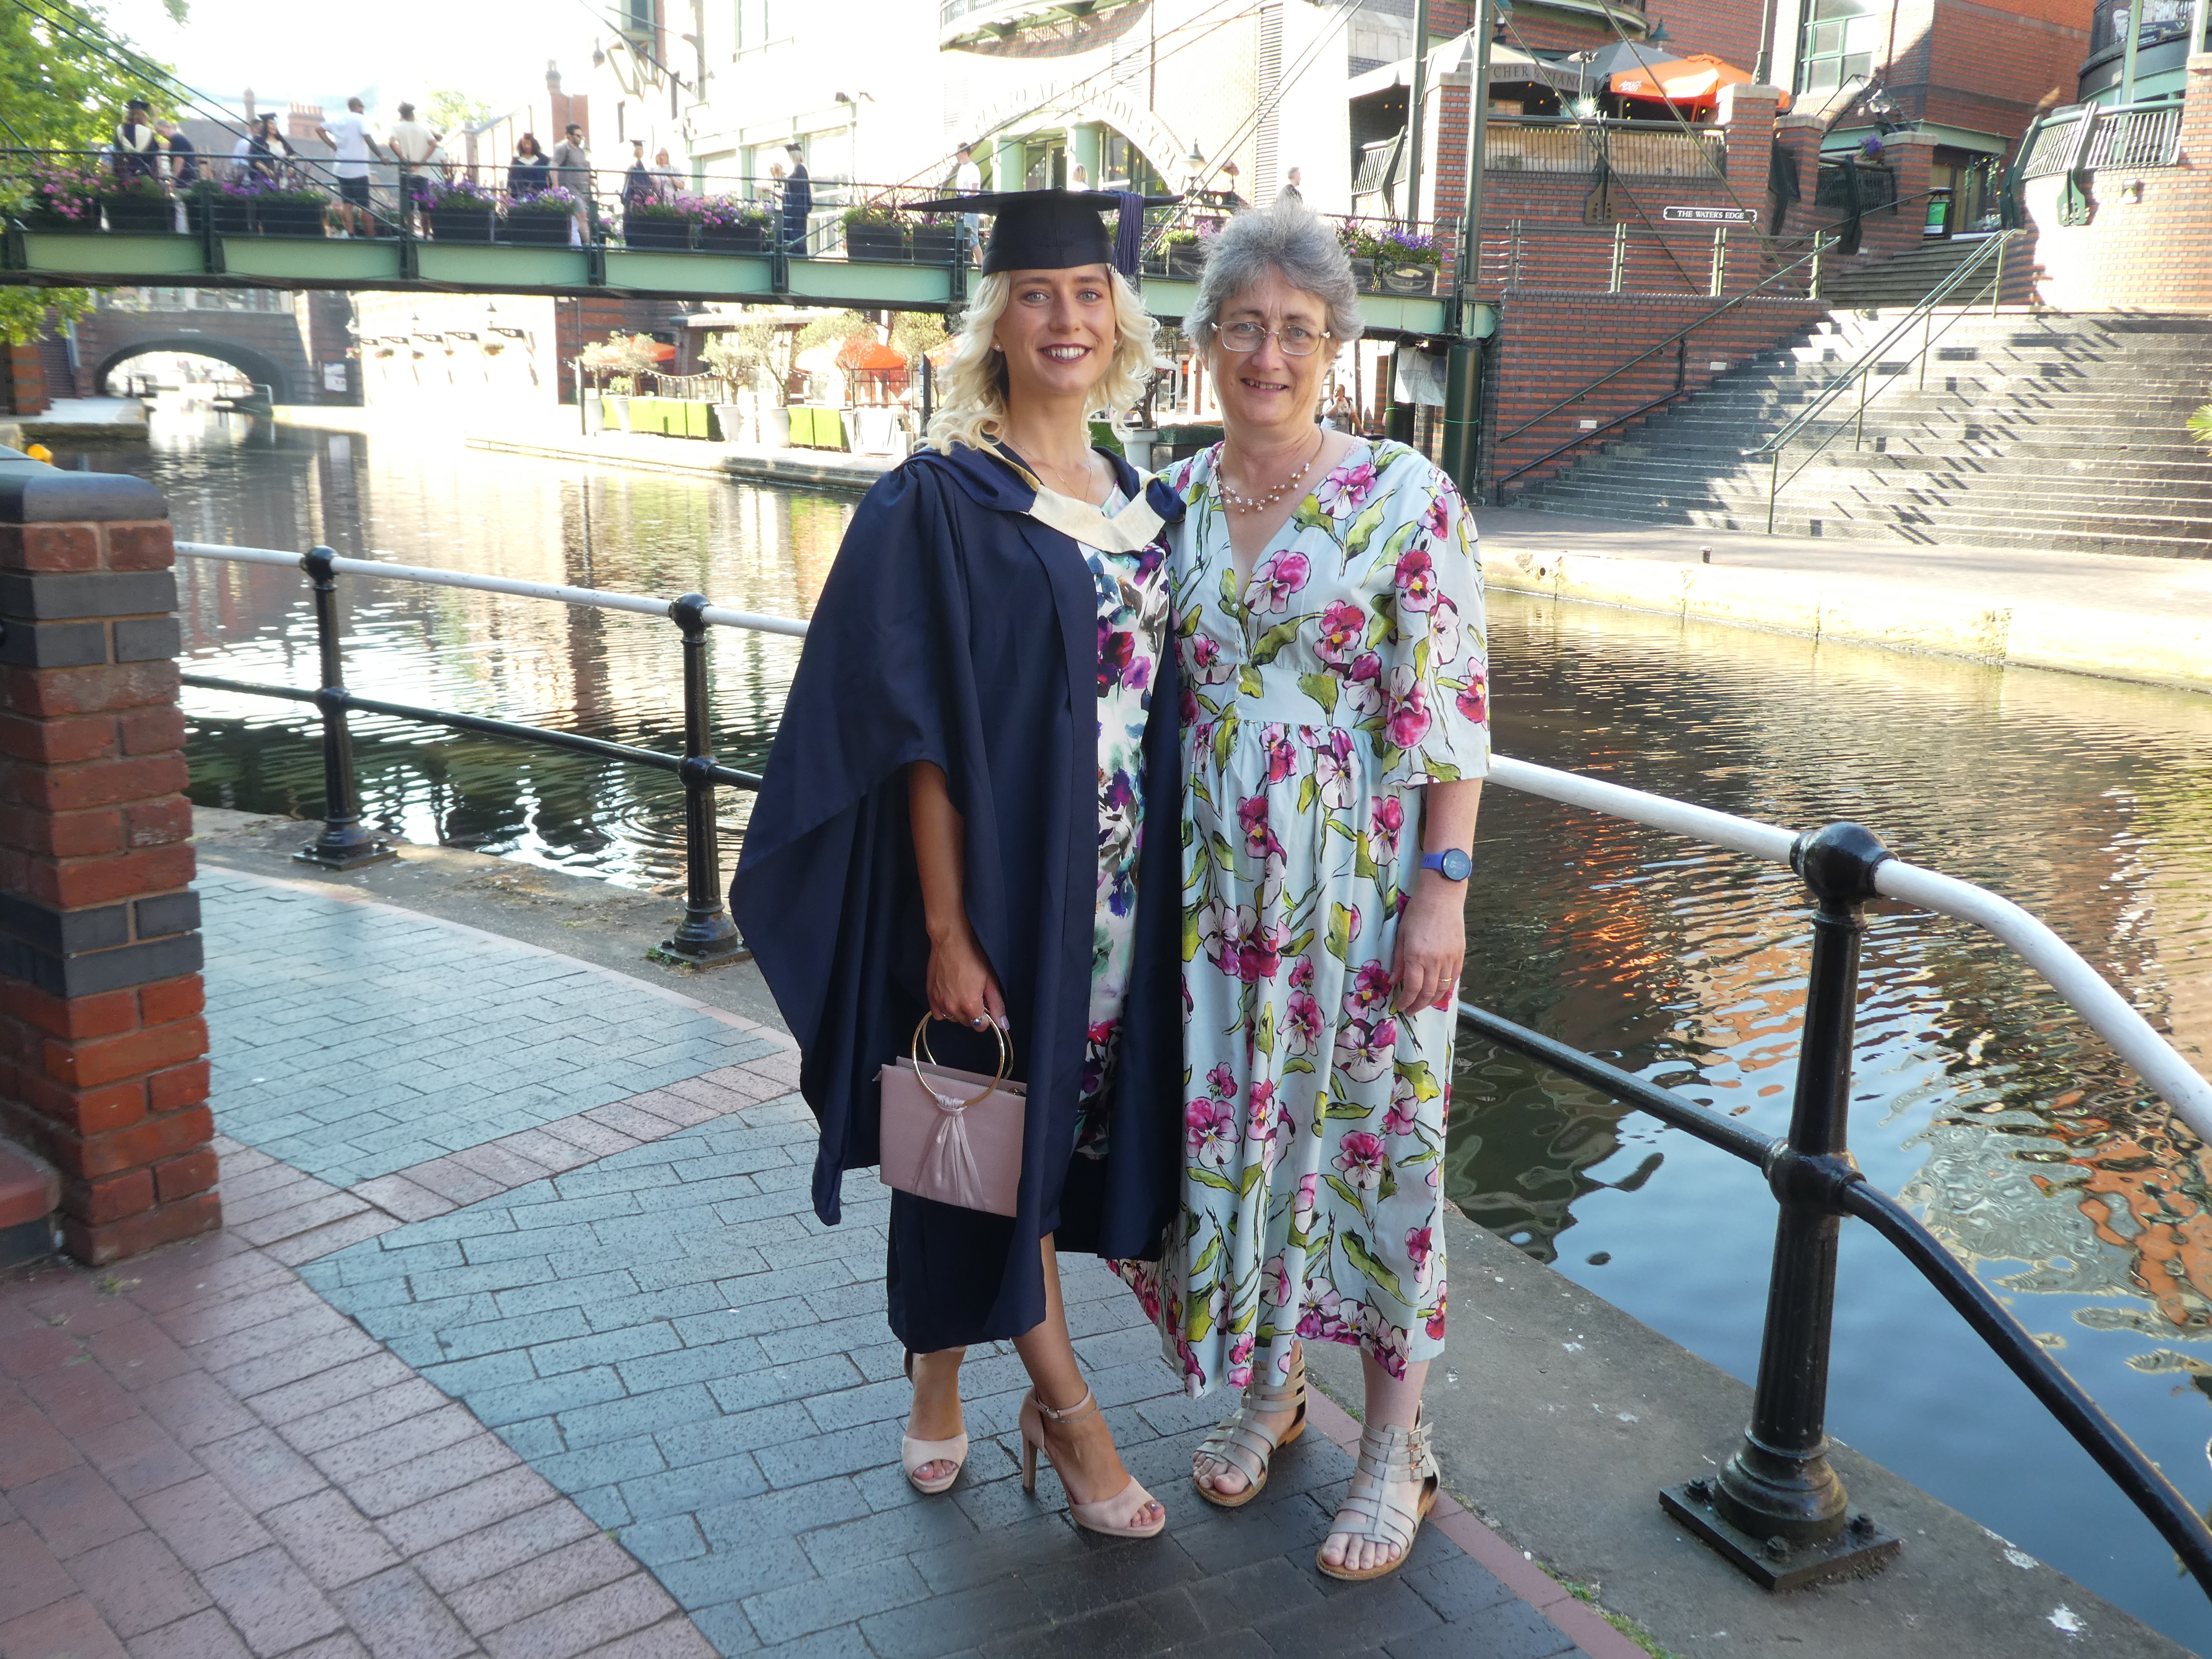
My daughter finally had a graduation ceremony, two and a half years late due to covid. Definitely a proud mum moment, even more so as we both had me-made dresses on, Helen probably makes more clothes than me at the moment!…
We came home from the graduation weekend to welcome my stepson home for a week, he lives in Sydney so we hadn’t seen him since pre-covid. We didn’t do much, it was just lovely to chill out together, even if his corny jokes haven’t improved with age!!
All in all, a busy couple of weeks! I did manage to squeeze a little sewing in though…
I’m working on two on-line courses at the moment, the cartography embroidery with Zara Day and Stitch a garden with Nicki from The Stitchery. I found a way of combining the two courses. I’d already decided my Stitch-a-garden piece was going to be a textile book of our garden, this was decided before we decided to move but has become a bit more special even with the delay until the spring.
The latest piece of work with the cartography course was to combine patchwork and machine embroidery to make a map. One difficulty everyone has found with this course is finding a map to use as a basis for the stitching. It needs the scale and detail to be right and ideally be somewhere that means something. So far I’ve done maps of West Witton where my mum had a cottage, the Yorkshire Dales, Catbells (of course)…
Our next piece was more of a street map, I decided to do a map of our street which I can then include in my garden book. I needed a patchwork type background so I had a rummage through my stash and found four fabrics which I felt worked well together. They also seemed fairly apt, the purple/grey one has deer on which we occasionally see on the back lane or in the field behind, the green one is leafy, the blue one has flowers and birds and the brown one has beech masts on, all fitting in with the garden theme.
I traced a map of our estate with standard tracing paper. I included the houses but not the garages as that got too complicated. I was originally planning to trace it onto the fabric the traditional way, but I decided it would be difficult to get the tracing to show up. Instead I pinned the tracing over the fabric and stitched through it, just following the lines with my sewing machine. As it was mainly straight lines, albeit short ones, I used a walking foot rather than a free motion machine foot. I was a little concerned how easy or not it would be to remove the paper after I’d stitched it but actually it came away more easily than tissue paper. It was fiddly to stitch but I’m pretty pleased with how it’s come out. I added the flower button to mark our house.
For my final piece I’m planning to stitch a map of the garden, I am currently stitching the patio area for my book, planning to do an embroidery for each main area. I thought a map would bring the areas together, give it a bit of context. I’m too late for the ‘final exhibition’ of the course but I’ll send Zara a photo once it’s complete.
We’ve had a busy few weeks recently, we’ve accepted an offer on our house and we’ve found somewhere to move to. On Friday we found out our offer has been accepted which is a huge relief! The housing market here in the UK is not easy to negotiate round at the moment, house sales have slowed slightly, which is good, houses are tending to sell in a few weeks, rather than a few days but there still seems little point in even looking until you have a buyer. When you do have a buyer there’s not a lot on the market!
We’ve found a house in the village next to Otley called Burley in Wharfedale, the house is big enough for us, room to extend if we want to and the garden is a nice size and flat!! Fingers crossed everything goes through OK!!
This preamble is another way of saying I haven’t managed to do any hand quilting over the last three weeks!! it’s also been too warm to sit under a quilt in the evening, so my staying home quilt is still sitting patiently in the lounge waiting for me to pick it up and start quilting…
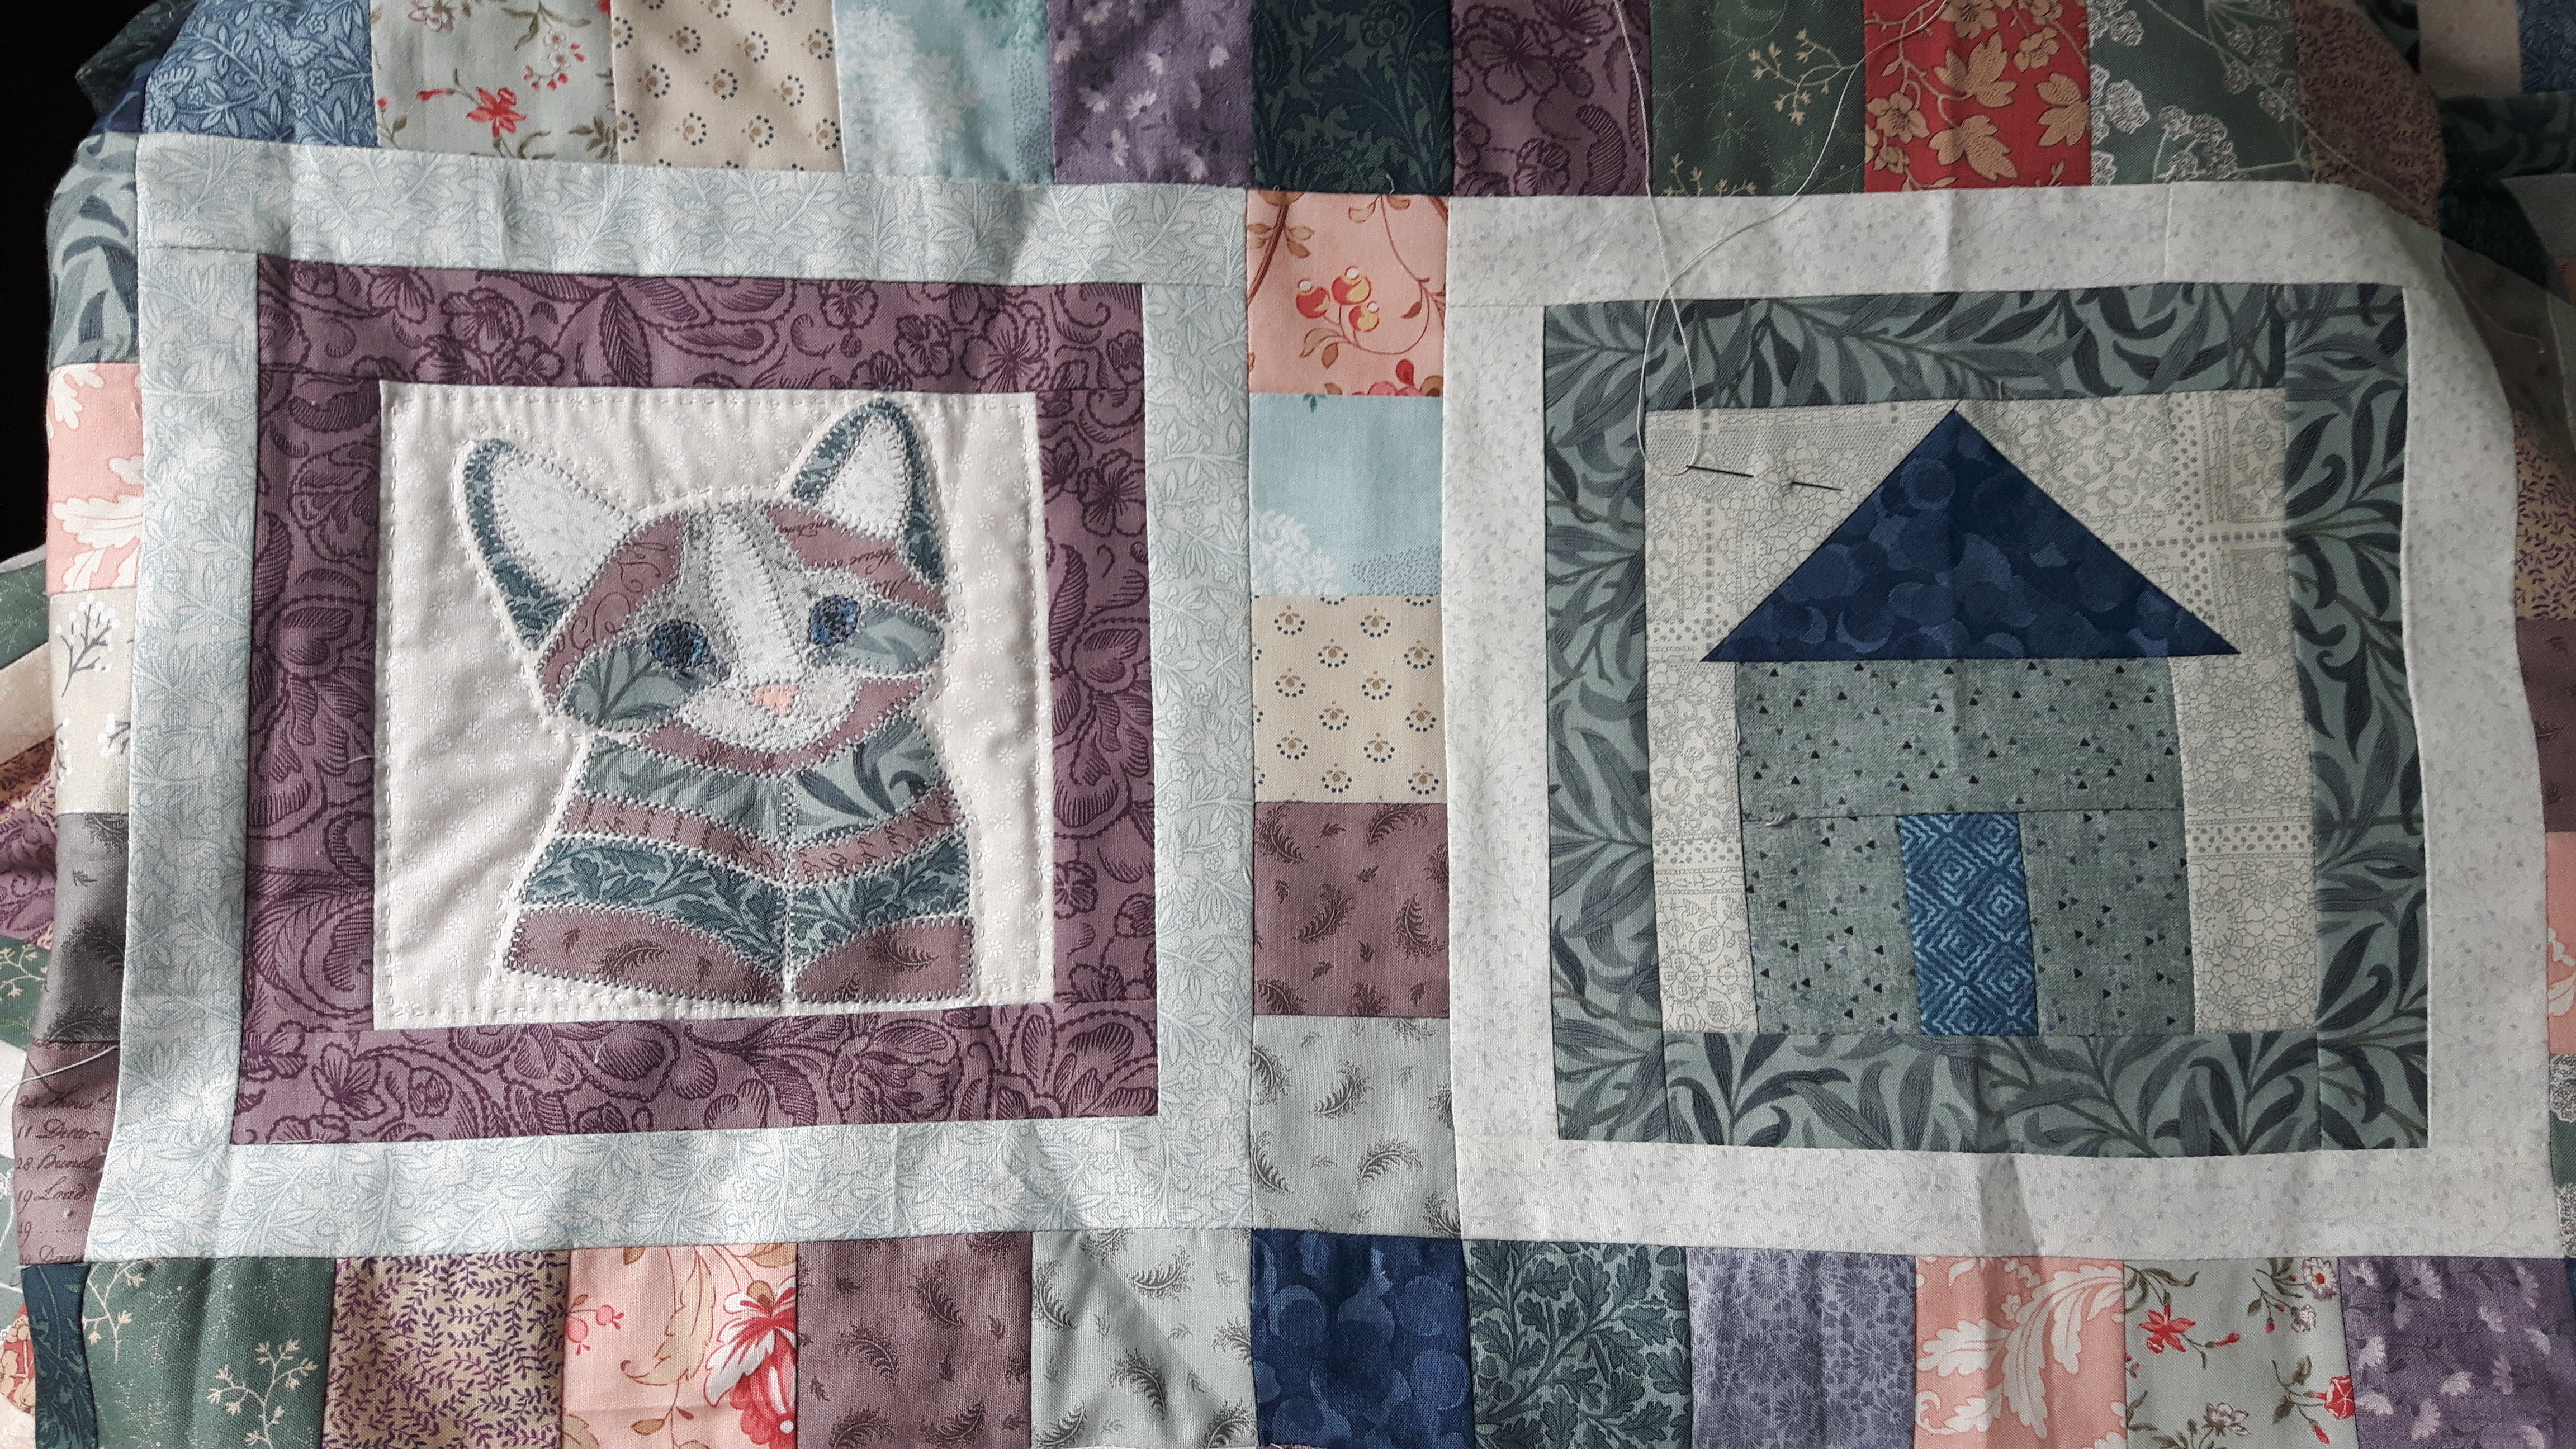
I still haven’t quite decided whether to quilt round the houses or not. With the cat block I’ve shadow quilted round the applique, these embroidered blocks will have to be quilted on an individual basis depending on the layout of the design. With the houses I could either stitch just inside the seams of the house or stitch in the ditch round the houses, which is not the easiest to get neat, but I could then quilt windows and round the door…however I’m conscious there are a lot of houses if I start something more time consuming!
Hopefully next time I post about this quilt in September I’ll have managed to do a little quilting and come to some design conclusions, though I might be knee deep in packing by then!
Hand Quilt Along Links
This Hand Quilt Along is an opportunity for hand quilters and piecers to share and motivate one another. We post every three weeks, to show our progress and encourage one another. We are pleased to welcome Cathie into our little HQAL this week, please follow the links to see what everyone else has been quilting. If you have a hand quilting project and would like to join our group contact Kathy at the link below.
I’ve finally made a bit more progress on my garden stitching, not a huge amount as I’m still a bit hesitant on how I’m going to get the effect I want. Three weeks ago on my last SAL post I’d started embroidering the applique bushes…
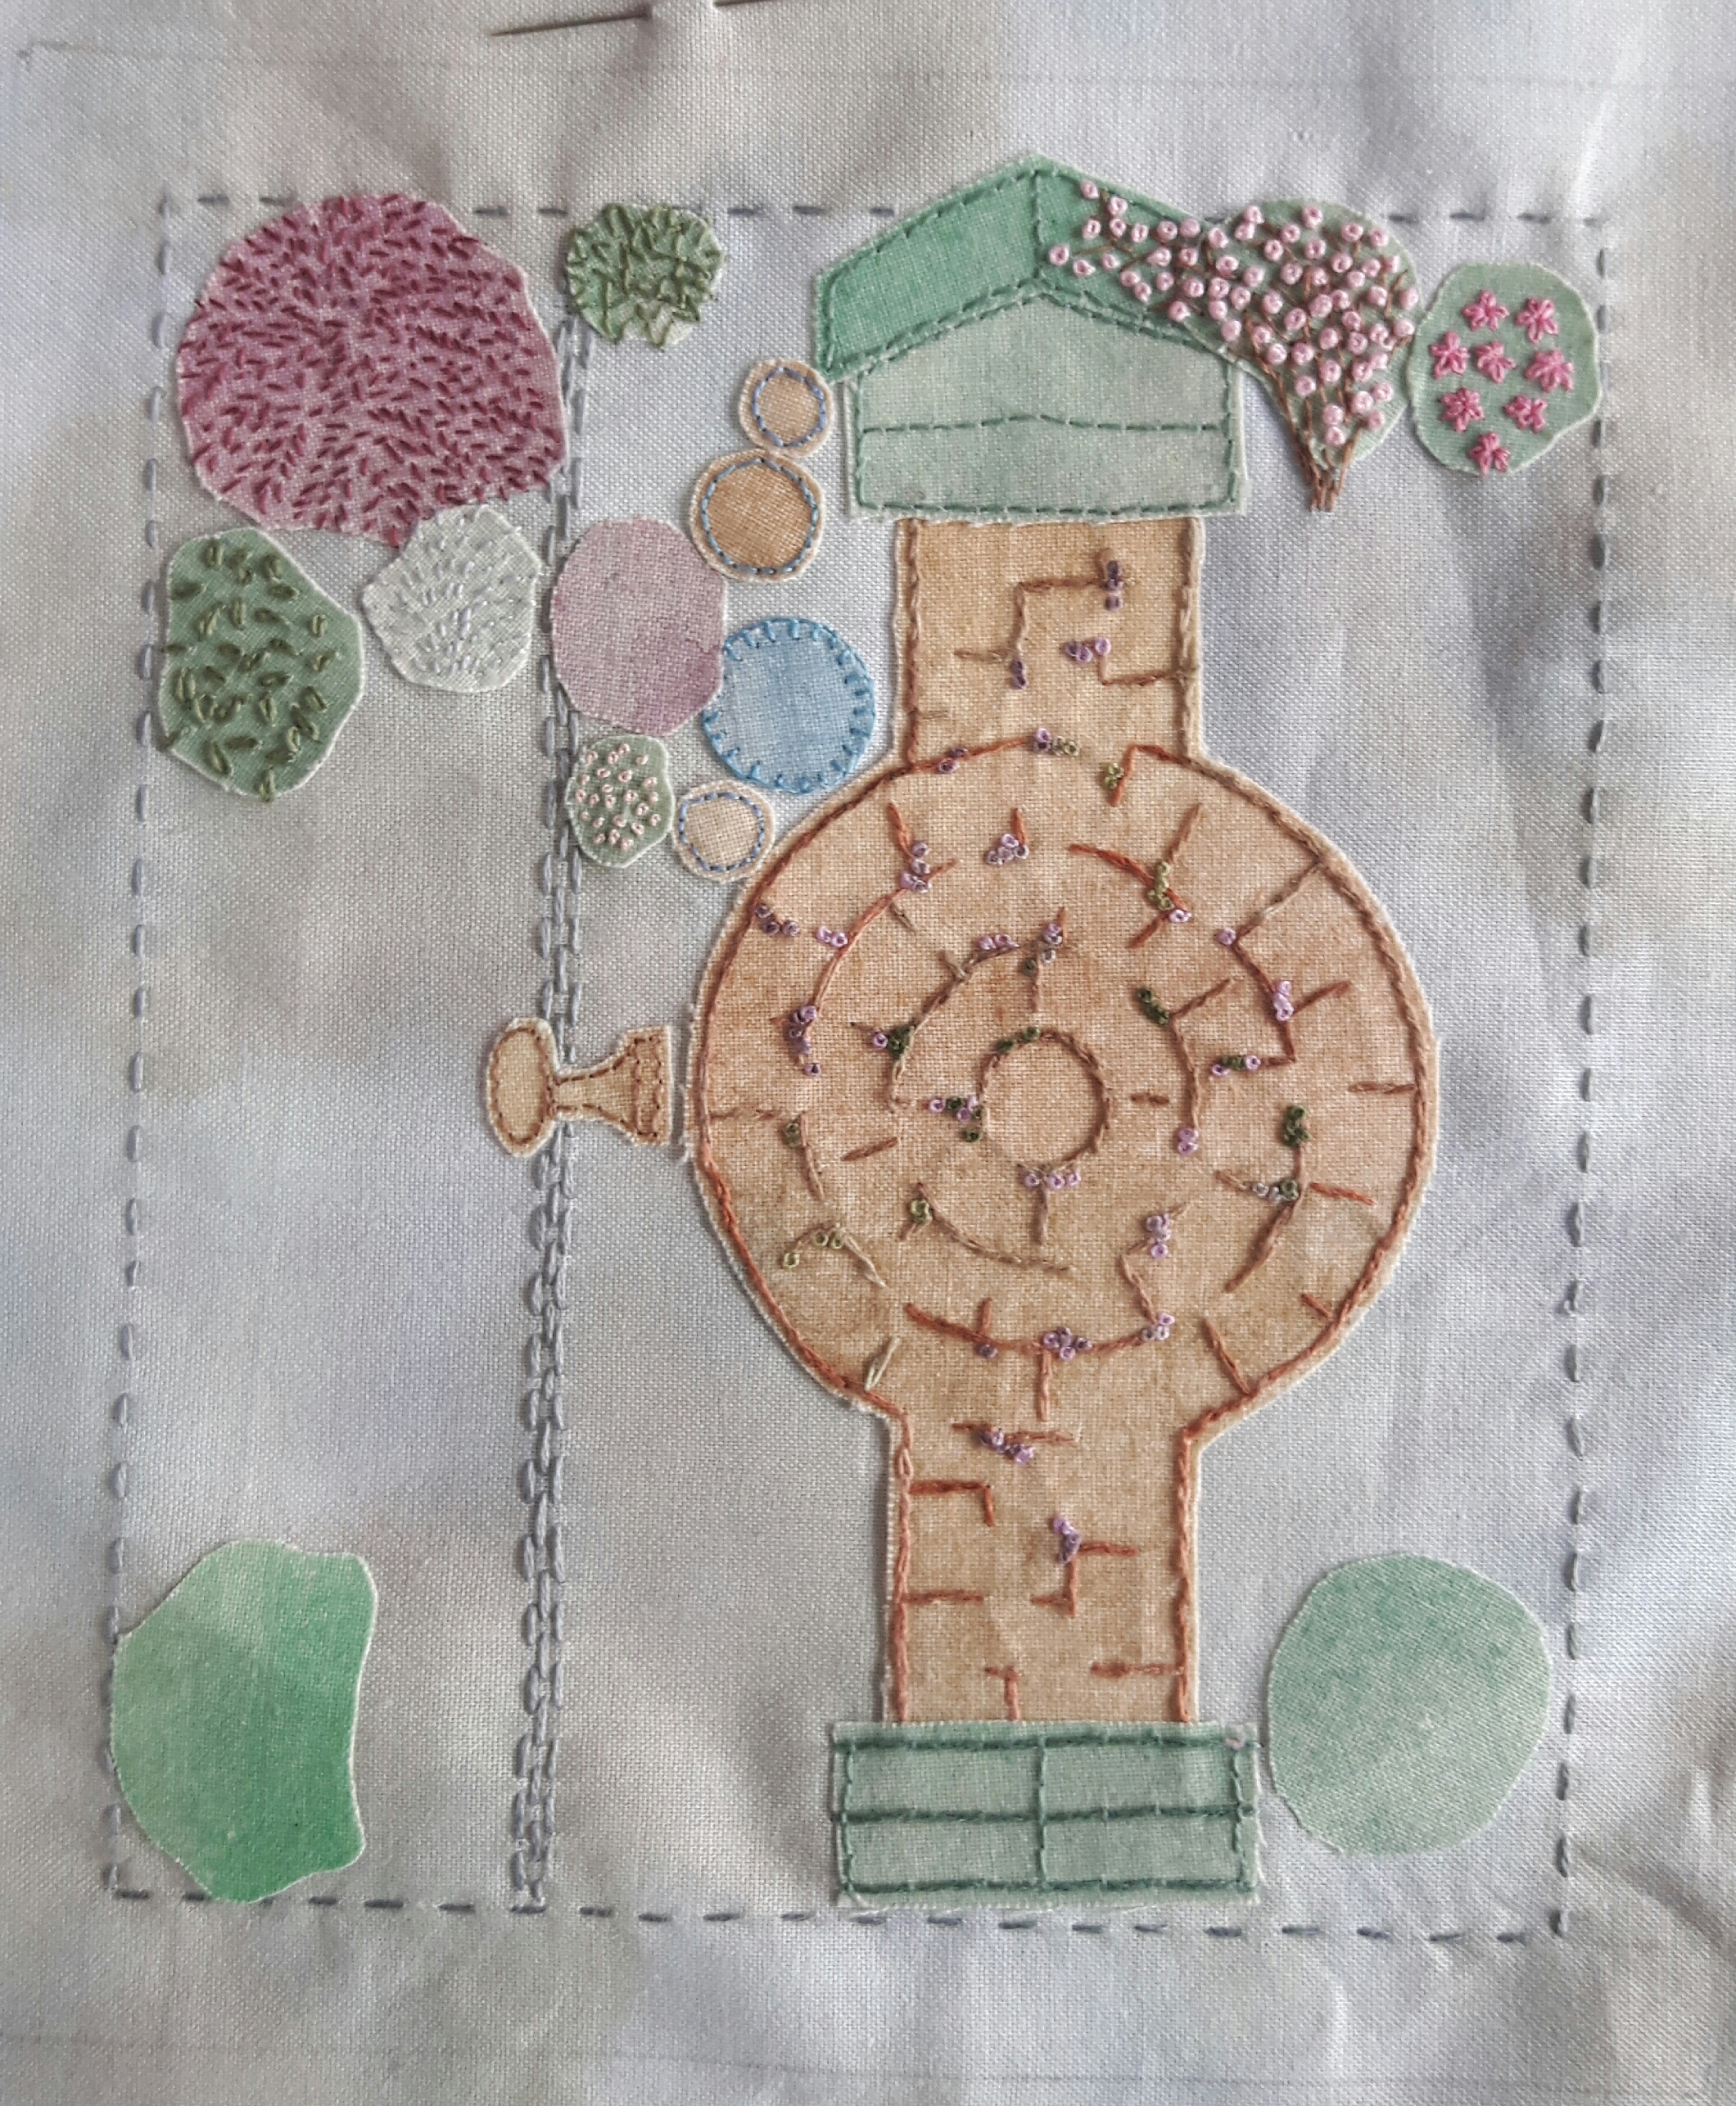
The perspective of the piece was still making me procrastinate even more, having designed the piece as if above the arch, if I stuck true to the view then things like the bird bath would be just circles, which way do I embroider plants such as irises…
There has to be an element of artistic license in projects such as this, so I’ve decided to portray the borders as if you’re standing on the patio. I’m working my way through a set of on-line lessons from Nicki of The Stitchery, the course is called Stitch-a-Garden, it’s been a lovely course as she’s sort of felt her way along the lesson format as she has been stitching her piece based on Beatrix Potter’s garden. I was very encouraged when I saw how she had stitched a flower border as a profusion of plants is what I’m aiming for here.
Last week I tried a bit of water colour painting on fabric to colour the background a bit, this was the embroidery representing a huge pink geranium which up until this spring was next to the arch and behind the gate…
Encouraged by the effect I decided to paint the border areas of the patio garden. I used several shades of green and allowed them to mix and merge together. They bled a little beyond the outer row of stitching but I was fine with that as the borders of my garden do overflow somewhat! I’m really pleased with how the painting came out, it just softens it nicely.
As you can see I have finally started stitching the plants. The blue irises round the birdbath are just straight stitch leaves and then a loose fly stitch for the flower. The obelisk of canes is just four long straight stitches which I then couched down as I was stitching the twining stems. The little blue clematis flowers are tiny straight stitches, like a little star, although I have realised since that although I have several blue clematis like that, the actual clematis here is more pink!!
I’ve added a trunk and branches to the magnolia stellata and a few flowers. This is another bit of artistic license as magnolias flower before the leaves appear, but at least it identifies it as the magnolia! I have stitched a magnolia with the bare branches earlier in the year for the garden textile book…
I think I need to look back at Nicki’s flower border again for more ideas (and confidence!) but I’m pleased with it so far. Hopefully by the time I’ve finished this one I’ll have got the knack of stitching all the flowers and the other two areas of the garden won’t take as long!
This stitch-a-long is organised by Avis from Stitching by the Sea, please follow the links to see what everyone else has been stitching.
I started an on line embroidery course with Zara Day a few weeks ago on cartography, I love looking at maps and I’ve a couple of ideas rumbling round my head of embroidered maps, so hopefully this will give me a kick start.
I’m a little behind at the moment as the lessons are weekly and I’ve a lot going on at the moment at home but this week I’ve managed to do a bit of catching up. Each week we try a different way of embroidering maps, from stitching on the actual paper to hand-stitching contour lines. These are the ‘maps’ I’ve stitched in the first couple of weeks…
The third lesson was ideas for stitching contour lines, making more of a geological map than the road maps of the previous pieces. Most of us seem to be finding the most difficult bit of this course is finding a suitable map to the scale or detail we require, together with finding an area personal to us but with enough variety on it to be interesting to stitch.
Of course my first thought was Catbells, I’ve stitch this fell many times but always as an outline shape, rather than the contours of a map. I found an OS map on line which I could adjust to the size I wanted, rather than tracing the ones I have at home. I made my map slightly smaller, just so I could get the areas of interest on whilst not being too big and taking forever to stitch.
The four squares I chose included Catbells and Derwentwater. I decided to paint the background with silk paints. I added aloe vera gel as an experiment to see if it stopped the silk paint from spreading. It did, though it didn’t go on quite as smoothly as I would have liked.
I embroidered the main contour lines, on the map there’s another four fine ones in between each of these which would clearly have been too much on this scale. I used a single thread of DMC and back-stitch. I tried to keep as much as possible to the colours on an OS map, so the footpaths are in green running stitch, different stitch lengths denoting the size of the path. The road is in yellow and the route of the Derwentwater launches is in dark grey. I included the blue grid markings too which help to frame it whilst allowing the map to extend a bit further. To give you an idea of scale, the four boxes measure just under three inches.
I’m pretty pleased with this one as a practise piece.
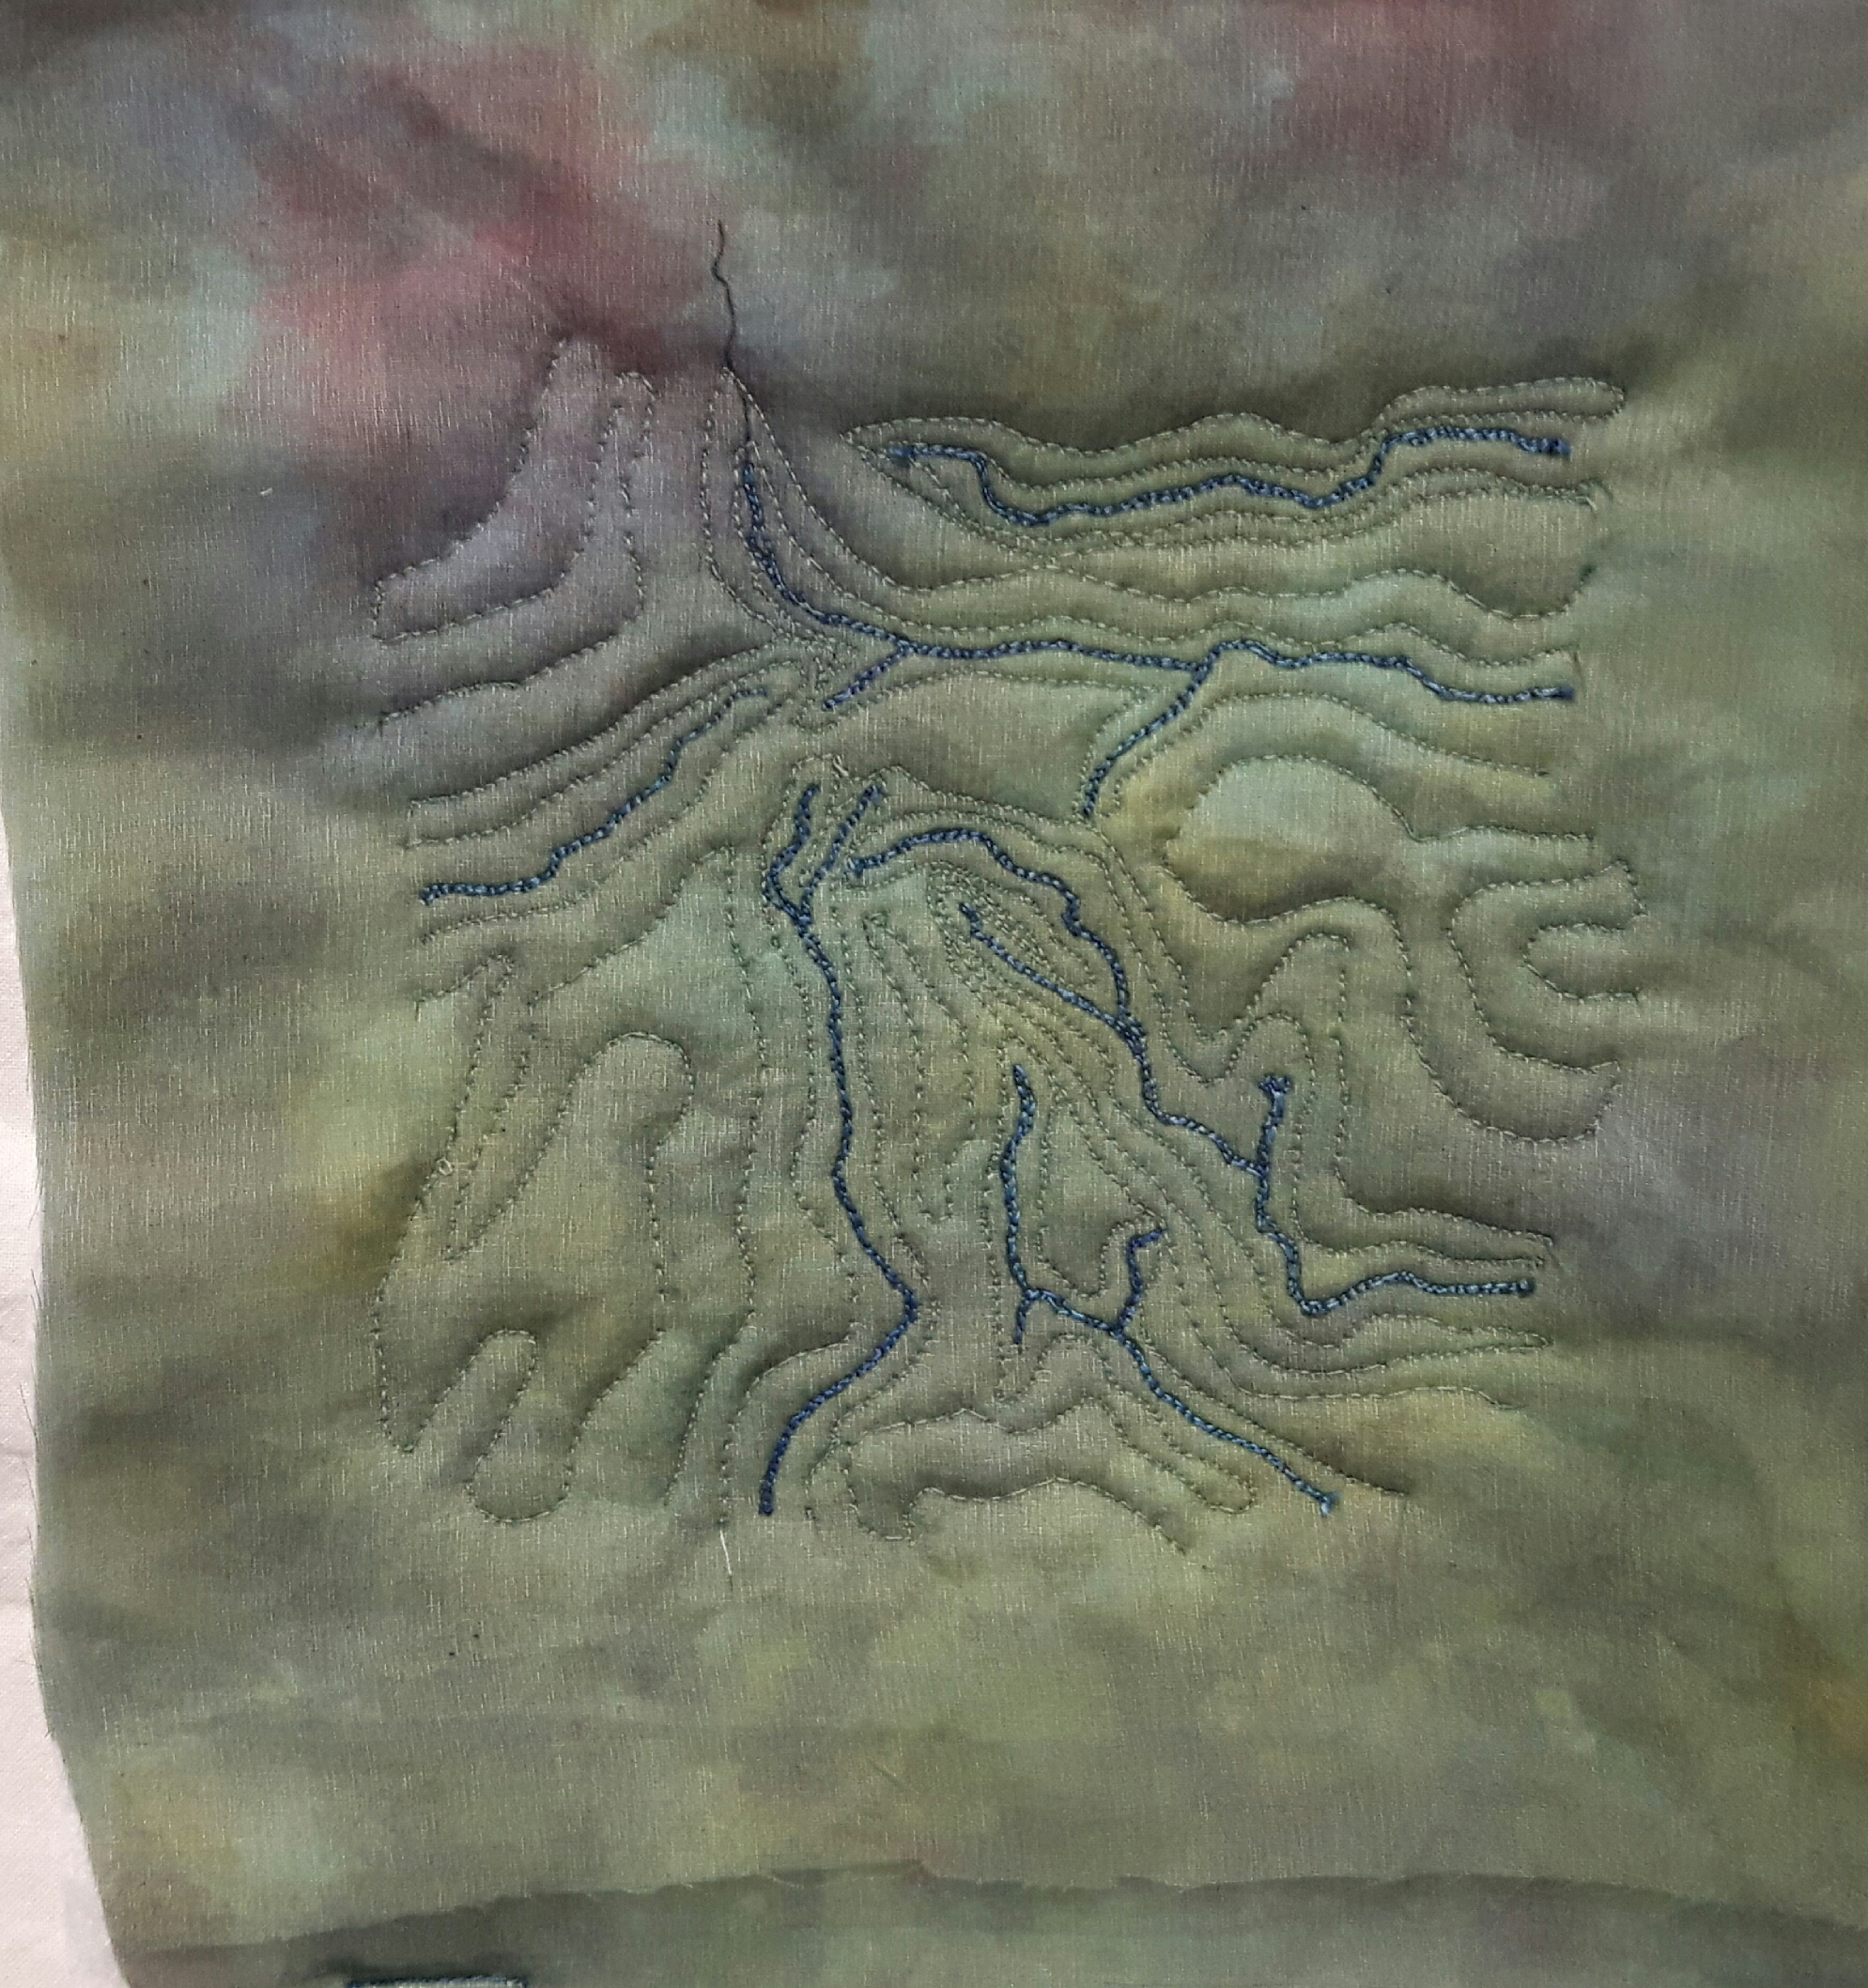
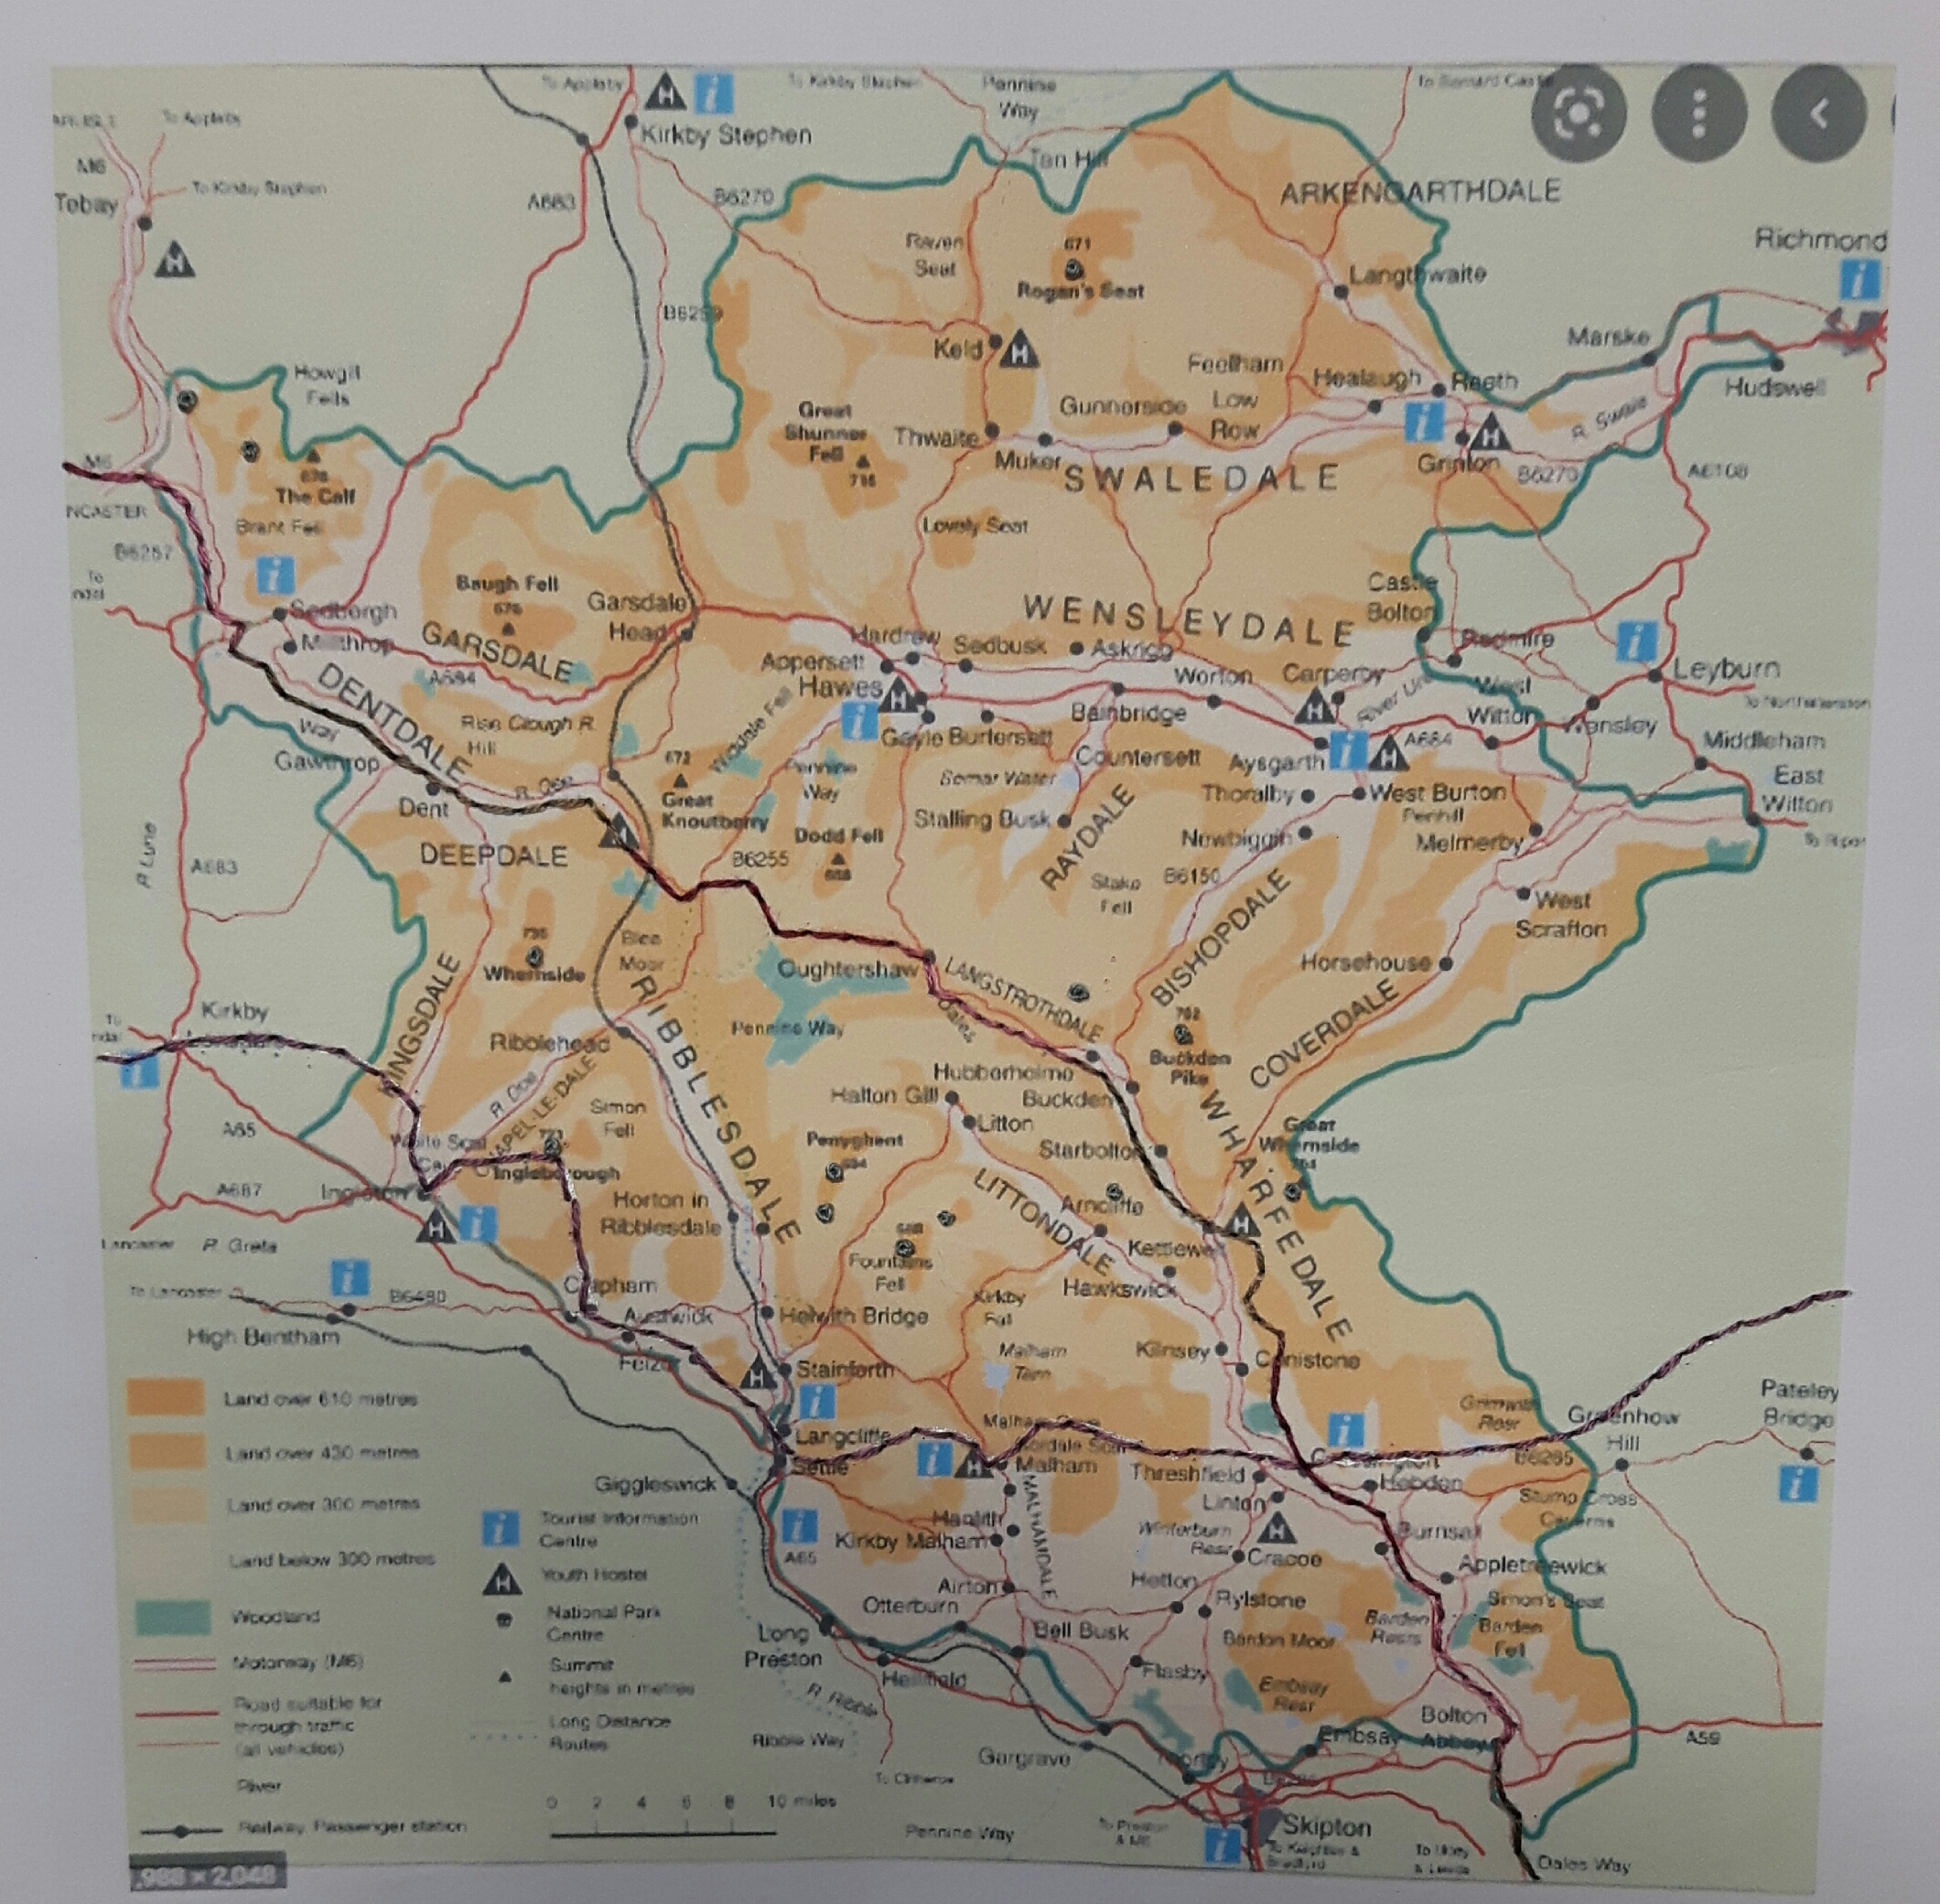
The next lesson was about using quilting to stitch a map. One idea I’ve had mulling about for a couple of years is to embroider a map of the Yorkshire Dales, with not just the main valleys such as Wharfedale, Wensleydale and Swaledale, but all the little side valleys such as Langstrothdale or Bishopdale. Whist my idea is for quite a big embroidery, I decided to do a mini version.
I found a map which showed the rivers and dales, I traced the rivers and then used a light box to transfer the tracing onto some calico. I didn’t want a plain calico background so I had a rummage in one of my stash boxes and found some lovely organza in shades of green and purple, perfect!
I sandwiched the fabrics together with some batting and a calico back and used free motion quilting to outline the rivers in a variegated blue thread. I went over the lines a second time to make them a bit heavier.
My original thought was that the quilting of the river courses would provide me with the valley and fell in relief, a sort of 3D map, however there just wasn’t enough stitching so I decided to do some ‘contour’ lines in green. Here artistic license took over, as I didn’t want to start trying to trace and transfer lots of contours…so I made them up! I like the effect of the organza and the quilting on this piece, it’s certainly given me food for thought when I finally get round to stitching the dales…
I learnt a little interesting fact a couple of weeks ago about the river Wharfe which runs through Otley. On my map it’s the one which goes from the middle to about 4 o’clock. It’s the fastest rising and fastest falling river in Europe apparently.
I haven’t quite decided what I’m going to do with these maps yet, maybe I’ll put them all together in a fabric atlas of my favourite places!
I’ve been busy stitching over the last week, just haven’t quite got round to writing about it. I’ve stitched another couple of little embroideries for my garden book. These are both from the mystery bundle I bought from Soukie Soo, she draws pretty little designs onto vintage linen with a heat erasable pen which is perfect for me as if I want to change something or a design is not to my liking, I can just iron it!
Here’s three I stitched earlier…
My plan is to use these in crazy quilting pages or simple textile pages so I’m trying to link them to my garden. Last week I stitched a garden gate. We have a gate in between the patio and the rest of the garden, mainly to keep the dogs off the main garden. It opened against a billowing large geranium with deep magenta flowers…
I painted the gate after I had stitched the outline and the sides, probably not the best order but I used aloe vera gel to stop the paint from bleeding and I seem to have got away with it. I painted the background with some green watercolour which was useful practise for my main garden embroidery – more of that on Sunday.
In the front garden we have an abies Korean, a tall rather spindly fir tree which has the most amazing purple fir ones, so this is what the fir tree design has become with a few (rather too many maybe!) purple French knots. I’ve just realised when photographing it that I still need to stitch a bit of earth and grass for it to stand on.
I also received in the post a lovely bundle of linens from Sookie Soo, it’s a mystery bundle of vintage linens of varying weights and sizes, the smallest is A5 size, up to A4, fifteen different pieces. They’ll be great for little embroideries as they have a lovely texture to them. They’re all white but they will take dye or paint. I think they will be perfect for my garden book.
I’ve still a long way to go with my garden book but I think I might start putting some of these little embroideries onto a page, otherwise it could be quite daunting at the end!
We had a fabulous workshop last month at Skipton Stitchers, one of our members ran it, it was called a Garden Book workshop and I really didn’t know what to expect. The equipment list was things like papers, fabric, paper napkins quotes, glue, blade…luckily she was bringing lots of stuff as I really haven’t got much in the way of decorative papers.
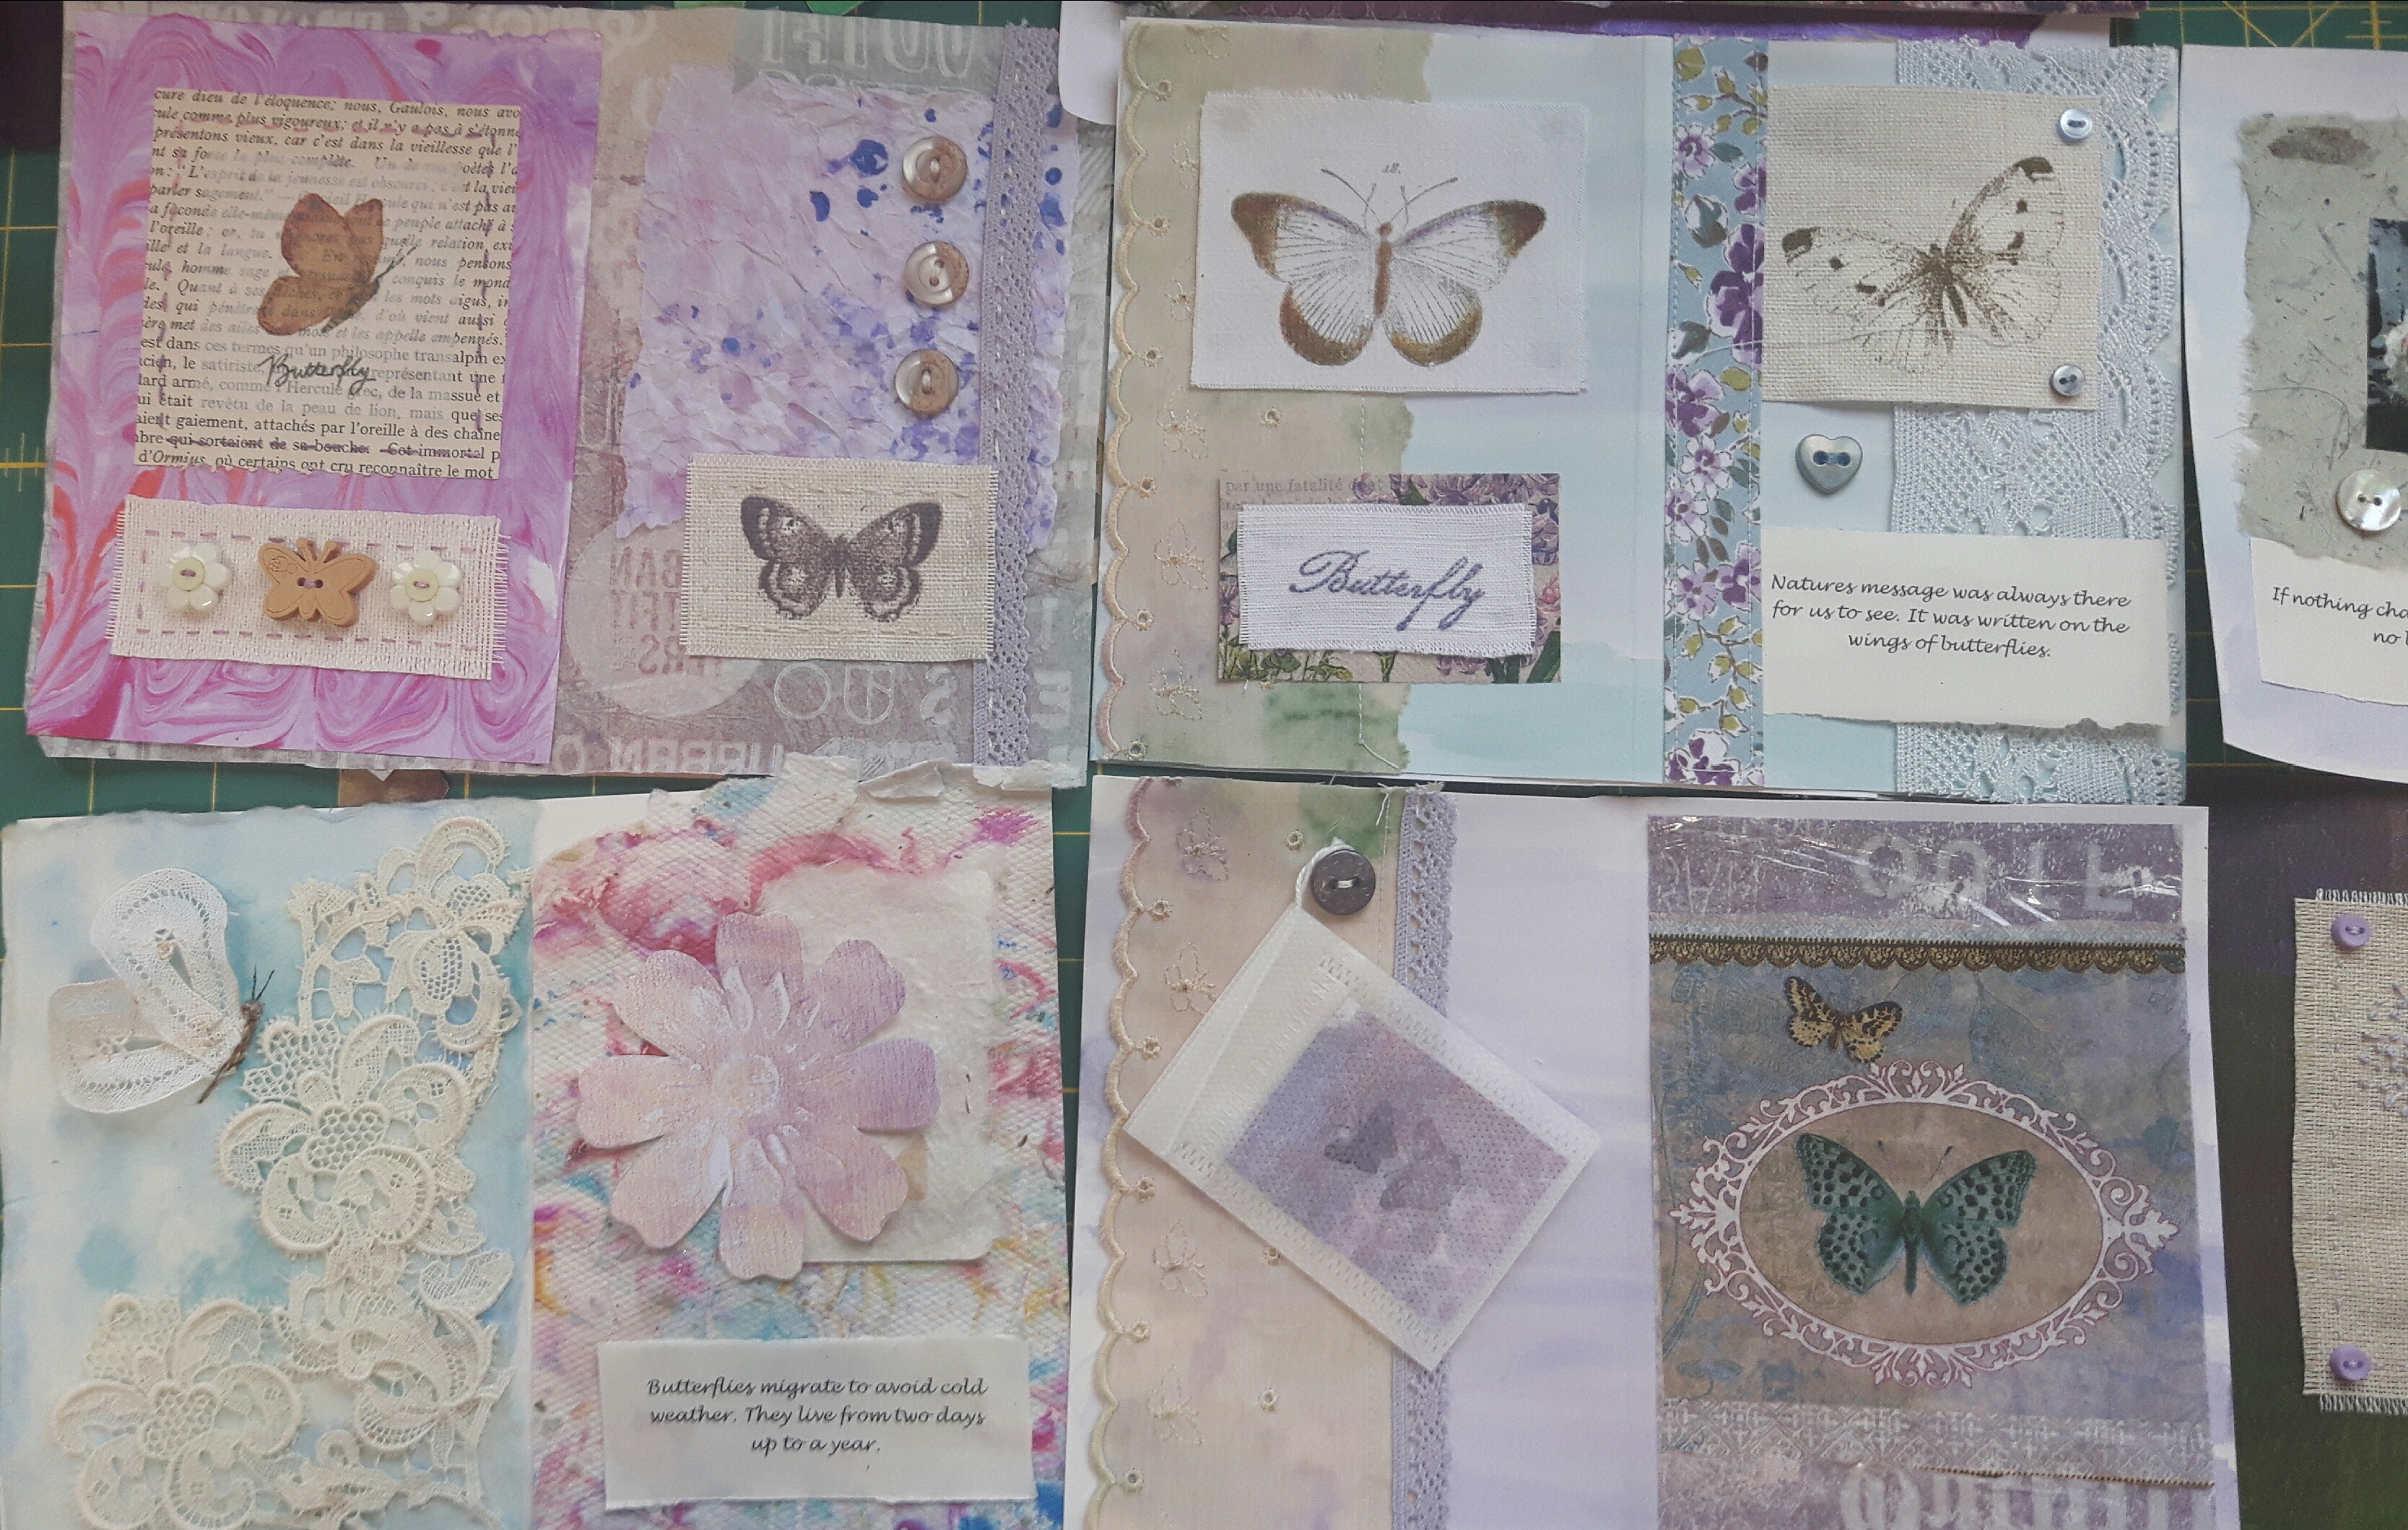
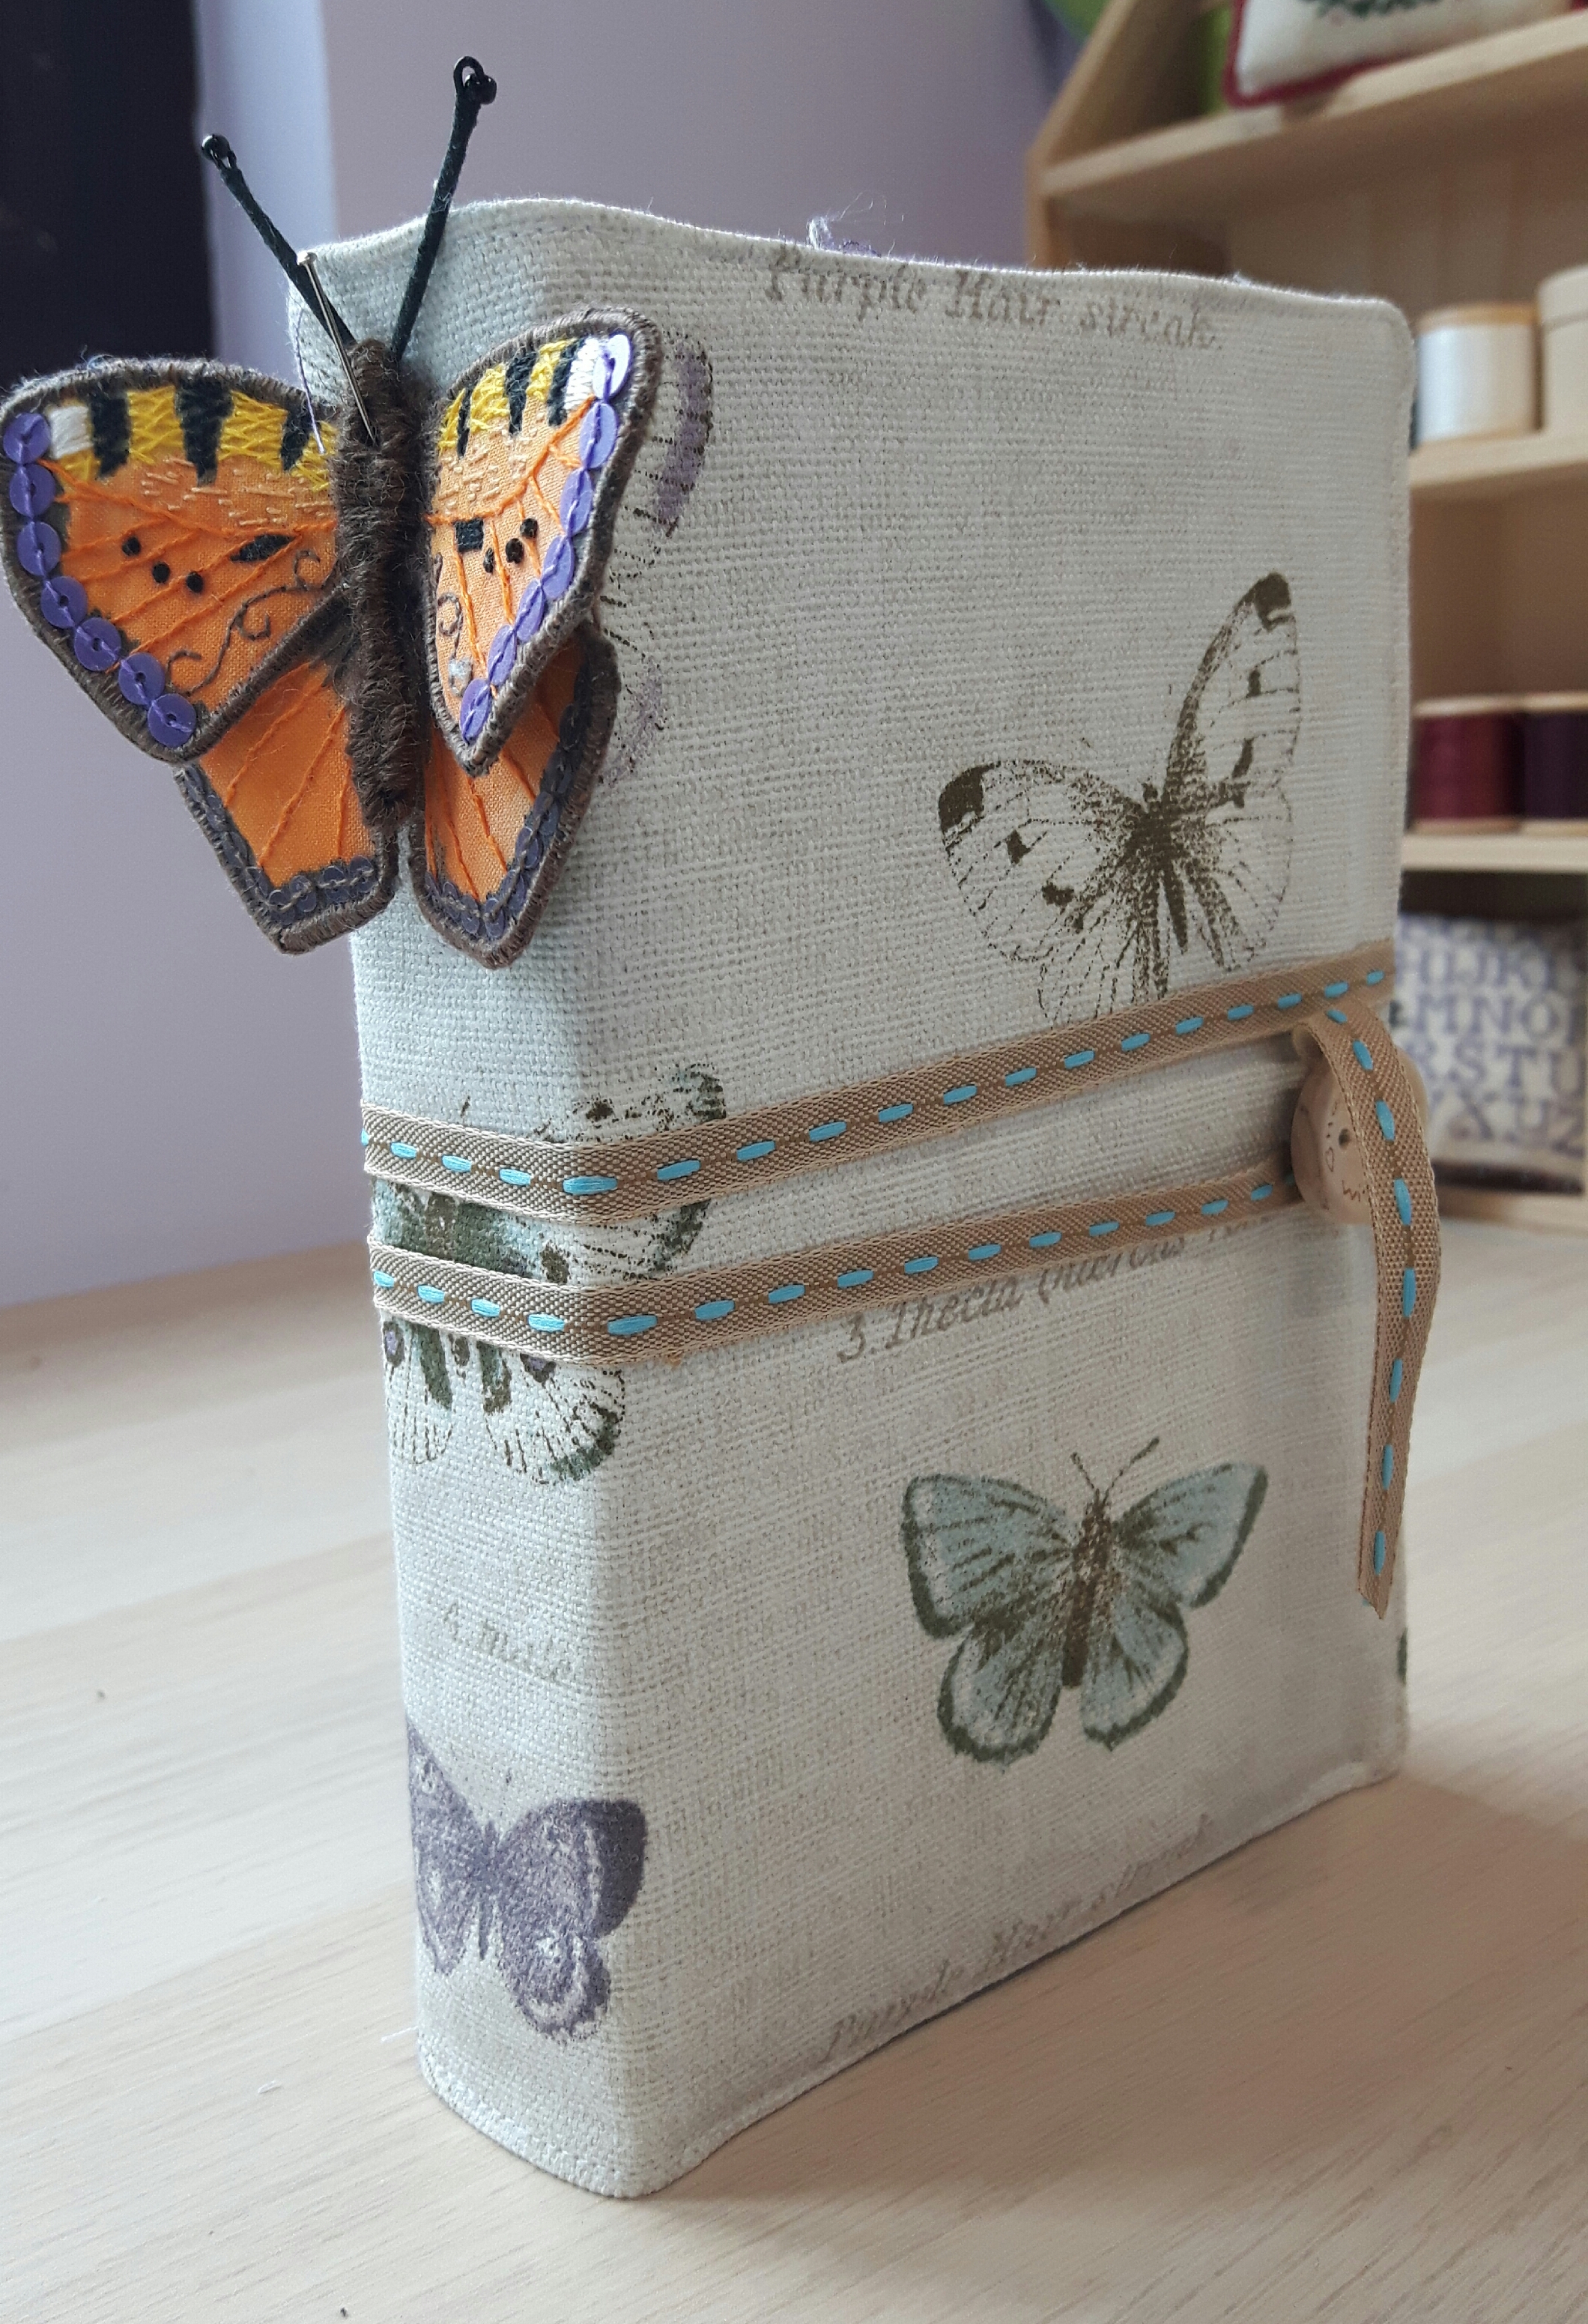
I took some pretty butterfly fabric with me and this provided me with the inspiration to make a butterfly book.
Well I had a wonderful time, sticking, playing with papers, learning all sorts of new tricks…
We made ‘stickers’ by putting sellotape over a magasine image then soaking it in hot water, the paper comes away leaving the image on the tacky sellotape! The ones I did at the workshop didn’t come out as well as I wasn’t careful enough to keep the sellotape smooth, but I did one at home and it came out beautifully.
We stuck a single ply of a pretty napkin onto vintage book pages using clingfilm! We just put the clingfilm in between and covered it with brown paper and then pressed it with a hot dry iron and it melted enough to stick the napkin.
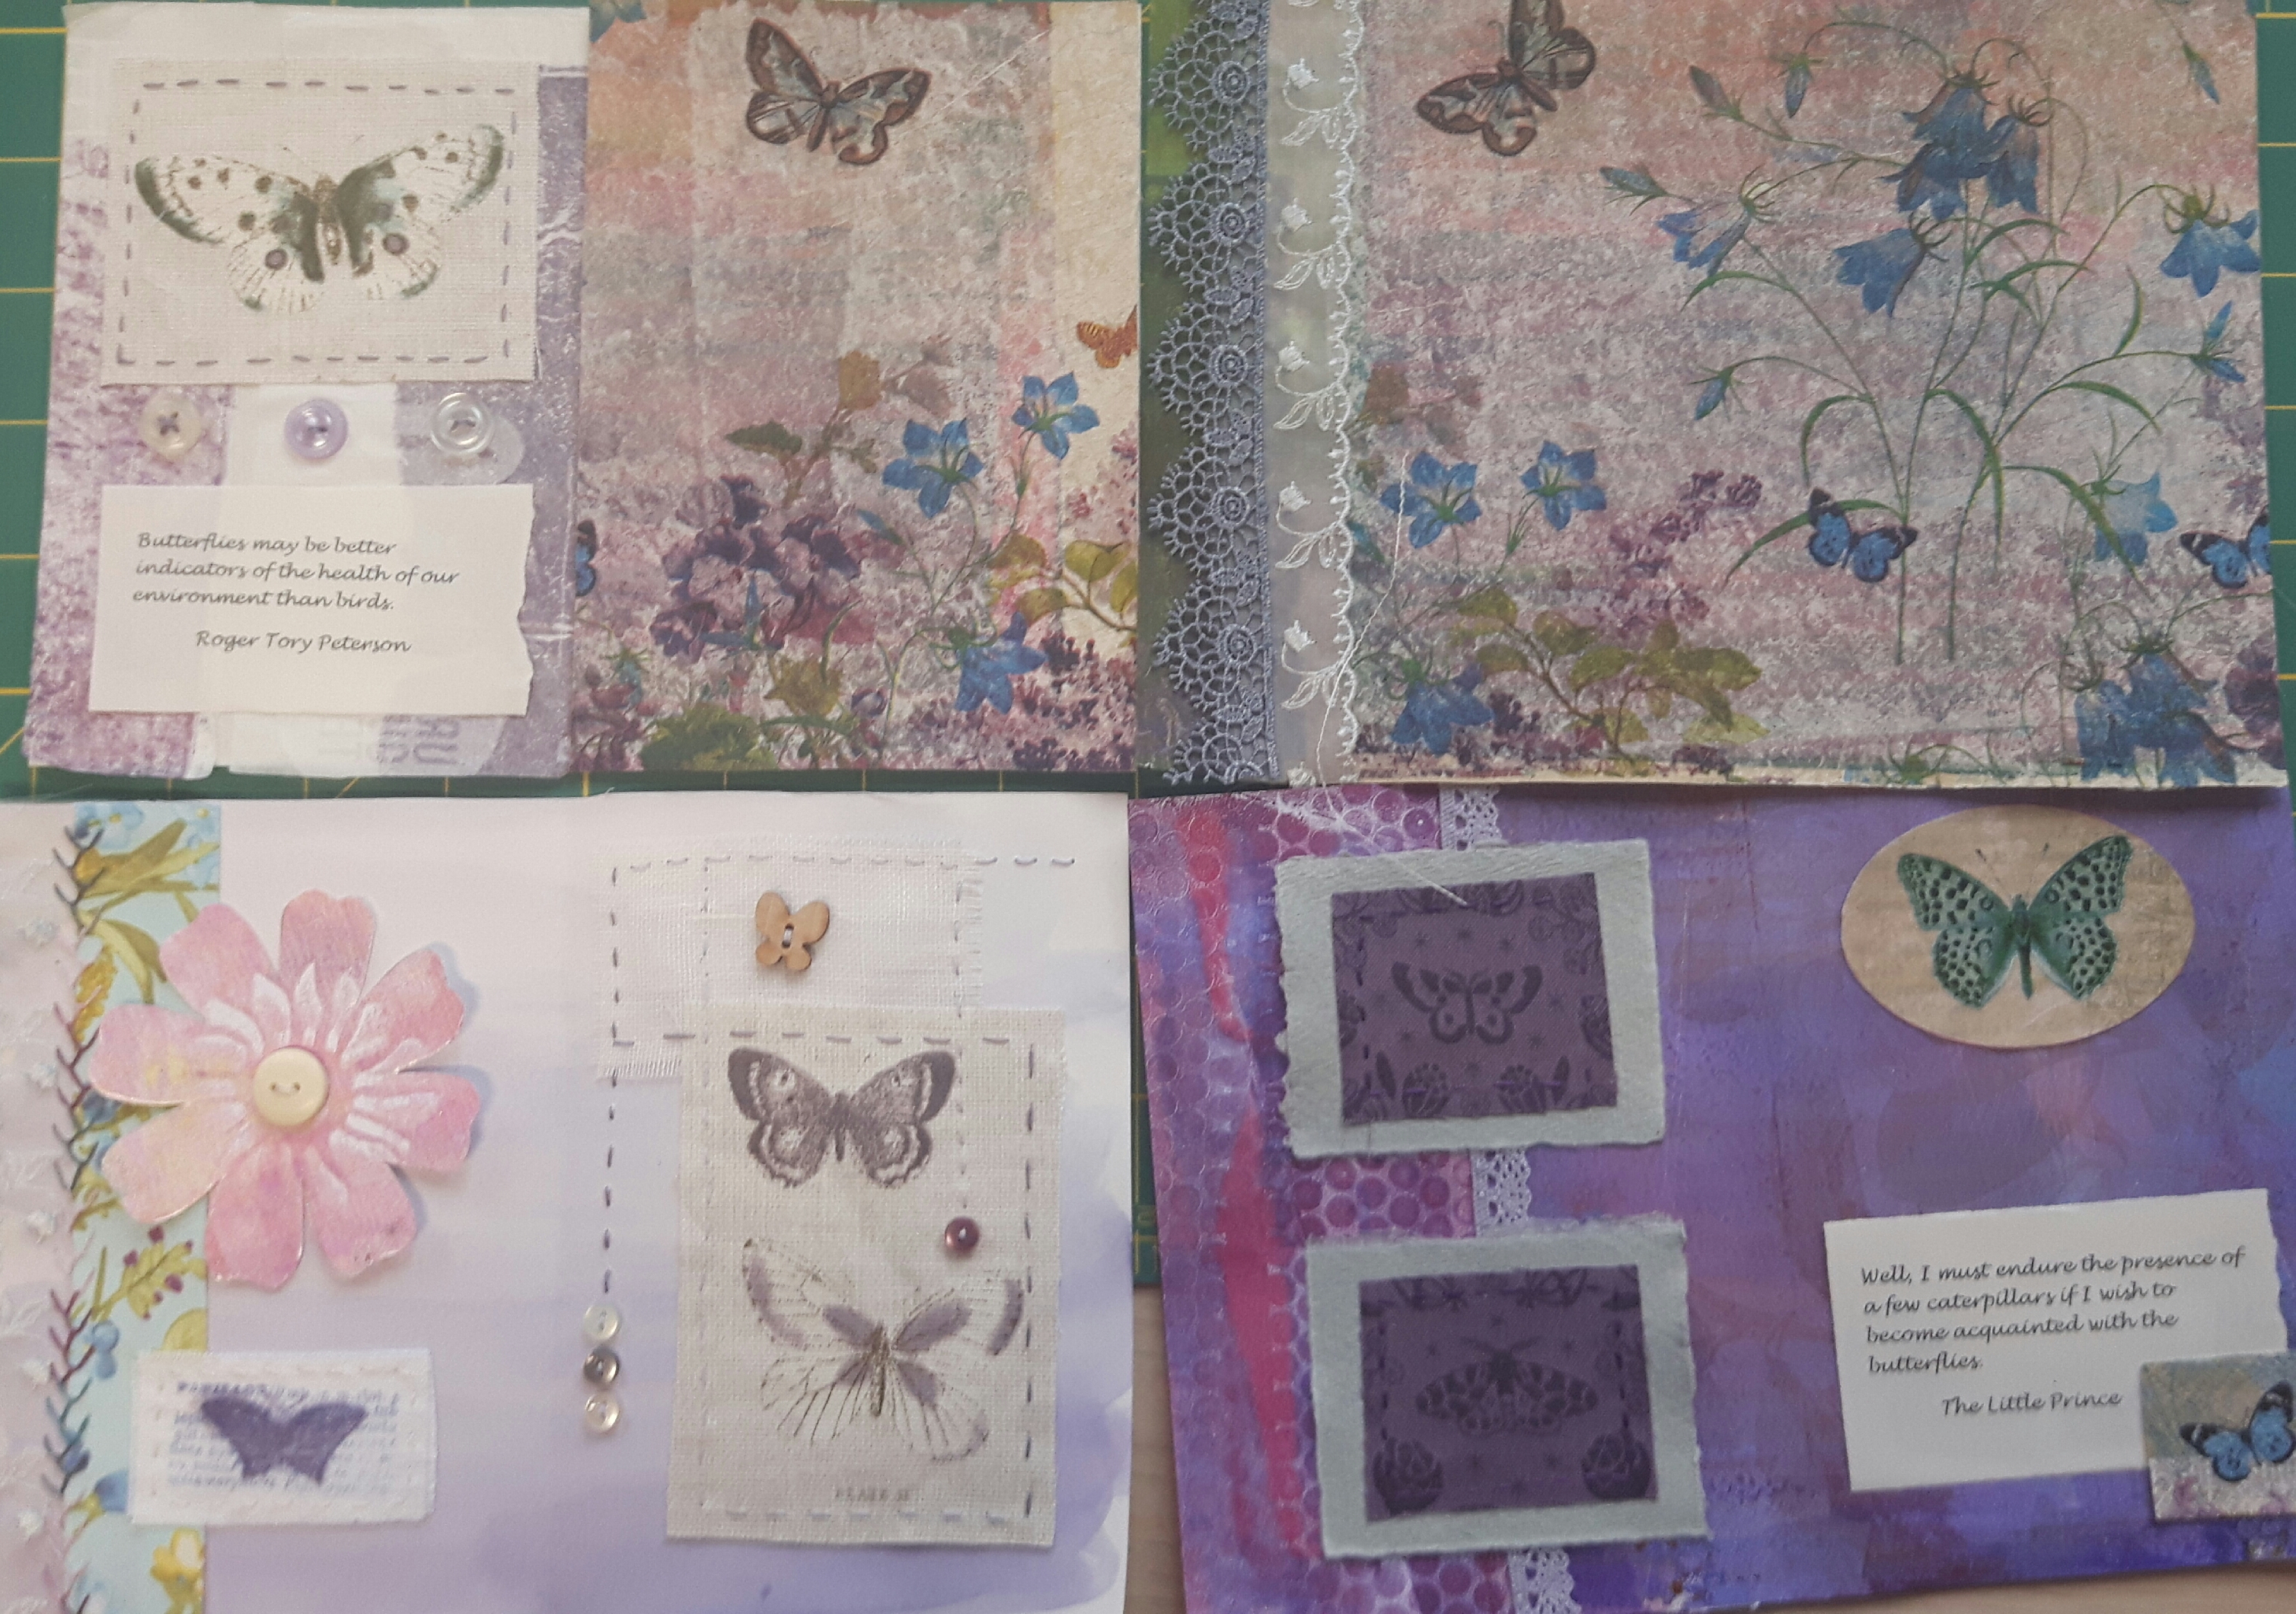
We had to make a total of twelve double pages, each set was A5 size. Apparently these pages are called signatures. Sally showed us how to layer the papers, add bits on to make them big enough, add simple flowers or buttons. She had a huge stash of what she called rejects from eco printing, they certainly wouldn’t be in my reject pile!! Clearly in a day we weren’t going to make all twelve but she was happy for us to take bits home so we could finish our book. Luckily I found several sheets which fitted in with my theme of butterflies and colours of teal and purple…even if it did wander to pink too.
Once home I set about making the dozen signatures. I found some quotes about butterflies and printed them off, I made a lace butterfly from an old doilly, I tried tea dying for the first time when I realised I had some very white broderie anglais with butterflies on. It took quite a while as I really overthought the first few, over stitched some, eventually I realised I was going to have to do a few cut and stick ones otherwise it would take too long. My cutting table looked like a bomb had hit it!
Next came the clever part, how to put it together. Each double page had a slit cut down the centre leaving a good inch top and bottom. Next I needed an A4 piece of card cut full length but the width just a tad narrower than the slits. The piece of card was then folded in half and then again and again till it looked like this…
The signatures were put into pairs to go back to back with each other and an order sorted, then each pair of pages was ‘threaded’ onto a fold of paper (there’s six ‘mountains’ in the photo above for the six pairs of pages. A long narrow piece of card was then threaded up the middle of the ‘mountain’ so it stuck out a bit each end. This holds the pages in place but also means they can be changed or moved around if necessary. I was amazed how sturdy it all was. The double pages could now be stuck or stitched together to hide the backs, I remembered I had lots of double-sided sticky tape which I found when clearing my mums house, it worked fine and probably less messy than me with glue!
Having made the book I then had to make a cover. I felt it needed to be firm so I cut some daler board to size and made a fabric cover with the original fabric which inspired the whole book on the outside, I managed to position it so the little blue butterfly was centred on the spine. I added the button and ribbon to keep it closed. As an afterthought I pinned on a butterfly which I made at a workshop a few years ago, it’s been hanging round my sewing room ever since. It’s only pinned at the moment whilst I decide if it works but I thought by putting it on the spine I could stand the book up in a row and it wouldn’t get damaged.
I’m now trying to work out if I could use this system of construction with fabric books!
We have an exhibition in October called ‘There is no planet B’ so I’m thinking it could go in there, it used lots of recycled bits and it’s all about nature. One of my favourite quotes in the book is very apt…
Having to write this post today for the Hand Quilt-a-long gave me the impetus I needed yesterday to start it. I found the fabrics I had ear-marked for the back which were three remnants of varying sizes left over from the front. The whole quilt is made with leftovers as I had a fair amount left when I finished the Coming Home quilt in the beginning of 2020. I pieced it during the lockdowns of 2020 and the embroideries came from a free stitch-a-long from Natalie of the Birdhouse. All the details about the embroideries and houses are in this earlier post.
Having finished my Seaside quilt, I decided to hand quilt this one too. I do like the feel of the hand-quilted quilts, they are soft and more cuddly than a machine pieced one. I just have to watch that I don’t try to quilt one that’s too big and put myself off hand-quilting again. This one is about 64″ square, a nice, manageable size.
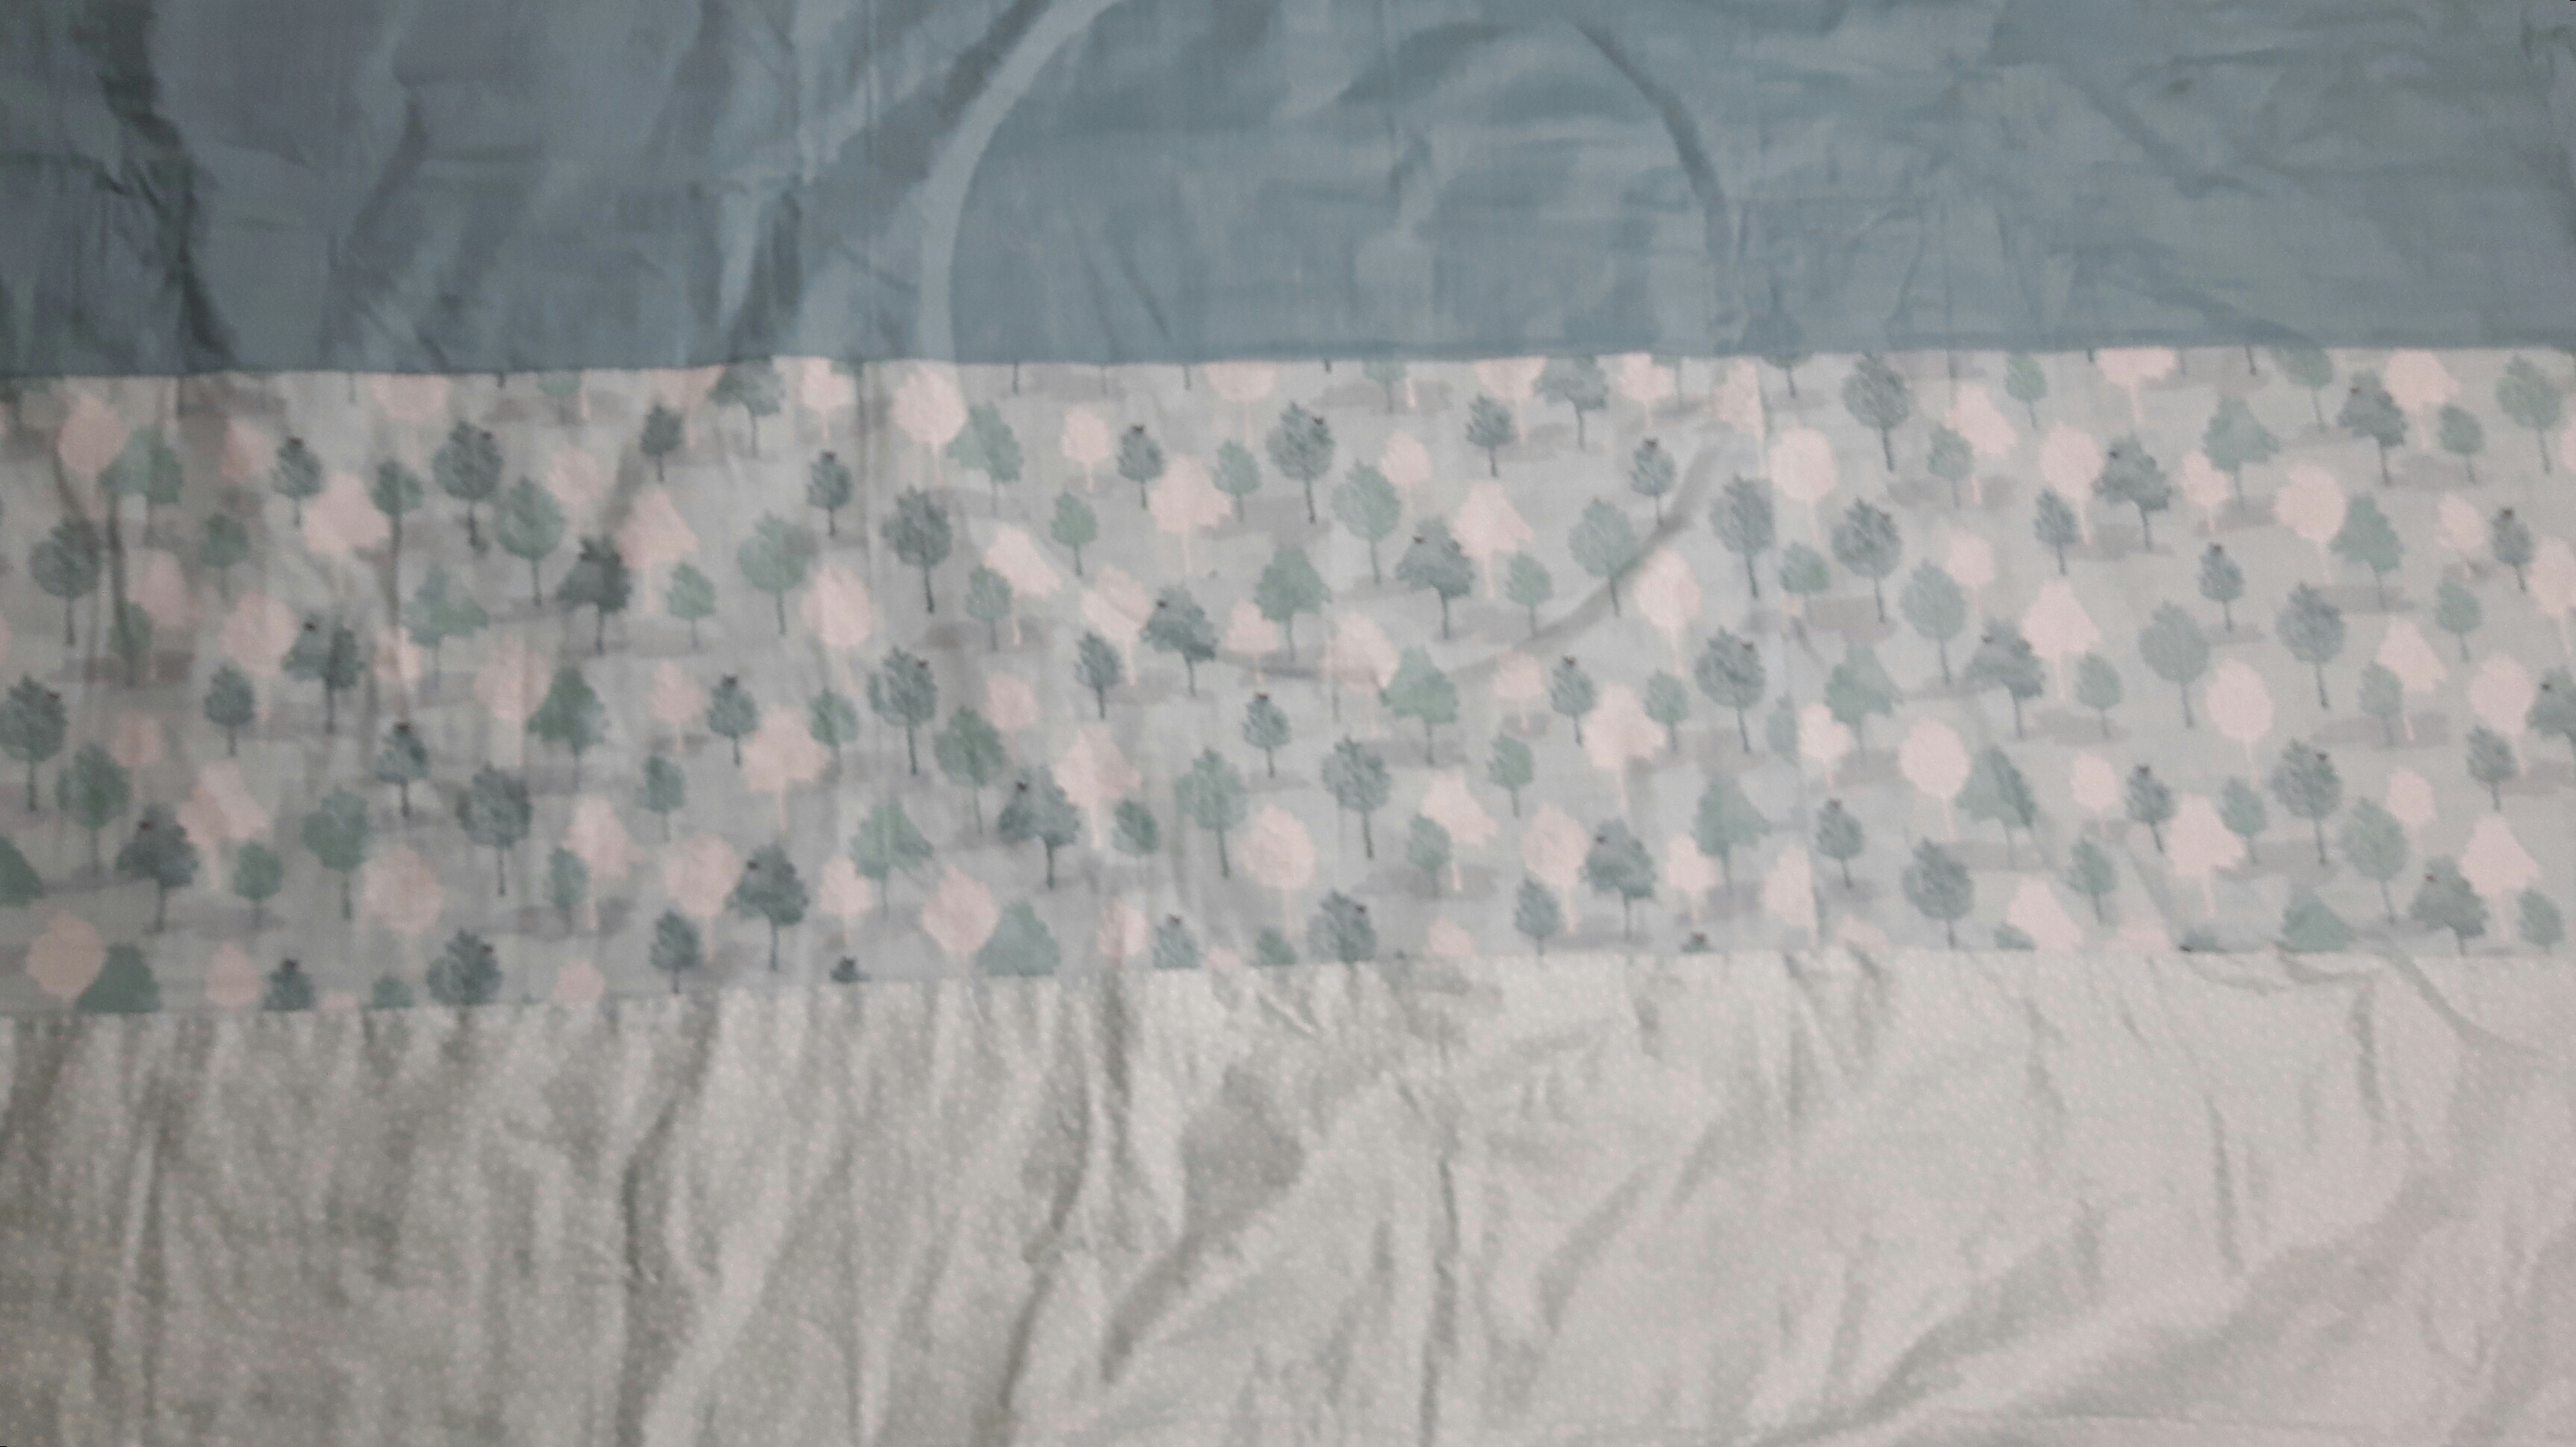
I had three different fabrics for the back, a muted green, one with trees on and a spotty one that glows in the dark like little stars. I worked out a piecing plan so I had three strips, a narrower one of trees for the middle and I originally planned the plain one at the bottom and the spotty one at the top. Unfortunately I sewed the plain one to the top and really couldn’t be bothered to unpick the whole seam. so it’s now a big green hill with trees in the middle and a field of cotton grass below!!!
The spots hardly show in the photo but they are there!
I sandwiched it yesterday evening with my usual 505 spray and organised everything for quilting it in front of the TV, a large lap hoop, two muted quilting cotton threads by Gutermann, a sharp needle and a thimble.
I’ve started with the cat square, I’ve just quilted just inside the seam line and also ‘echo’ quilted round the cat. it’s not much but at least I’ve started!
Hand Quilt Along Links
This Hand Quilt Along is an opportunity for hand quilters and piecers to share and motivate one another. We post every three weeks, to show our progress and encourage one another. If you have a hand quilting project and would like to join our group contact Kathy at the link below.
I seem to be doing a lot of embroidery at the moment, lots of little ones which don’t take long but are lovely to stitch…and they’ll go in my garden textile book. These ones are from a ‘Treasure Bundle’ I bought from Soukie Soo, it was a mystery bundle and there’s lots of sweet little designs to stitch on lovely vintage linen or cotton.
I’m trying to adapt the designs a little so that they show flowers which I have in my garden. This little wreath had a circle of leaves and some simple flowers om stems. I decided to turn it into a wreath of lilac. We had several lilac trees when we first moved in but they’re actually quite short lived trees and one day one fell over across the drive, luckily there was nothing underneath it. I tested the other three lilacs down the drive by giving them a little push and they all fell over! We’ve still got an old one behind the summerhouse which I keep testing every few months as I don’t particularly want it to end up on the summerhouse and also one near the big fence which sprouted up after the main trunk fell down!
I stitched the leaves with fish bone stitch and then used lots of French knots for the lilac flowers. I added some single French knots where there was a bit of a gap.
The next piece was a long garland sort of design. I decided to do this one as Teasing Georgia, which was the rose I had climbing up the arch over the patio until last year. It had lovely yellowy-orange blooms. I used a variegated DMC thread and bullion knots. Again I added a few French knots to fill in the spaces.
Another one from the bundle which I’ve embroidered today is just the word Butterfly, it was printed rather than written with disappearing ink but the stitches have pretty much covered the print. This one is going in a butterfly book, more of that another day! I’ve photographed it with another one which is waiting to be stitched.
It’s nice to do these little ones when I’m in the middle of some long term projects. If this style appeals to you, do have a look at Sookie Soos website, she does full kits as well as just the design on fabric.
I’ve enrolled on a Zara Day Cartography Embroidery course, I’m way behind as usual but as Zara sends links for all the recordings which I can then save, it doesn’t matter how long I take! I’m just enjoying the journey!
In the first workshop we were stitching directly onto a map, I used a map of the Yorkshire Dales where I could plot my walks…
We had a second method to try from the first week too. This involved choosing an area and stitching areas so the map could be cut a way in places. Half the conundrums on doing this course is choosing a map…and I’m clearly not alone from the comments on Whatsapp! In the end I decided to do a map of West Witton.
West Witton is a village in Wensleydale where my mum had a cottage for many years, she was up there every weekend and school holidays too, she made lots of friends in the village and joined in village activities as much as she could. We had many holidays up there too especially when the children were small.
I found a map and laid it over some soft green fabric, not sure if it’s cotton or linen but it feel lovely. I tacked round the map to hold it securely. I started off using stem stitch for the main road through the middle and a slightly thinner stem stitch for the side roads and back lanes.
I liked the patterns of the fields on the map with the remnants of the old strip fields which go back centuries. Each cottage would have a strip of land behind it to grow vegetables or raise animals or chickens. I used back-stitch in grey thread for the walls. I then used a scalpel to very carefully cut away the paper so the fields were shown as green fabric.
The blue chain stitch is used for the streams around the village. We used to often walk over the fields so the children could paddle in their wellies, the intermittent one shown at the bottom of the map is not much more than a rill in places but they would spend hours toddling up and down. I’ve found a photo, well it’s a photo of a photo of a photo, so excuse the quality!
I’ve stitched the footpaths in red and the heart shaped button is where my mums cottage was. The buildings weren’t very clear on the copy I made so I went over them with a sepia fine point pen.
The bunch of French knots by the lower footpath marks the spot where I rolled a rigged sheep, as a townie by birth I was pretty proud of myself! For those of you who are wondering what on earth a rigged sheep is…
In the spring when the fleeces are pretty thick the sheep can get top heavy especially after rain. If they overbalance they can’t get back up again and just lie stranded on their backs. Now sheep are a bit like chickens, one day you have a live healthy chicken, the next day it’s dead, or as a friend who’s a farmer once said to me, any excuse and a sheep will die! If they are left upside-down for any length of time they won’t survive, all you have to do is give them a push to roll them back over onto their feet. In Yorkshire this is known as riggwelter or a rigged sheep. Those of you in the UK will probably have heard of Black Sheep beer, it’s brewed in Masham, just down the road from the cottage. They have a beer called Riggwelter, it’s 5.9% so pretty strong for a beer (so I’m told!) and if you drink too much you’ll end up riggweltered!
Anyway, I gave the sheep a push and over it went and trotted off down the field.
So there’s lots of happy memories in this stitched map. I put it in a ring frame partly to reduce the amount of stitching and I think it looks pretty good.