We’re invited to a wedding tomorrow, I finally managed to finish my outfit yesterday, just in time!
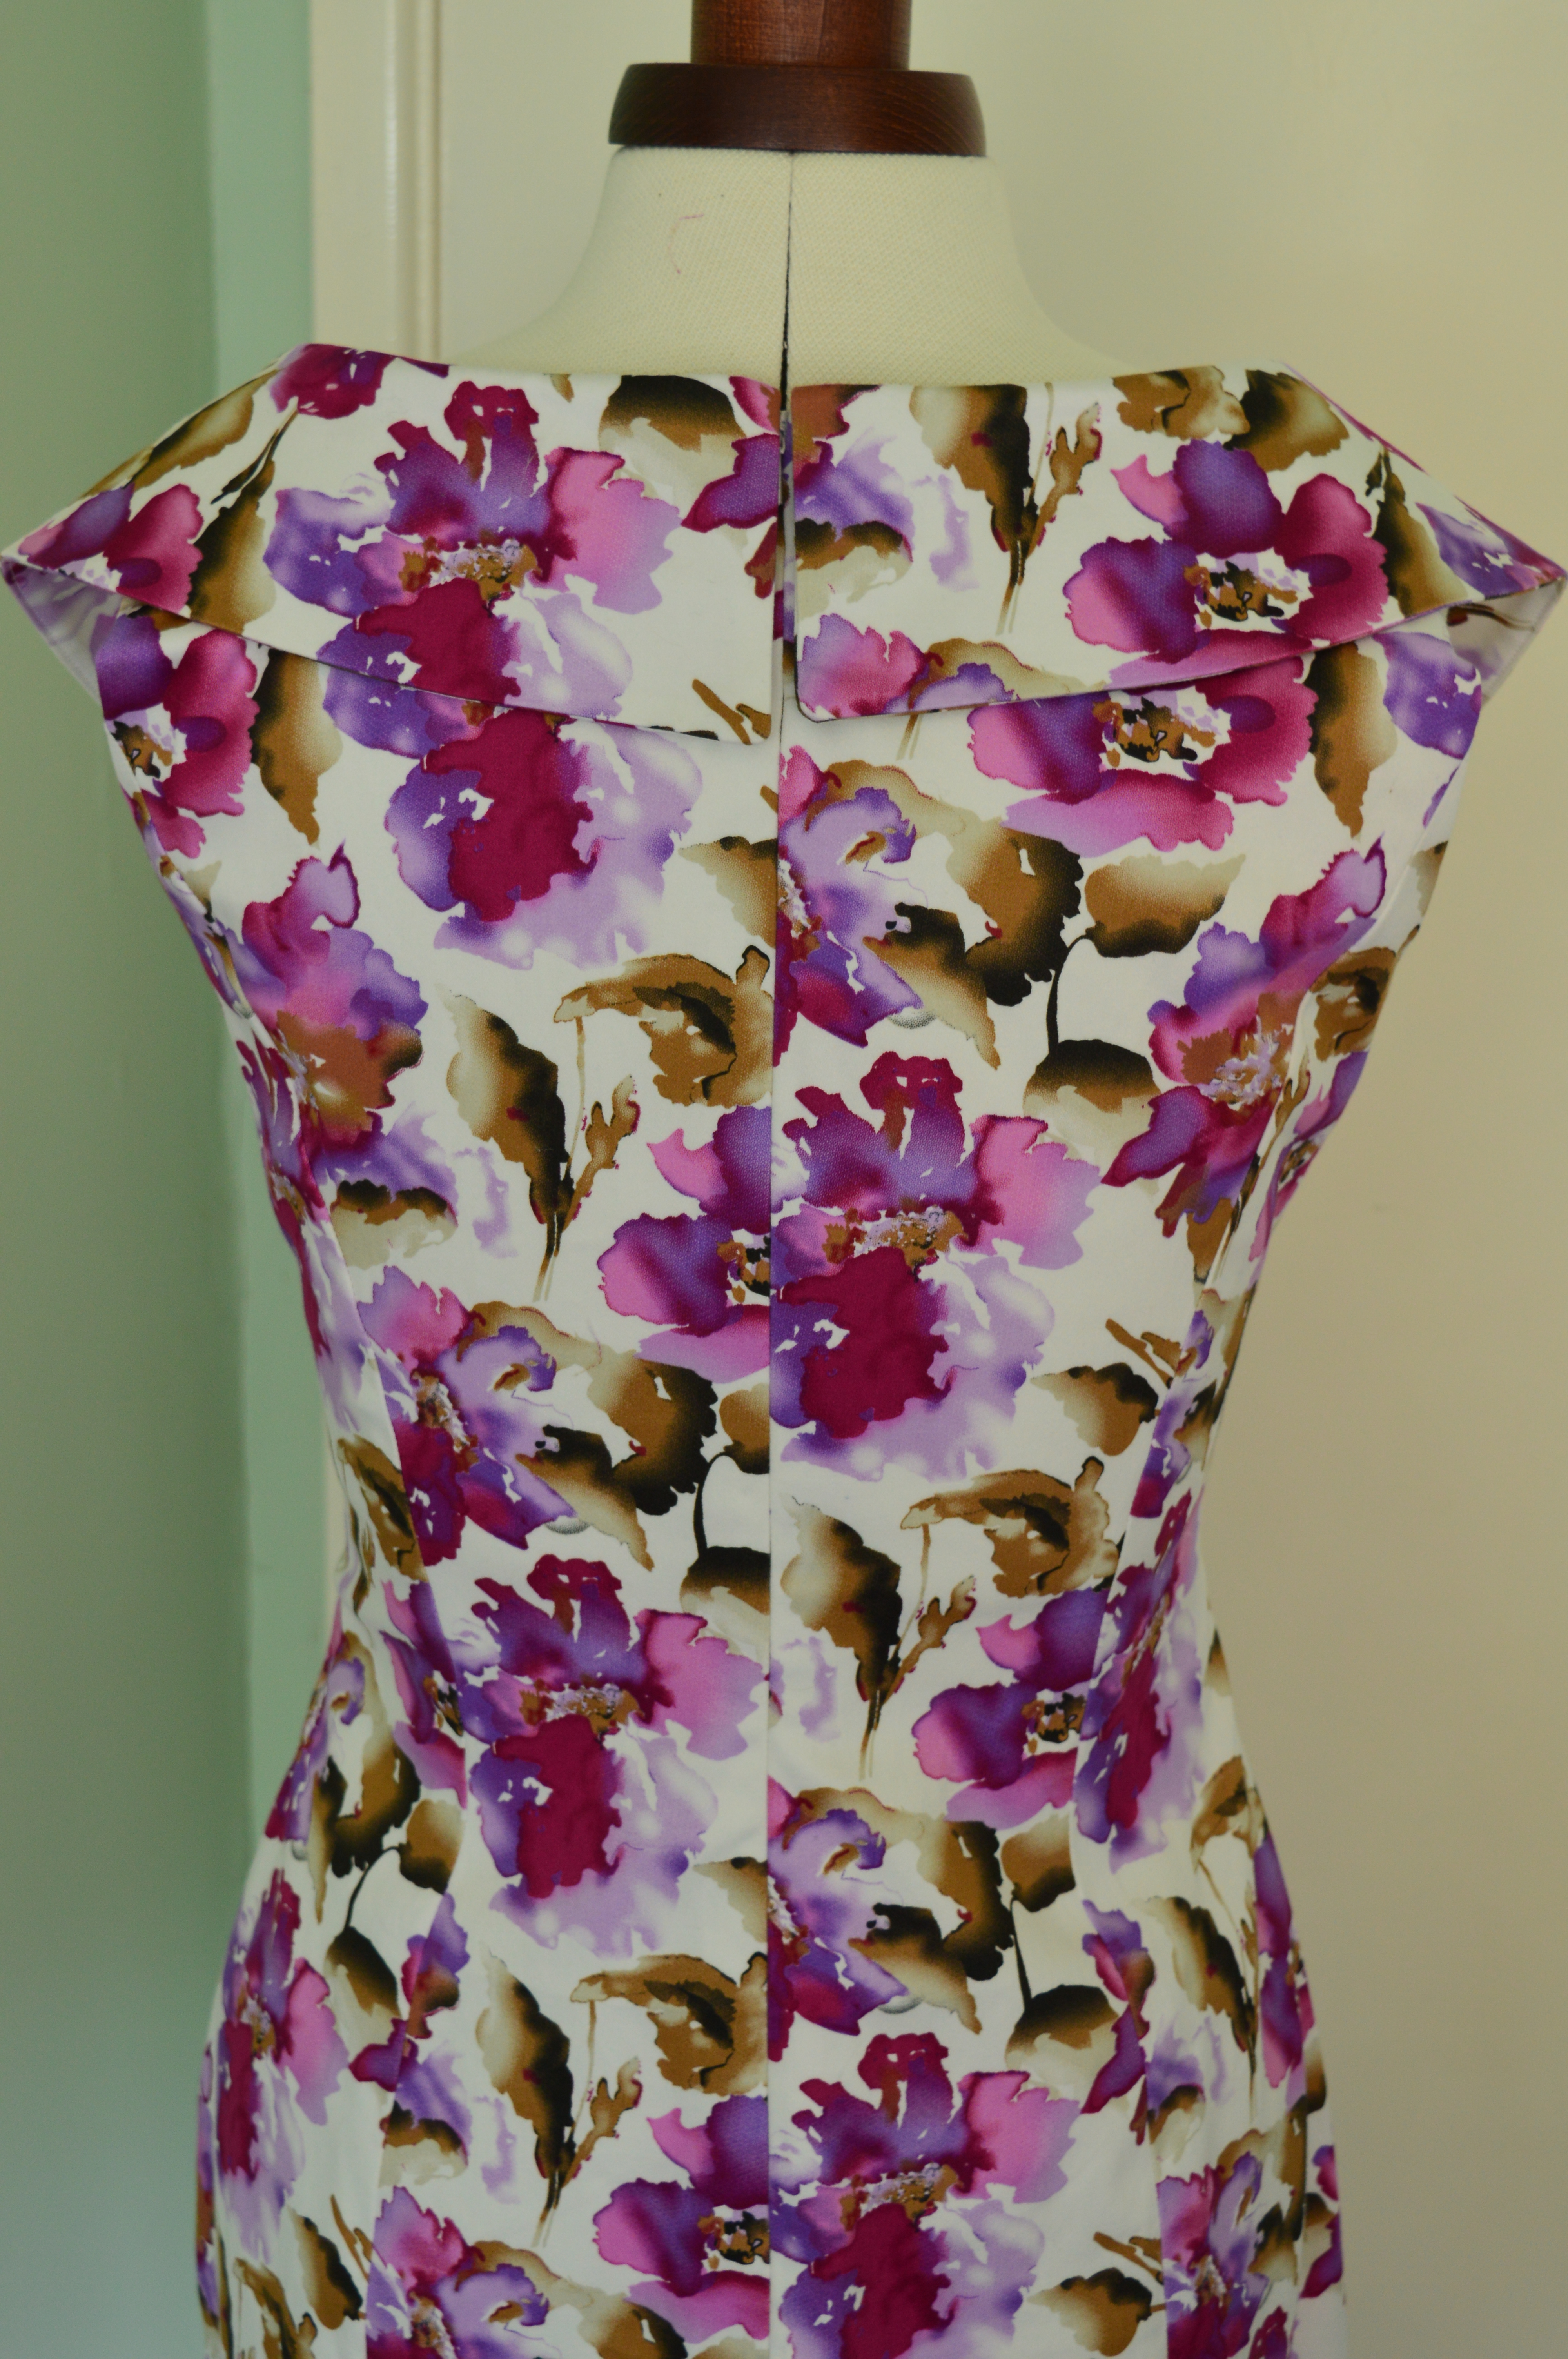
 I saw a photo on facebook of a very elegant dress made from a kwiksew pattern. I realised I had a very similar pattern, Vogue 1182. The pattern is for a close-fitting dress, sleeveless, just above the knee, with a shawl collar and pleats across the front which hide a multitude of sins!!

The material is from Minerva Crafts, isn’t it gorgeous, as soon as I saw it I wanted it, I love the colours and the watercolour painting effect of the design. It’s a cotton sateen with a little bit of spandex so it’s just got enough stretch in it to make it comfortable to wear. It’s a lovely weight too. I ordered it on line, desperately hoping I wouldn’t be disappointed when it arrived, I wasn’t, I just love it.
The pattern isn’t the most straight forward one and sometimes the instructions don’t make sense until you get to that point, so you do just need to work your way through. Having said that I did change a couple of things.
I stitched the lining first as a toile to make sure the fit was ok, which it was.

I went on the sewing pattern review site and I had to smile that someone made exactly the same mistake as I did, right at the beginning…when I cut fabric out I always have the right side uppermost so I can check pattern matches etc. I was very good and followed the pattern cutting layout, it was one of those where the fabric is folded so there is a single thickness area to one side. I’ve never noticed before the shading that indicates which way up fabric should be…the fabric should have been cut with the right-side inside, as the left and right fronts are completely different it meant that my front is the other way round to the pattern. Luckily I could still stitch it up, just the other way round!!
 Quite early on in the instructions the invisible zip is inserted. Now this is only the second invisible zip I have ever put in in my life, so they do stress me out a bit. I didn’t have a proper foot but I stitched one before with a standard foot. I’m so proud of that zip, it’s invisible!! I’ve decide to put invisible zips in the next few garments I make just to get practised at them so they don’t stress me out as much, I’ve even bought the special foot.
In the pattern one of the last areas to stitch is the side seams, after the lining is hand-stitched around the neckline. I decided to stitch the side seams first in order to check the fit was good enough whilst it was still easy to access to alter it. I did take the sides in a bit, so my method worked. It made no difference when stitching the lining in.
 The lining was a bit complicated at the front due to my fronts being the wrong way round in the main fabric. I did a bit of hack and slash and tucked it in neatly. The dress was a bit shorter than I envisaged, there is a limit to how much of my legs I want to show! I stitched it using 1″ bias binding, I like to sew my hems with bias as it gives a nice flat finish, in this case by using 1″ wide bias I could turn the actual fabric up about 1/2″ whilst still having a decent weight of hem.
My new assistant, “Florence” was a big help, she put on a bit of weight as soon as she arrived and I’m hoping to customise her shape with a bit of extra padding!
I’m really pleased with my clematis dress as I call it. It feels great to wear, I managed to get pink shoes and bag to match and a lovely big ivory hat for the wedding.


 Two good friends were married on Friday, I thought long and hard about wedding presents as they are both about our age, settled in their home, and originally said they didn’t want any presents…well that wasn’t going to happen!


