Stitching my Garden SAL

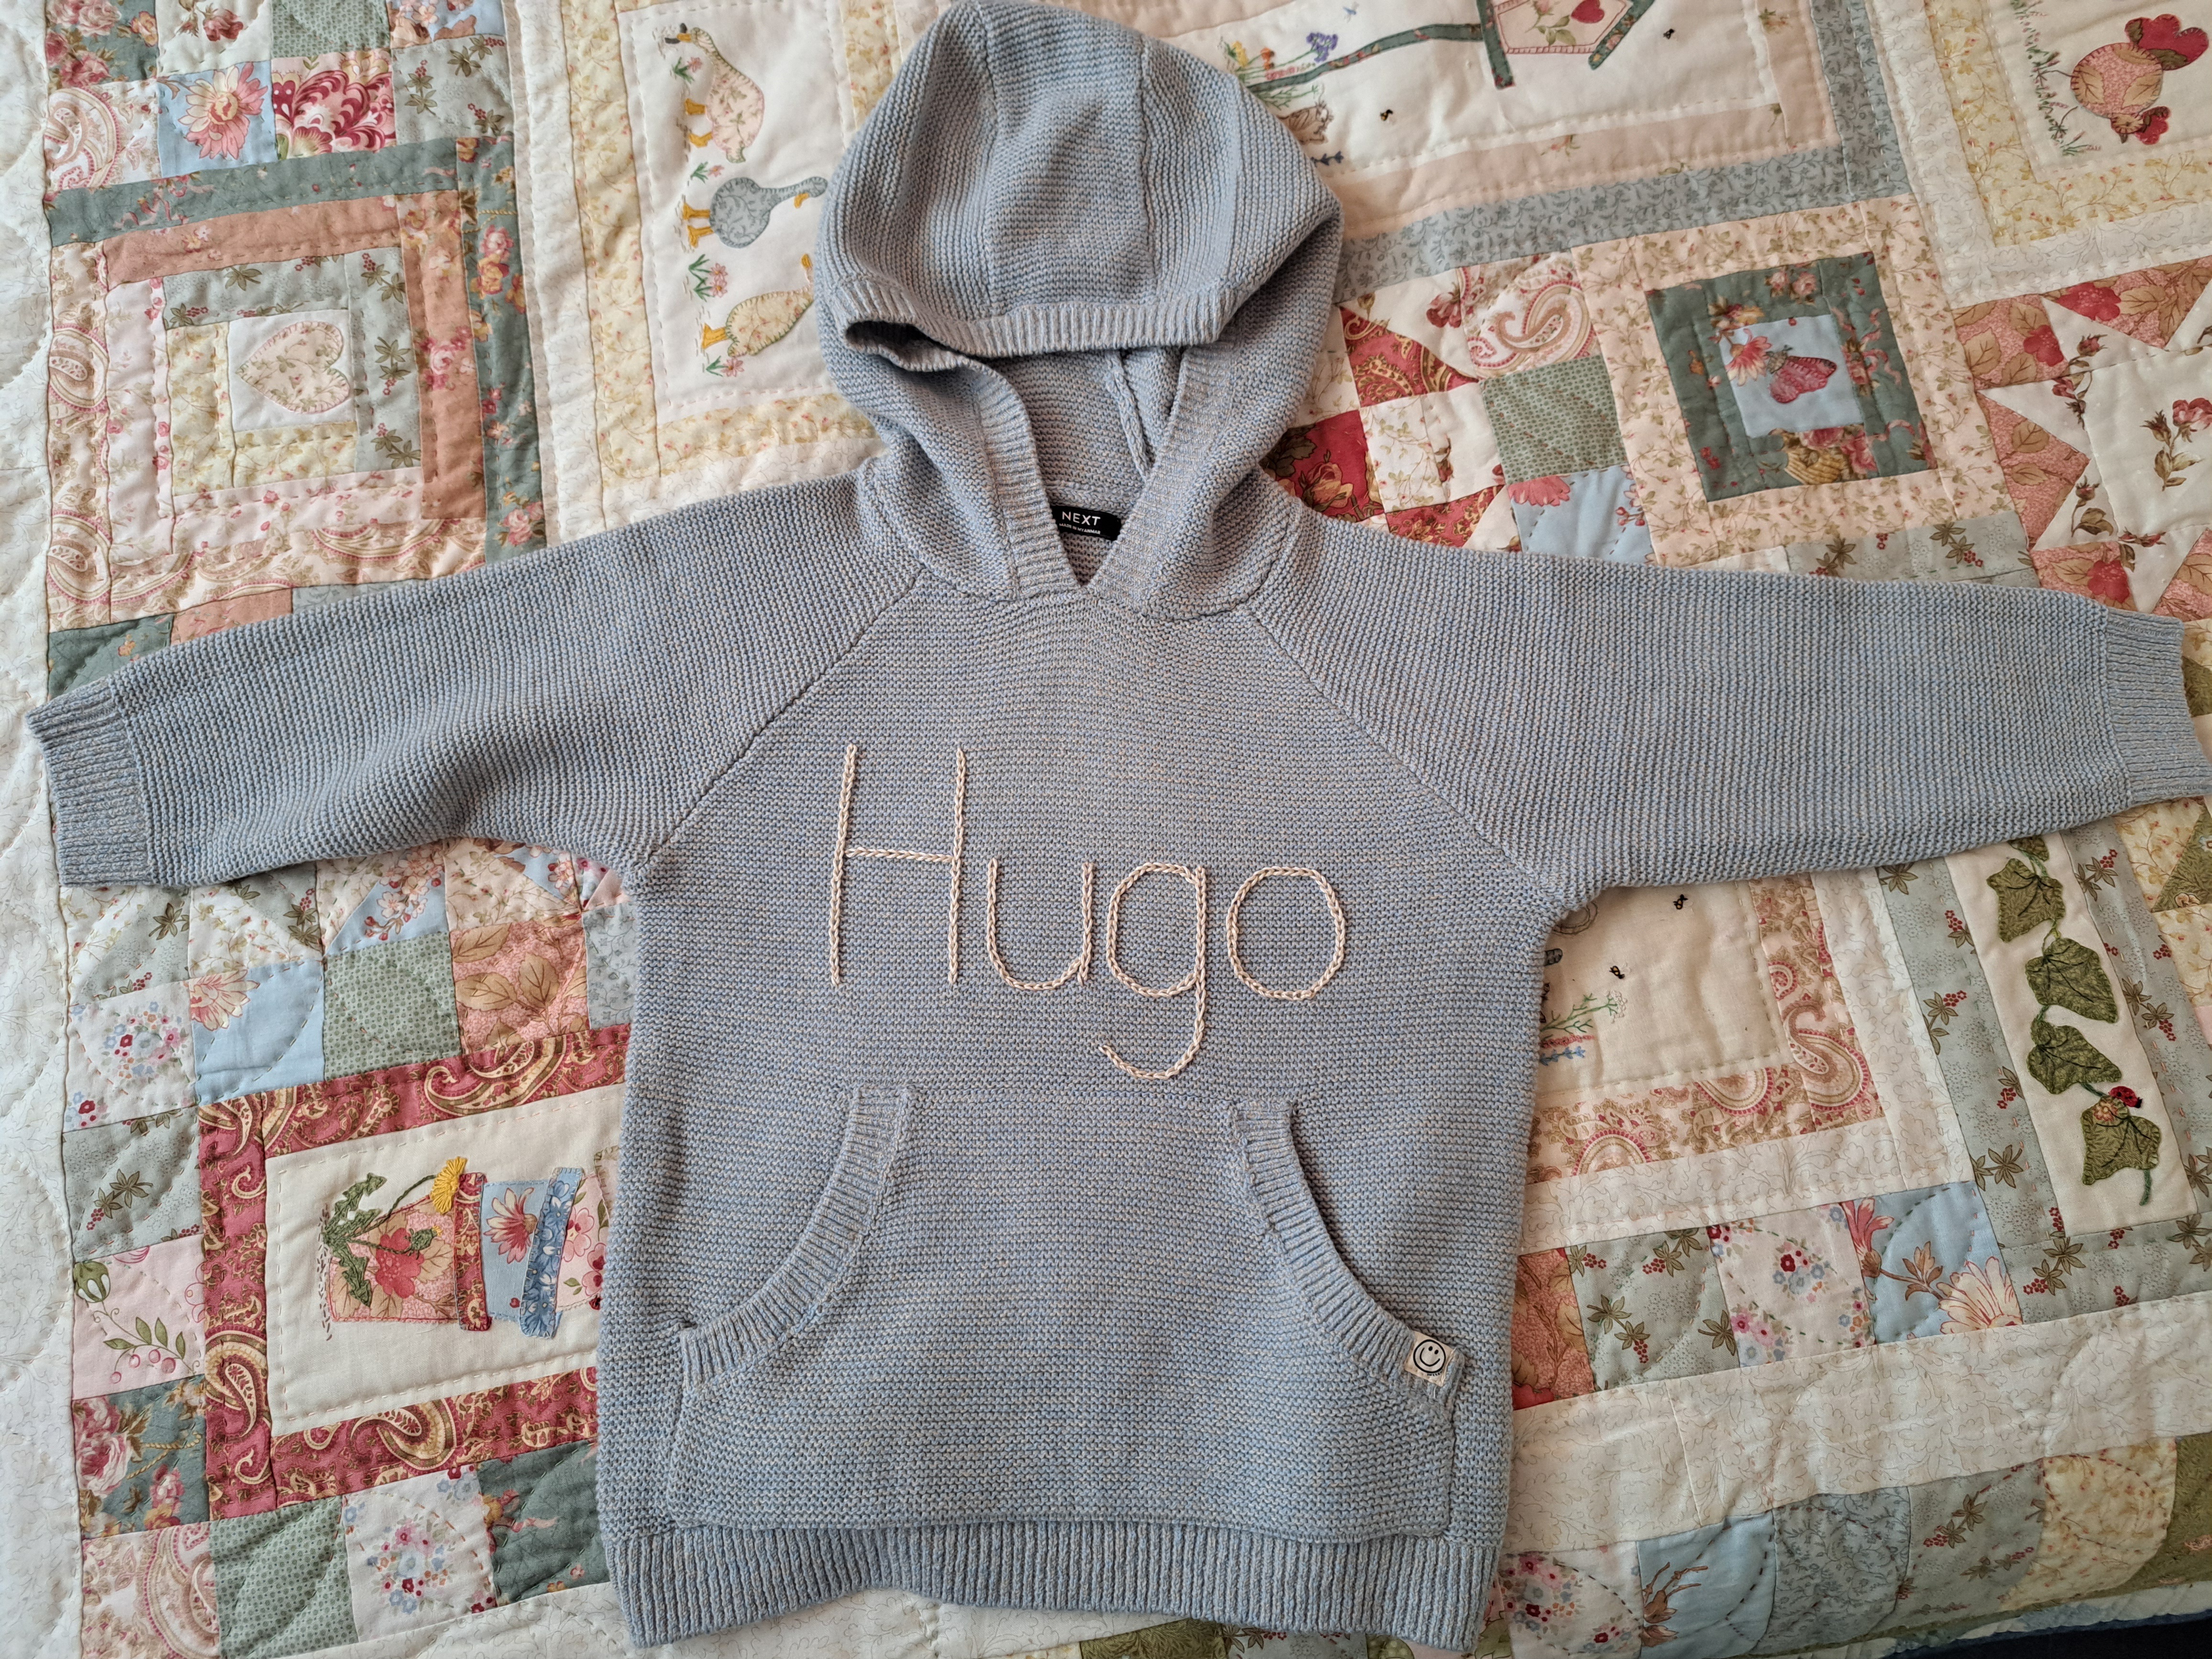
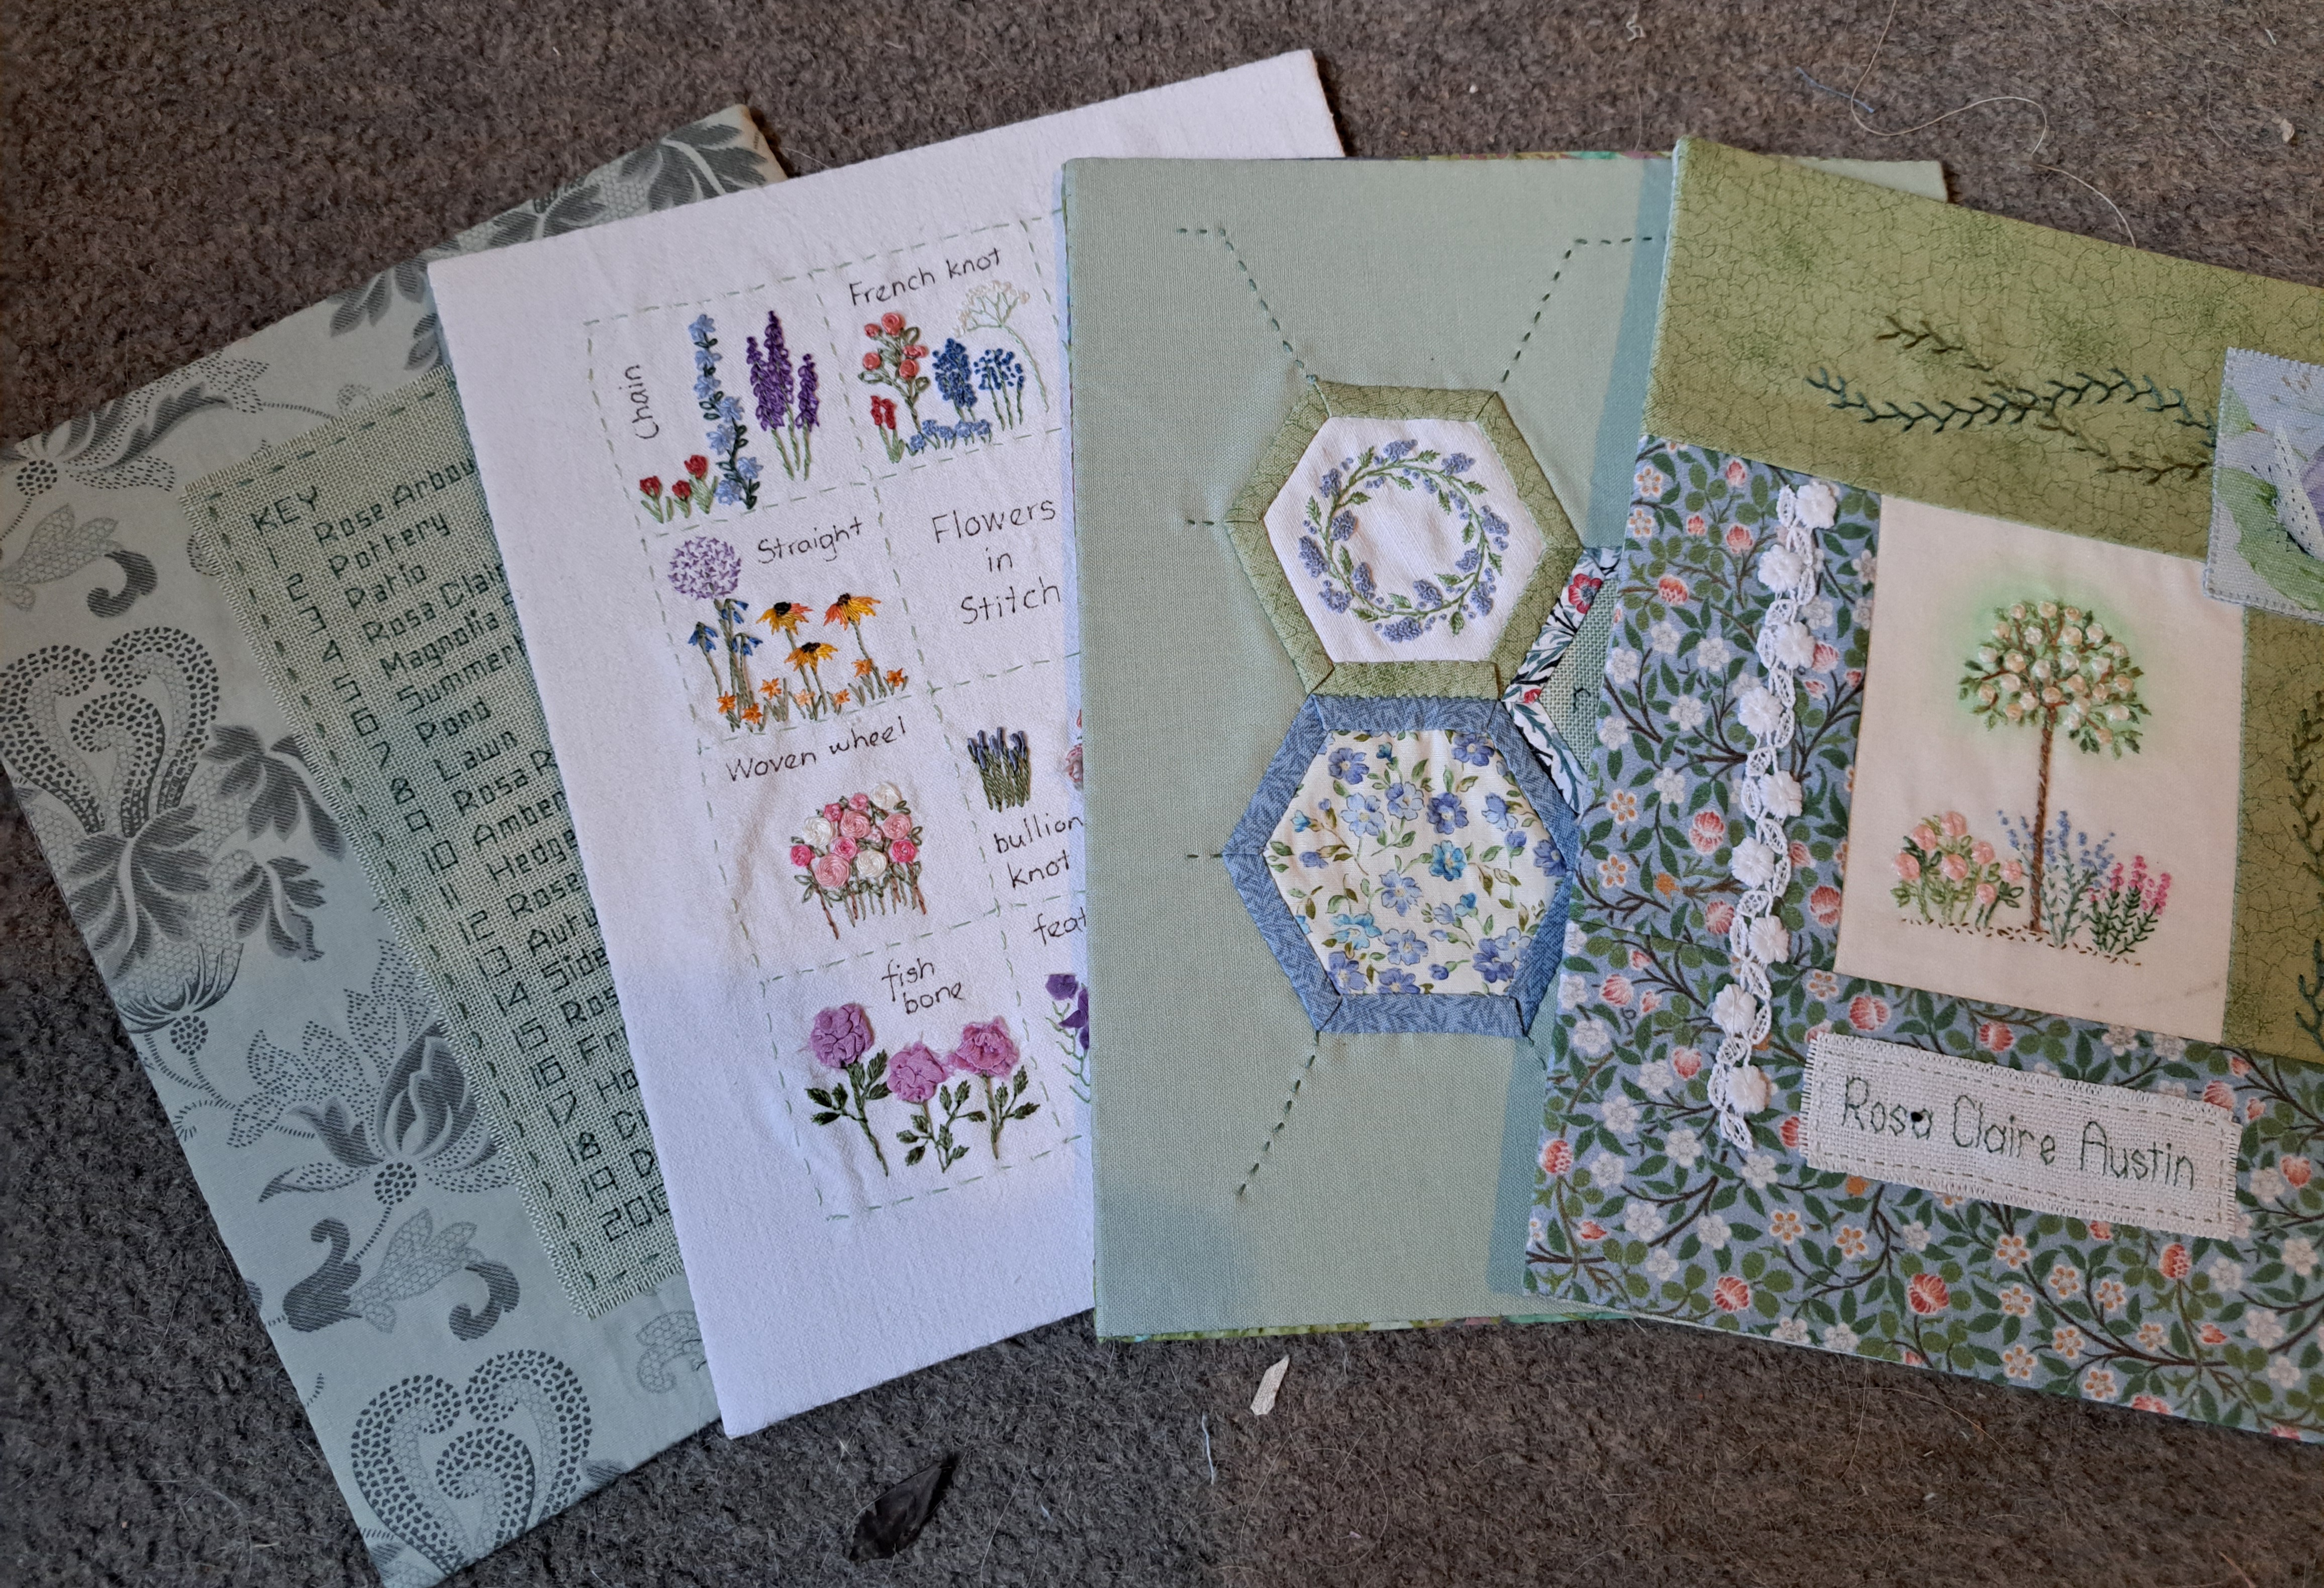
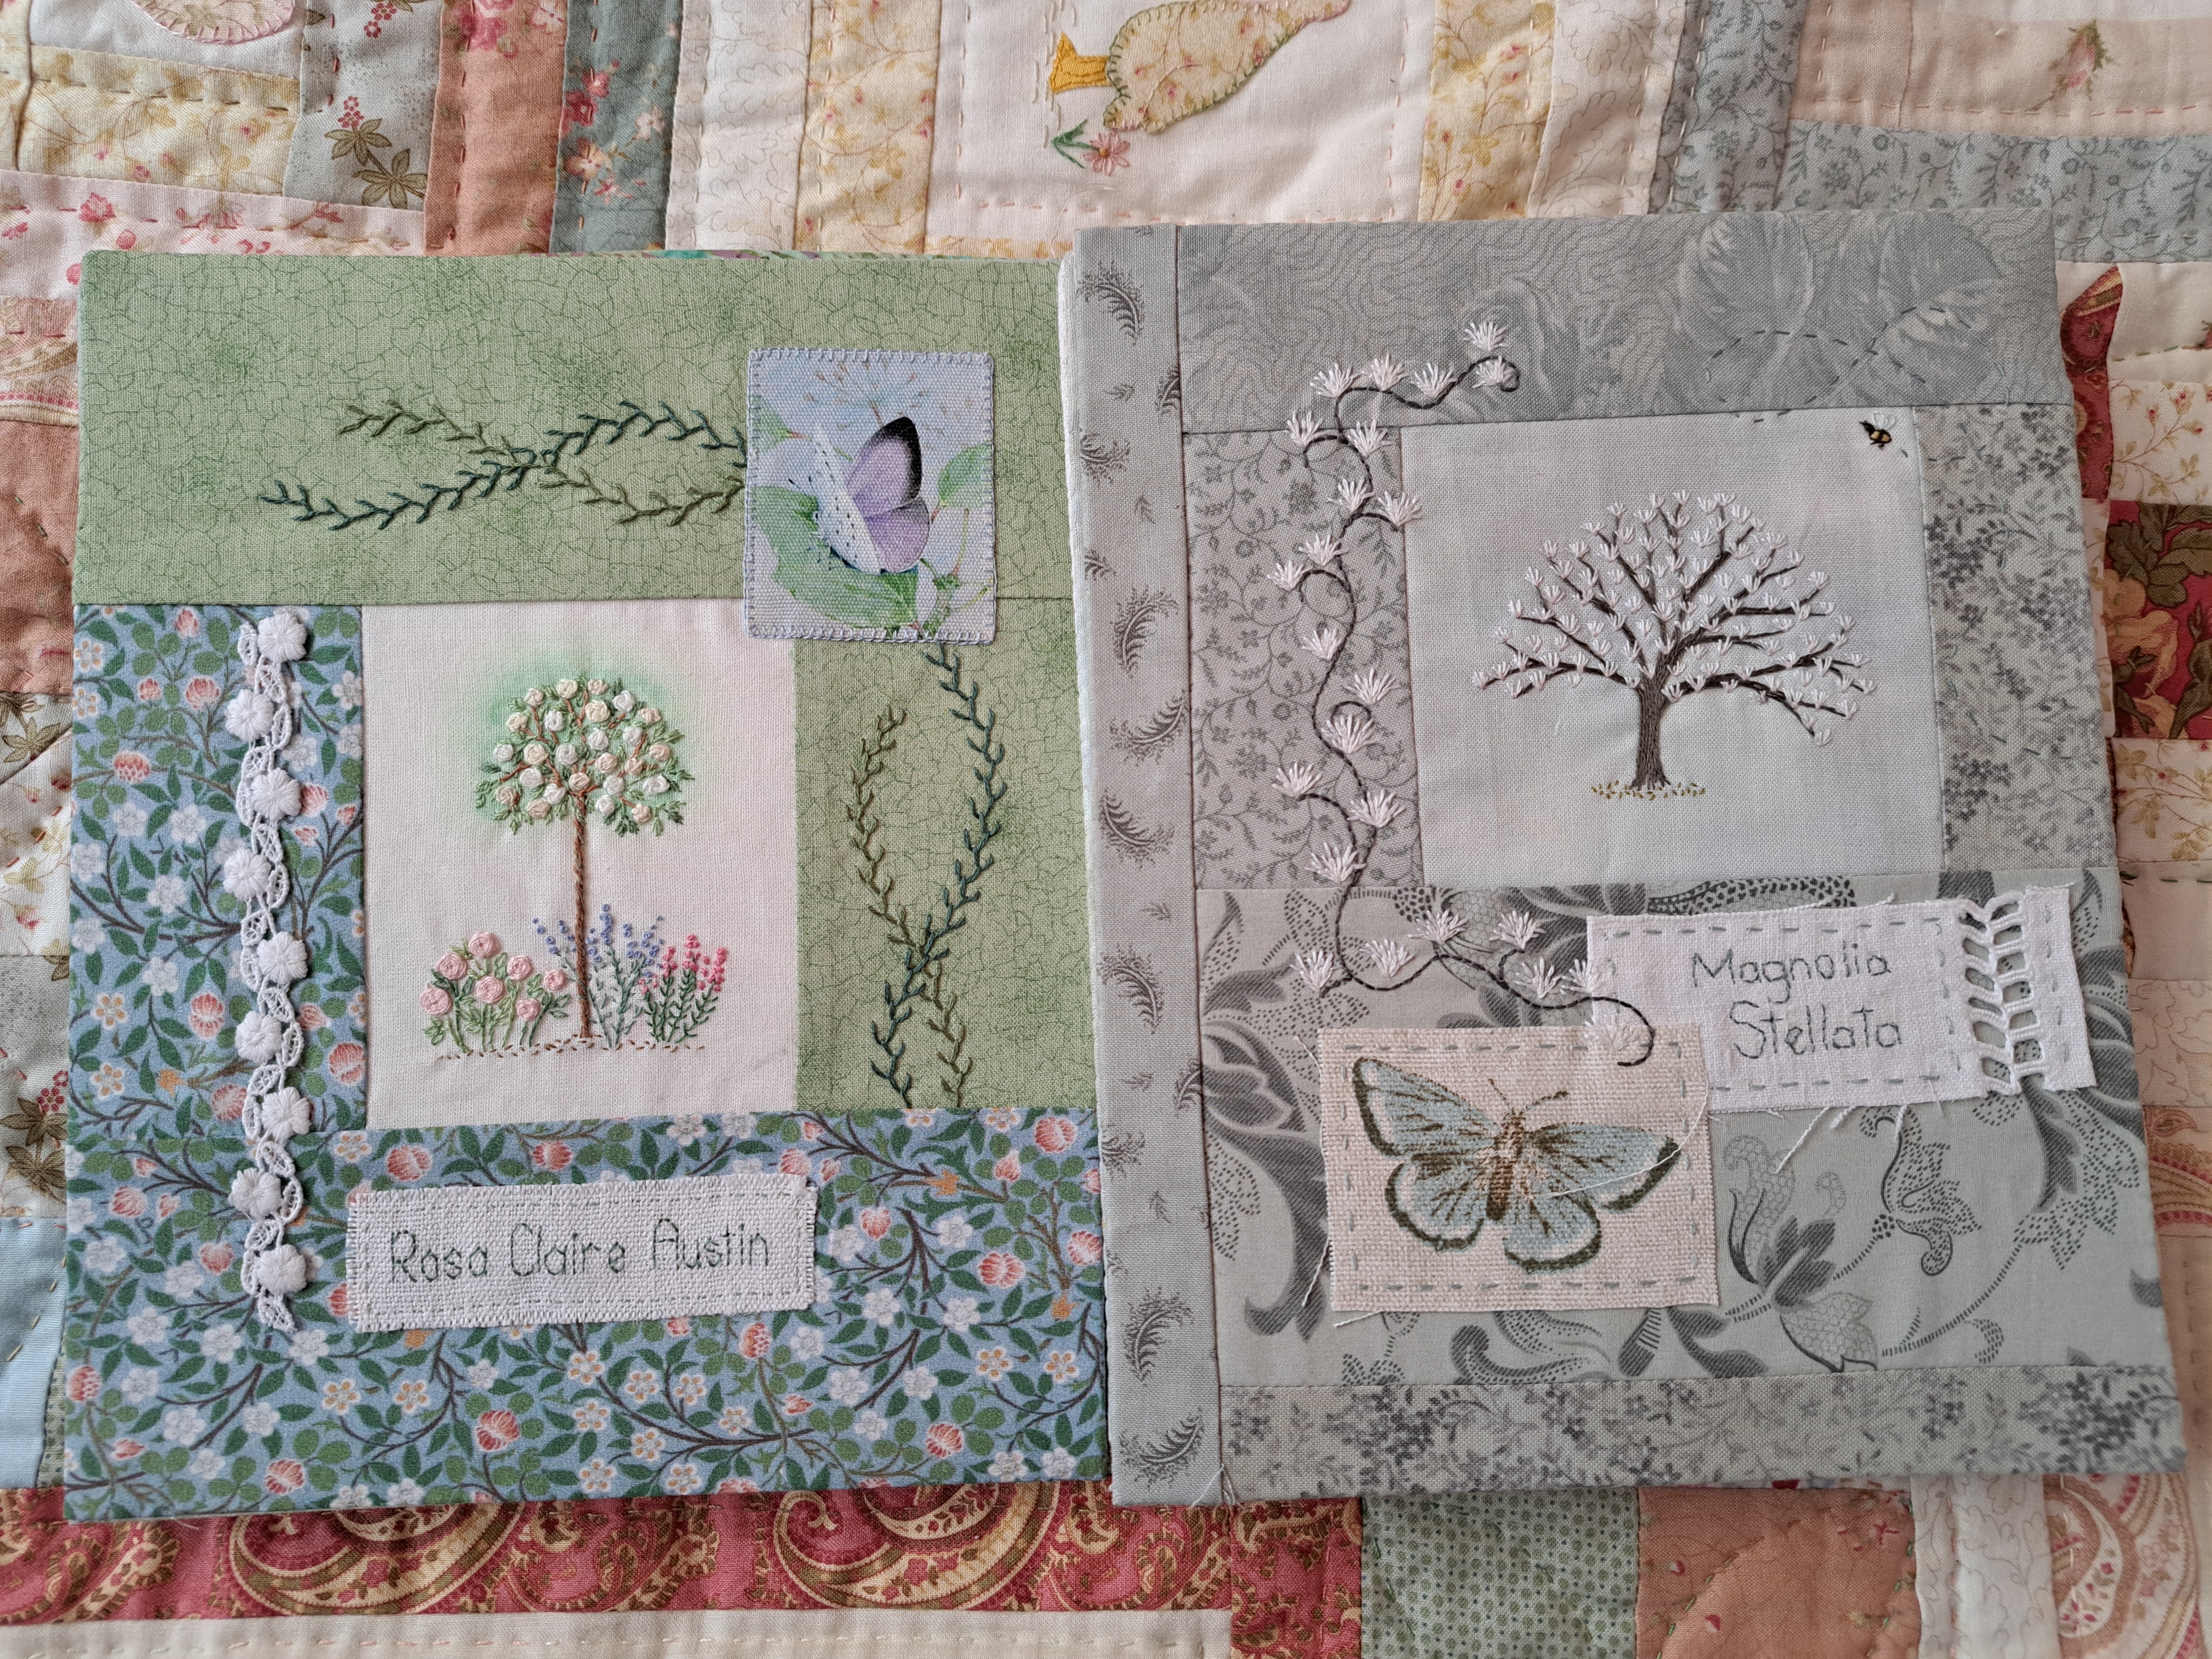
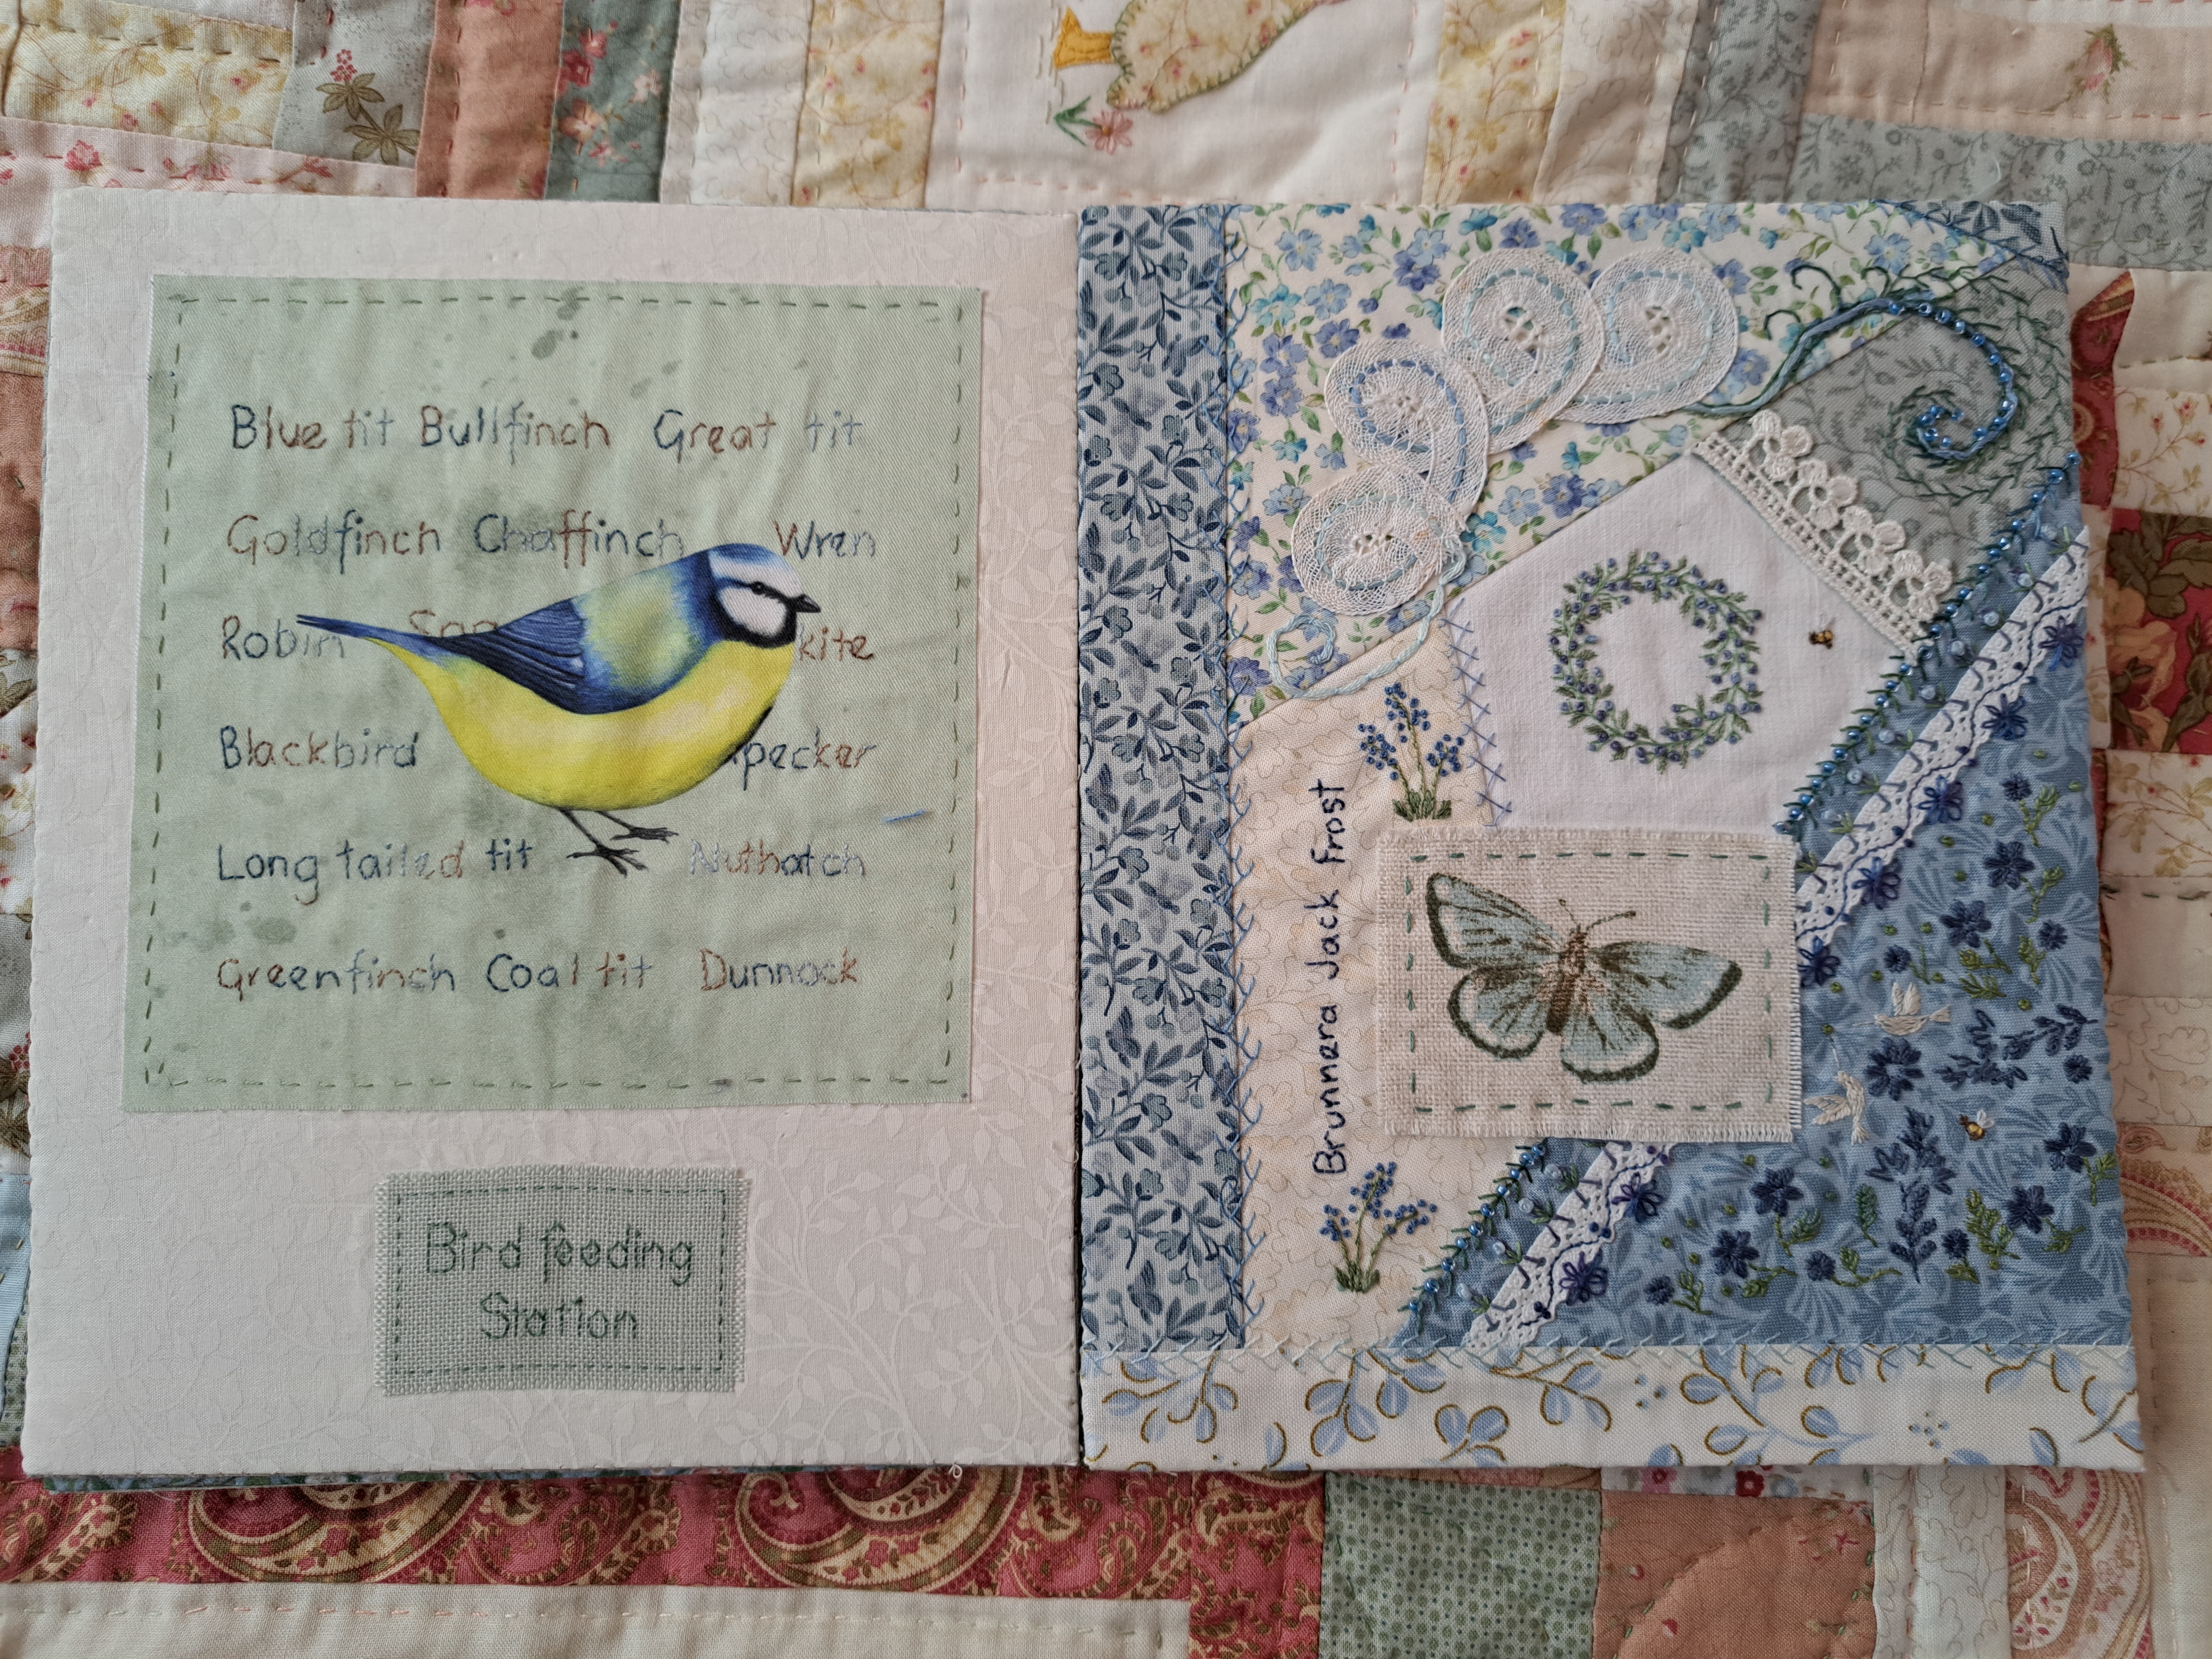
Well I’ve finally finished it! Two years in the making but my embroidered garden book is finally finished. To say the least, I’m well chuffed with it 🙂

Three weeks ago I’d just finished making all the pages, I was planning how to finish it and had more or less decided on exposed binding…

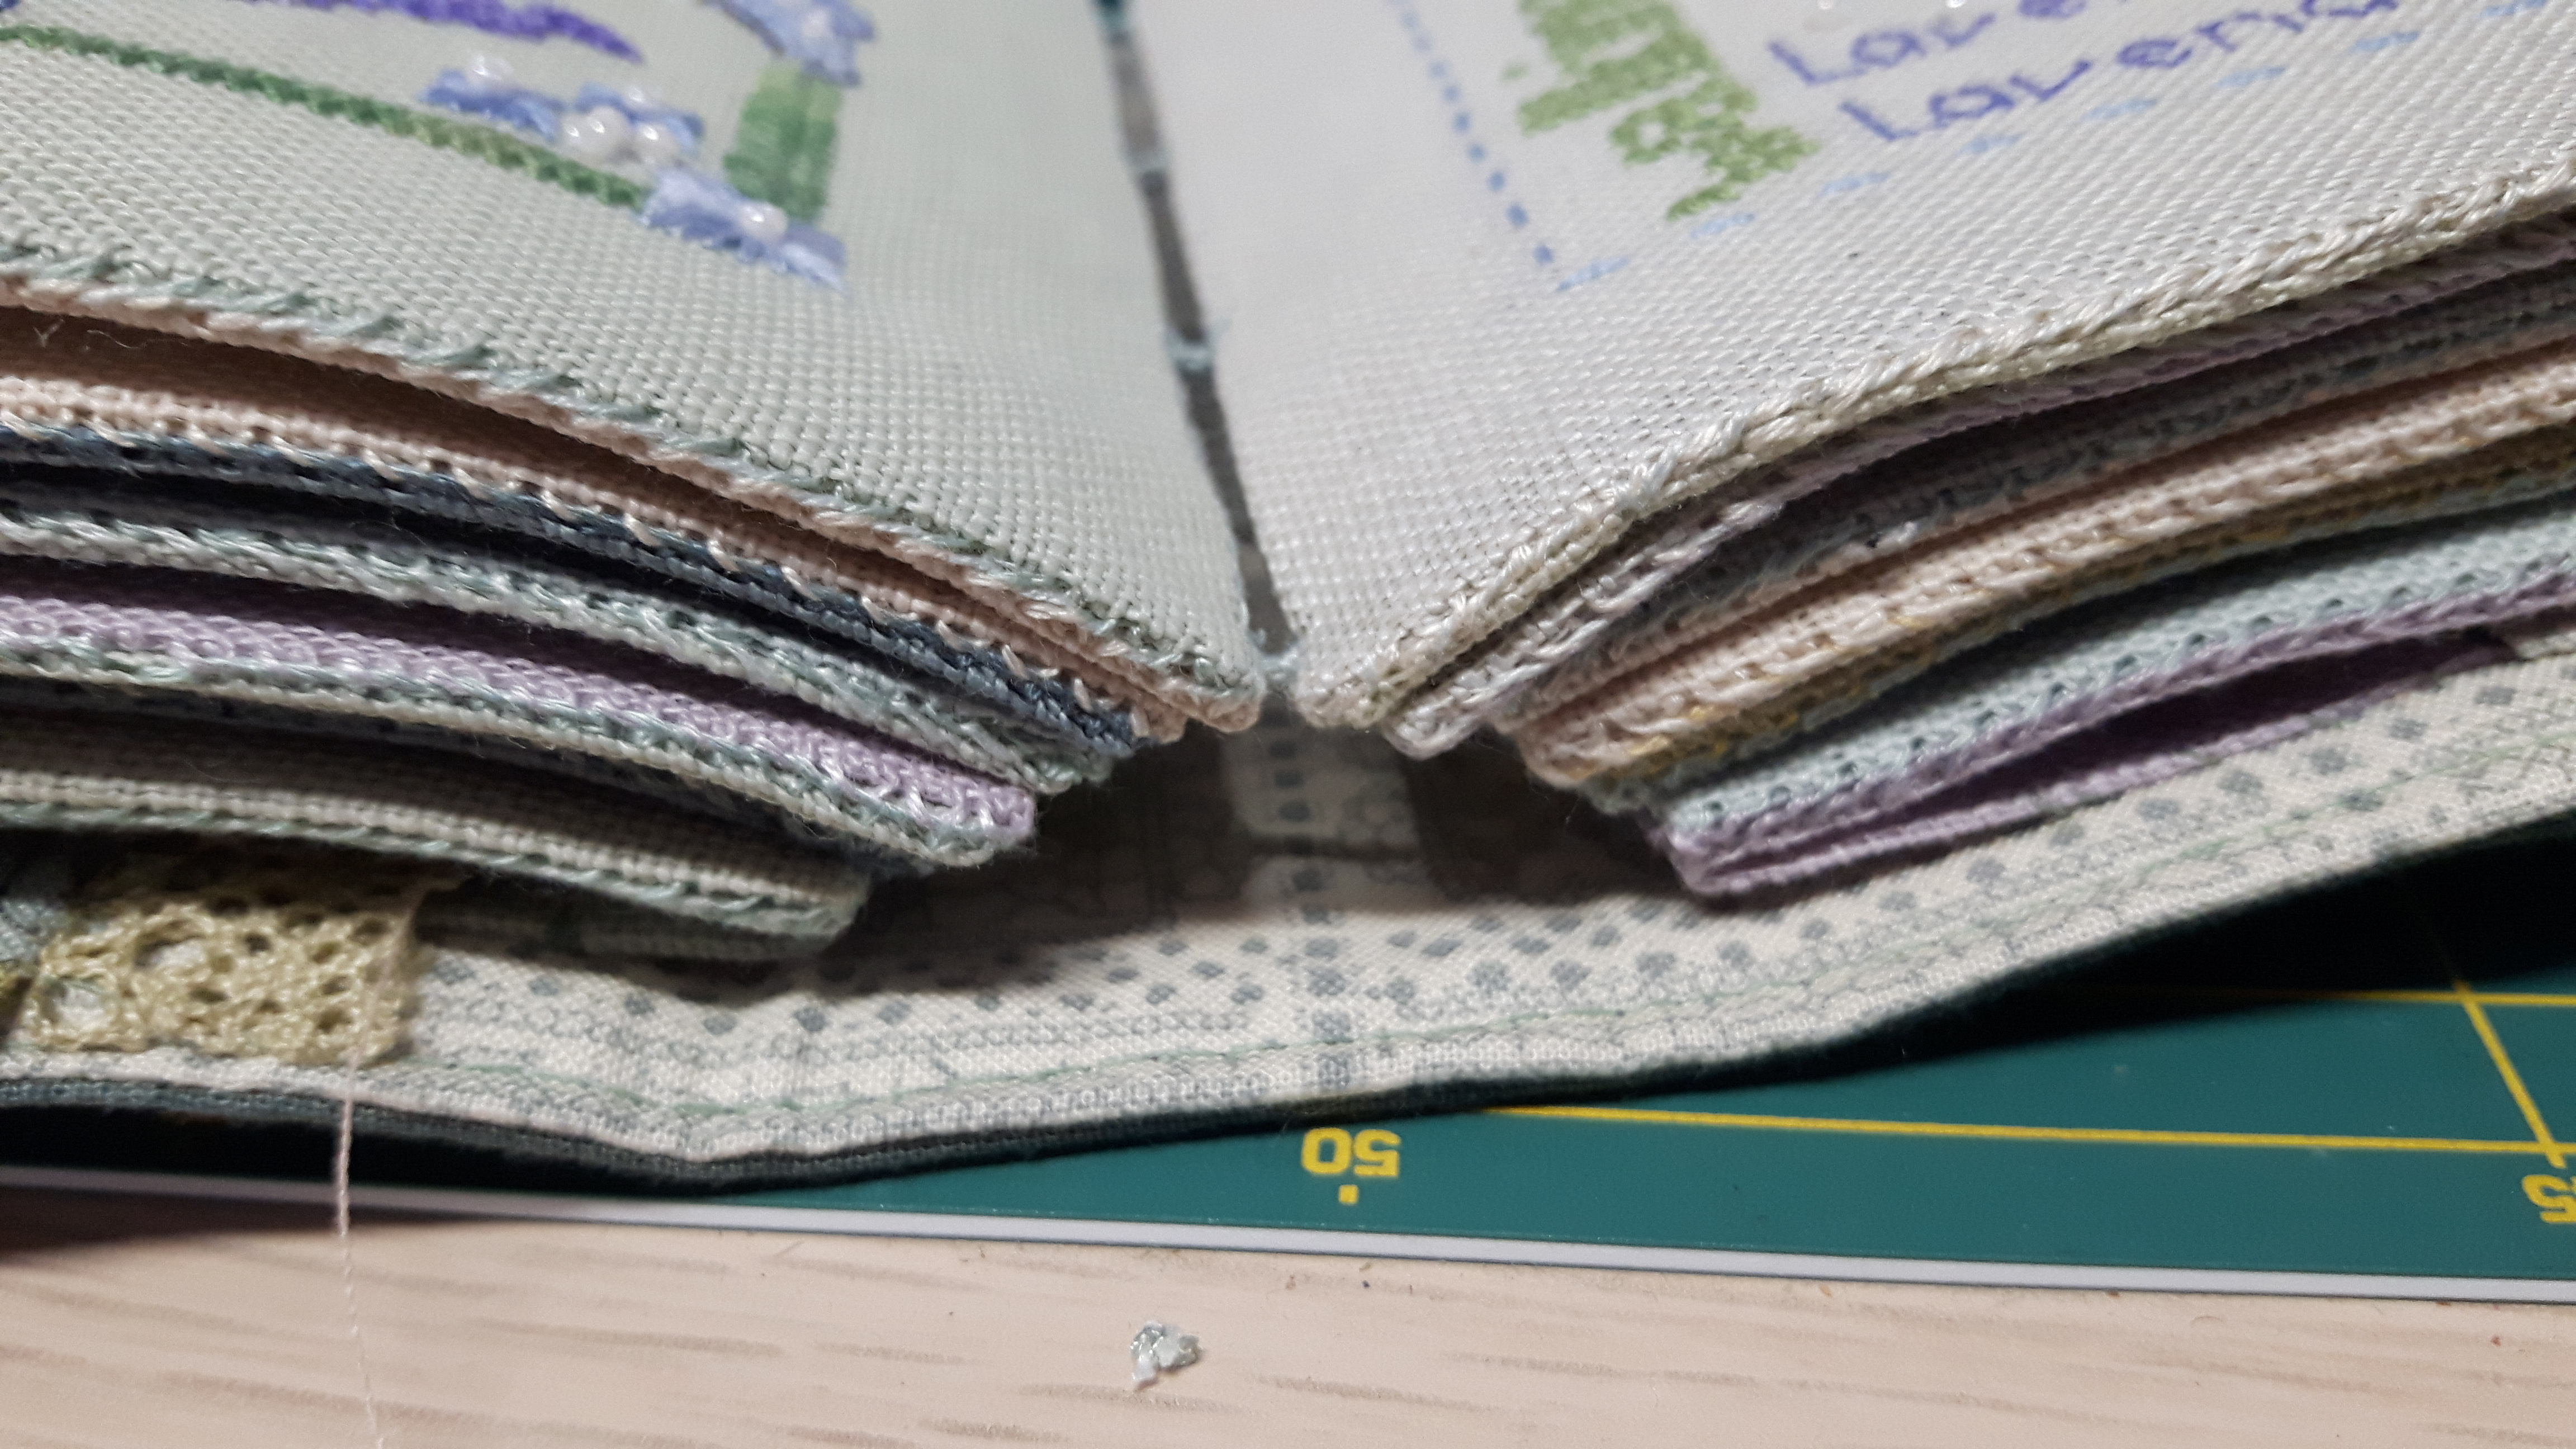
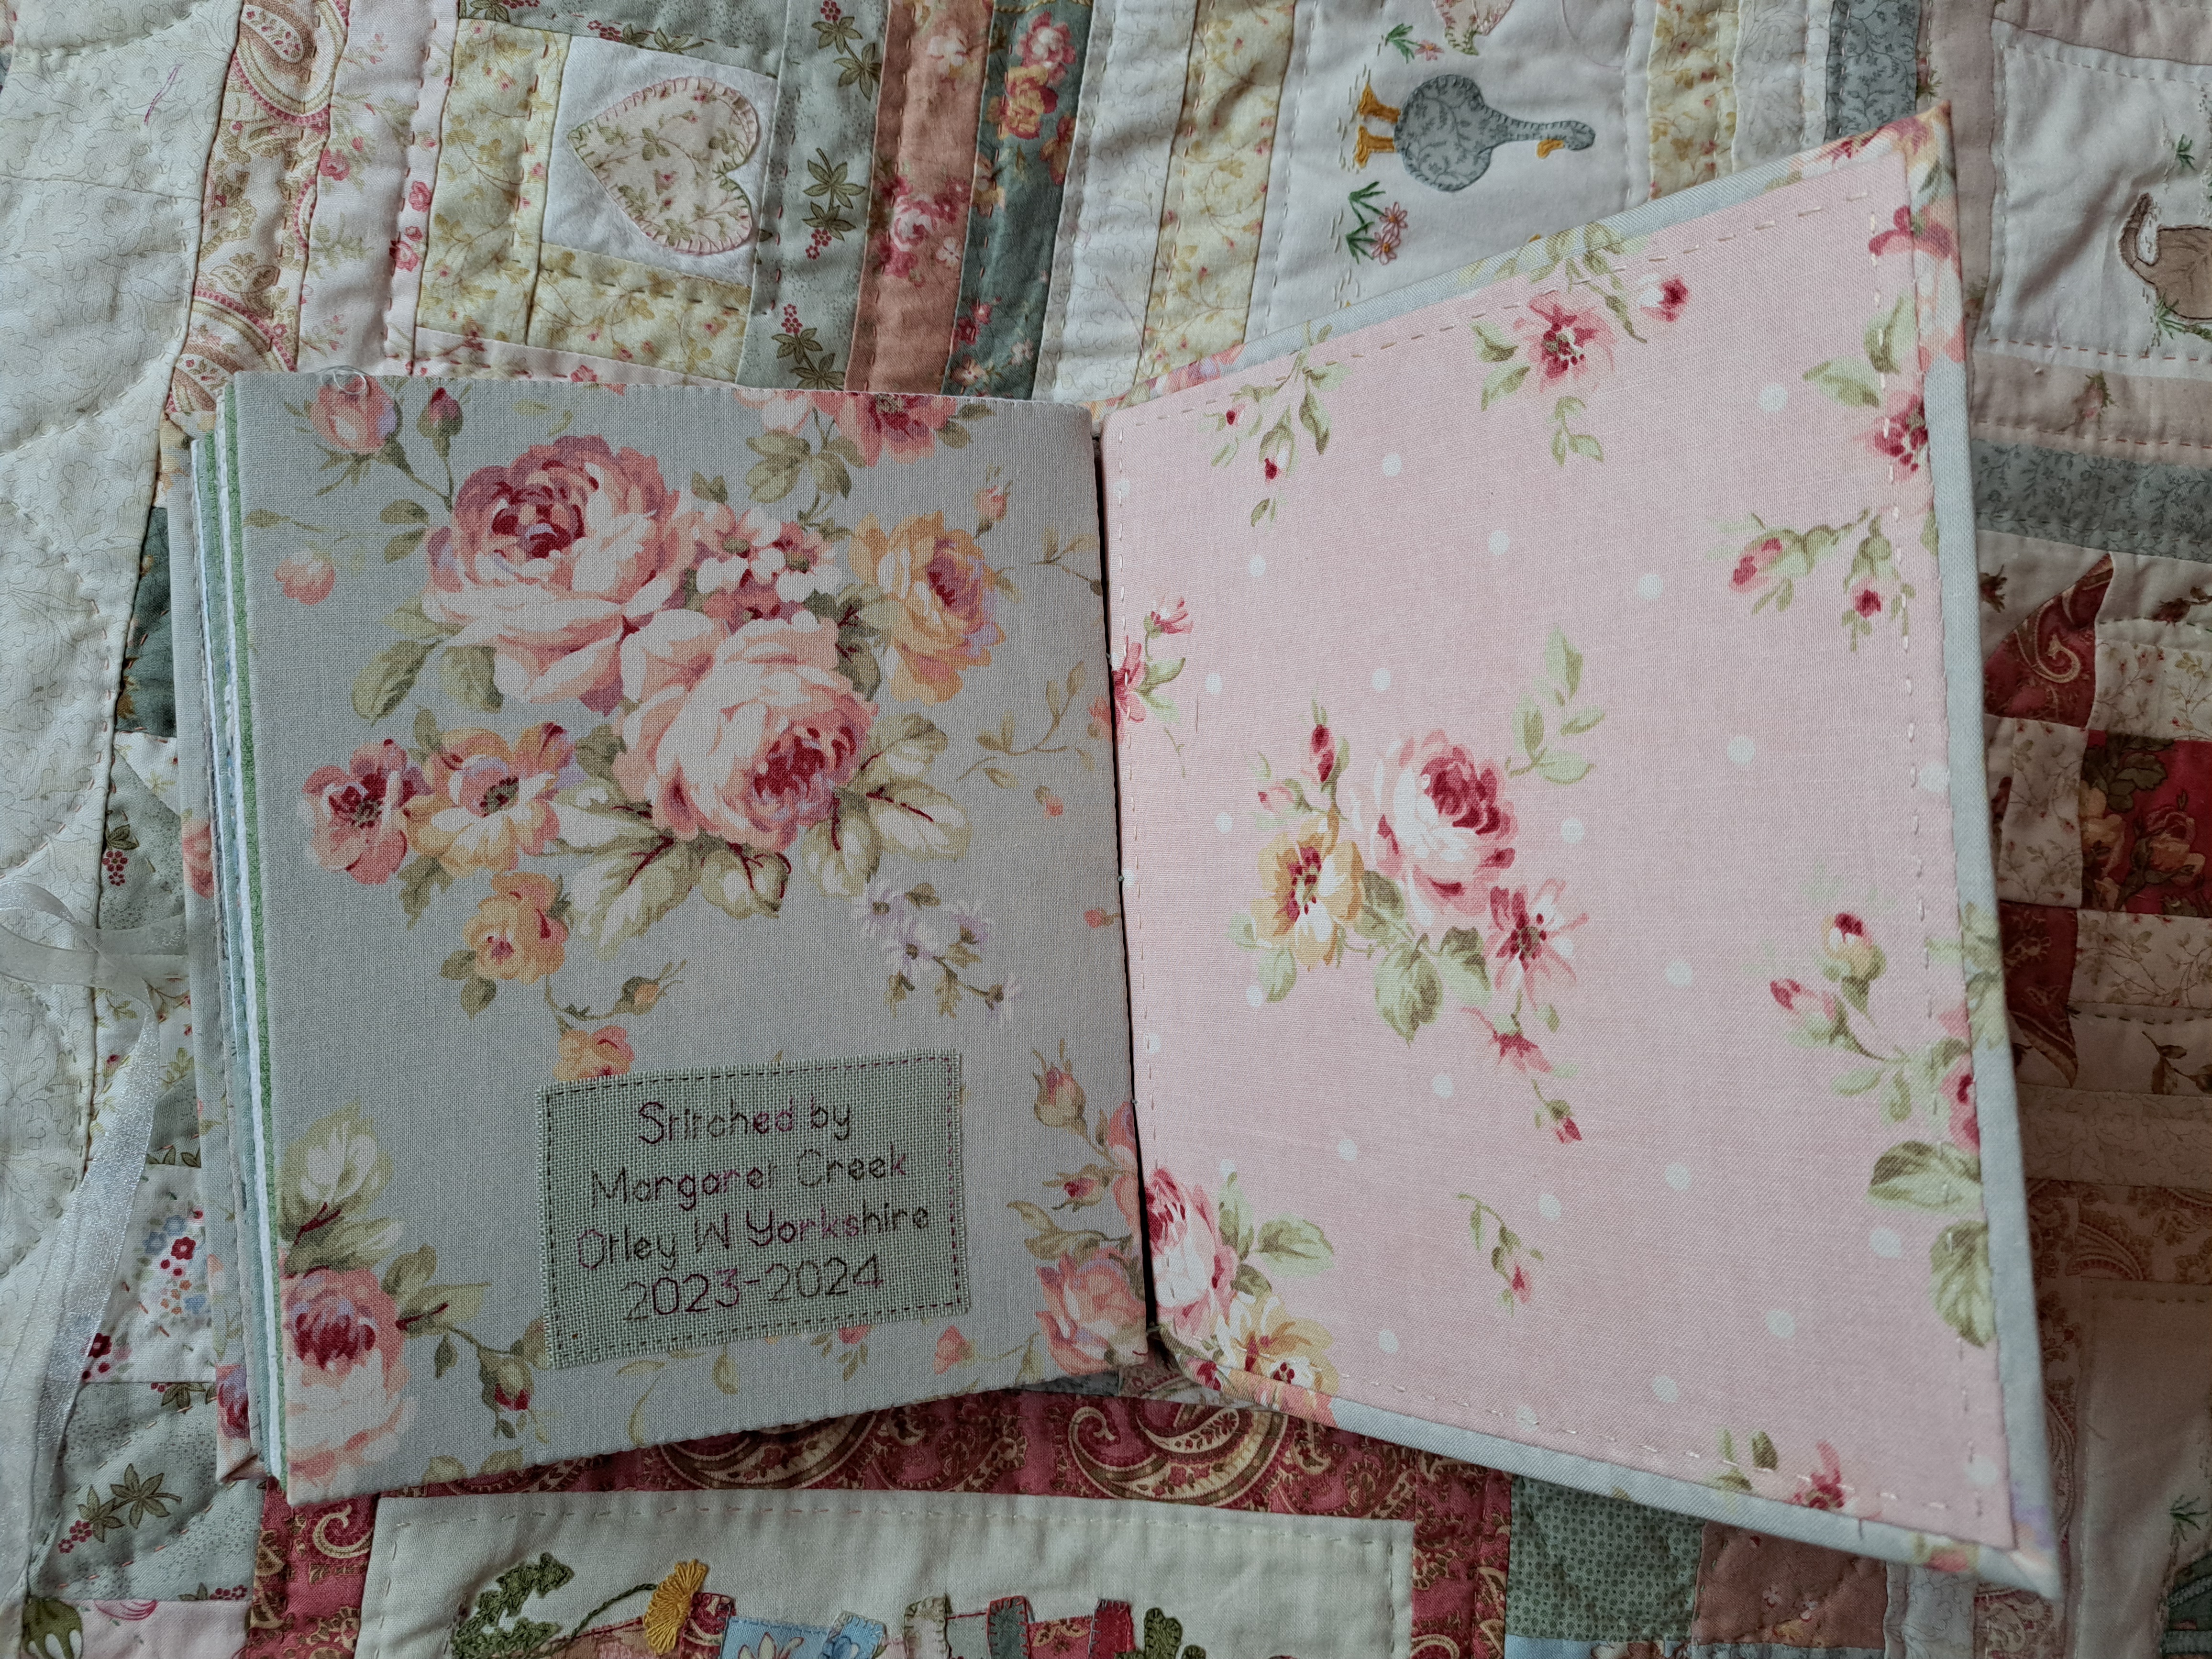
I changed my mind and decided to do a full cover instead, mainly because I think it will protect the pages better and I hope this will be treasured for many years so longevity is important. I stitched the pages together using my mock Coptic stitch, I say ‘mock’ as Coptic stitch is designed for double page signatures, so I’ve had to adapt it for single pages. I also made an extra page front and back to act as the book lining, making attaching the cover much easier. I used perle thread as it’s a good weight and strong, stitching five rows across the spine.

I’d been mulling over the title of the book for a couple of months, The Garden Book, My Garden in Stitch…none of them inspired me. Then it came to me in the bath! A Stitch in Thyme. Gardens are ever evolving, so some plants have already changed since I started this book, this book is really just a snapshot of our garden. Changing ‘time’ to ‘thyme’ just emphasized the garden theme.

I embroidered the title on a scrap of linen and stitched it on the fabric I’d chosen for the cover. I’d originally bought some gorgeous watercolour style flowery fabric for the cover, I still love it but when I put it against the actual book it was just too colourful, especially as the first couple of pages are fairly muted. I’m hoping to use it to make a book bag to keep it in instead. I chose an equally beautiful floral in duck egg blue.

I used bosal to make the cover, it holds it’s shape but it’s a bit flexible too, I like it for book covers. I just used 505 spray to hold it in place whilst I put it all together. Having attached the fabric to the bosal I realised my calculations for where the title needed to be were a bit off, not central where it was meant to be but not far enough to the side to be there either. I unpicked it but of course it left a mark. I decided to mount the soft green linen onto some off white linen, making a bit of a border. I stitched it back on in the centre and actually I think it looks much better for the extra layer.

I added a strip of cover fabric down the inside where the spine would be as I realised there would be a fabric gap between the front and back lining pages.

At the last minute I remembered I rather like a ribbon or thread to close the book, I found a perfect button in my button drawer and some organza ribbon, I felt the organza ribbon worked well as it doesn’t dominate the cover, it just sort of blends in. I used clover clips to hold the cover and the lining together whilst I slip-stitched it round…

…and that was it, finished!

I knew I couldn’t share photos of all the pages, so I’ve made a little video and put it on instagram, here’s the link…

https://www.instagram.com/reel/C80_GwUKdNI/?utm_source=ig_web_copy_link

If it doesn’t work for anyone, just send me a message and I’ll send a copy.

I want to say a huge thank you to Nicki Franklyn of The Stitchery who started me off on this journey with her Stitching your Garden course, I did her first one which was live, it’s now been fine-tuned and honed to a recorded class called The Garden Sampler

This SAL is organised by Avis from Sewing by the Sea, we post our progress on our chosen project every three weeks, perfect for keeping us motivated and moving forward on a long project. Please follow the links to see what everyone else has been stitching.

AvisClaireGunChristinaKathyMargaretJackieSunnyMeganDeborahSharonDaisyCathieLindaMaryMargaretCindy  and Helen

Posted in embroidery, Stitch-a-long, Stitching my Garden, Textile Books, Workshops | Tagged , , , , , , , , | 30 Comments

Strawberry Sampler Book

Happy days! Last night I finished making my Strawberry Sampler book. I started it over Christmas whilst on holiday, it was a kit from the Cross-stitch Guild.

I think last time I posted about this book I’d just finished the pulled work pages.

Since then I’ve stitched the lining which includes an index for the front and a blackwork page for the back. I also finished the front cover, I had done the cross-stitch ages ago but I hadn’t plucked up the courage to do the hem-stitch edge. Eventually I couldn’t put it off any longer! It involved removing and reweaving two threads all round the page, then counting nine threads out. scoring along with a needle, then counting another nine threads, score again, then count seven and cut here! The scoring did make a huge difference as the linen then folded neatly along the line. It was then folded in on itself, mitred at the corners and hem-stitched down to the bit where the threads were removed. The instructions weren’t really clear on this bit so I’m not sure if I did it right but it looks fine. I also re-stitched the four-sided stitch down the centre of the cover, the instructions said use cream, so I did, but the photos clearly showed more of a matching colour, I found a DMC that matched well and re-stitched it, I think it looks much better.

With all the embroideries done, my next task was to make the pages. I decided to put a layer of calico in between the sides just to give a bit of body, I made my pages slightly different from the instructions, they used hem-stitch and then stitched the two sides together along the hem-stitch. I wasn’t sure about the stitching line being two threads in from the edge, so I had edged mine with blanket stitch. I trimmed them closely to the stitching and whip-stitched them together. In the kit was also some red silk to put behind the hardanger and the hem-stitch pages, it looks very effective.

The lining was trimmed and folded under, just fitting nicely between the hem-stitched border.

Then came the fiddly bit, getting the pages stitched into the book. The instructions advised starting with the outside pages and working in which I did, two pages to each line of the four sides stitch.

I realised at this point that when I was stitching the lining in I was also meant to attach some ribbon to the sides, as a closure for the book. At this point I also realised I had used the wrong ribbon when weaving it through some of the stitches (it didn’t specify which piece) Of course the piece that was left was too short. The only ribbon I had that was suitable was some silk ribbon and that actually made it easier to attach, I just threaded it onto a tapestry needle, knotted the end, and pulled it through the even weave to the back and then out of the edge of the cover where it seems to be holding quite nicely.

So that’s it complete. I’m pleased with it, I found the instructions a bit of a challenge, not sure if this will put me off doing another of their books – they have several different ones. I’m happy with my blanket stitch edge, though another time I might try the hem-stitch edge. I also wonder if the calico I put inside the pages to give them a bit more body made it a bit too bulky at the spine. It will be interesting to have another look at the sample at the next Harrogate show.

My fabric book collection is growing!

I’ll be linking up with Kathy’s Quilts for Slow Stitching Sunday, please follow the link to see what everyone has been stitching.

Posted in cross-stitch, embroidery, kits, Serendipity, Textile Books | Tagged , , , , , , , , | 21 Comments

Birthday Jumper

It was my grandson’s 2nd birthday this weekend. I decided to embroider his name on a jumper, it’s quite the ‘in’ thing on Etsy and Instagram apparently, my daughter has done a few for friend’s children so she gave me some tips.

I bought a knitted hoodie from Next, it’s a lovely soft marl grey in quite a fine knit. I wrote his name on paper first to get the sizing right, once I was happy I used a fine Frixion pen to lightly mark the letters on the jumper, you can just make them out on the photo below.

These jumpers are usually embroidered in chunky wool, I had some double knitting wool, a cotton one, in a cream with blue flecks, I thought it would work OK. I started on the H, but it looked too bulky, before I undid it I tried some DMC using all six threads in a softly variegated cream. That worked much better.

Luckily the wool chain stitch came out without a problem and I stitched it all in the DMC. It didn’t take long to stitch, I love it and hopefully he will too when we see him tomorrow.

Posted in embroidery, grandchildren, Serendipity | Tagged , , , | 9 Comments

Strawberry Sampler Book

I’ve been working on my strawberry sampler book for about an hour most evenings and I’ve now finished the last two pages. I think this one just needed the edge stitching after I last shared it with you. This is the hem-stitch page.

The next page to do was the hardanger one. I found this one quite tricky as the instructions were really not very clear, I ended up googling how to do the pulled stitch for the strawberries as the diagram and the picture just weren’t clear at all. The instructions for the diamonds were also contradictory as it said one stitch on the chart and another in the instructions!

I’m now stitching the inside cover lining page which has the index for the front of the book and a blackwork page for the back. I’m also going to start stitching the pages together, I’ve found some stiff calico to stiffen the pages a little, I’ll just put a square in the middle as I’m whip-stitching the edges together.

I also need to finish the cover, it needs a hem-stitched folded border but I’m also tempted to undo and restitch the centre four sided stitch as I think it’s in the wrong colour. The instructions said to stitch in cream, so I did, but the cover isn’t cream linen and there’s lots of a darker thread I’ve not used!

Here’s the other completed pages…

Posted in embroidery, kits, Textile Books | Tagged , , , , | 9 Comments

Yorkshire Wolds Way Part 3

When we woke on day six of our walk, the first thing we did was to trot along to the shower block where our boots were drying on the towel rail. The previous day had been so wet our boots were soaked through, we did wonder if wearing gaiters meant the rain above funnelled down into our boots!! By morning I can’t say they were dry but they were definitely wearable with a fresh pair of socks!

After a bacon butty breakfast in the cafe we set off. We walked nearly ten miles, passing the half way point on the Wolds Way. We passed through some classic wolds, deep sided dry valleys, on our way to Wharram le Street.

We also walked through Wharram Percy, we visited there a couple of months before the walk as it was somewhere which sounded very interesting but we knew we would be too tired by that stage of the walk to linger. Wharram Percy is a deserted medieval village, only the walls of the church remain and the imprints in the fields where cottages were. It was deserted when the landowner decided to change from strip arable farming to the more profitable sheep farming, it sounds a bit like the land clearance that went on in Scotland about the same time.

We were picked up by Mal from the Goaties at Wharram le Street. We used the Goaties for our baggage transfer for the first five days, there are a few companies around who do this but the Goaties are the only ones I know about who will collect the walkers as well. They were great, a lovely friendly service who I will definitely use again. As we obviously didn’t know exactly what time we would want collecting, Mal had asked me to keep him updated on our progress, so I sent messages, when we left Fridaythorpe, ‘enjoying coffee in Thixendale’ ‘ Having lunch in Deepdale’…he admitted my messages made him smile but they were great as he could see how fast (or not!)we walked.

Mal dropped us off at the Ramblers Rest B&B where we stayed for two nights. It was very comfortable but there was no where nearby to eat, we needed a taxi go go to the nearest town which would prove expensive. So we decided to try one of those mountain meals, the dried version. By chance we both bought the same one, chili con carne. We added boiling water and waited the allotted time…it was absolutely vile!!! Maybe if you’re up a mountain it doesn’t taste too bad, but we coudn’t eat it! Luckily I’d also bought two puddings in sachets, chocolate puddings that we heated up in the kettle…and we had lots of snacks too! Next time we’ll just take a pot noodle!

Day seven we got a taxi back to Wharram le street and walked over ten miles to West Heslerton. We had quite a laugh that day as when we were dropped off there were two gents also getting out of a taxi on the other side of the road. They asked which way we were going, I hadn’t got my bearings yet and pointed up a road, ‘That way!’ My friend said ‘No we’re not, we’re going that way!!’

A few miles later and my friend got a message from her OH who was our taxi service for the rest of the walk, ‘Use the rope’ We didn’t have a clue what he was talking about. We were also laughing about how the different guide books vary, mine talked about the amazing views, my friends talked about nettles and steep hills! One comment it made was how someone with a sense of humour made one of the signposts…

…that was an indication of the steepness of the hill! The rope was along side the path to haul yourself up on! It was actually a lot better than I thought it would be when I first saw it, the rope worked very well, probably easier and cheaper than making steps all the way up. I certainly would have struggled big time without the rope. The photo doesn’t do it justice, it was steep!! When I commented on it on the facebook page, someone else just commented ‘I hate that sh******ng hill!!’

We were then wondering how on earth my friends OH knew about the rope. It turned out he had chatted to the two gents we saw first thing and they had told him to tell us to use the rope!

Day 8 was nearly nine miles to Staxton Wold. A good walk, I took the opportunity of photographing all the wild flowers which had featured on our walk. We always do a photobook of our walks, so I can do a page of the flowers. This is meadowsweet surrounding one of the five mile marker posts. We came to love these marker posts, ticking off the miles, it’s a lovely feature which we’ve not come across on previous walks. On the sides it told you how far you’d walked and how far to go.

There was also a lovely old track passing some very old wizen hawthorn trees…

Day nine was our last day, eleven miles to Filey. I nearly had a bit of a wobble when my friend pointed to a distant headland and said it was Filey Brigg, the end of our walk. It was a couple of miles further when I said it couldn’t be as the direction was wrong, luckily the end was much nearer! It was wet and miserable in the morning, but it cleared up in the afternoon as we walked through the town to the seaside.

The end of the walk is on the top of that headland, Filey Brigg, it’s also the end of the Cleveland Way which we walked back in 2019. Here we are sat on the stone seat that marks the end…

…tired but happy! We did it!

It felt quite a challenge, but it is five years since we last did a long distance walk, we’re five years older and we hadn’t been able to do much in the way of practise walks. It’s also the longest we’ve walked in one stretch, we’ve usually managed to do some of the walk before hand and just walked for 5 to 7 days, 9 days walking was a long time….we’re already thinking about which walk we’re going to do next year, the Swale Way is the top contender at the moment.

Posted in Walking, Yorkshire | Tagged , , , , , | 17 Comments

TWRD Quilt Block

Over the weekend I finished the second block I had promised for Kates charity quilt. I’m pretty pleased with this one as it’s one I ‘designed’ myself, rather than just finding a pattern someone else has written out…it is however a pretty simple block 😀

I pulled out all the teal and ocean blue colours I had in my batik drawer, which turned out to be quite a pile!I wanted lots of half square triangles in all the different shades, with some fishes swimming along too. I decided I wanted to end up with 6×6 2″ squares once it was stitched, so I cut out lots of 3″ squares and made pairs of half square triangles which I could then trim to size.

The fishes are made from quarter square triangles so I cut 3.5″ squares. Initially I made the fishes in a lovely orange batik which did look good, they were fun!.. but then I happened to see the post of blocks Kate has already received, my orange fishes were going to stand out a mile!

At this point the block was just laid out on my wool mat. I decided to give Kate the choice of fishes or no fishes – I loved the block without the fishes too. Just after e-mailing her I remembered she wanted blue as an accent if we needed one, I found some nearly electric blue batik, so I offered blue fish and that’s what we went with. Much more subtle but still there.

I stitched the blocks together with the chain technique where you don’t actually cut the threads between blocks, whilst it made it a little fiddly for ironing, it did make piecing pretty easy. You can just see the threads in between all the blocks on the above photo.

Here’s my finished block, I also realised that it could go either way up, depending on which way Kate wants the fishes to swim! It’s already posted, swimming across to Australia.

Posted in Quilting | Tagged , , , , , | 9 Comments

Owl and Hare Hollow HQAL

I finally made a decision about the sashing for my quilt, three weeks ago I was still mulling over several ideas…

I did like the darker one but I felt it was overpowering the blocks somewhat. Eventually I decided on the mid-shade fabric, I ordered a couple of extra meters and last night I started stitching it together. I’ve cut 2″ strips so the sashing ends up at 1.5″, which looks about right with the 8″ blocks.

It took me a while to arrange the blocks, not helped by the fact that two blocks decided to hide in my sewing room!! They’re all laid out on my spare bedroom floor at the moment, with the door shut so Bella doesn’t decide to reorganise them!

I started off with the layout in the pattern, adapted it as my quilt is 7×7, rather than 8×6. I then looked at background fabric and also switched a few round where I felt the ‘heavier’ solid circle blocks were clustered together. It’s not perfectly arranged but sometimes the more you change things the more you tie yourself in knots!!

I’ve started sewing the bottom two rows together and I’m pleased with it so far…

I might still use the other darker fabric for an outer border, maybe with a narrow cream in between, I’ll see how the size looks when I’ve finished the sashing. Hopefully I’ll have the top finished for the next update in three weeks time.

Hand Quilt Along Links

This Hand Quilt Along is an opportunity for hand quilters and piecers to share and motivate one another. We post every three weeks, to show our progress and encourage one another.  If you have a hand quilting project and would like to join our group contact Kathy at the link below.

KathyMargaretDebNanetteSharonKarrinDaisy, and Connie

I’ll also be linking up with Kathy’s Quilts for Slow Stitching Sunday. Please follow the links to see what everyone has been stitching.

Posted in Owl and Hare Hollow BOM, Quilt-a-long, Quilting | Tagged , , | 9 Comments

Teal Waters Run Deep

I still feel I have rather a lot of projects on at the moment but I’m slowly ticking things off my list. Some things take more priority than others, as they are time critical. One of these was some quilt blocks for Kate Chiconi’s latest quilt to raise money for ovarian cancer, it’s the 11th year of making these quilts, quite an achievement for Kate.

They’re alway teal coloured as that’s the ‘colour’ for ovarian cancer and Kate always finds a theme with a teal pun to it. This year it’s Teal Waters Run Deep, it’s an ocean themed quilt and we could choose whether we did an underwater block, a boat block etc. I plumped for two underwater ones.

I pulled out all my teal and sea coloured batiks out of my stash and my scrap box, I then went to a craft fair and one stall was selling a bundle of four batiks called Ocean! Well they fell straight in my bag! Having browsed on pinterest I found a wave block which I liked, most wave blocks like this just use two colours, I liked the way this used four.

The pattern is by Timeless Quilt Designs on Etsy, you could choose what size block you wanted and then just print the pattern off. The instructions are basically a video of someone making the block, which did make the whole process a lot clearer, it’s basically made of four square blocks. I would have liked however to have some measurements too, such as the size of the squares part way through. The pattern is all triangles so I found it easier to cut slightly bigger and then trim to size.

I also laid out all the pieces before hand so I knew I was getting the fabrics in the right place. Having made one 6″ block, apart from the final triangle, working out how it went together, I made the other three at the same time which worked out better for checking seams etc.

I’m pleased with how it’s come out, not sure I’d like to make a whole quilts worth though! The colours are not so contrasting as it looks in the photo.

I’ve already got the next block laid out, I just need to stitch it together.

Posted in Quilting | Tagged , , , , , , | 8 Comments

Stitching my Garden SAL

It’s time for a mini happy dance, I’ve finally made all the individual pages and stitched them together into ten double sided pages.

Three weeks ago I had finally worked out how to create the actual pages. Each embroidery is backed with pelmet vilene, the raw edges were then pressed to the back and the two sides slip-stitched together.

A couple of the early pages weren’t quite big enough so I needed to add a couple of extra strips of fabric to two sides. The magnolia page was the first one to tackle in this way…

The Jack Brunnera page was also too small so I added a couple of borders again, this time I felt they needed a little embroidery too as otherwise they would be the only seams without any. I just did a line of feather stitch down the seams, either double or triple feathers. I also added a little triangle to the top corner so that just got a bit of fly stitch. I think these two pages go well together.

I also realised I needed one last page, the very back page. I decided to keep it simple and just use it to add my details. I used a pretty muted floral background and some soft green linen.

So I now have a pile of ten prepared pages. I just have to decide how to finish them. I need to make a cover but first I need to decide the final look of the book. Last time I made a book I learnt coptic stitch to bind them. It can be quite decorative, so I have to think whether to make a front and back cover and have the coptic stitch on show. This is the coptic stitch on the book of days I made back in 2021…

With the Book of Days I then stitched the book onto the cover so the coptic stitching was hidden by the spine…

I’m tempted to do that again as it does help protect the edges of the pages, but I equally quite like the idea of an exposed coptic stitching. I might do a bit of googling on more decorative coptic stitching…I could always make a bag to keep the book in 🙂

This SAL is organised by Avis from Sewing by the Sea, we post our progress on our chosen project every three weeks, perfect for keeping us motivated and moving forward on a long project. Please follow the links to see what everyone else has been stitching.

AvisClaireGunChristinaKathyMargaretJackieSunnyMeganDeborahSharonDaisyCathieLindaMaryMargaretCindy

Posted in embroidery, Serendipity, Stitch-a-long, Stitching my Garden, Textile Books | Tagged , , , , , , , | 14 Comments

A Place Mat …or not!

A couple of months back I was asked at my WI if I would make a placemat for a WI competition to be judged at the Great Yorkshire Show, I tried to duck it but without success! I don’t like making stuff just for a competition if I don’t think I’ll like or use it afterwards and we don’t use placemats at home.

I then thought if I made a sewing themed one I could use it as a mat to put my overlocker on, I had in my mind some pre-printed panels from Raggedy Ruff designs. When I found the schedule again however, I discovered it could be no bigger than A4, or about 8″ by 11″, barely big enough to put a tea plate on never mind a dinner plate and cutlery!

I was rummaging through my stash and a file of unfinished, abandoned projects, when I found a pair of star blocks which were made for a totally forgotten about QAL by Pat Sloan called Bloomtopia back in 2021.

They were pretty much the right size, just needed a bit of a border top and bottom to widen it a bit. I had a rummage through my scrap box and found some scraps which matched perfectly, but when I say scraps, they were scraps!! One was too narrow, the other too short! The bird border is pieced down the middle, I just managed to find a line that didn’t chop a bird in two! The plain strip was too narrow so I used two strips!

As you can see I did a decorative line of stitching to hide the most obvious seam line. I quilted round the star ‘in the ditch’, which I was pretty pleased with as it’s not as easy as it sounds to stitch exactly on the seam line.

I backed it with a modern style leaf fabric which was in just the right colours. The binding is from another scrap – I could just get four strips out of it to make a long enough length of biding to go round. It’s a pretty stripy cotton which I bought in Amsterdam years ago, cut across the stripes it makes a pretty binding.

Having put the binding on, the fancy line of stitching on the two borders was in a funny place, so I added a few more lines of quilting!

Well it’s done! It won’t win any prizes with it’s lost points and wonky seams, but we have an entry! I might just use it as a large mug rug in my sewing room afterwards…and fingers crossed they don’t ask me again next year!

Posted in Quilting, Women's Institute | Tagged , , , , | 3 Comments