Last autumn one of the quilting facebook pages I follow was full of beautiful Christmas wreaths made from a pattern by Poor House Quilts, I thought they were gorgeous but I knew I didn’t have time to start making one at that time…roll on a year and a workshop was announced at WI to make one, I signed up immediately!
We received a list of requirements which included three different fabrics, some bondaweb and some stuff I’d never heard of before called Bosal, or to give it it’s full title, Bosal 4955 In R-Form Single Sided Fusible Foam…a bit of a mouthful! I managed to order some through Hobbycraft to collect at my local store, it’s weird stuff, like a stiff, spongy interfacing. I popped down to Samuel Taylors in Leeds and found some gorgeous Christmas fabric in a rich red, green and cream, all with the same gold pattern on. I also learnt something new about Bondaweb, sometimes when I’ve bought it it has separated already, which is a bit of a pain, my initial thought was that I’d bought a cheap version, but apparently it’s because it’s old, I understand it’s not such a problem with other makes.
Anyway, back to the workshop…this morning my friend and I travelled over to Ripon, laden with sewing machines, cutting boards etc and had a wonderful day stitching and creating.
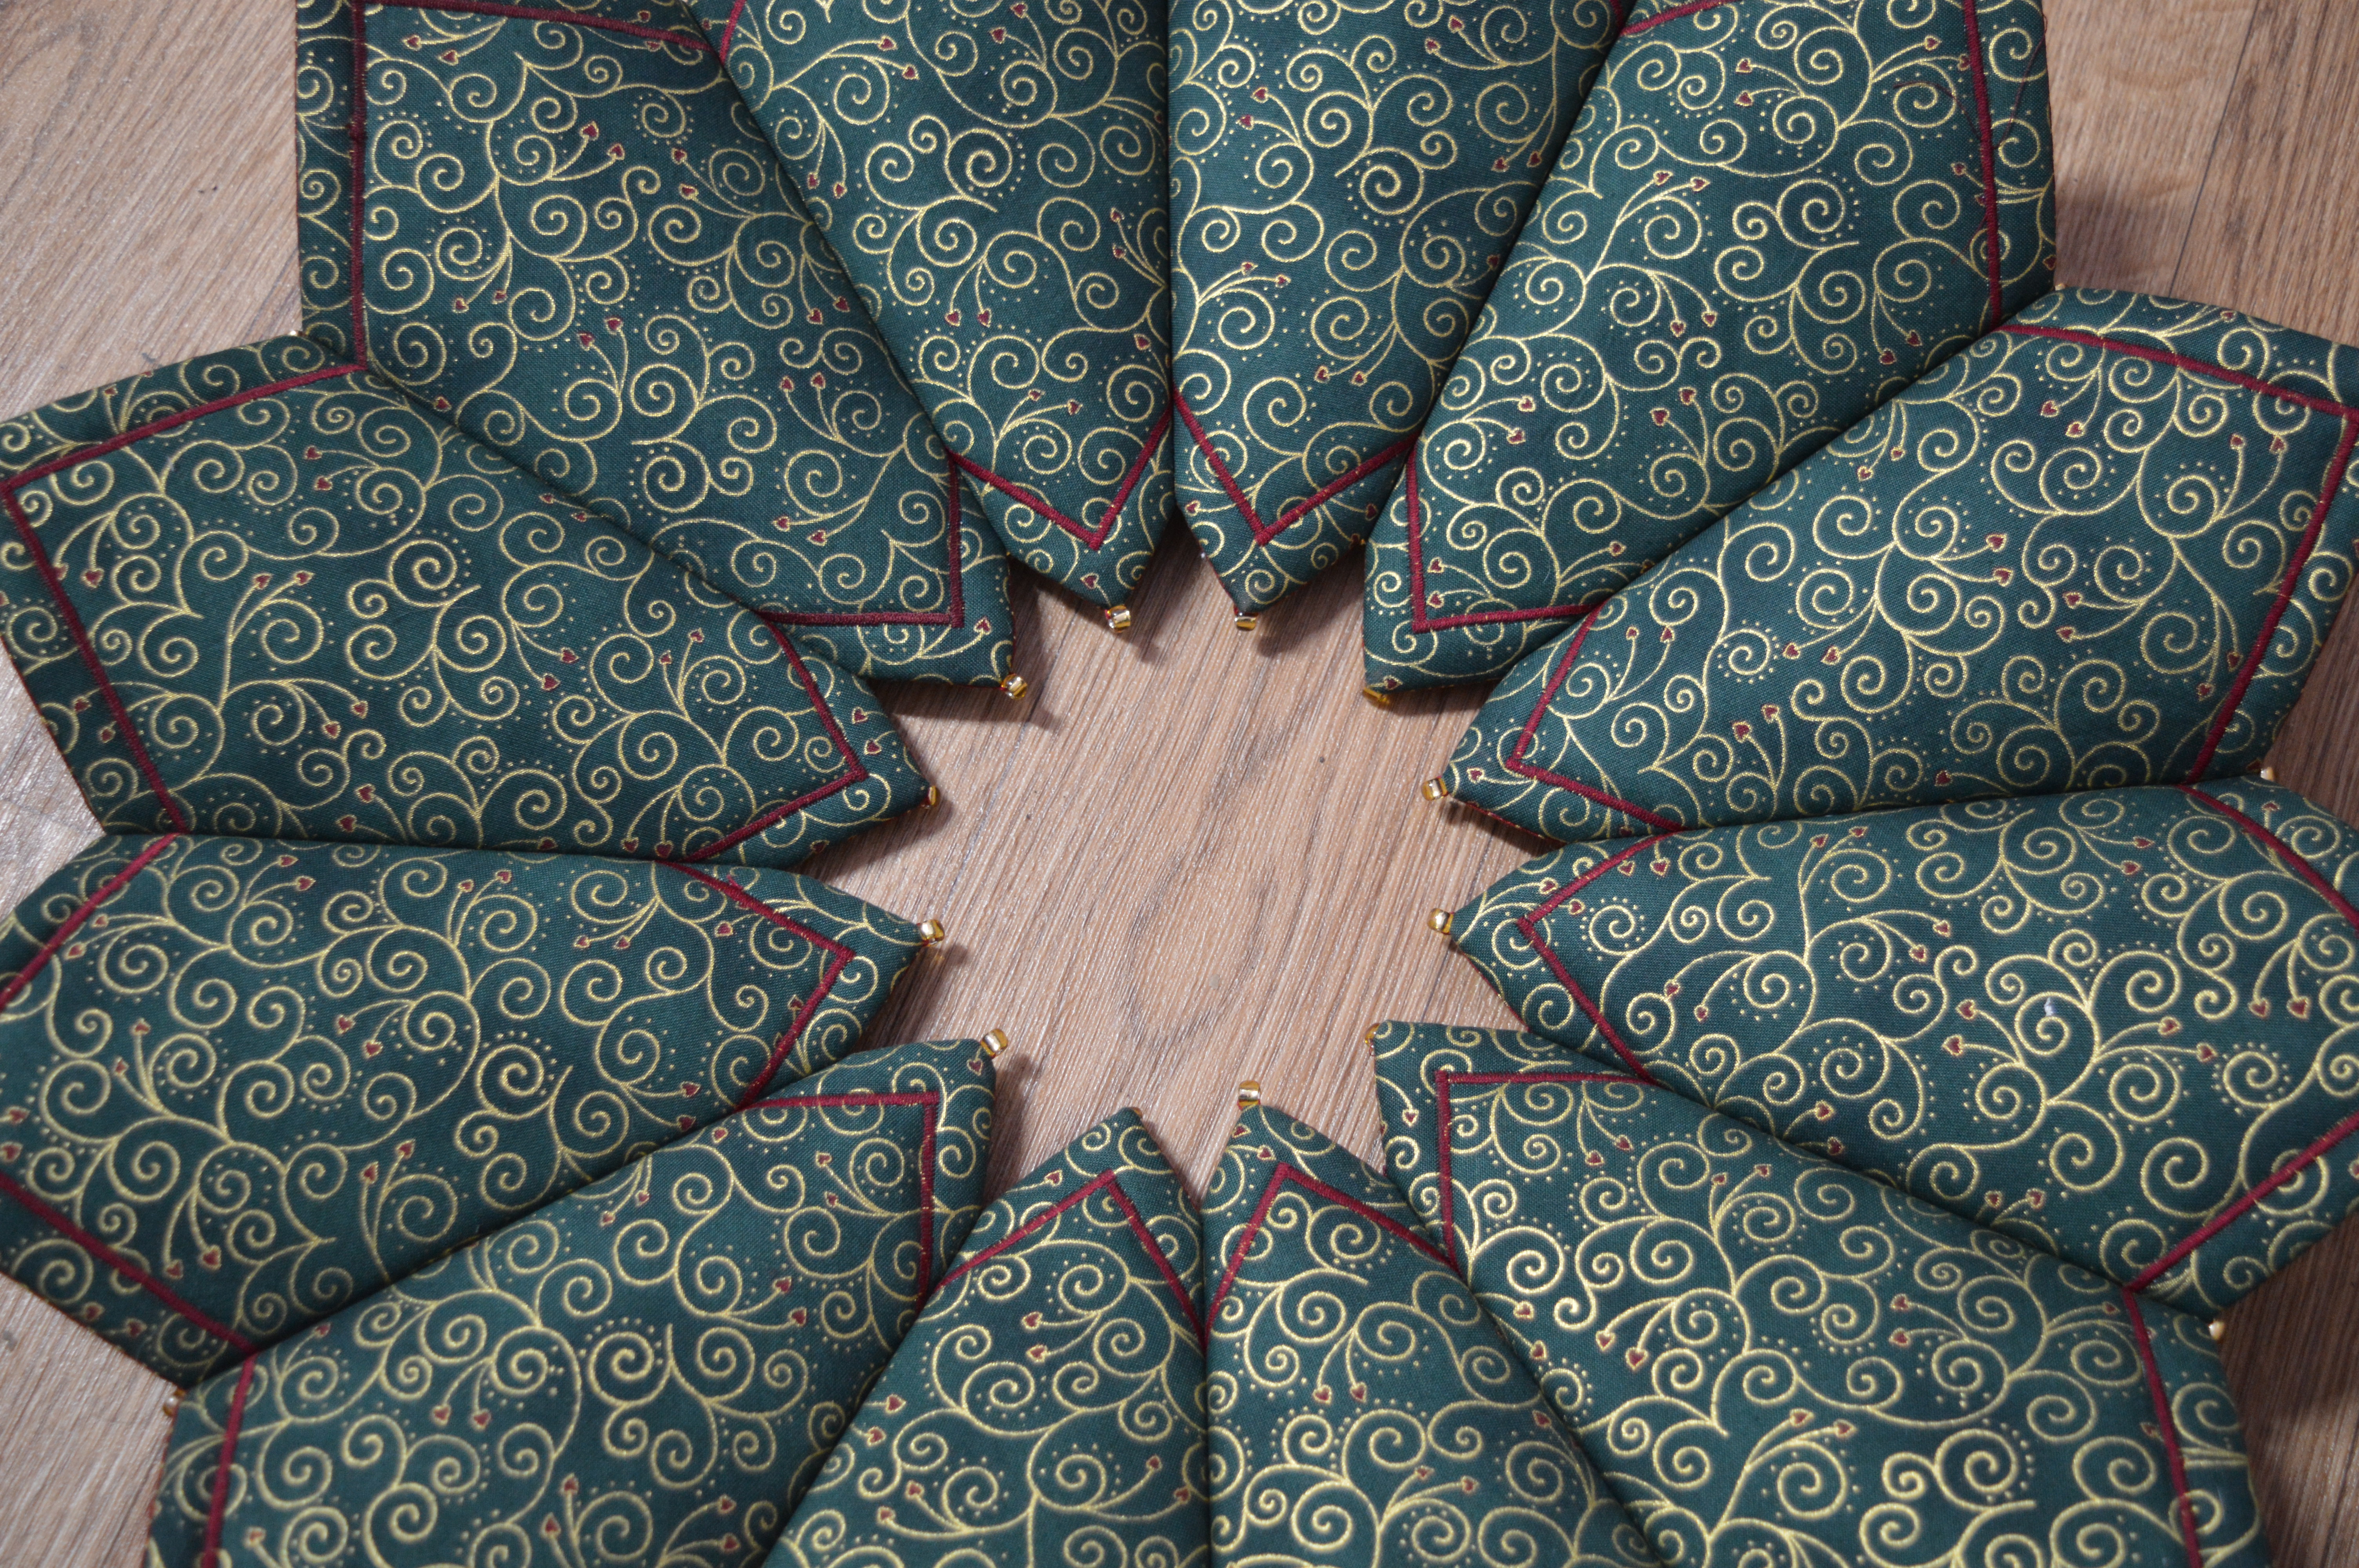
Our first job was to cut everything out and prepare everything, this seemed to take most of the morning…twelve 7″squares in the red and green fabric, twelve 5″ squares of cream fabric, with Bondaweb already applied, twelve squares of bosal. 
The bosal was bonded to the green squares, they could then be stitched to the red squares with the stitching line right next to the bosal. They were then turned through a cross cut in the centre of the red fabric, this turned out easier than I thought it might. After a good press the cream squares were then centred over the red (covering the hole) and ironed on.
The instructions suggested a zig-zag stitch around the edge of the cream. I decided to do a really close zigzag, more of a satin stitch really. I chose this mainly because my cream thread was too light, so I chose red, I also decided to use red in the bobbin so I didn’t risk the wrong colour showing through. It actually worked brilliantly as there is now a lovely satin line around the green squares.
Satin stitching round twelve squares did seem to take forever…and took an awful lot of thread! Eventually I had twelve neat squares all ready to stitch together.
The squares are stitched together at a certain angle, the template comes with the pattern. My sewing machine wasn’t too keen on the thickness of the two squares. I was using my walking foot and my first attempt came to an abrupt halt when the needle broke at the start. I realised it was because of the steep step up at the beginning which caused the needle to hit the slanted foot. I popped another square behind just to start each stitching line off and it worked fine. The squares were stitched into pairs first, then fours and eventually altogether in a circle.
All that was left to do was to hand-stitch the corners together to make the cone shape. I decided to stitch a bead on at the same time. I just managed to stitch the last bead on with about two minutes to spare before the end of the workshop. I was the only one who managed to complete the wreath by the end, I’m a pretty fast worker but even I only just managed it in the six hour workshop.
This evening I decided to add a few more beads on all the joins and the points, they are a nice gentle gold bead which adds just a little twinkle, they also neaten up any uneven seams or not so sharp points!
These wreaths we not half as complicated as I thought to make, just in case you’re still trying to get your head round the design, the green is the bottom square which curls up to the front. The red is the top square, it isn’t binding, this is then almost covered by the cream applique square. The stitching round the cream square helps give it structure.
I’m really pleased with my wreath, it will look great with a candle in the middle over Christmas. They also look nice just hung on the wall. I’ve enough bosal to make another one, but they are pretty big, about 21″ across. We’ve got measurments for a smaller one too, so maybe I’ll do one to hang on the wall.