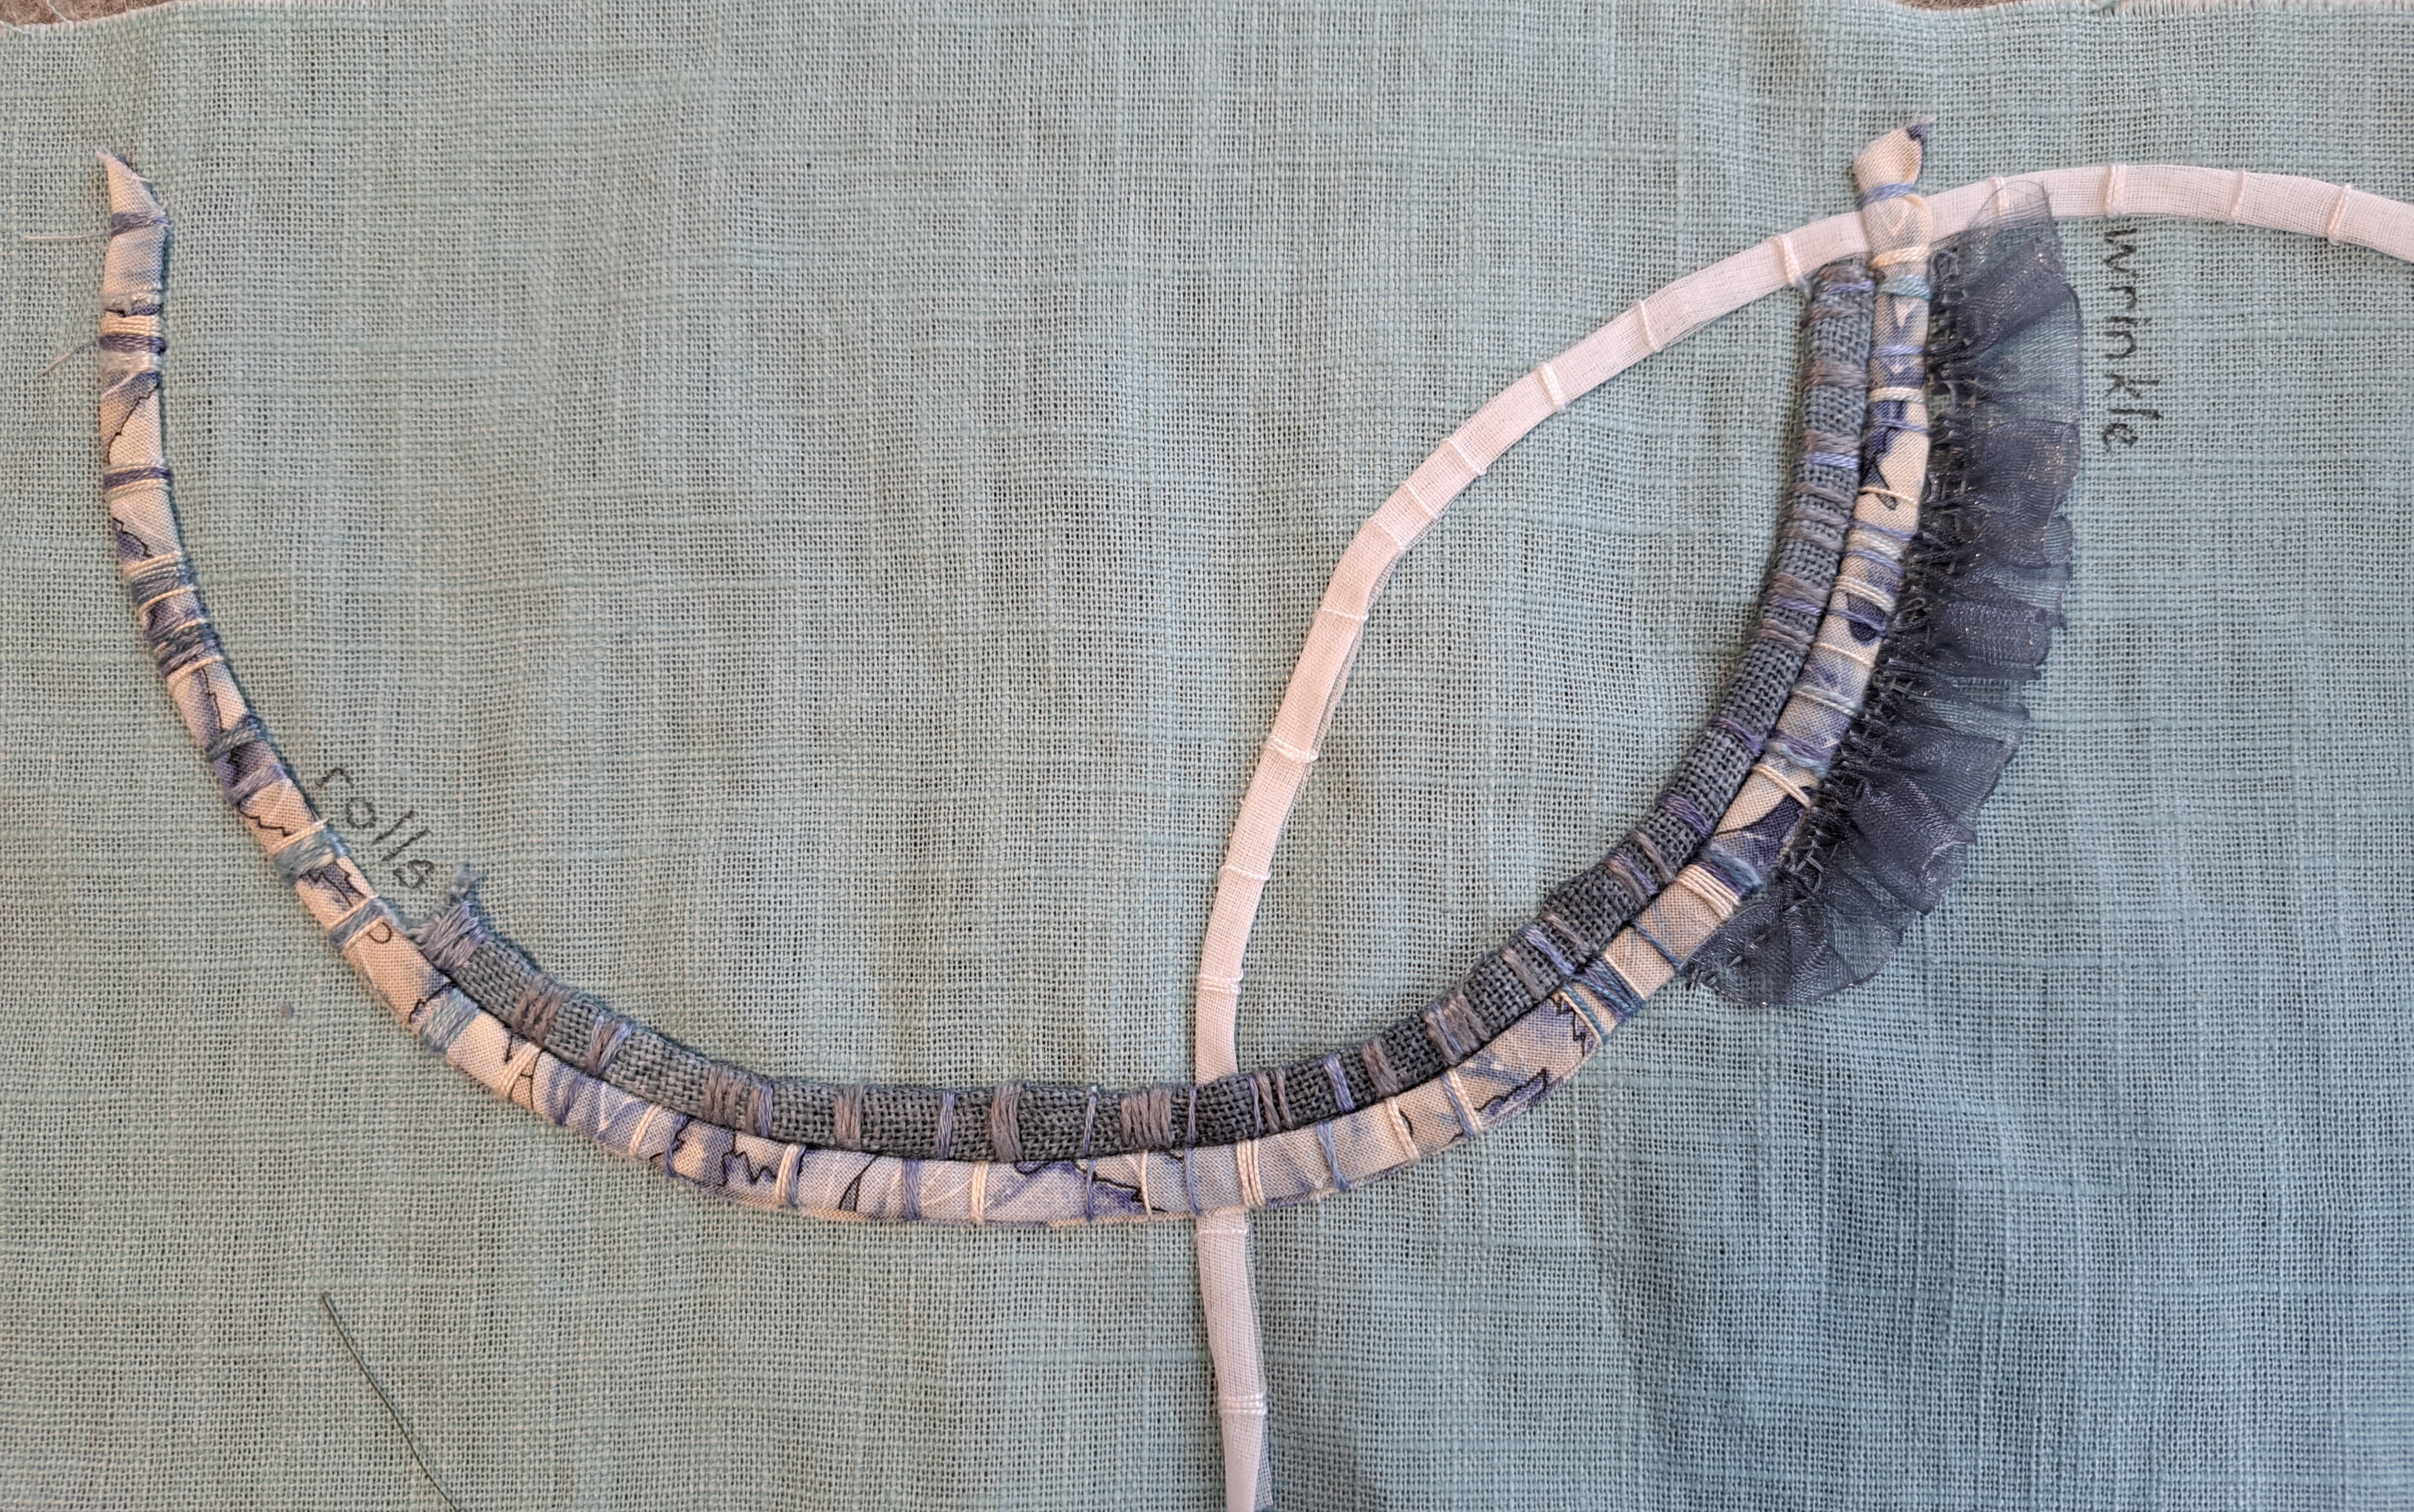
I caught up with the Anne Brooke Bobbin Along challenge last night. Each week she adds a little more stitching to a piece to represent a word, we’ve had layers, rolls. hummock…and a couple of weeks ago it was wrinkle.
Anne gathered up fairly narrow lengths of cotton to make a wrinkly ruff or circle. I tried a couple of different cottons for my piece but they looked too heavy, so I tried organza ribbon and that worked much better for me. I initially also tried placing it round the hummock, but I just couldn’t get it to look right. I then had the idea of stitching it along one of the arcs of rolled fabric and that worked much better. This is going to be a double page spread in my textile book.
Last week the word was Slit, cutting a slit in the fabric, folding the sides back a bit like Cathedral Windows in patchwork, revealing another fabric underneath. I wasn’t sure how a straight slit was going to work in my book of circles, obviously I couldn’t do a curved slit as it would distort the fabric too much. I then had the idea to turn it into a slitty eye, a bit like an owl’s eye, or a reptile. I decided to make it next to the hummock with the two circles slightly overlapping each other.
I used a straight stitch to catch the turnings down and stitch the backing fabric in place at the same time using a subtly variegated quilting cotton. I could then use a blue thread to do two running stitch circles round the slit…
…and I couldn’t resist having a little bee peeping out of the slit 🙂
Since starting the Sewing Room Declutter Challenge (almost finished!) I’ve been trying to make up some of the kits I’ve acquired over the years. This is one I fell for at the Harrogate Knitting and Stitching Show last year, a complete impulse buy!!
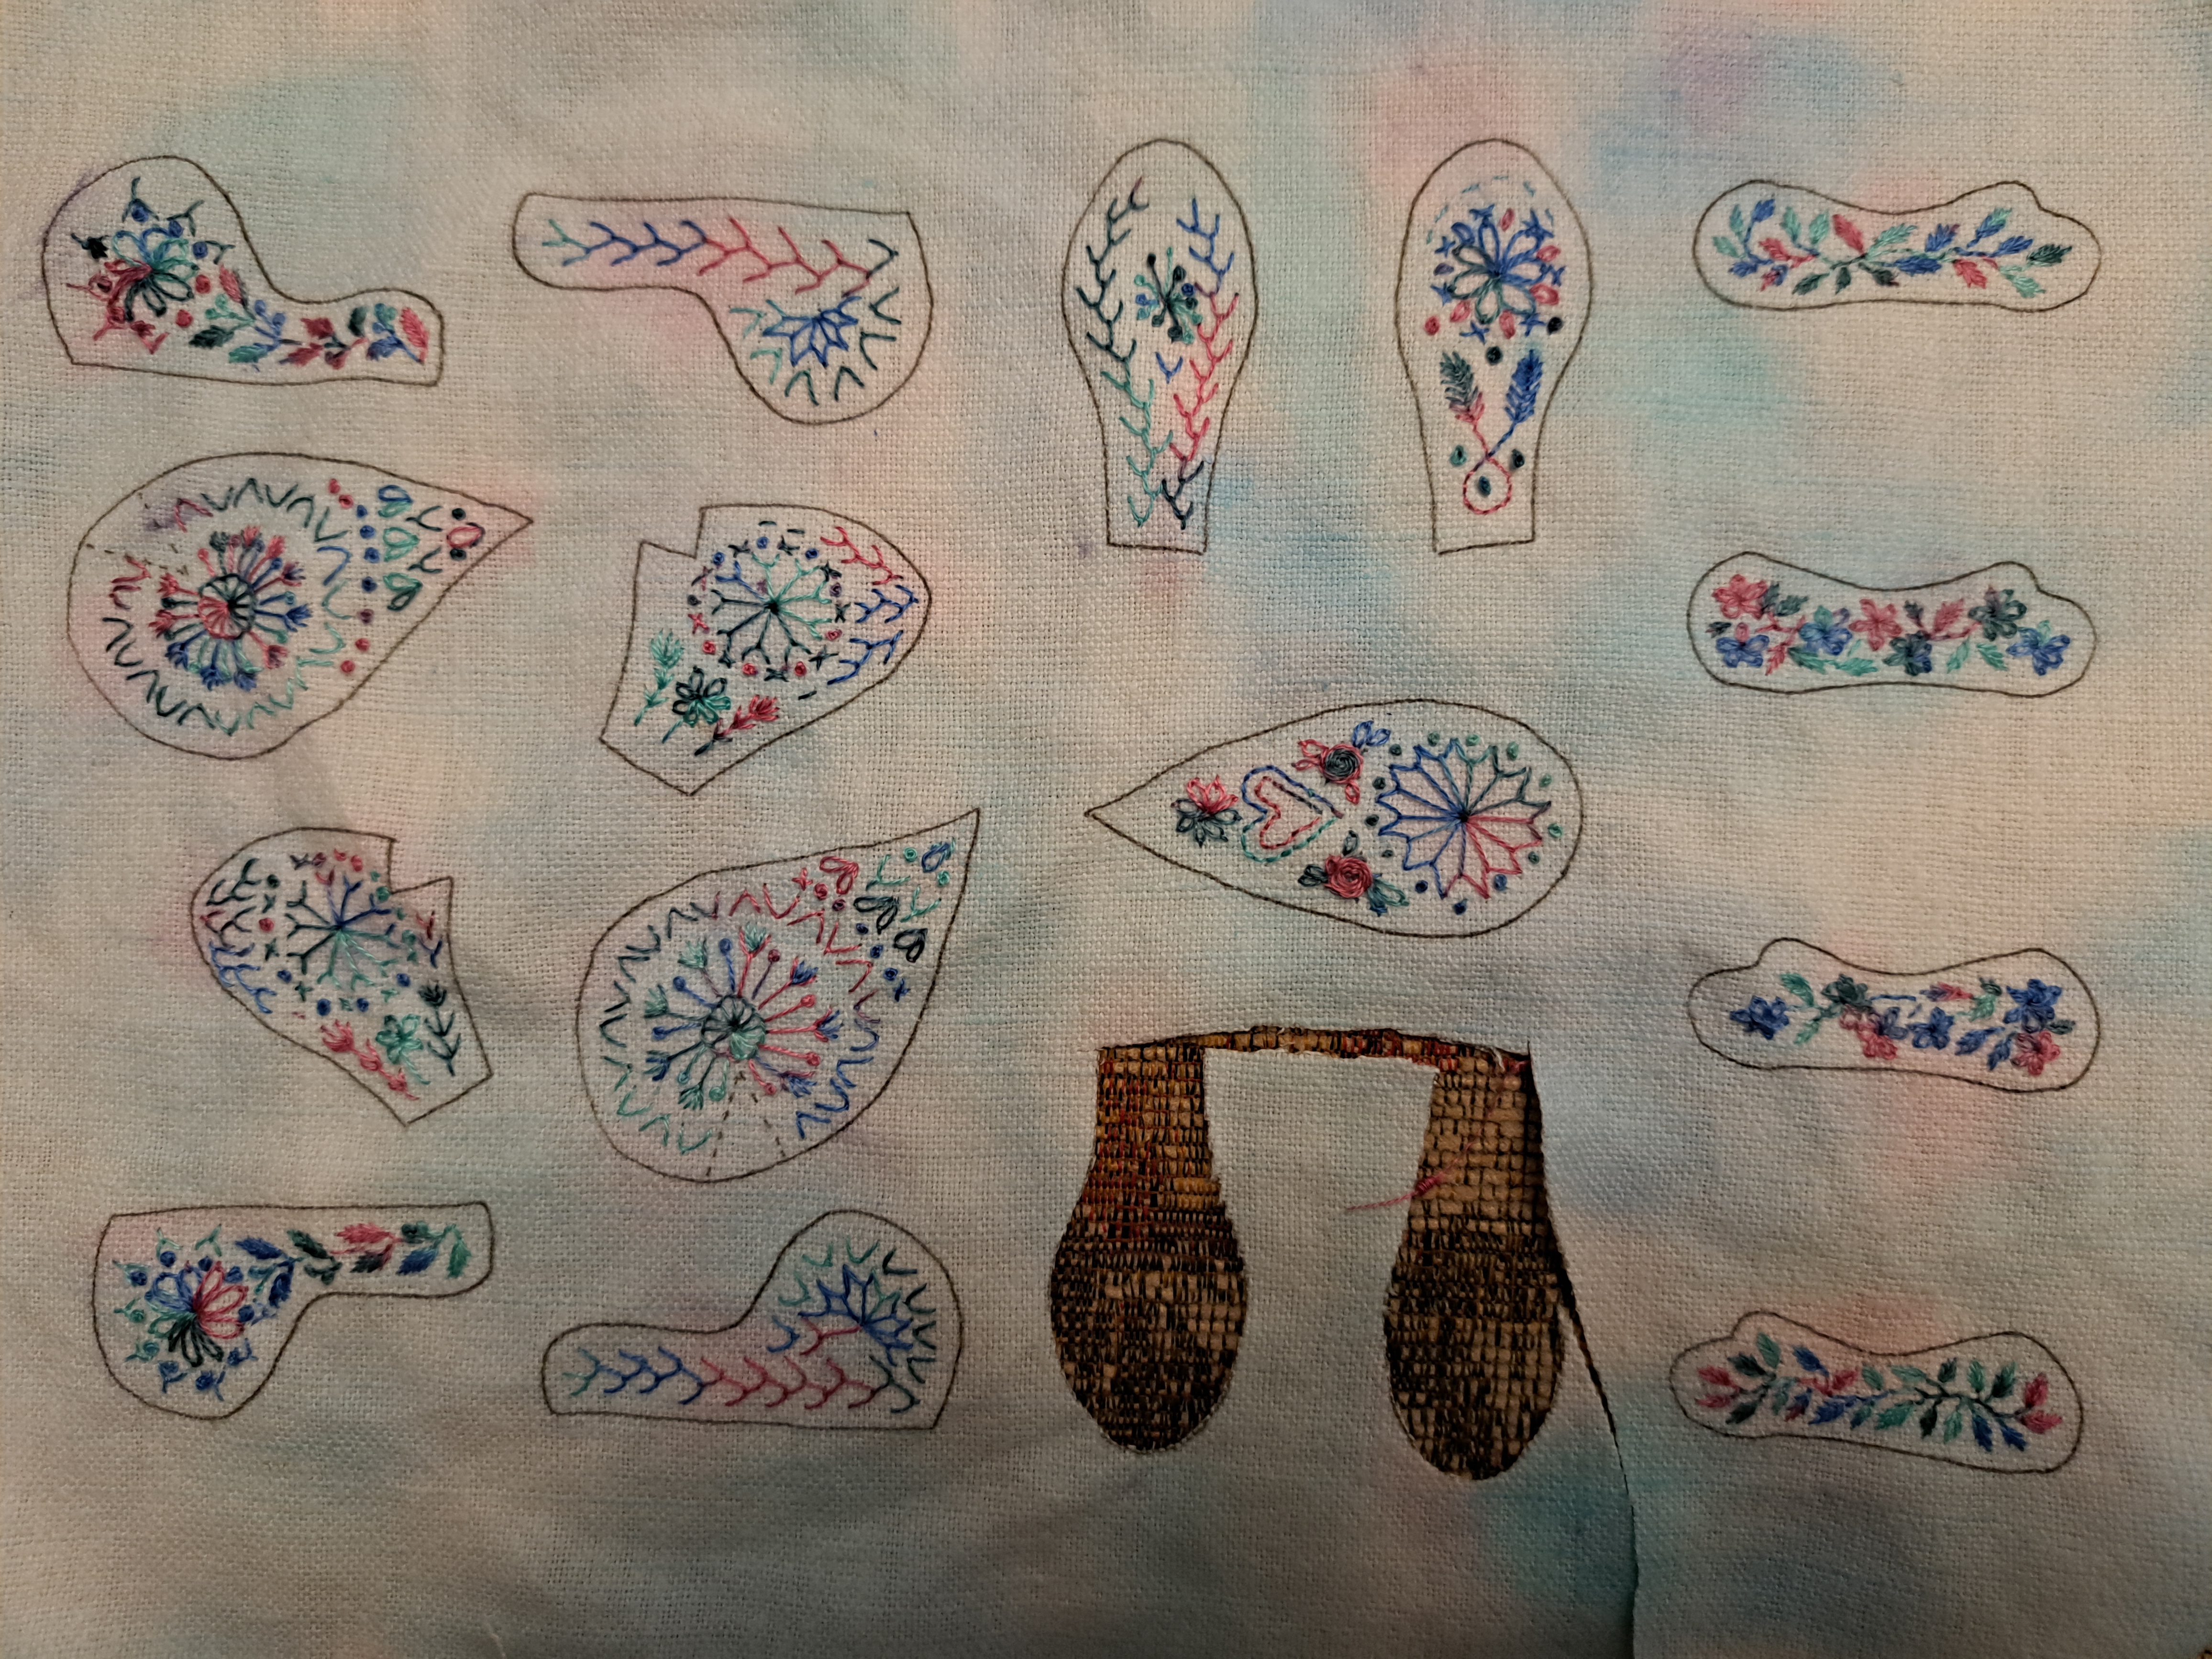
The kit included some lovely linen/cotton preprinted with the shapes, the large cotton reel and a spool of variegated perle thread. I decided to use a variegated DMC thread instead as it’s finer and I liked the colours of this one.
I decided to embroider leaves, flowers and general pretty shapes. Half way through I thought it might be nice to colour the fabric so as to soften the contrast with the white fabric. I used silk paints as I have them in my stash and I know how they work as it were. This is just before I painted it, as you can see I managed to stretch it on a large hoop for painting.
One advantage of silk paints is that it isn’t permanent until you iron it, so if I really didn’t like it, I could have just washed it out. Luckily it worked really well and I carried on with the embroidery. There’s no embroidery designs with the pattern, it’s a matter of choosing your own stitches and in my case making it up as I go along.
Once the embroidery was complete I could start cutting out. I just cut out a piece as I was ready to make it up as they were so tiddly it would have been easy to lose them,
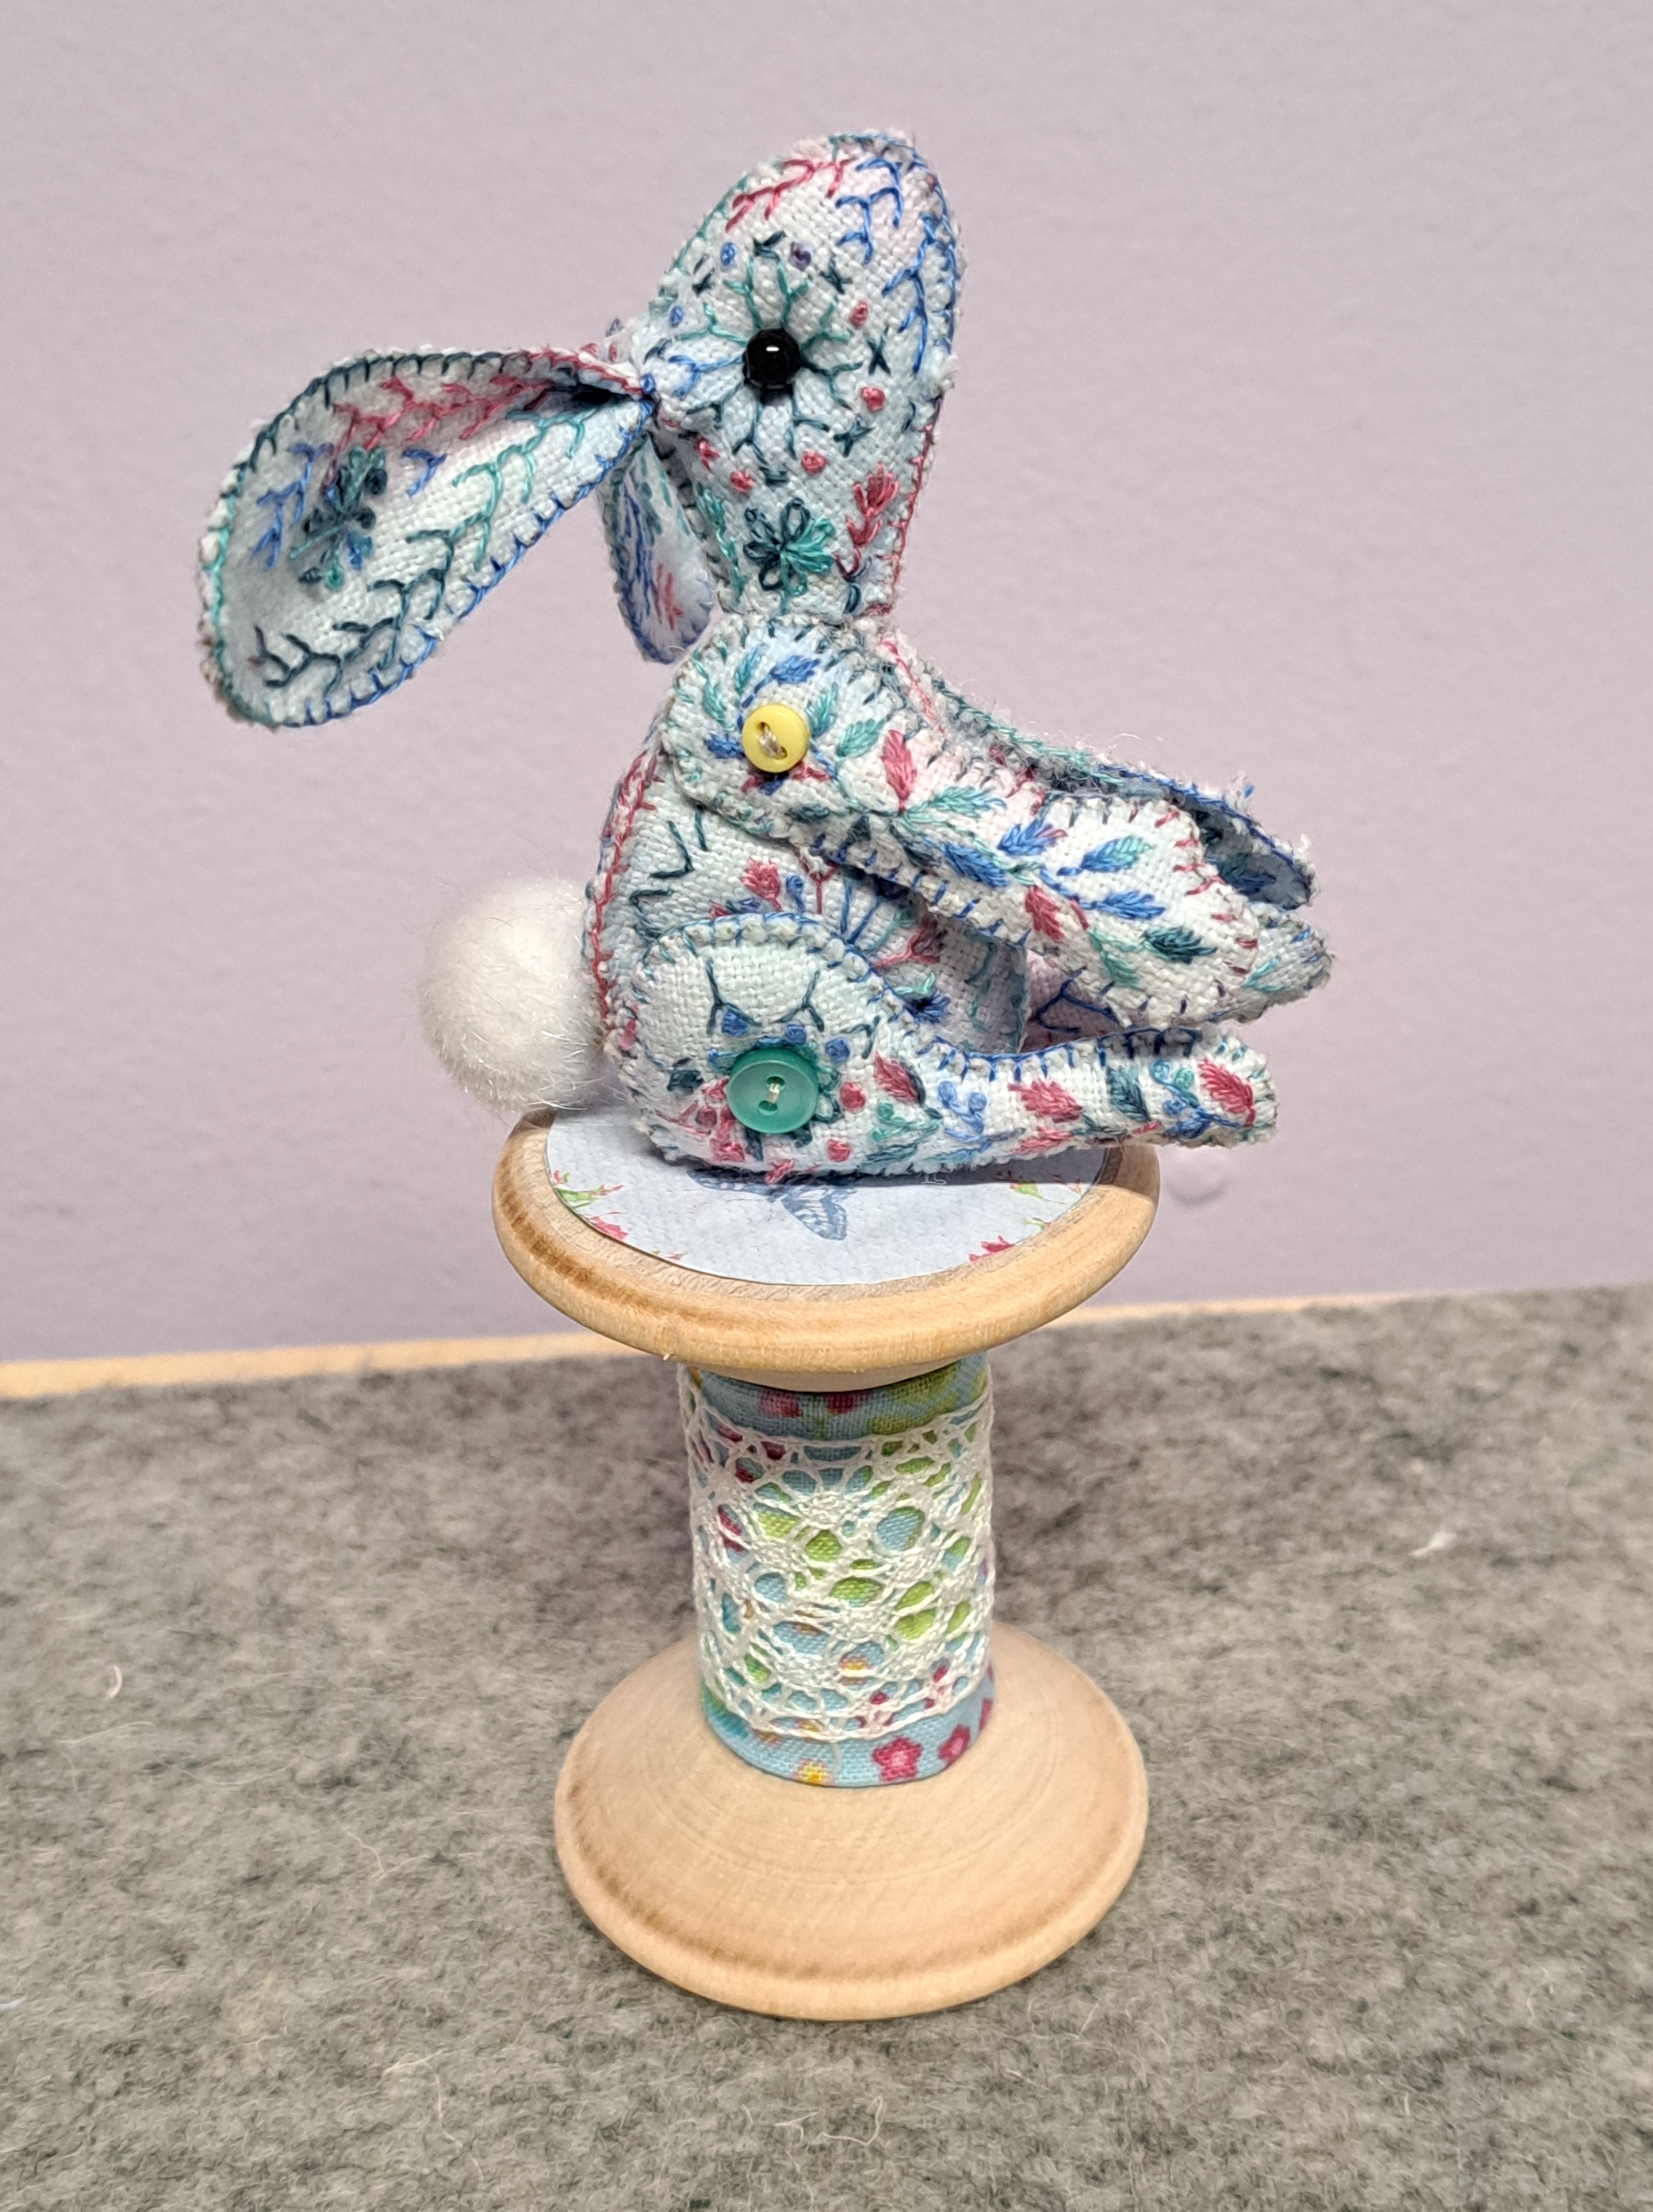
There are basic instructions in the actual kit but there is also a link to several videos which detail each section to be stitched. I used blanket-stitch in the same variegated DMC thread. The pieces are pretty fiddly as the whole hare is only 2.5″ tall. In the kit there is also an orange stick which is very useful for stuffing the pieces.
Tiny buttons are also provided for attaching the arms and legs. The tail is on a metal hook to stitch it on with. The pattern also suggests a ruffle round the hare’s neck but I couldn’t find anything that looked right and I think she’s cute as she is.
I covered the spool with some pretty cotton and overlaid it with lace. I popped some batting underneath which just helped soften it for sewing. I cut a circle of paper to cover the top. glued that on top and sat my hare in place.
I love her! She is so cute!
The kits are from Moonlight Stitches, I’m tempted to do another one with maybe more of a flower theme, maybe make it into a mouse with bigger ears…
I’d been a member of Askwith with Weston WI since I was in between babies, nearly thirty years ago. I write that in the past tense, not because it has closed or I have left, but because it has recently renamed the institute. We had moved venues to the other side of the valley in Menston which is a much better drive for most people, over the years we also have had hardly any members from Askwith or Weston villages, our members come from quite a wide area, just not those villages.
It’s been a good move as our membership has steadily increased since moving to Menston. We did feel however that we could no longer call ourselves Askwith with Weston when we don’t meet anywhere near the villages. A new name was required.
After much deliberation and a vote, we settled on Wharfedale WI.
At out meetings we have a tablecloth embroidered with the name of the WI which is laid on the President’s table. I’m not sure just how old it is but it’s certainly been there as long as I’ve been a member. Obviously a change of name necessitated a change of cloth…or did it!
I was tasked with the job of creating a new tablecloth. I ummed and aarhed for several weeks, do I go down the quilted route, or the embroidered route? I didn’t want to make myself too much work either! I suddenly had a lightbulb moment…
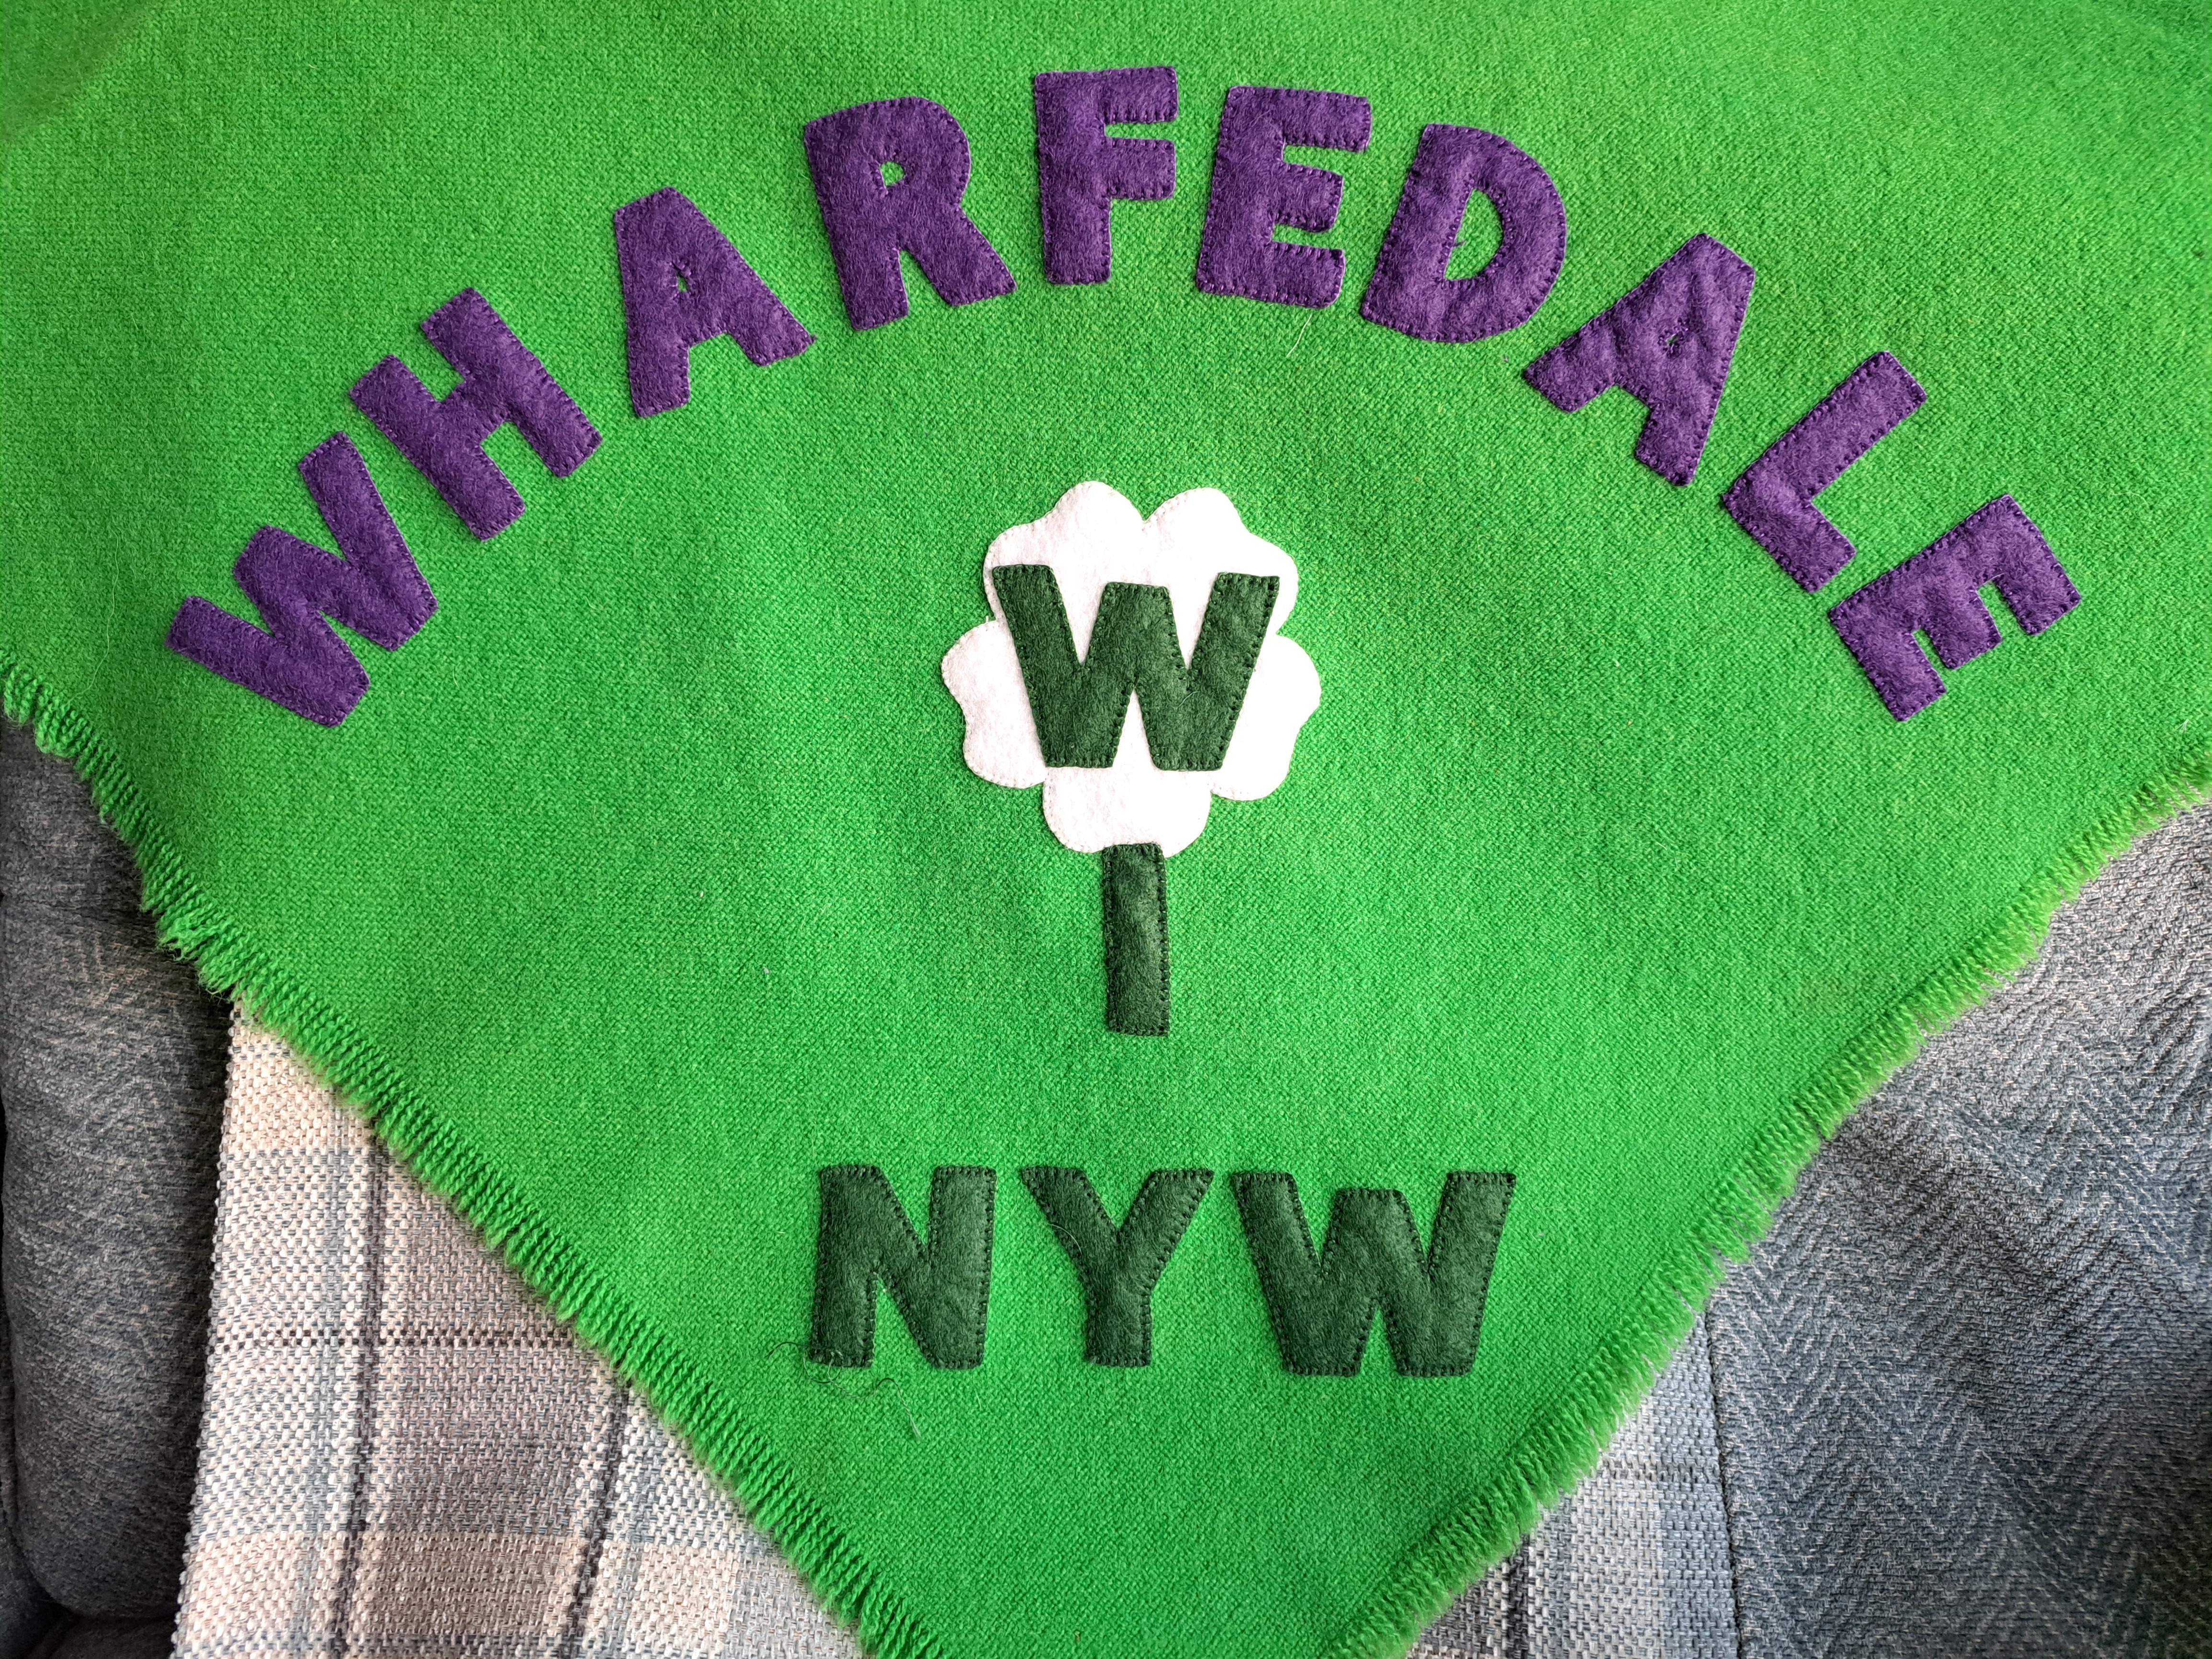
The old green tablecloth had the name in felt across one corner, if I put the new name across the opposite corner we would keep the history of the institute whilst incorporating the name of the new one. Luckily the committee agreed with me.
The old name was in red felt, I decided however to use purple and dark green as these are the WI colours, dating back to it’s origins in the suffragette movement. I found a font I liked on Etsy and traced the letters onto Bondaweb, remembering just in time to reverse some of the letters as Bondaweb reverses everything. It took a while to arrange the letters evenly.
Unfortunately although the bondaweb stuck nicely to the felt, it wouldn’t stick well to the wool tablecloth, so I ended up pinning and tacking everything down. I cut a white rose of Yorkshire out which is an old symbol for North Yorkshire West federation of the WI. The dark green letters W I are then overlaid over the Yorkshire rose.
I decided to blanket stitch everything in place which took a few evenings. I was very surprised to see the original letters were machine stitched with a zig-zag, despite being President for three years I had never noticed!
Hopefully everyone will like the new version of the tablecloth.
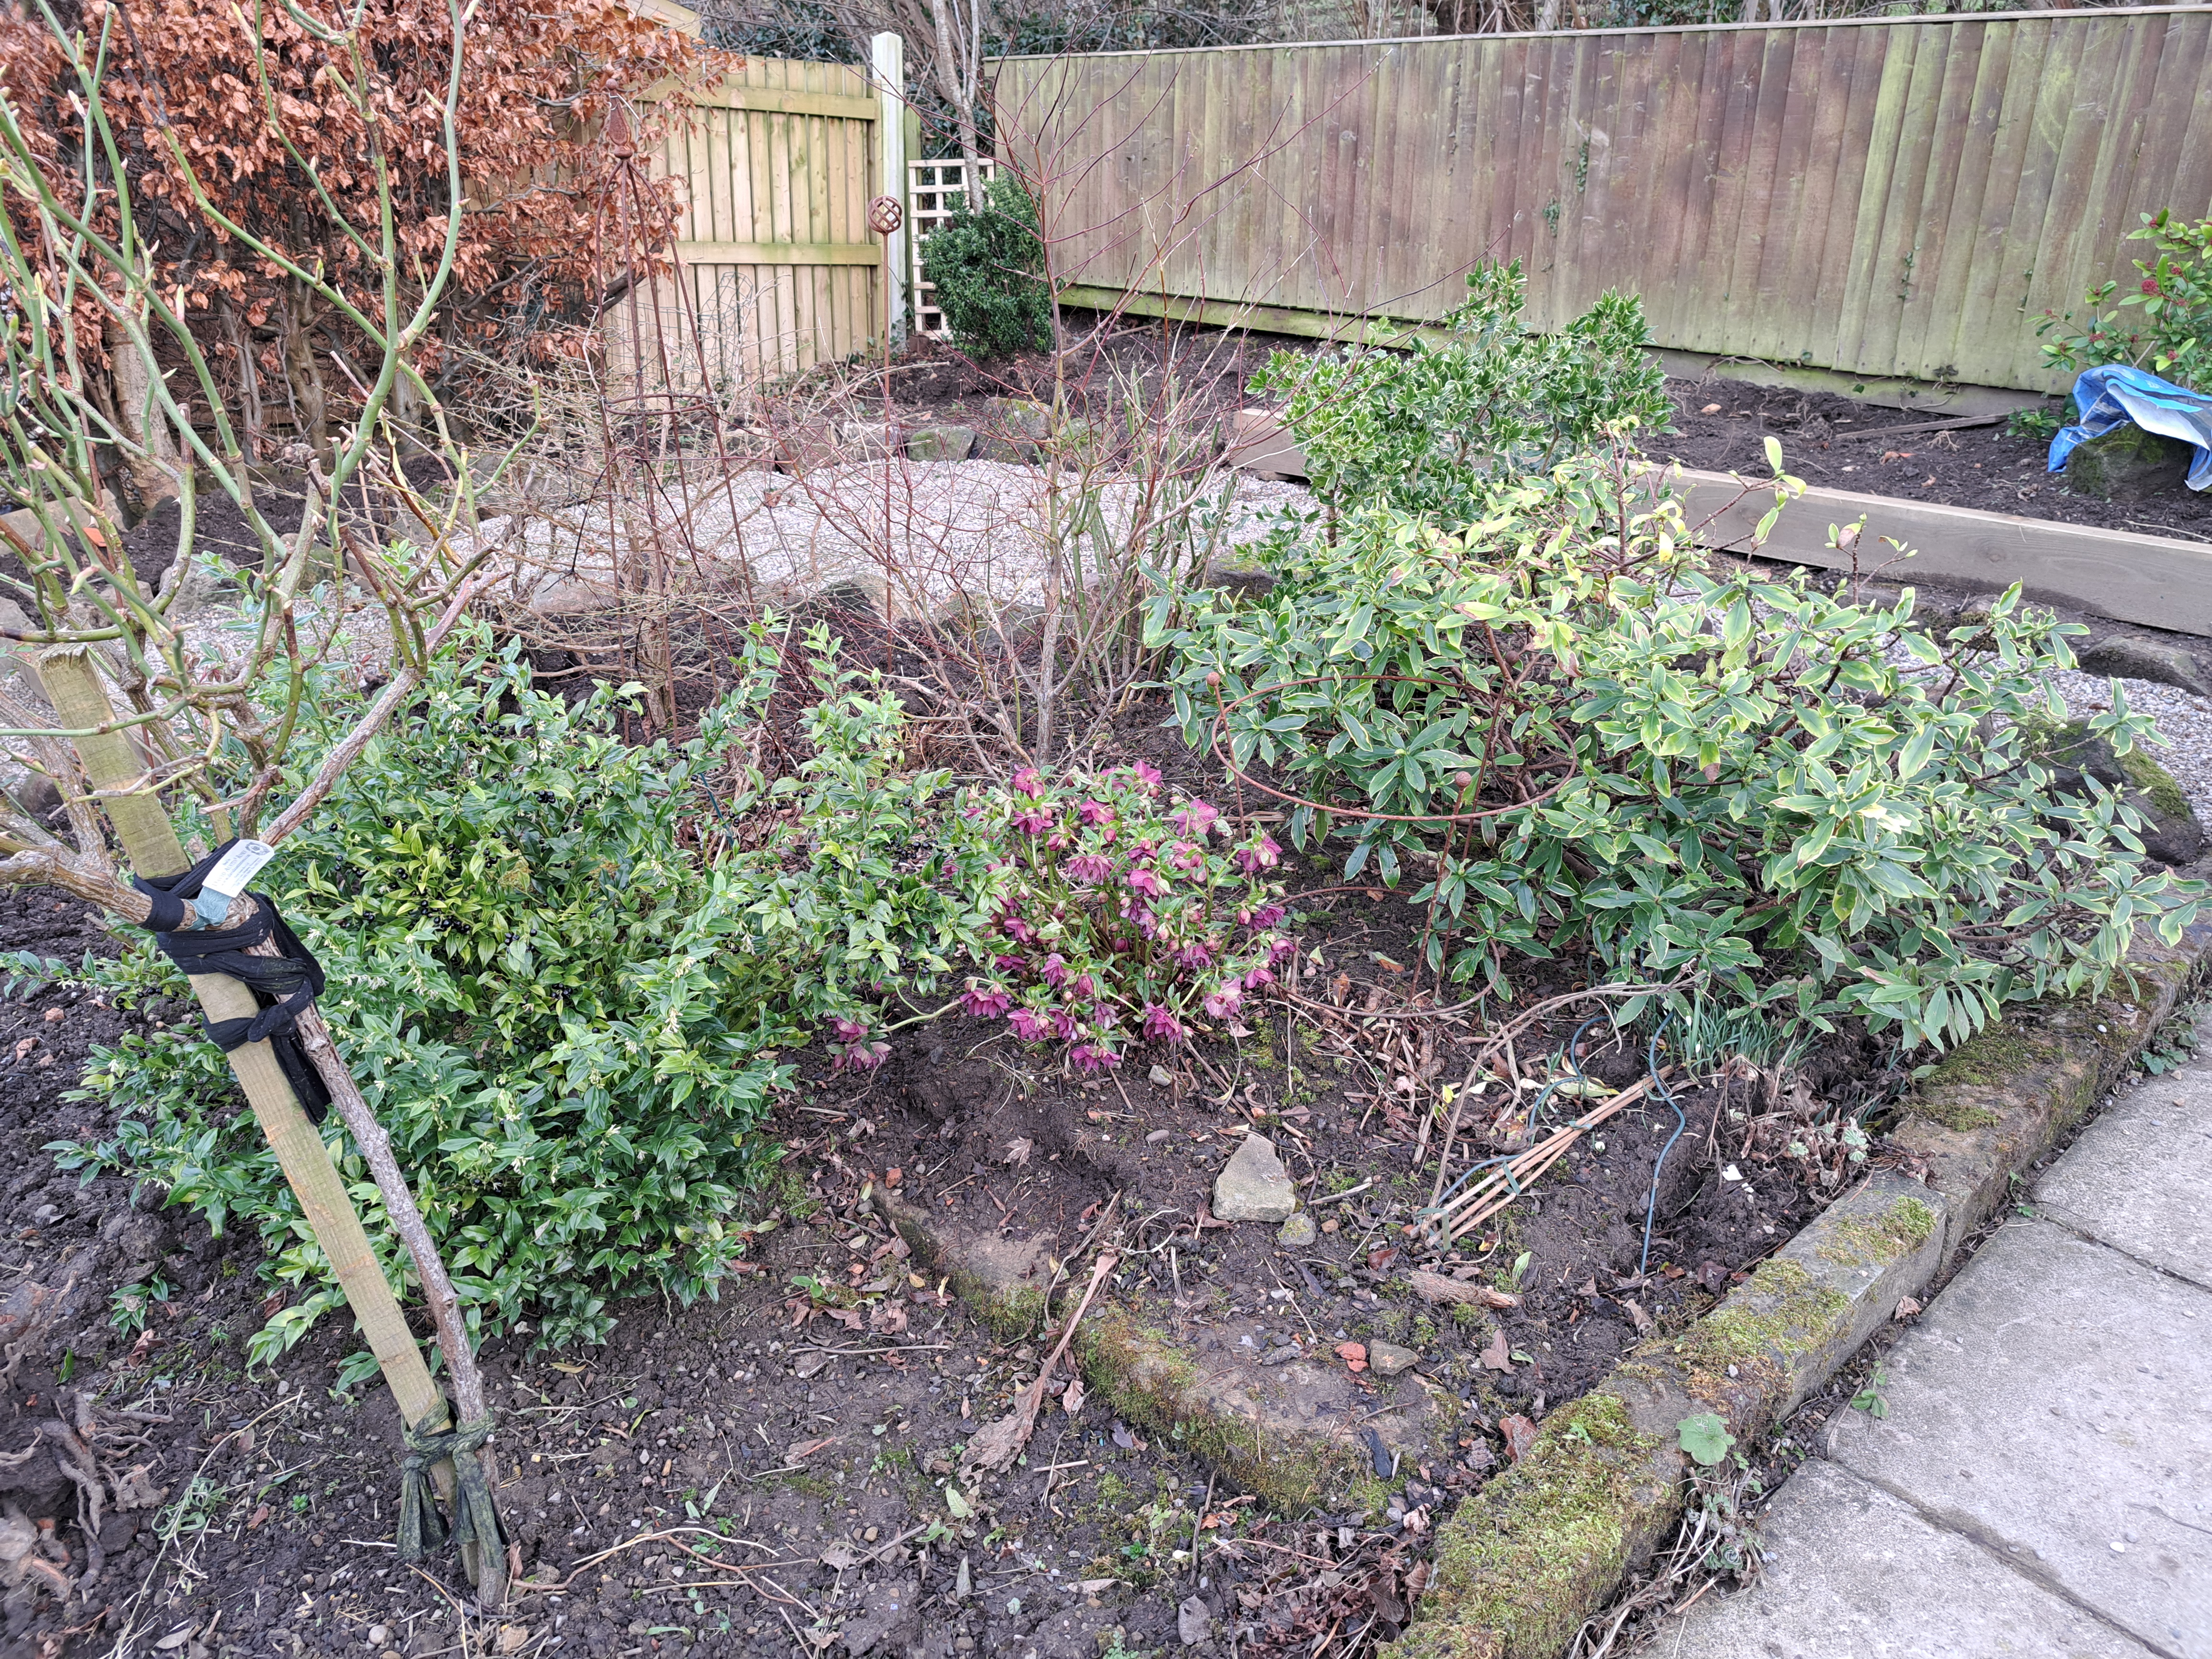
Someone mentioned recently that I haven’t shared photos of my garden recently…that’s because it’s been looking a bit like a builders yard!
Last summer I did some serious thinking about our house and our future here. We’ve got to the age when you need to start planning, do you stay put and make the house work, or move whilst you’re still young enough to cope with it.
We live in a dormer bungalow so in many ways it’s perfect for growing old in, our bedroom is downstairs, we have a downstairs bathroom. We could live downstairs if we needed to. On the negative side, it has a steep drive and a large garden.
The garden is terraced so it does have some drops which are concerning me more as my balance and MS are getting slightly worse. In particular the area in front of the Amber and Amethyst garden has a 5′ drop onto concrete if I wobble the wrong way! I decided it’s also this left hand side of the garden which is the highest maintenance so a radical rethink was required.
I looked at the plants I wanted to keep and worked out a design round that. My priority was the Roald Dahl standard rose which I bought when my mum died. Near to it were a few nice shrubs which were on my ‘like to keep’ list, that includes a sarcocca, an acer, a eunonymous elatas and another shrub which I don’t know the name of!
I started off with circles but I couldn’t get the long border to look right, then my daughter suggested squares and rectangles…in the end I’ve gone in between using arcs to make one large seating area and one small one where I will put a ‘banana bench’. We’ve got some sturdy trellis in front of the big drop, some lovely new steps up to the back lane and I also had the path round the pond made a little wider to again make the bed easier to manage.
The landscaper finished at the weekend, I’ve hopefully got a load of topsoil and compost arriving on Wednesday and once that has topped the beds up I can start replanting everything I saved, time will tell what has survived and what hasn’t.
As you can see, I managed to keep the shrubs that I didn’t want to move. The sarcoccus (sweet box) smells amazing at the moment.
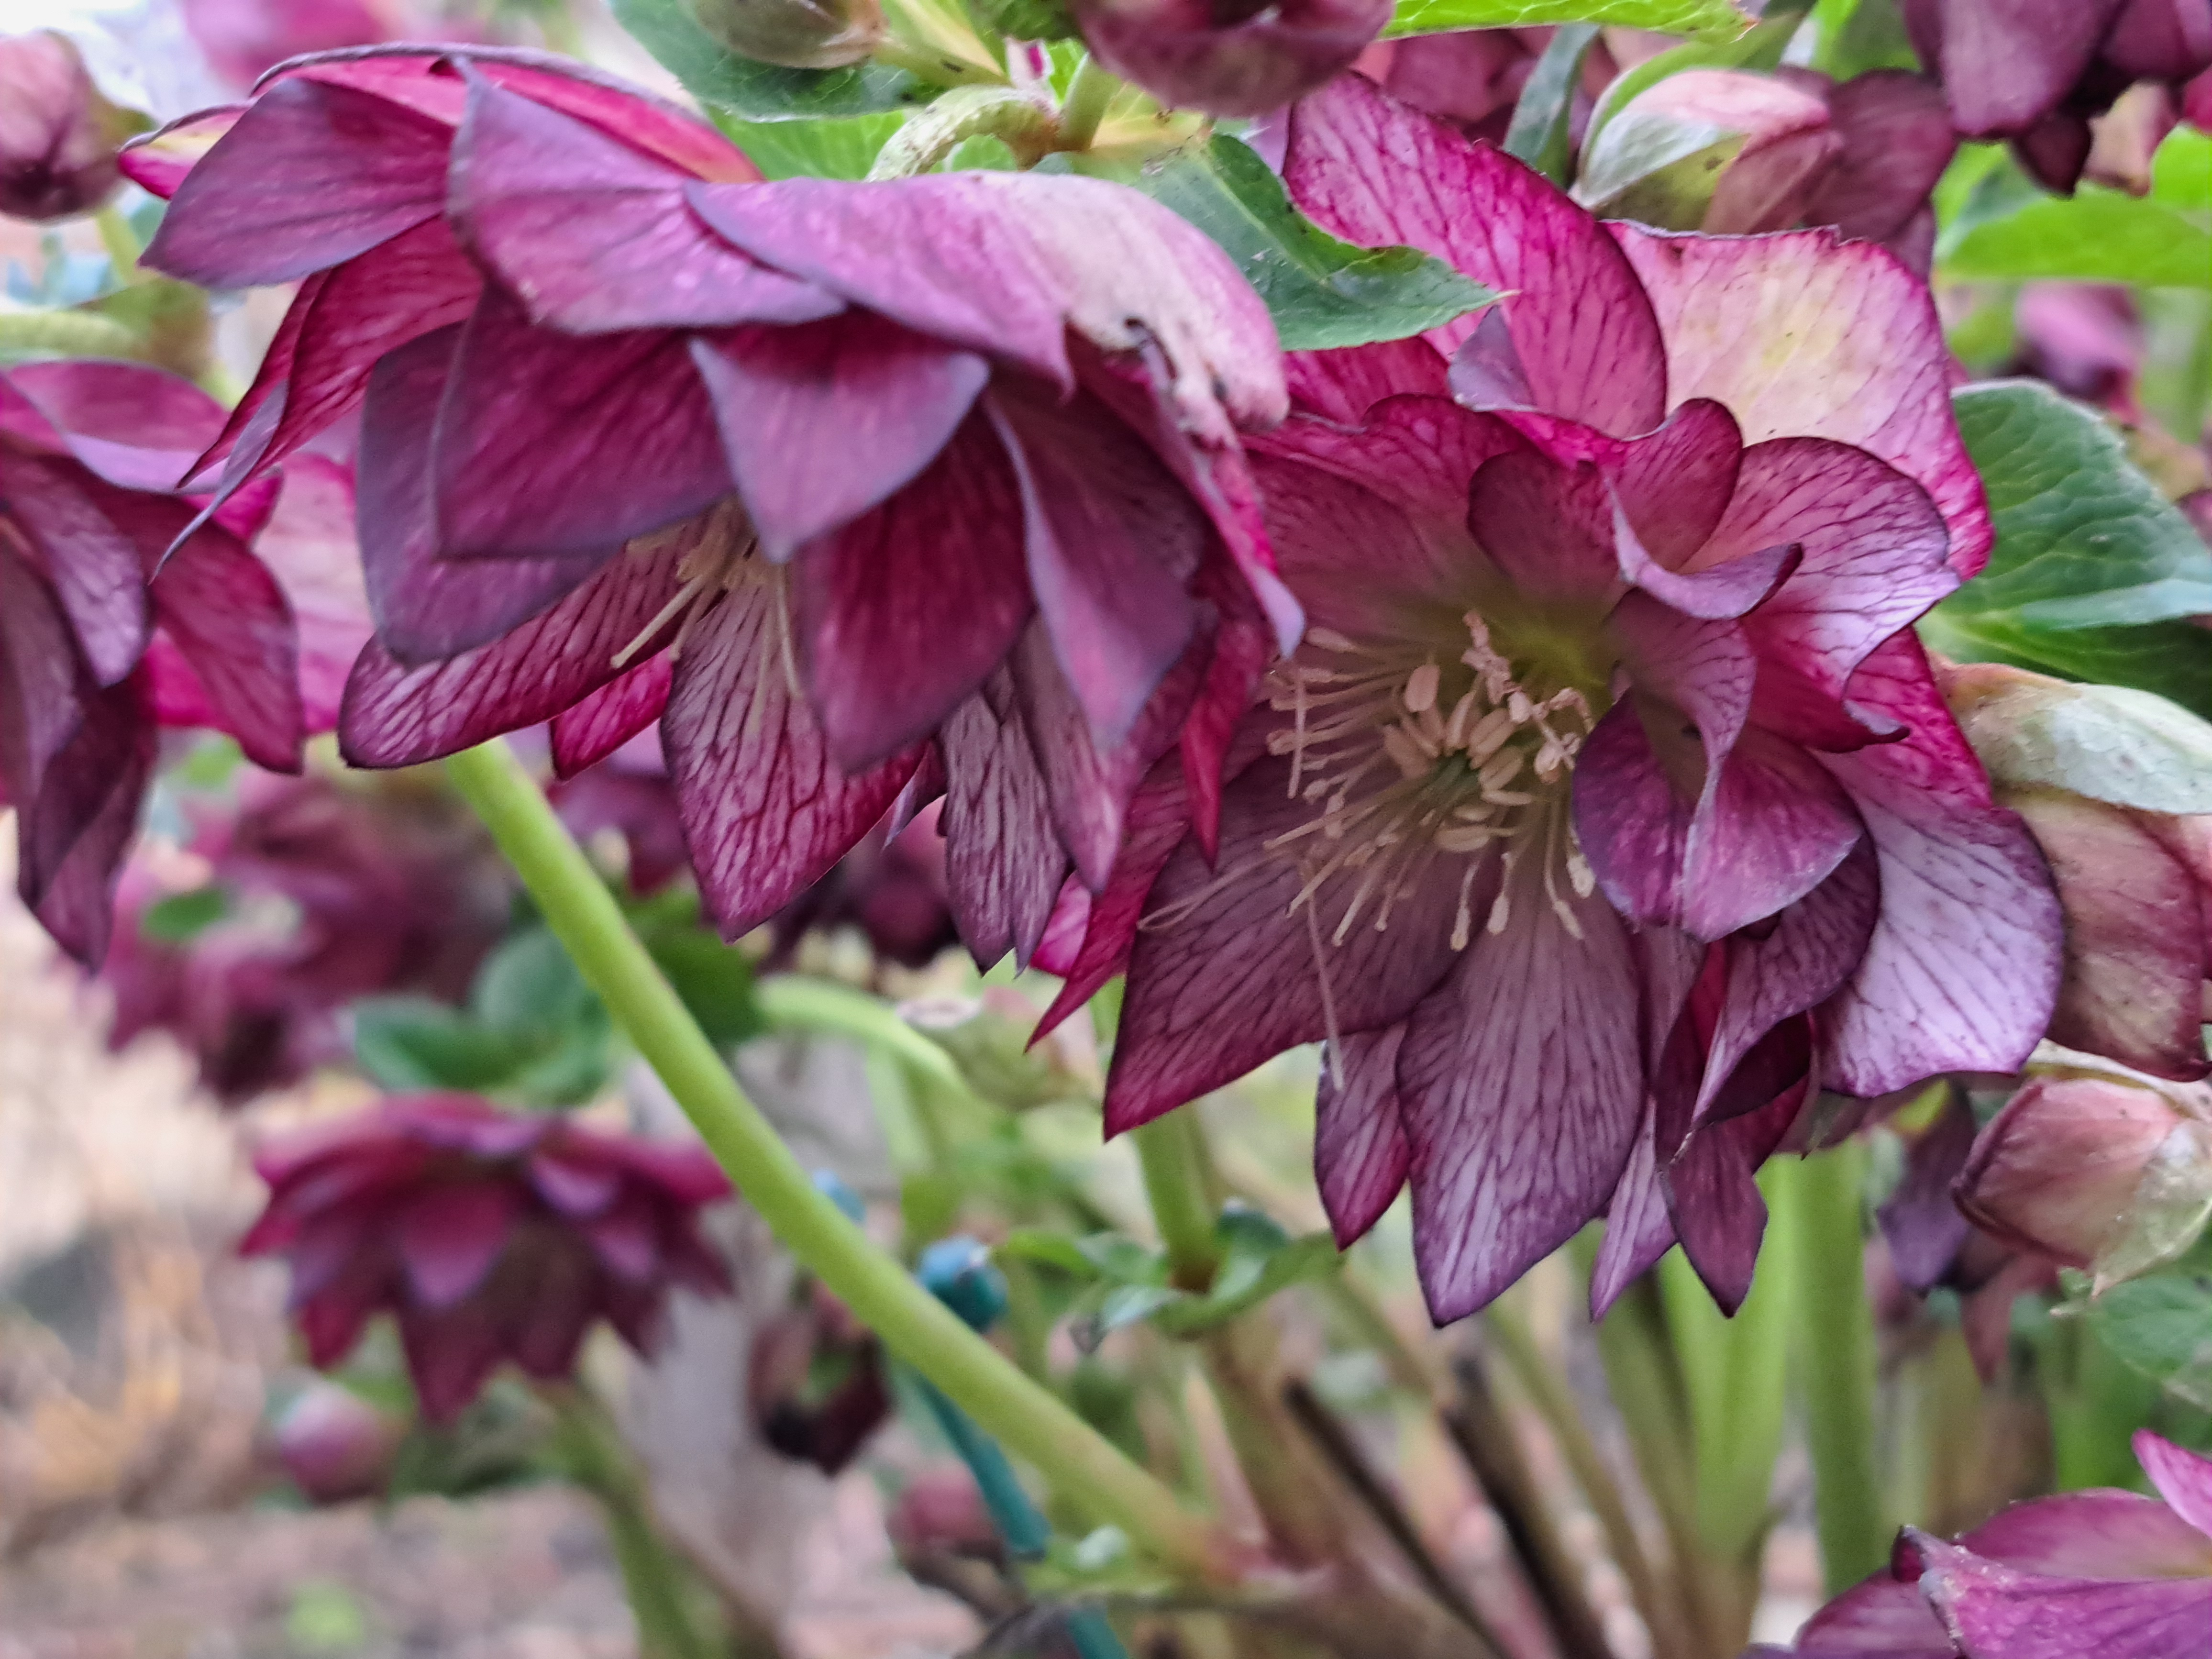
The hellebores are in flower too and two of them in particular are looking gorgeous. The purple one is up by the saved shrubs, the freckled one is down by the patio. I’ve bought a couple more too on the market last week so I’ll get those planted soon.
So, big changes in the garden, hopefully soon it will look like a garden again, full of flowers and scent.
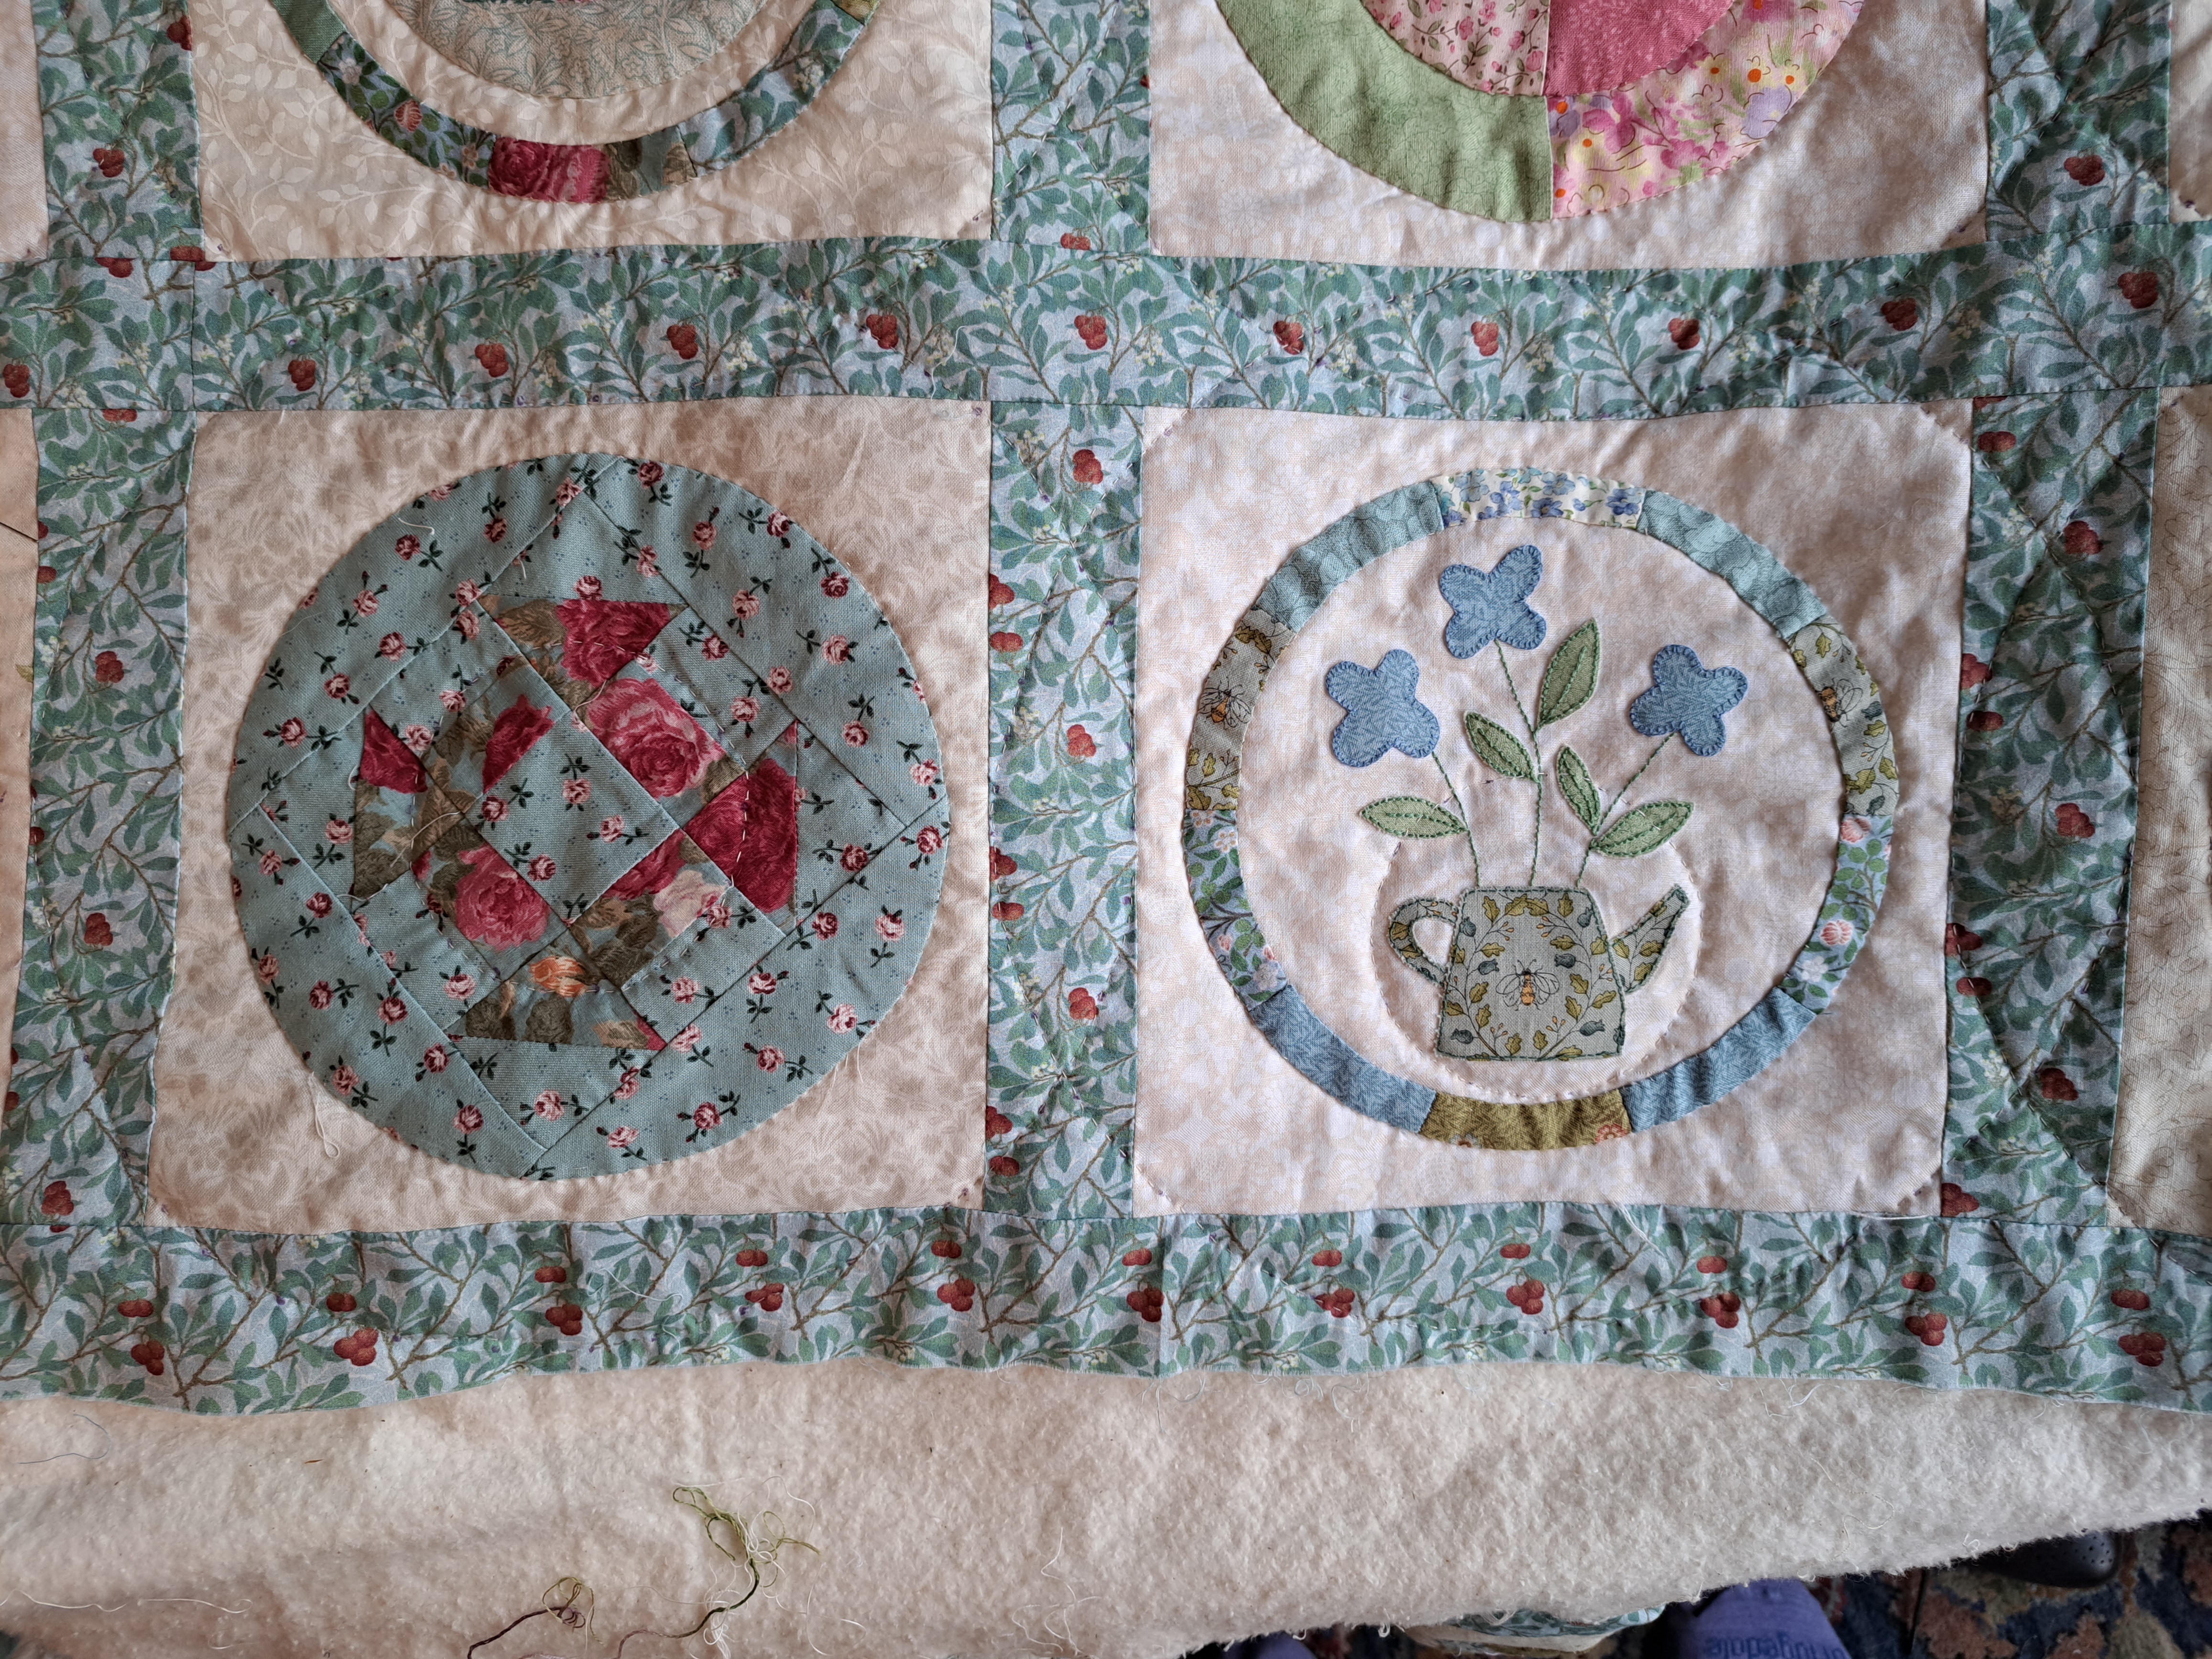
I’ve made pretty good progress with my Owl and Hare Hollow quilt, three weeks ago I’d quilted 24 blocks, so not quite half way…
…I’ve been concentrating on mainly the bottom rows so I have complete rows. I now realise why I kept missing off the bottom one, I find them a lot more fiddly as it isn’t so firm in the hoop.
I quilted round the flower vase and also a circle inside the churn block square…
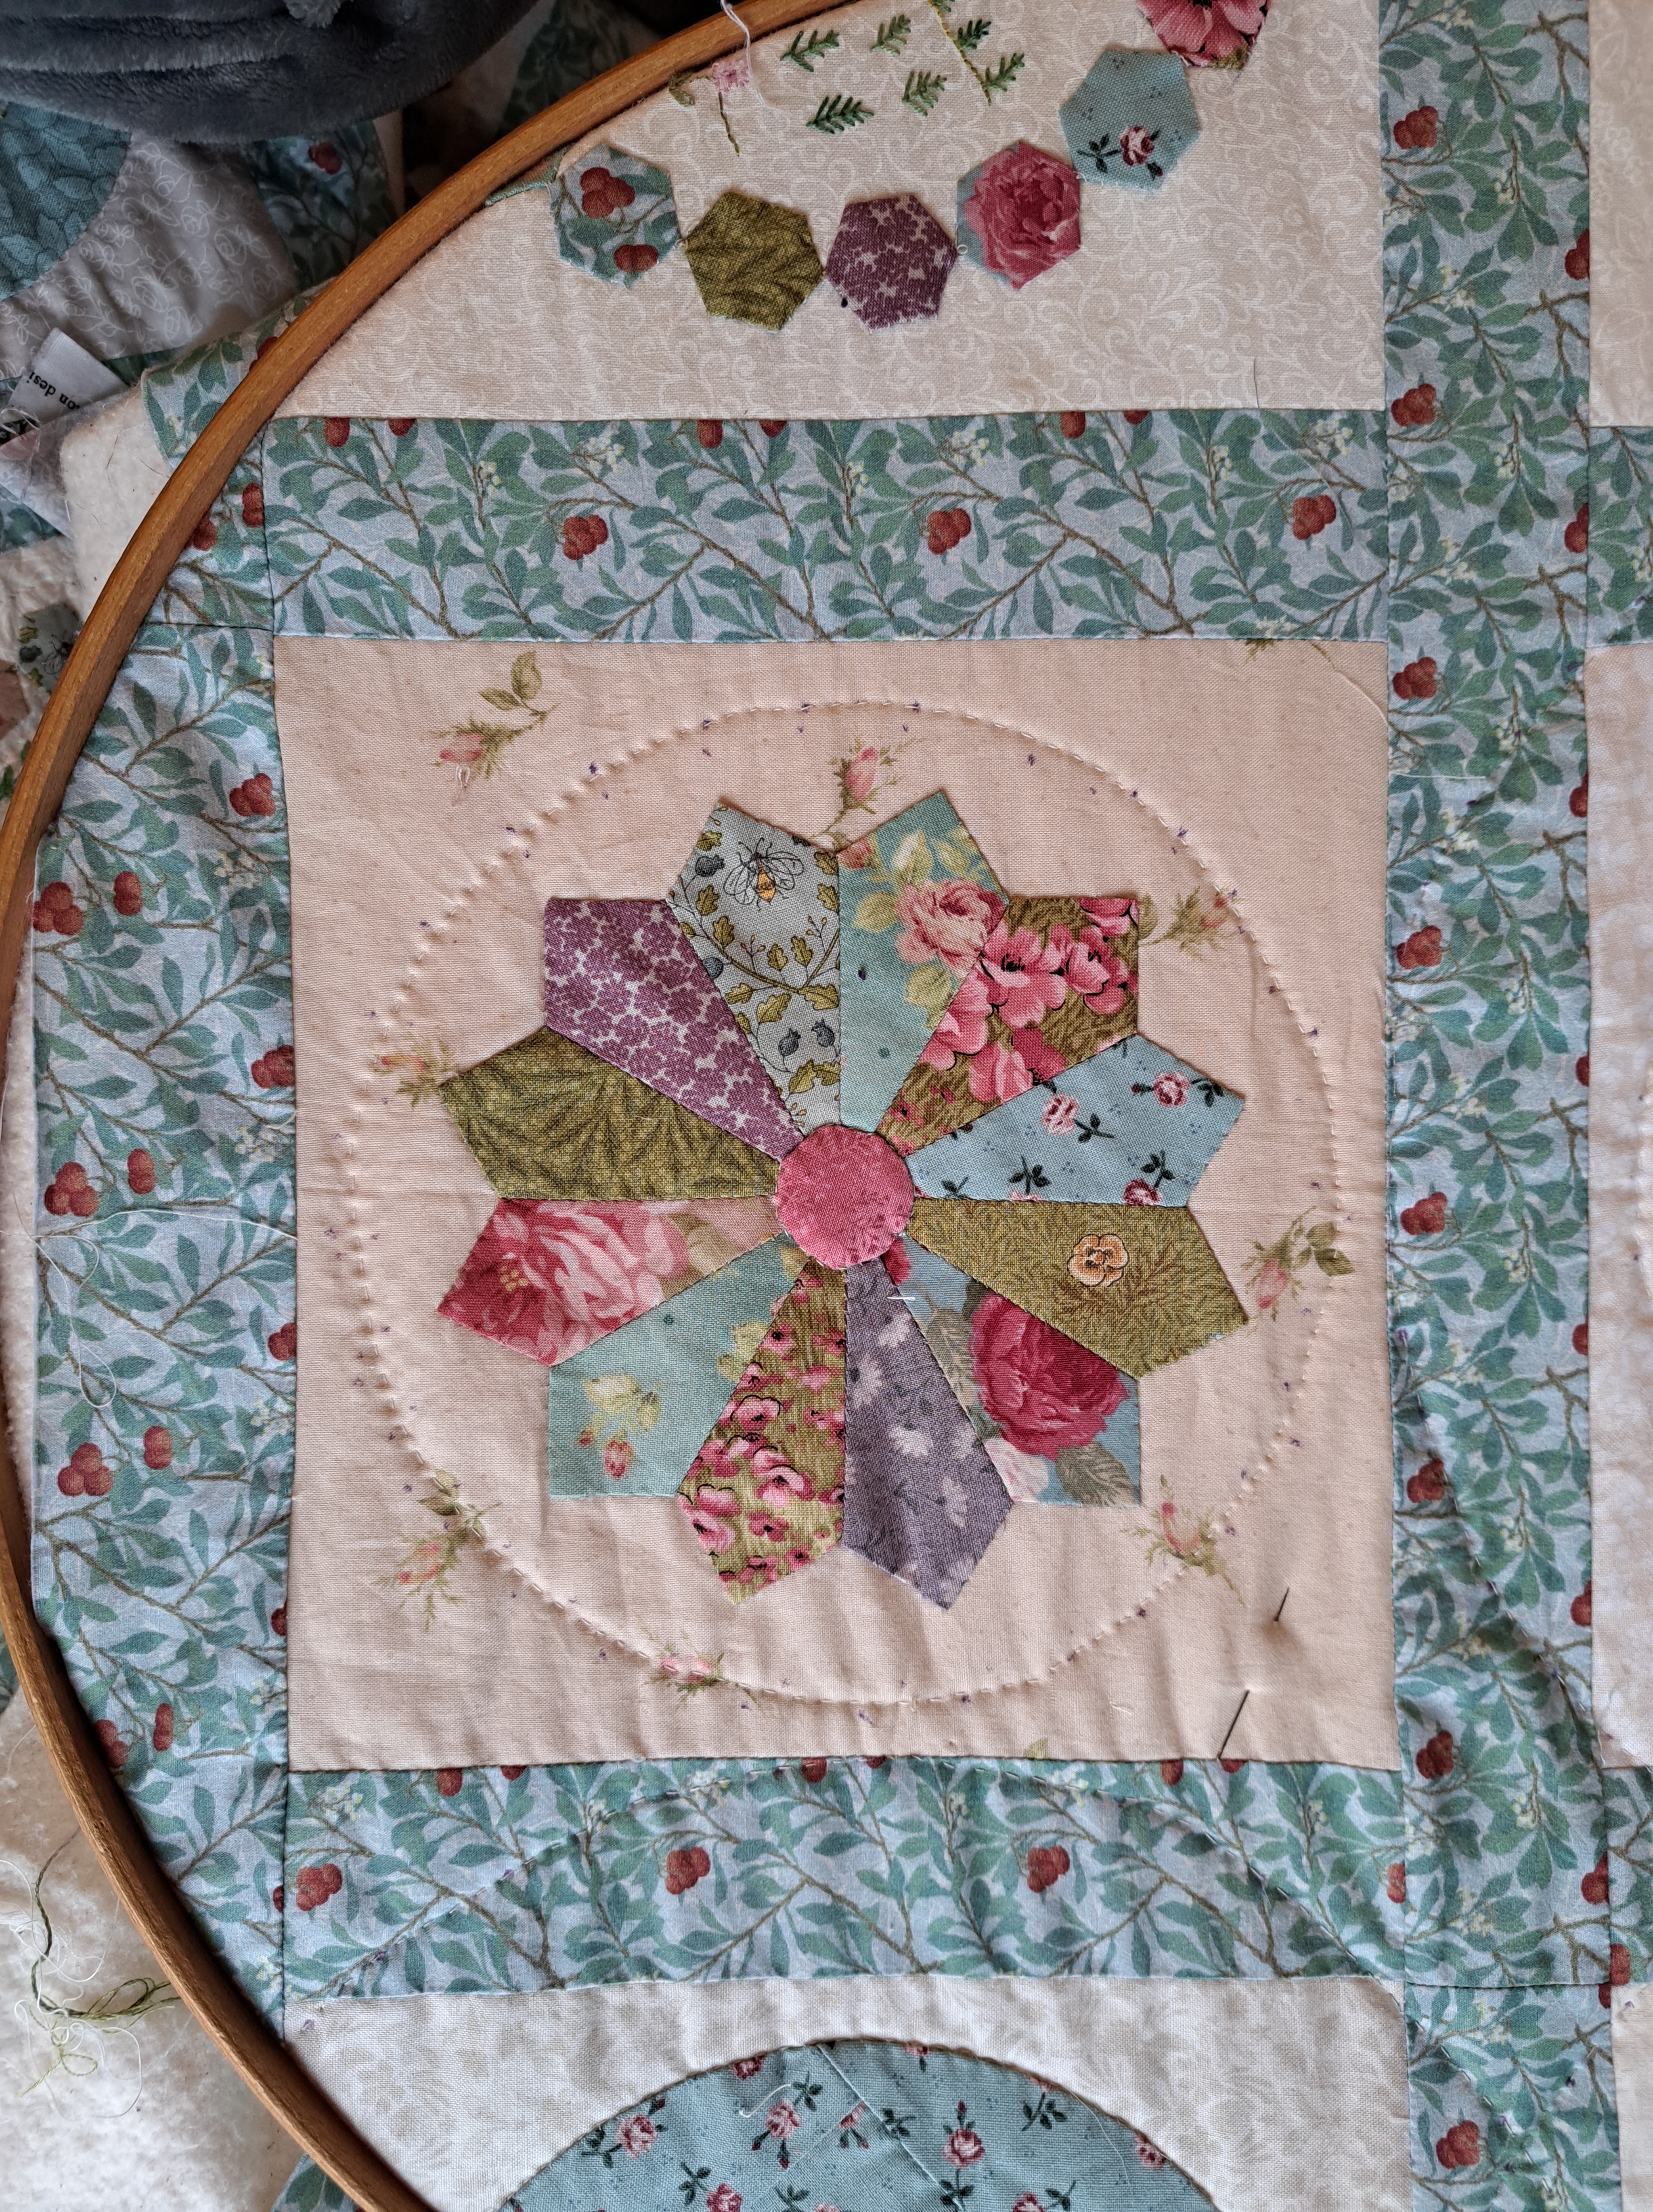
This morning I quilted round the Dresden ring and also in the centre, so I just need to do my big circle round the sashing. The little purple dots you can see are Frixion pen marks so they will disappear with a bit of heat.
Once I’ve done the sashing circle I will have completed thirty blocks, so well over the half-way point of twenty-five. Sounds even better now I can say nineteen to go!
This Hand Quilt Along is an opportunity for hand quilters and piecers to share and motivate one another. We post every three weeks, to show our progress and encourage one another. If you have a hand quilting project and would like to join our group contact Kathy at the link below.
I caught up with Anne Brookes weekly SAL over the weekend, luckily this weeks was a quick one!
This SAL is to stitch on a large hoop, I’m making mine into a book as I haven’t enough wall space left so I’ll have to adapt bits and it will probably be quite a bulky book! Each week the stitching is based on a word, obviously we can either follow Anne’s suggestion on go off-piste.
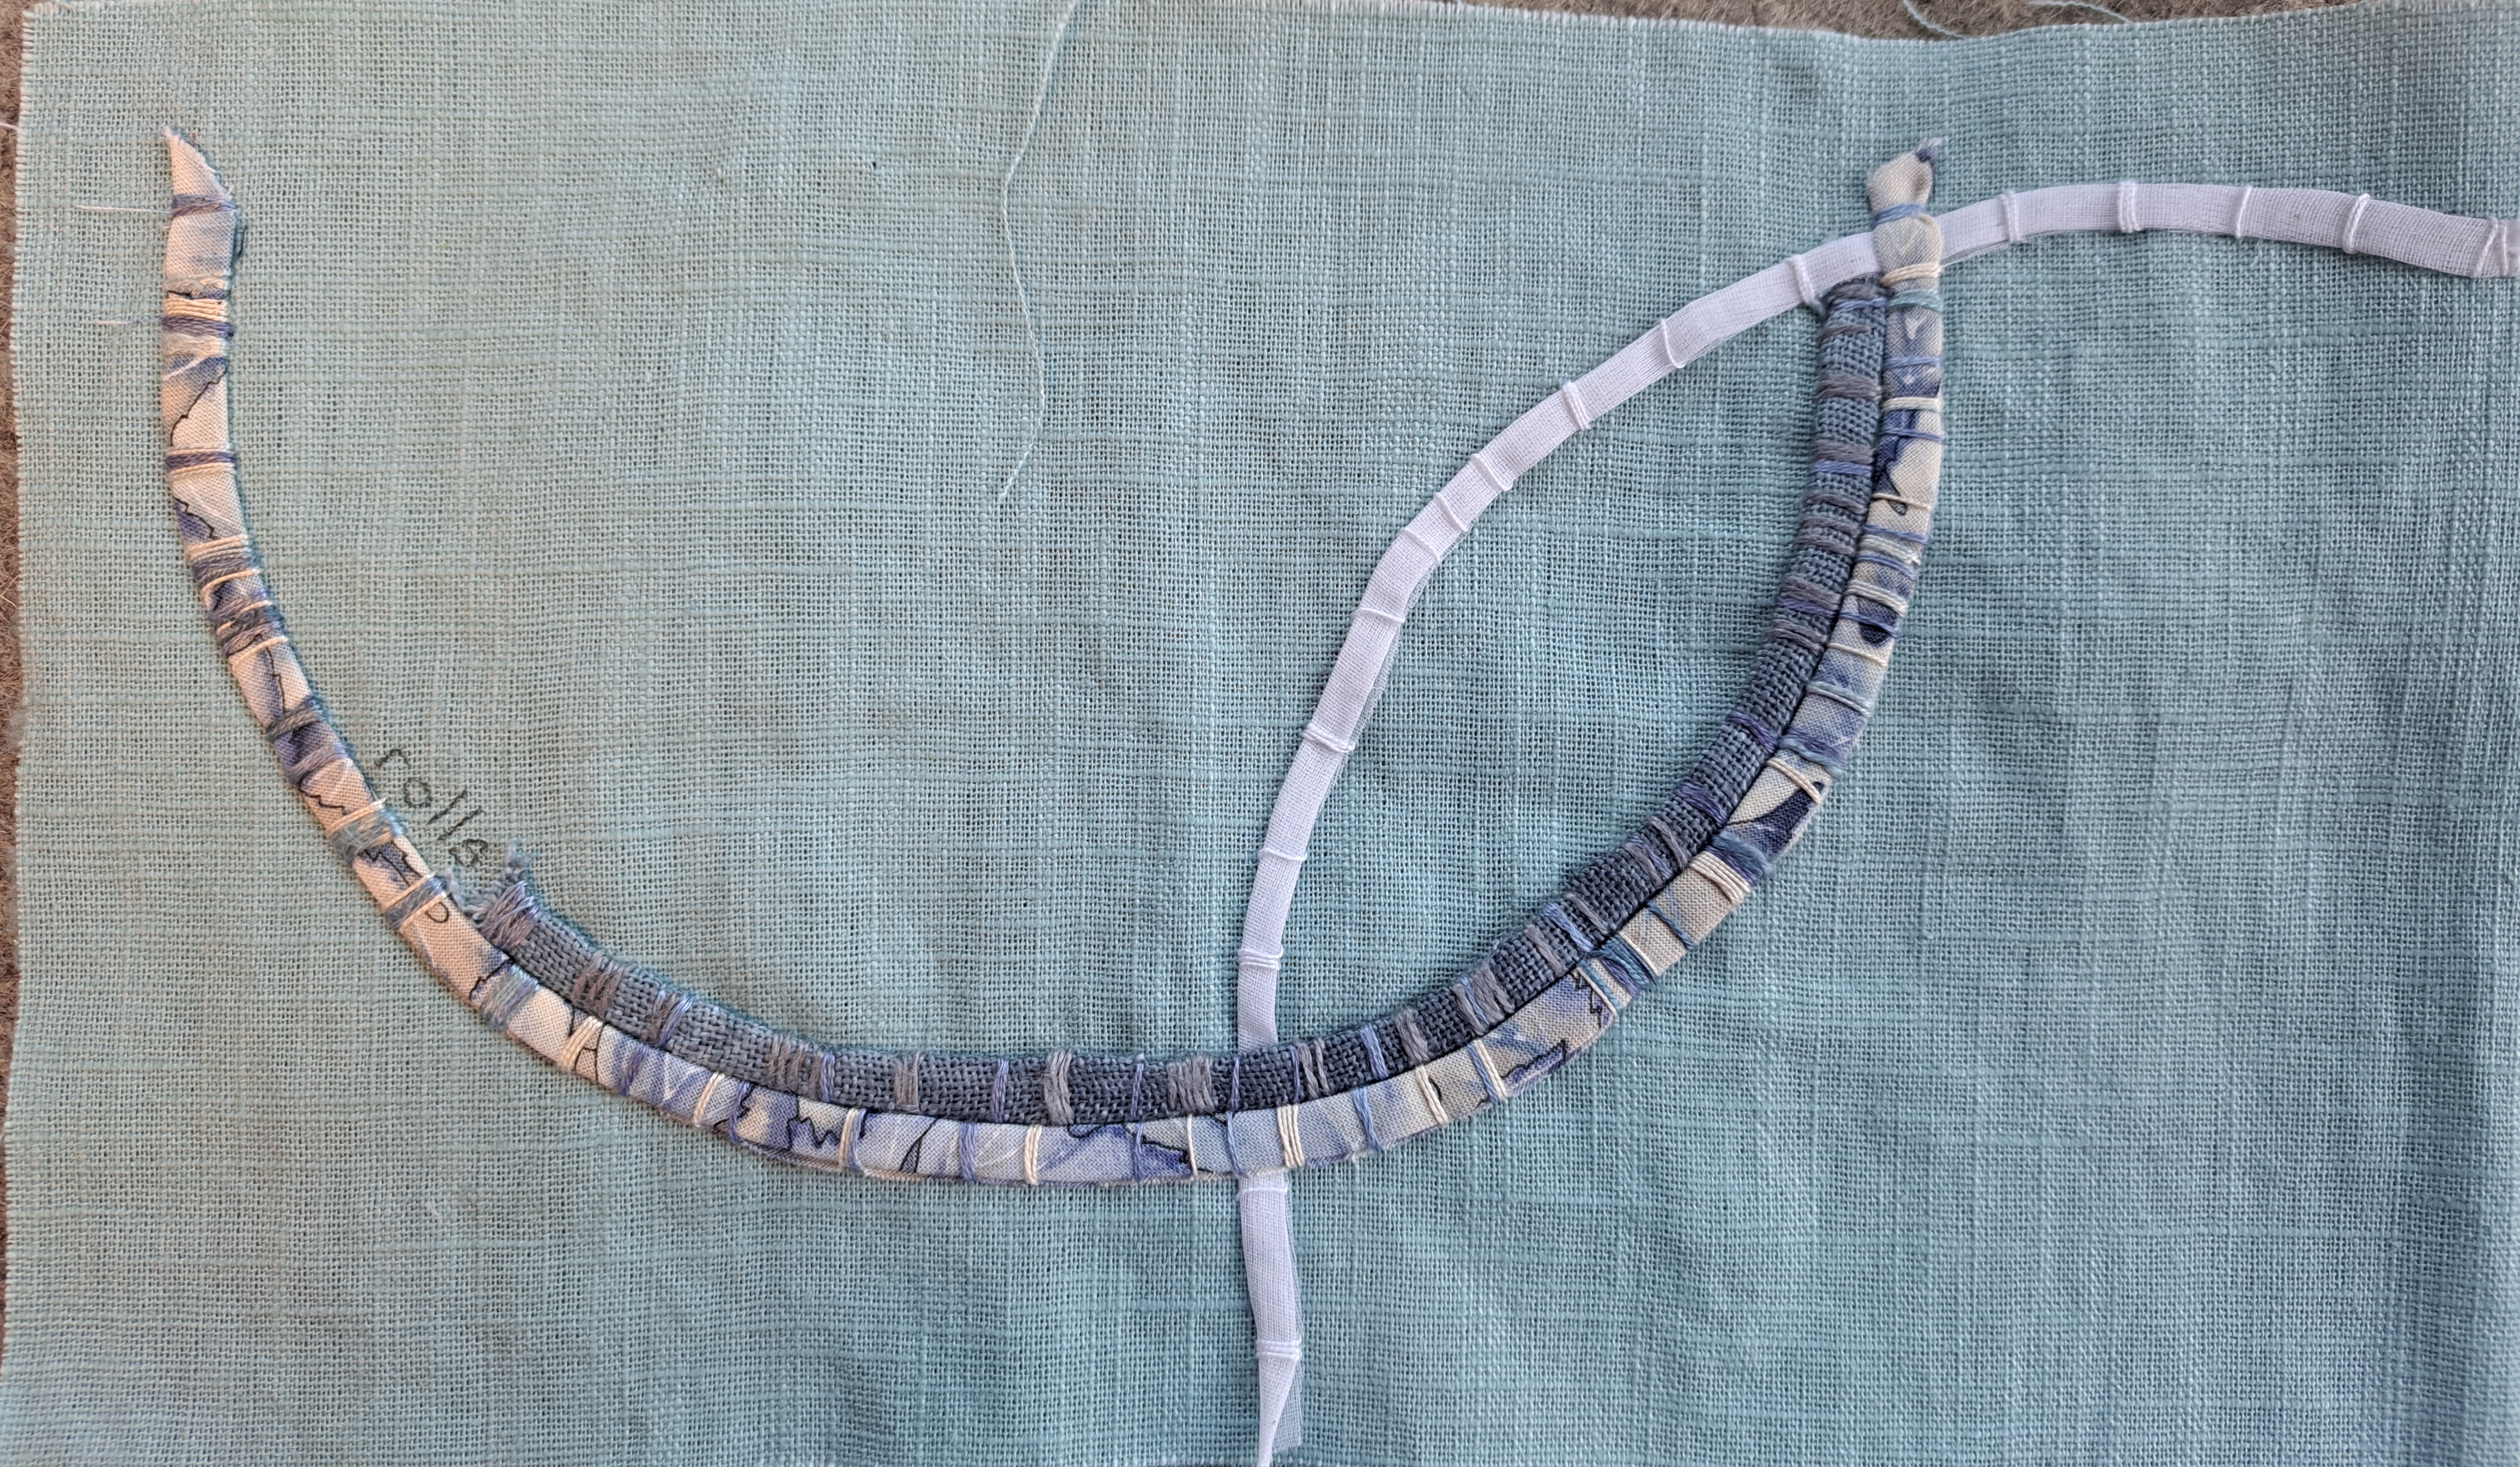
Week 3 word was rolls. For this Anne made narrow rolls of fabric and then couched them down with a variety of threads. She did quite long lines which help to break up the big circle of linen. As well as putting mine in a book, I’m also having a loose theme of circles. I tried cutting my first roll on the bias, thinking it would take the curve better…it might have done but it was awfully fiddly! I used a leafy quilting cotton for that one. I’m trying to use a variety of fabrics and threads, so I then made a roll from a crisp cotton gauze and another from some even-weave linen.
Having made the rolls I drew arcs on one of the linen pages and then stitched the rolls along the arcs, hopefully creating nice areas to stitch in in future weeks. I couched it down using perle and then some textured threads.
I’ve quite a collection of textured threads but I rarely use them, so I’m trying! I used a large eyed chenile needle to make sure the hole was big enough for the thread.
This week the word was hummock. This was made with a Suffolk puff (sometimes called a yo-yo) which was then lightly stuffed and couched down. Mine was very lightly stuffed so it didn’t dome too much and I might even end up taking a little bit out of it at a later date if I think it’s too big.
You’ll also note I’ve written the words on the fabric, following the curves. I’ve used a fine-point grey pen, I thought I’d start writing them before I forgot them!!
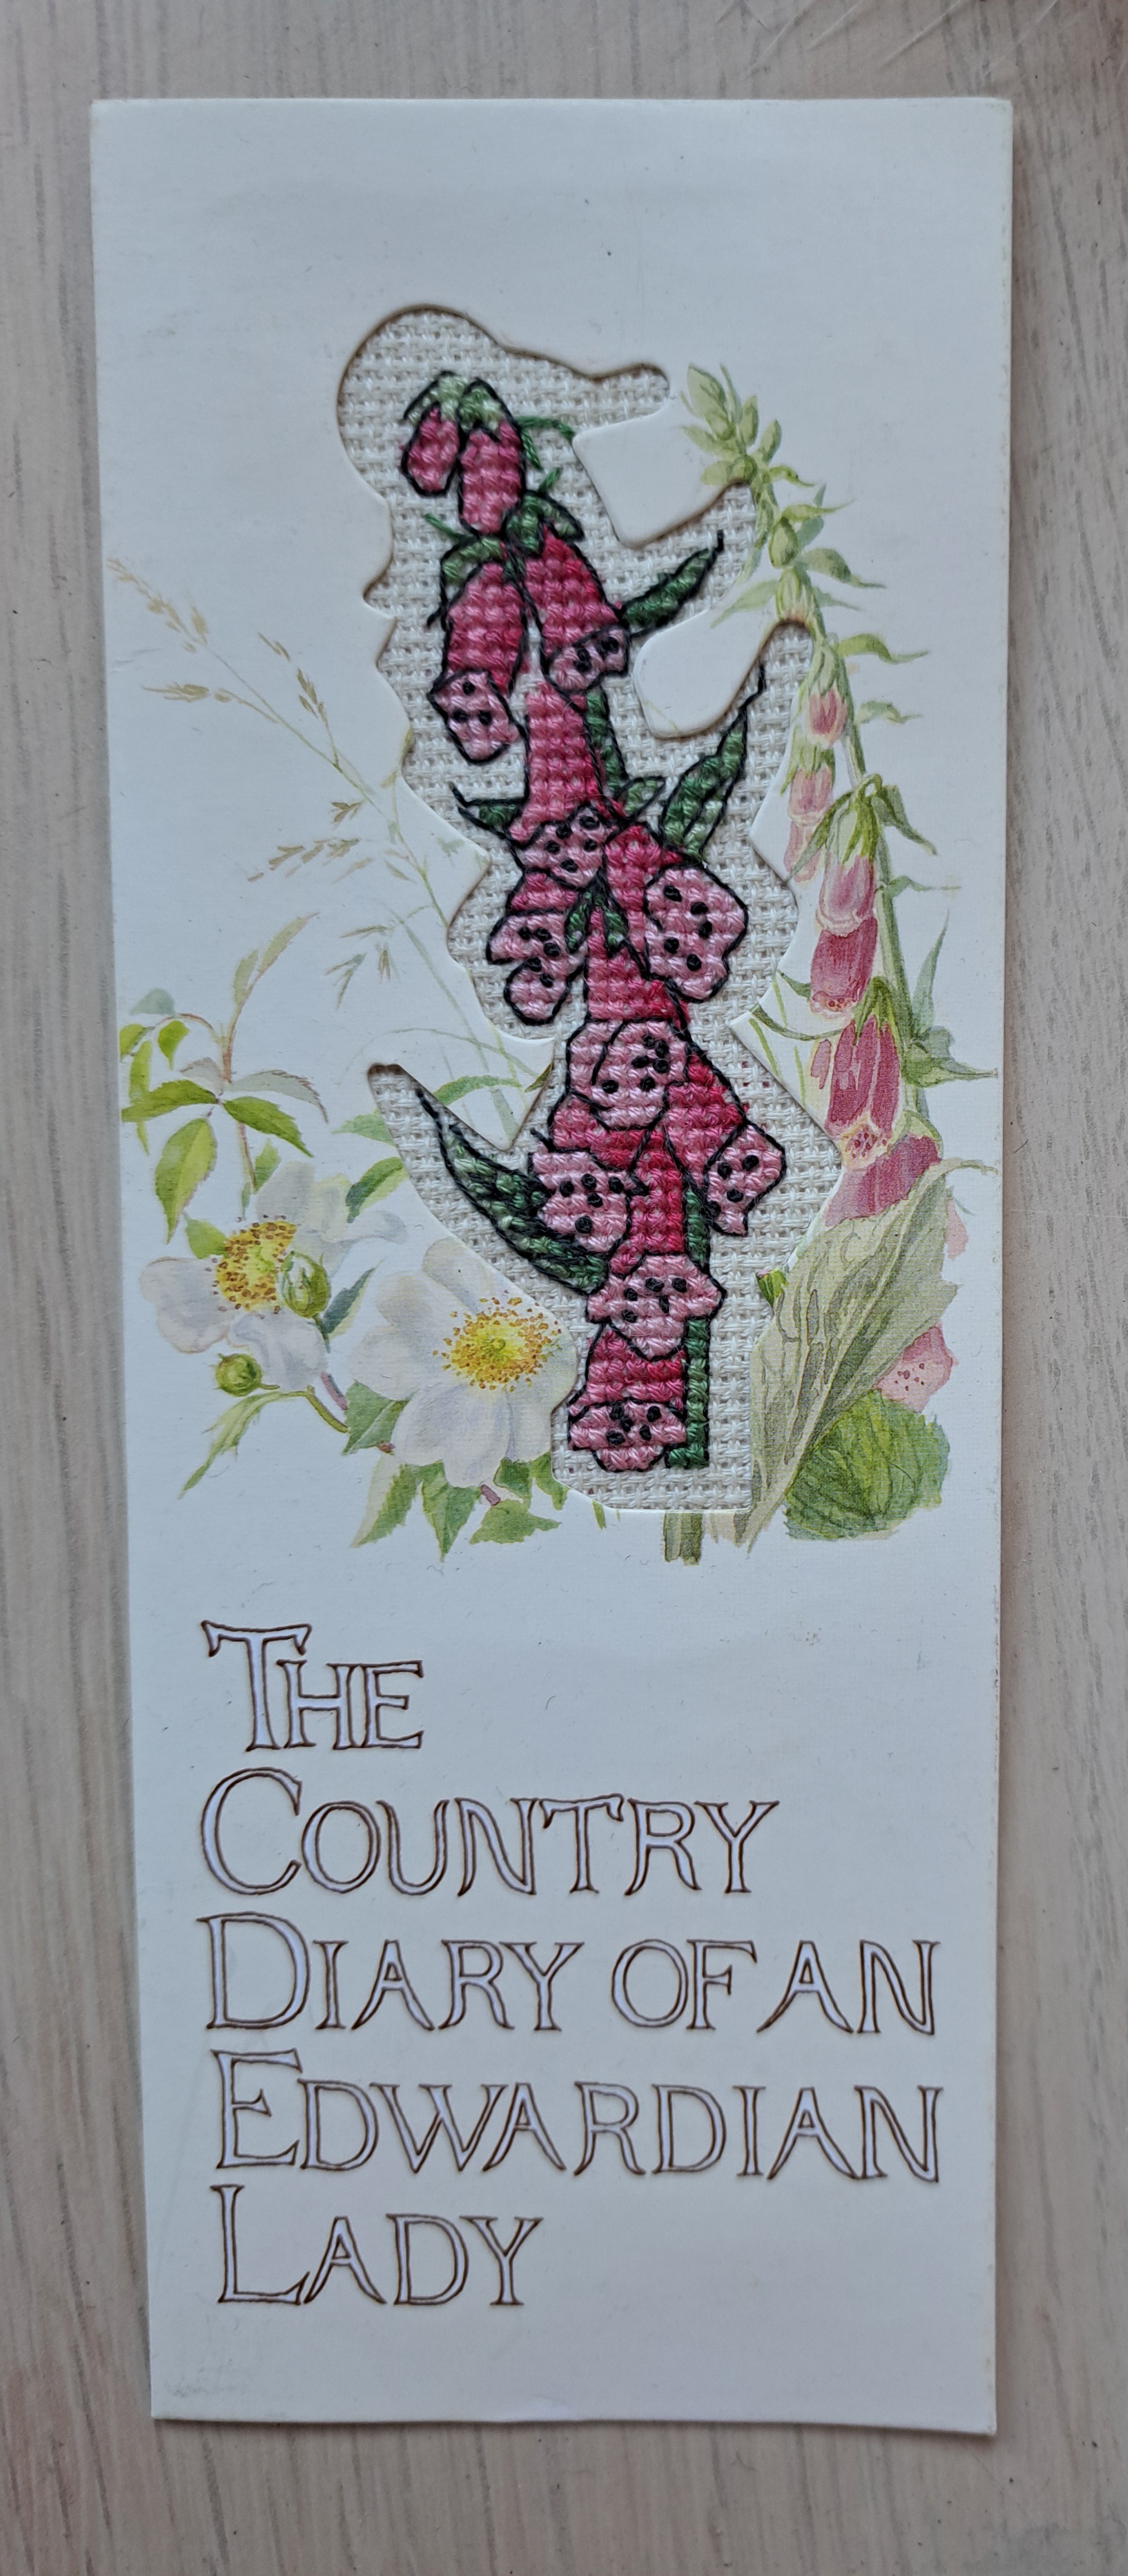
This was a little kit I found during my declutter, I decided I either stitch it or rehome it. I decided to stitch it, it was one of those free kits from the front of a magasine ages ago. I’ve always like the book ‘Diary of an Edwardian Lady’ which the picture is based on, in fact I’ve still got my copy from probably about 30 years ago!
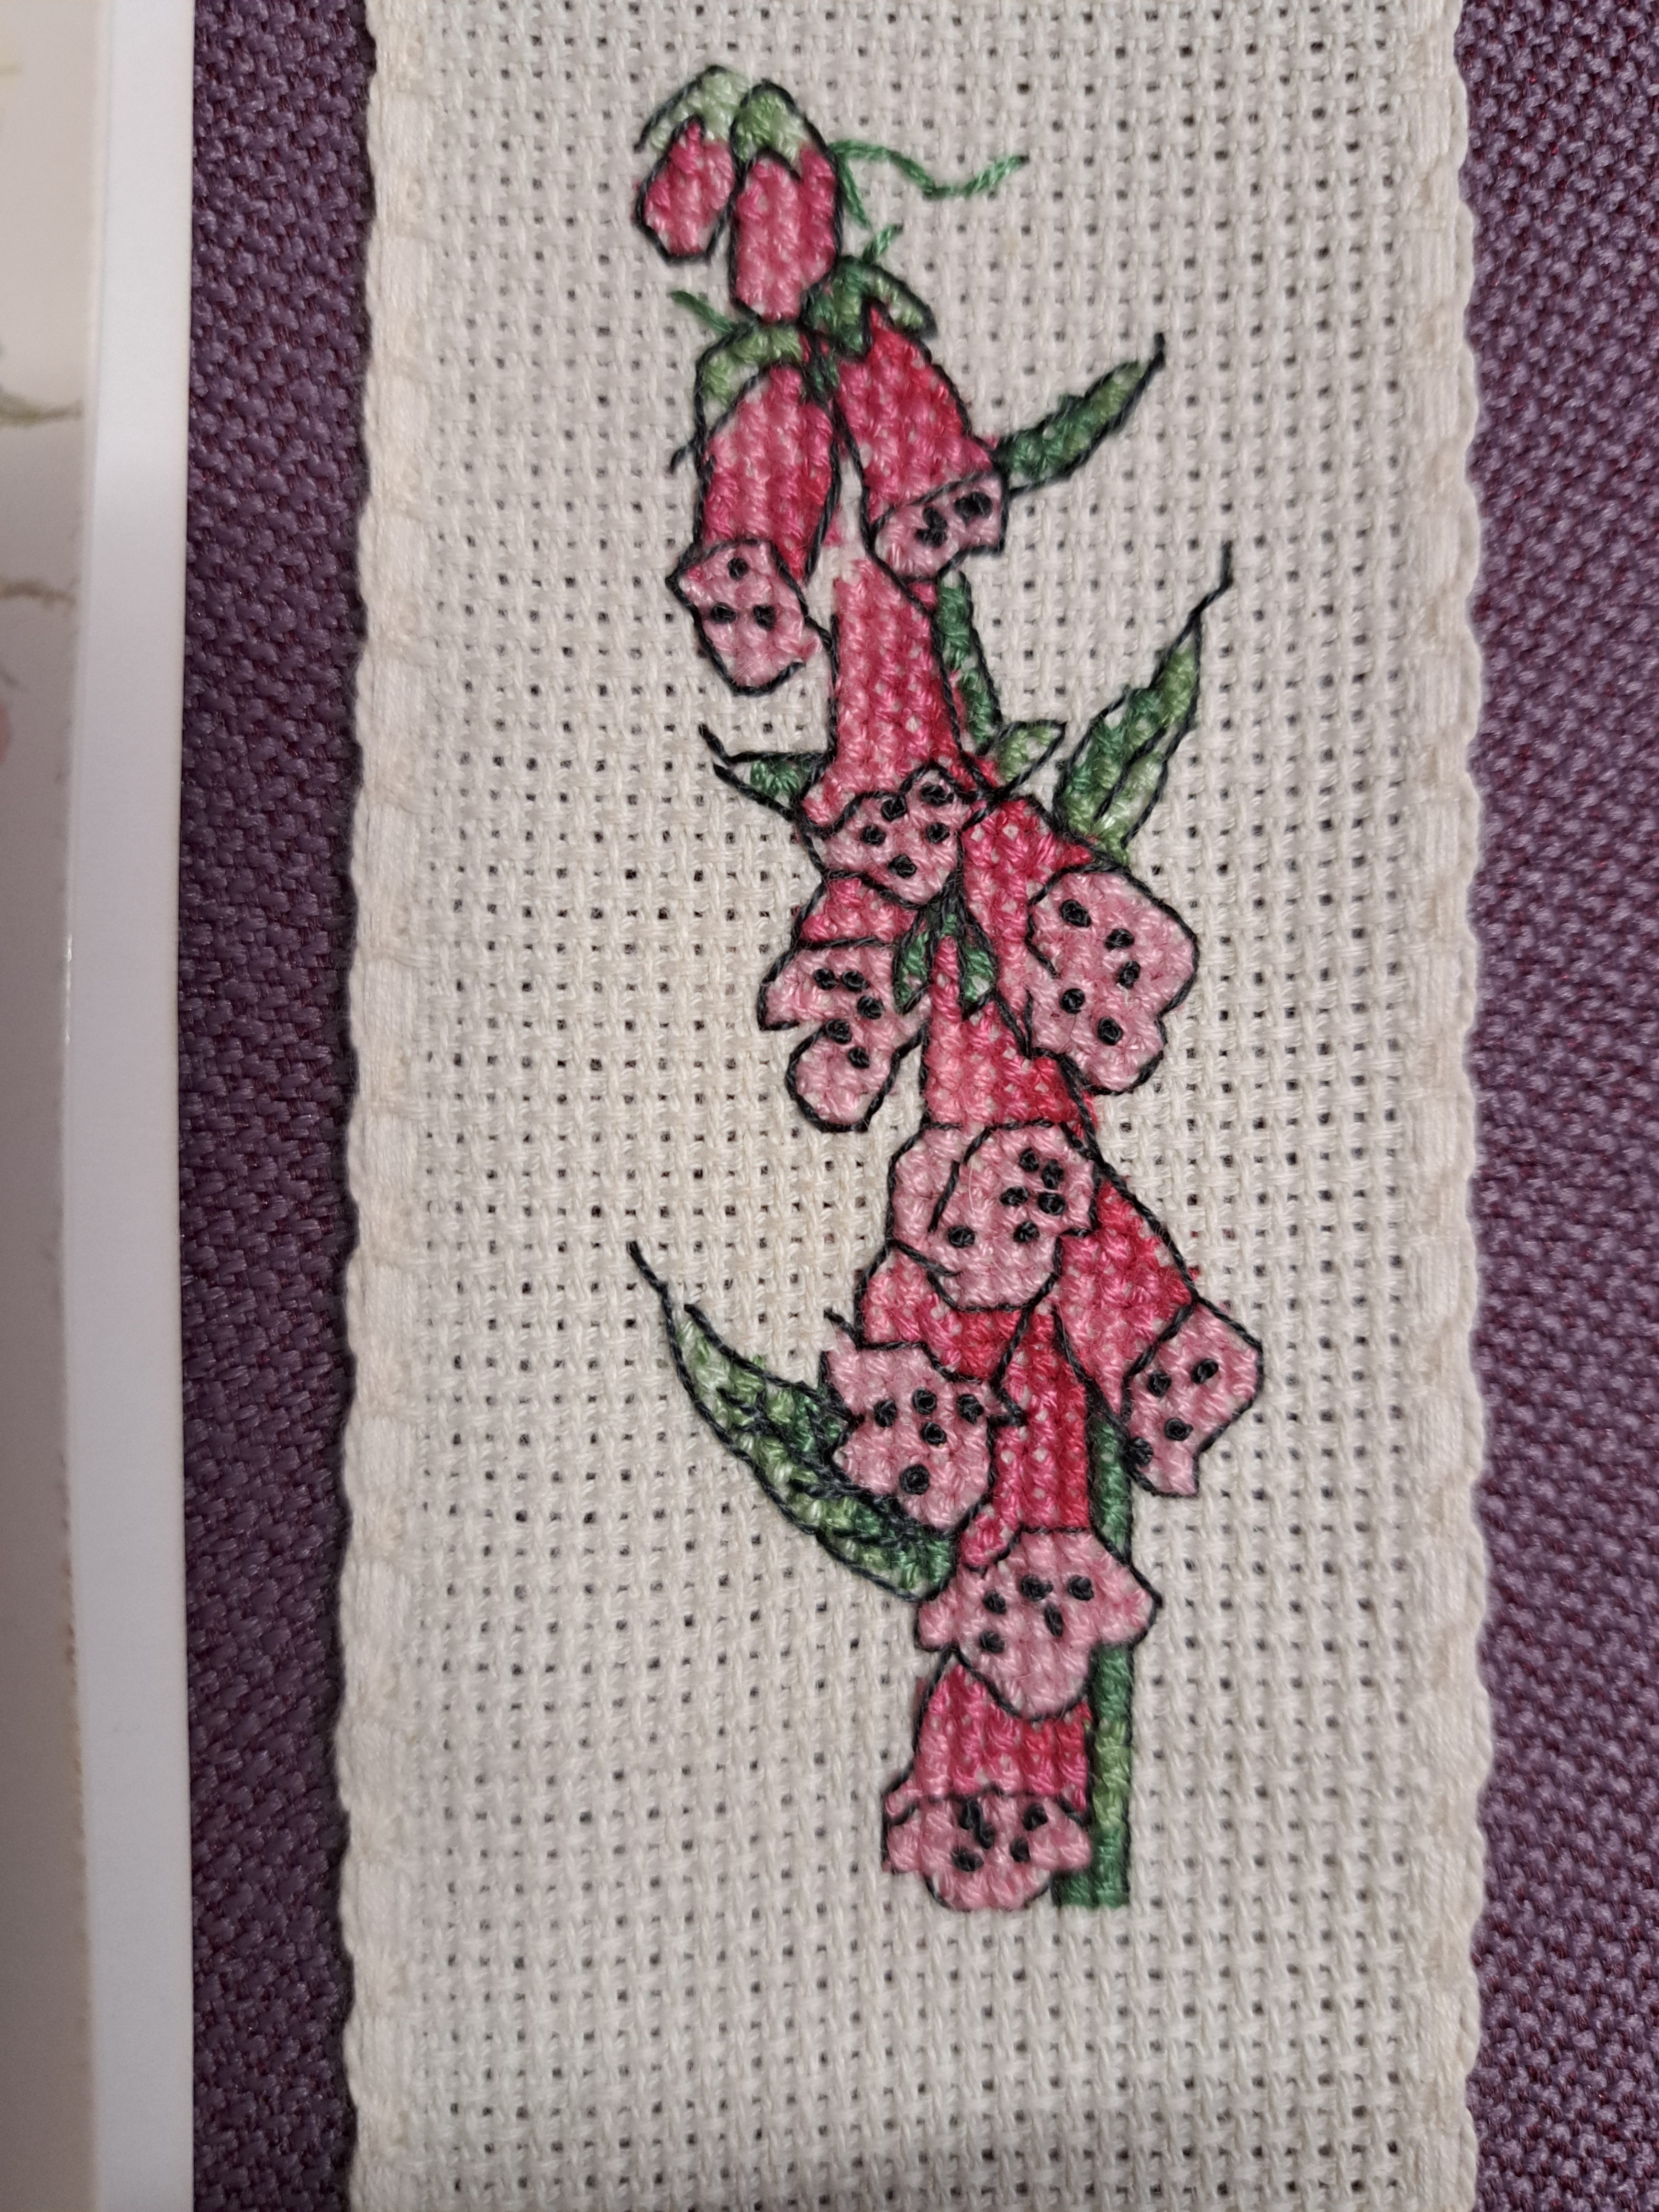
The kit said it should take about four hours to stitch. Now I’m a quick stitcher and it took me a lot longer than four hours. However after several evenings work, it was done.
I had changed the aida in the kit from white to ecru, which I felt blended in better with the bookmark outer. I don’t like stitching on aida but I didn’t quite trust my thread counting to make sure an even-weave linen was the right size.
Here;’s the finished stitching,..
…and the made up bookmark.
It did cross my mind when stitching this, it just shows how many hours go into a fairly small piece of cross-stitch…minimum wage is around £10, would anyone pay £40 for a bookmark! How often do you see cross-stitched greeting cards at craft fairs, often for under £5!
I think it’s very pretty, I think I’ll use it with my bed-time reading.
When bees find a good source of nectar, they do a dance to show the other bees where it is, so having finally finished my bee book, I’m doing my happy bee dance!
Three weeks ago I’d stitched the pages together, I just had the cover to make. During the Sewing Room Declutter Challenge tidy up I then found a bumble bee kit from Raggedy Ruff Designs, my initial thought was that it would fit on the cover of the book…
…I then started making the cover and had to rethink!
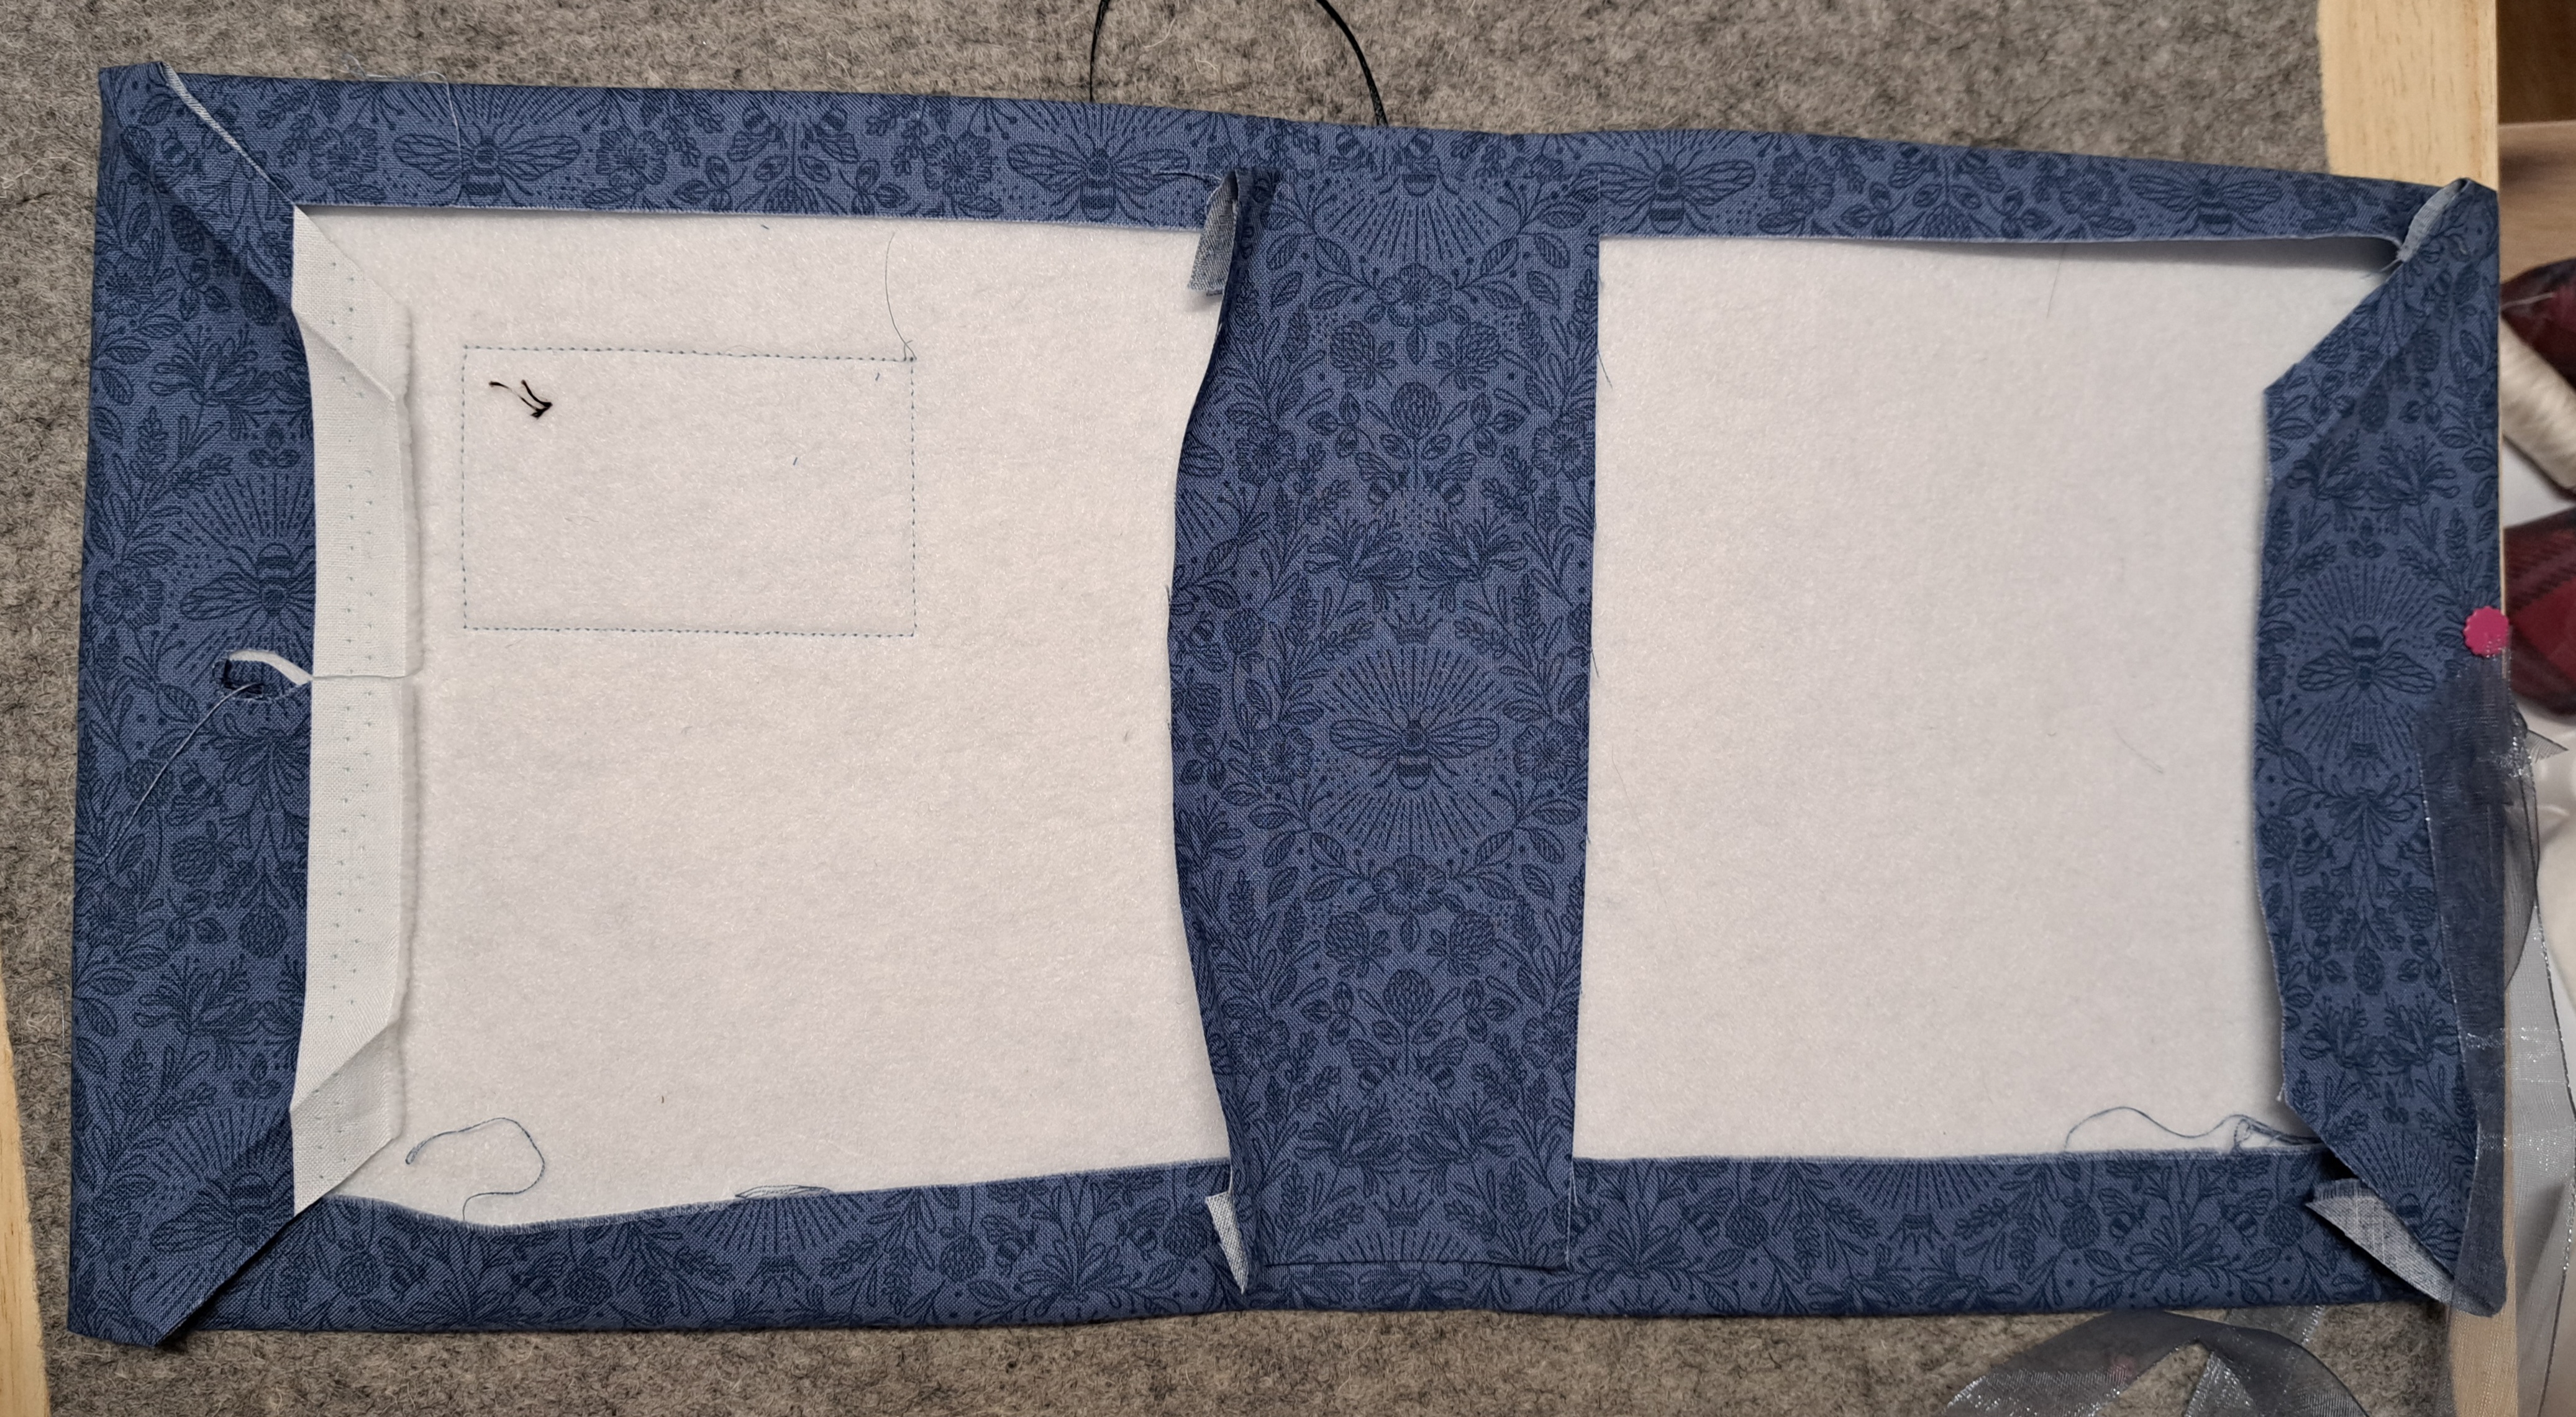
I had chosen a lovely blue bee themed fabric from Lewis and Irene. I measured round the book aiming for the cover to be 1/4″ bigger than the pages. I used some Pellon to stiffen the cover, Pellon is like a very thick vilene, like it’s probably 2mm thick. It’s also iron-on on one side. I ironed it on and put the folds in for the spine so I could work out the cover design. I always add a strip of fabric underneath the spine too, just in case it’s visible.
I made a bee hive and a queen bee last month to go on the spine. It only just fits and it was quite hard work stitching through the pellon. There’s a little gap at the top so the queen bee can be pulled in and out and the ribbon is the book mark. I added a bee charm to the end of the ribbon.
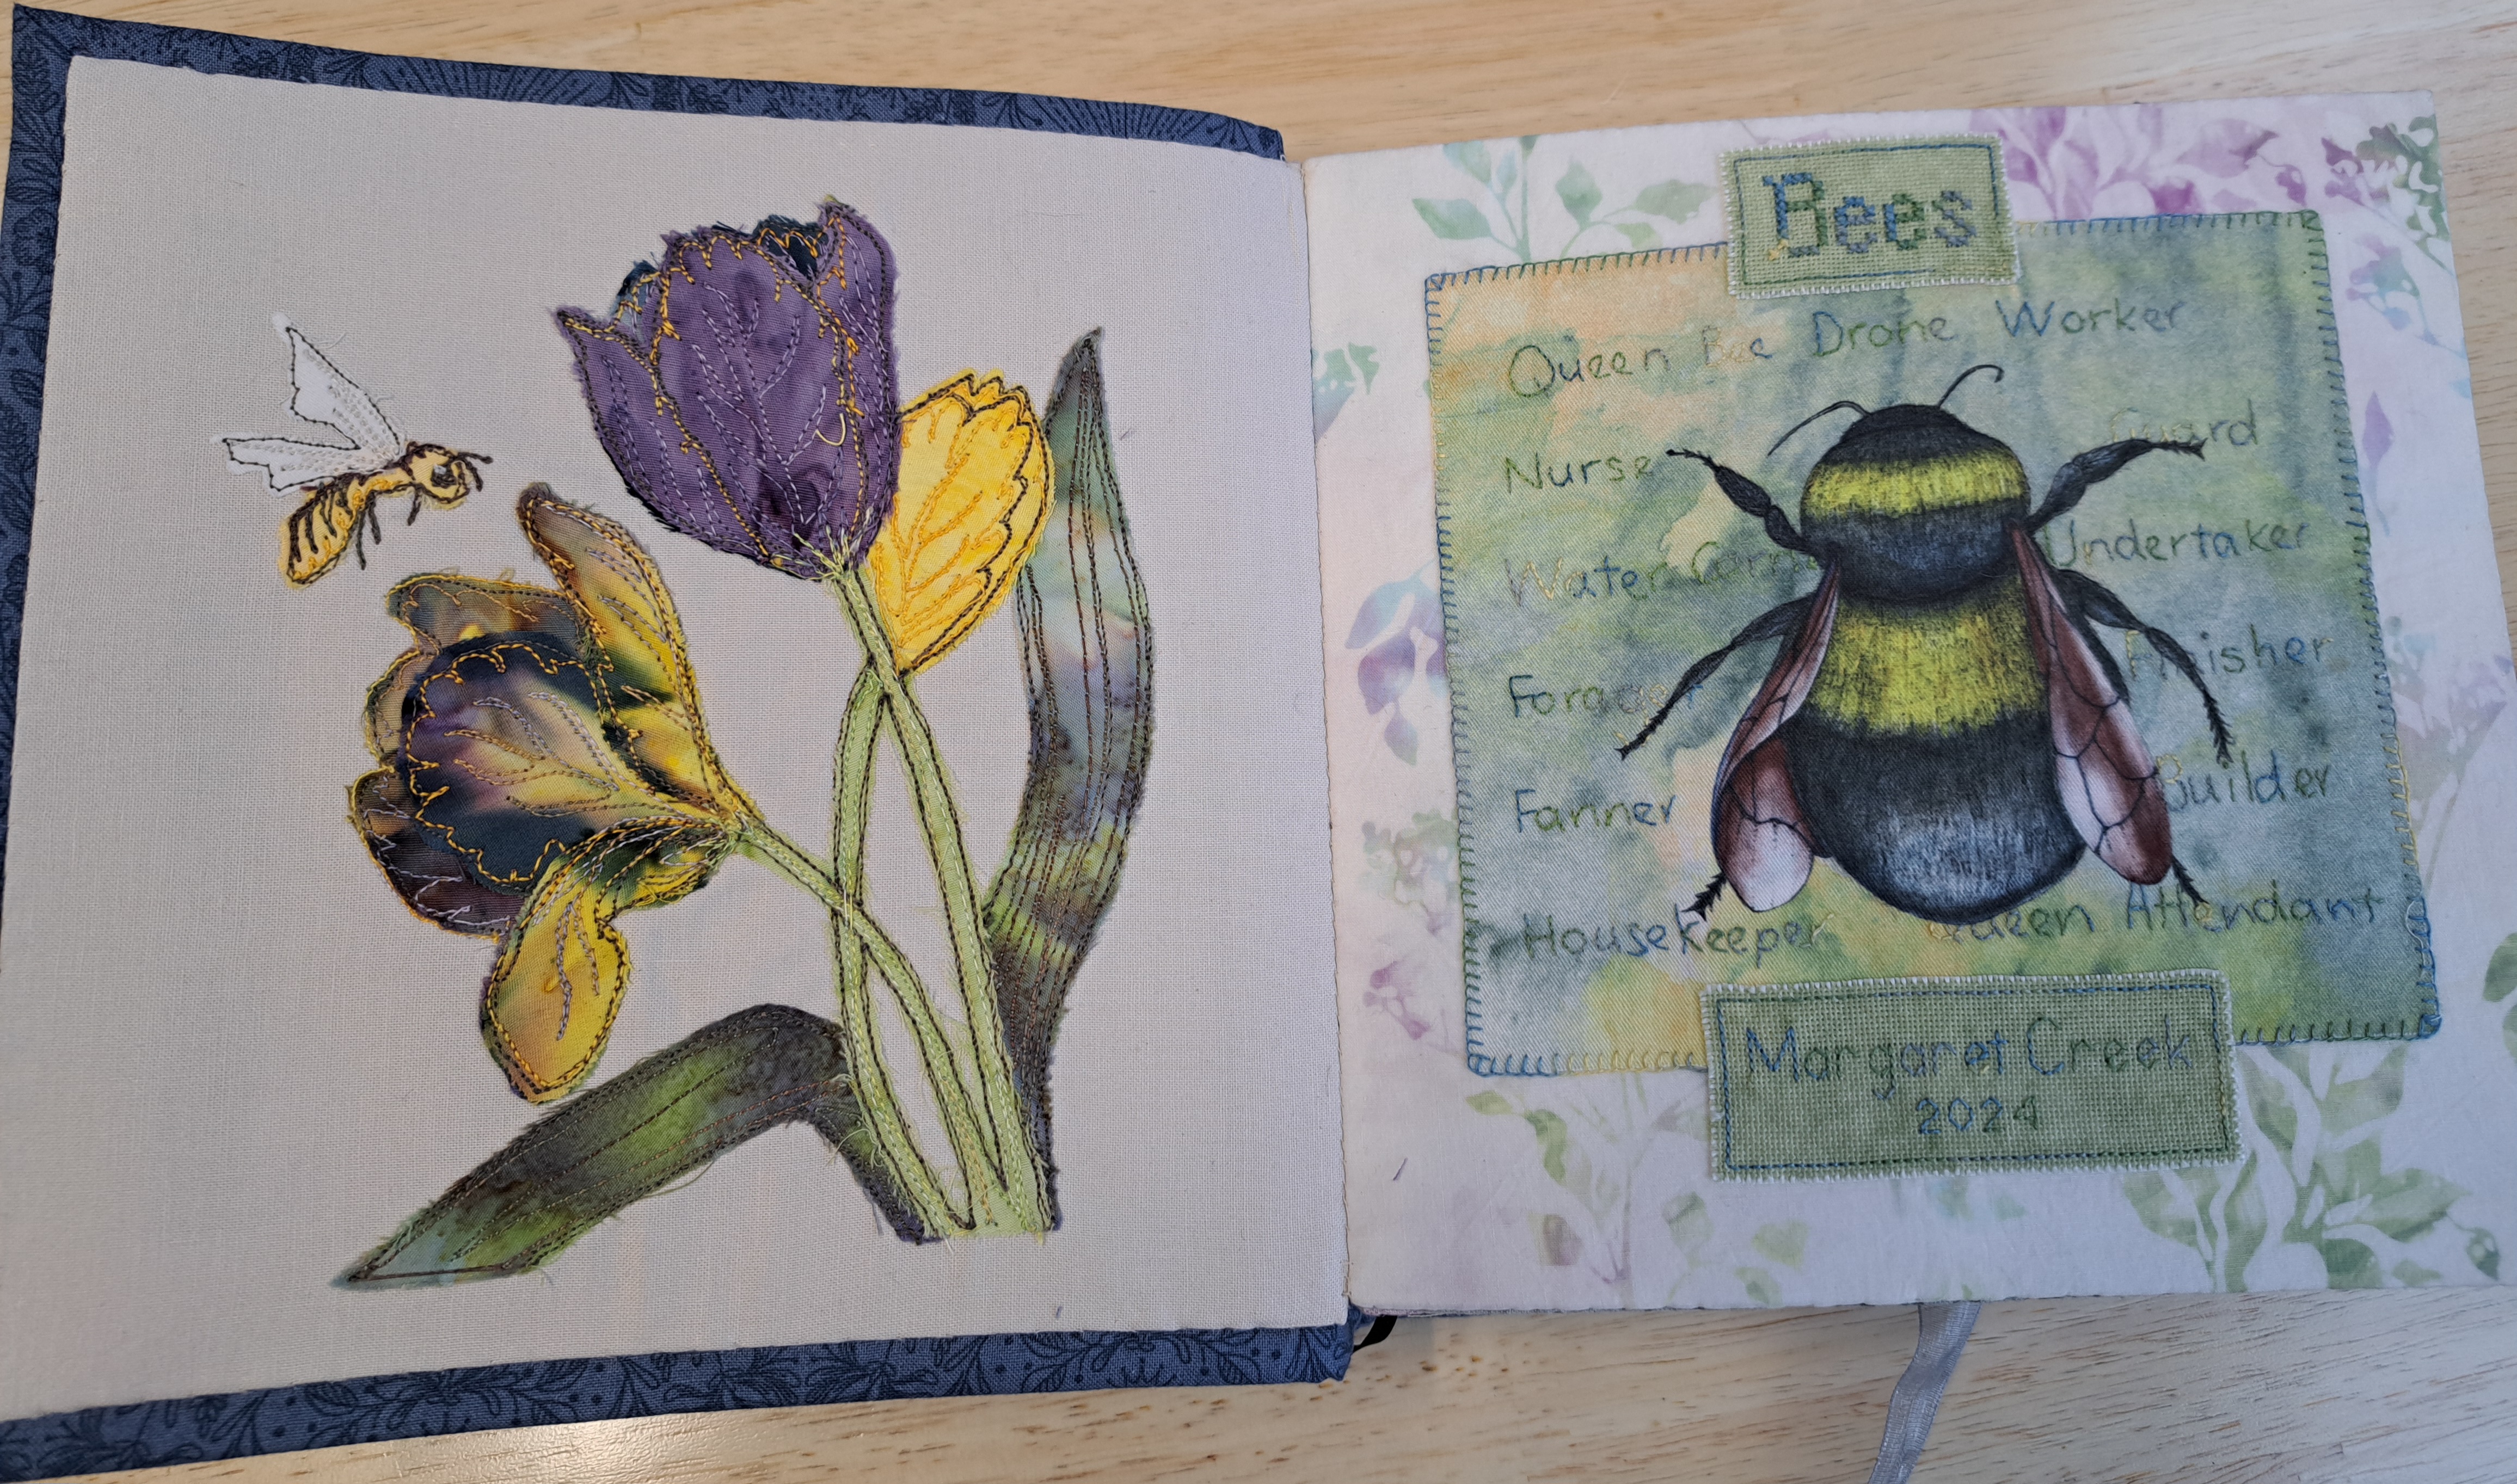
My tulip bee didn’t look right next to the hive on the spine, so I kept the cover simple with the title and a ribbon to tie.
I mulled over the name of the bee book for quite a while, I did quite like ‘A Bee Compendium’, with its ABC, but with compendium being such a long word, I couldn’t get it to work. In The end I kept it simple with ‘Bee’. I found a cross-stitch font I liked on Etsy and stitched it on a blue linen. The tiny bee button which I’ve had in my stash for ages worked perfectly.
I started to stitch the title on using the back-stitch but I realised very quickly that trying to do neat back-stitch through the pellon and stitch the label straight at the same time was going to be very hard. Instead I back-stitched the linen first and then machine stitched right next to the back-stitch so it blends in nicely.
So, my next dilemma was what to do with the tulip bee! Obviously I wanted to use it, it was too bright and happy to go at the back opposite the Last Bee poem. Colourwise it actually went perfectly next to the title page, so although it’s not ideal having the title page second, I wasn’t going to start unpicking pages. I cut a piece of iron-on buckram the same size as the pages to back the tulip with. I could then slip-stitch it to the title page, ready to stitch it to the cover.
For the back inside cover I decided to keep it simple with just the blue of the cover, so I made another ‘page’ of the blue fabric and slip stitched that to the Last Bee page.
Then came the fiddly bit, stitching the inside covers to the outer cover…lots of clover clips and a few curses later and it was complete. I had added the ribbon as I went which holds the book closed, I do like a ribbon closure on my fabric books.
Well I thought it was complete…
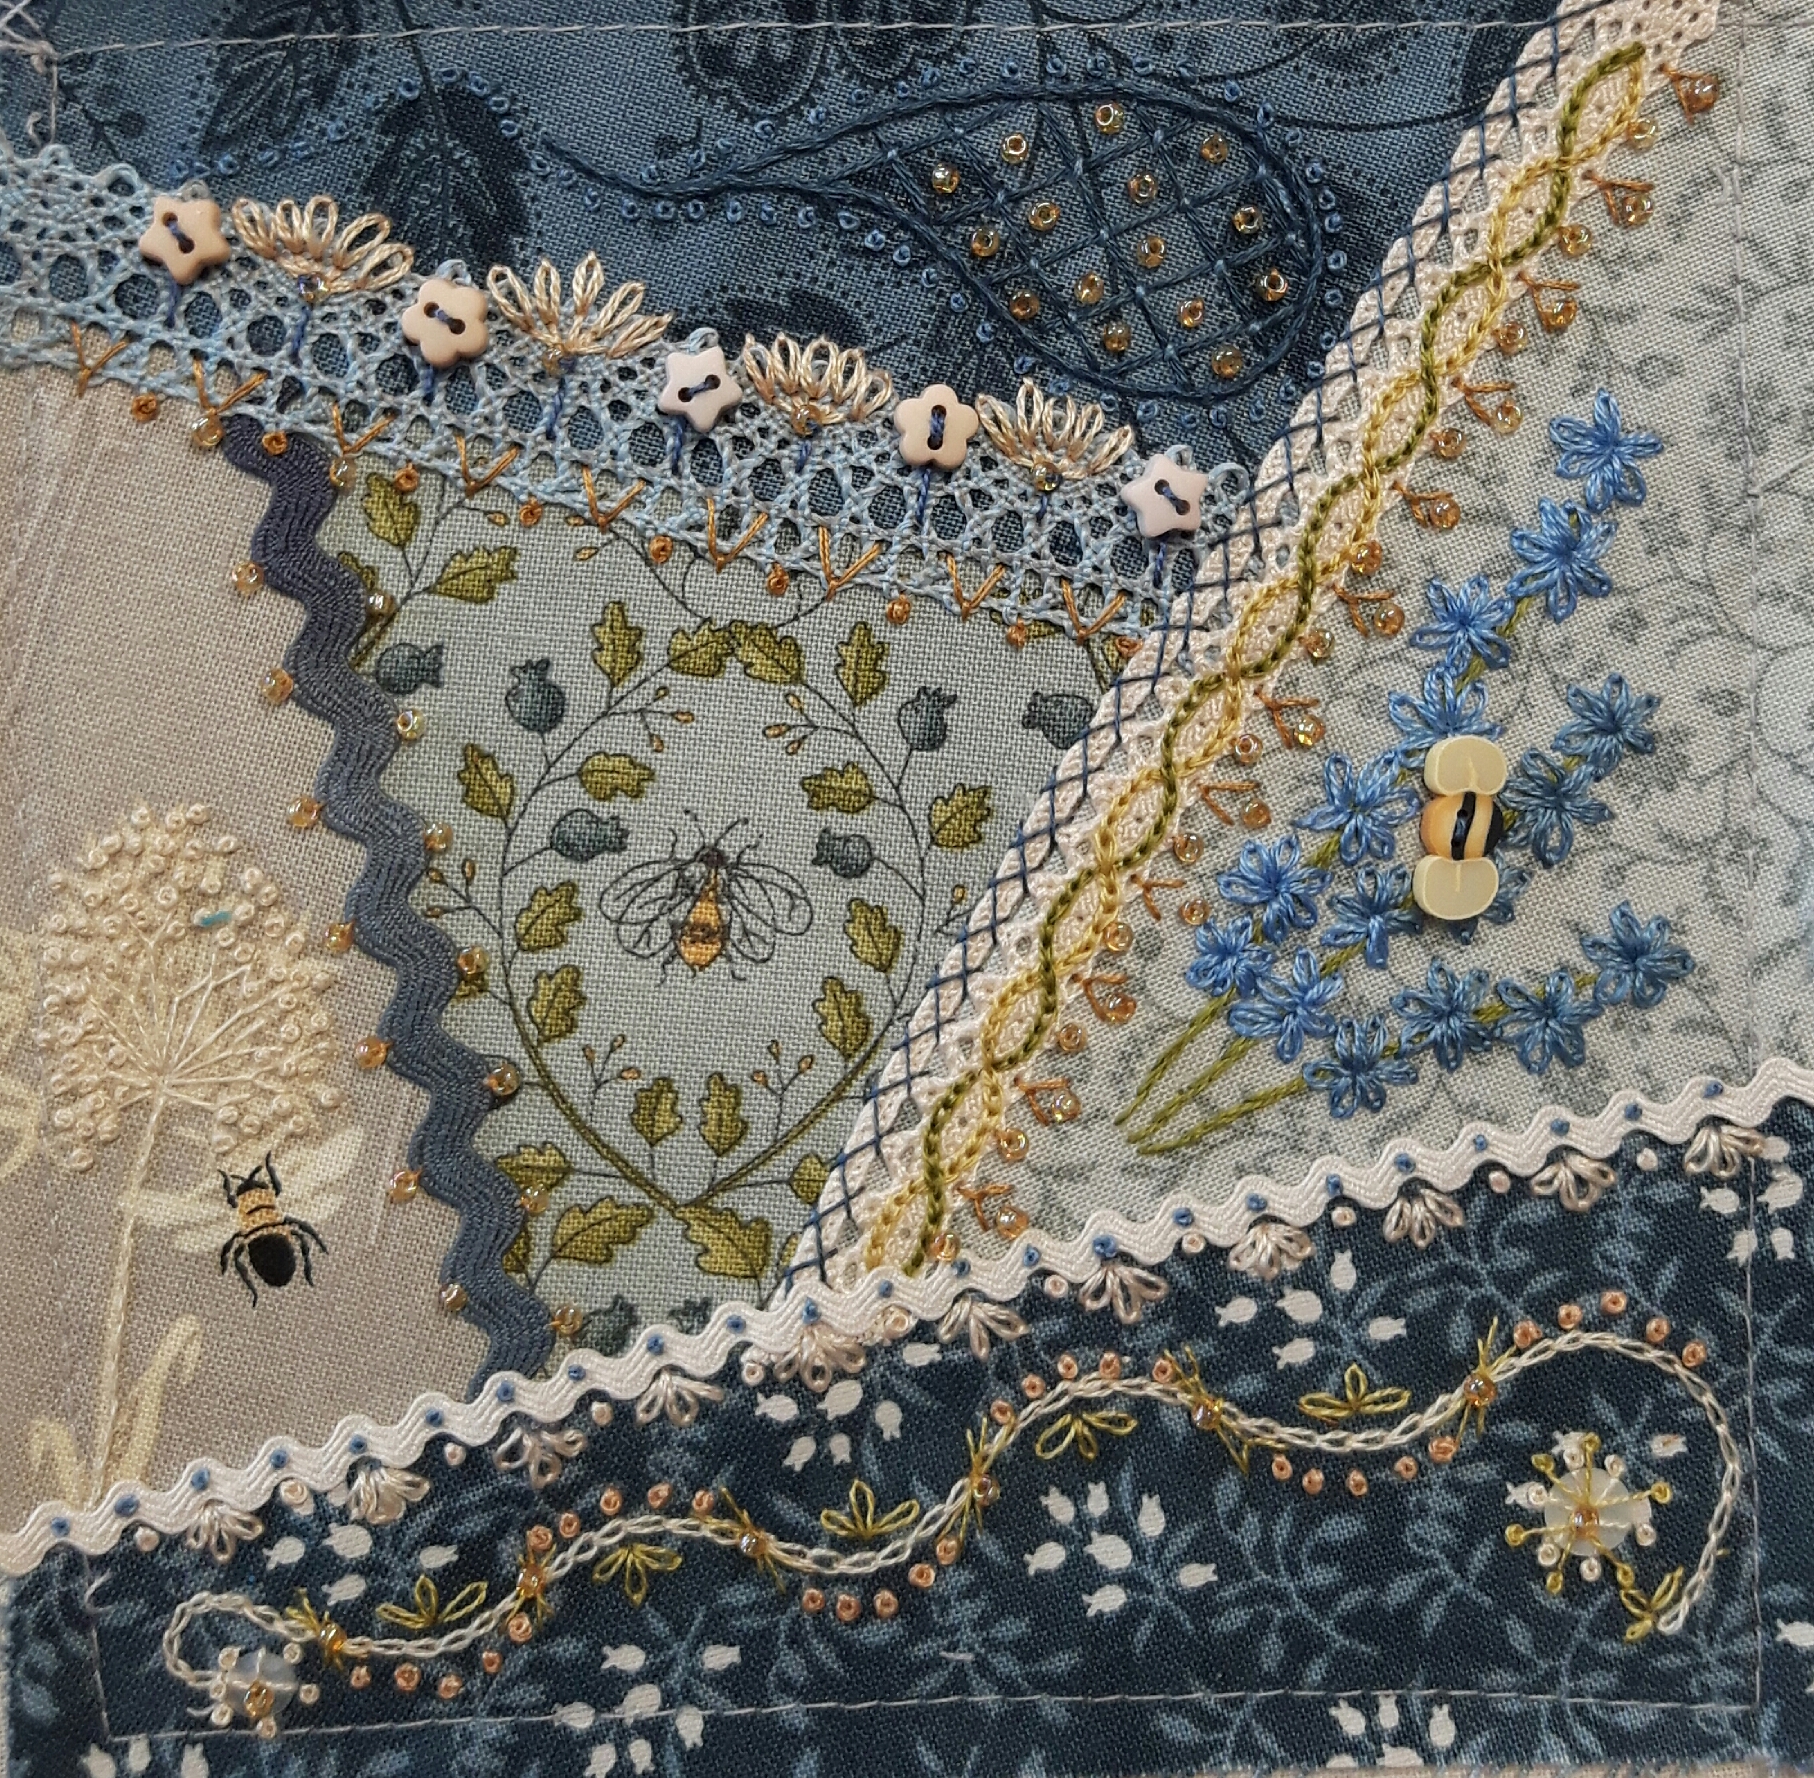
I was sorting another box for the Sewing Room Declutter Challenge and I found another bee embroidery, a square of crazy patchwork. It was so lovely I had to use it! I just checked back and I made this in January 2022!
Luckily it did look right next to the Last Bee poem, colour wise it worked and it wasn’t too bright and cheerful. I trimmed it to a neat 5″ square. I looked at ways to attach it as the book was already complete. In the end I used bondaweb!
There is definitely no more room in my book! I’ve counted up and there are over fifty embroidered bees of various sizes and styles. If you include the ones on the fabrics too there are over a hundred bees in the book.
I decided the best way to share my book was a video, so I’ve add a reel to YouTube. Apologies for the silence, I tried adding some peaceful bee themed music, but it seemed to cut the video short!!! Here’s the link…
This SAL is organised by Avis, please follow the links to see what everyone else has been stitching;
This year I’ve decided to join in with two of Anne Brooke’s SAL’s, Bobbin Along which is a weekly one and What’s Sewing which is a monthly one. Anne Brooke is a lovely lady who lives not too far away near Brighouse, she started doing SAL’s in 2020 and has continued ever since. They are very much what I would call free embroidery, I did one in 2021 and it does push me out of my comfort zone so they’re good to do every so often!
Last time the SAL was to make a book, this time Anne is stitching into linen on an 18″ hoop. I know I haven’t the wall space for a big hoop, so despite the fact that Anne said her plans won’t work easily with a book, I’m going to adapt them and make a book!!
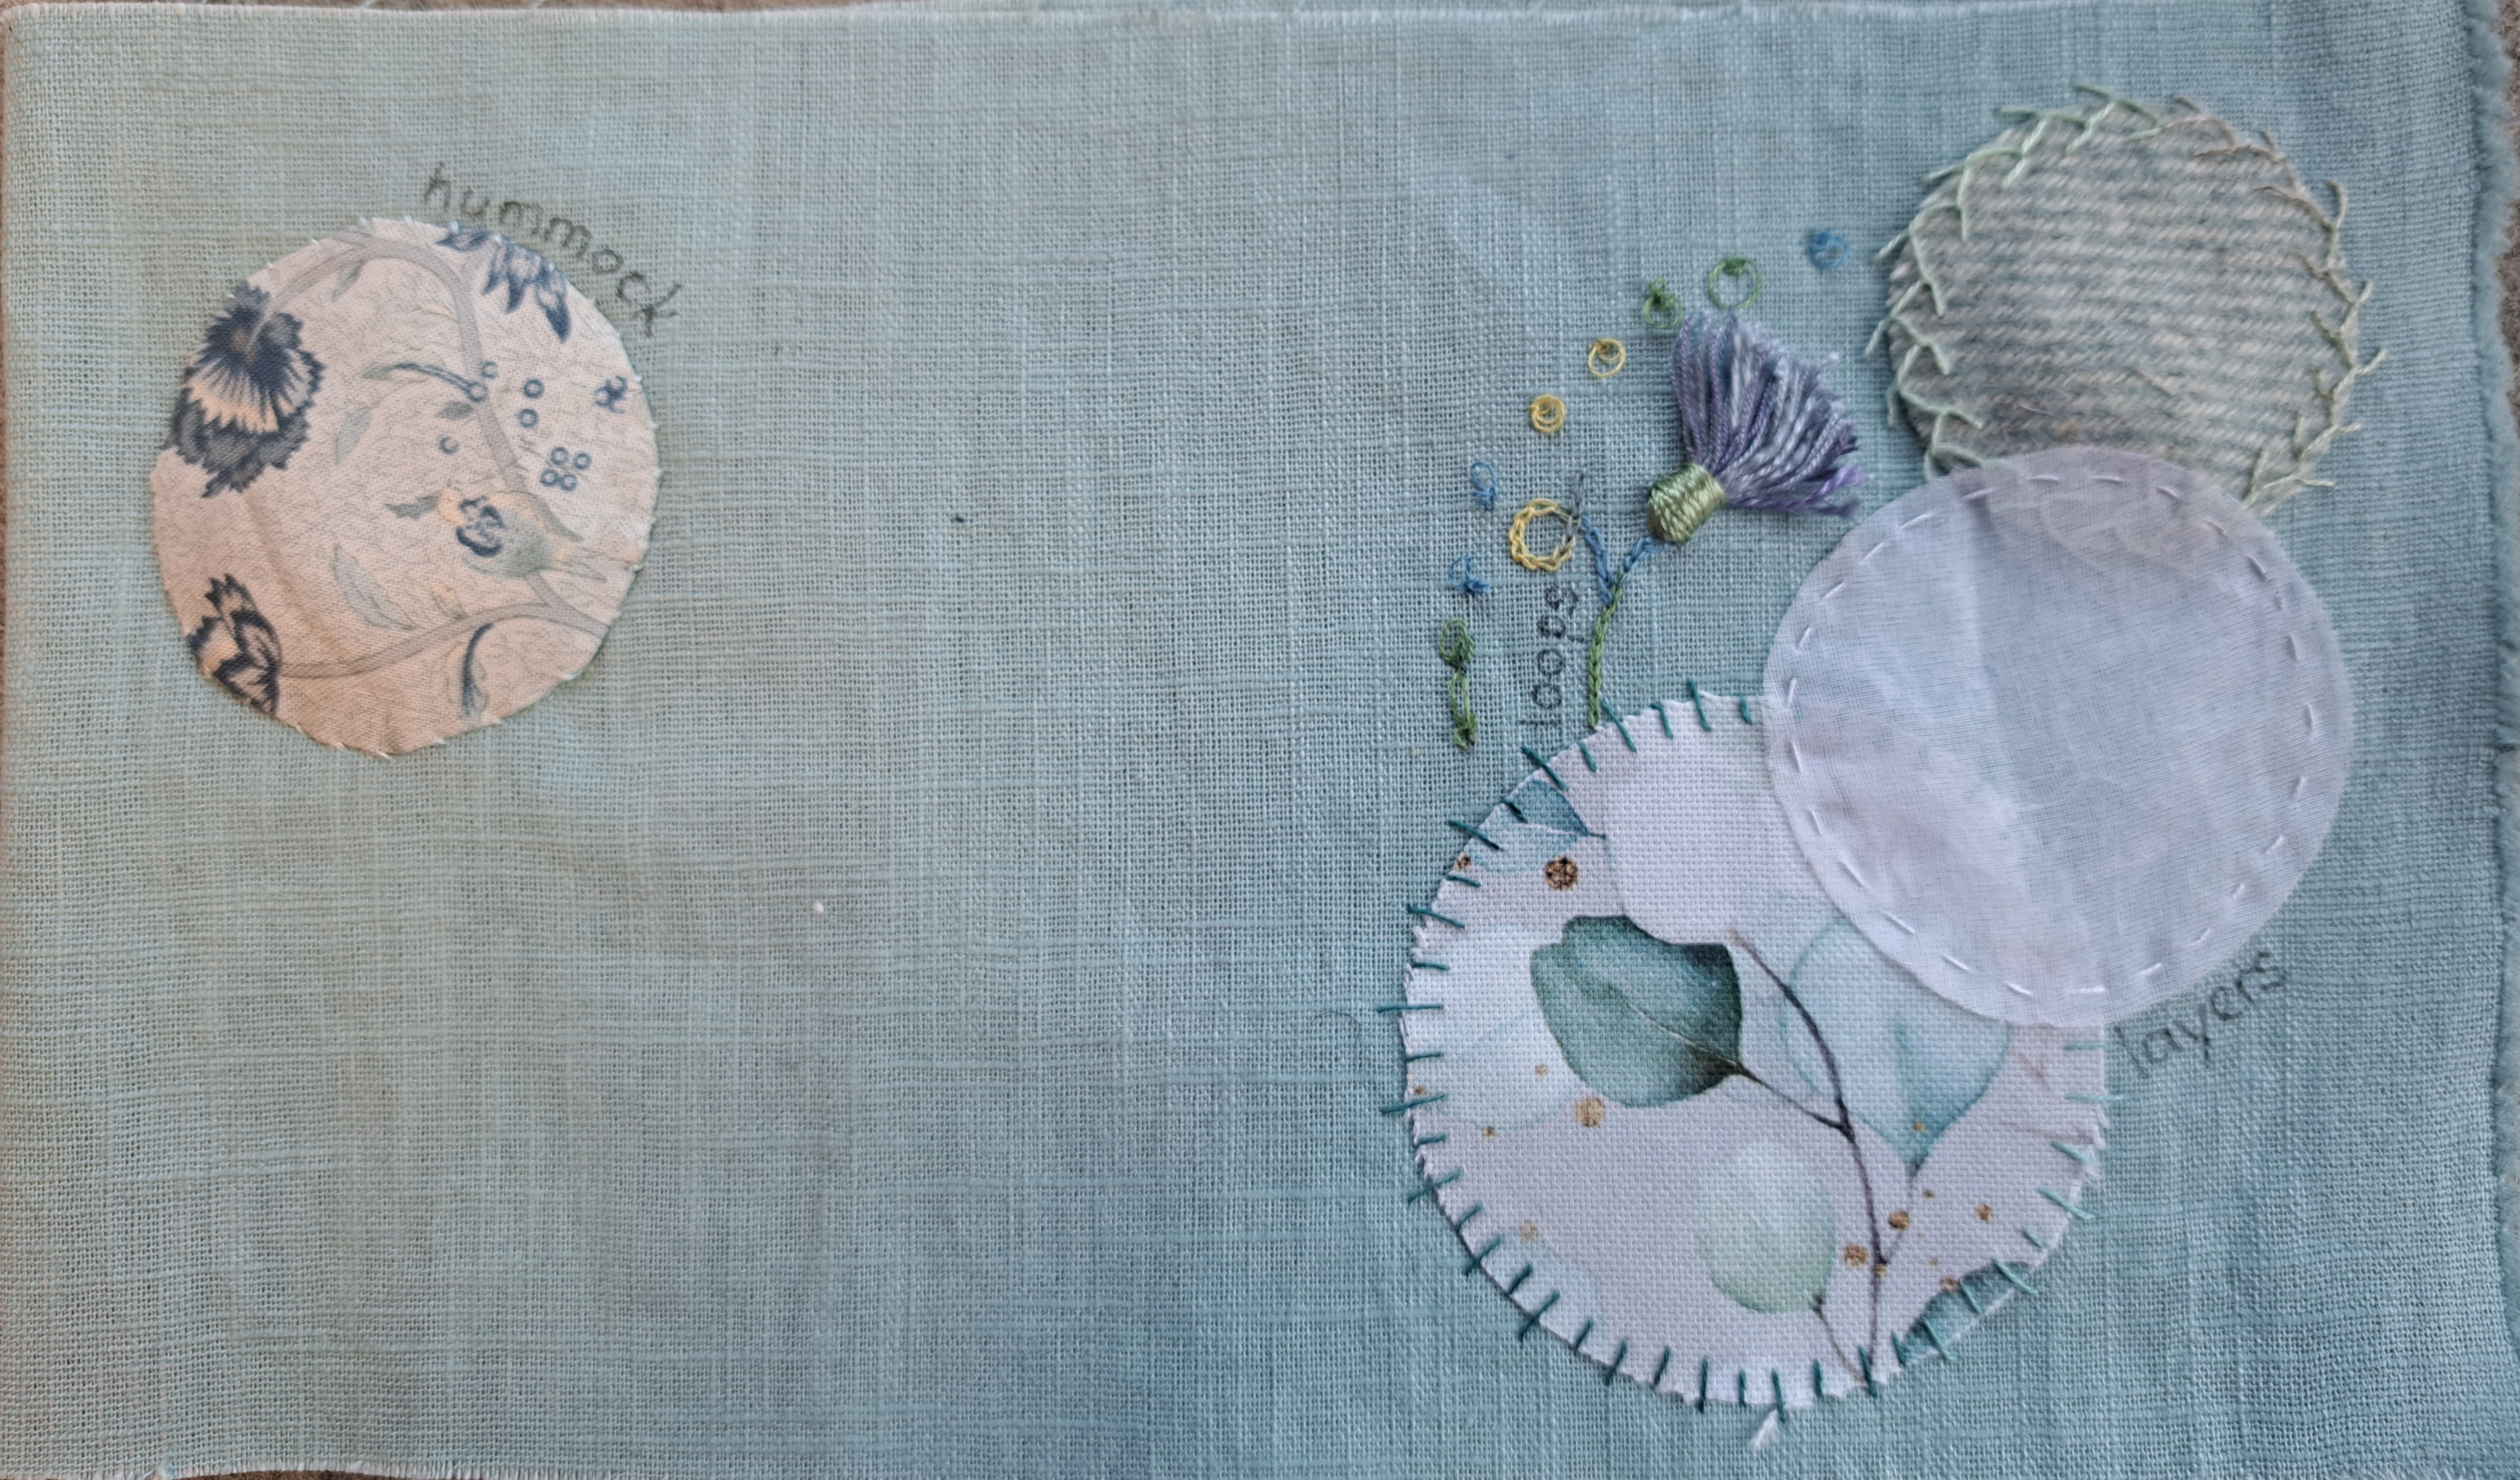
Every Friday she releases a video and a new word prompt. She then demonstrates how she is interpreting that work in her stitching. After much prevaricating over how I’m going to do this stitch-a-long, I finally started this week and stitched the first two weeks. I’ve chosen some duck-egg blue linen which was left over from a jacket as the base for the book, I’ve then picked a heavier cotton print of eucalyptus leaves as the inspiration for my colours.
The first word was ‘layers’. Anne appliqued three shapes onto her hoop which also helped everyone move on from the ‘white page syndrome’ where the starting fabric seems so big and plain you’re scared to start.
I have an plan to have a circles theme through the book, that might change, but I chose three different weights of fabric and cut out three different sized circles which then overlapped like the different layers of our lives. I stitched them on with a variety of simple stitches.
Week 2 word was ‘Loops’, Anne stitched an arc of loops which could then the trimmed to add texture and depth. I thought mine would get too squashed in a book, so after attempting a loopy butterfly which was not a success I changed to a thistle head which although the loops have been trimmed, they are designed to lie flat. I stitched a curved stem which follows the arc of the circle in chain-stitch, which of course is all loops! I then added an arc of loopy French knots, these are just French knots which are left loose, rather than pulled up neatly into a knot.
I’m trying to use a wide variety of threads this time. I’ve pulled perle, linen and textured threads into the mix and on this page I’ve only resorted to DMC for the stem and the French knots as I needed the fineness.
I think I’m just going to keep going on one page until it feels full, then move on to the next one, as obviously I don’t want a 52 page book, or even a 26 page one! I’m planning to write or embroider the words on the pages too.
I keep saying this is the last bee and then I make another one!
I found this kit whilst I was sorting through my patterns for the Declutter Challenge. I’d completely forgotten I had it, which is a bit frustrating as I now have to decide how to use it!
It’s another kit by Andrea from Raggedy Ruff Designs, She helpfully provided two sizes and the smaller one fits within the page size if the top flower is a little shorter.
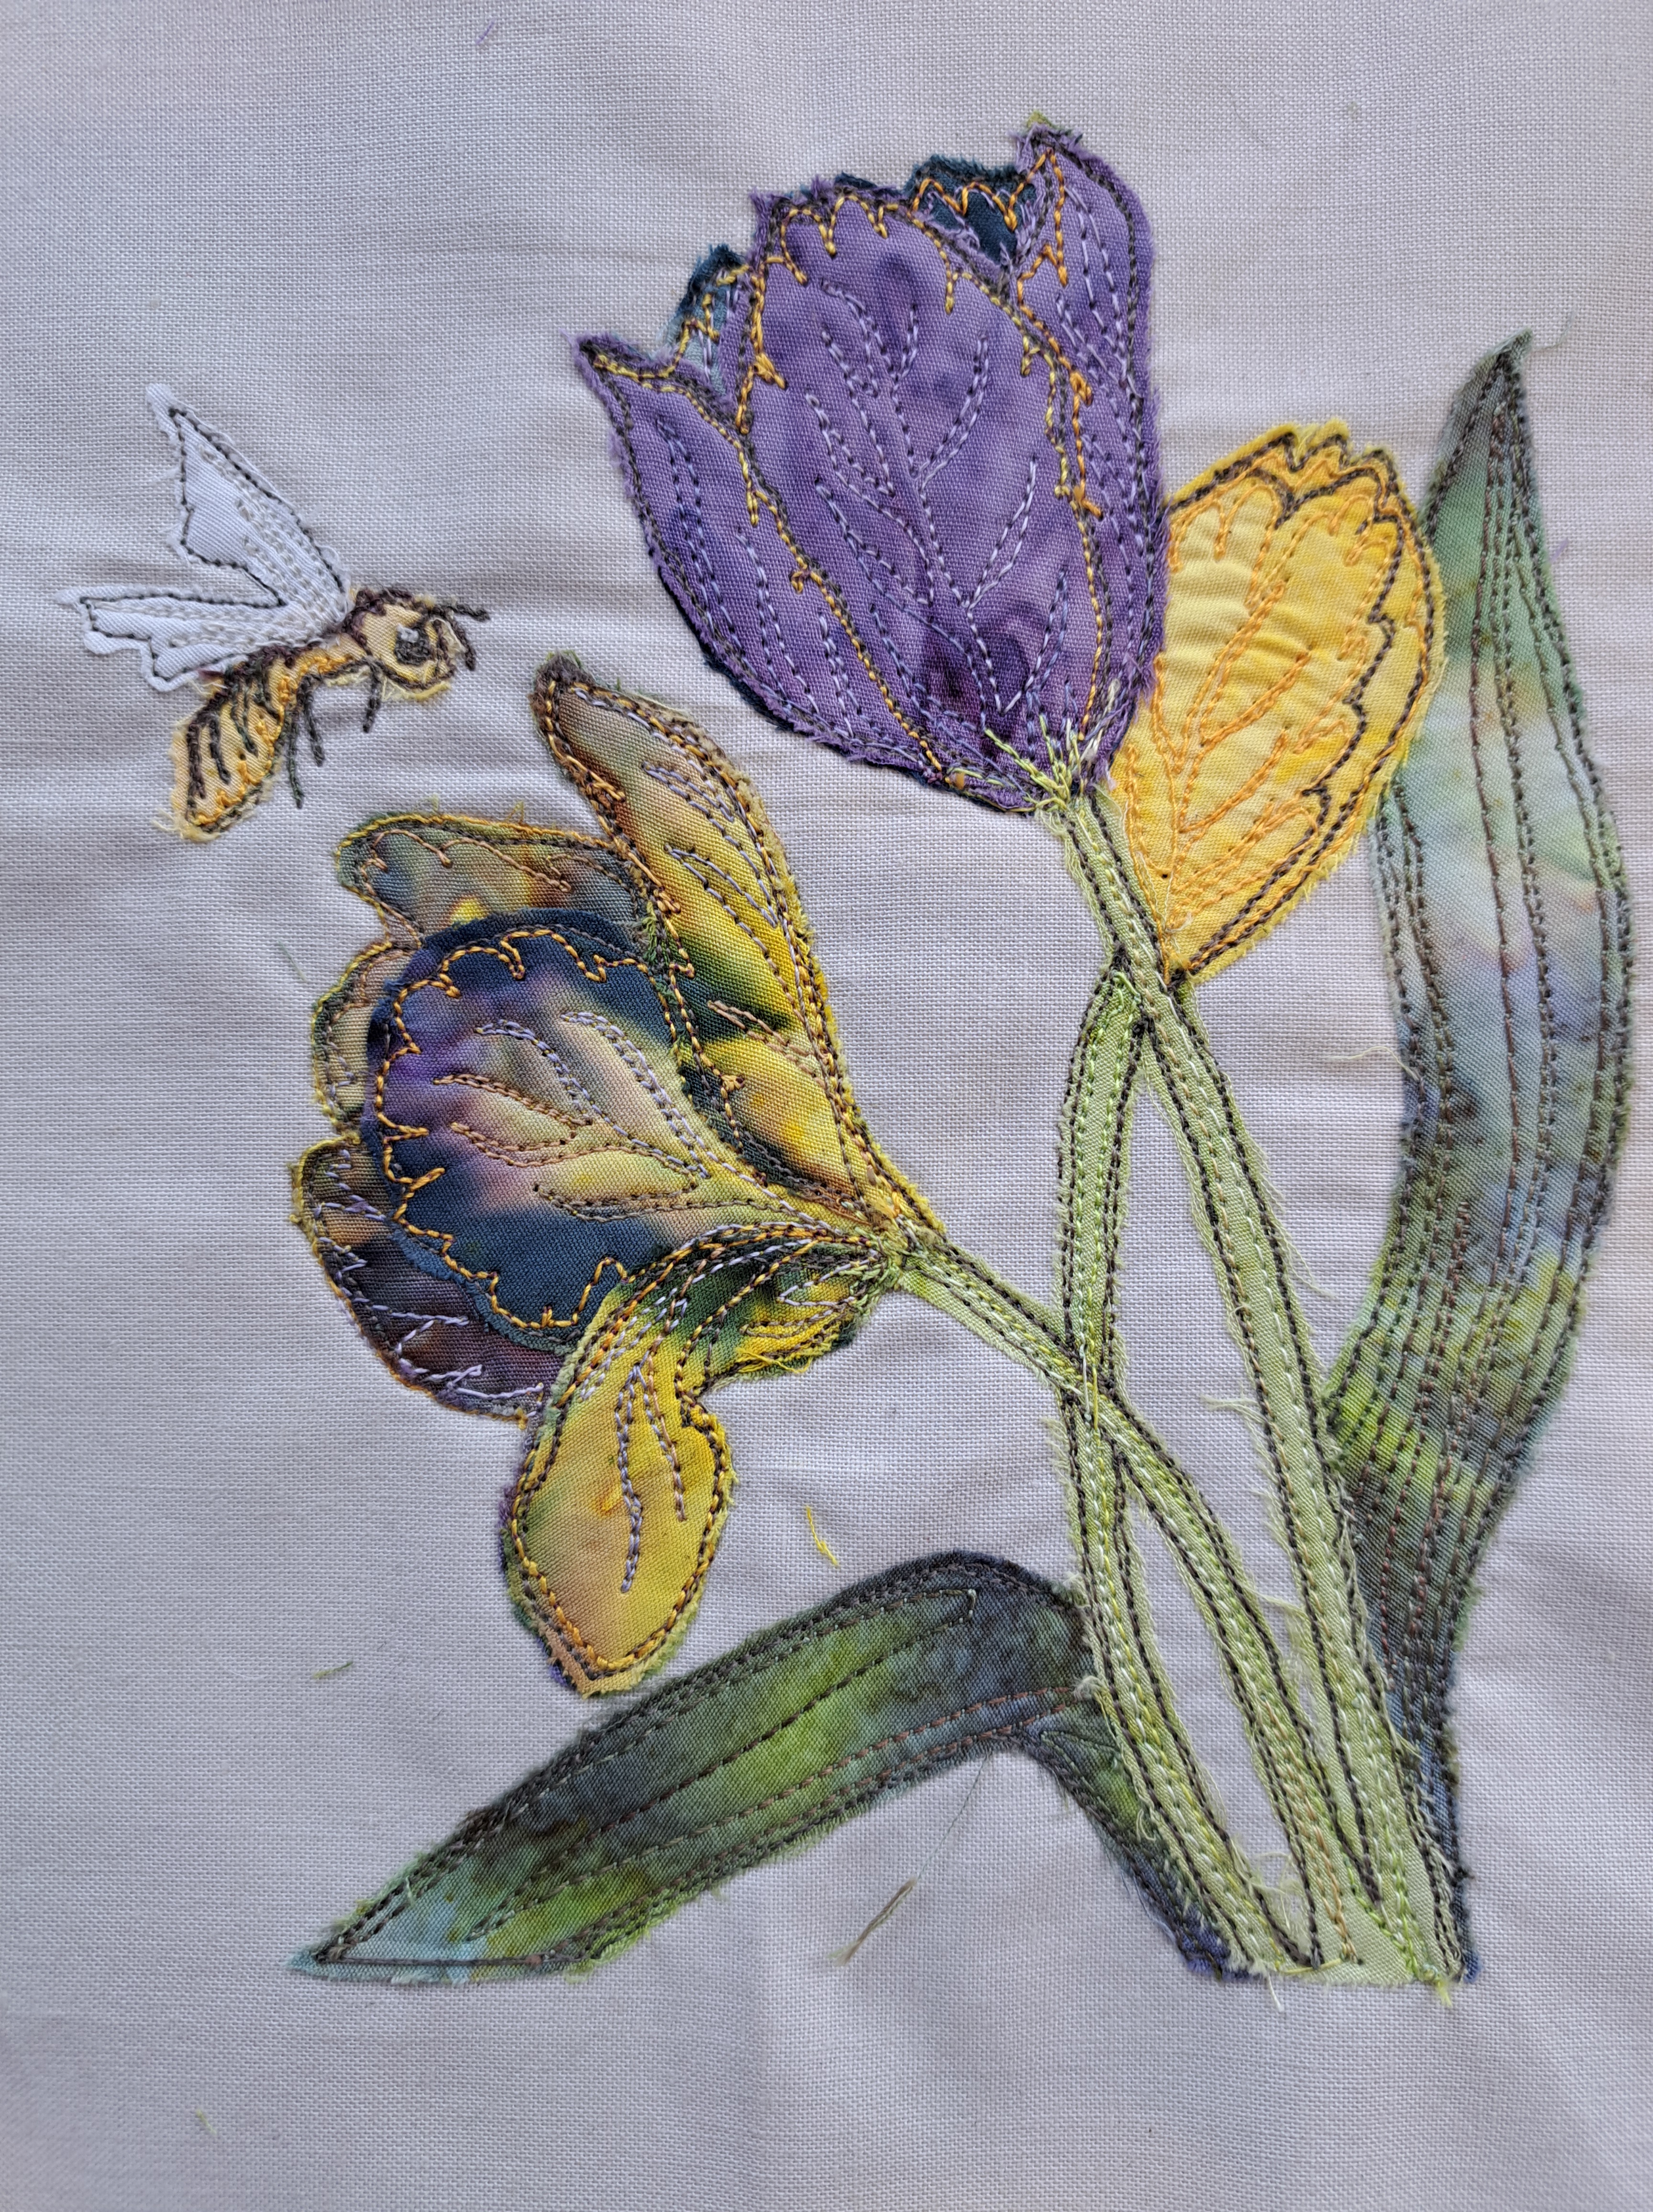
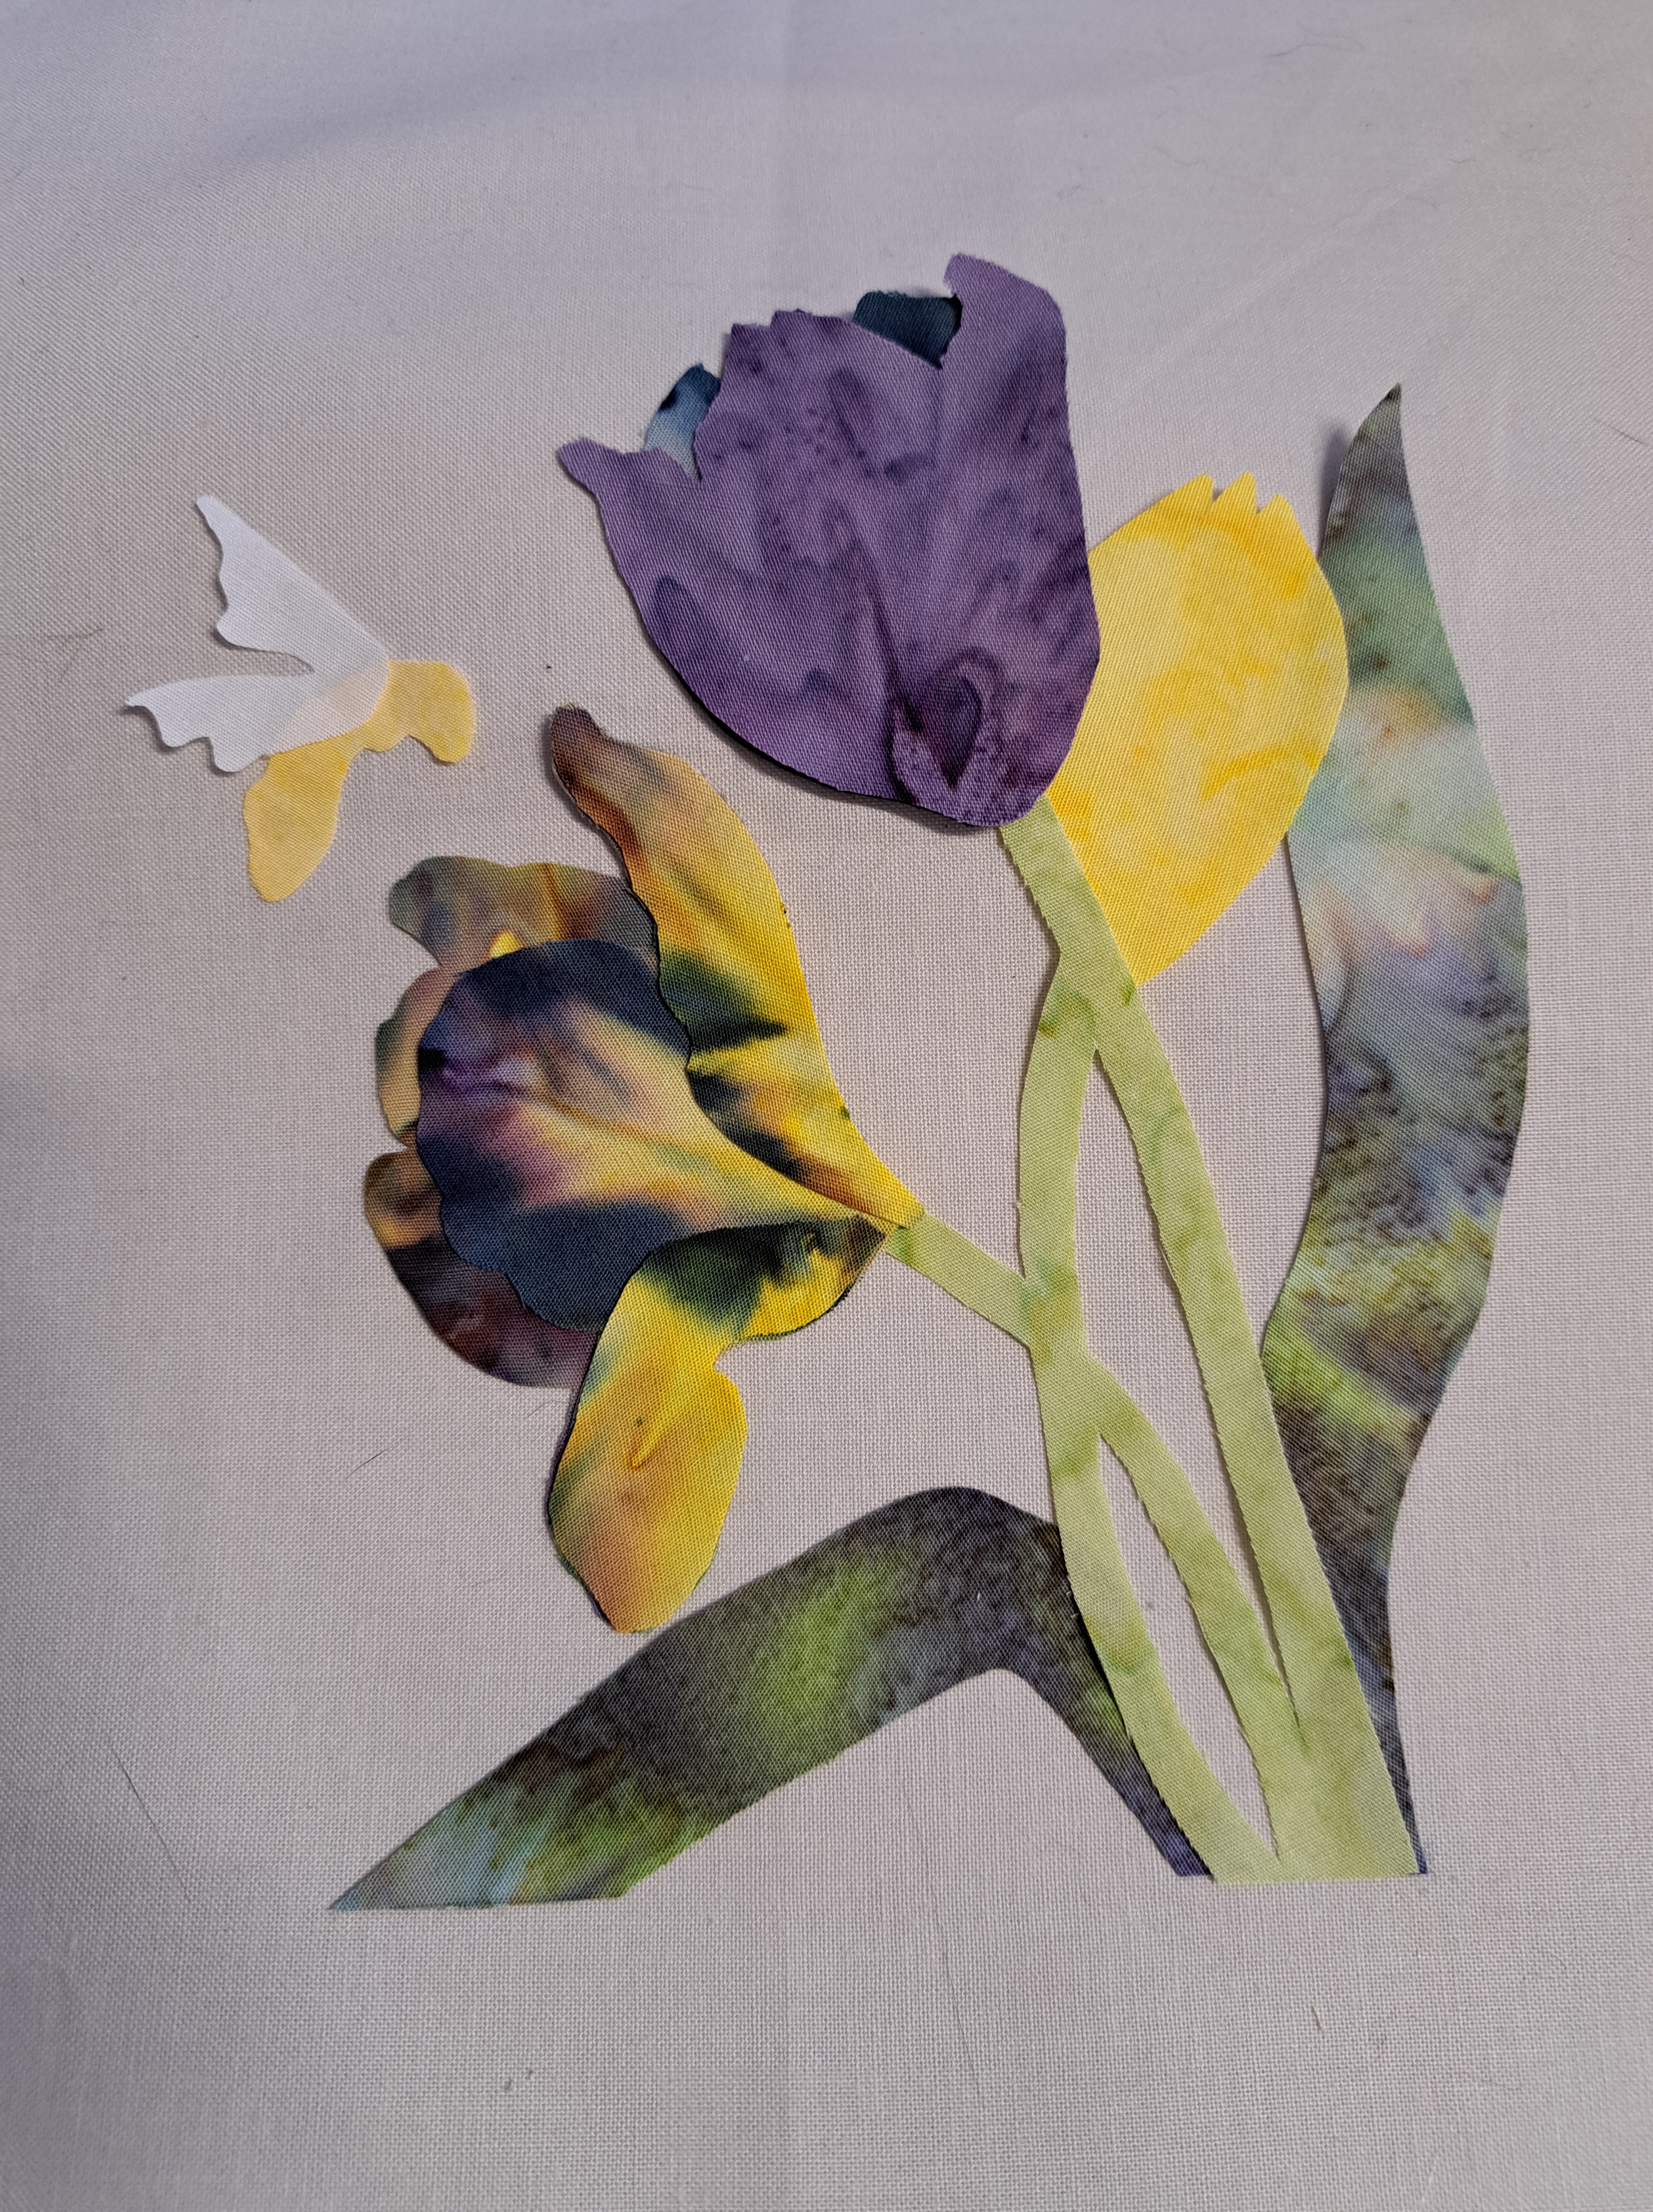
This one was fairly quick to do as it’s on a plain background. The shapes are traced onto freezer paper which allows for easy cutting out of fiddly shapes. I was particularly pleased with the left hand tulip, the batik Andrea provided was gorgeous mix of yellow and purples, I managed to do some fussy cutting and I love the vein effect of that central petal.
I tend to use tiny dabs of fabric glue to hold the pieces in place whilst I then stitch all the way round with some mid brown thread. Then I stitch all the way round a second time, I used to miss this part of the instructions out but actually I think you do get a better effect. Any bit you wobbled on or missed, you can catch it second time round.
Then comes the fun part, adding the machine embroidery! I’ve done quite a few of these now so I am getting more confident – I don’t have to remember to breathe anymore! I also know it doesn’t have to be neat or perfect – the eye is very good at picking out the correct line!
So here is my finished bee. The only bit I’m not sure about is the orange edge to the top tulip, I’m tempted to go over it with a purple pen, maybe I’ll try a bit with a purple frixion pen first!
I haven’t decide yet where this is going to go. My first idea was to put it on the front cover, it would look good there, but I’m not sure if it will look right with the bee hive on the spine. I think I’ll make the book cover, add the hive, then I can see what it looks like. The alternative is to put it on the inside cover opposite the title page. Colour-wise I actually think they look OK together so it is an option.