It’s the last Friday of the year, so it’s the final Friday Photo Challenge set by Postcard from Gibraltar. Today’s theme is winter, I’ve tried to find non-Christmassy ones…
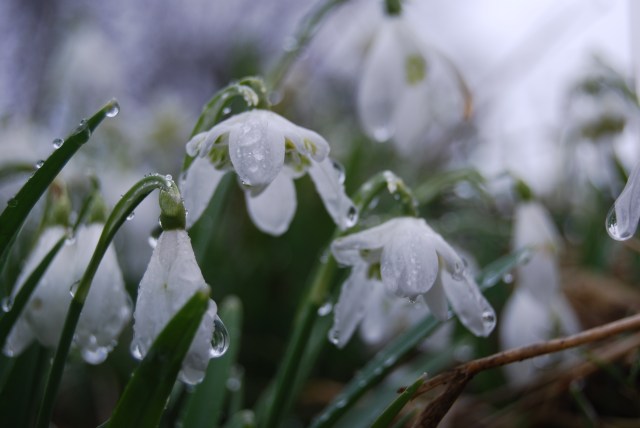
These snow drops were in Austwick in North Yorkshire, a village well known for it’s snowdrops. My friend and I had been walking round to Norbers Erratics, a glacial stone formation, we returned via Austwick and saw a lovely bank of snowdrops. It had clearly been a bit of a damp walk! I love the droplets of rain hanging from the petals.
I rather like a good frost, it’s good for the garden, breaking up heavy soil and killing pests, and it looks rather beautiful. These little guinea fowl chicks get moved around the garden regularly.
A Snowy Garden
Snow looks very pretty when it first comes down, when it settles on every little twig, so long as you don’t need to go out in it, in which case it loses it’s appeal very quickly!
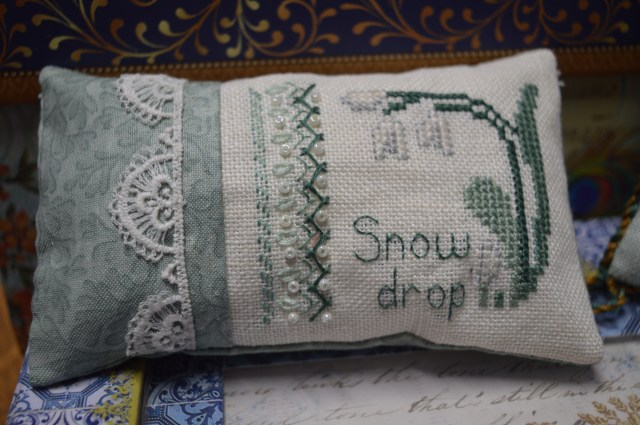
I’m trying to put together a seasonal display of cross-stitch smalls. This little snowdrop cross-stitch was one I stitched many, many years ago and it sat in my workbox waiting to be made into something. I finally got round to it this year, it’s made a very pretty mini pillow.
As you can see I have had my ducks for quite a while too as their backs are covered in moss.
A sharp hoar frost can look beautiful, highlighting every leaf and blade of grass.
This little chap was quite happy in the cold weather, he lives at Harewood House in the bird garden.
Final photo goes to Rosie and Lucy, enjoying a walk in the snow up the garden and out onto the back lane. Lucy has clearly decided it’s worth eating!
From being very young I always tried to instill into my children the idea that handmade gifts were treasured, they always made presents for Grandparents and aunts etc, it might be a tray of mince pies, or a decorated matchbox. I loved the paintings they turned into calendars and I still use a pinsafe Helen made me when she was about six.
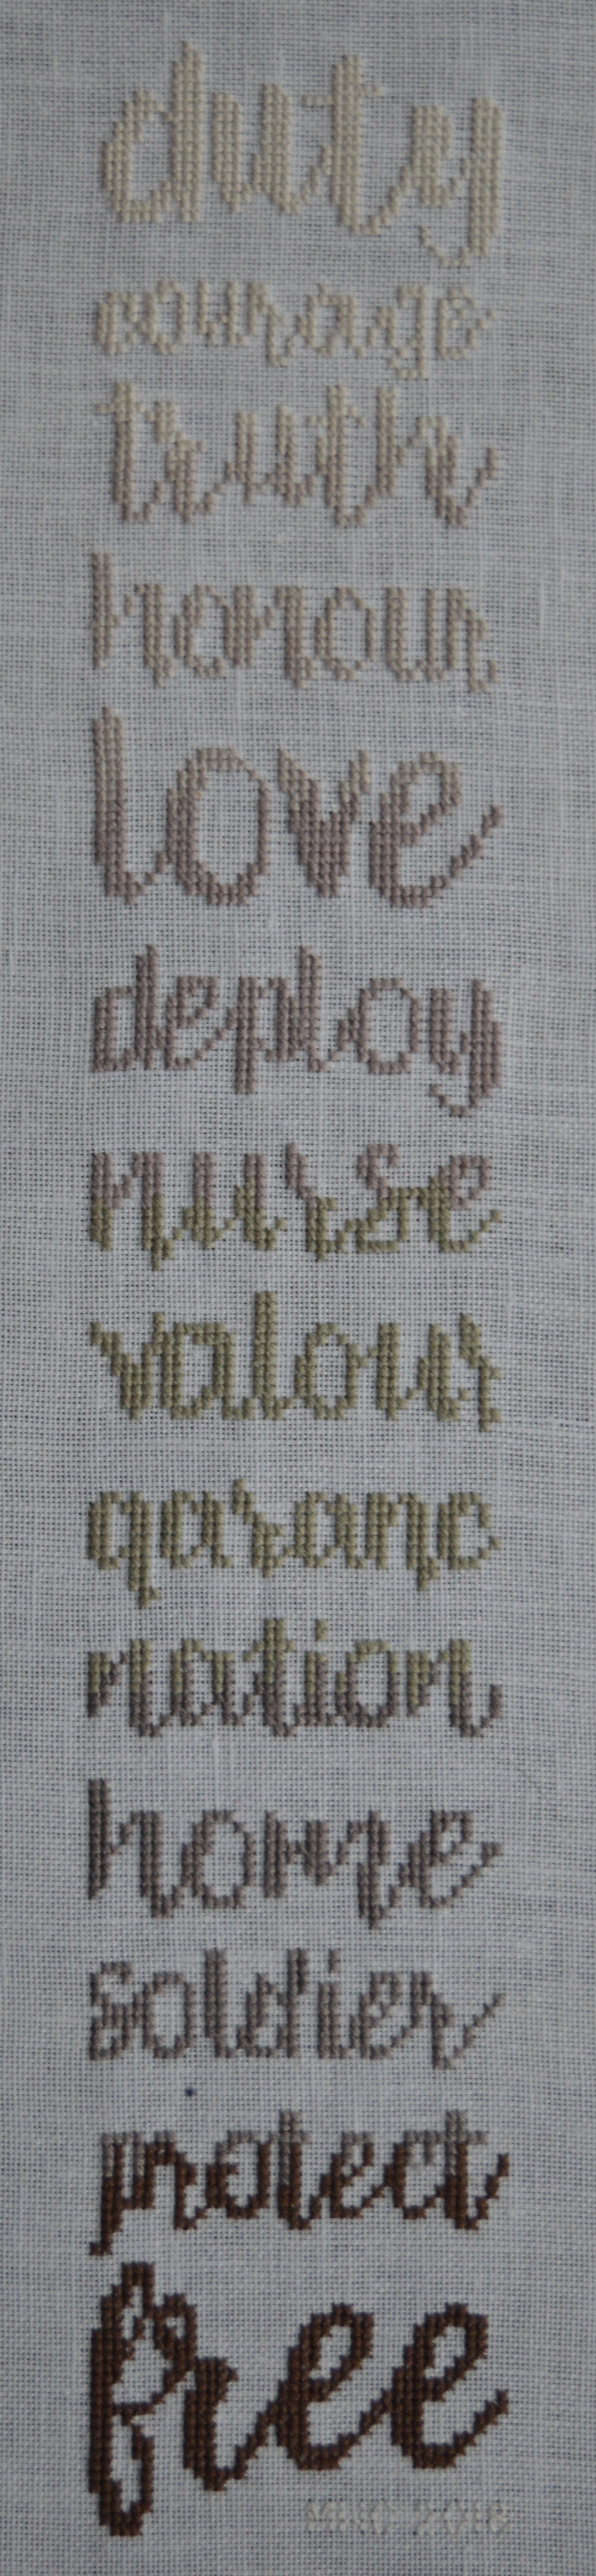
I try and make them presents each year, even if it’s just a little something. A few weeks before Christmas I happened by chance to find the Peacock & Fig website and their ‘Lest we forget’ collection. In amongst the poppies was a lovely design just called ‘To Serve’. It was perfect for my daughter Helen, she’s training to be a nurse in the Army. Now I’ve given it to her I can share it with you.
To Serve is described as ” a typographic art representation of what it takes to serve one’s country. These words are used constantly in unit and training mottos, and are at the very core of the military ethos. To serve your country and your community is a position of great honour, and also of great sacrifice.”
I love the simplicity of the design, the colours are based on the desert camouflage colours, blending gradually from ivory to dark brown. I adapted the pattern a little to personalise it. I changed the spellings to the English way with the addition of a couple of ‘u’s, I left out ‘airman’ and ‘sailor’ and added nurse and qaranc. Yes that’s the word you were all wondering what it said! Queen Alexander’s Royal Army Nursing Corps.
I took it down to Artworks in Otley and they framed it in a soft grey/brown frame which works perfectly. I was really pleased with it and Helen loves it, it’s already hung on her bedroom wall!
When it came to opening my presents I had a lovely surprise. Helen had made me a patchwork cushion! It’s gorgeous! I was so impressed as she hasn’t got any quilting equipment down at Uni, in fact I don’t think she’s ever done patchwork before, just watched me occasionally!
She cut out the triangles using scissors and a homemade paper template! She made a different design for the front and the back and just worked it out as she went along, learning from her mistakes and unpicking it and restitching it until it worked! It’s beautiful and I love it, it looks great on my favourite chair.
When we went round to my son’s house for Christmas dinner, I found he was also making me a present, it’s not yet finished but it hopefully won’t be long. He’s in the middle of making an oak dining room table with a ‘river of blue resin’ running down the middle. From the pictures I’ve seen it’s going to be stunning. With two of the smaller pieces he’s making me a chopping board, though it will probably be too precious and beautiful to chop veg on, it might become my special cheese board.
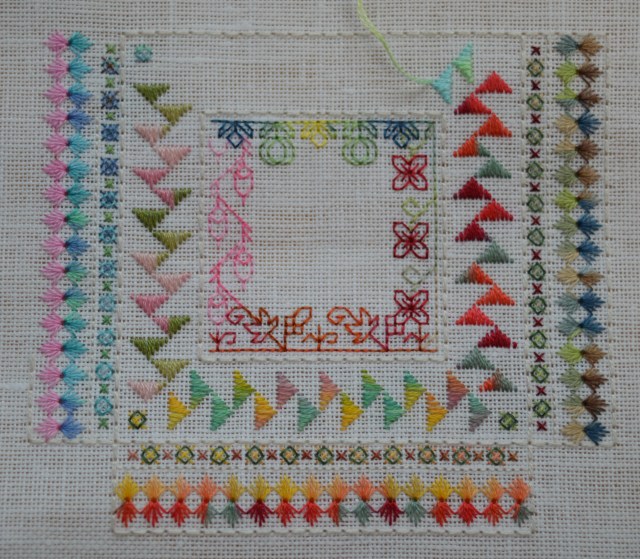
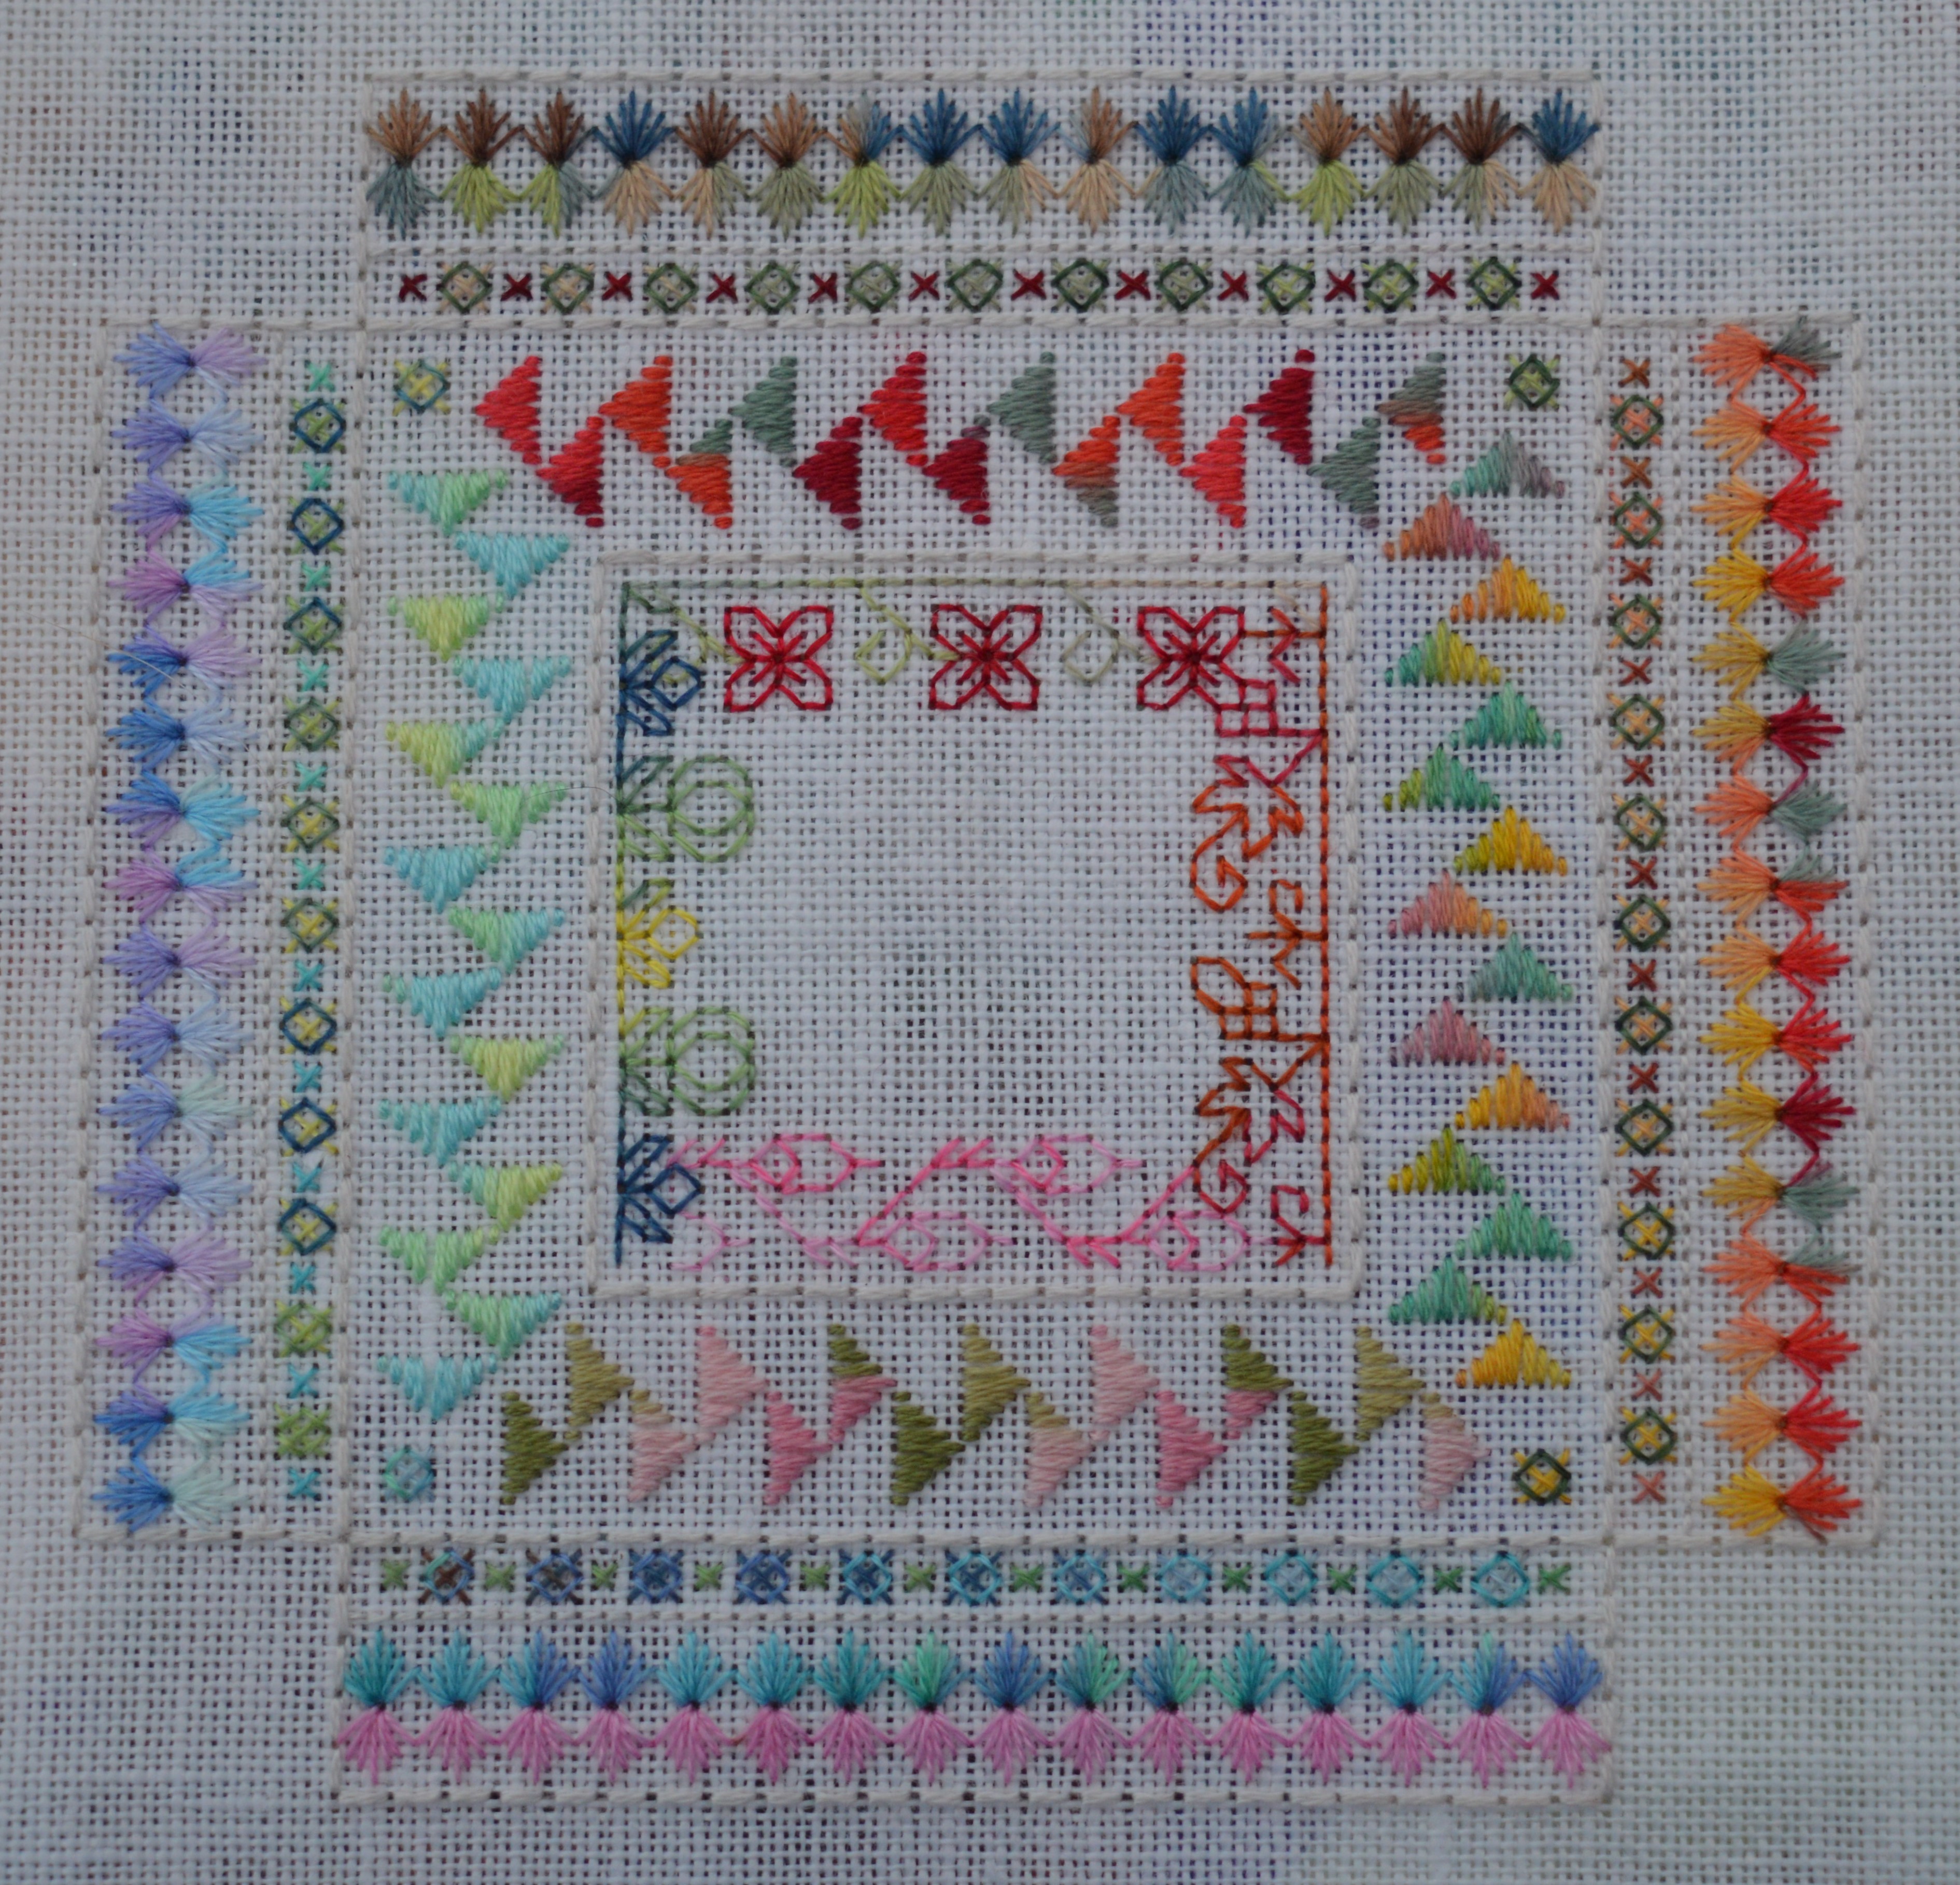
It’s three weeks since I last showed you my Tall Year Square Etui, it’s a design by Betsy Morgan which I’ve been working on for what seems like ages! Well I finally feel I’m almost there!! Three weeks ago I was just finishing the lid…
I’ve made a concerted effort to get the stitching finished and I’m almost there. I completed the lid, each quarter is a different season, they are not all exactly the same colours as the sides but I think they blend well together.
I back-stitched round every piece, that’s four sides and four pin cube sides. I found that my counting at the beginning wasn’t perfect so spring and summer are an odd thread out here and there, some I’ve left, some I filled in where a line was a stitch too short and some shouldn’t make a difference, like a side being one thread taller! I found the charts very difficult to read at first as they are written completely differently to a standard cross-stitch chart. Usually each square represents one stitch and the symbol is in the middle, with these charts each line is a thread of linen with the stitchlines drawn in colour. It clearly took me two seasons to get used to how to read them! I think the summer stitching below is the most off, but at least the frogs now have their googly eyes 🙂
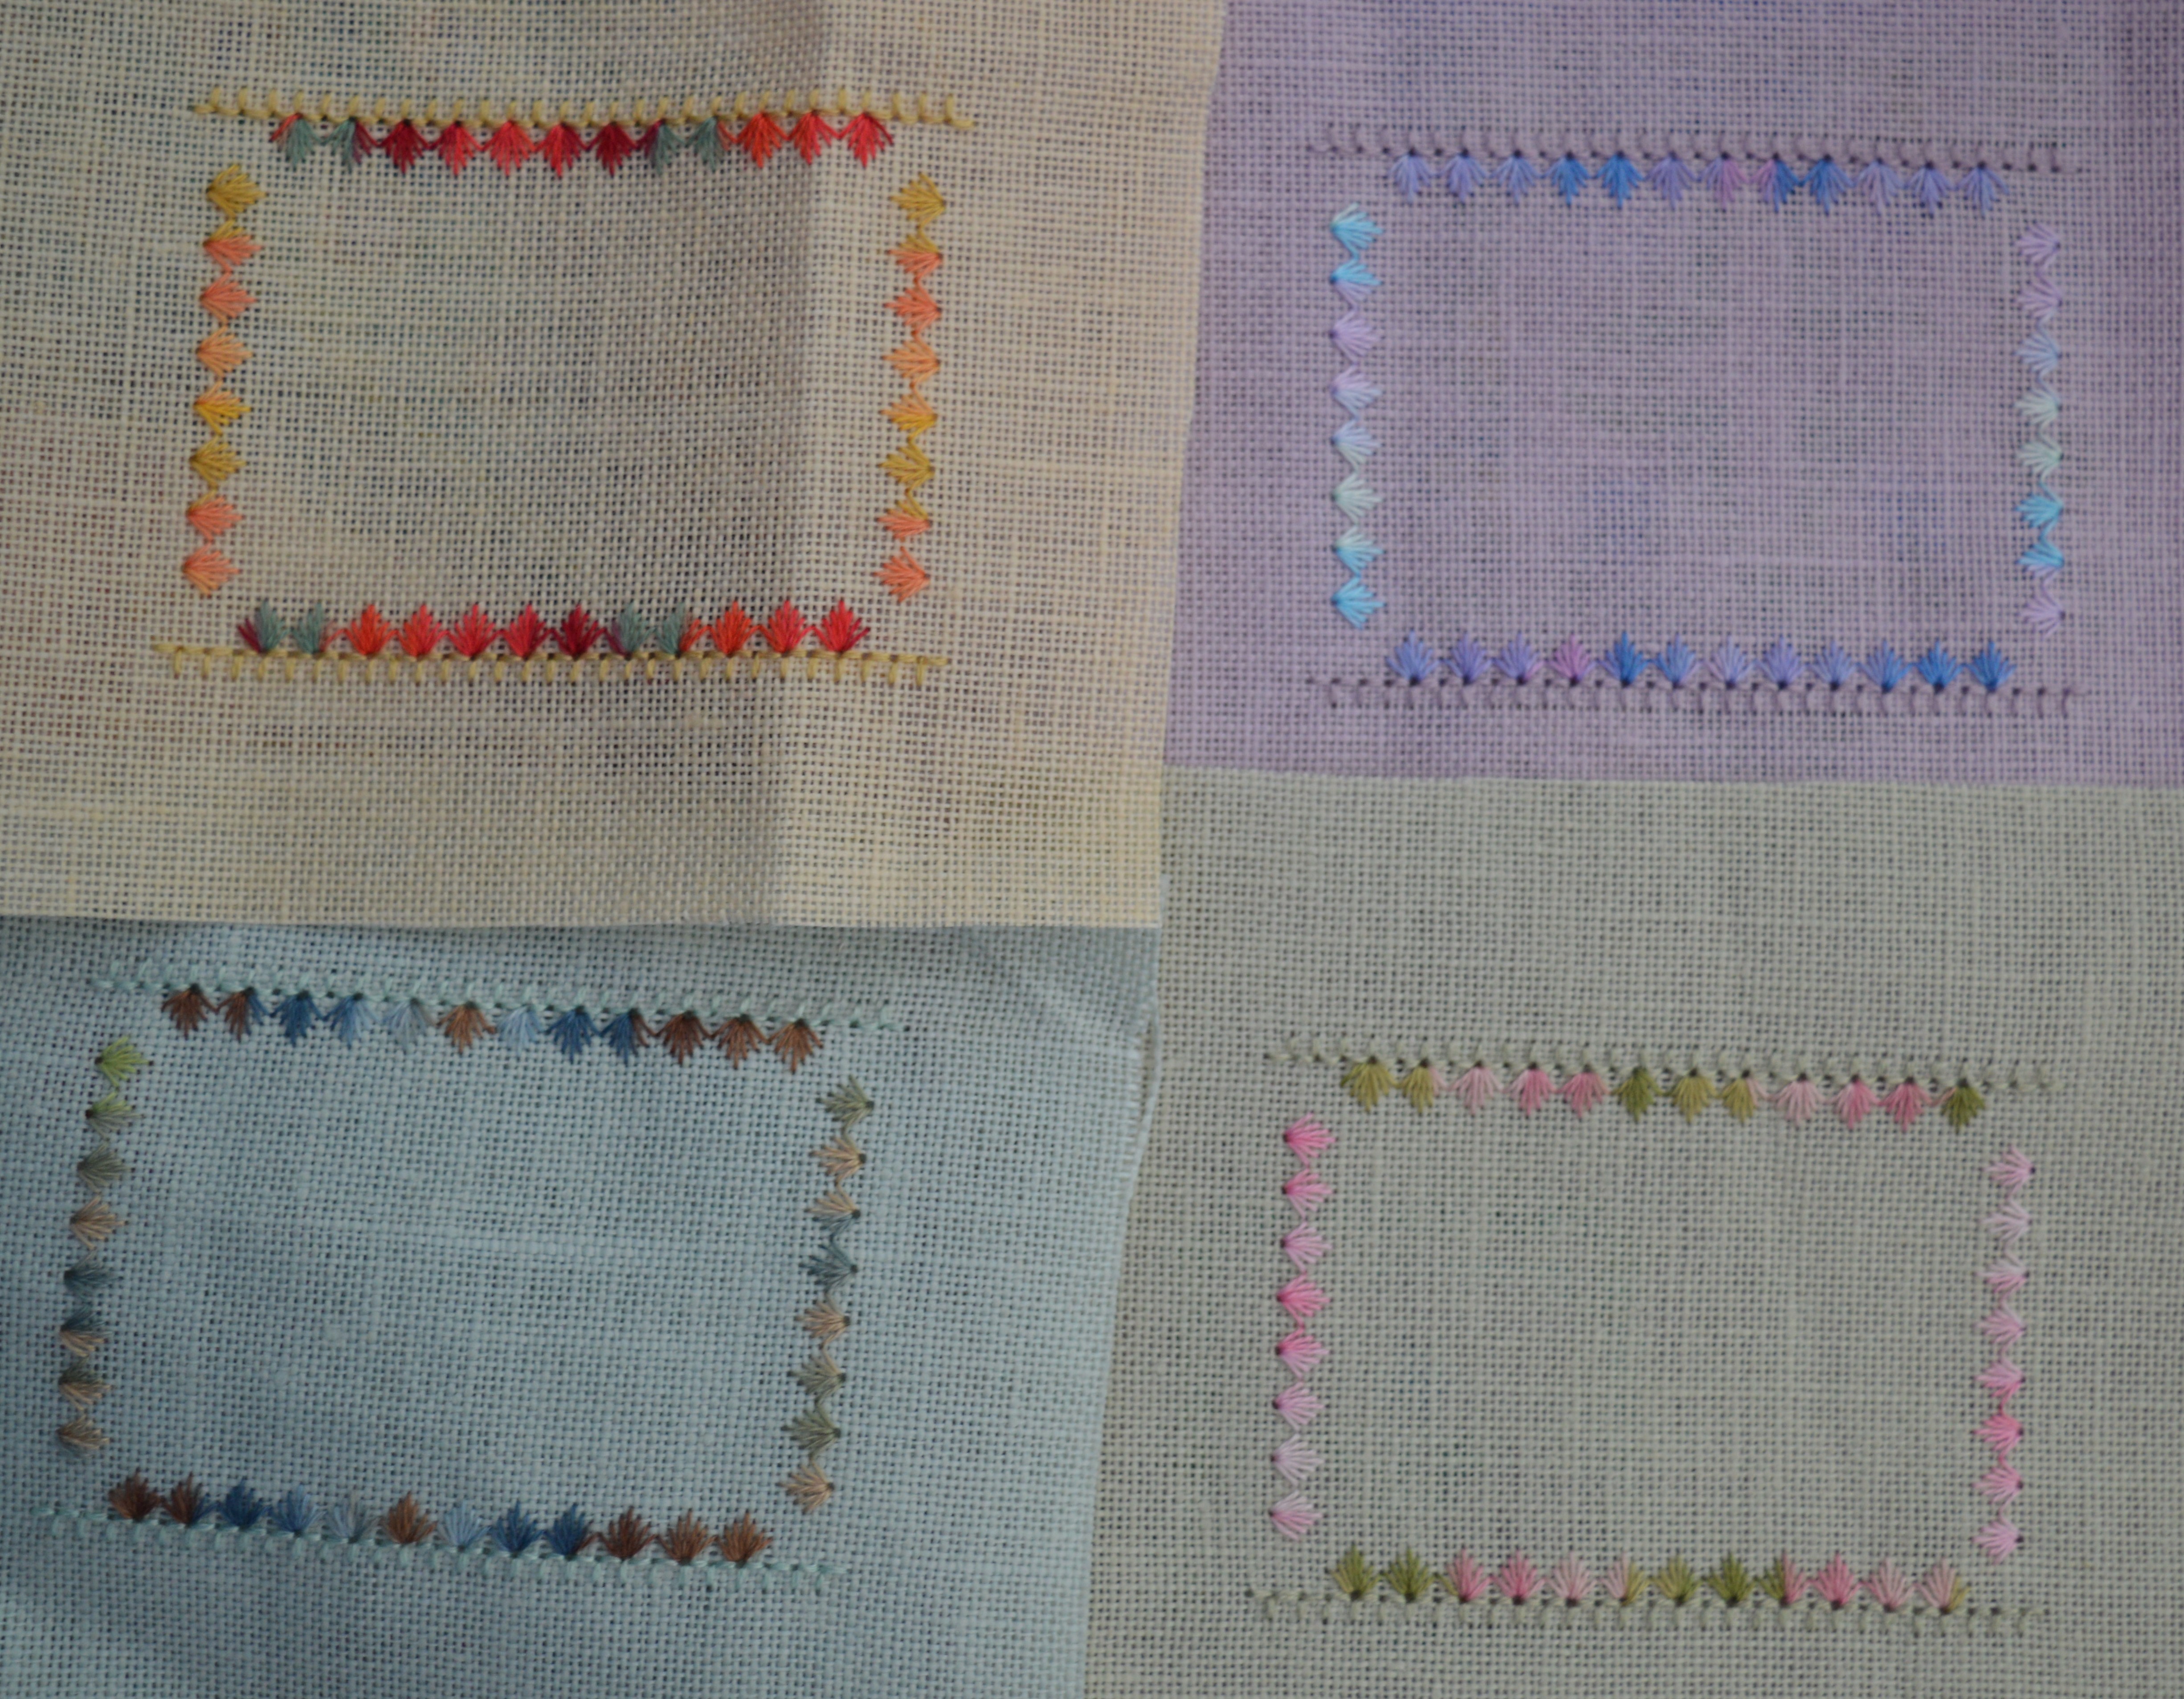
As I back-stitched each season I also stitched the inside pockets, these were fairly simple to do with nun stitch top and bottom and the pretty border stitch all round. A couple of these still have a little more stitching to do but I have to wait until I’ve interfaced the back of them for extra stabilising.
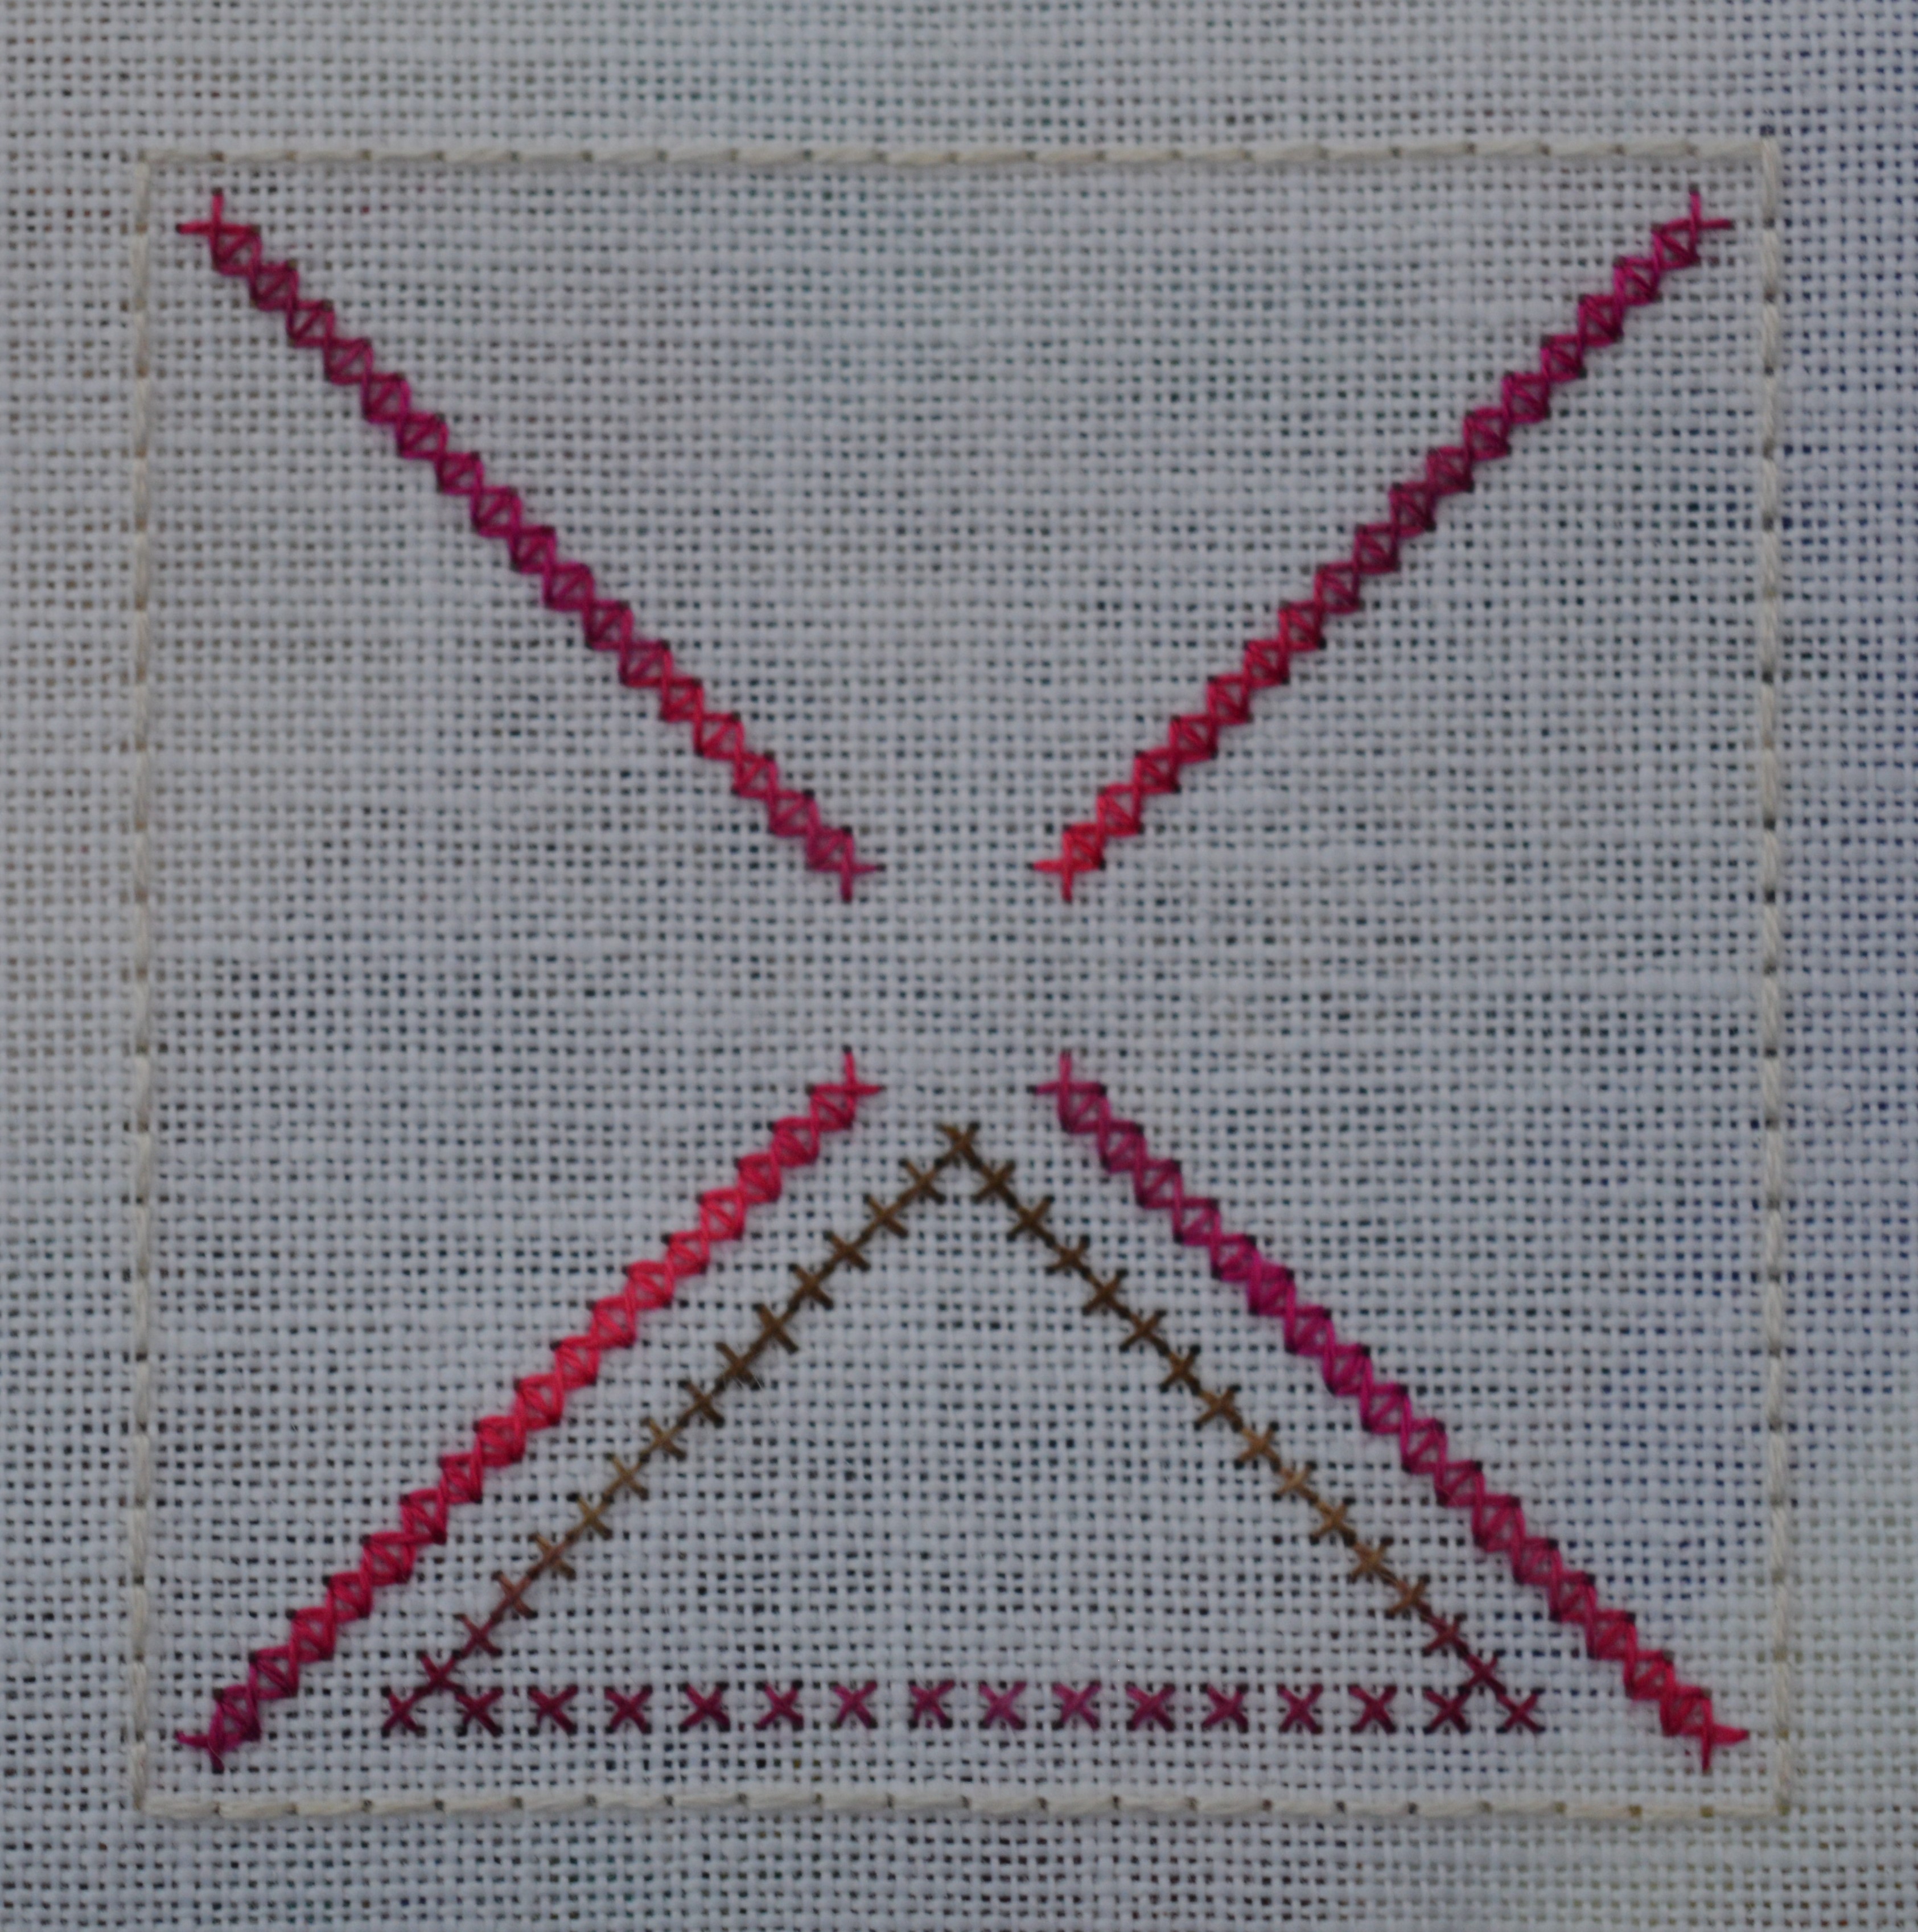
I’m stitching the base at the moment, I was briefly tempted to leave it plain, as it’s underneath anyway. Luckily I thought better of it, as I rather like it now. Betsy suggested just picking our favourite colours for the base, so that’s what I’ve done. I can put my initials and the date in the triangles too. Once that is complete I just have the pincube top to stitch which is only little so it shouldn’t take long.
Then comes the scary bit of constructing it all! I’ve bought my buttons and various interfacings and interlinings, I’ve had a read through the instructions, fingers crossed it all comes together 🙂
This stitch along is organised by Avis, we post our progress every three weeks which is a great motivator! If you would like to join us just drop her a line. Please follow the links to see what everyone else has been stitching.
It’s the penultimate photo challenge today, it’s organised by Postcard from Gibraltar and today’s theme is Star…
This was the first design for the Christie SAL by Faby Reilly, she often uses embroidered stars to embellish her designs. I added three onto the red cotton to bring it all together.
These are some cards I made last year when I was demonstrating at a mini work-shop last Christmas, I love the light and depth of colour you get with silk paints.
She’s out of focus in this picture, but behind the bells decoration I made last year is a tiny cute wooden angel, sitting on a start with an even smaller star hanging underneath. Of my little wooden decorations she is one of my favourites, she’s probably about 30 years old…is that old for an angel 🙂
More Faby Reilly designs with lots of stars using different stitches. This is the mistletoe humbug and the holly humbug I made over the last couple of years.
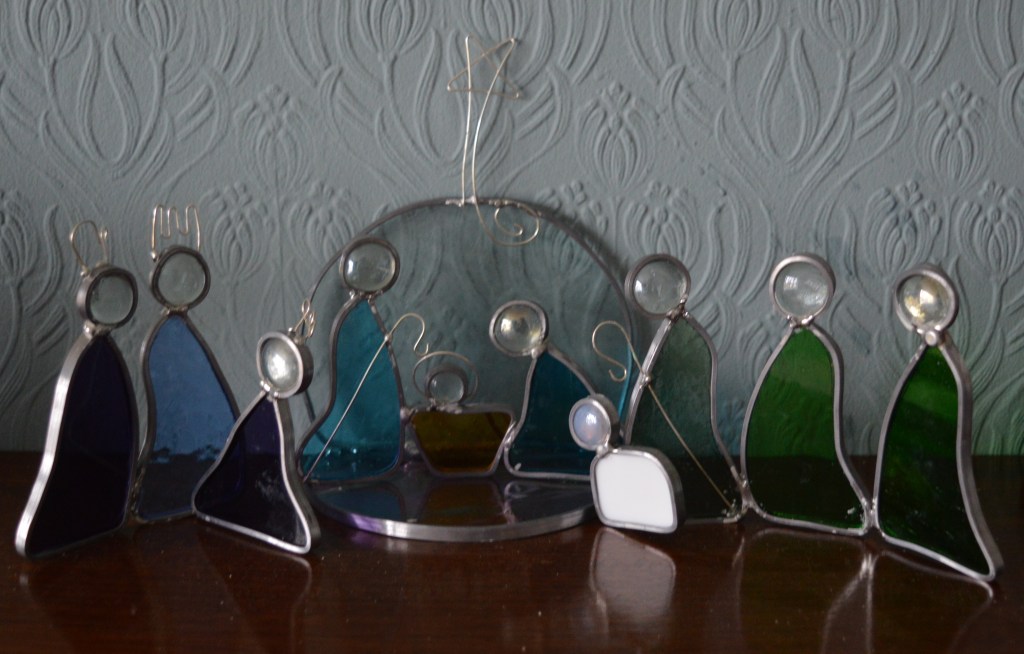
This is the stained glass nativity I made last December. I made the satble and then decided I wanted a star, so I fashioned one from silver wire and soldered it on.
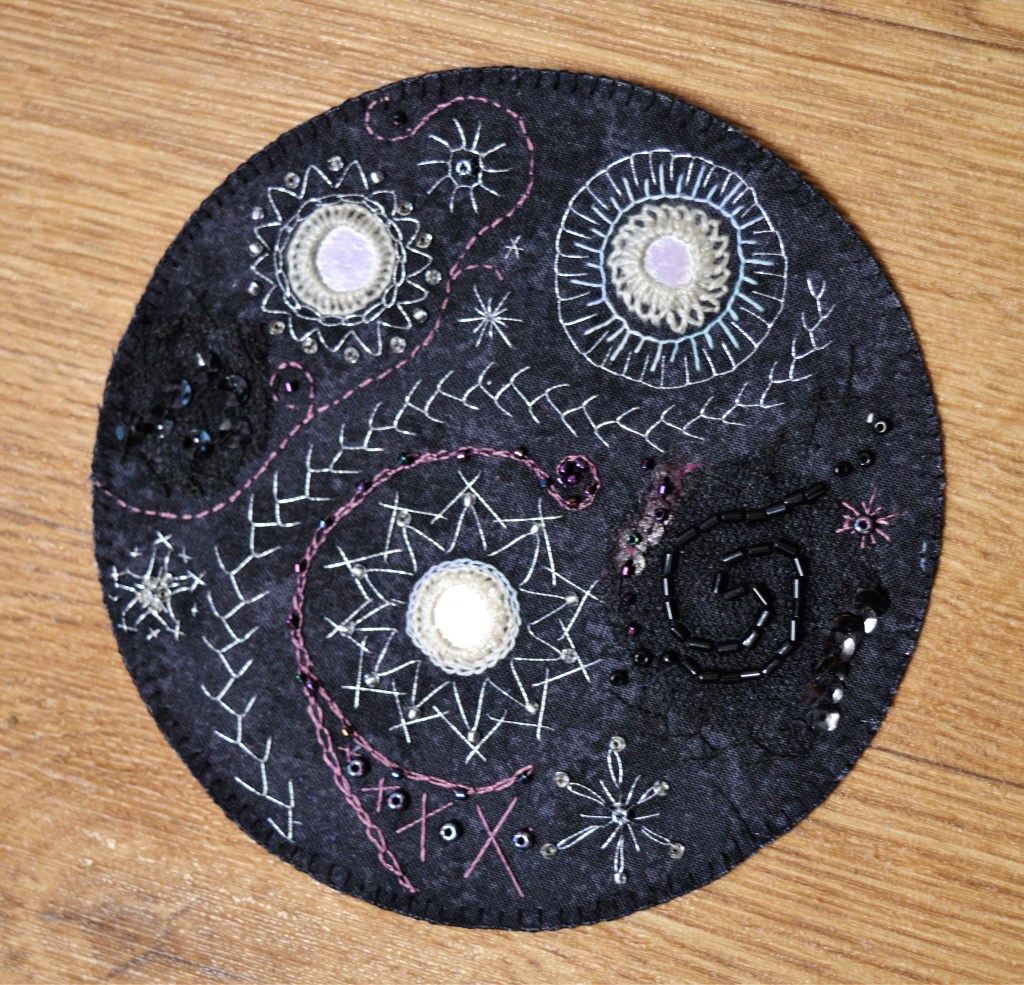
This is the nearest I’ve got to actual star embroidery, A couple of years ago for a Travelling Sketchbook project with my Embroiderers Guild I had to do something on the theme of Astronomy. After much searching for inspiration this is what I came up with. It’s made of shisha mirrors, metallic embroidery threads and beads.
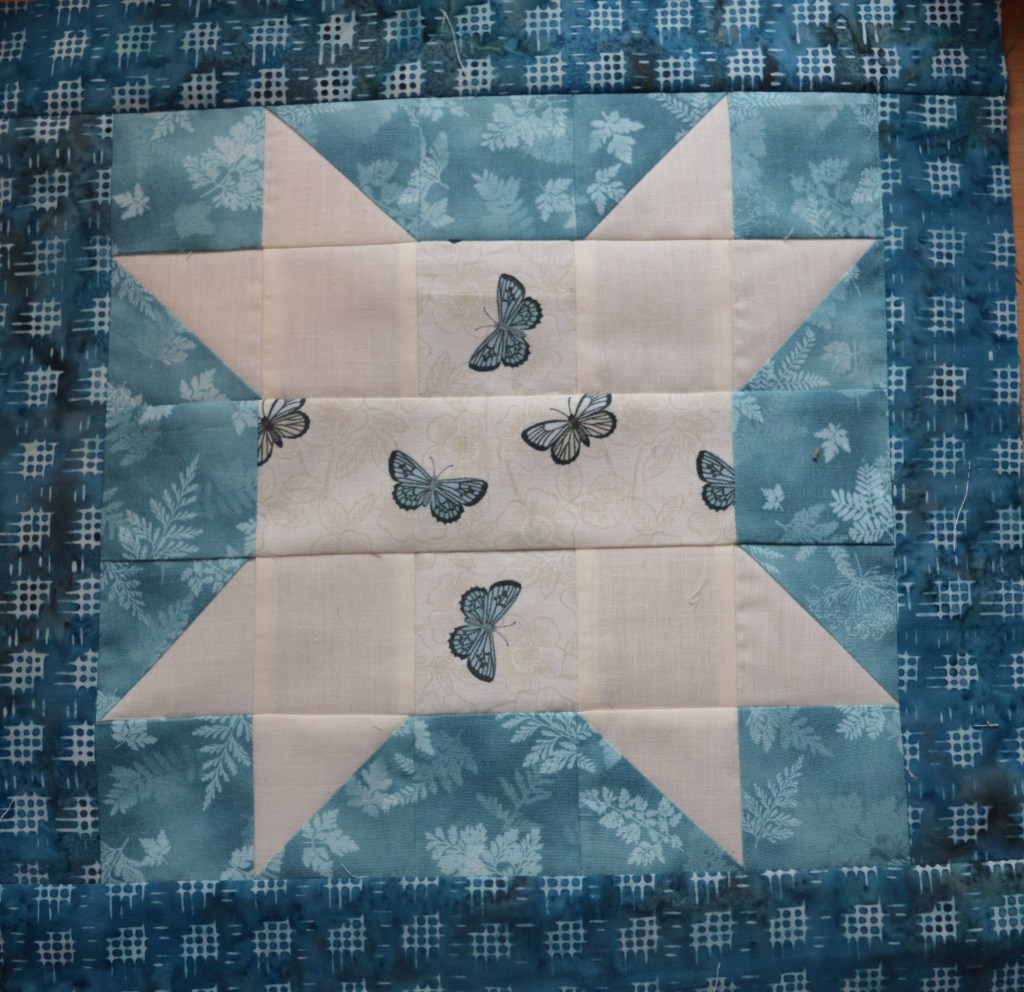
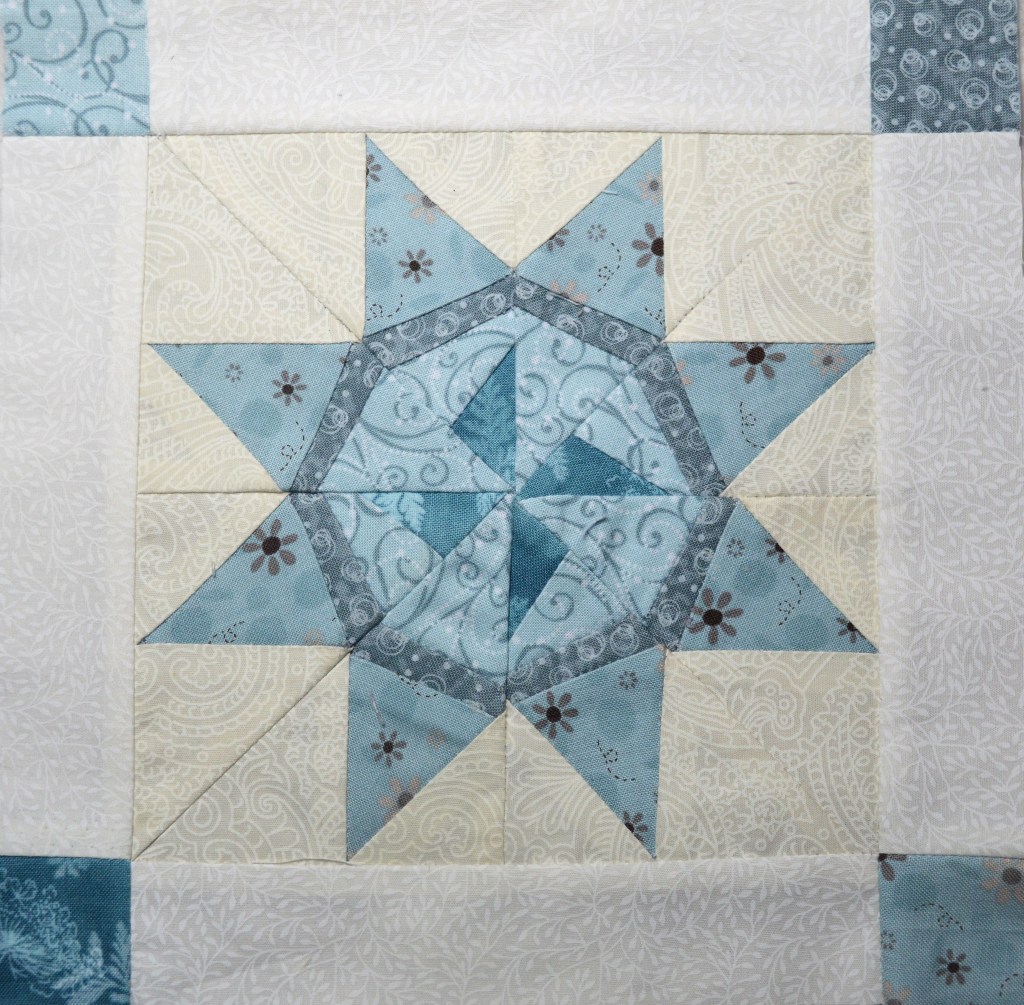
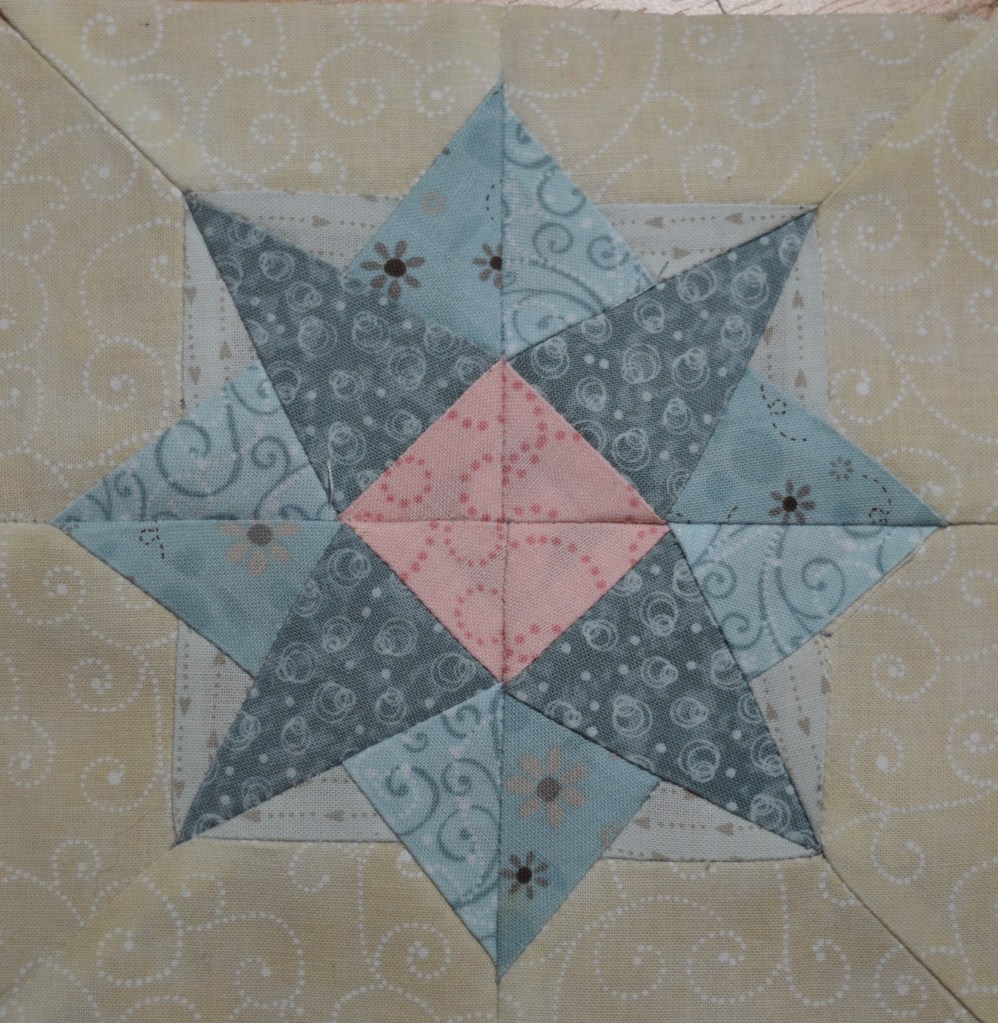
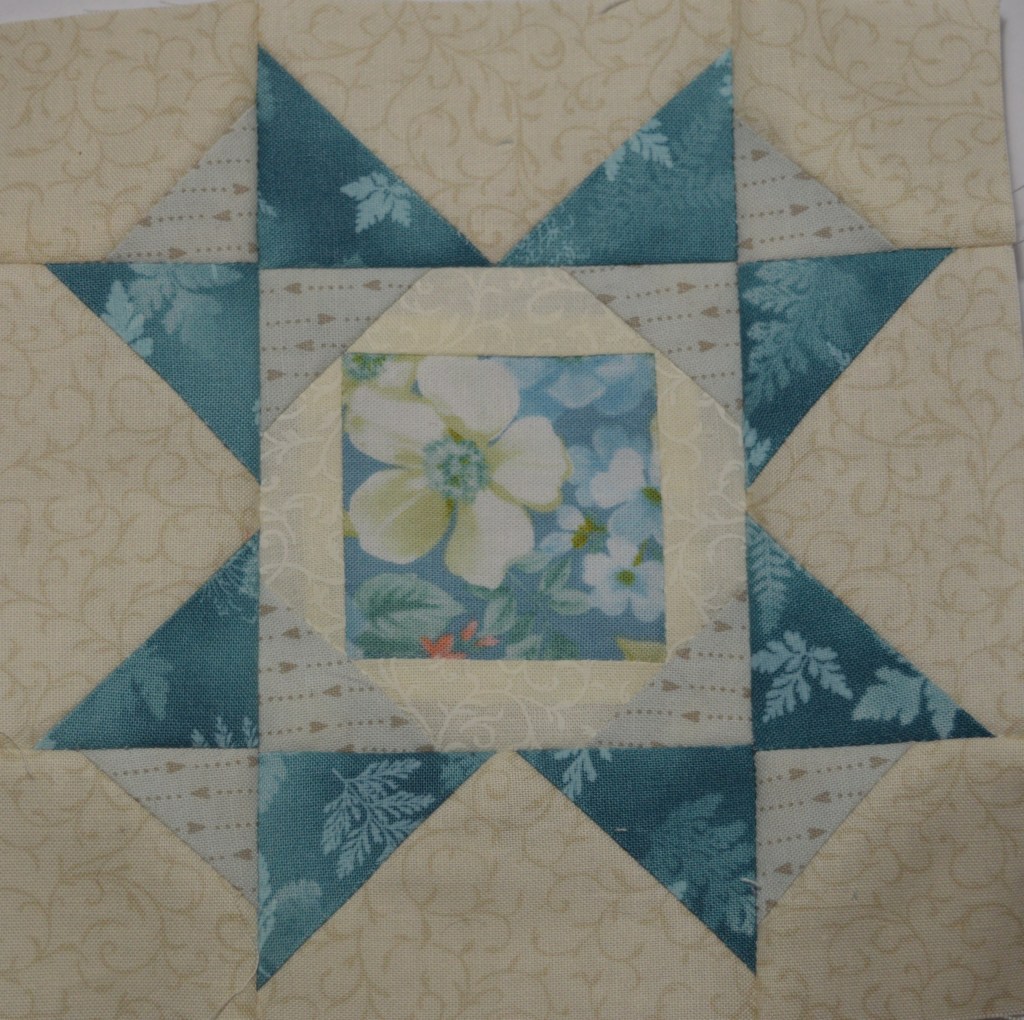
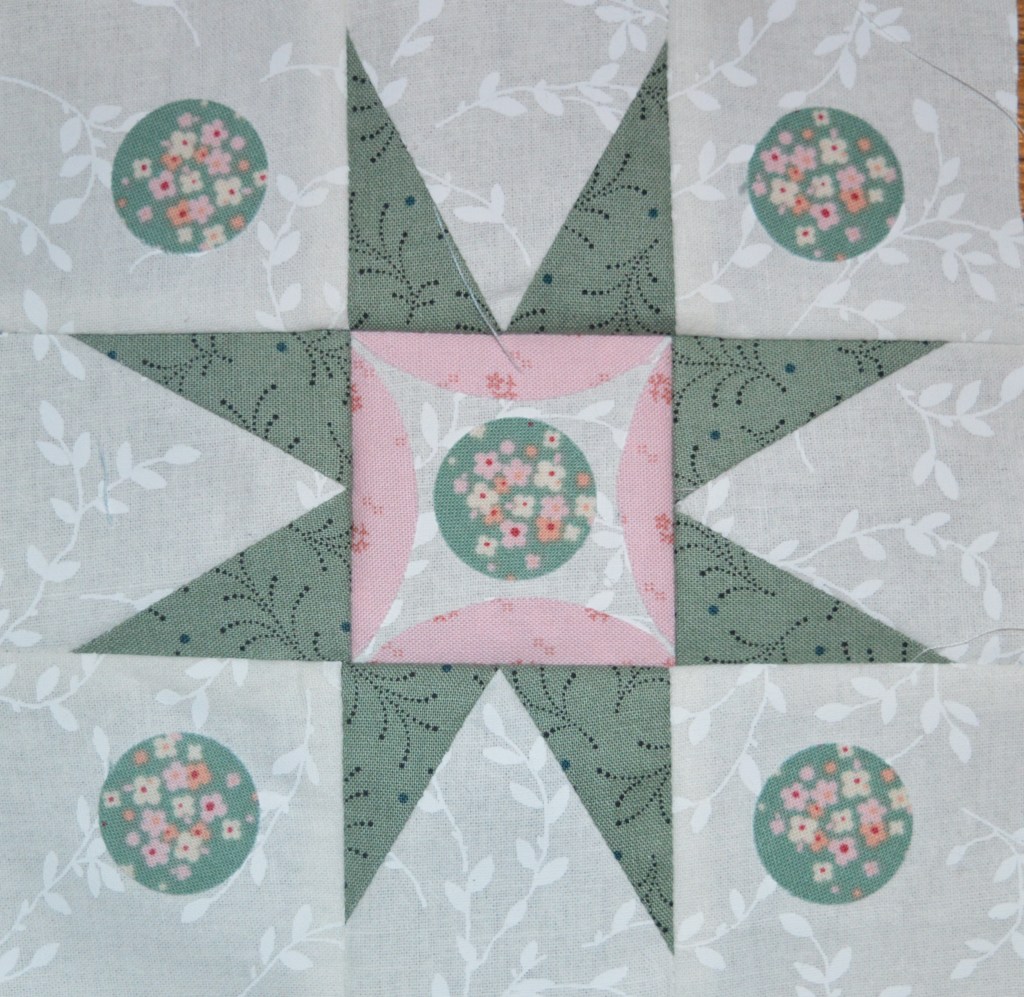
Of course many quilt blocks make stars, either intentionally not or, most of these are from my first Splendid Sampler quilt
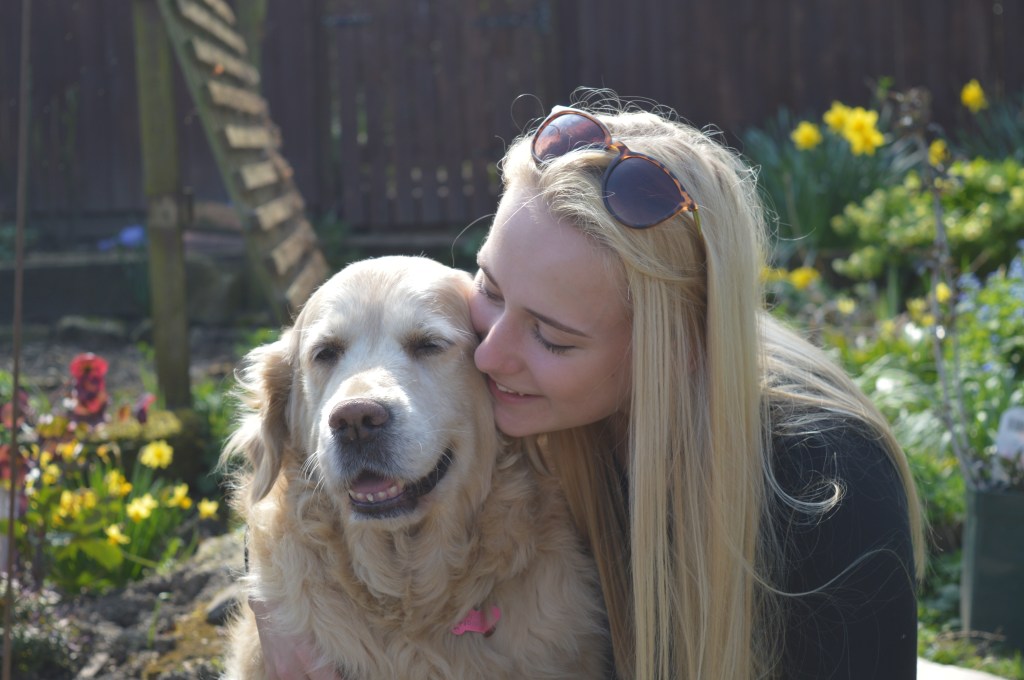
I decided to finish with photos of the stars in my life, my family, my dogs and my friends…
A good month ago I made my Christmas cake, here in the UK a rich fruit cake is traditionally used for celebrations, be it weddings, Christenings or Christmas. I usually make an 8″ one which takes about four hours to bake. It’s dark from using soft brown sugar and dark treacle and is full of dried fruit, mine has about 2lb of raisins, currants and sultanas, soaked for at least a day before in sherry! Once made they are wrapped in tinfoil, popped in a tin and left to mature. My sister feeds hers with brandy during this time too, so you can’t eat her cake and drive!!
The traditional day for making the Christmas cake and puddings is Stir-up Sunday, this is the last Sunday before Advent begins so it’s just nicely a month before Christmas. It’s called Stir-up Sunday because in the Book of Common Prayer the opening collect for the day is “Stir up, we beseech thee, O Lord, the wills of thy faithful people.” I seem to remember my mum making her cake on Stir up Sunday, we all had to go in the kitchen to stir the mixture and make a wish!
James, my son, asked me to make him a cake about two weeks ago, a bit late but it should still taste OK. I finally got round to decorating them this weekend, I had a good session on Sunday decorating two gingerbread houses and two Christmas cakes!
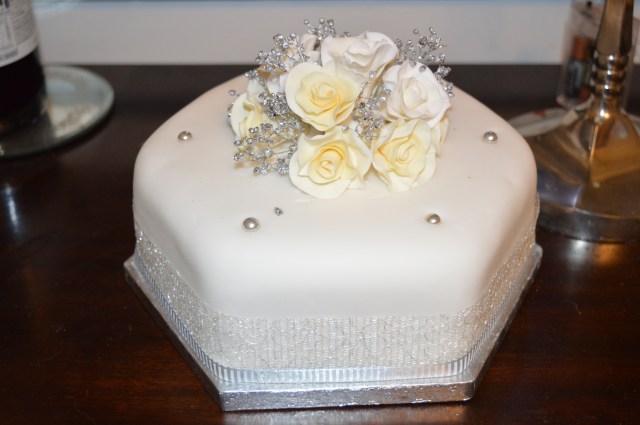
Rich fruit cakes have to be covered with marzipan first, it’s meant to be stuck on with apricot jam, I forgot to get some so I used marmalade instead – no one will notice! Once the marzipan is smoothly covering the cake then it can be covered with icing. I usually use fondant, it doesn’t taste as nice but it’s a ten minute job instead of several hours to coat smoothly with royal icing. Then it just needs decorating…
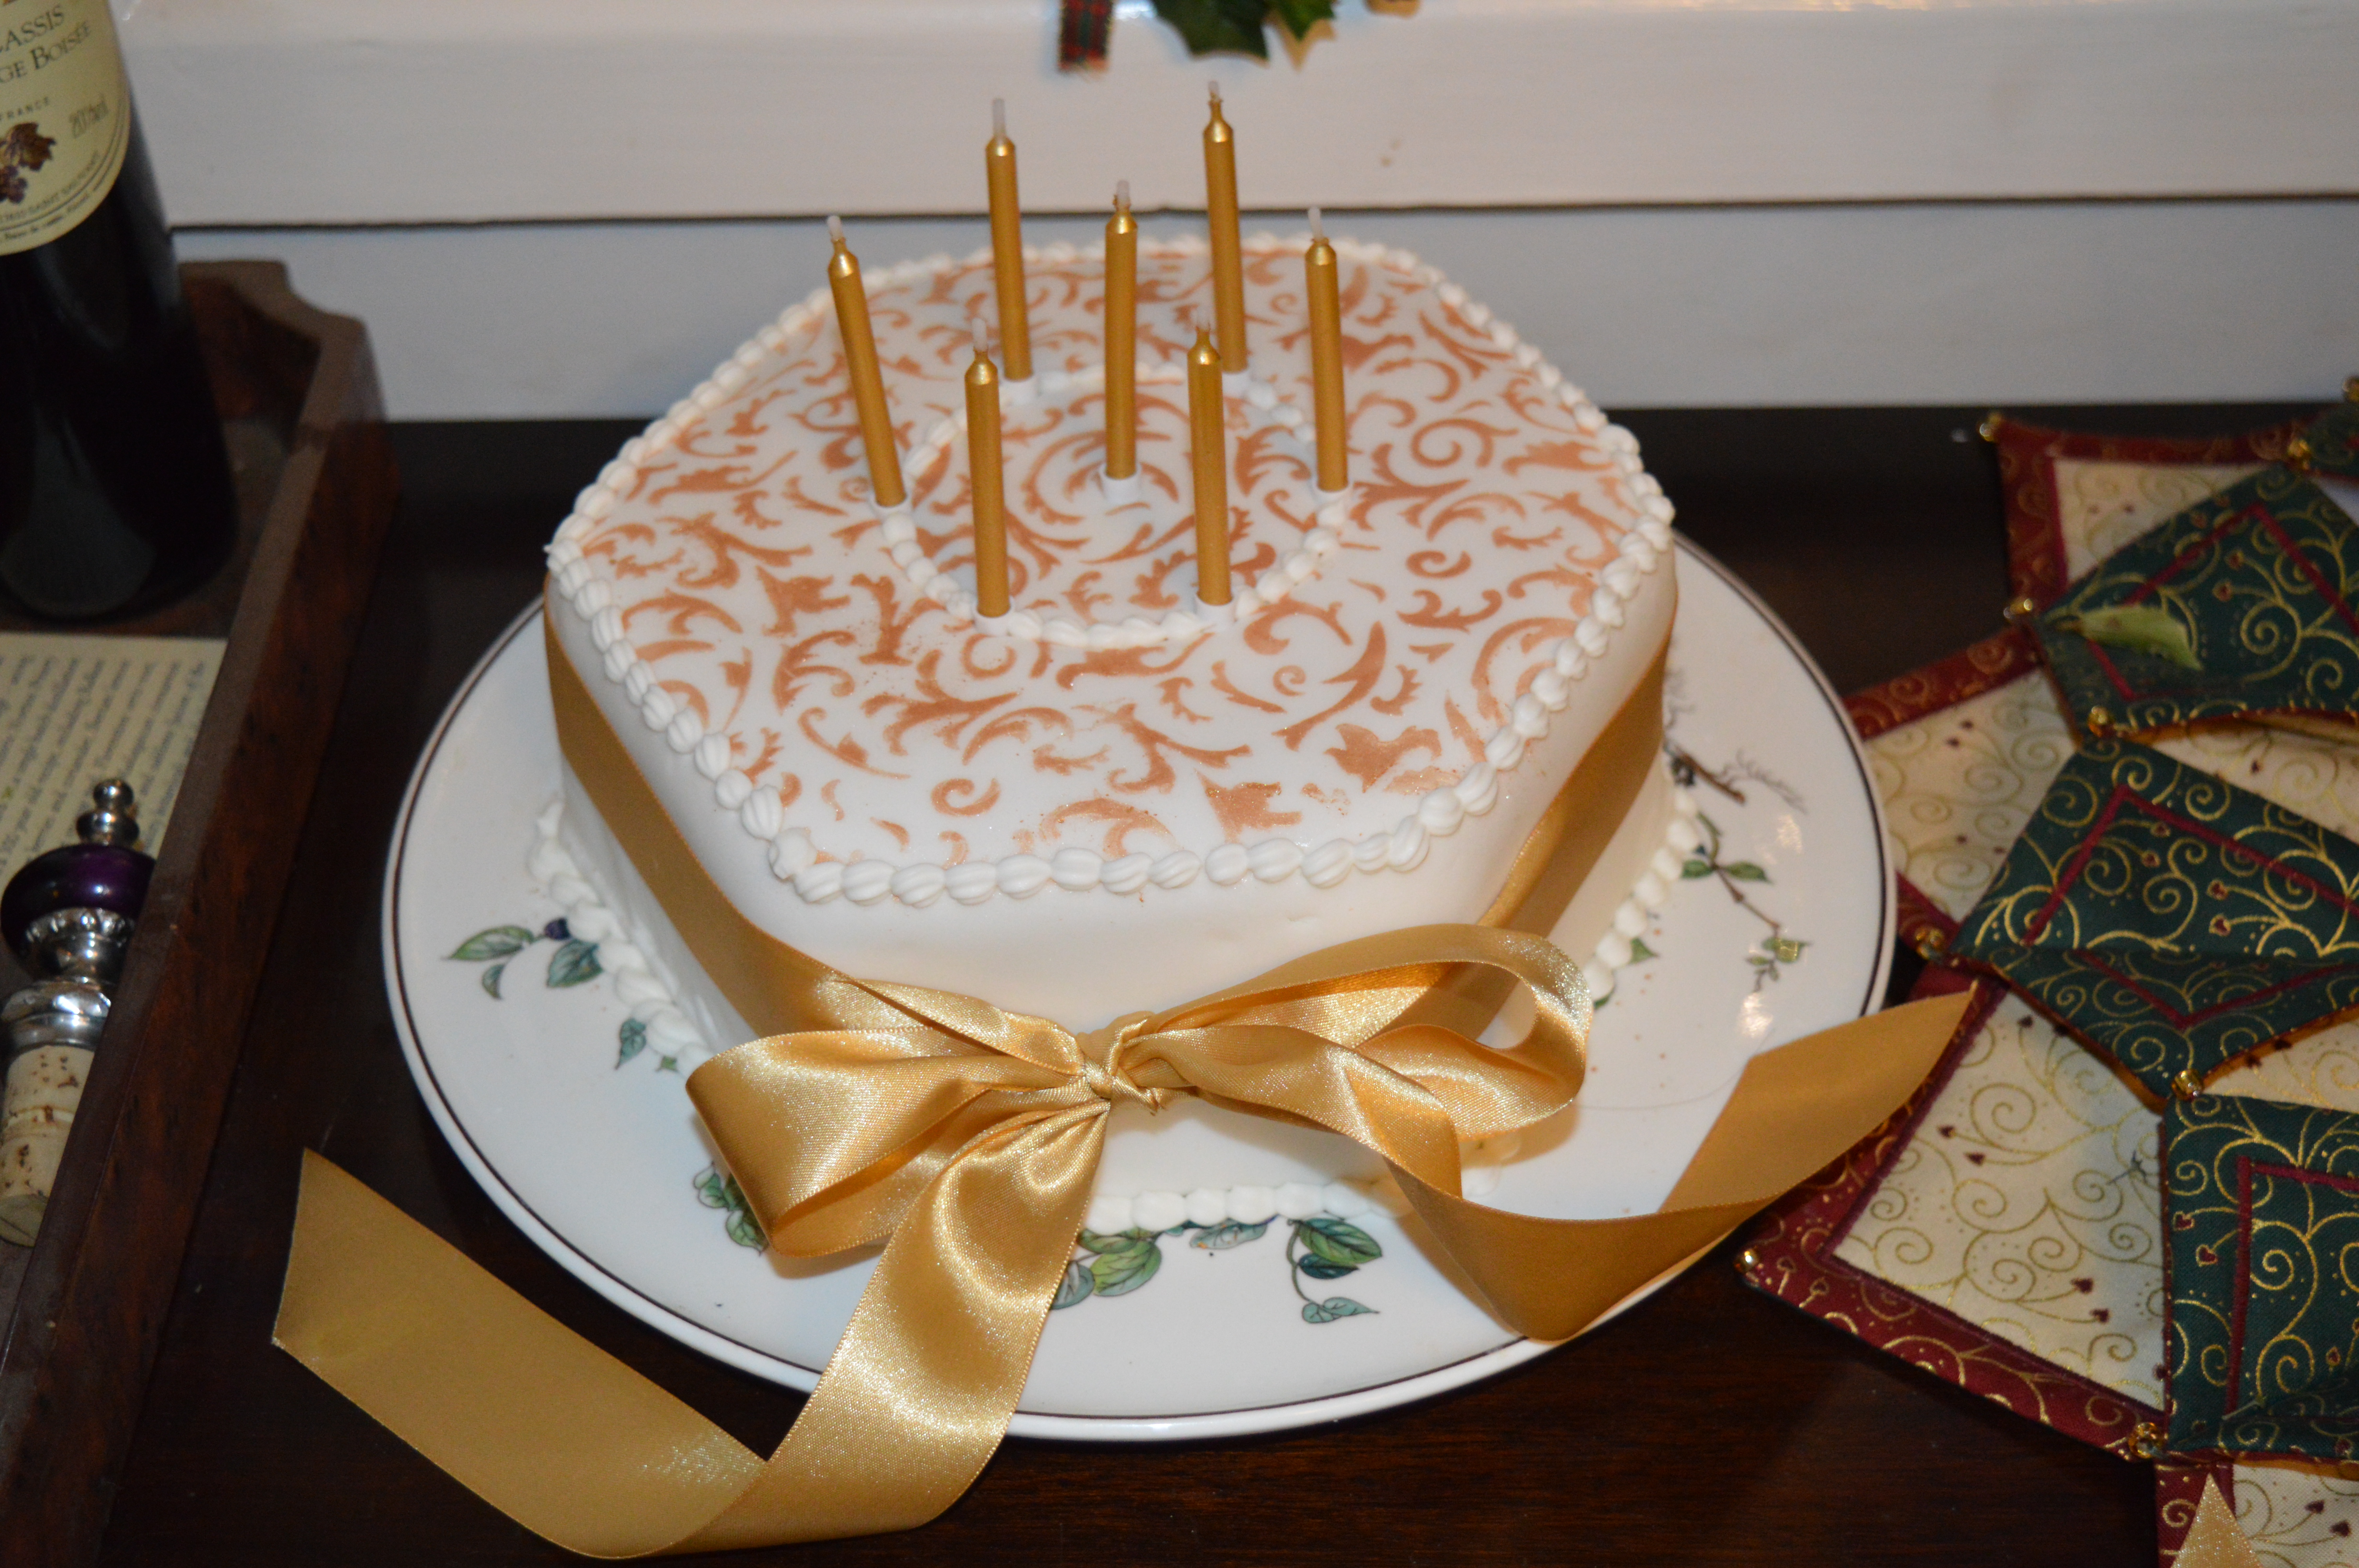
I needed something fairly simple as time was of the essence, I decided to use a stencil I bought a few years ago. It has like a filigree pattern on it, you just lay it on, go over it with a rolling pin and then without moving it dust the cake with a metallic dusting powder. I used a fine brush to start with as it was handy but the brush kept slipping under the stencil, so I changed to just wrapping some kitchen roll around my finger and dabbing the powder on. I did James’s in silver and mine in an antique gold. I did have to laugh as my OH thought I was being really clever painting the design on…until he saw the stencil in the washing up bowl!
I knew I had some candles left from Helen’s birthday cake so I made a gentle circular imprint and arranged the candles around the circle. I completed James’s circle with some large silver draghees. Having broken a tooth on a biscuit just two days before I decided to pipe a circle on our cake, I didn’t fancy my chances with the silver balls!! Somehow the filigree on James’s worked out better, maybe I just prefer the colour, anyway I decided the gold one needed edging with a line of piping. The ribbon round the sides just finishes them off nicely.
It was only when I tried to find a gold ribbon in my stash that I realised my cake was more of a rose gold. The usual gold ribbon just looked tacky! I did a quick visit down tot the cake decorating shop and they had just the right colour…
I’ve been decorating gingerbread houses for years, I used to do about 15 to order, it helped pay for Christmas! I used to get the gingerbread houses flat-packed from Ikea but a few years ago I discovered the local supermarket sold them, not only were they cheaper, they tasted much nicer too.
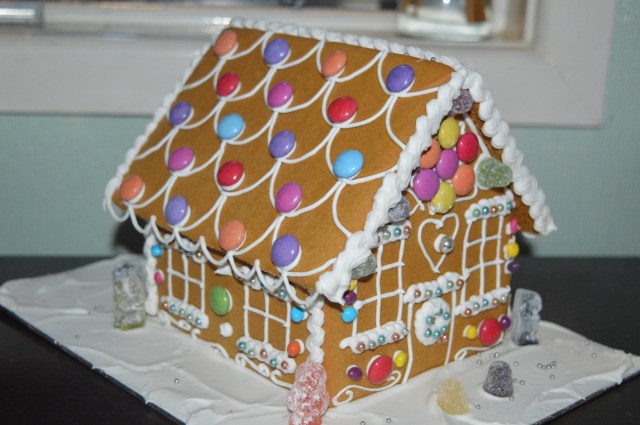
I always decorate them flat and then put them together. James wanted sweets on his, so I used the sweets that came with the houses. The decoration of these houses changes each year, a new feature this year was icing their initials above the door which I think looks rather cute.
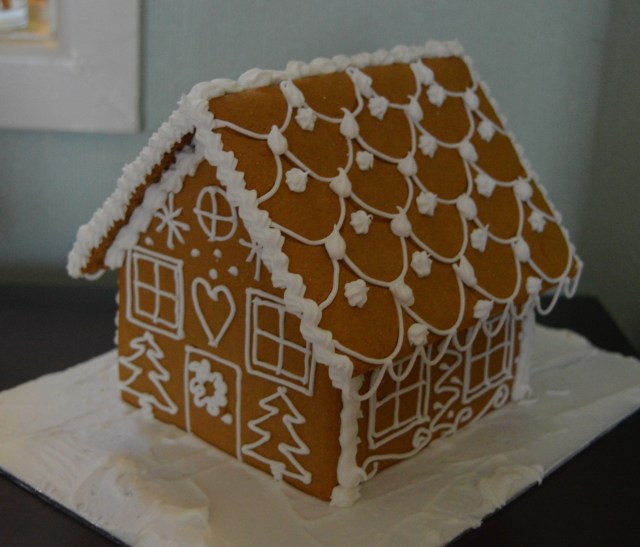
I like our house just decorated with white icing and the occasional silver draghee. I think they look beautiful and delicate. The design is made up as I go along, even if I’m not sure about one bit I have to keep going to make it match, then maybe add something else to make it work. My favourite bit this year is the roof, I love the way the tiles have worked out. The hanging loops are actually a lot easier than they look, the knack is to have the royal icing the right consistency.
We have a rule in our house that the gingerbread house can’t be started until Christmas Day evening! When I used to use the Ikea gingerbread houses I made lattice windows in icing, so the first things they always did was to put their fingers through the windows!
I think I’m just about ready for Christmas, cards are written and posted, presents wrapped. I would just like to make some mince pies this weekend. I’ve got a truckle of Wensleydale cheese ready in the fridge too to eat with our Christmas cake, cheese and Christmas cake is just the best!!
On Monday it was my Embroiderers Guild meeting, we usually spend the morning stitching our own projects so I always pack my box the night before with whatever I’m planning to stitch. I decided to crack on with my Etui box, stitching outlines and inside pockets, I sorted out the flosses and linen so I was all ready. At the last minute I threw in a little scissor fob kit.
It was a good job I did, as when I sat down to start stitching I realised I had everything apart from the magasine with the instructions in!!
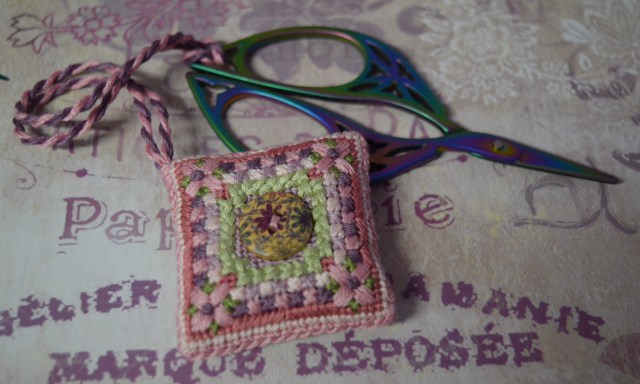
Out came my little kit! It’s one I bought at the Knitting and Stitching show a couple of years ago, it’s one by Sue Hawkins, she always has a wonderful display of needlepoint smalls.
I nearly fell down at the first hurdle – I couldn’t follow the instructions on where to start on the canvas, I even got someone else to look at it! In the end we decided it was only little so I could wing it and just start where I thought!
The rest of the instructions were fine with clear charts and diagrams. I learnt a new way of starting thread by having the loop of a double thread underneath and passing the needle through, a neat way of starting!The mint green border is stitched in long armed cross stitch, I’m still not sure about the way it goes round the double corners but she did provide very clear instructions on how to do it.
The front and back were stitched with two threads in between and didn’t take long at all, after a day at Embroiderers Guild and a morning visiting my mum I was almost there so I just cracked on and finished it…
The two sides are stitched together using long legged cross-stitch. I’ve used it before for joining needlepoint and it does make a nice textured finish. I wasn’t sure how to go round corners so I just added a couple of extra stitches to make sure the canvas was covered. I used my cord-maker to make the loop for the fob, stitching it in as I went along. After stuffing it quite firmly I had a pretty little scissor fob.
The finishing touch was two very pretty buttons attached either side and pulled firmly to dimple the fob – easier said than done!
So within about three days my scissor fob was finished, all ready to attach to a pair of embroidery scissors. Of course I have quite a few to choose from but I decided on my newest embroidery scissors. I think they look very pretty together.
Last weekend I finally got round to decorating the house for Christmas. We usually get our tree about two weeks before Christmas as it’s a real one so if we get it too early the needles drop off before the big day, and no one wants a bald tree on Christmas Day!
We have a bit of a tradition now of walking up to the local riding school to buy our tree, it used to be quite entertaining when the kids were smaller, three of us carrying it, trying to cross a busy road in formation! This year my OH came instead (he wasn’t going to put a Christmas tree in his new car!!) so he carried it back!
I love Christmas and all the decorations but it isn’t quite the same when you haven’t got little ones around, I did chunter a bit to myself whilst I was arranging everything that I was only going to have to take it down again in three weeks time! Luckily that feeling soon passed and I love all the Christmassy bits again!
I like to have a vaguely themed arrangement to my decorations, thinking about it it’s probably linked to my difficulty with random! Anyway, the lounge is always the Father Christmas room with my felt Santas next to the tree, the mantelpiece is full of santas, reindeer, my lovely gnome from Linda looks great next to the viking santa, a little nordic corner! I have snow globes and russian doll santas on the side tables too.
Of course the tree is the centrepiece, I like it to be reasonably colour co-ordinated, mainly red, green, silver and gold. My daughter and I always have a bit of a laugh at Christmas as when they were little we had a tradition of going down to the local garden centre where they always have a big Christmas display. Each year they could choose one decoration each. One year she picked a bright pink and purple bauble, a big one too! It clashes with everything! Each year she would proudly hang it prominently at the front. It was years before she realised that by the next day it had mysteriously moved to a less noticeable place. She now moves it back to the front and I move it back to the back…this year I have hung it elsewhere in the house so we’ll see how long it takes her to notice 🙂
I’ve got quite a few handmade decorations now, there will be even more after Monday when we take down the WI tree at the Christmas Tree Festival in town. Deborah’s angel does look like she’s dancing across the branches!
This year the dining room has a new theme, Christmas Wreaths, there’s about six in there! Under the Advent wreath I’ve put the stitch ‘n’fold wreath I made last year, it seemed a good place to put the stained glass nativity I made last year as well. ..
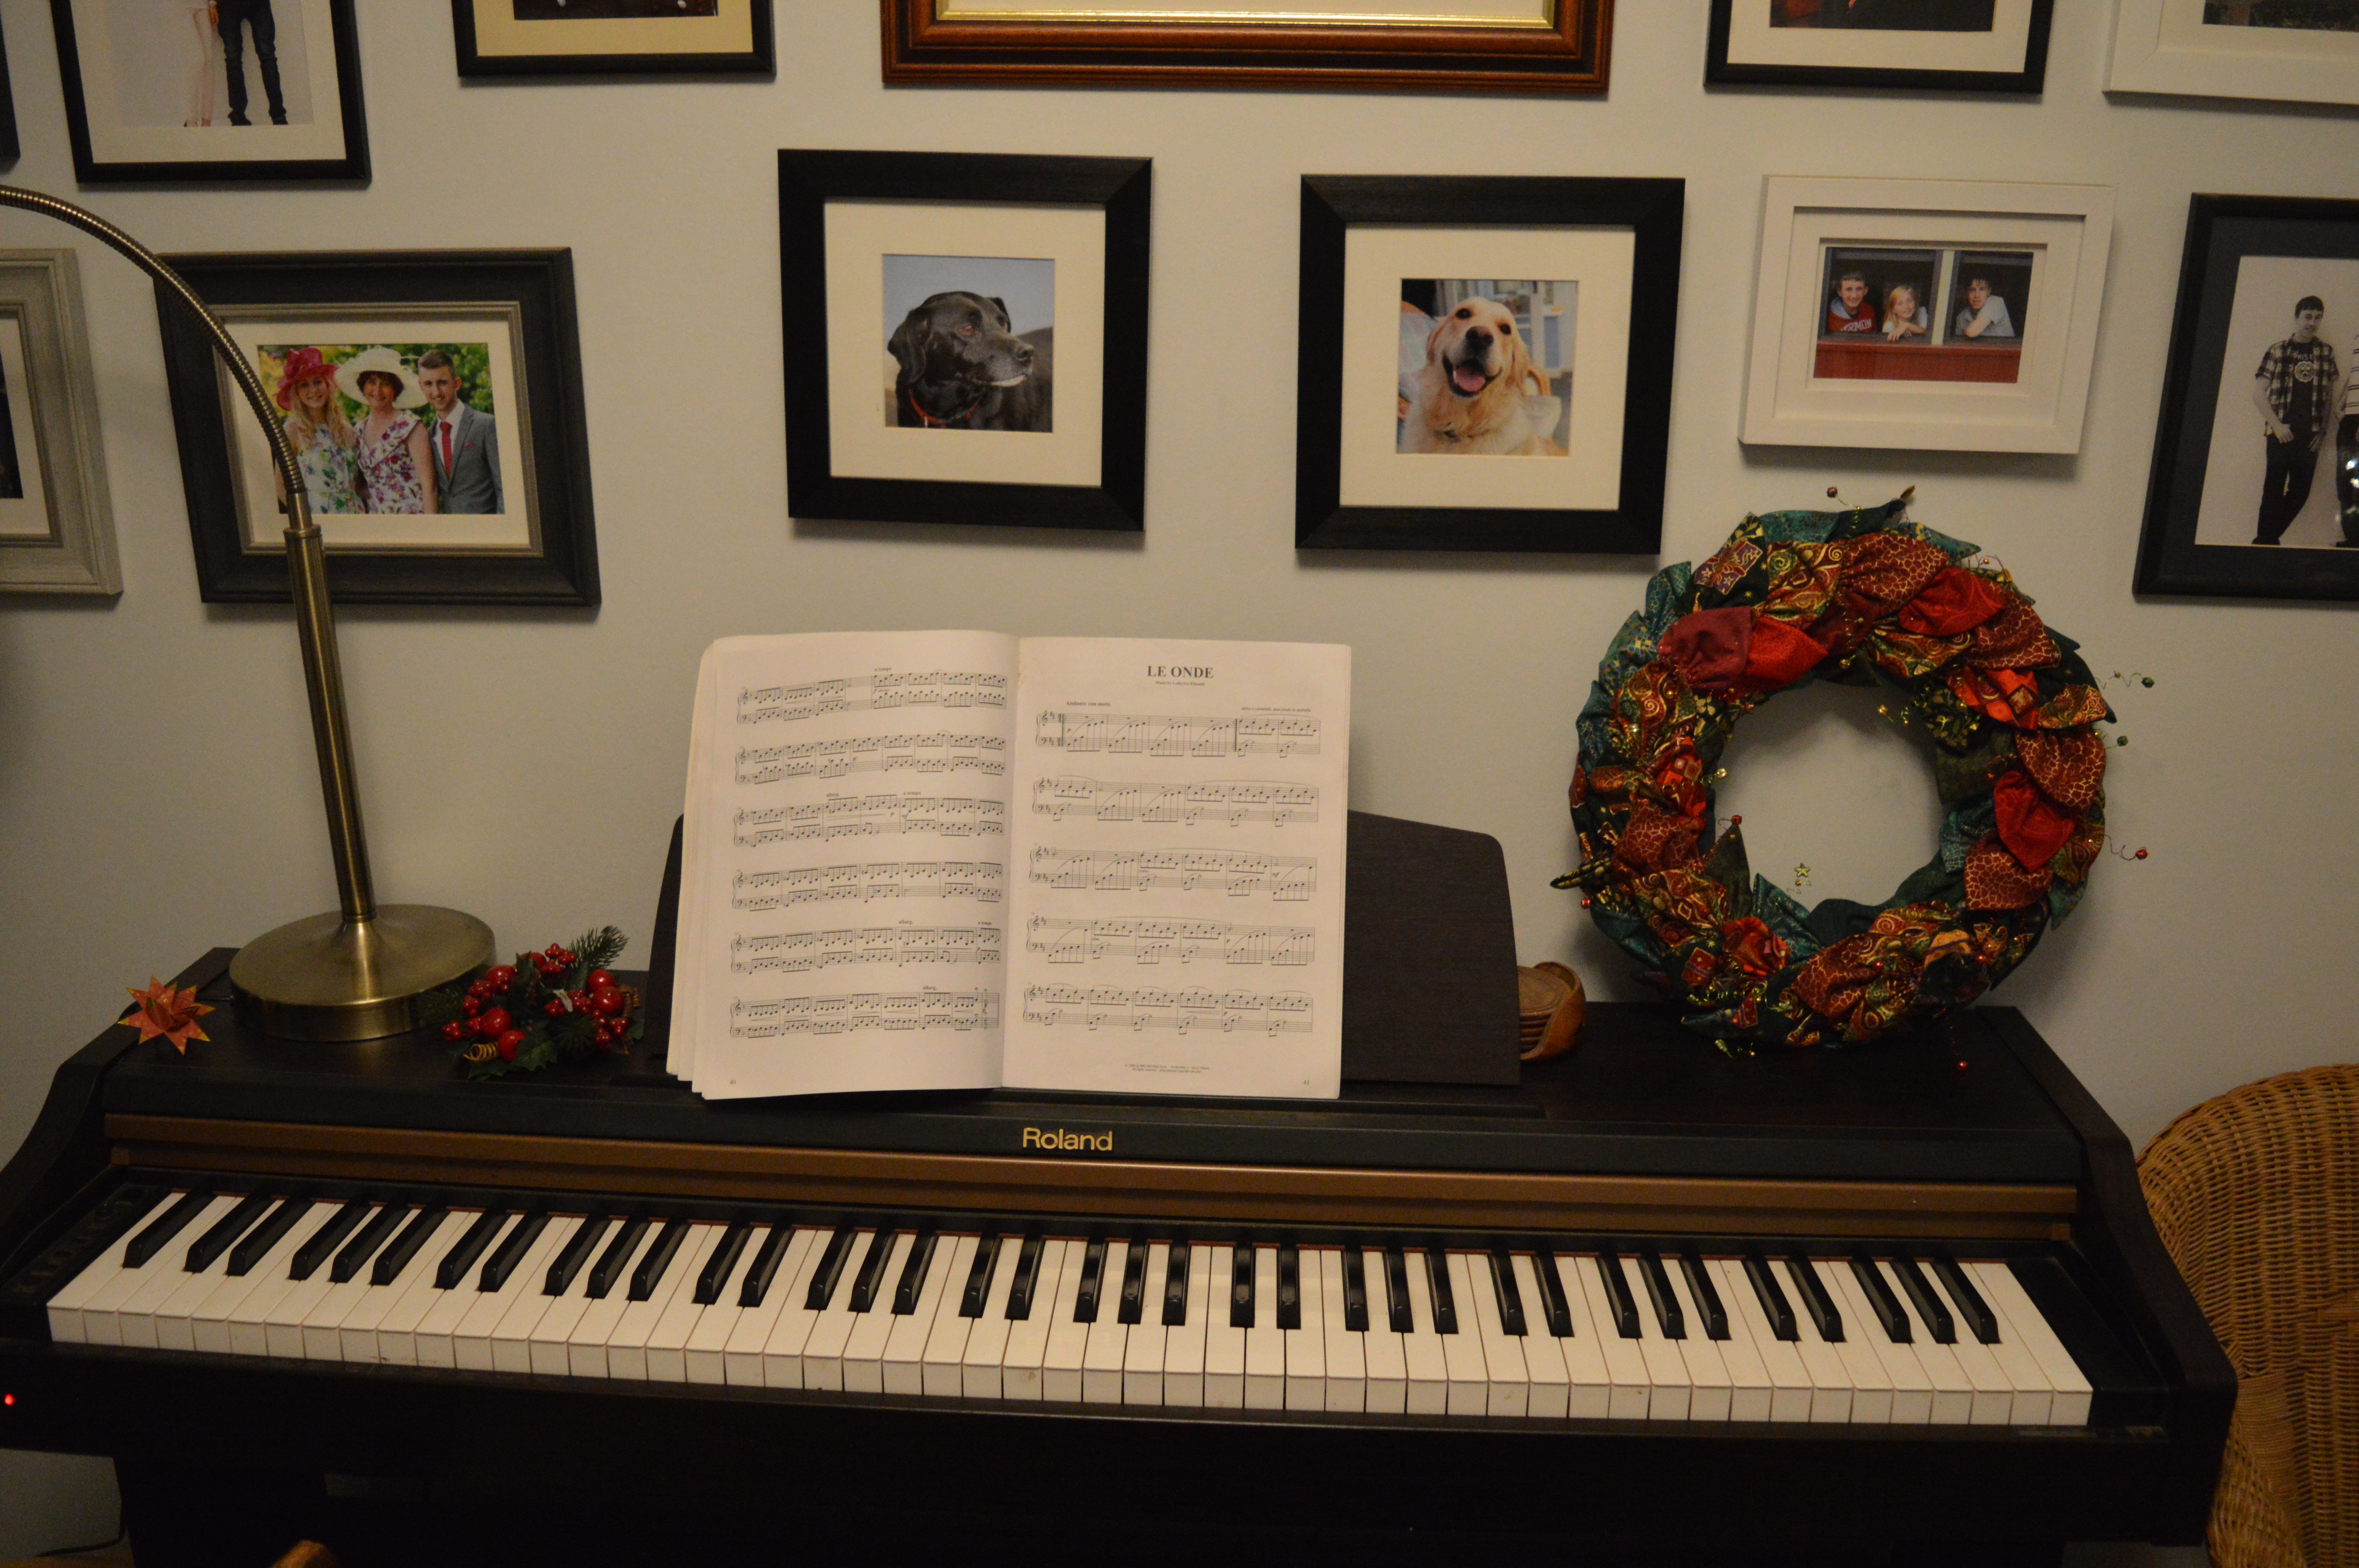
The big fabric wreath I made a few years ago is propped up on the piano
Even the hall has a theme with stars going up the stairs, you can just see the stained glass one I made at the top.
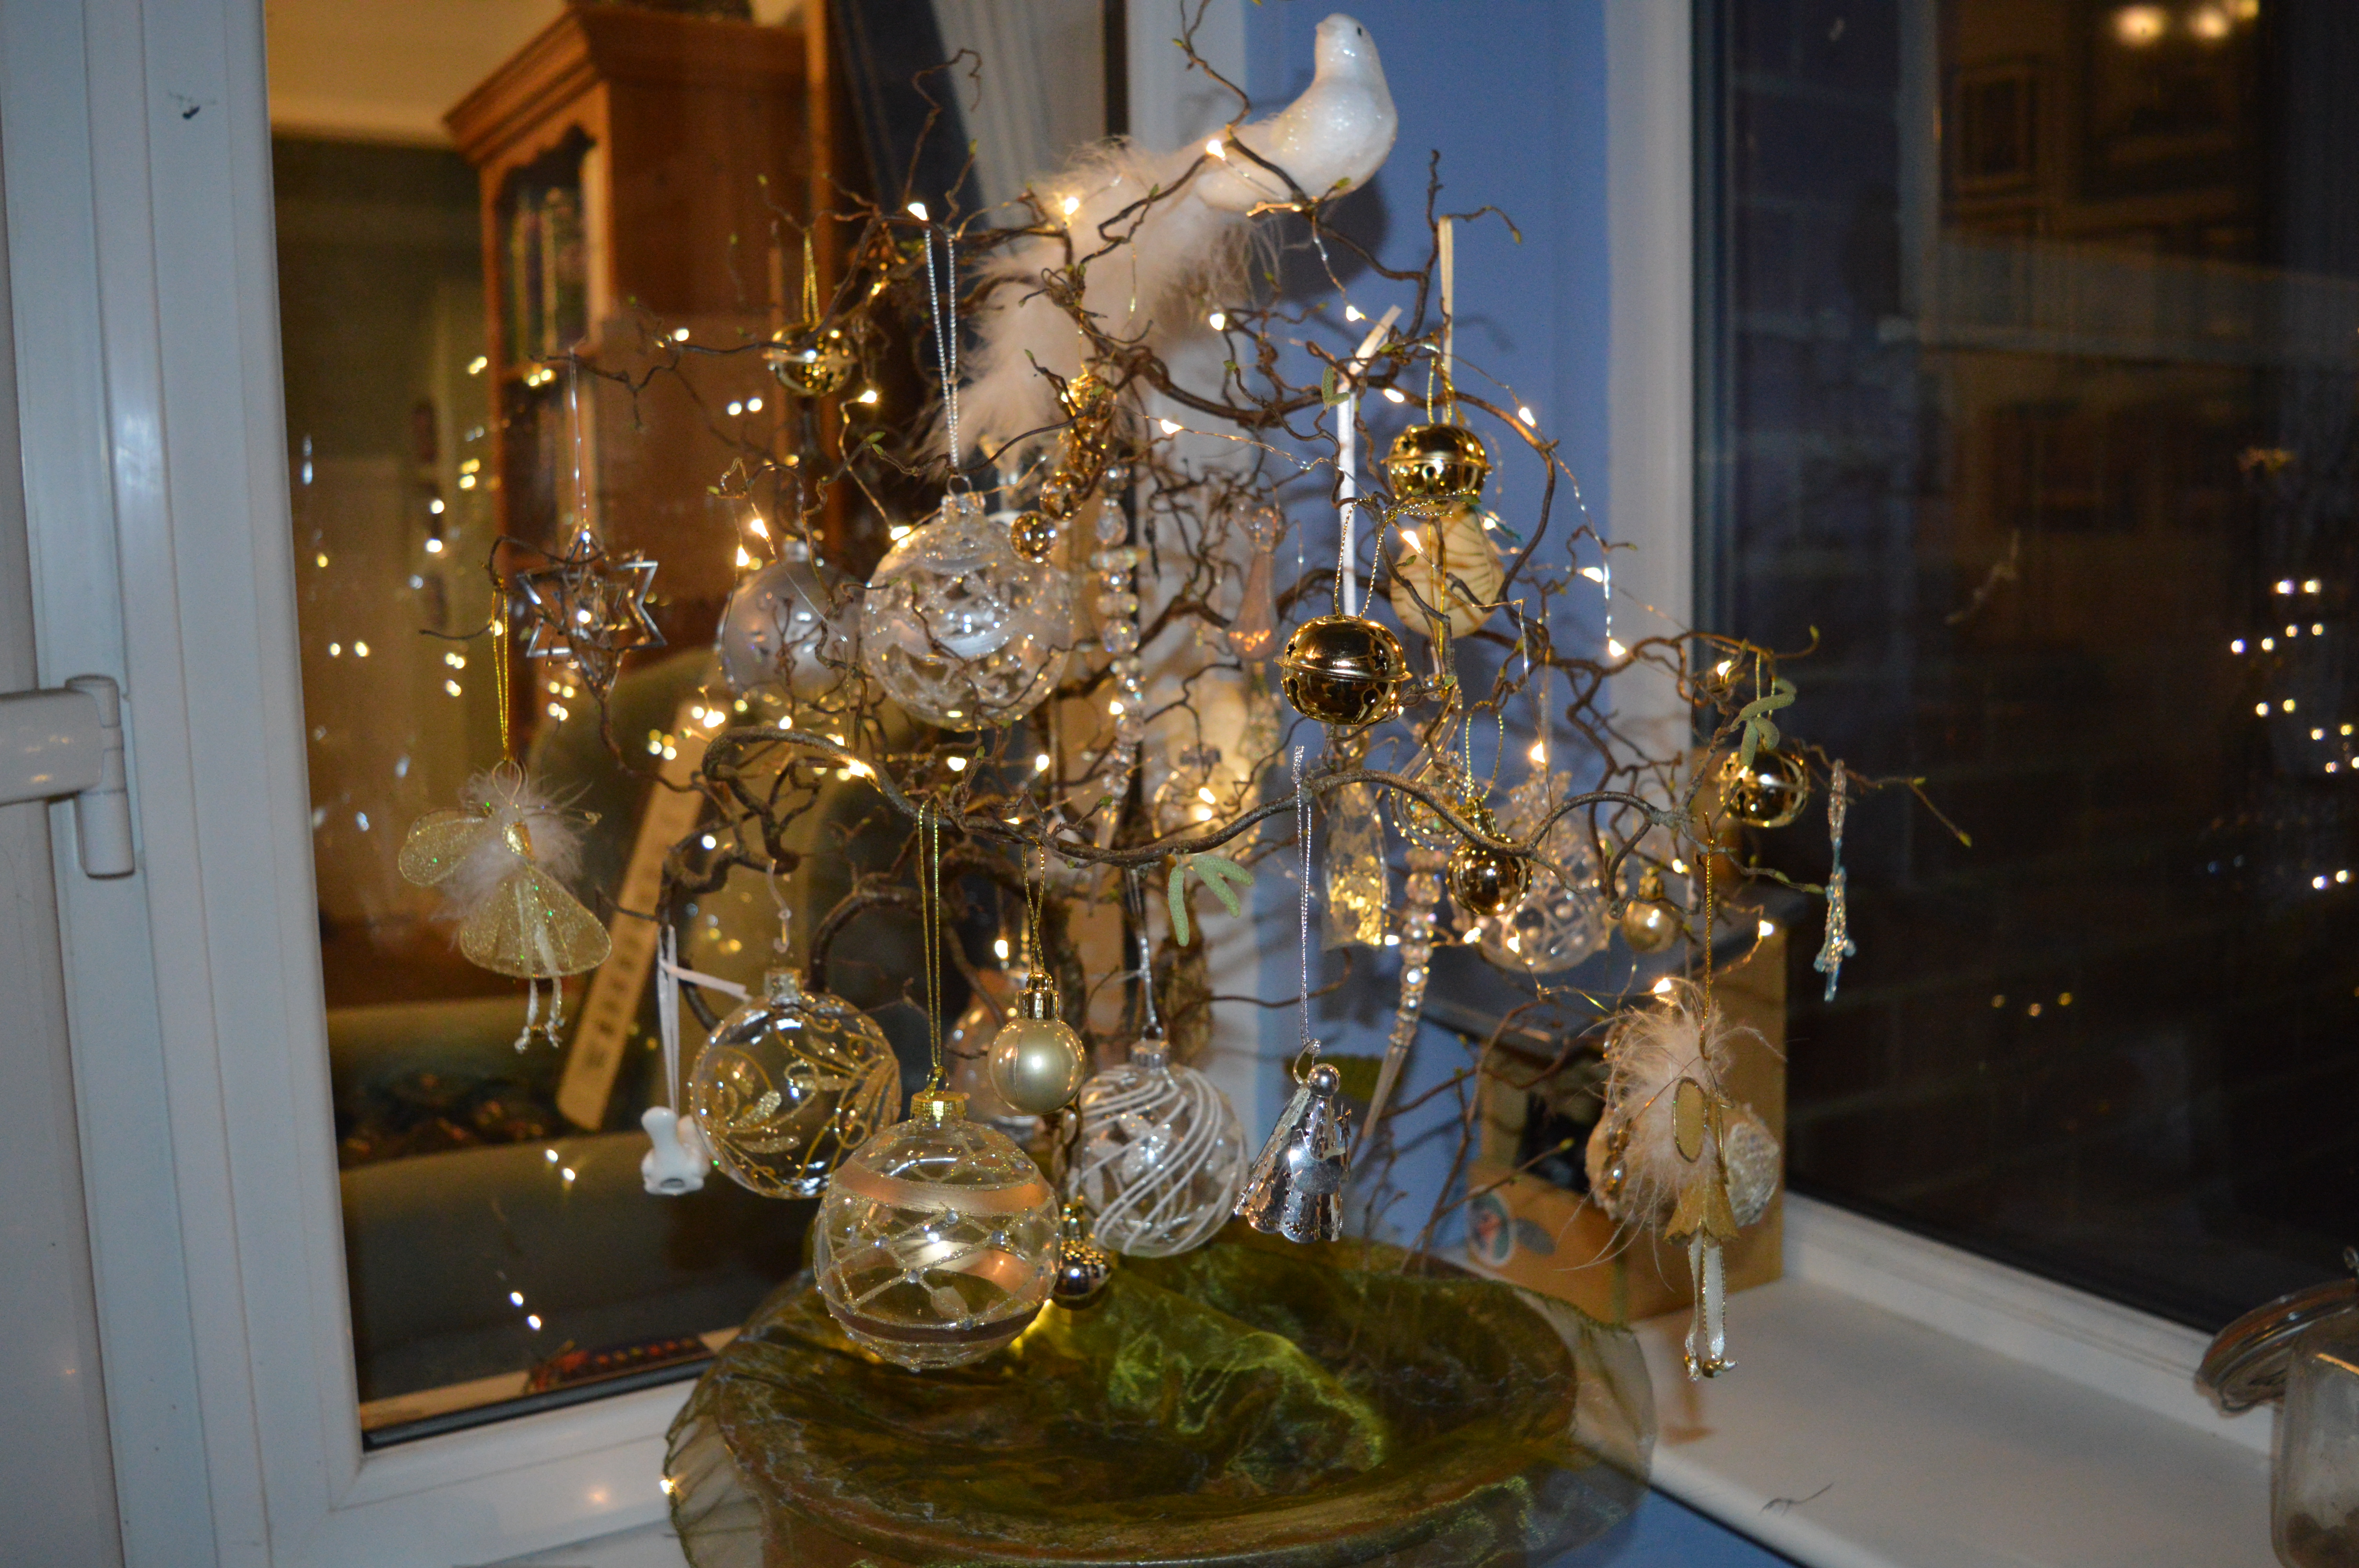
The conservatory has a Christmas tree theme, I put a tree in each window, various sizes from 3-4 ” to about 2′ tall. There’s wooden ones, metal ones, fussy ones, minimalistic ones. My favourite is my bare tree. I got the idea from visiting Castle Howard a few years ago. I have a twisted hazel in a pot in the garden, it’s only about 2′ tall. At Christmas I bring it in and decorate it with silver and gold decorations. I found on the main tree that these ones just seemed to disappear, but hung together they look so pretty.
Yesterday a friend came round and we made my version of a door wreath, more of a swag really, it’s really easy and I think quite effective. I collect holly and ivy from the back lane and add laurel, eucalyptus and eunonymous from the garden, tie it all together in a big bunch and of course add a big red ribbon.
It always fascinates me at Christmas to see how different countries decorate their homes so differently at Christmas time so I’m looking forward to seeing everyone else’s Christmas decorations.
I’ve just realised I haven’t told you about my latest Minerva Make…
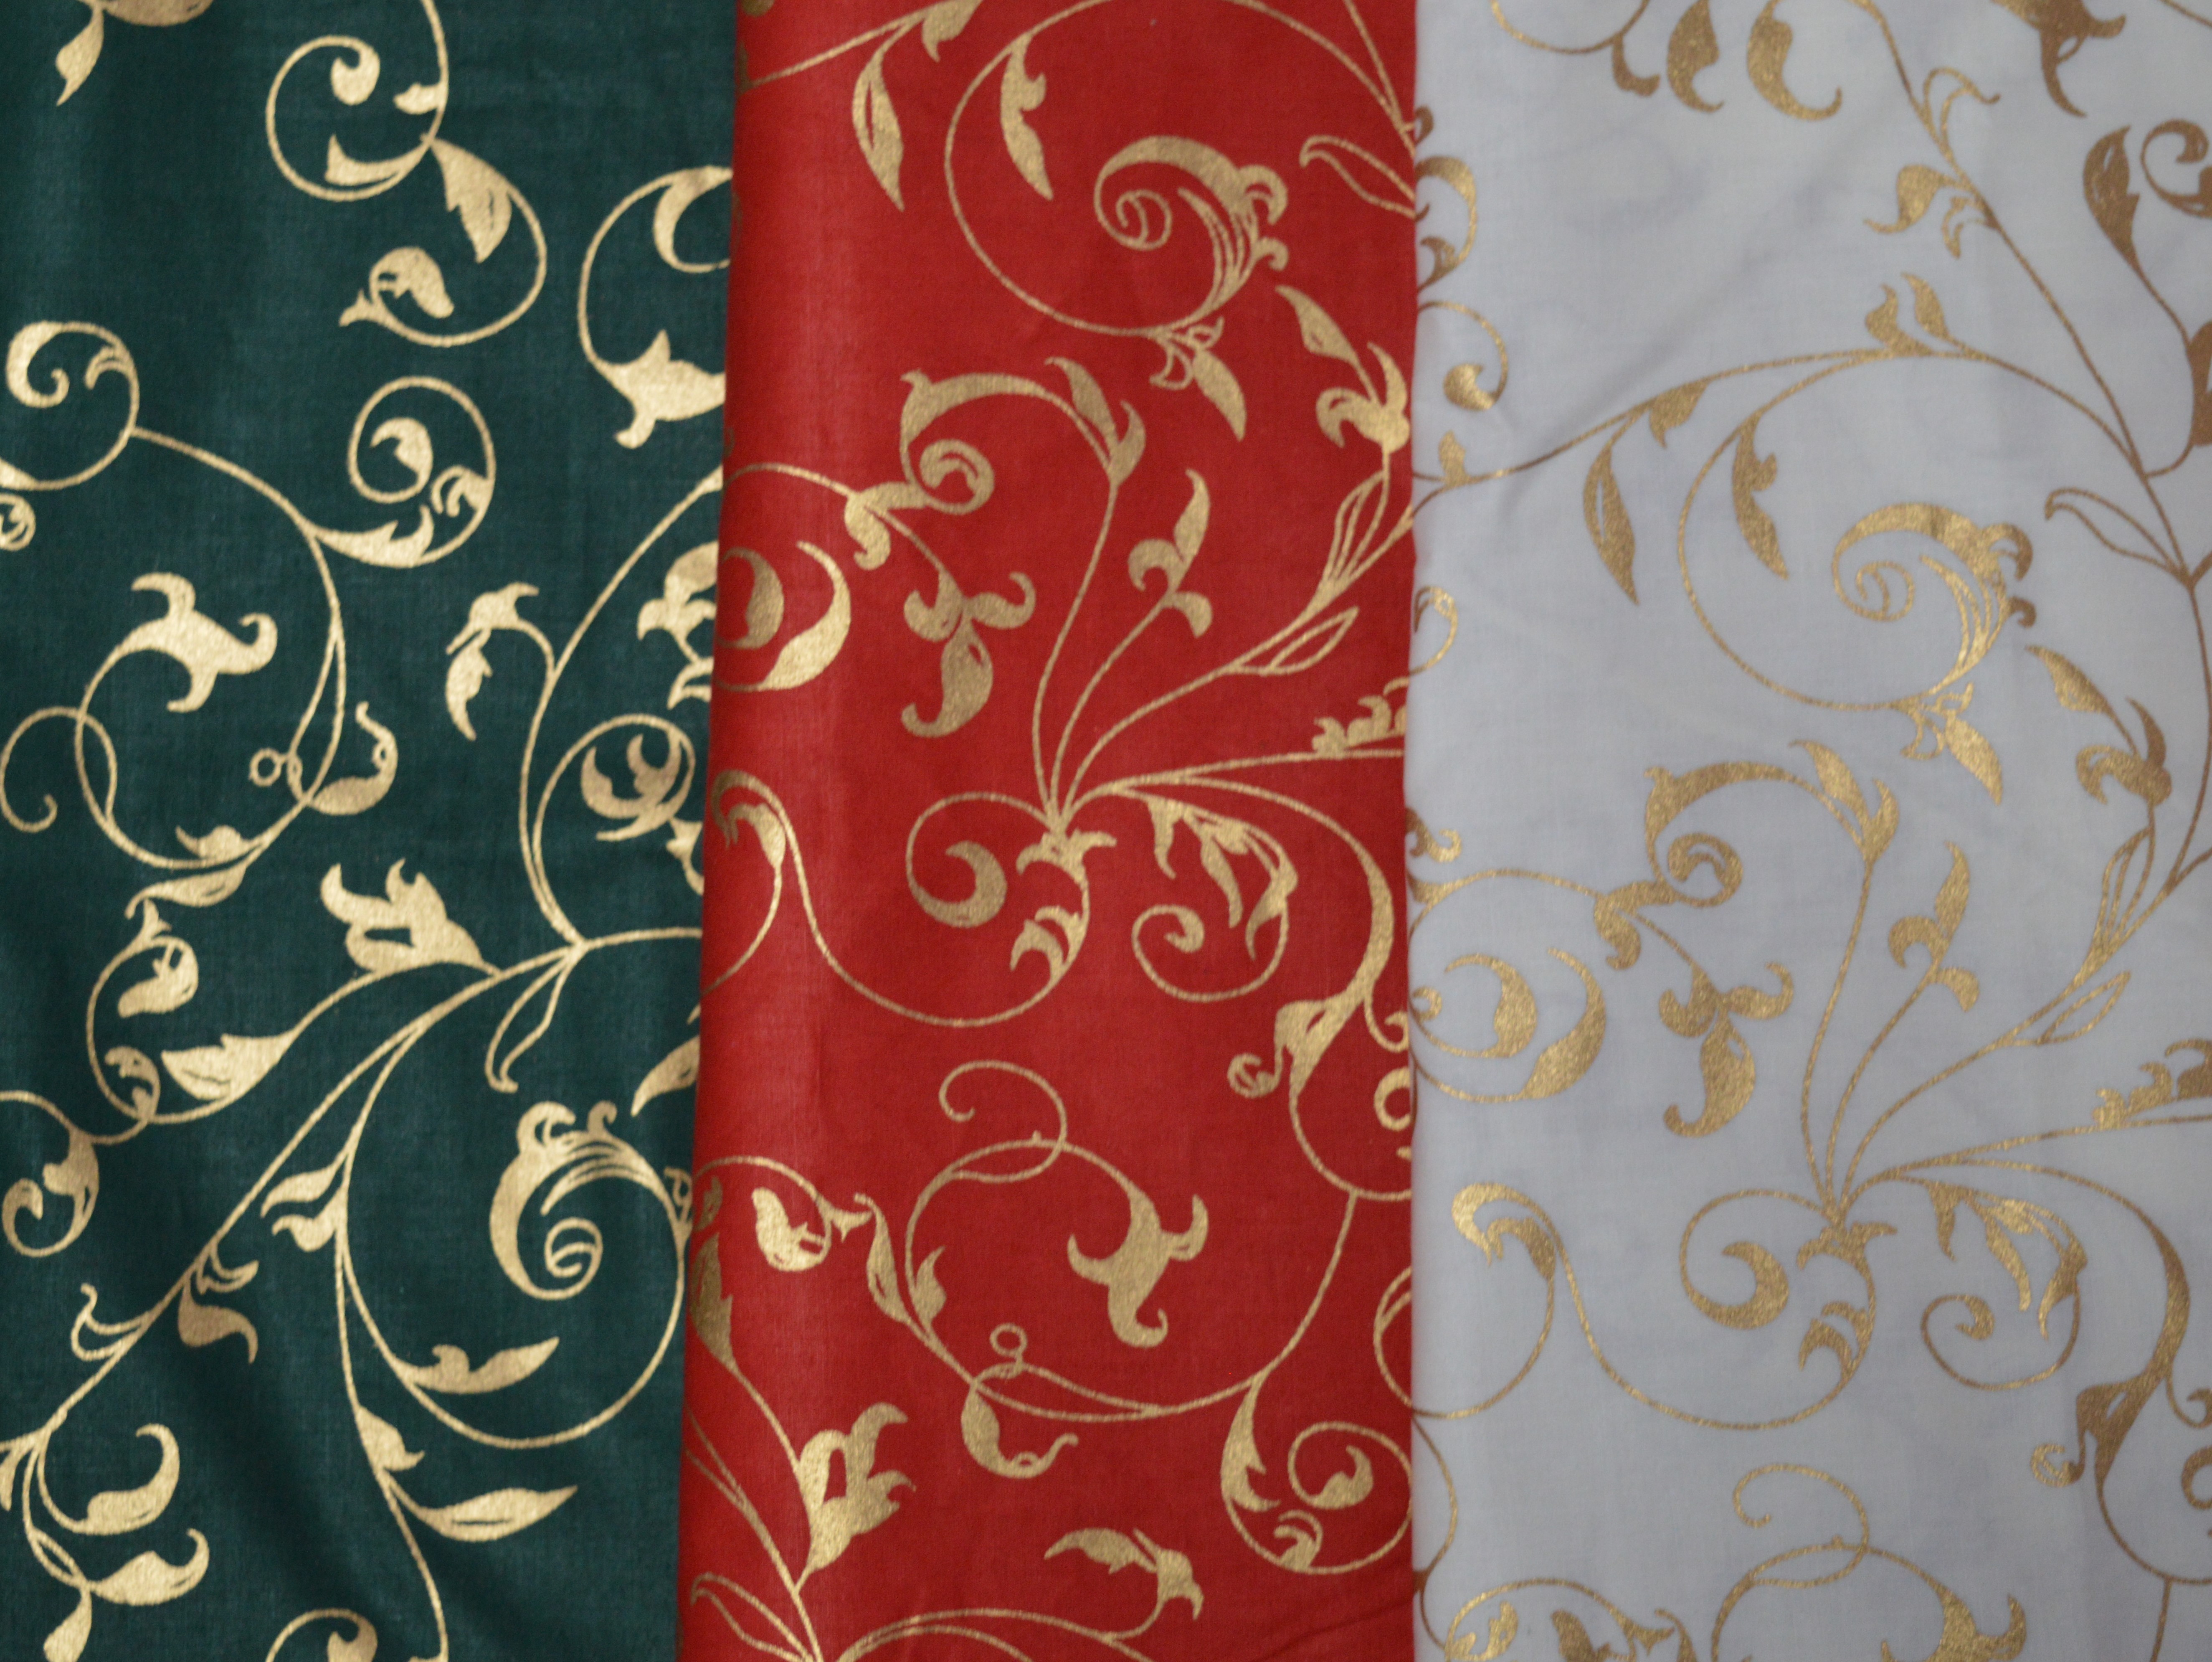
This year I decided to make a Christmas Tree Skirt, I’ve been admiring them for a while so when Minerva Crafts asked me to make something Christmassy it was the first idea I had. I found a pattern by Deonn Stott called Star Medallion Tree Skirt which looked perfect and not too difficult either. I chose some gorgeous Christmas fabric with gold swirls on, it worked really well as I wanted three different colours and this fabric comes in red, green and cream. A few days later a lovely parcel arrived from Minerva.
I did have to laugh as when my OH saw the parcel I explained it was fabric for a Christmas tree skirt. He looked rather puzzled a few days later when he saw it half made as he thought it was a skirt for me with Christmas trees on! He was still a bit nonplussed about the idea, I sold it to him on the grounds that it would collect all the pine-needles up, save them getting trodden into the carpet!
The skirt is made like a quilt, the slit and the centre circle are not cut until almost the end. My first job was to cut out 18 large squares and stitch them together to make pairs of half square triangles. It was lovely arranging them on my design wall and seeing the colours come together.It was then a fairly quick job to stitch them all together.
Once it was well pressed I could sandwich it with a red fabric backing and some cotton batting in between. I laid it out on the dining room table so I could get it nice and smooth and used 505 adhesive spray to hold it in place.
It took me a while to decide how to quilt it, the pattern picture has feather quilting down each diamond, which looked stunning but I don’t think my quilting is quite up to it yet! In the end I decided on a flower pattern which I’d seen in a tutorial on facebook just a few days before. I liked the idea that it was just curves and points, I find patterns with curves and points easier to do neatly with free motion quilting as the point gives me somewhere to stop and ‘regroup’ rather than wiggling on a straight line. I quilted in red, green and cream Gutermann thread with red in the bobbin formost of it. The fabric was lovely to quilt as it has a smooth sheen to it which seemed to let it move really easily under the foot.
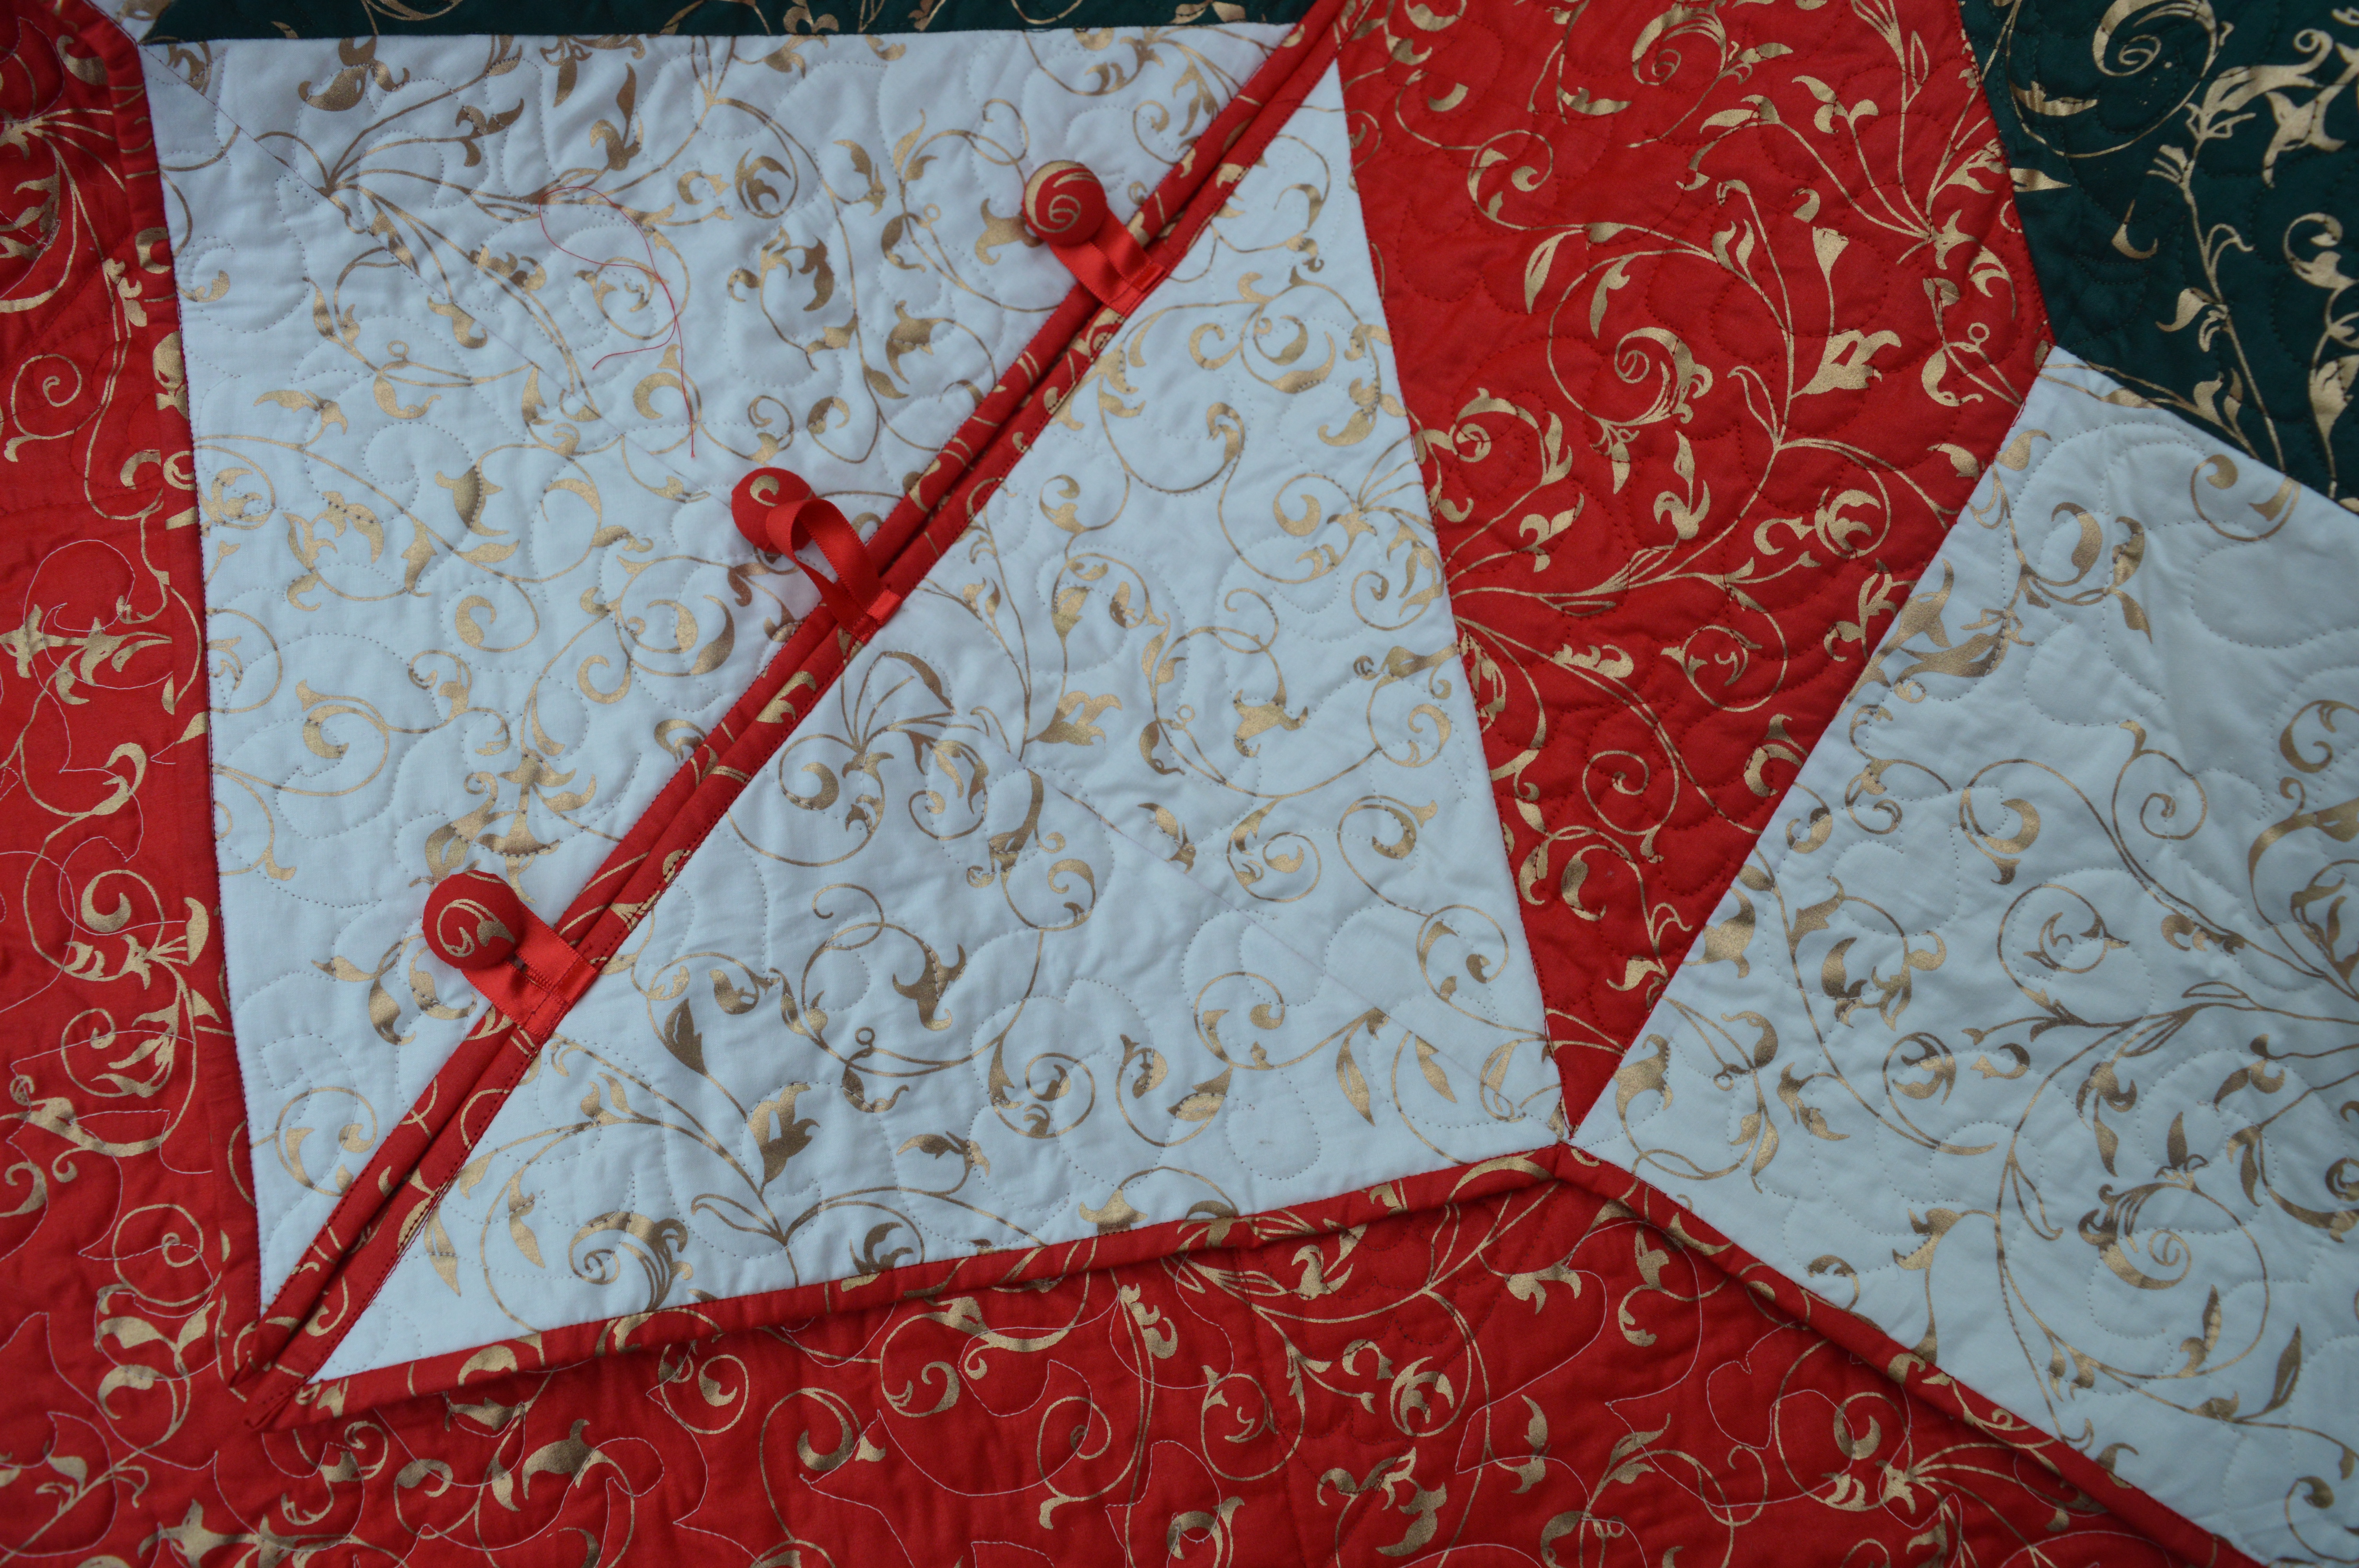
Once the basic ‘quilt’ was complete I had to make it into a tree skirt. I cut a straight line from the outer edge to the centre with a rotary cutter and then cut a 4” circle in the centre. I trimmed all the outer edges and reinforced the inner corners with a row of stitching. All that was left was binding and buttons.
I cut some lengths of ribbon to make button loops and pinned them in place down one side so they would be stitched under the binding.
Binding a star shape was a bit of a learning curve for me,I’ve only ever bound nice 90’ outside corners. The star had narrow angles and inside corners too. Luckily the designer Deonn had a couple of tutorials on her website so I watched those and went for it! I stitched the inner circle first with a length of bias binding in the red swirl fabric. I hand stitched the back which is how I prefer to attach binding.
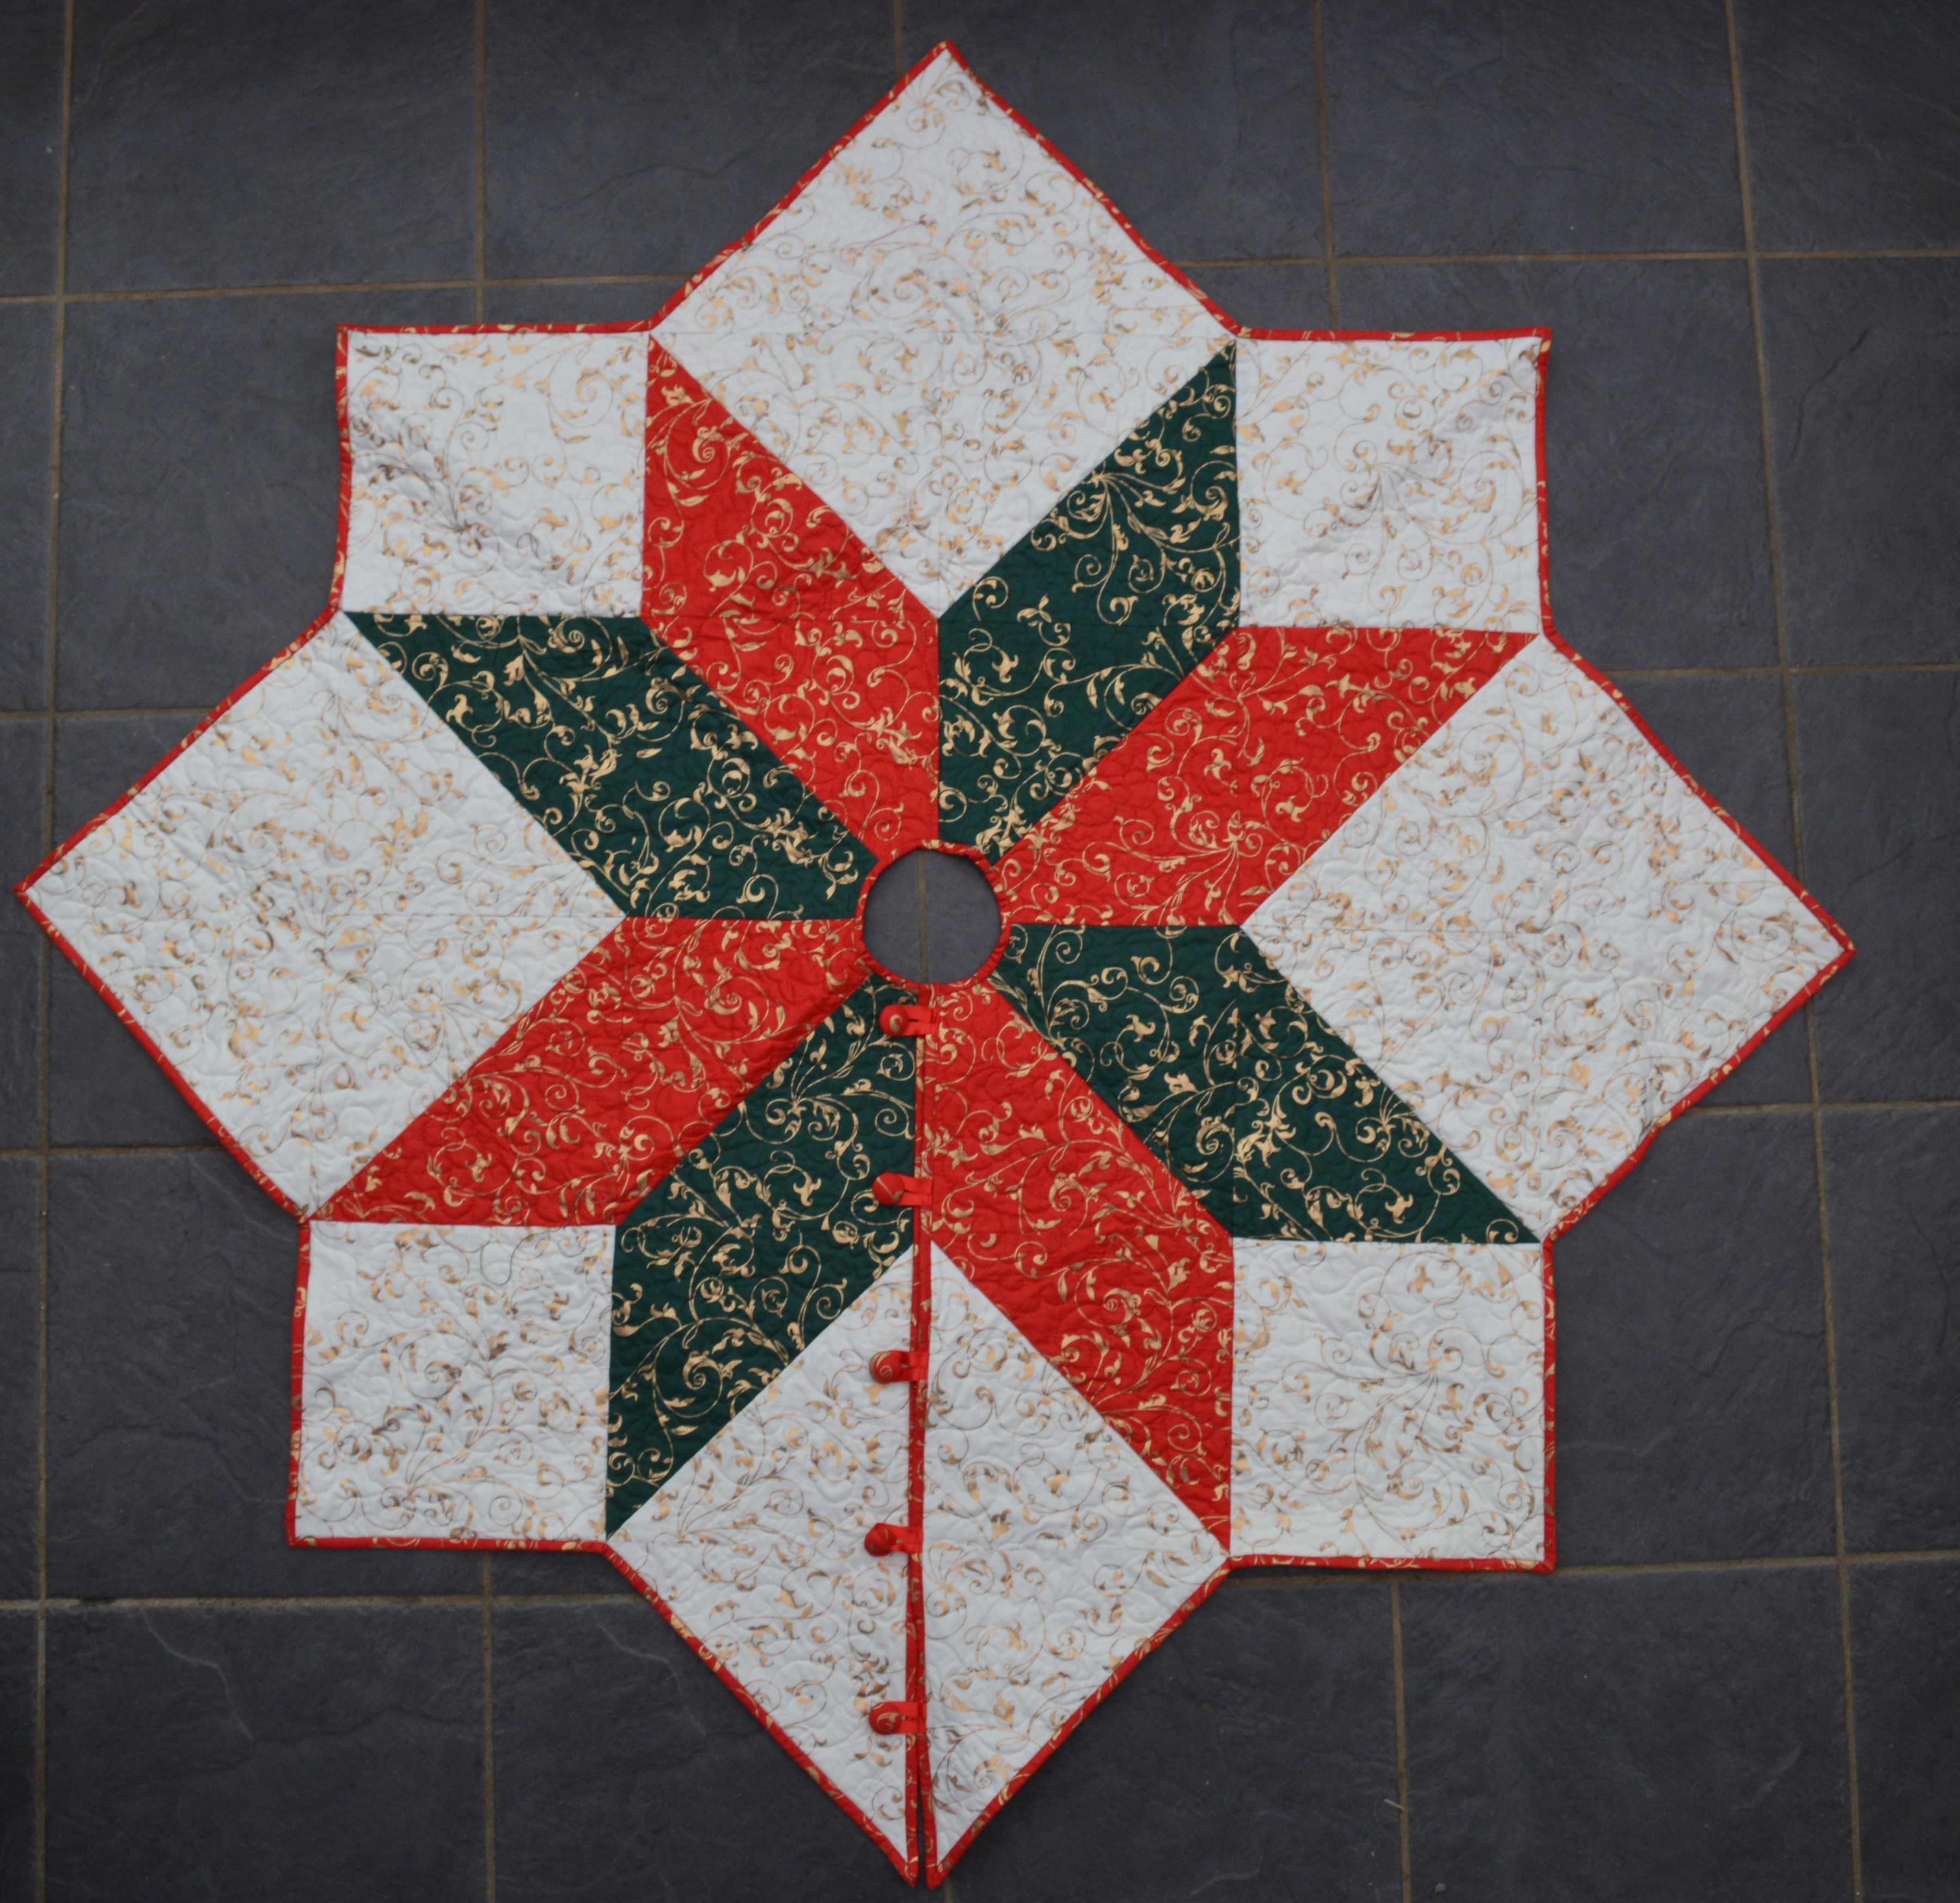
The star shape proved easier to bind than I thought with my points coming out better than I anticipated! .I didn’t fancy hand-stitching the whole of the binding down so I found my clover clips and turned the binding to the back. I then stitched in the ditch from the front, catching down the back as I went. I covered some buttons with the red fabric,trying to cut the circles so I had a swirl on each button. I stitched them on and my Christmas Tree skirt is all ready for the festive season.
I’ve now put it under my Christmas tree, I think it looks great! Why not follow the link to Minerva Crafts blog and check out the other Christmas makes.
These Fridays come round awfully fast, in fact I didn’t even realise I’d missed last week! This week’s theme is decoration, so lots of Christmas photos coming!
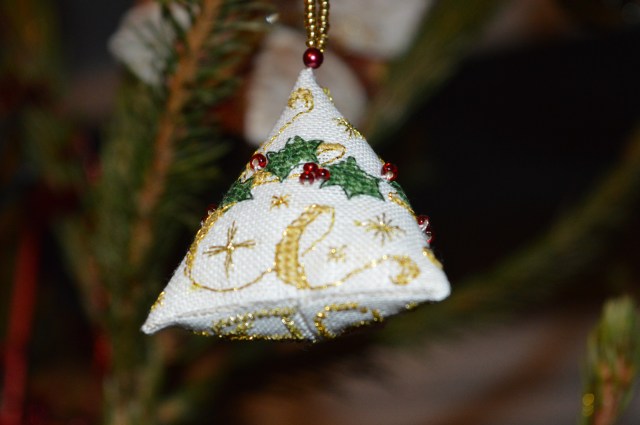
This is a Faby Reilly humbug, I’ve stitched two Christmas ones, the holly one above and one with mistletoe, I’ve more patterns in stock too just waiting to be stitched! They look really cute on the Christmas tree
This is the Fold ‘n’ Stitch wreath which I made last year at a WI workhop. It’s much easier than it looks! This year I’ve put it under my Advent Wreath.
I always make a Christmas cake and decorate at least one or two gingerbread houses. Traditionally Christmas cakes are a rich fruit cake made about 6 weeks before to give it chance to mature. It’s covered with marzipan and then icing. I’ve got a book of Christmas cakes which the children used to choose a design out of each year. Now they’ve flown the nest I can choose! I’ve made two this year as my son asked me to make him one as well, I just need to decorate them both. I also need to decorate two gingerbread houses. I buy these flat packed from the local supermarket, I used to get the Ikea ones, but these are easier to get hold of and more importantly they taste nicer too!
Just so it’s not all Christmas! I love decorating my home with paintings and pictures, in particular I like gallery walls, I have one just of family photos, another going up the stairs of paintings and pictures we love and finally this one in the hall which has some of my embroideries on. Some of them are recent, some of them are over thirty years old. I’m running rapidly out of wall space…
I like to decorate my sewing space too, it may not be tidy, but I like the homely touches, this was taken when I first moved into this sewing room, I’ve moved it round again but the decorations are the same. The decals came from America, they go all the way around the tops of the walls. I used vintage cotton reels as drawer handles and wooden letters on the top of my homemade pegboard. I’ve got various sewing pictures or embroideries on the walls too.
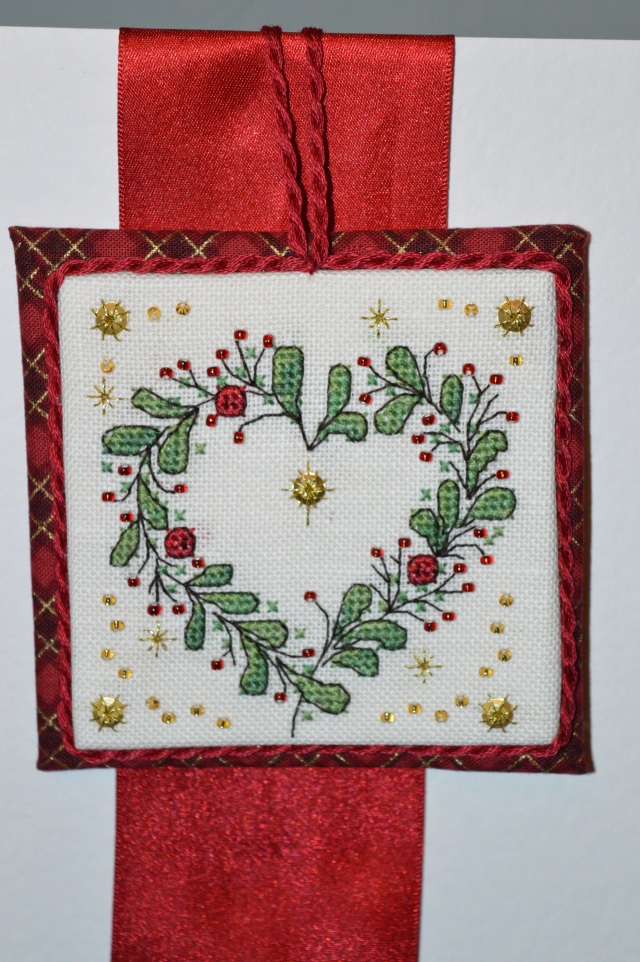
I’ve just finished the fourth and final Christmas cross-stitch from Faby Reilly’s Christie Stitch-a-long. It’s a beautiful design of a heart shaped wreath. The designs are all designed as Christmas cards but I chose to make them into little Christmas decorations. This was the exception! I was hoping there would be one card which I could use for my OH and this was perfect.
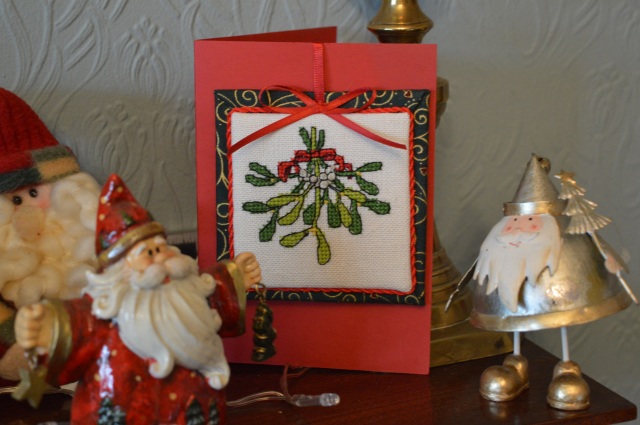
I sort of started a little tradition last year, I stitched a little cross-stitch design of a bunch of mistletoe, flat mounted it and ‘hung’ it on a card. This year it’s a decoration!
I love watching the different layers of Faby’s designs appear, first there’s just the cross-stitch, which sometimes hardly even shows the picture. The next layer is the back stitching when it starts to come alive. Finally there’s the embellishments, all the red and gold beads, the gold embroidery with sequins as well. It all comes together to make a magical picture.
Once I’d completed the wreath I cut a square of cardboard and glued on some felt to soften it. I glued the cross-stitch around the card, trying to make the corners as neat as I could. Half of me doesn’t like using glue to mount, I prefer to lace, but on little projects like cards I find it’s easier to get a neat, flat finish with glue. I covered a slightly bigger square of card with more felt and then some Christmas fabric which would fold over far enough to the front to surround the cross-stitch.. I could then just glue the two squares together, leave it overnight with a book on top and then trim with some homemade cord.
Making into a card was pretty simple, I just glued a length of broad ribbon, hung the cross-stitch in place and then sellotaped the cord on the inside, so it is literally hanging on the front of the card. My hanging cord doesn’t appear to be perfectly in the middle as it doesn’t quite hang straight! Hopefully he likes it as much as he liked the last one though.
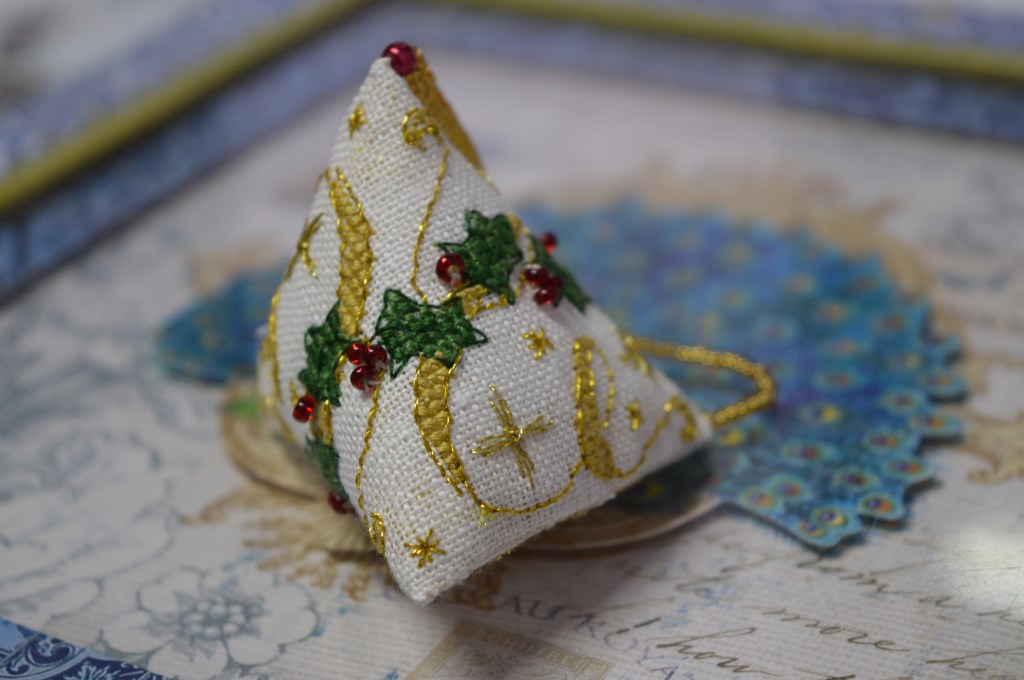
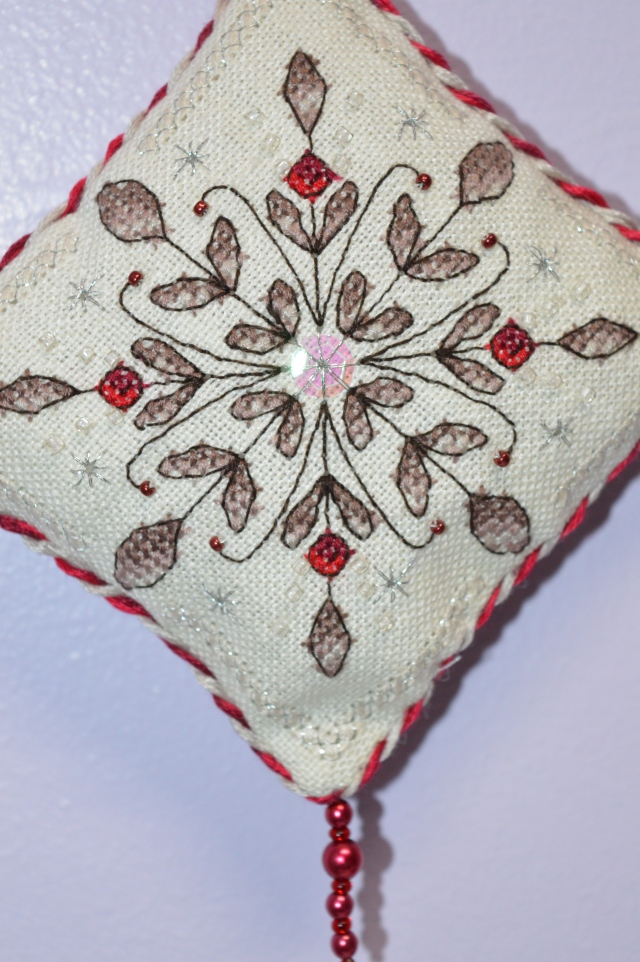
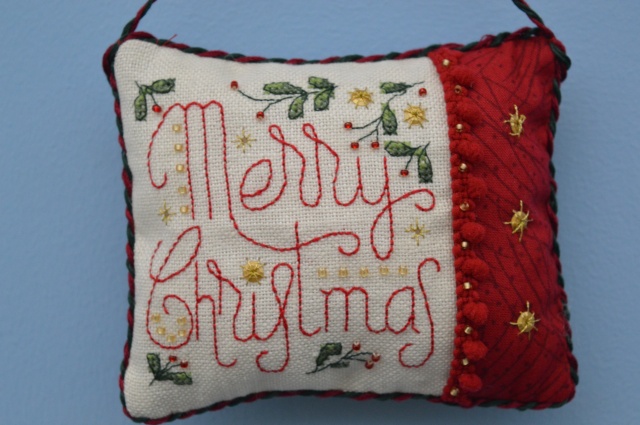
I’ve really enjoyed this stitch-along, the finished designs are beautiful. There’s even another two designs available now, so I’ve got those ready for next year! This is the four of them together;
I think they’re all gorgeous but I think my favourite has got to be the Christmas Tree, I just love the way it work out with the finishing. It looks wonderful hung on the key of our old family bureau.