Wild Daffodil is organising a monthly photo challenge with one theme all year, windows, so here’s another little collection of photos;
This photo of the garden last summer reminds me that I really need to fix the window on the summerhouse – the door fell off in a storm and broke the glass, I’ve got two sheets of perspex sitting in the conservatory waiting to be fitted!
The window fittings at Blackwell House near Windermere were all individual, lots of beautiful designs typical of the Arts and Crafts movement. I visited last year with my Embroiderers Guild and enjoyed a fascinating guided tour.
This was the view from the dining room window of our hotel in Keswick when we did our four lakes walk a couple of years ago. It is, of course, my favourite fell, Catbells!
The Old Barn
The windows on this old red barn are appliqued and embroidered. It is one of the blocks of the Anderson Farm quilt, I hadn’t mastered needle-turn applique at that point so I think they are bondawebbed on and stitched down.
Why not follow the link to Wild Daffodil and see else is sharing lots of window photos.
We’ve had hoar frosts and a smattering of snow this week, not weather conducive to gardening, luckily today it’s warmed up a bit and everything has thawed.
The little patch of snowdrops by the pond is looking very pretty. A few stately homes round here open their gardens at this time of year for people to see the snowdrops. My WI is off to Goldsborough Hall in a couple of weeks time and they have a huge display.
For me, this time of year is all about hope, winter is passing, the days are getting noticeably longer and there’s shoots appearing all over the garden, bulbs, perennials and buds on trees. They may only be small, but they’re starting, spring will soon be here! These big red buds are the shoots of a peony.
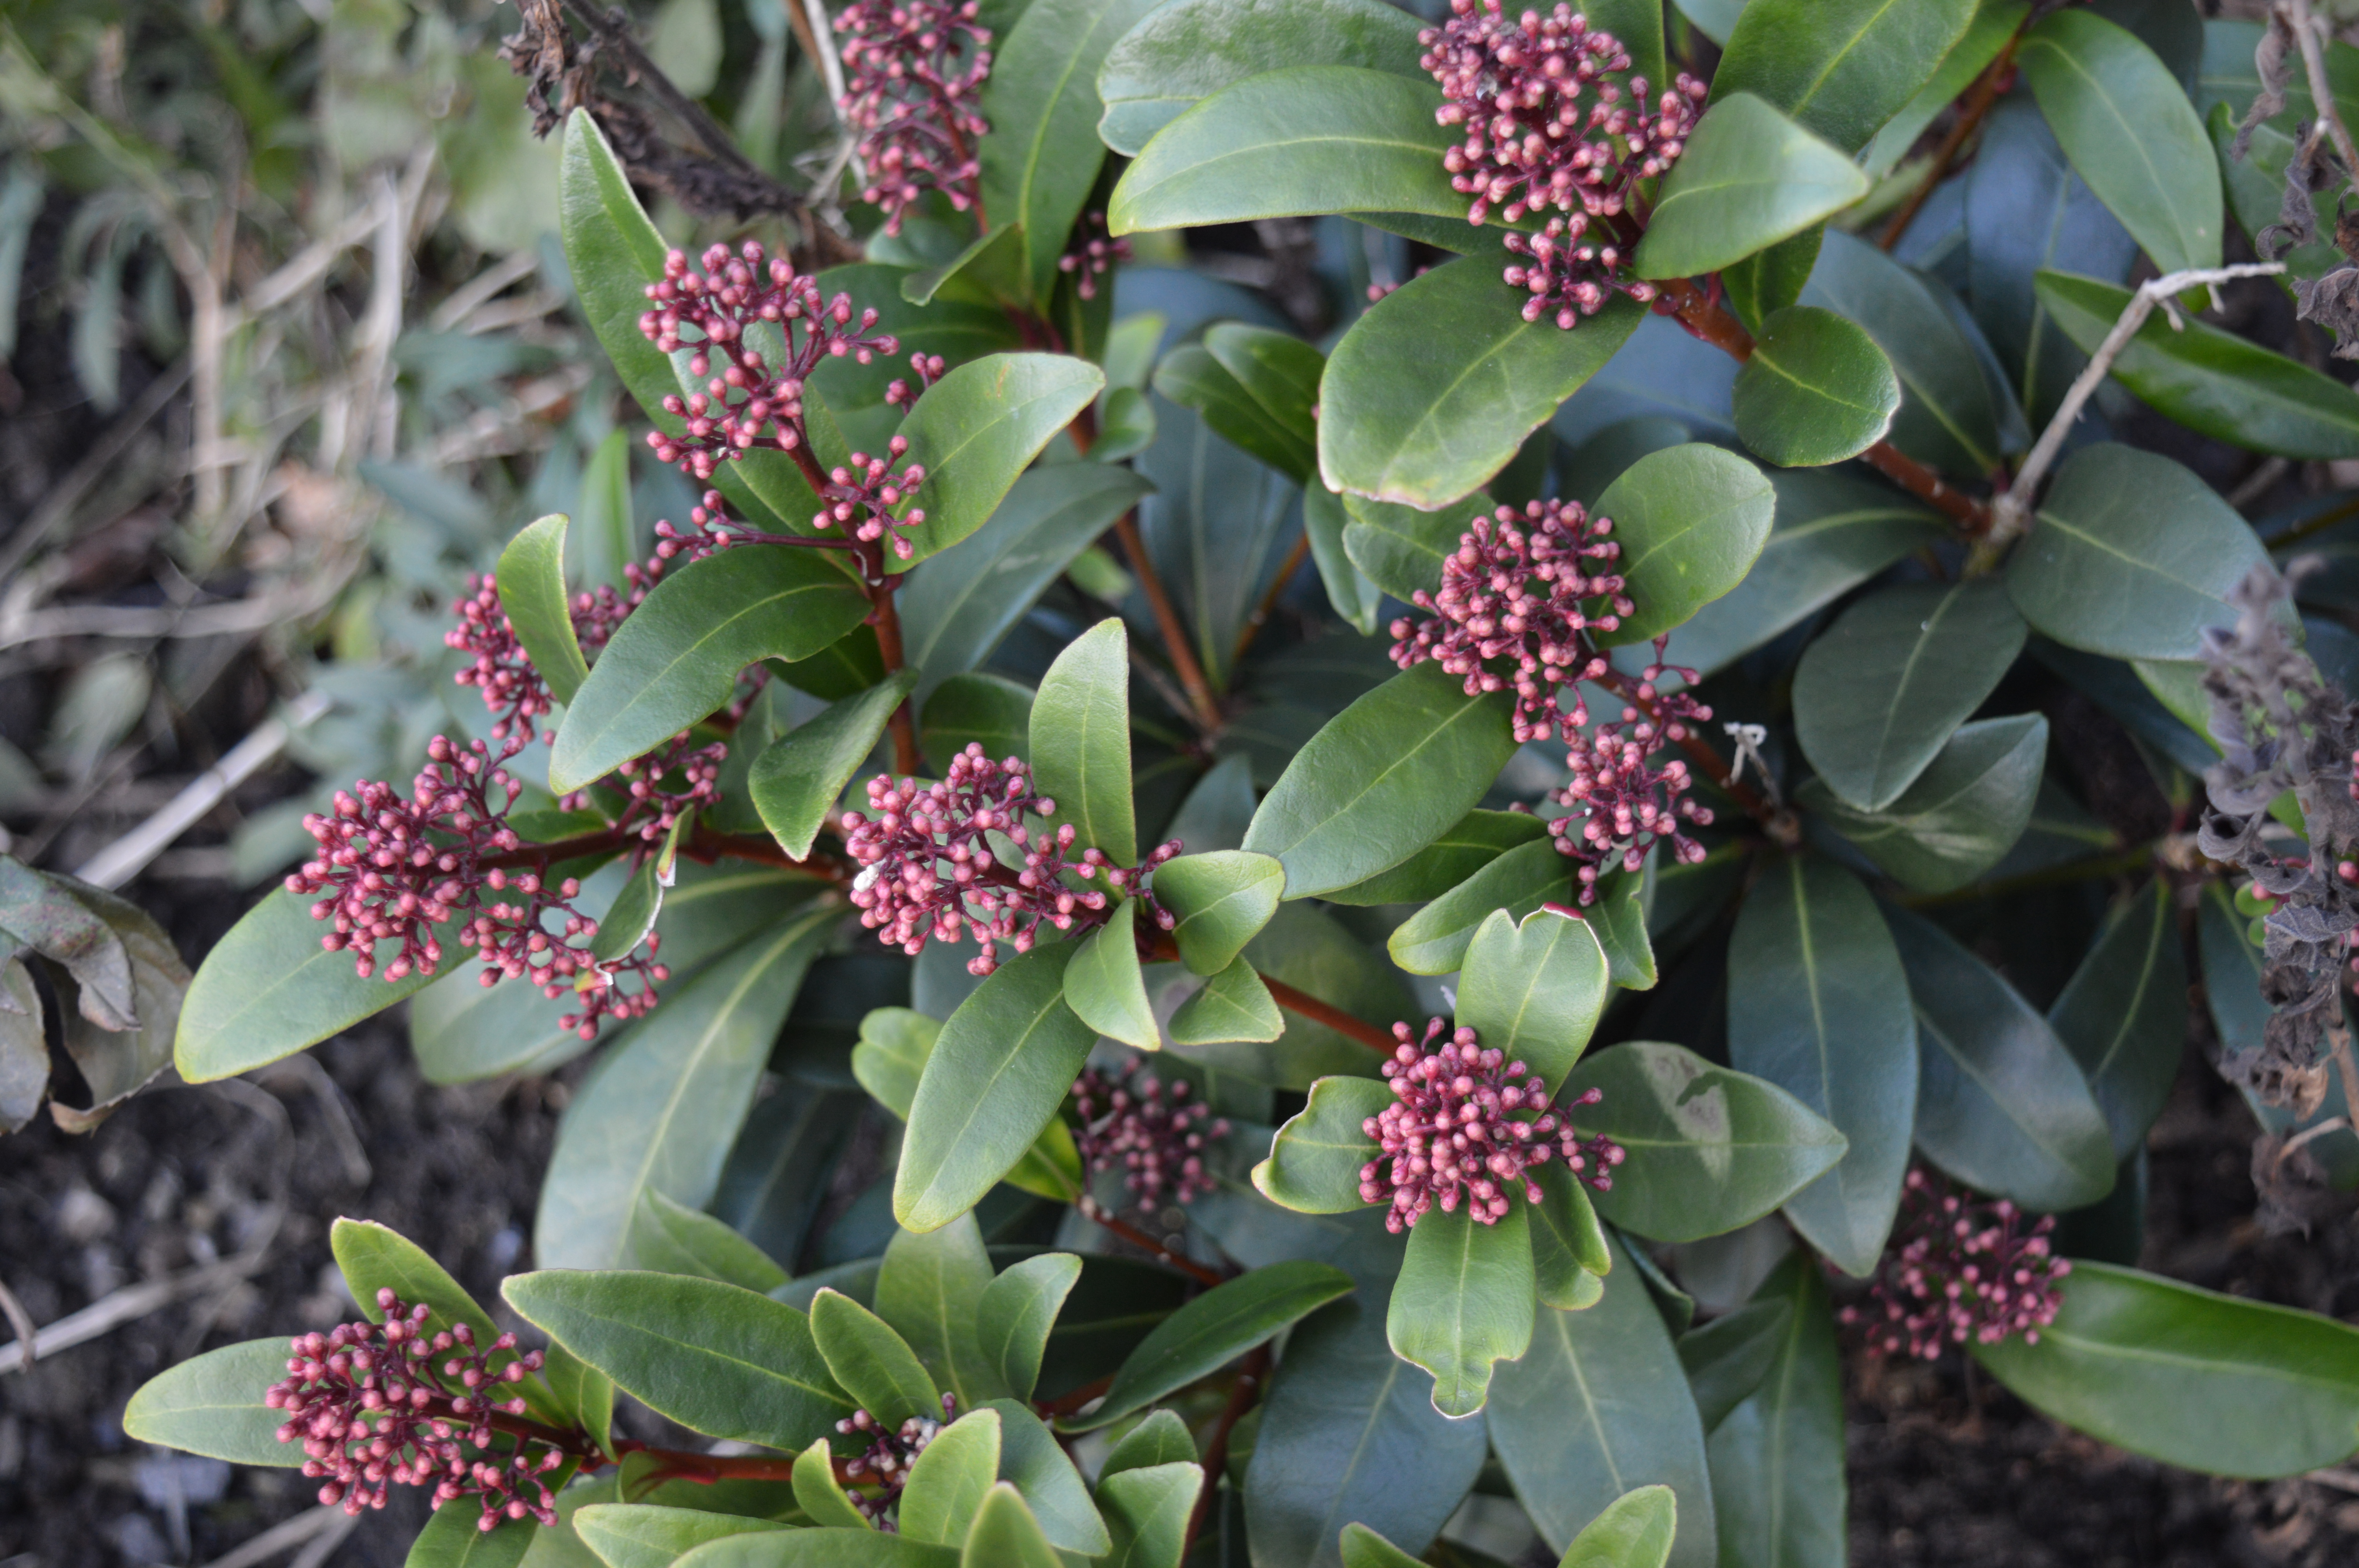
There’s a few shrubs putting on a quiet, understated display at the moment, they are all the more appreciated at this time of year. The skimmia is in the Amber and Amethyst garden with it’s tiny coral coloured buds…
Hebe’s a great at all times of the year, there’s the flowers in the summer and the foliage the rest of the year. I’ve got several of diffent sizes and colours. This one has reddish-purple tinge to it’s leaves and will (hopefully) be covered in purple flowers in the summer.
Looking at the garden from upstairs at this year really shows the bare structure and plan of the garden, what it doesn’t show is everything that’s happening underneath 🙂
Three weeks ago I finally finished by Tall Year Square etui, so it was time to start a new project for the stitch-a-long. I decided on a kit which will take a while to do but which I hope is straight forward enough for me to do in short spells such as whilst I’m cooking tea or having my morning coffee.
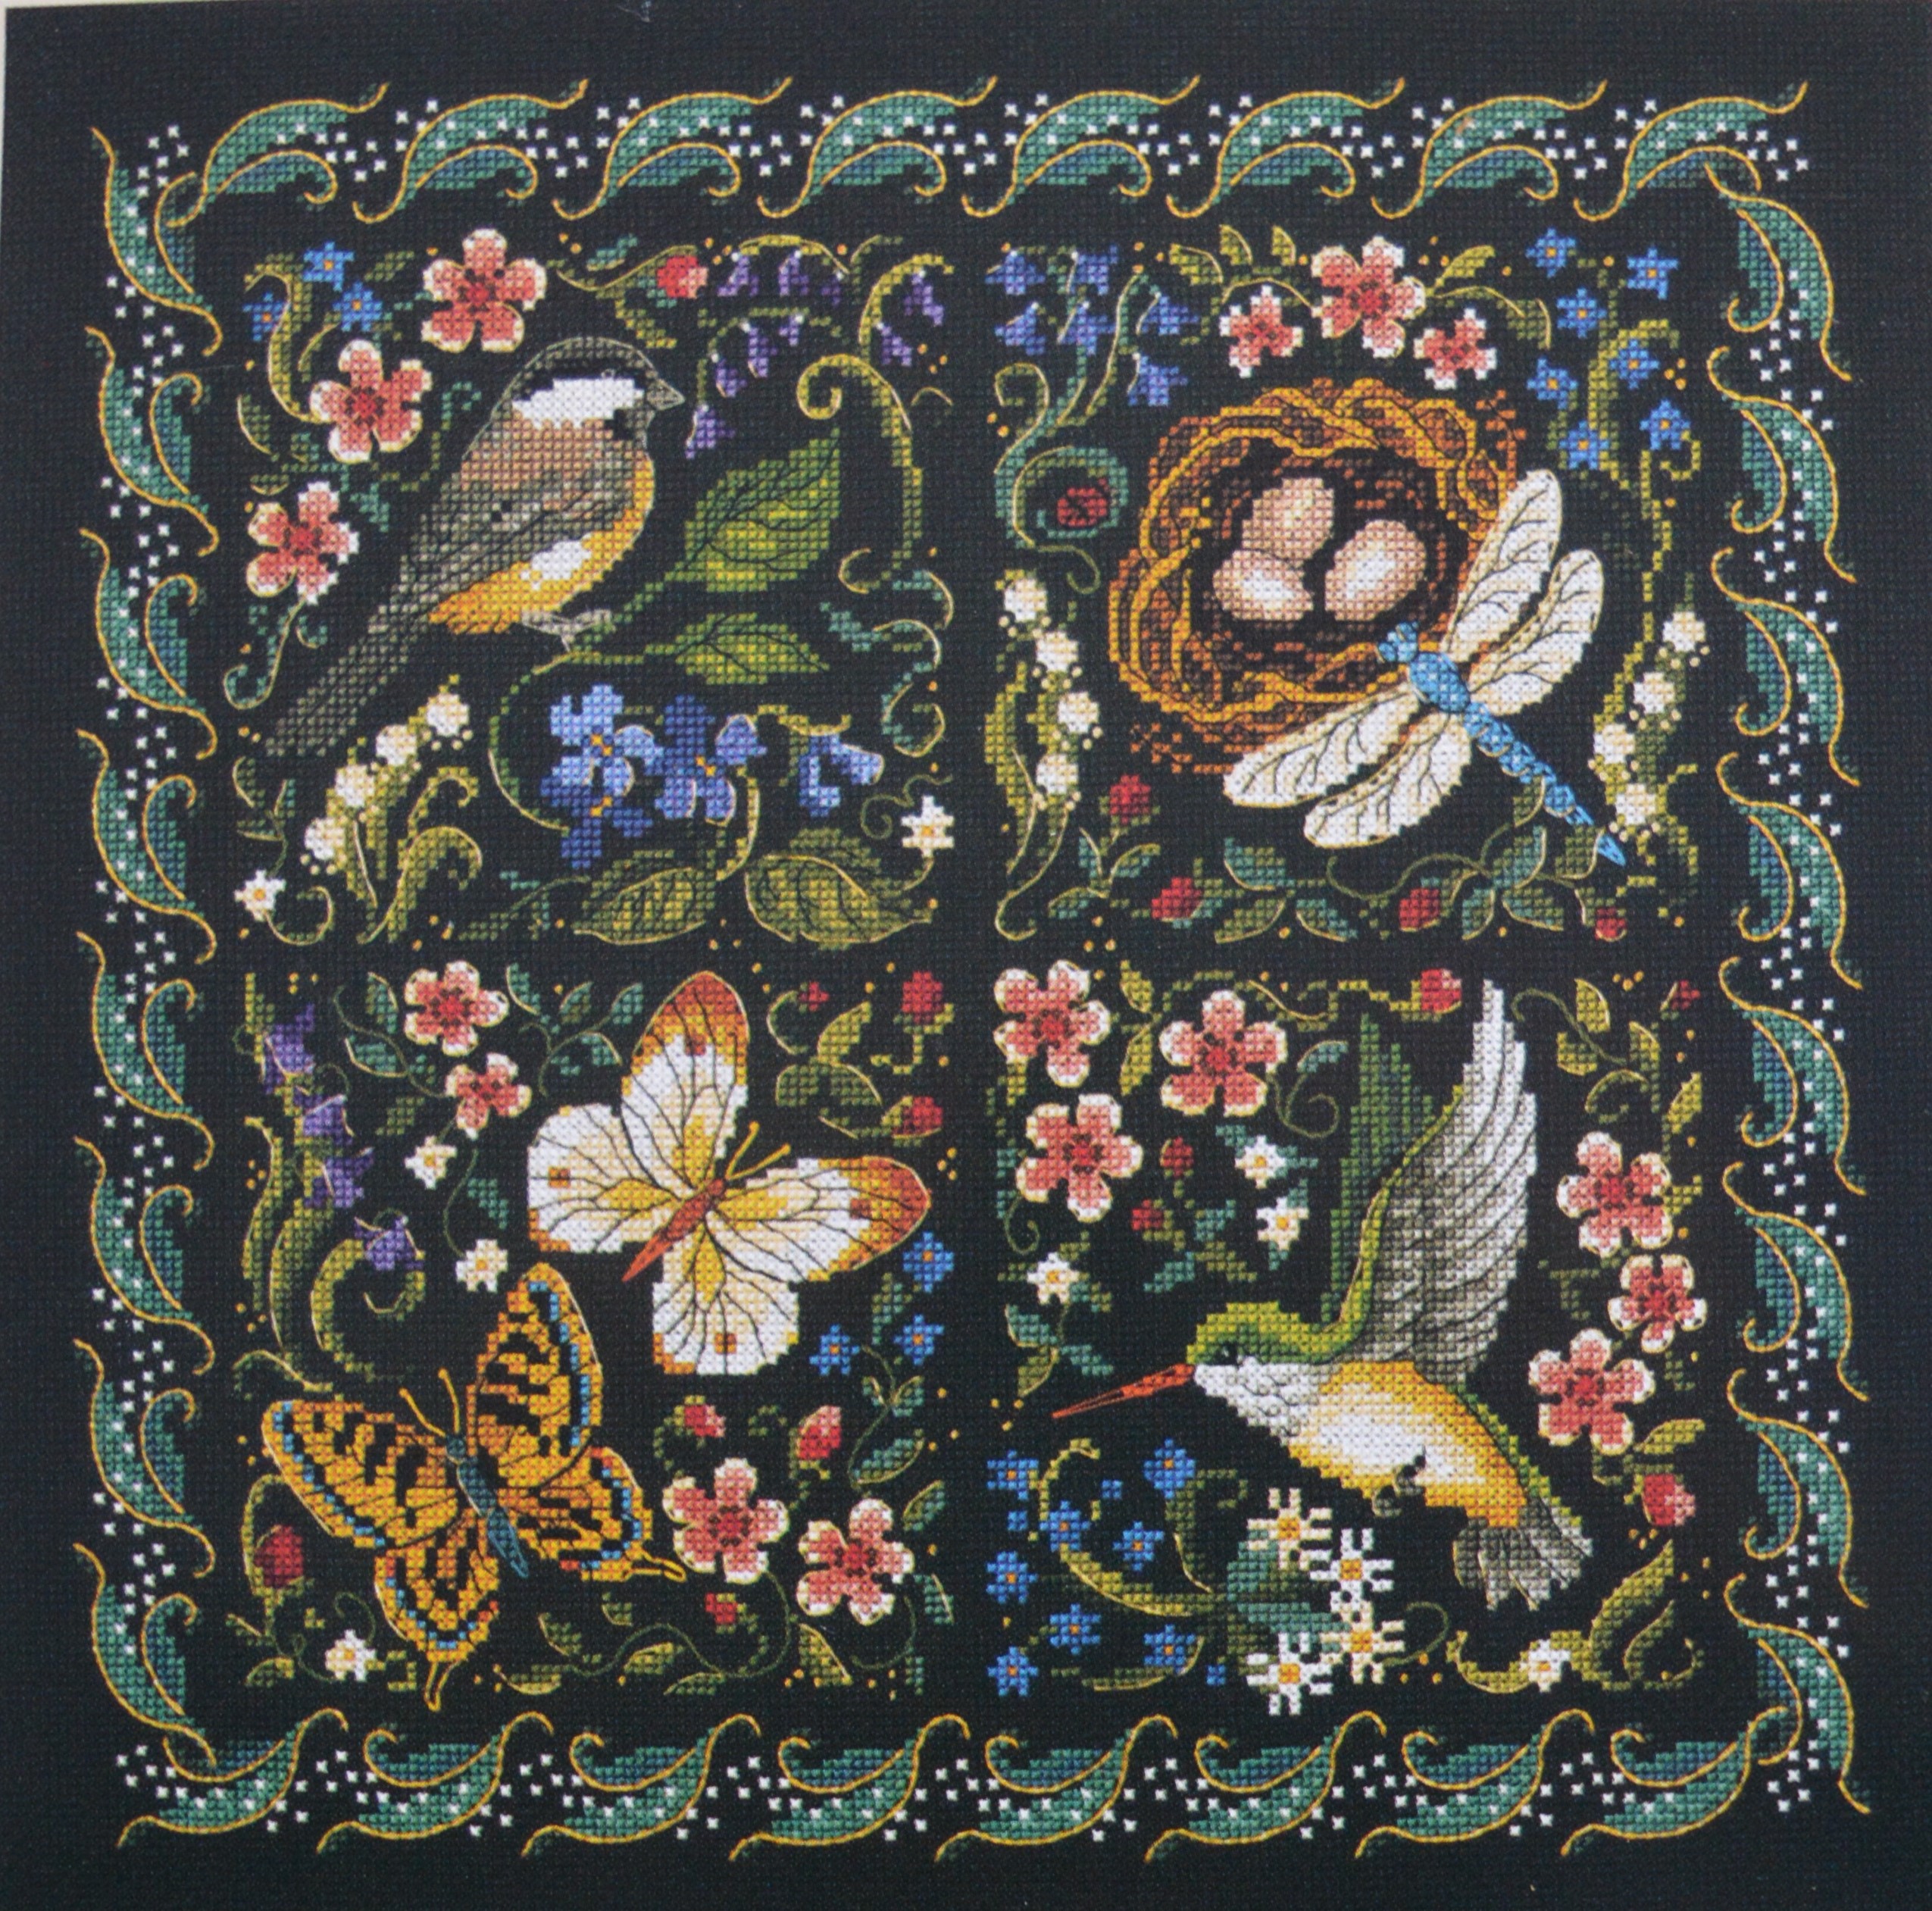
At Embroiderers Guild we have a sales table, anything a member no longer wants can be put on the table, and anyone can have it for a donation to the Guild. A few months ago I spotted this cross-stitch kit, it’s by Dimensions and it’s called The Finery of Nature. I popped a donation in the pot and it was mine!
I liked the nature theme with it’s birds and butterflies, the flowers also reminded me of the medieval style tapestries, I think they’re called mille-fleurs. The only thing I didn’t like was the black aida, mainly because it’s so difficult to work with, but that was easy to sort out.
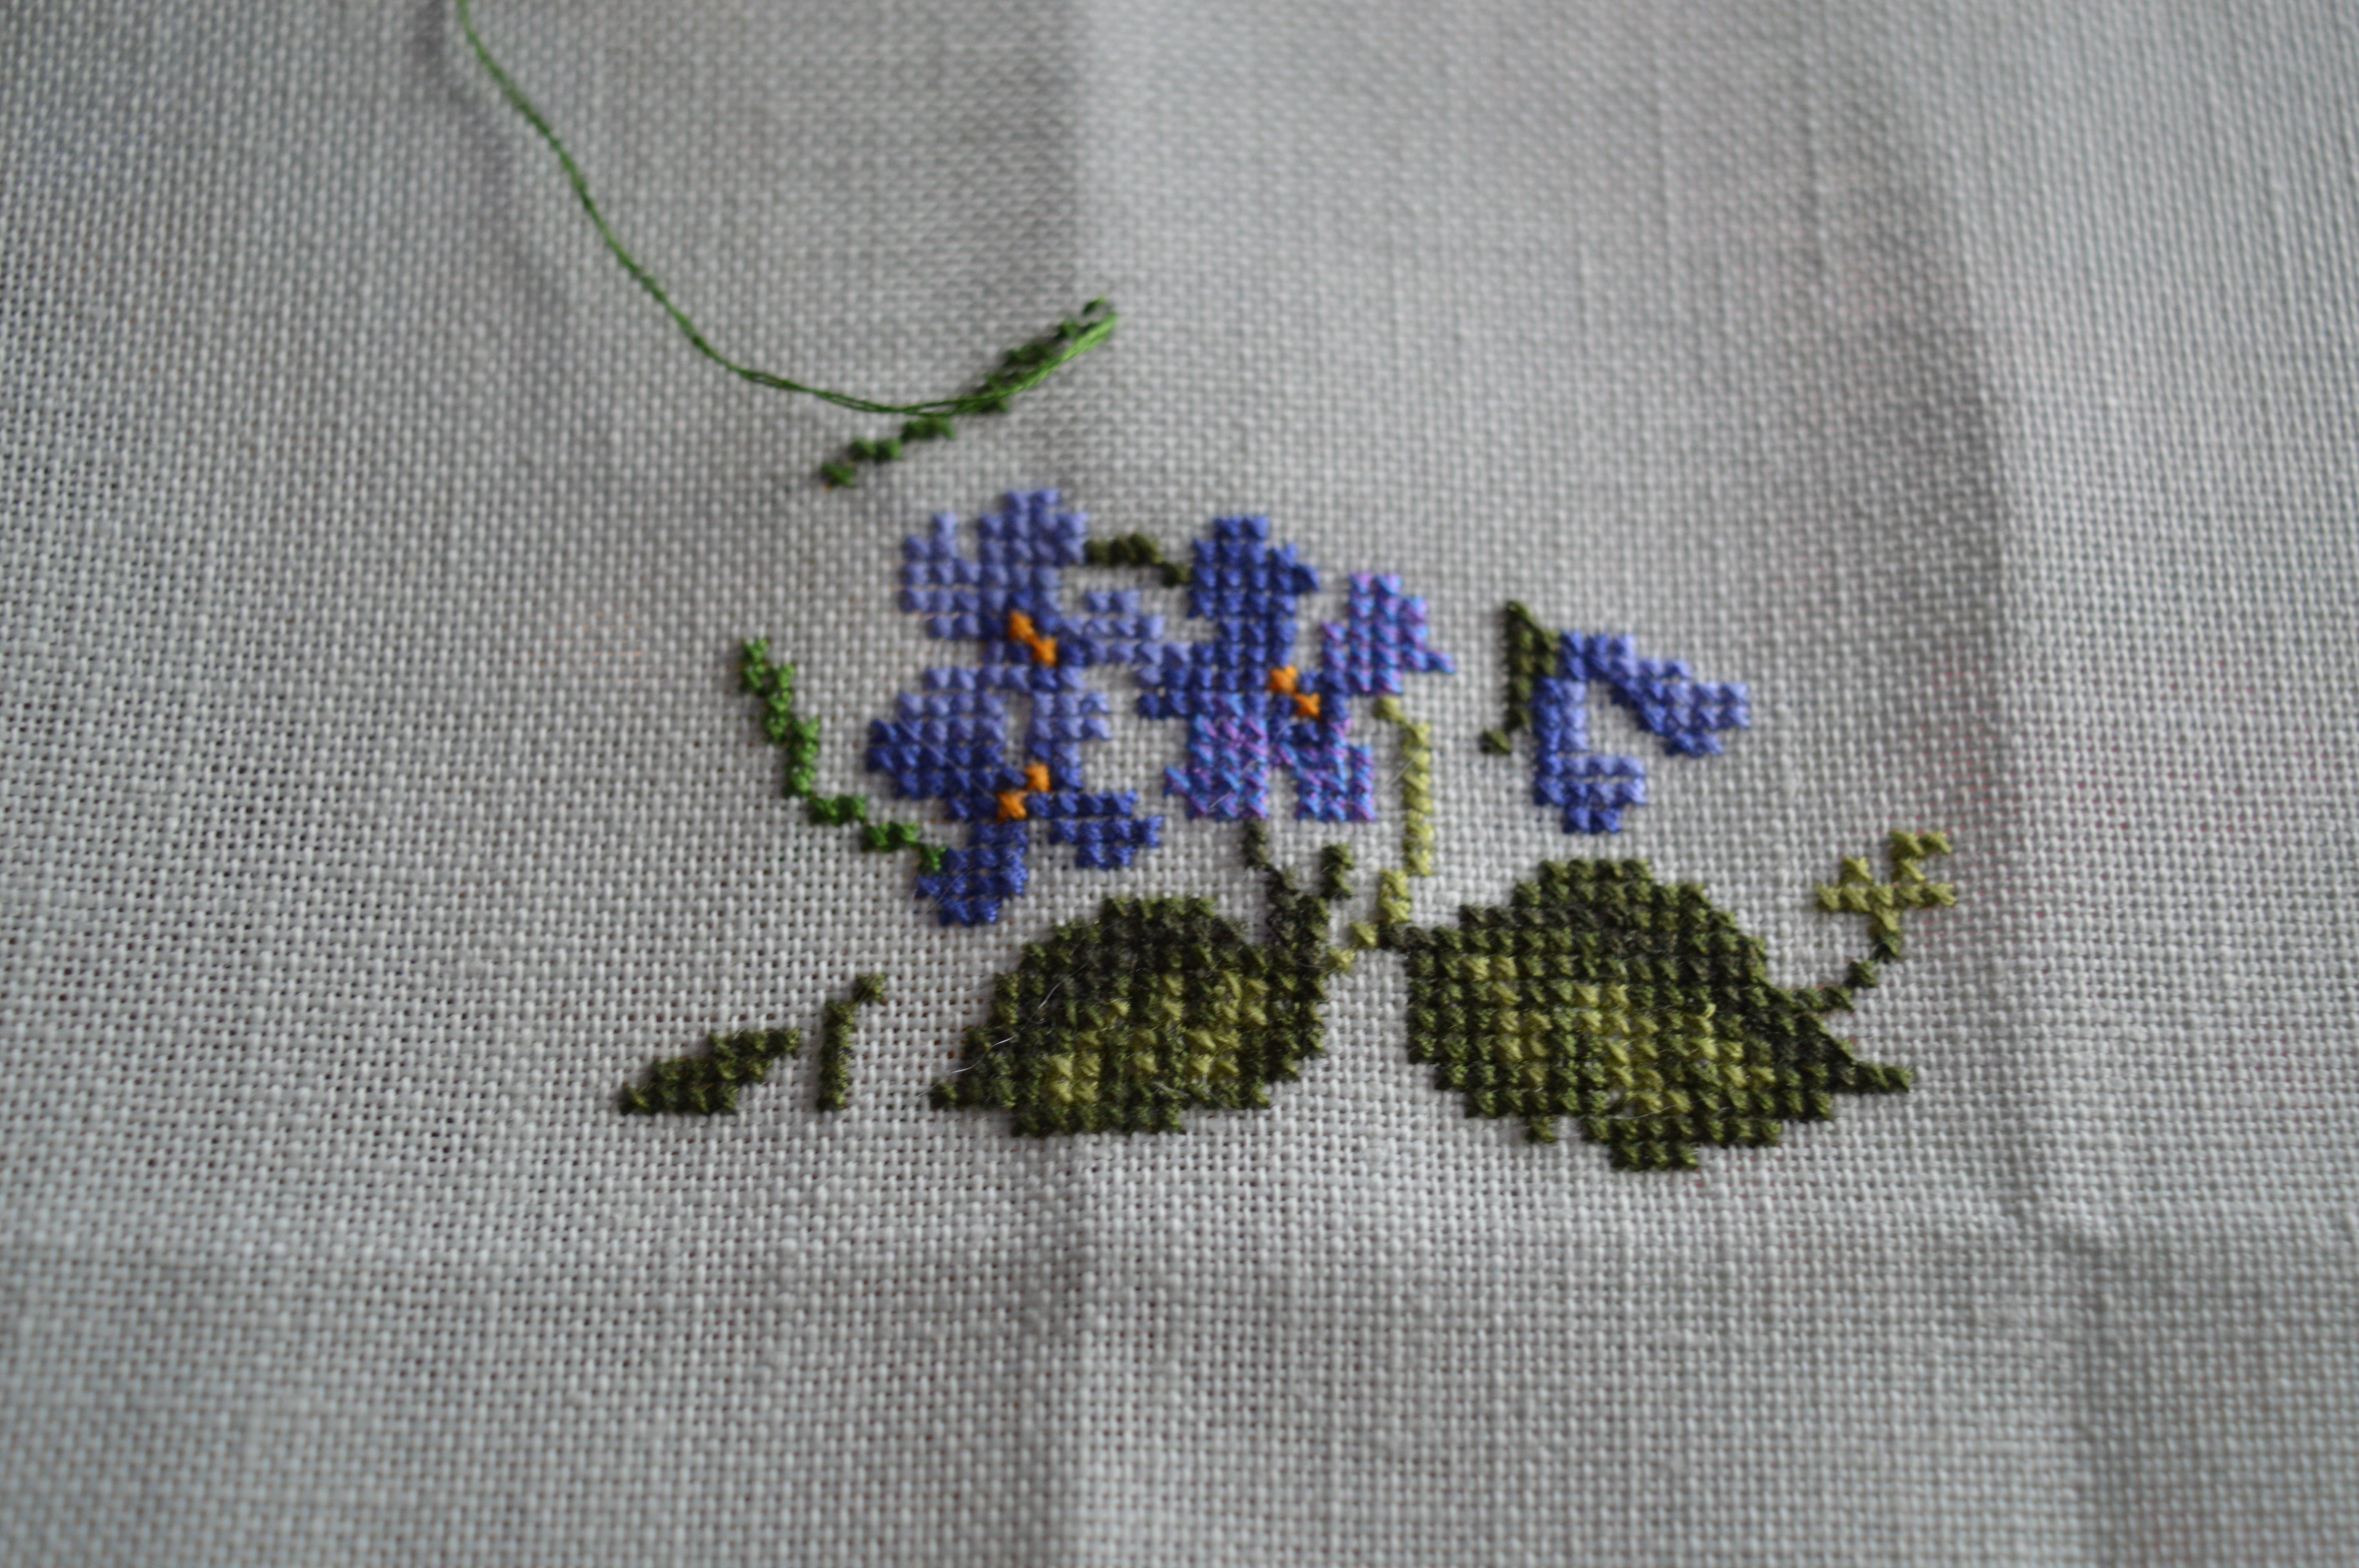
I chose a soft blue-green permin 32 count linen called sapphire. Hopefully it will work OK with the design. It took me quite a while to sort the threads out as there were four bundles to identify. I sorted them into colours so I have a card of blues and greens, one of reds and oranges and a third one of neutrals. So far it’s working pretty well. There’s a few different stitches in this design too, apart from the usual cross and back-stitch, there’s french knots, cording and couching too. Some of the french knots are with thicker thread too to make them stand out. It all adds interest!
I’m working the quarter with the little bird first, I think he’d a chickadee. As you can see I’ve stitched the violets at the bottom and I’m just working up the stem to be able to start the bird. I’m aiming to back-stitch as I go along but there’s also quite a bit of gold thread used both for back-stitch, cording and couched stitches. I might leave that until the end as I’m using a hoop and I’m concerned about the couched and corded stitches in particular being damaged. I could change over to a frame, but the hoop is one of those you sit on whilst you stitch, so it’s easy, convenient and I can stitch with both hands so it’s quicker.
This stitch-a-long is organised by Avis from Stitching by the Sea, we all choose our own projects and just share our progress every three weeks. It’s a great motivator to keep going! We’ve got two new members today too, welcome to Carmela and Jocelyn, please follow the links and see what everyone else has been stitching.
I’ve got two embroidery projects on the go at the moment, well actually I’ve got three, but one is my new stitch-a-long piece so you’ll have to wait til tomorrow to see that one.
At one of the big shows last year I saw a stall selling embroidery kits for mandalas, luckily they had samples stitched on display as I must admit if I had only seen the image on the packet I wouldn’t have bought it. It’s a french company called Chat Dans l’Aiguille and both the colours and the designs are beautiful.
I popped it in my bag a couple of weeks ago when I was going to Embroiders Guild, just in case I had chance to start it, I did!
It’s lovely to stitch, the transfer is printed in pink on the fabric and so far I’ve used stem, chain, buttonhole stitch and french knots. The diagram telling me which stitch and colour to use is nice and clear, I’m finding it a really relaxing stitching project, the word mindfullness comes to mind! I’m tempted to do some more as I remembered I already have a book of mandala designs, I’m just hesitating as I’m not sure what you can do with them apart from hoop art or maybe a cushion.
I hope no one is offended by my next project, there is a bit of a trend in cross-stitch at the moment called subversive cross-stitch. It’s not my cup of tea at all as it’s basically stitching phrases with swear words. I’m not saying that the occasional expletive doesn’t pass my lips at times, but there’s something about reading the words that I really don’t like, whether it’s in books, memes or cross-stitch. However…this one made me smile and actually it’s more double meanings rather than blatant profanities!
It’s our twelfth wedding anniversary in March and over the last couple of years I’ve started a bit of a tradition of stitching a card. I’ve done hearts etc, I wanted something a bit different. I saw a design on Etsy of two birds, but it was only available as a kit and I think it will have been a little big for a card. I found a similar pattern on Etsy from a different designer of a smaller bird which conveniently she provided in reverse too, perfect for my plan…
Here in the UK we have lots of little garden birds called tits, bluetits, coaltits, long tailed tits and great tits. They visit our garden most days and regularly nest in our bird boxes too.
Blue tits in our garden
My OH grew up in Australia and I think has only really learnt to identify British birds since meeting me. I’m not sure if it’s the school boy in him or what but I’m sure I still detect a slight smirk every time we see great tits in the garden!
I started stitching this in the clinic at the local hospital waiting for a mammogram (nothing to worry about by the way) which I couldn’t decide was apt or inappropriate! I positioned one bird a couple of stitches higher than the other and also made his ‘beard’ a bit longer, I think the males have a longer beard than the females. All I had to do then was join the two branches together, I also added a couple of tiny black beads to give their eyes a bit of a sparkle.
I finished the stitching a couple of evenings later, I just need to make it up now so it can be on the front of a card and used as an ornament later. I think it’ll make him laugh!
I’ll be linking up with Kathy’s Quilts for Slow Stitching Sunday, please follow the link for more hand-stitching.
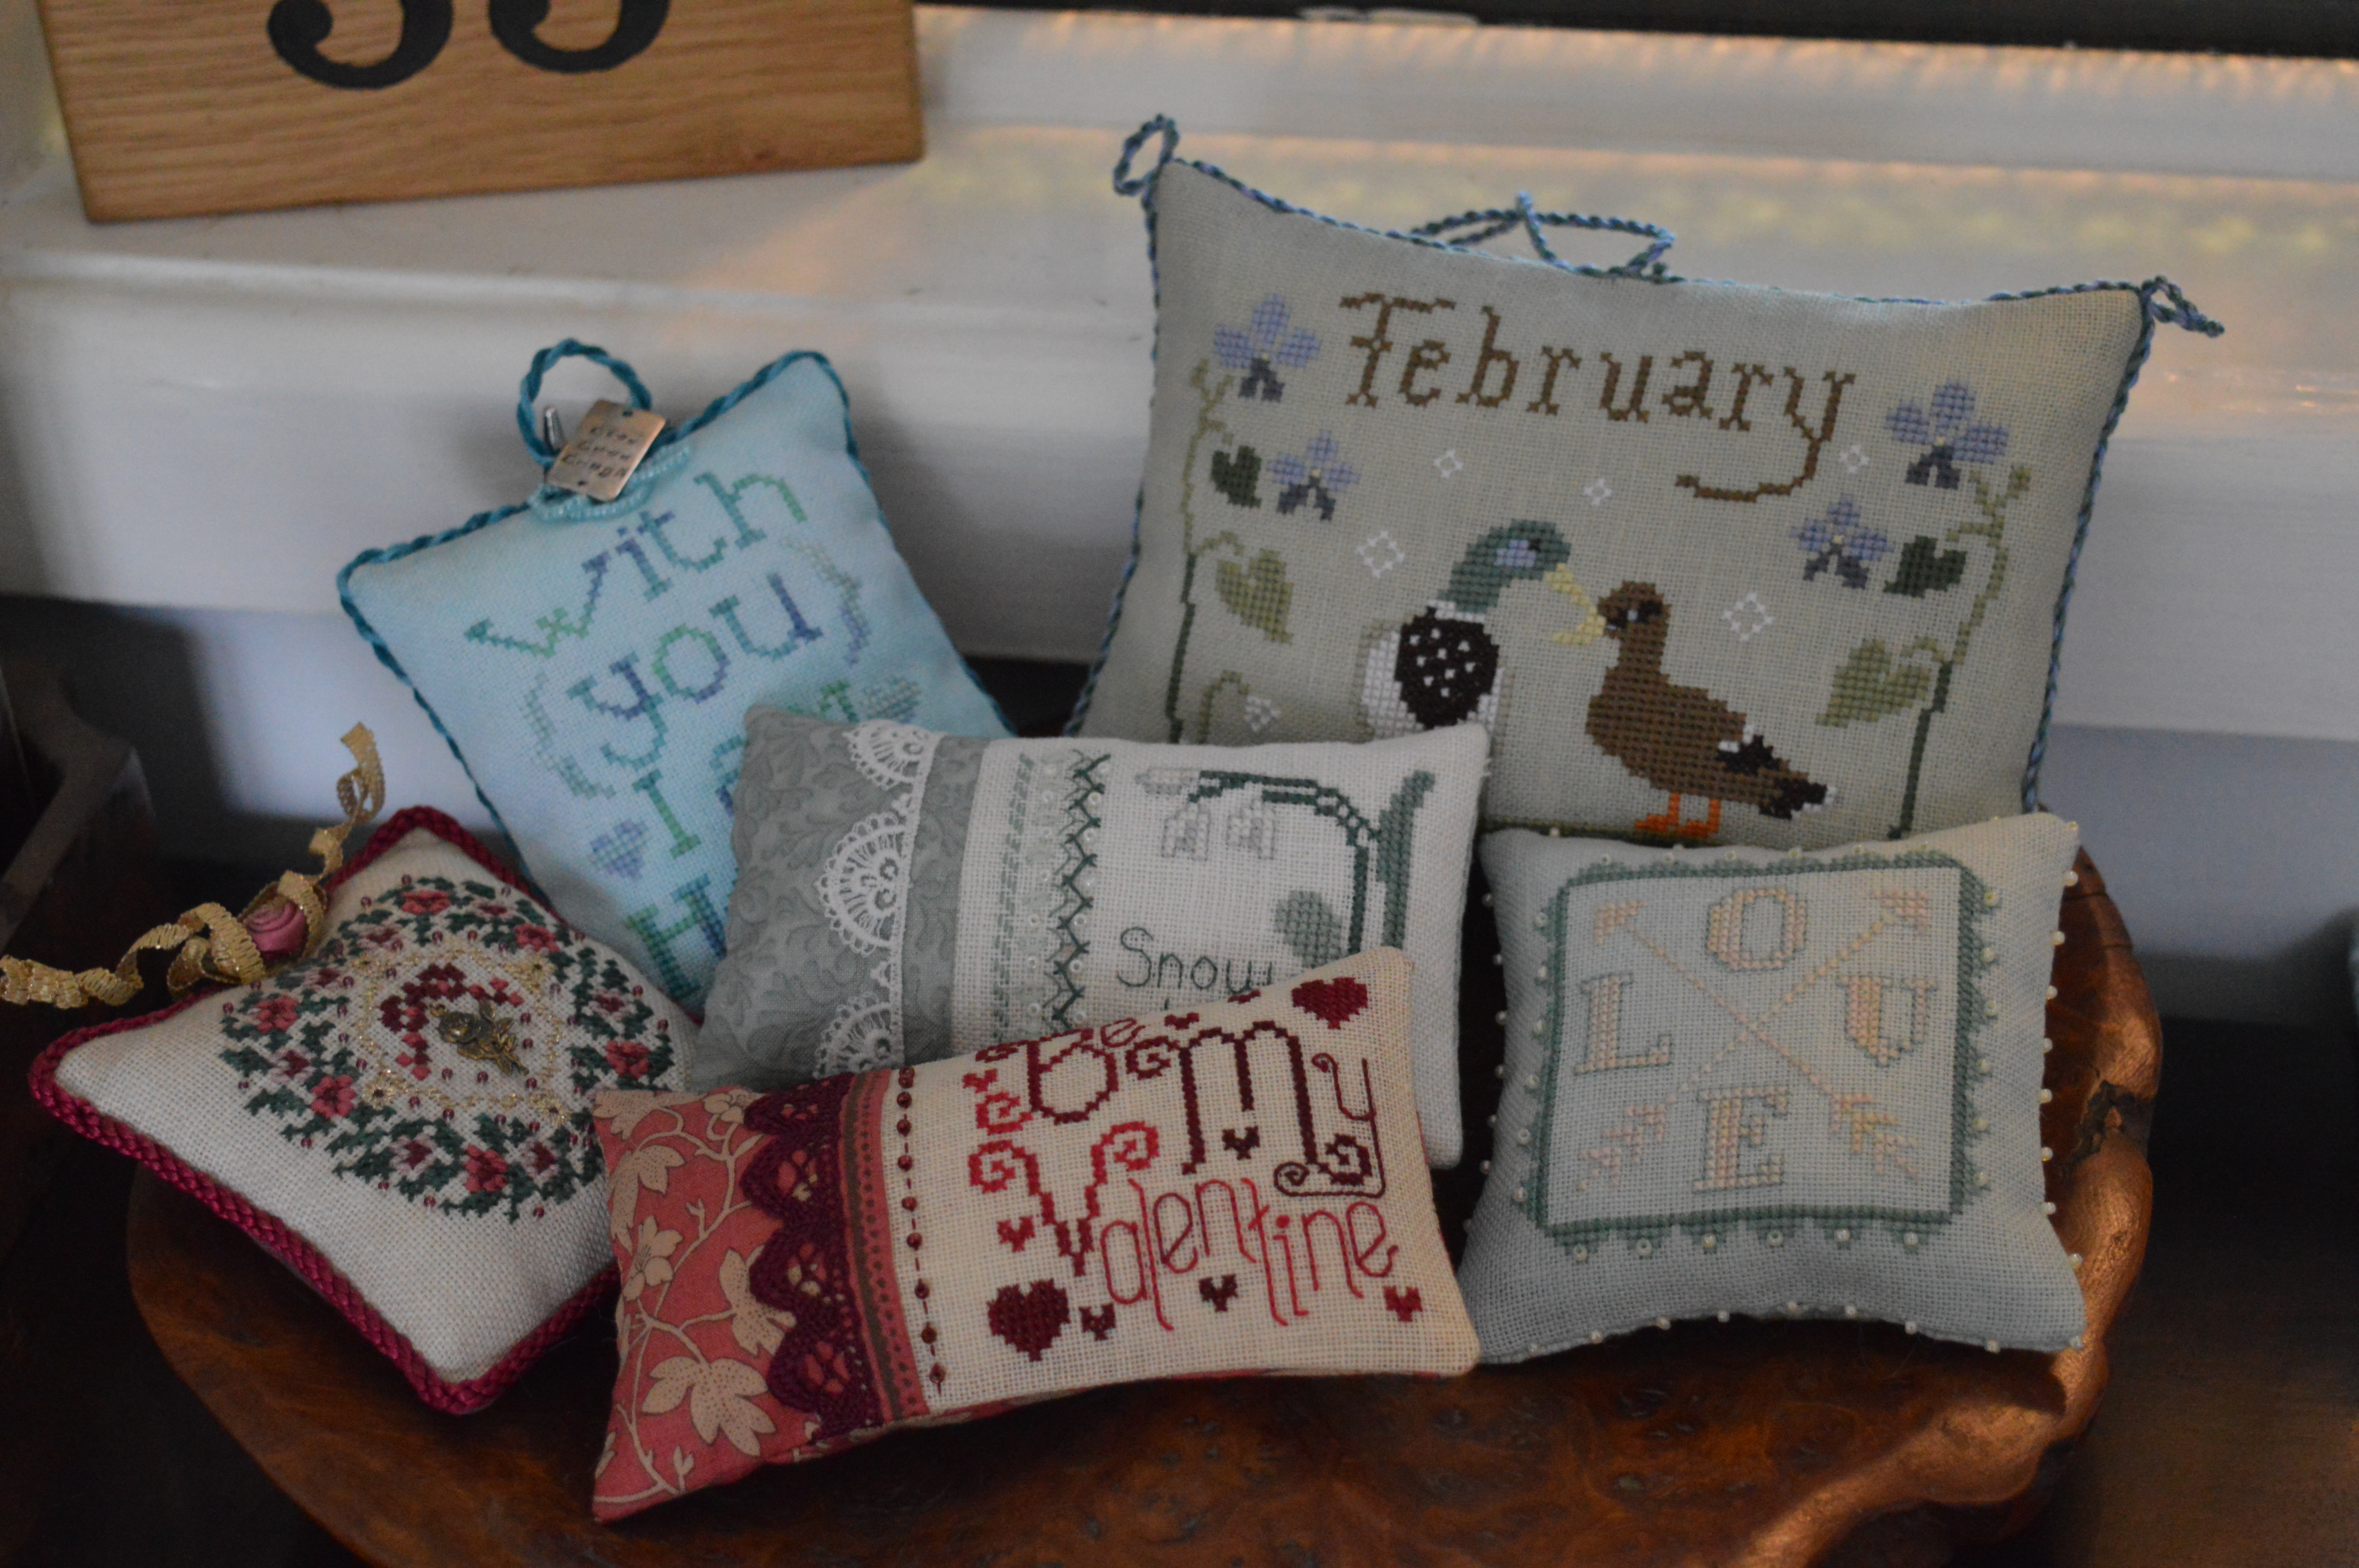
Yesterday I changed my little display of cross-stitch smalls with the beginning of the new month.I’m rather enjoying putting together these little groups, deciding which can stay and which to change. They’re all together of a burr elm bowl, which isn’t perfect shape wise as it isn’t really deep enough, but I love having a use for such a beautiful piece of wood.
This months smalls predictably have a valentine’s theme running through them, although luckily it’s not all red!
The snowdrop one is the only one to stay over from January as they are all just coming into flower at the moment. I made this one last winter. It was a very old cross-stitch that actually said lily, I thought they look much more like snowdrops so I unpicked it and changed it.
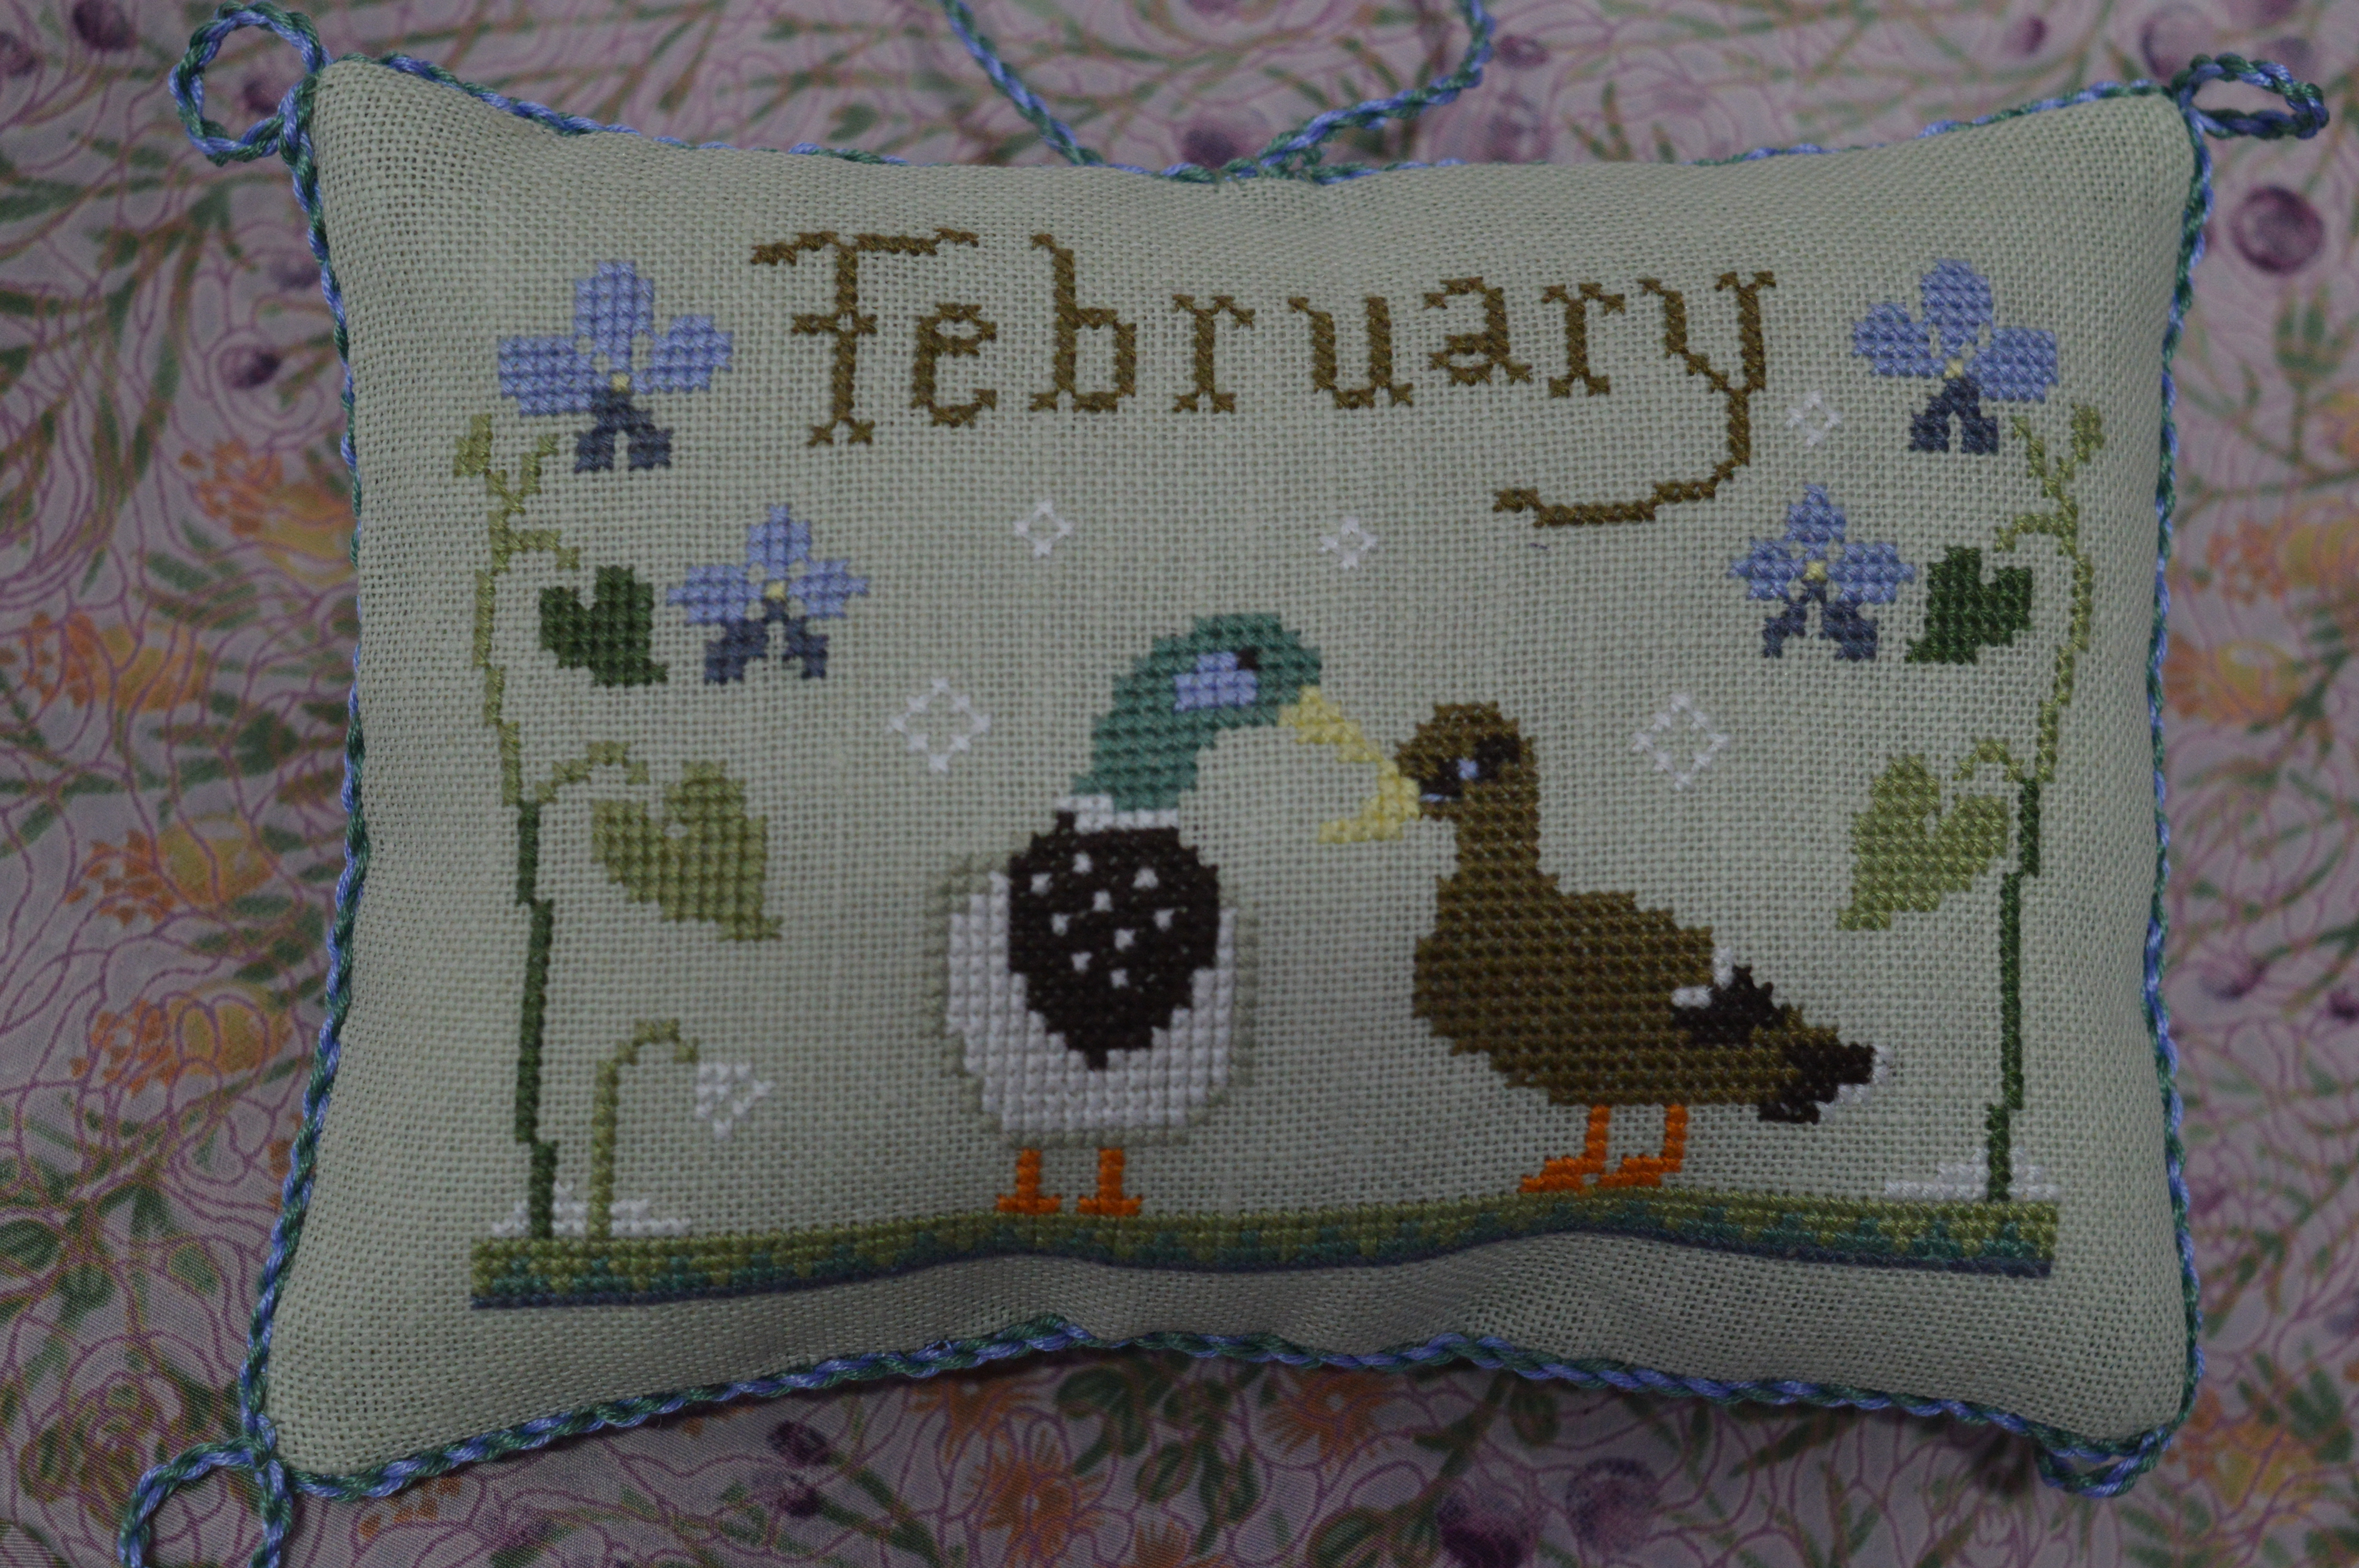
Of course the February small from the Snowflake Diaries set is out, this is one of my favourites with a pair of mallard ducks.
The little red one on the left is one I made years ago, like about twenty years ago! I seem to remember it was a Just Nan kit. I was so pleased with it at the time I made my mum one as a present. She hung it on my dad’s carriage clock handle and it was still there when we cleared her house, so I have two versions now!
I’m getting quite a collection of cross-stitch smalls to choose from now!
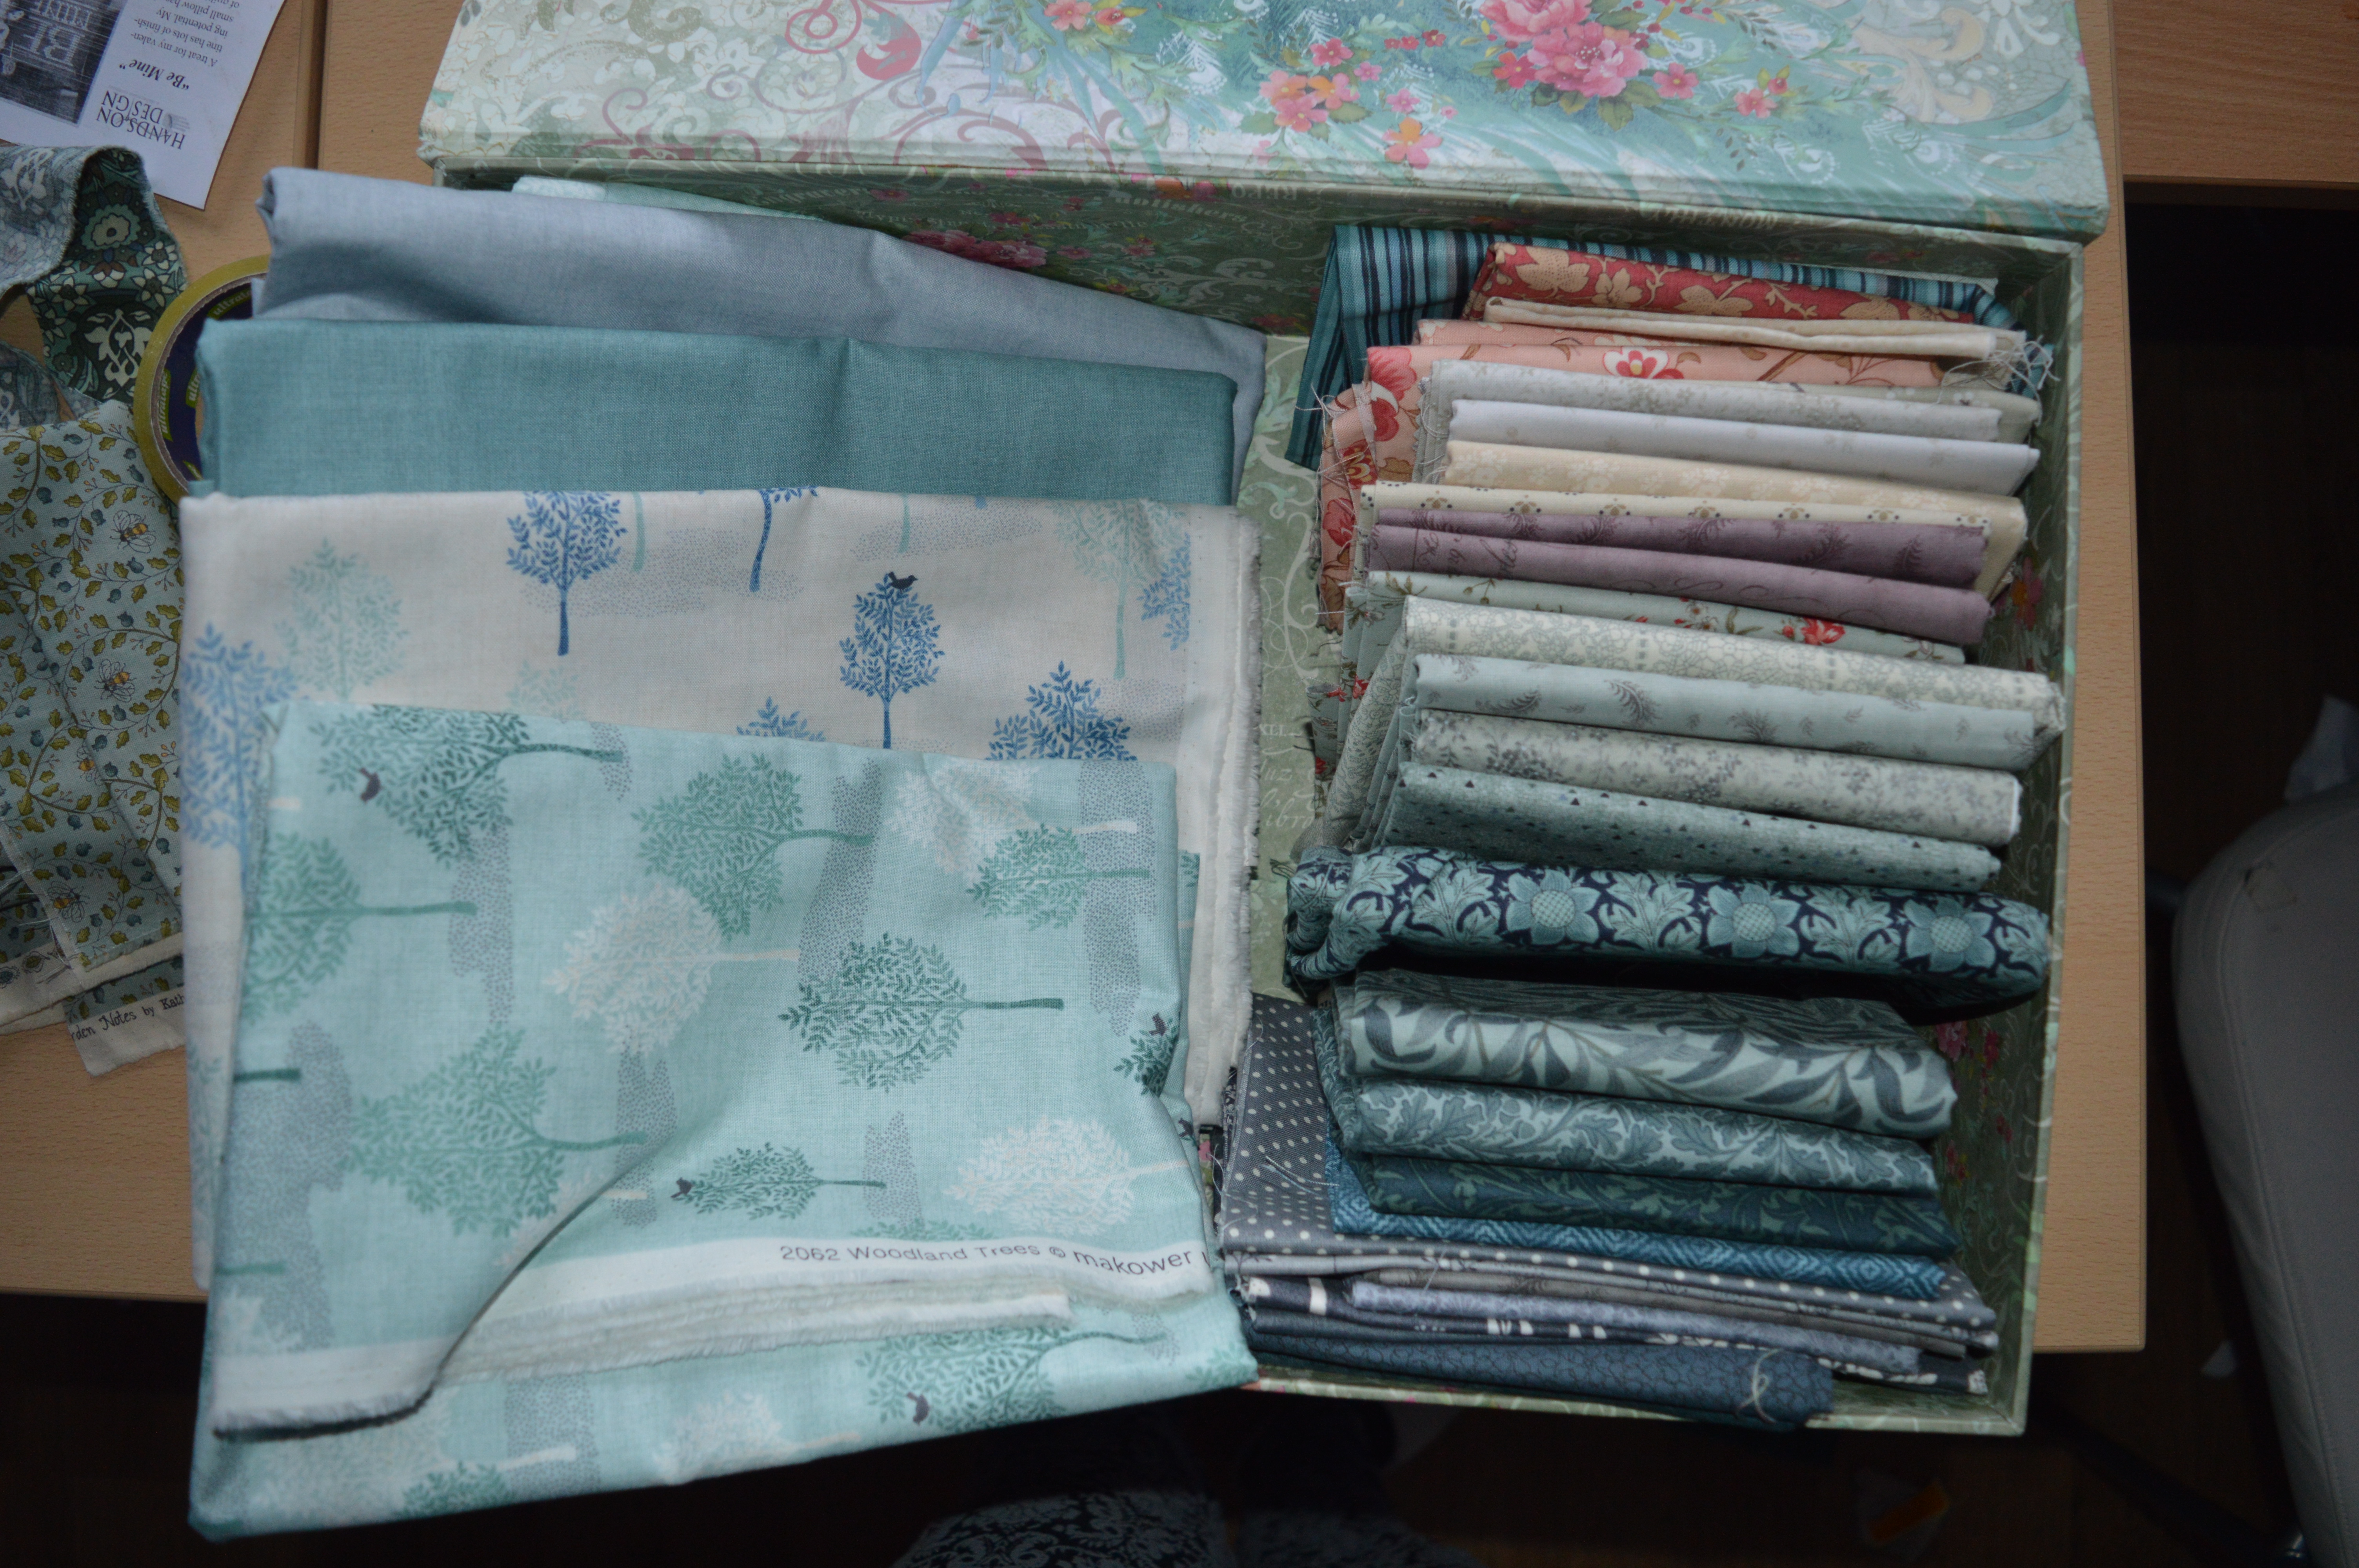
It was quite exciting today as this year’s Sarah Fielke Block of the Month started. It’s a gorgeous quilt of houses, cottages, trees, as soon as I saw the design I signed up. Sarah was the designer of Down the Rabbit Hole quilt which I’m quilting at the moment, so I know her designs are wonderful and her instructions are great. I tried very hard to veer away from my usual quiet palettes of colour, I went to a quilt show with a completely open mind…and came home with a subtle collection of fabrics in teal, grey, adding a little purple (of course!) and peach. I found my background fabrics later with the trees on together with a couple of plains in light teal and grey.
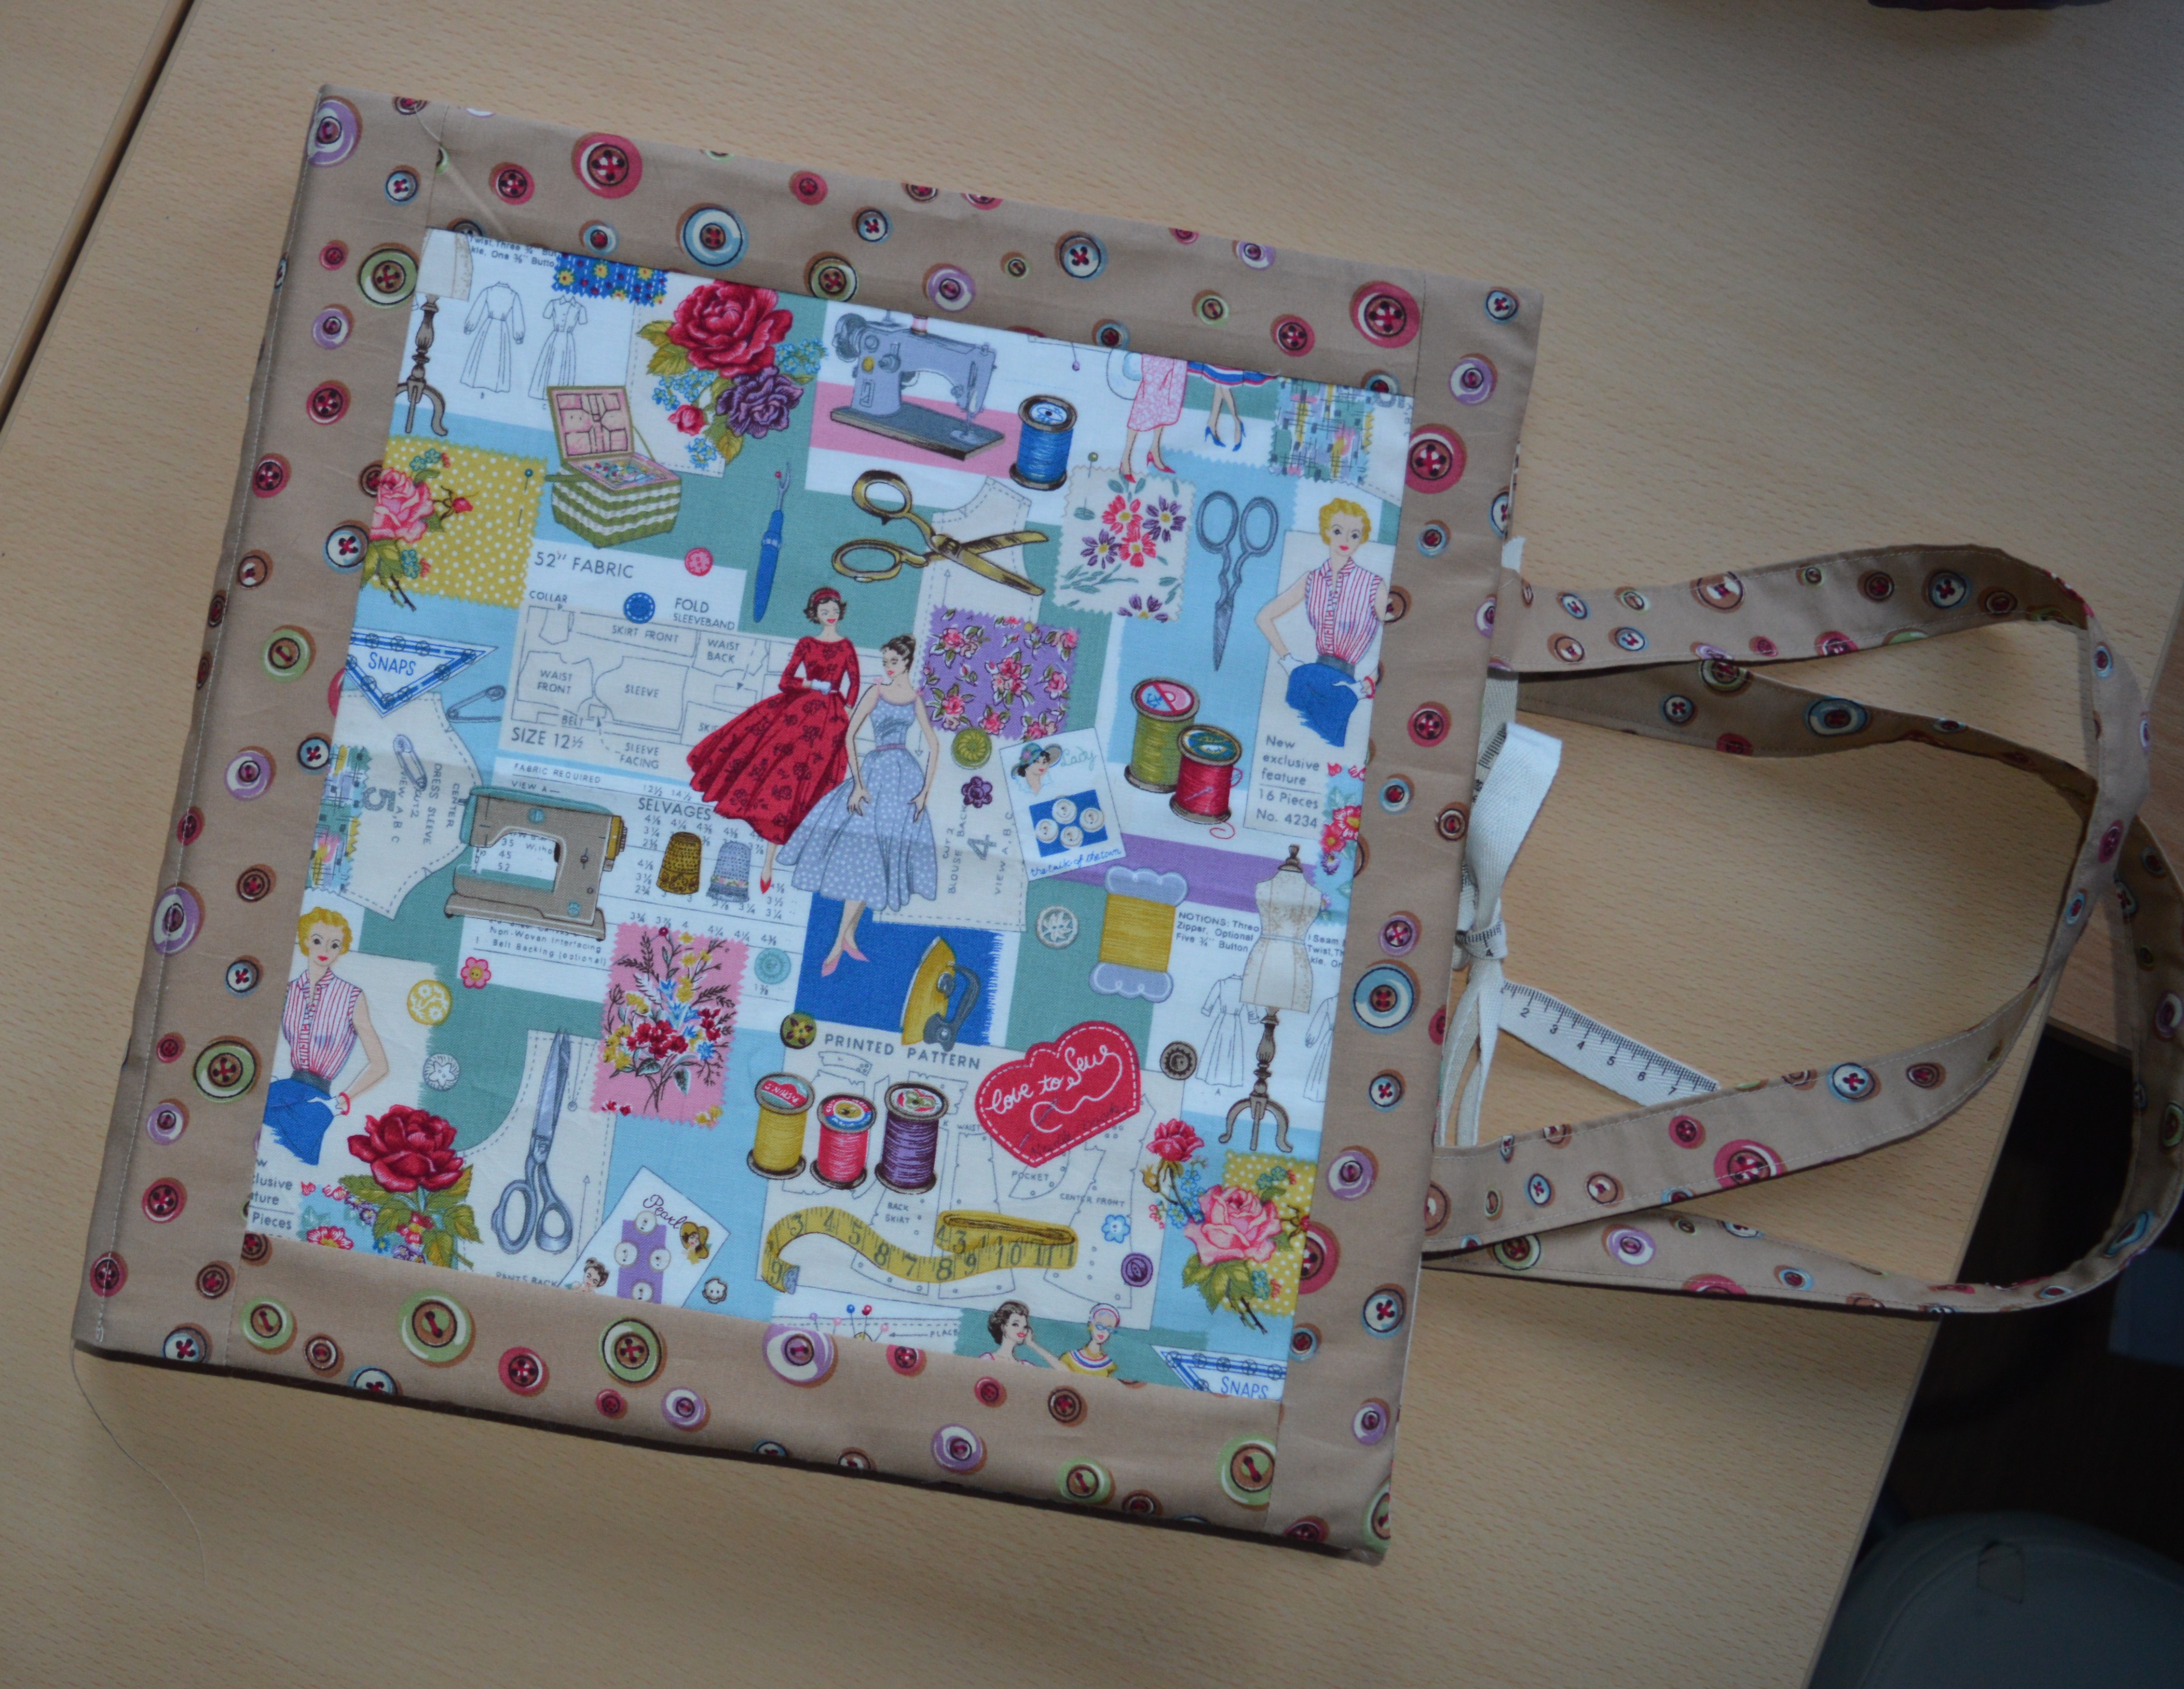
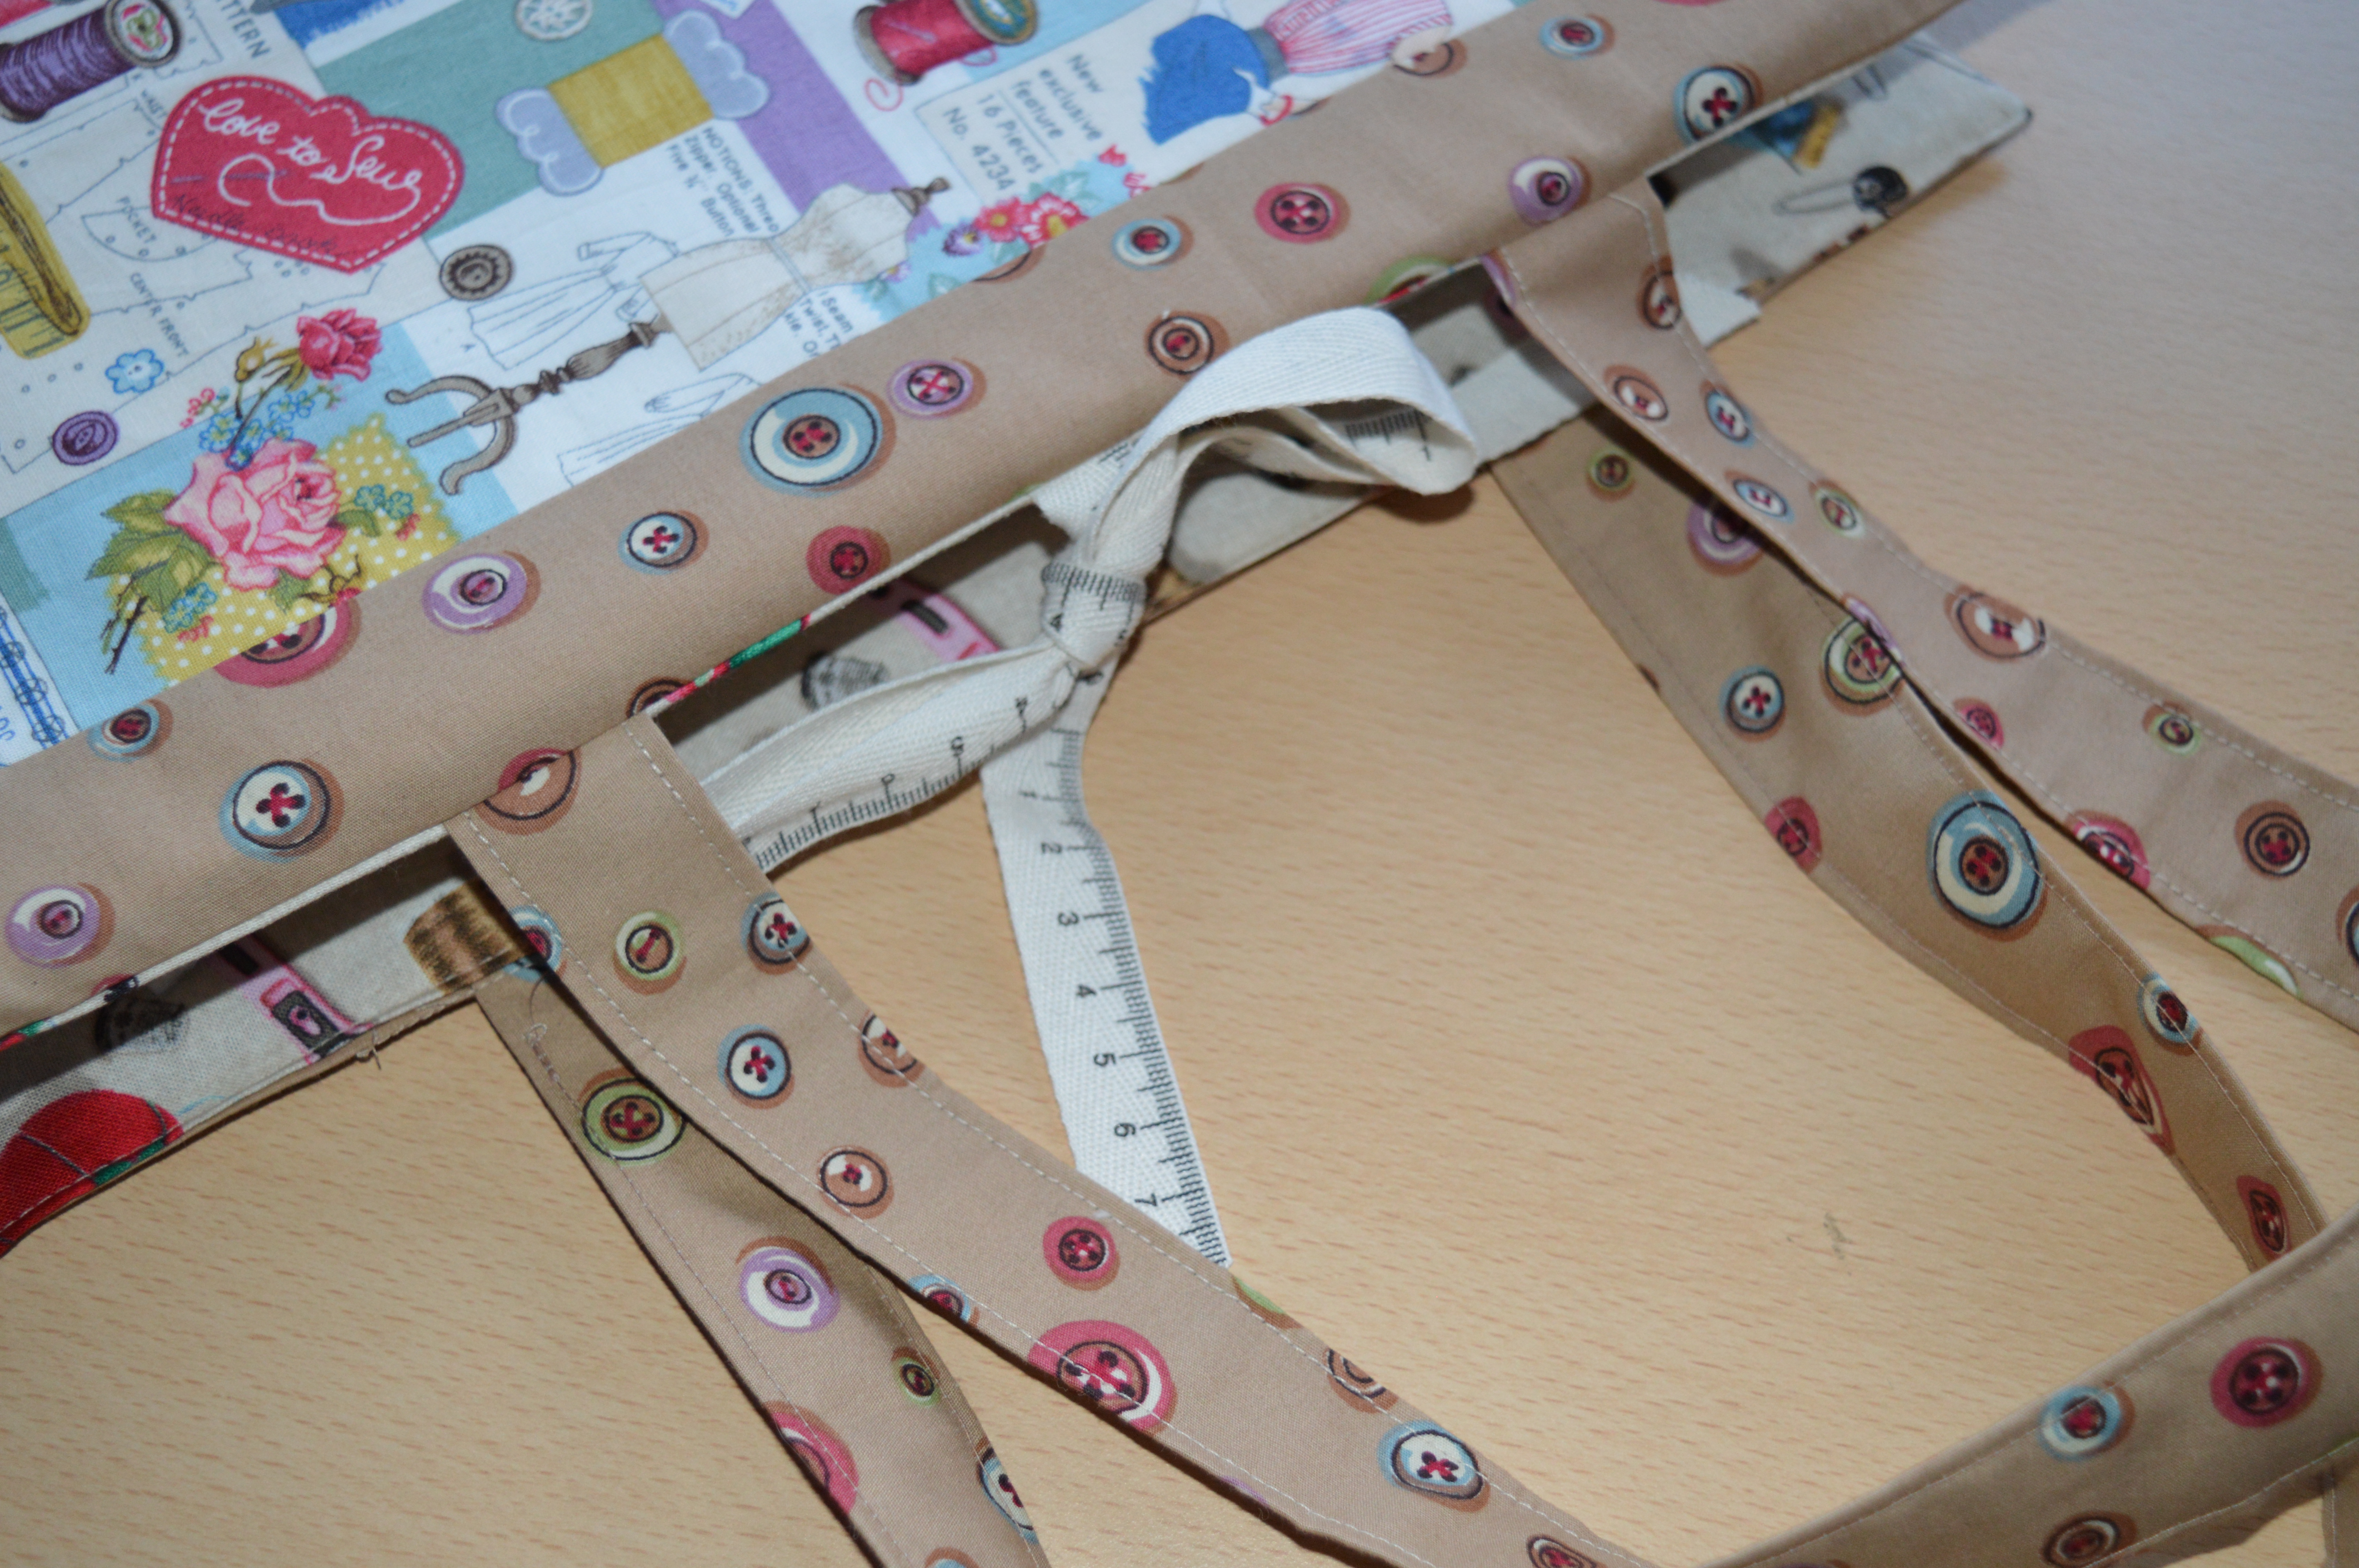
As a lead up to the start of the BOM, Sarah suggested we made a fabric block book to store both our finished blocks and work in progress too. She released a video to show us a simple way to make one. I finally got round to sewing mine yesterday, just in time!
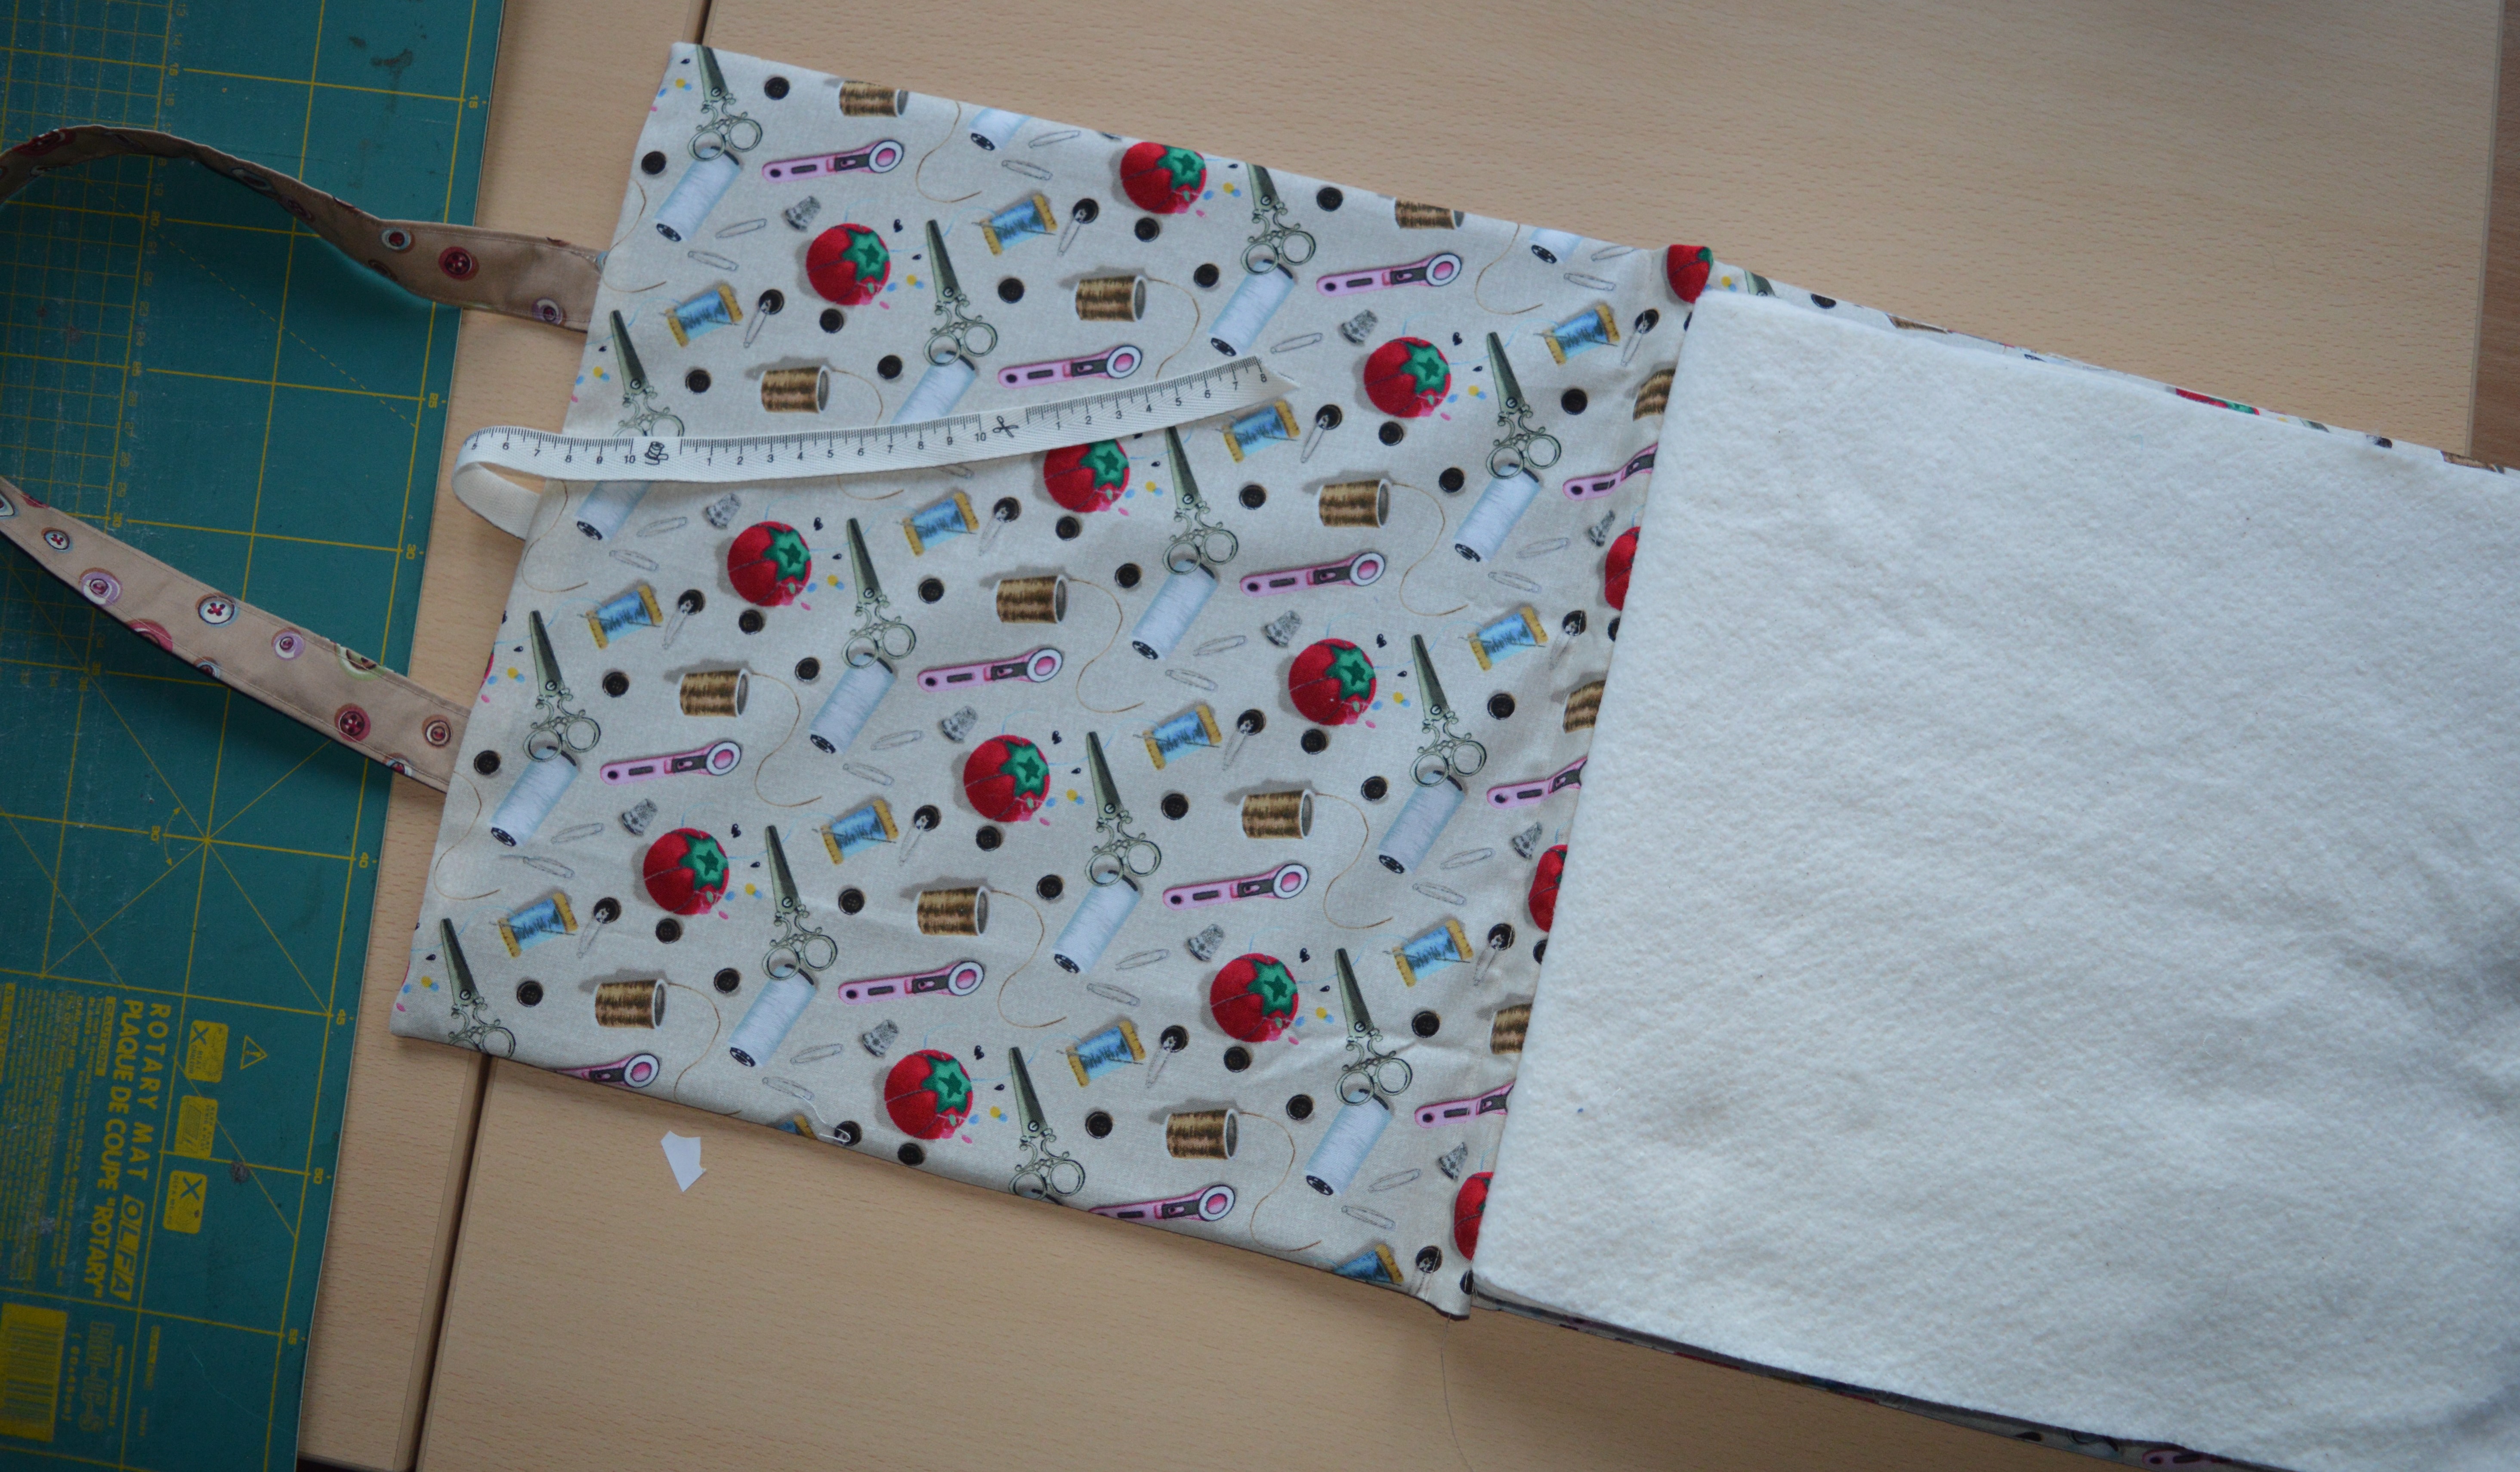
Sarah used an orphan block for the front, I haven’t got any orphan blocks so I raided my stash for some sewing themed fabrics. I bought these ages ago on a whim and then wondered what on earth I was going to do with them, this was the perfect project to use them. I even had just enough of the tape measure cotton tape left in my stash for the ties.
The book was very straight forward to make with cardboard inserts front and back and pages of batting which acts like fuzzy felt for work in progress and finished blocks. My main difficulty was trying to persuade my twenty year old sewing machine that it could stitch through six layers of batting, necessary to make the spine. It flatly refused at first – I got that STOP IMMEDIATELY FOR SAFETY sign! I lengthened the stitch and tried it with just three pages, it stitched OK. I did two sets of three and then put one on top of the other and it happily stitched all six together!! It didn’t even complain when I added the two layers of fabric for the cover – I think it was just feeling it’s age at first!
The only change I made was to add two handles to the book. It measures about 13″ square and I can see myself using it to carry work to sew at Embroiderers Guild or when visiting my mum. Handles will make it a lot more convenient.
I’m really pleased with my book, I’m actually tempted to make another one as I’ve now got three BOM’s on the go and another one would help keep things organised.
So now I need to choose the fabrics for the centre of my quilt and make the first eight houses.
I was all set to write this post on Monday, I took the photos, sat down at my computer in the corner of my sewing room and with a slight ping I was plunged into darkness, at first I thought it was a power cut, until I realised it was just my sewing room! The LED strip light had gone!! I’m hoping my son will come round tonight to wire up a new one as daylight is in short supply at this time of year!
I have managed to continue my tidy-up in the garden. The drive is getting somewhat overgrown and my OH is chuntering about his new car, so I pruned back all the overhanging branches, cut out lots of dead wood and made a very big pile to go to the tip. I really need to take a saw to some of it as it does need a good chop but that will wait a little longer.
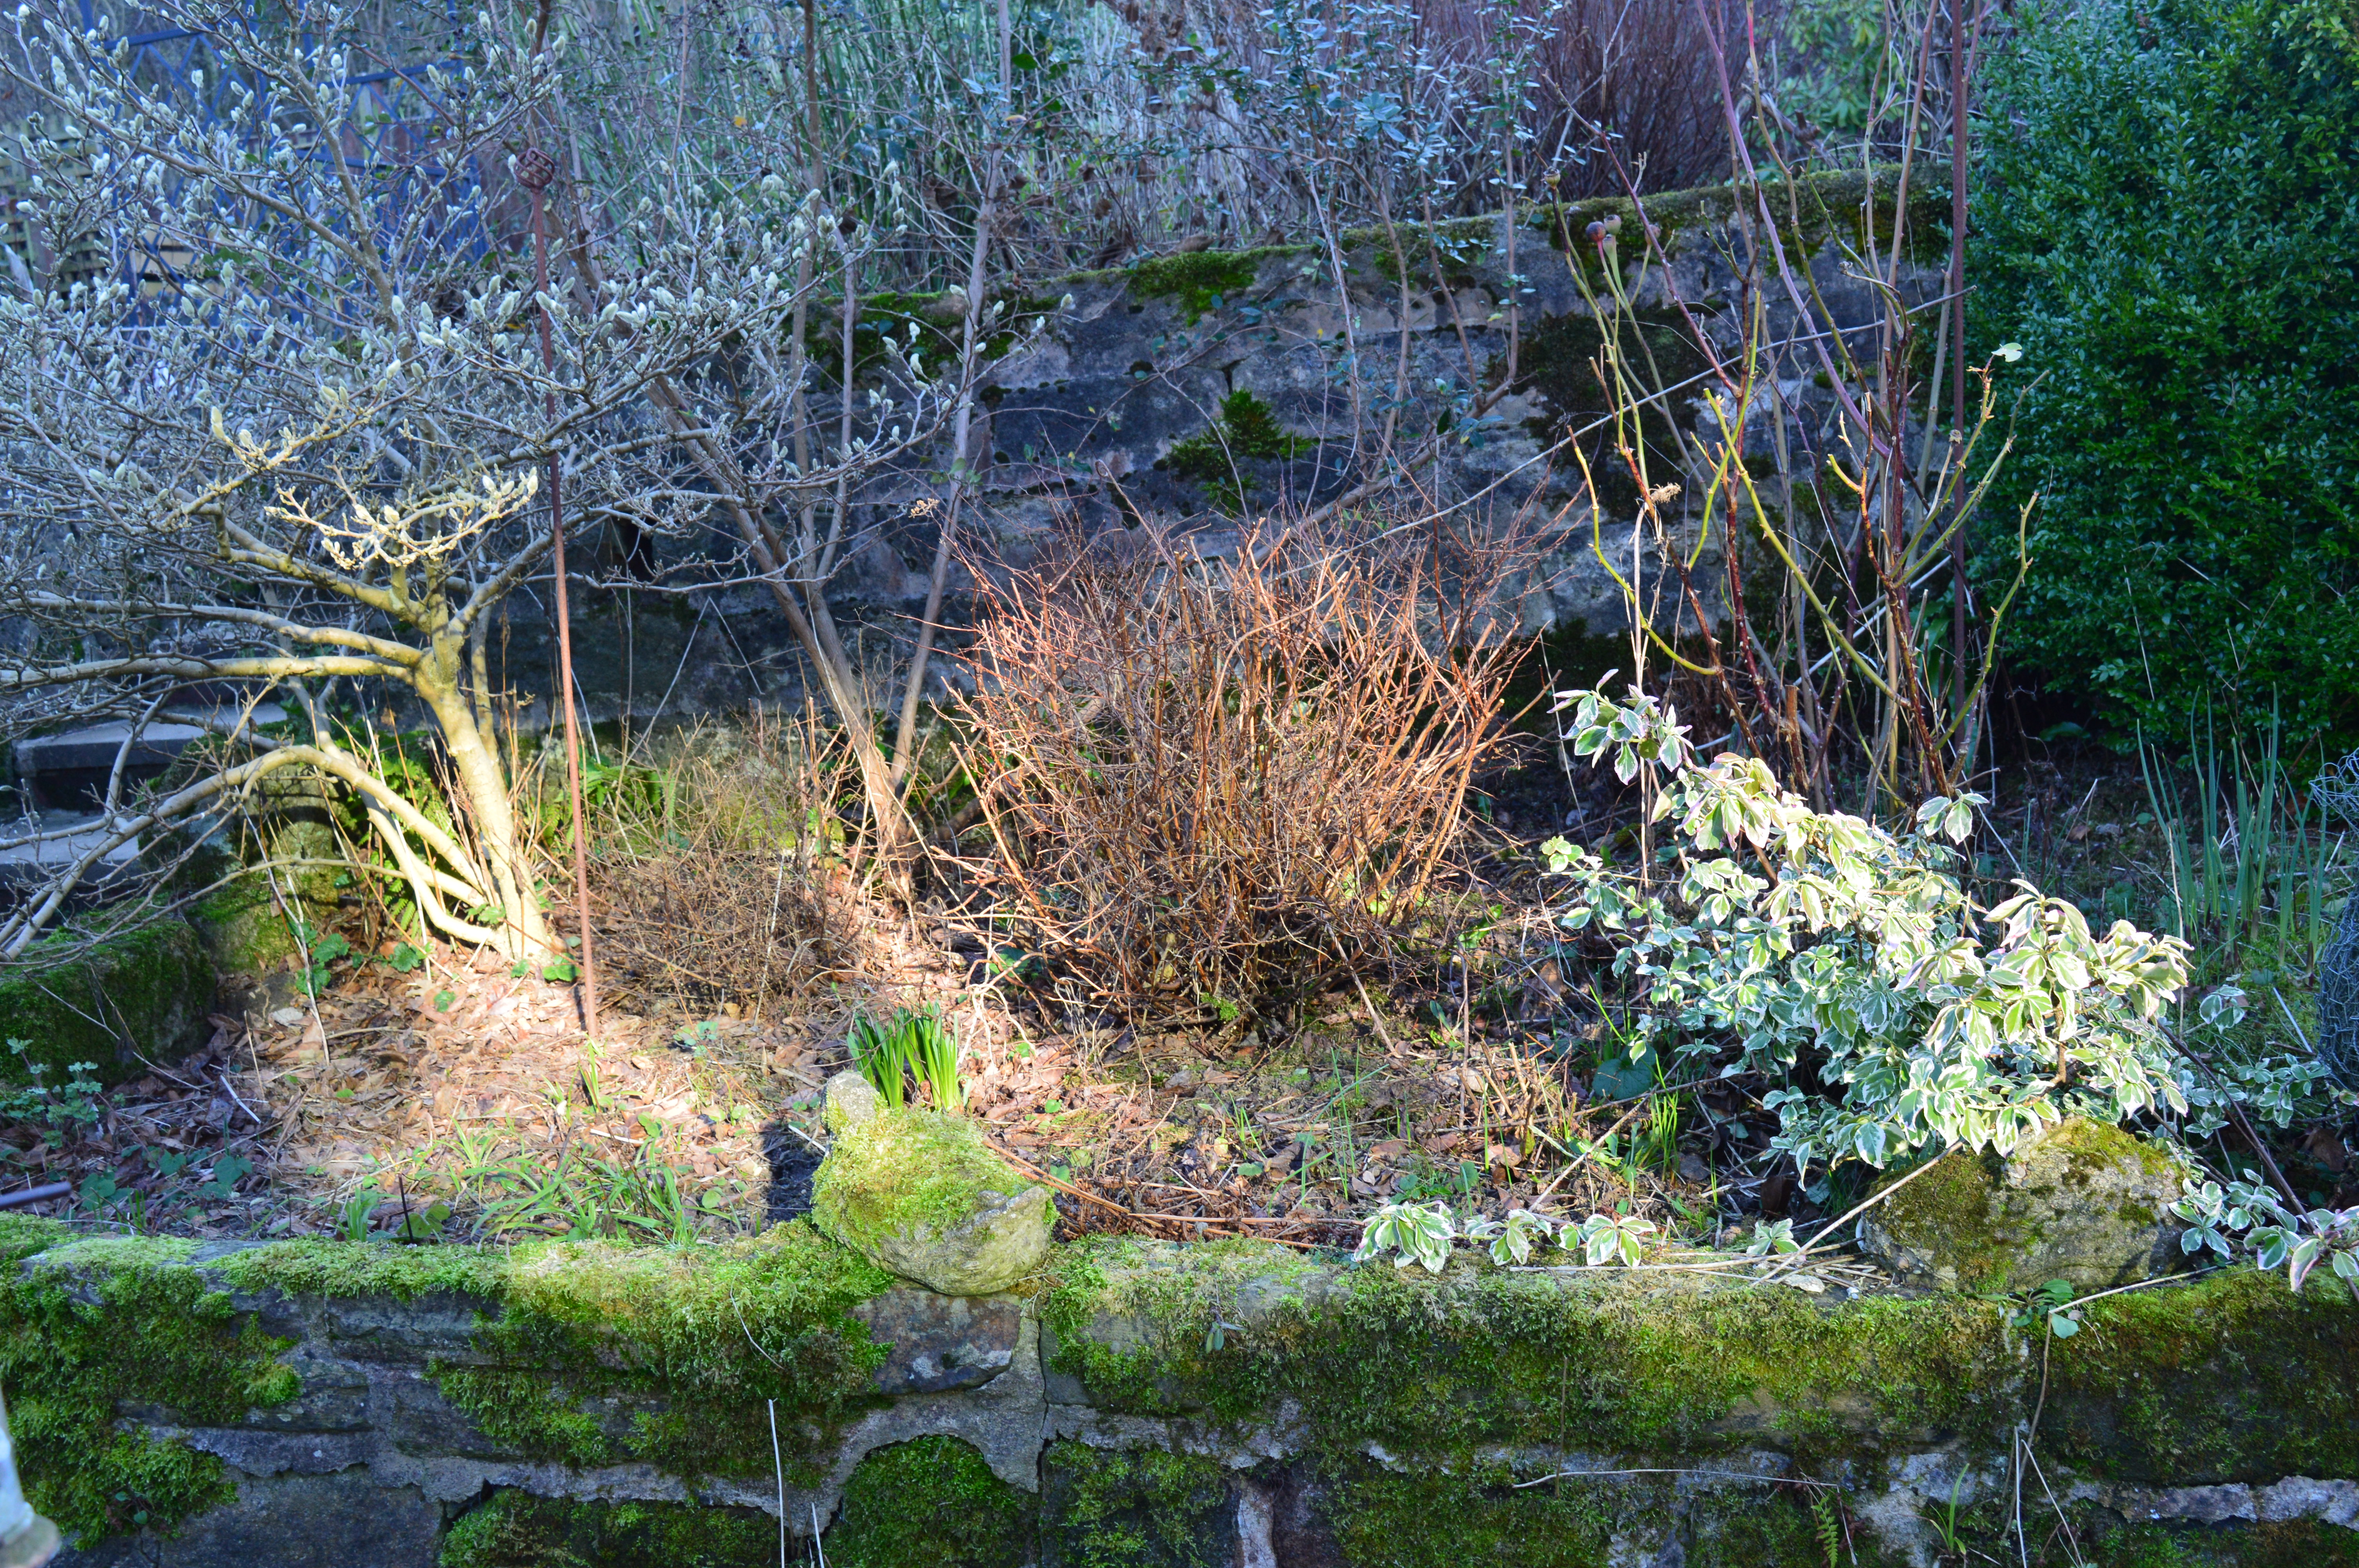
I’m still concentrating on the patio area mainly. The clematis over the arch was starting to bud so I’ve given it it’s annual hard prune. I usually use the appearance of leaf buds as a good sign of when to prune a lot of shrubs. I climbed up onto the raised bed by the patio and had a good tidy up there too, the magnolia stellata is covered in flower buds so hopefully we’ll have a good show this year. They’ve still a long way to go before they flower but it’s encouraging to see them.
Our garden is still in shadow all day, though the sun is getting nearer. We live in the lea of a big hill called the Chevin so we have to wait usually until mid to late February for the sunshine to light up the garden. I was very surprised therefore to see a bright patch of sunlight on the raised bed the other day. Something about it didn’t look quite right, like why just that area! I went outside to investigate and found the sun was actually reflected from an upstairs window!
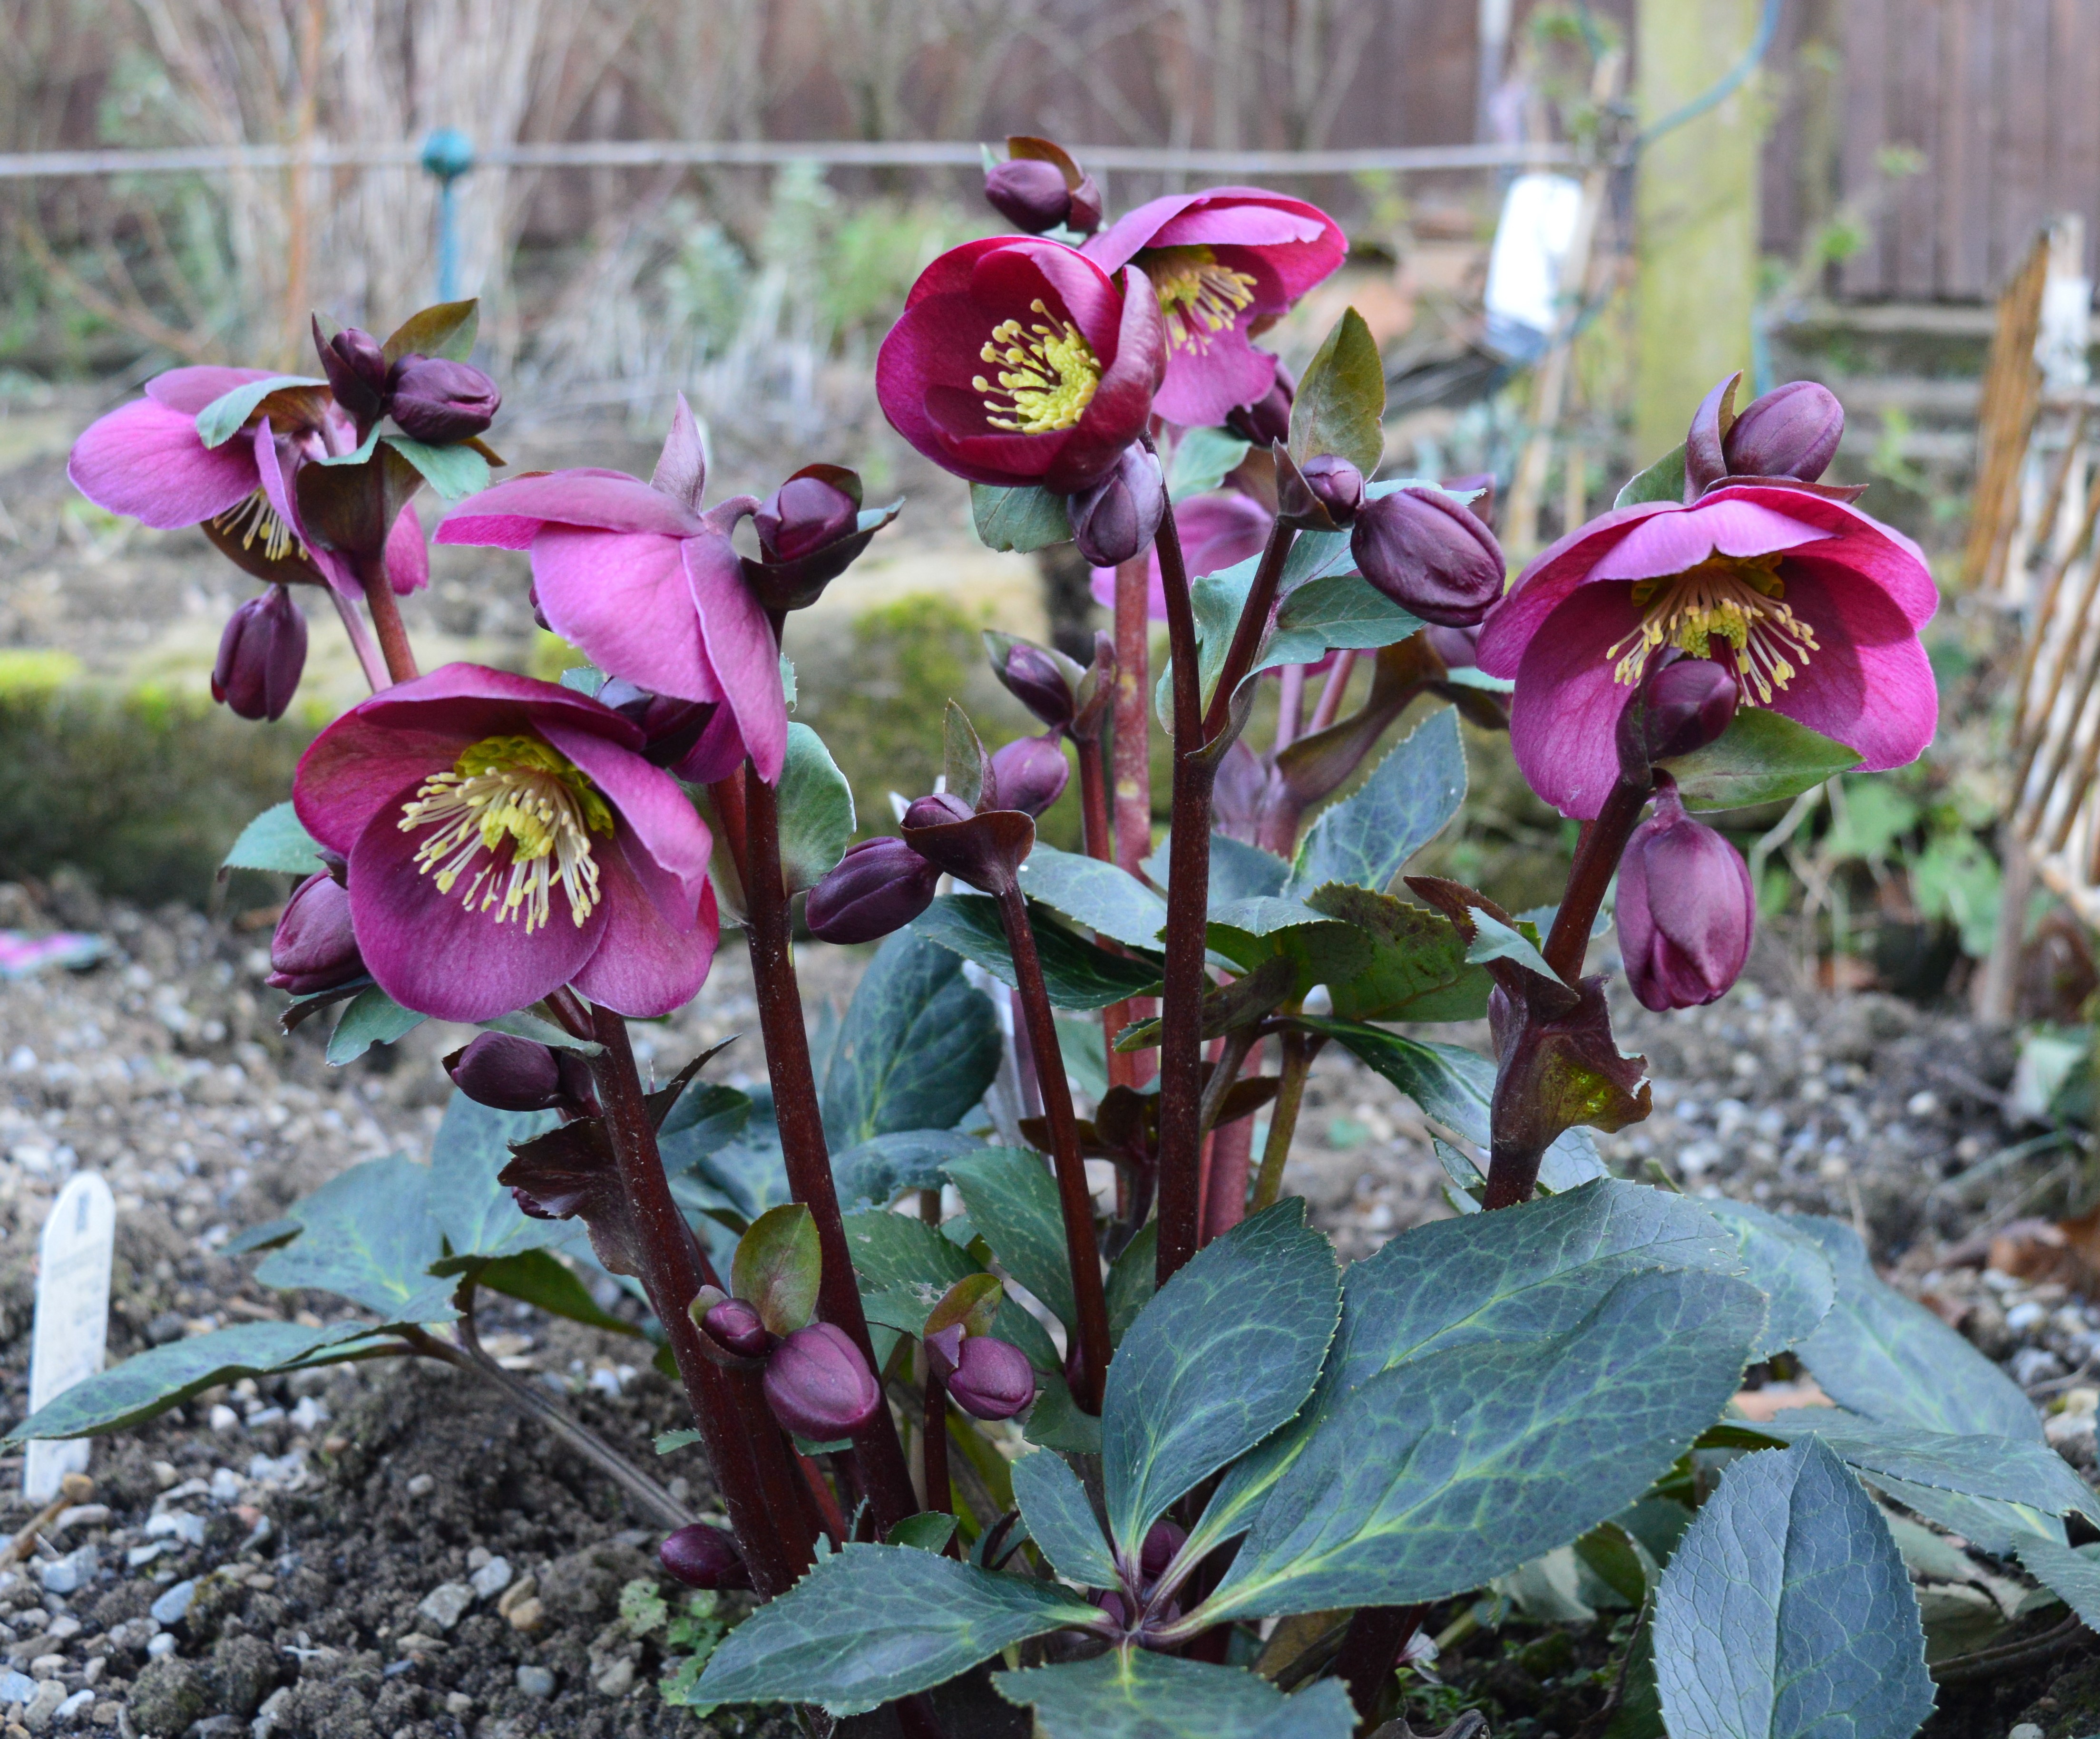
My plant of the month is definitely my beautiful hellebore…
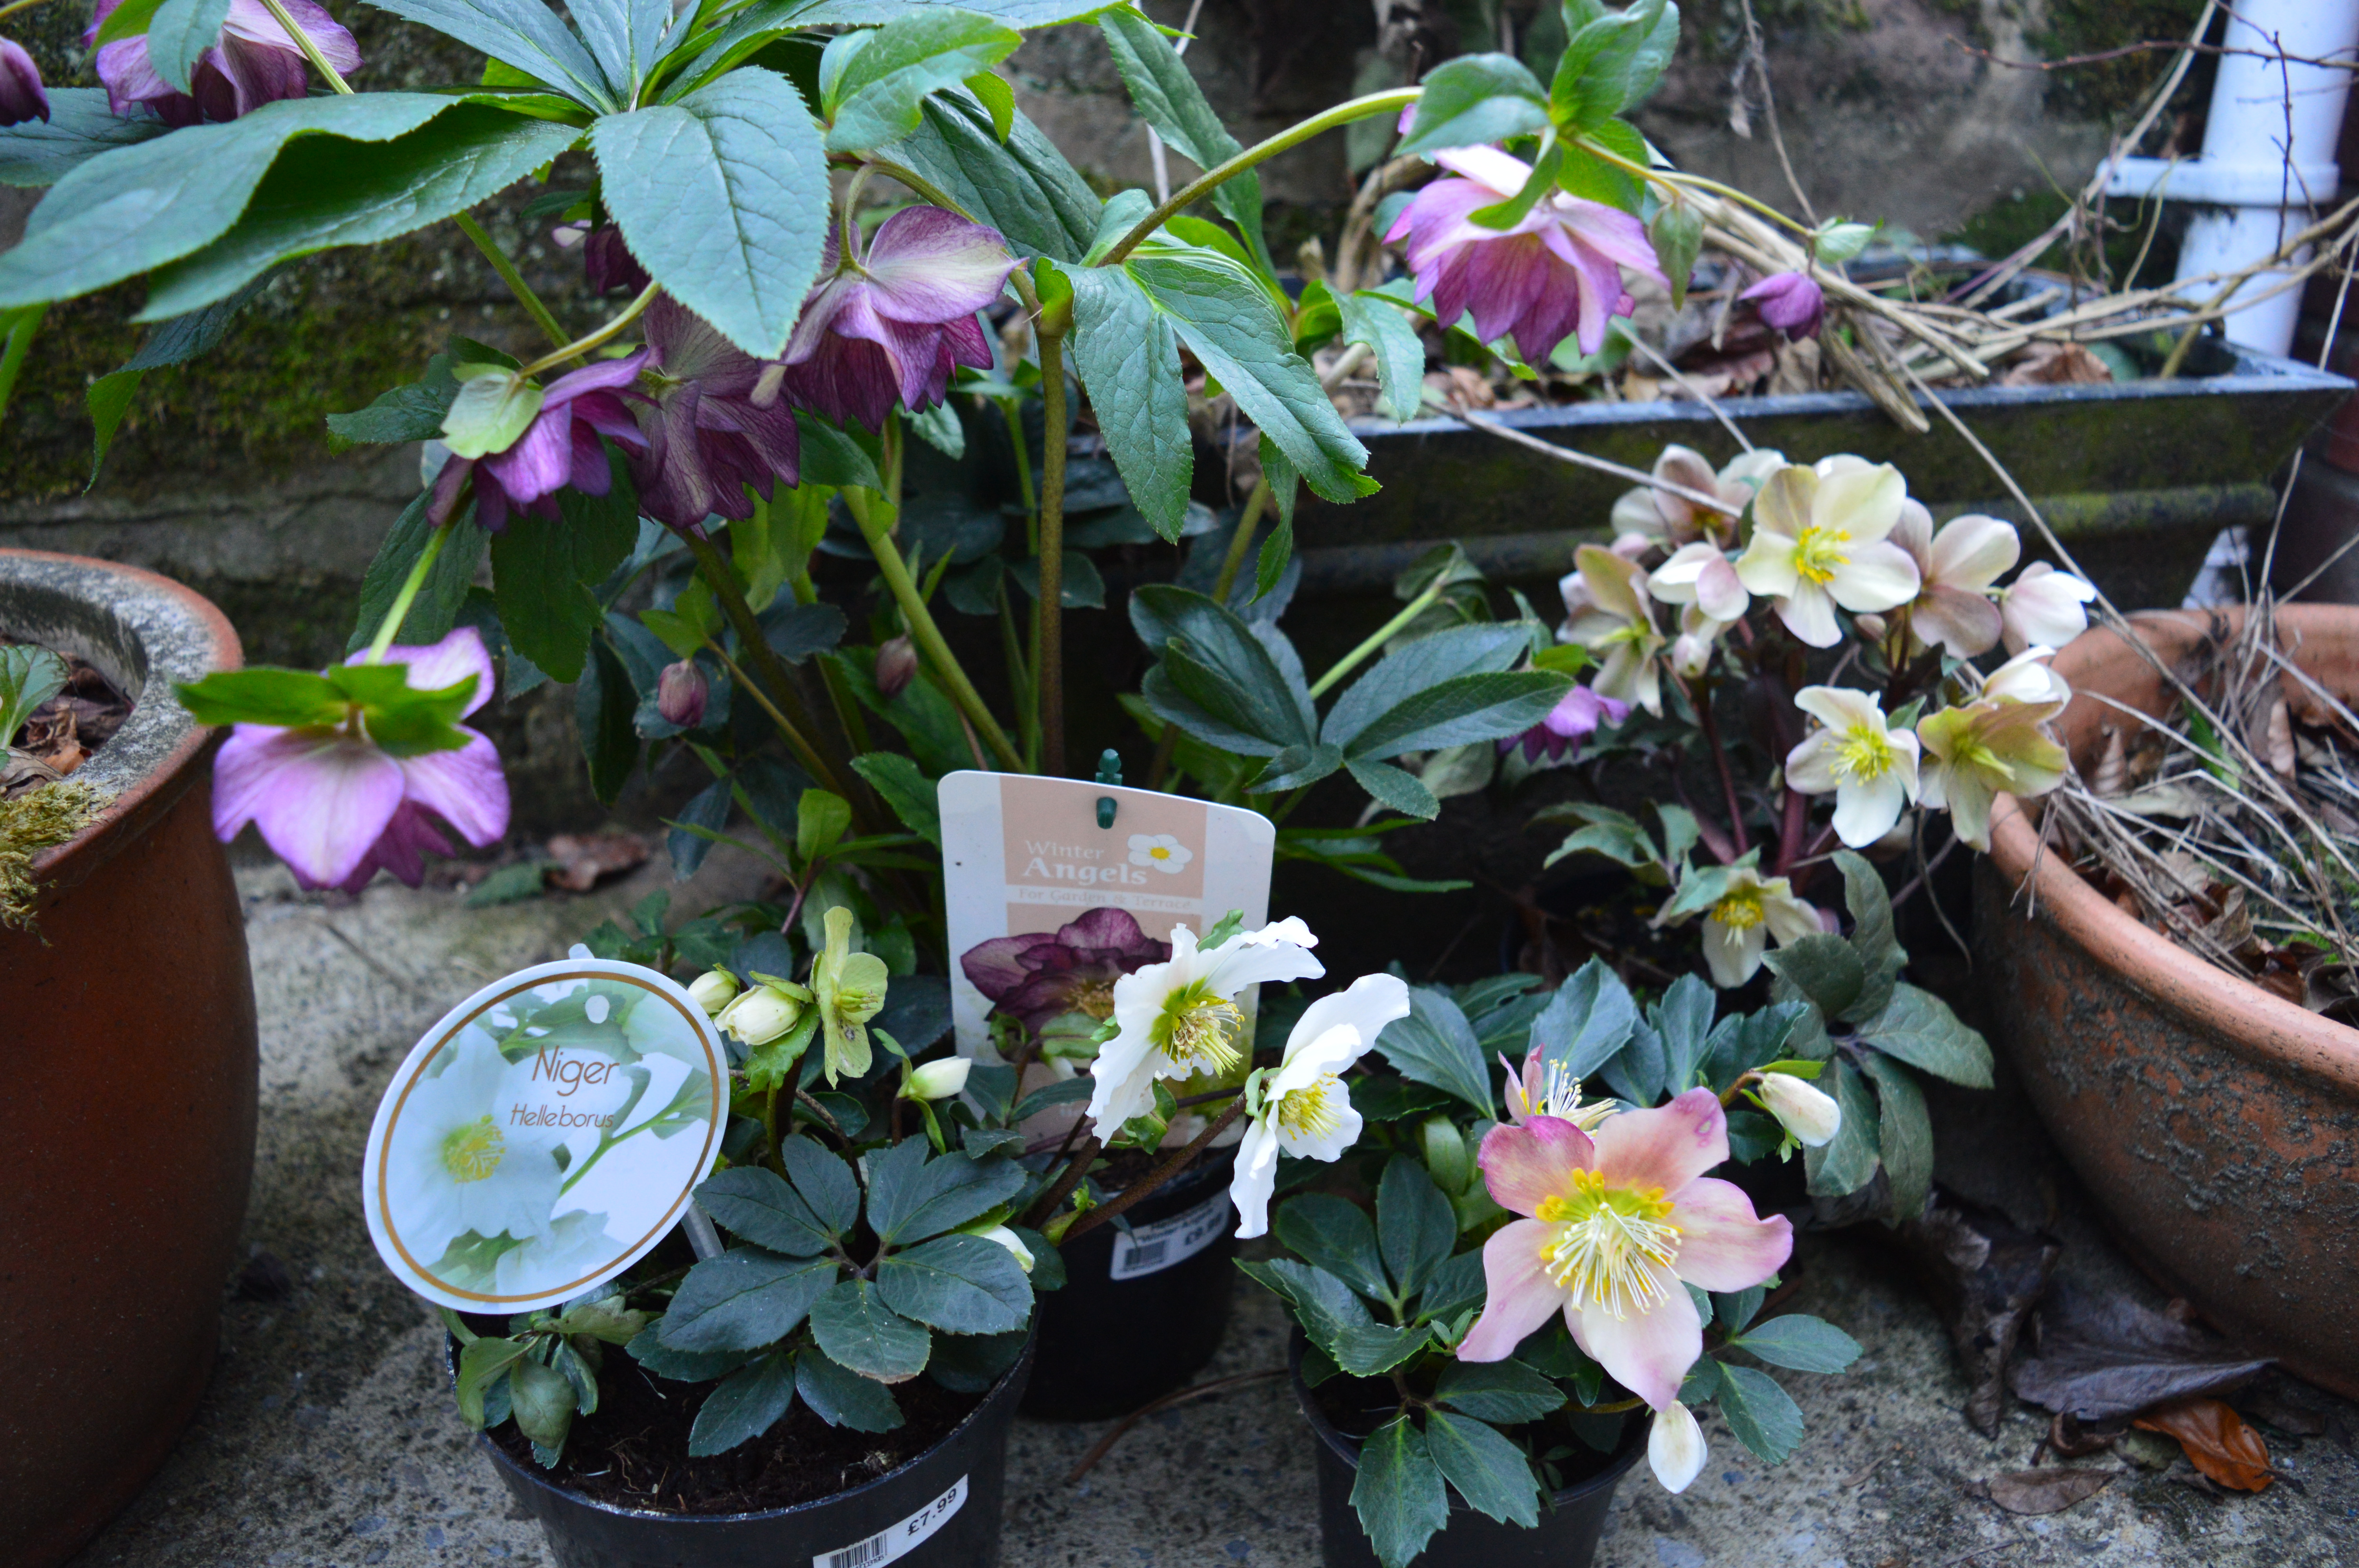
In my garden I have heavy clay soil, so if I find something grows well, I’ll buy one of each colour! I’ve had an idea following on from the success of my hellebores to plant some just in front of the rosa rugosa by the back fence, they make good ground cover, don’t mind dappled shade and look good in the winter. So I bought another four! I’ve got a pretty speckled purple one, a pink one and two creamy ones. I’m just waiting for the soil to defrost a bit before I plant them.
The sweet box is coming into flower at the moment, I bought it for it’s winter scent which is very strong, especially considering the size of the flowers. The scent isn’t noticeable yet, so I’m presuming the flowers aren’t fully open yet.
There’s a pretty little blue flower appeared near the pond and I can’t for the life of me remember what it’s called, the leaves are the big rounded ones you can see, it’s a gorgeous shade of blue. If anyone recognises it please do tell!
There’s bulbs appearing all over the garden, these daffodils are under the bird feeders by the patio. Lots of promise of things to come…
I was going to call this post a Trio of Love, but I thought that sounded a little smutty, then again a Trio of Smalls could be minimalistic packing for a weekend away!
Anyway, titles apart, I’ve just finished three little cross-stitch smalls. I got inspired by the cross-stitch smalls group on facebook, they are having a valentine special, so all these cute hearts kept appearing. I decided to do some simple, quick to stitch smalls for next month.
The first one to stitch was by Hands On Design, it’s a free pattern designed to celebrate her wedding anniversary. The photo shows it stitched on a beautiful fairly dark blue/grey colour with the central design in an ivory colour. I sometimes wish the linen companies would do like a layer cake of 10″ squares of different colours to try, they would be perfect for little cross-stitch projects. Instead I rummaged through my linen box and chose a soft duck-egg blue sort of colour, very pretty. I decided to use a variegated cream for the letters and two shades of teal for the border.
I really wasn’t sure about the cream whilst I was stitching it. I think it depended on the light I was stitching in. I loved the subtlty of the cream on duck-egg, but sometimes it just didn’t show up enough. With hind-sight I think the problem is more the two shades of teal, the inner one is too much of a contrast, but I’m not one for frogging unless provoked, so instead I outlined the cream in a single thread of teal which just gives it a bit more definition without losing it’s delicateness. I still felt it needed something else, so I stitched some tiny pearl beads round the border and then echoed them on the outer edge of the small. I like it, it’s pretty without being too frilly.
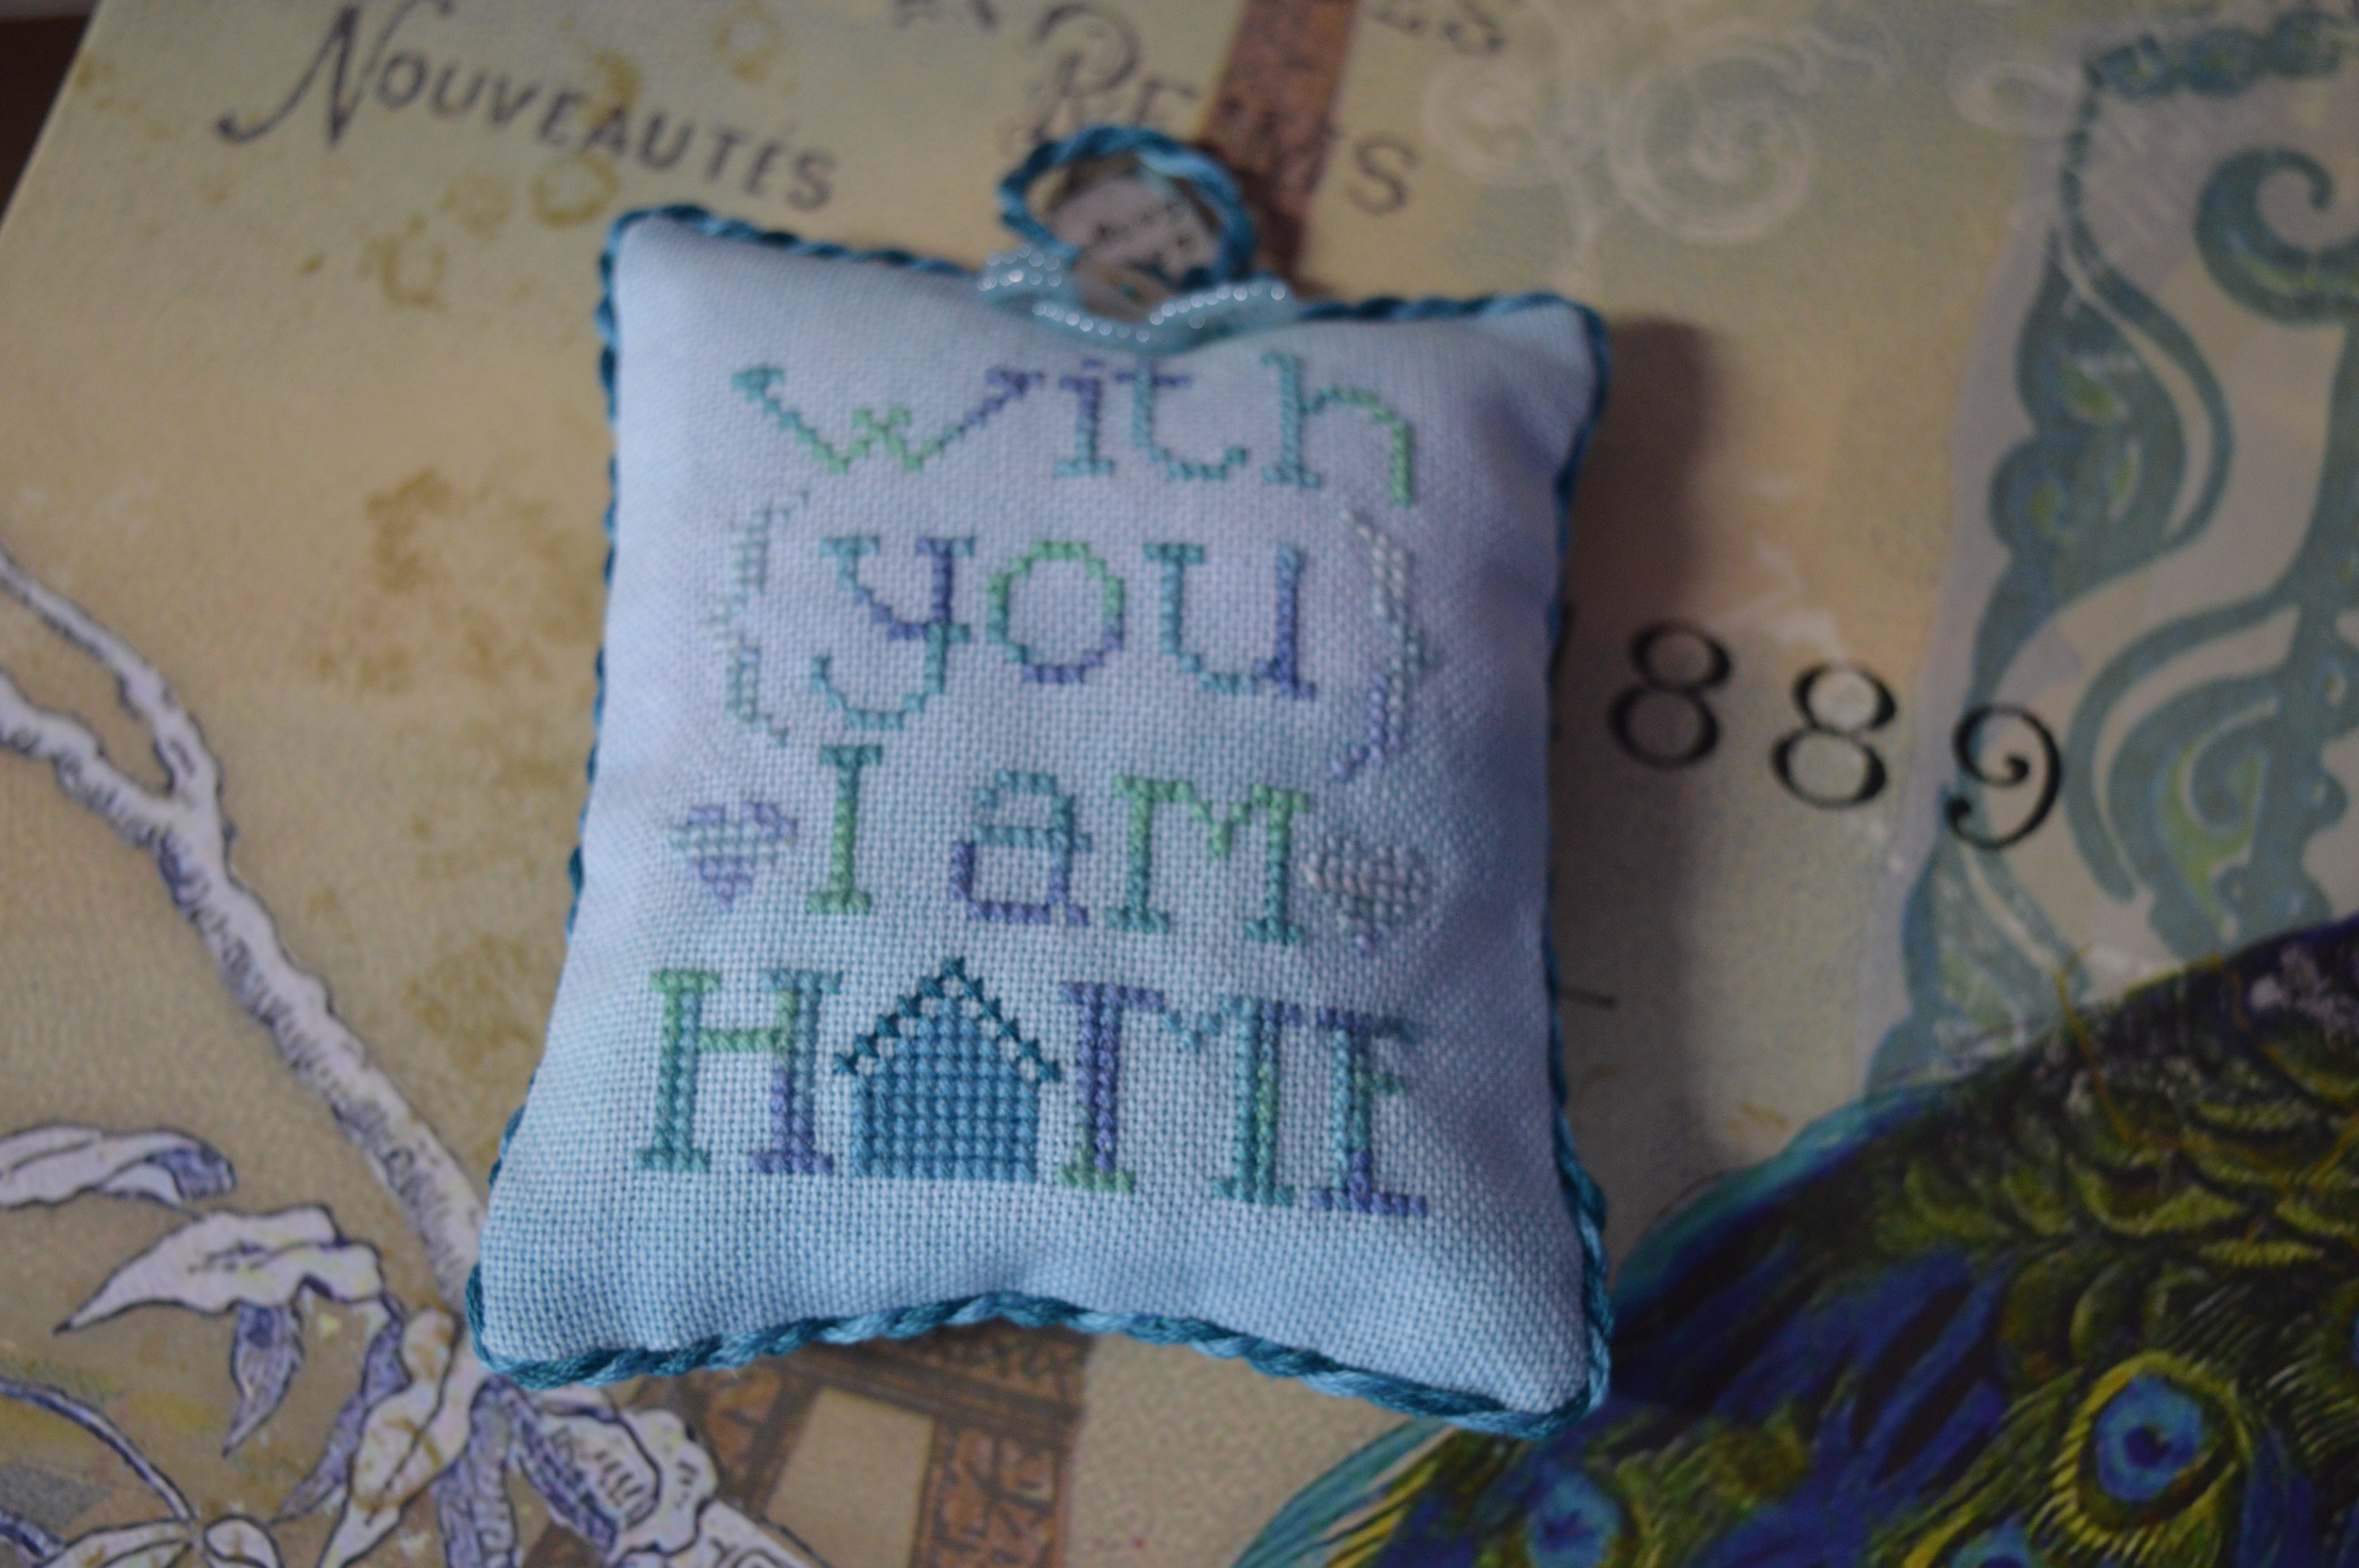
The second small was also by Hands on Design, a freebie from last year to celebrated another wedding anniversary. This one is called I am Home, I changed the thread choices again to fit the linen colour. This time I used a lovely dyed linen by Sparklies, I picked up a couple to try at the Festival Of Quilts, I’m tempted to try a few more as they are lovely to stitch and I love the effect of the spacedying. This one is in soft shades of blue and green. I decided to use one of my favourite DMC threads for the main lettering, 4030, it’s a wonderful blend of blues and turquoise / green. It worked really well with the linen.
I made one small change to the design. I must admit when I first saw the pattern I did wonder why there were bracket signs on it and arrows like signposts. I could live with the brackets, but I changed the arrows to hearts. It was only later that I realised it was probably a modern take on bows and arrows…it went straight over my head! The pattern also gave instructions to make it into a house shape with a fabric roof, I decided to keep it to my usual oblong. I made a cord to go round, added a button to cover the join and then felt it needed a bit more! I added a charm which says Love, Live, Laugh which I thought was quite apt, on the grounds that things look more balanced in an odd number I added some loops of beads…it was one of those times when I wasn’t quite sure when to stop!
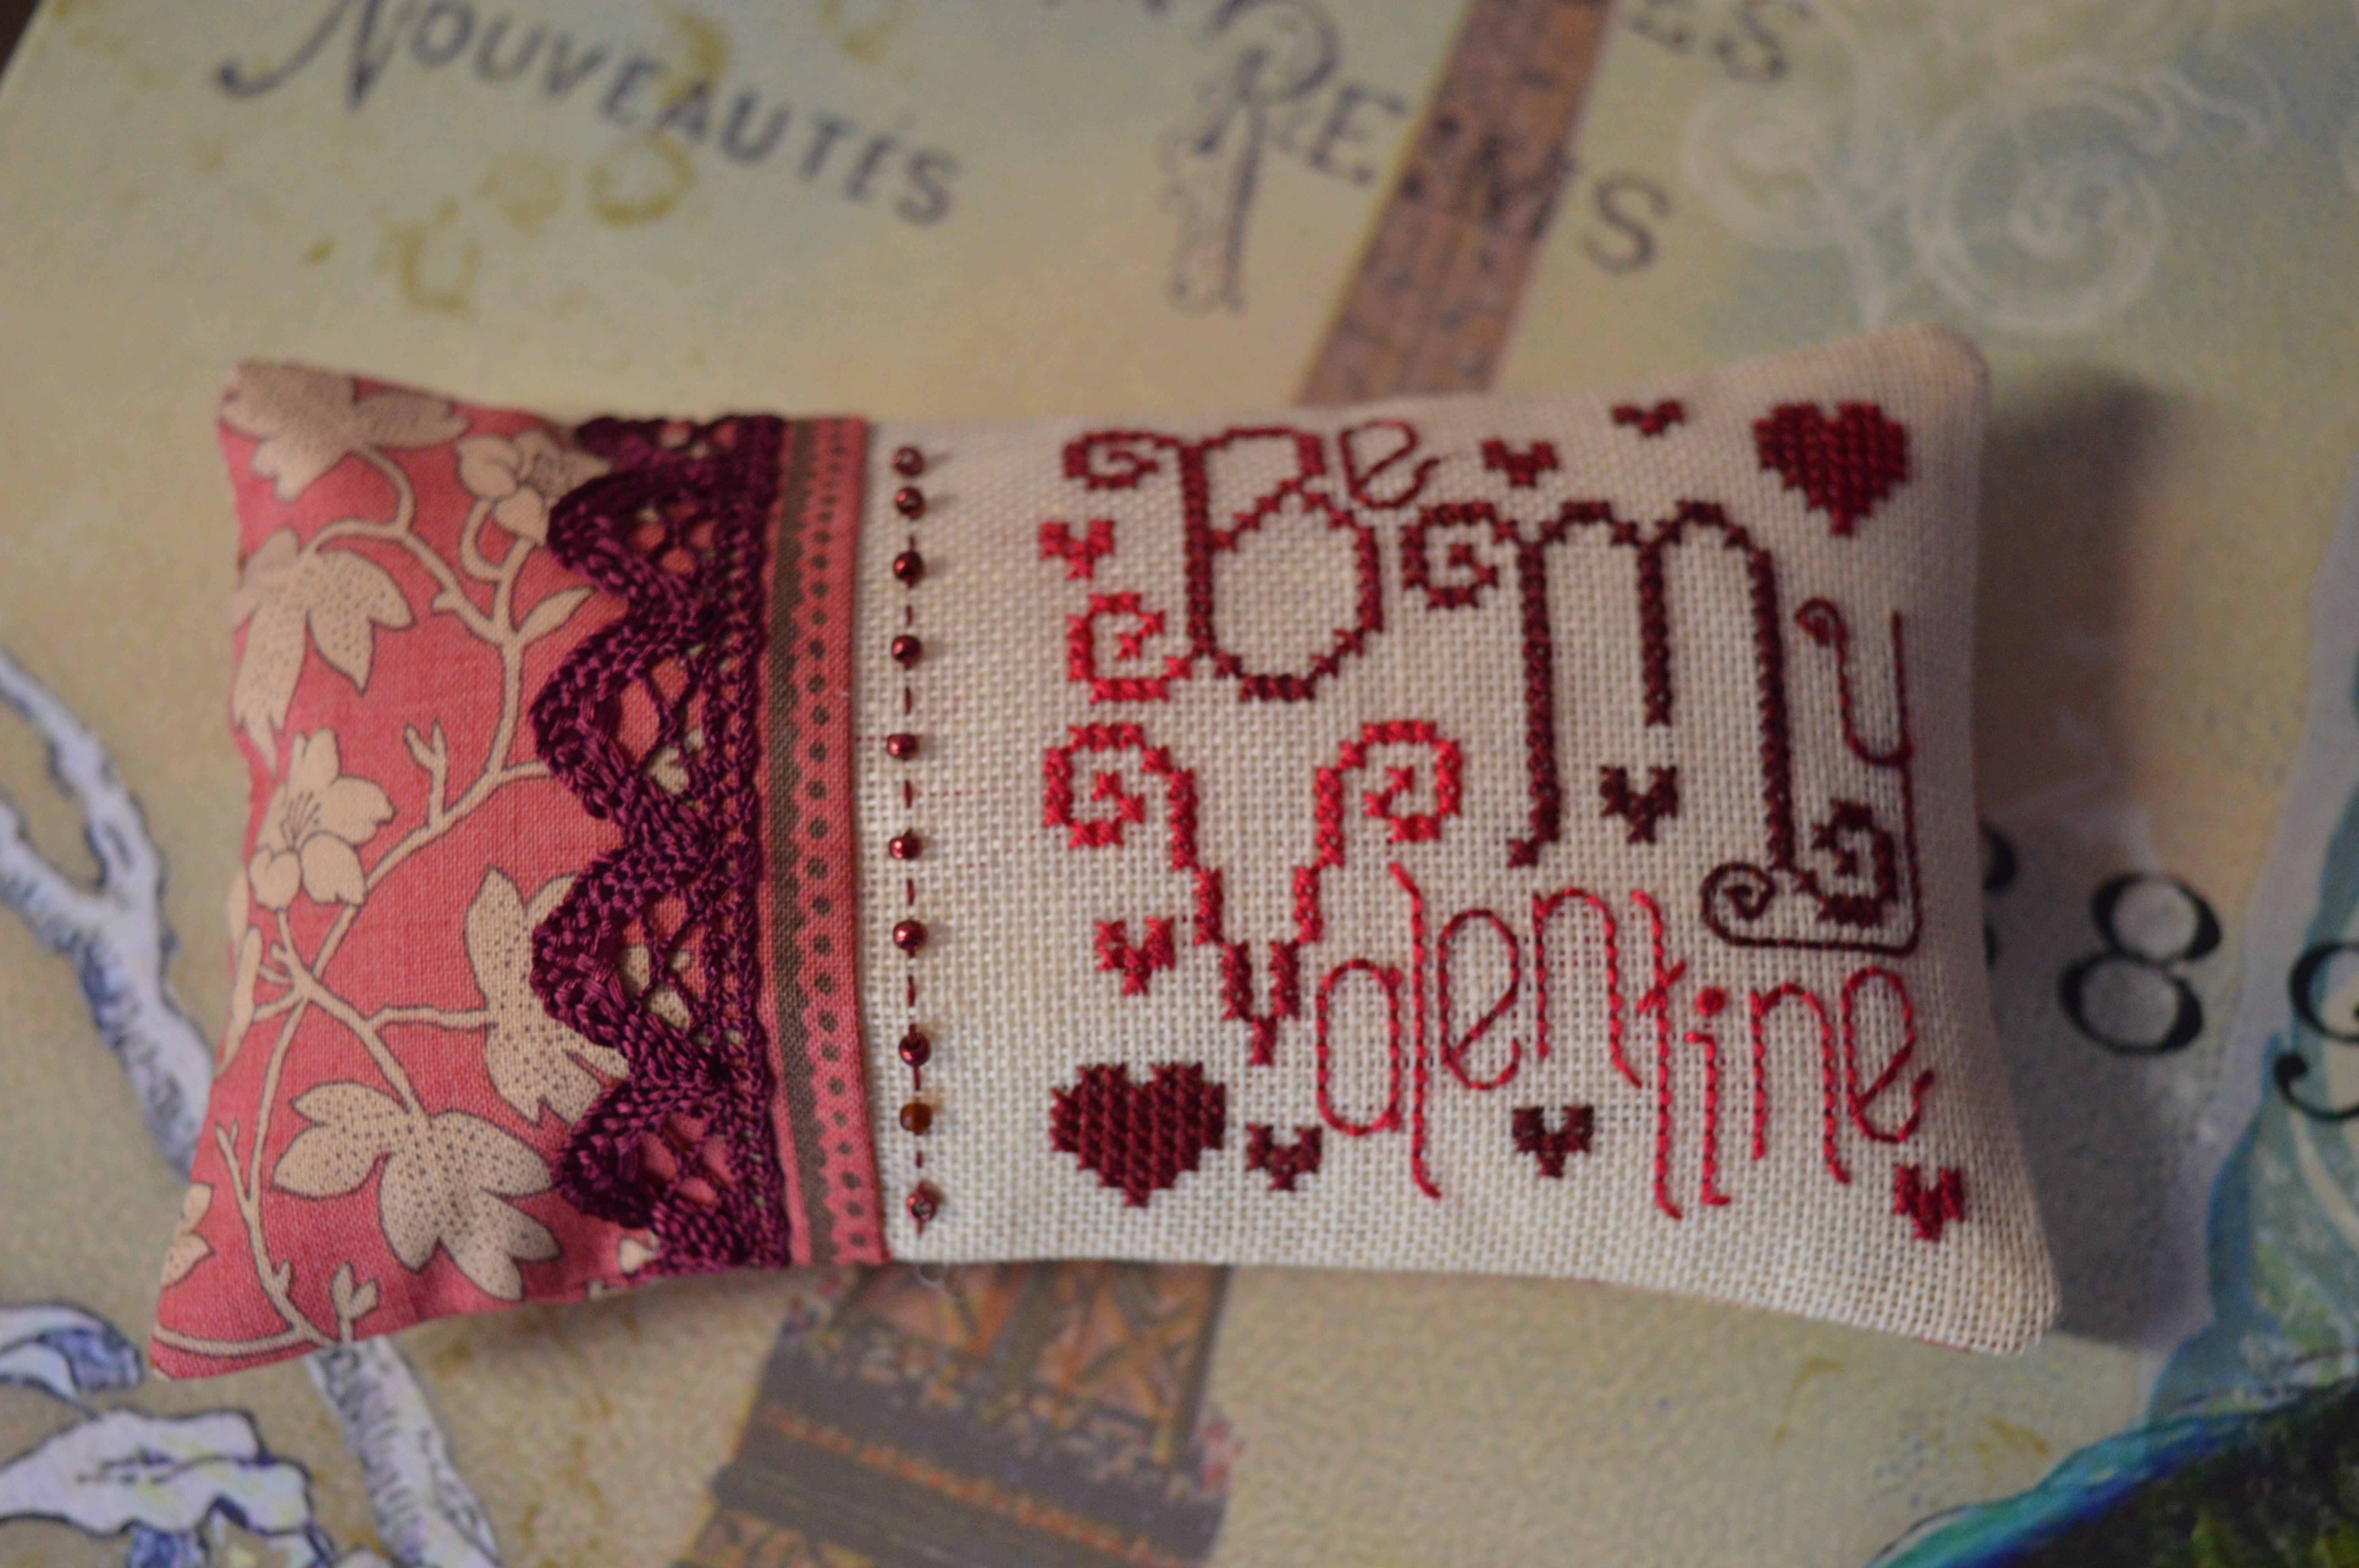
My third cross-stitch small is a design by Sandra Longan, it’s a free pattern from 2014 which I found on pinterest but managed to trace back to her website. I stitched it in one of the original DMC variegated threads inrich dark reds. The shading worked really well with Valentine all being in a lighter shade. I was stitching this when I visited my mum this week, she looked at the pattern and said “It doesn’t make sense, Be My Dentine”!!! It’s one of those comments that sticks in your head, now all I can see is dentine!
I decided to make this one rectangular with a piece of co-ordinating cotton. I tried about six possible fabrics, a couple matched beautifully colour-wise, but they were just too busy and dominated the design. Eventually I decided on this more muted one. I added a line of running stitches and beads and a length of pretty lace. I decided this one had enough and didn’t need an edging.
I’m really pleased with my little cross-stitch smalls, they’re quite addictive!
Linking up with Kathy’s Quilts for Slow Stitching Sunday, a celebration of all things hand stitched. Follow the link for more hand-stitching inspiration.
I’ve just finished my first quilt of the year and I’ve called it A Fluffle of Love…
I’m going to become a Great Aunt in the next few weeks, it makes me feel very old as I had a Great Aunt Margaret when I was little and she seemed ancient and quite formidable! Besides making me feel old, it of course gave me the opportunity to make a baby quilt.
One of my favourite children’s books when my two were little was Guess How Much I Love You, the story of two nut-brown hares which finishes with the wonderful line of “I love you to the moon and back”. It had only just been published when my two were little, in fact I think mine is a first edition! This is a fabric range based on the illustrations of the book.
I used a very simple free quilt pattern by Lo, Ray & Me as it meant I didn’t have to cut the hares up too much! I also fussy cut some of the 6″ squares to get the hares in a good place. The quilt went together pretty easily, my only hiccup came when I tried to get away without measuring a border properly, I got the seam ripper out and stitched it properly second time round!
When it came to quilting I decided I wanted to quilt a word down the vertical strip. I had some lovely suggestions from you all of possible words but I decided to stick with my original plan of LOVE as it fitted in with the books title.
I carefully drew the letters on some paper, trying to work out the size and the width of the lettering. Once I was happy I then had to transfer them onto the actual quilt. I had a little bit of a brainwave and used freezer paper, tracing round, cutting out and ironing on, all I had to do was stitch round the shapes. It sort of three-quarters worked as I found the freezer paper didn’t like the fabric bending at all, so I did have to re-iron some of the letters, but it did give me a neat outline to stitch round. I stitched a close meander round the letters, adding a heart top and bottom. I felt it needed a border of some kind between this strip and the rest of the quilt, so I stitched a wavy line of hearts down each side. The rest of the quilt is in a bigger meander.
I was pretty pleased with the quilting, I love how the lettering shows up on the back and more subtly on the front. All I had to do then was binding the edge and a label.
I spent a pleasant evening hand-stitching the binding down, I rather enjoy this part of a quilt, I can get into quite a relaxing stitching rhythm, my mind can wander all over the place whilst I’m stitching the binding!
I pondered for a while about the name of the quilt, then I recalled a comment someone made on the Down the Rabbit Hole quilt page, a collective noun for rabbits is a fluffle. Isn’t that a gorgeous word! I checked on Google and it also applies to hares, I had found a name for my quilt, A Fluffle of Love, I embroidered it on the back in one of the hearts using a DMC variegated thread and then just added my initials and the year.
I think I’ll buy a copy of the book and a matching cuddly toy to complete the present, just got to be patient and wait for baby to arrive!
I’m trying to read more this year, it’s one of my Nineteen for 19 challenges, so when I saw an interesting book just before Christmas I dropped a big hint that it was on my wish list! As it’s all about textiles I thought it may be of interest.
The book in question is called The Golden Thread, it’s by Kassia St Clair and it is fascinating! It’s all about the history of thread and textiles and how they have impacted on our lives over the centuries. As it says on the cover “When we talk of lives hanging by a thread, being interwoven, or part of the social fabric, we are part of a tradition that stretches back many thousands of years. Fabric has allowed us to achieve extraordinary things and survive in unlikely places and this book shows you how and why.”
Each chapter tells the story of a different thread and she goes right back to the beginning – 30,000 years ago!!!! Thread has been found which dates back 30,000 years! There’s a chapter on the Vikings and their woollen sail cloths, the linen used to wrap Egyptian mummies, the story of silk and the connection with the Great Wall of China, cotton, lace…
Kassia also tells the dark history of man-made fibres such as rayon and viscose. To be honest I never really knew the difference between the various man-made fabrics and I certainly didn’t really consider how they were made, but I can also now see where bamboo fabric fits in.
The book goes right up to date with sporting fabrics, mountaineering and space exploration. She also covers the ecological and political issues and events such as the Bhopal factory disaster.
It’s a wide ranging book, full of fascinating insights into something many people take for granted, textiles. For those of you in the UK, The Book People have it at a very good price!