Wreaths seem to be all on trend here in the UK at the moment, door wreaths are no longer just for Christmas, there’s ones for all year round. Well I’ve made one for my sewing room. It’s actually a kit I bought a couple of Knit and Stitch Shows ago and as I’m trying to declutter my sewing room, I thought I’d make this in between sewing projects.
The kit is made by Tee Pee Crafts and contains everything needed to make a sewing room wreath, wooden bobbins, lace, ribbons, fabric, buttons, trimmings generally. The colours provided are neutral, I wanted a purple slant so I added fabrics and trimmings from my stash.
The instructions are somewhat minimalistic, referring frequently to the picture when describing how to fold burlap or how to make the flower, for example. The only photo is on the packet, the whole wreath is less than 3.5″ in the photo so I found it difficult to see any detail clearly and certainly couldn’t tell how things were folded.
Once the ribbons and burlap were folded into loops, all the cotton reels needed decorating mainly with lace and trimmings. The smallest bobbins I just wound embroidery thread round them as I decided they were just too little to fiddle with lace. The body of the bobbin was also curved (outwards) which did make things extra fiddly as the thread kept slipping on the second half, I ended up smearing it with a thin layer of glue. There are some tiny ones too which again I used embroidery thread. I used the Roxanne fabric glue for these, I think if I’d used the glue gun I’d have glued my fingers too!

The largest bobbins are like standard wooden bobbin size, I wound fabric round those. One lovely touch was that Dewhirst’s Sylco labels were supplied for the two traditional ones. I only discovered on Monday on a trip to Skipton Museum that the Dewhirst mill was in Skipton!
Here’s all my trims ready to go on the wreath, glue gun ready for action…

Everything was stuck on with my glue gun, which is what they recommend as it is so instant. I tried arranging it all first but it was impossible to do it on the wreath and difficult to imagine how the curves of the wreath would affect the arrangement. In the end I just went for it.
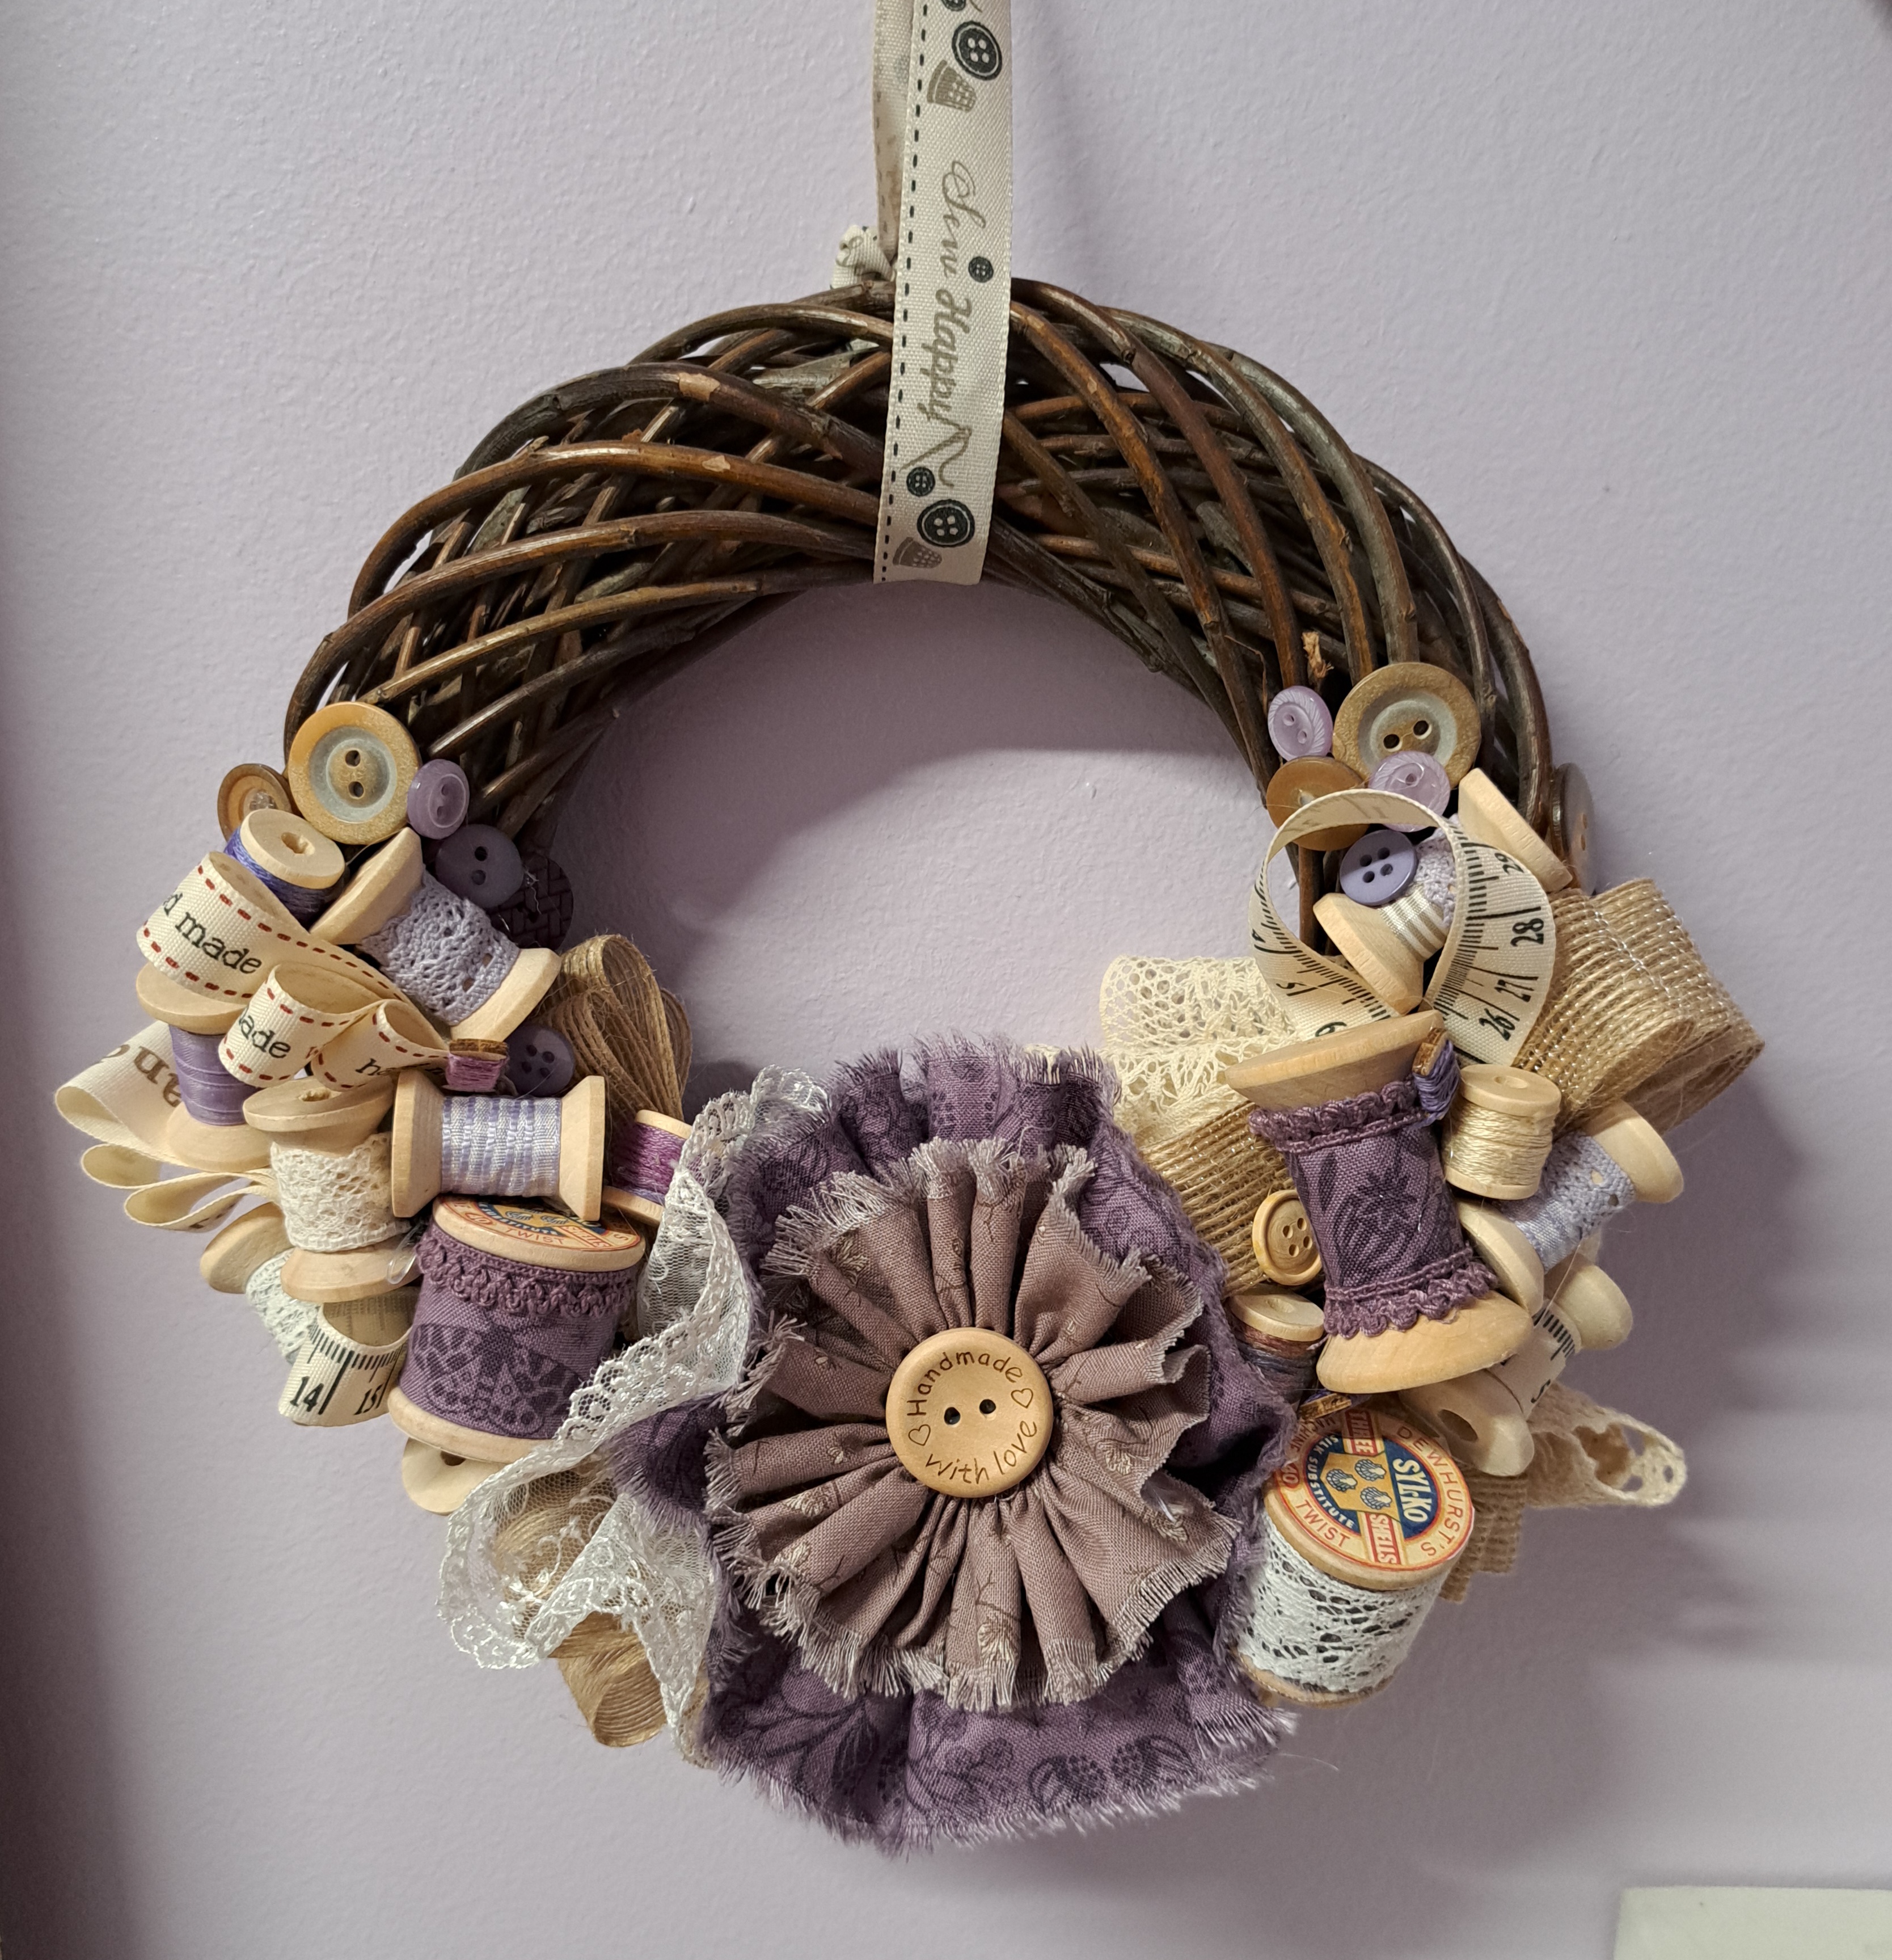
I did find it difficult to get it to look balanced, I think I could have done with another fold of burlap on the left, I added some extra ribbons instead. It’s certainly very full! I like the way the colours worked out, but I think if I did it again I would make my flower a bit smaller and maybe use less generally, but it’s a bit of fun on my sewing room wall. I hung it up straight away…

Having looked at it for a couple of hours, I felt the purple flower was a little too dominant, I wondered about adding to it to reduce the block of purple. I tried ivory lace first, thinking it would pick up with the lace to the left of the flower, but it was too much of a contrast. I then spotted on my desk the flower I’d made first but discarded as looking a bit too drab. I trimmed it in half width-wise and frayed the edges, I tried it with both a purple button and a wooden one. I then stuck it all on top of the first button and added the wooden button in the middle. I think it looks much better…


What a lovely wreath – you did a terrific job! I agree that the addition of the ‘drab’ flower really made all the difference. Beautiful!
LikeLiked by 1 person
Thanks Deb, it helps it to tone down and blend in a bit better I think.
LikeLike
That turned out really cute, Margaret! You are much braver than I am to try new crafts!
LikeLiked by 1 person
Thanks Kathy, I like kits for trying different crafts, everything is there and I can just have a go, a bit like going to workshops to try something new.
LikeLiked by 1 person
Love it, both versions actually
LikeLike
It’s lovely Margaret. I tried to buy a similar kit when I went to the event in Exeter but they had sold out and it was the first day!
I might have a go myself as I have any number of vintage cotton reels and bobbins etc. and quite a bit of hessian scraps. Yet another thing on the list of want to dos.
LikeLiked by 1 person
a perfect wreath for your sewing room. I always get in a mess with my hot glue gun, so you’re a braver woman than me ^^
LikeLiked by 1 person
You didn’t see the spiders web I had to remove once I finished gluing!!
LikeLike
Gorgeous. Love all the spools, buttons and ribbons, especially the ‘sew happy’. Right choice with your second flower
LikeLiked by 1 person
Thank you, it’s pretty 🙂
LikeLike
That worked well, and nice to view rather than being a clutter item. 😃
LikeLiked by 1 person
Exactly, it’s another box out of my to-do box 🙂
LikeLike
Super cute and out where you can enjoy it! 🙂
LikeLiked by 1 person
Thanks Laura, I like it too
LikeLiked by 1 person