
Last week at Skipton Stitchers we had a workshop called Lines and Edges by Deb Cooper, I really wasn’t sure what to expect but I loved it. I think sometimes having no expectations helps as you start with an open mind. All we had to take was a basic sewing kit, some calico as a base fabric and any scraps of fabric, lace, threads we had to hand, ideally natural fabrics such as cotton, linen, silk etc. I had a rummage around in my sewing room, rescued stuff from the charity pile (isn’t it always the way!!) and went along with a bag of goodies.
The idea of the workshop was to tear a long, thin strip of calico and then add different fabrics across it with different stitches, threads, trimmings and such like, making different textures and effects from how it was stitched. The strip could then be bound tightly round a bobbin and tea-dyed, left for a couple of weeks and then see what you have made.
Deb had several samples to show us, including a couple made into books instead of strips. As you know I’m a bit of a sucker for fabric books so I decided to go down that route instead. There was three or four of us doing books, the others were happy stitching strips.
I tore a strip of calico about 5.5″ wide, it took a while but I’m growing to like torn edges…on some things! After a little fiddling I decided that a double page about 9.5″ across would make a nice folded book size. I started playing with my scraps and seeing what worked.
I enjoy making smallish pages like this as however you decide to stitch it, it doesn’t usually take too long. One of my first ones was a line of fly stitches with French knots on a strip of linen, another had a line of feather stitch. One good workshop idea that Deb had was that we all picked a folded piece of paper from a box, on it was written a stitch, the idea being that you then try and incorporate that stitch into your piece, it does help to give you new ideas. My first one was detached chain stitch, I did like half flower shapes on a piece of linen. We then had to pass ours on two people…my new one was to try something new…not quite as helpful, but I decided to do the one my friend Claire had next to me, reverse applique.
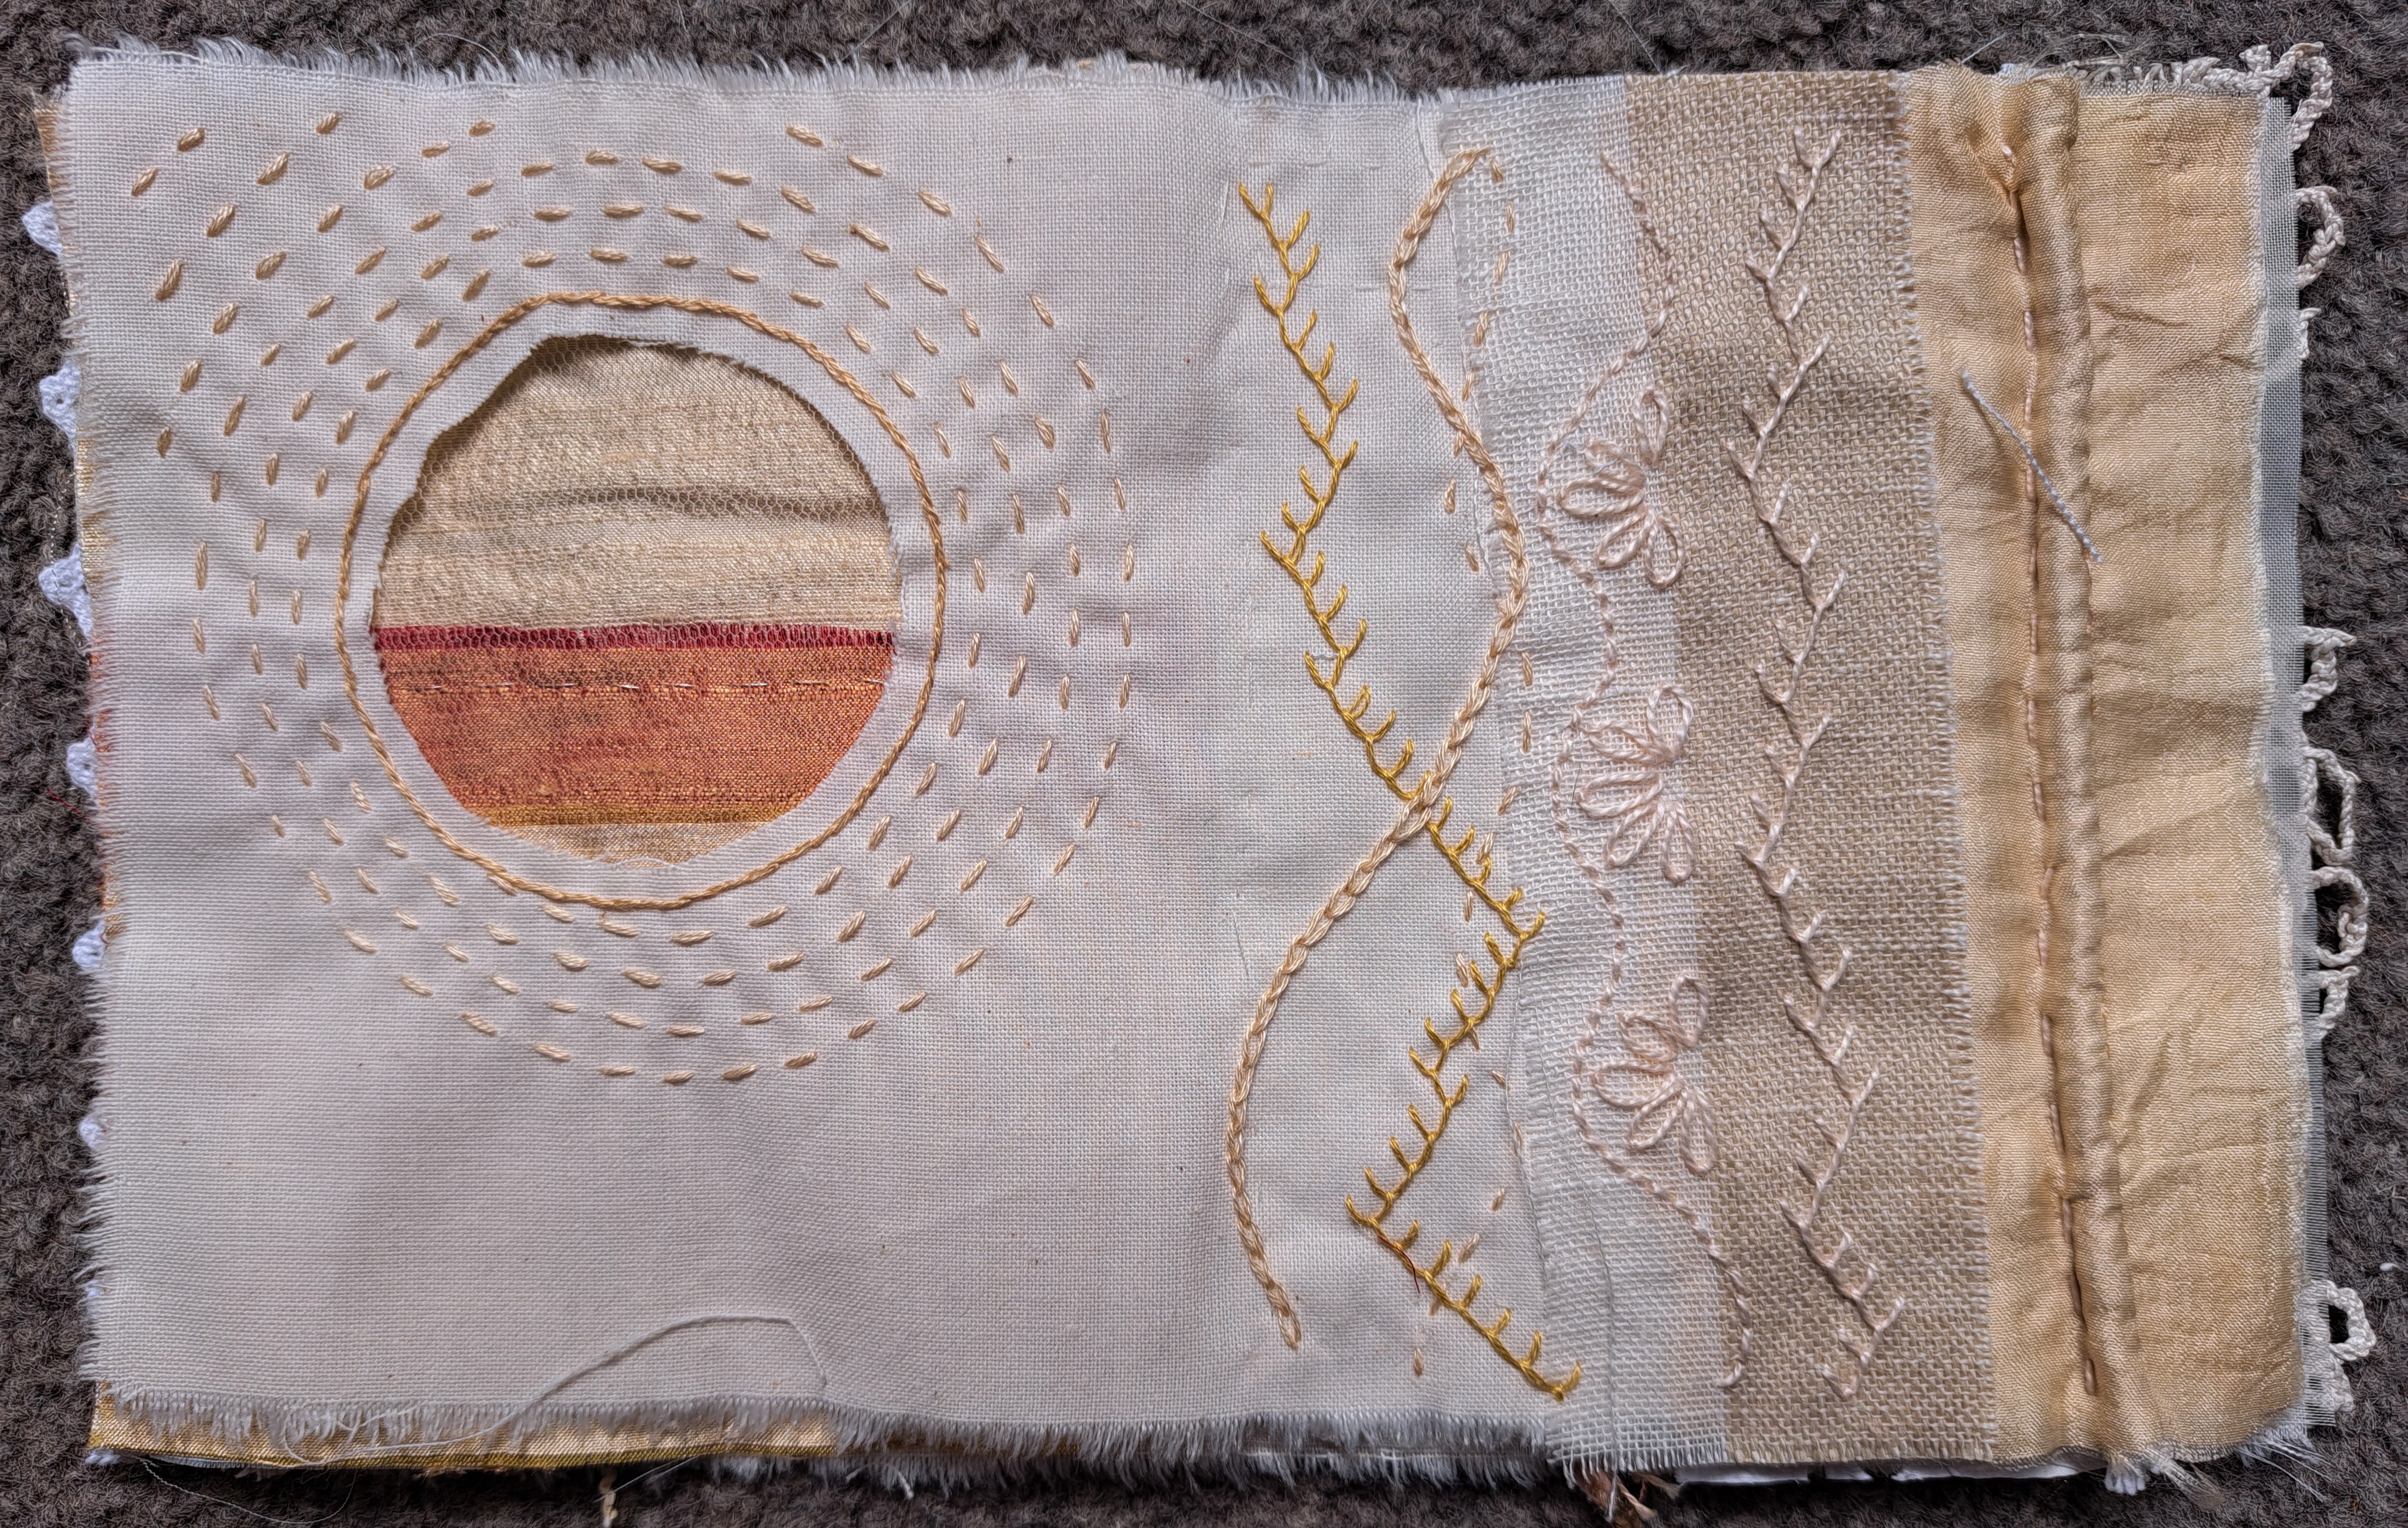
Remembering a ‘window’ page in Anne Brookes book I made in 2020, I cut a circle then stitched a square of tulle behind it. Once I got home I stitched round and round in a spiral around the window.
This week I’m having a gentle sewing time as I had an operation on Monday to remove my gall bladder, laparoscopic fortunately, but it still takes time to recover. Sitting with some easy stitching in the conservatory so I can watch the birds has been perfect over the last couple of days.
Sometimes my stitching doesn’t go quite according to plan and I have to think outside the box a bit, the other half of the ‘window’ page is a good example…the beige linen with the feather stitch on ended up decidedly slanted, I’d stitched too much to undo it, so I did lots of wavy lines instead so it’s hopefully not quite so obvious. The gold silk next to it has a length of piping cord in it, I’m having second thoughts about it at the moment as the book is going to be eco-dyed as a whole, flattened and bound tightly, I’m a little concerned that having the prominent piping will affect the pressure of the binding, it won’t be even…I’m still mulling that one over!
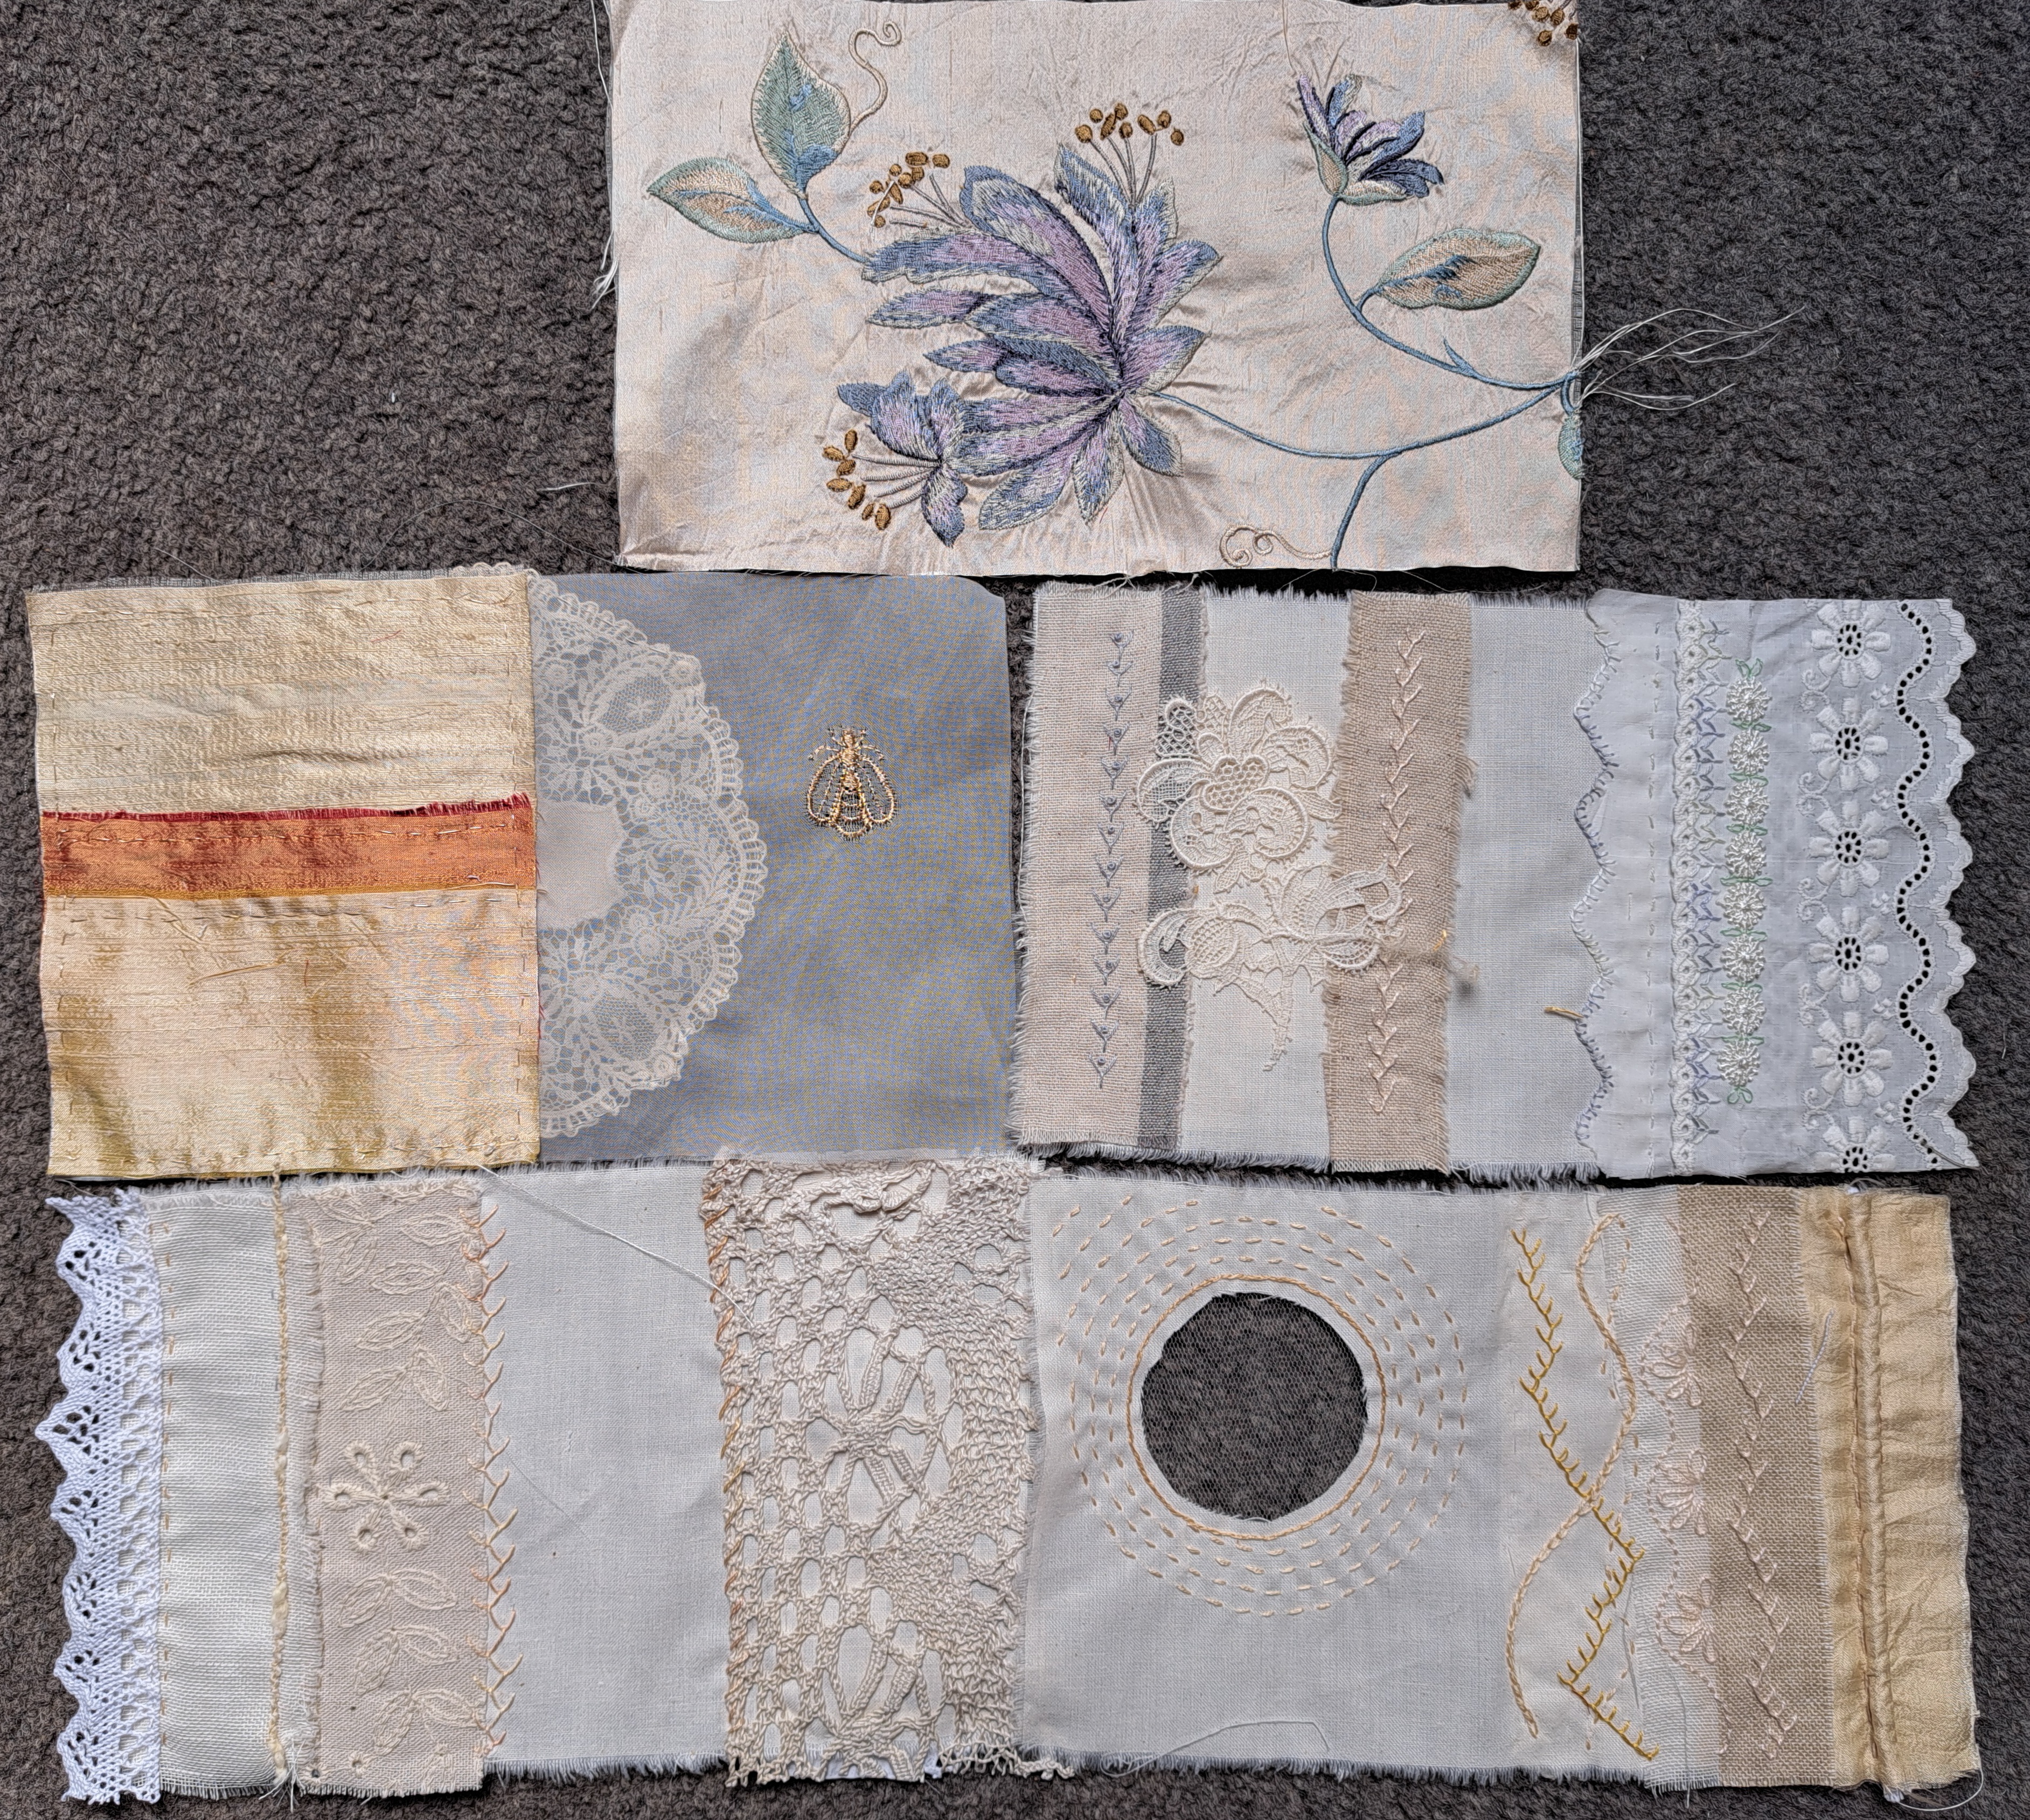
As you can probably see from the photo above, only two pages have ended up with the full calico backing. One page has a piece of broderie anglais blanket stitched on, which is further embellished with two short strips of daisytrim and narrow broderie Anglais stitched on with feather stitch and lazy-daisy.
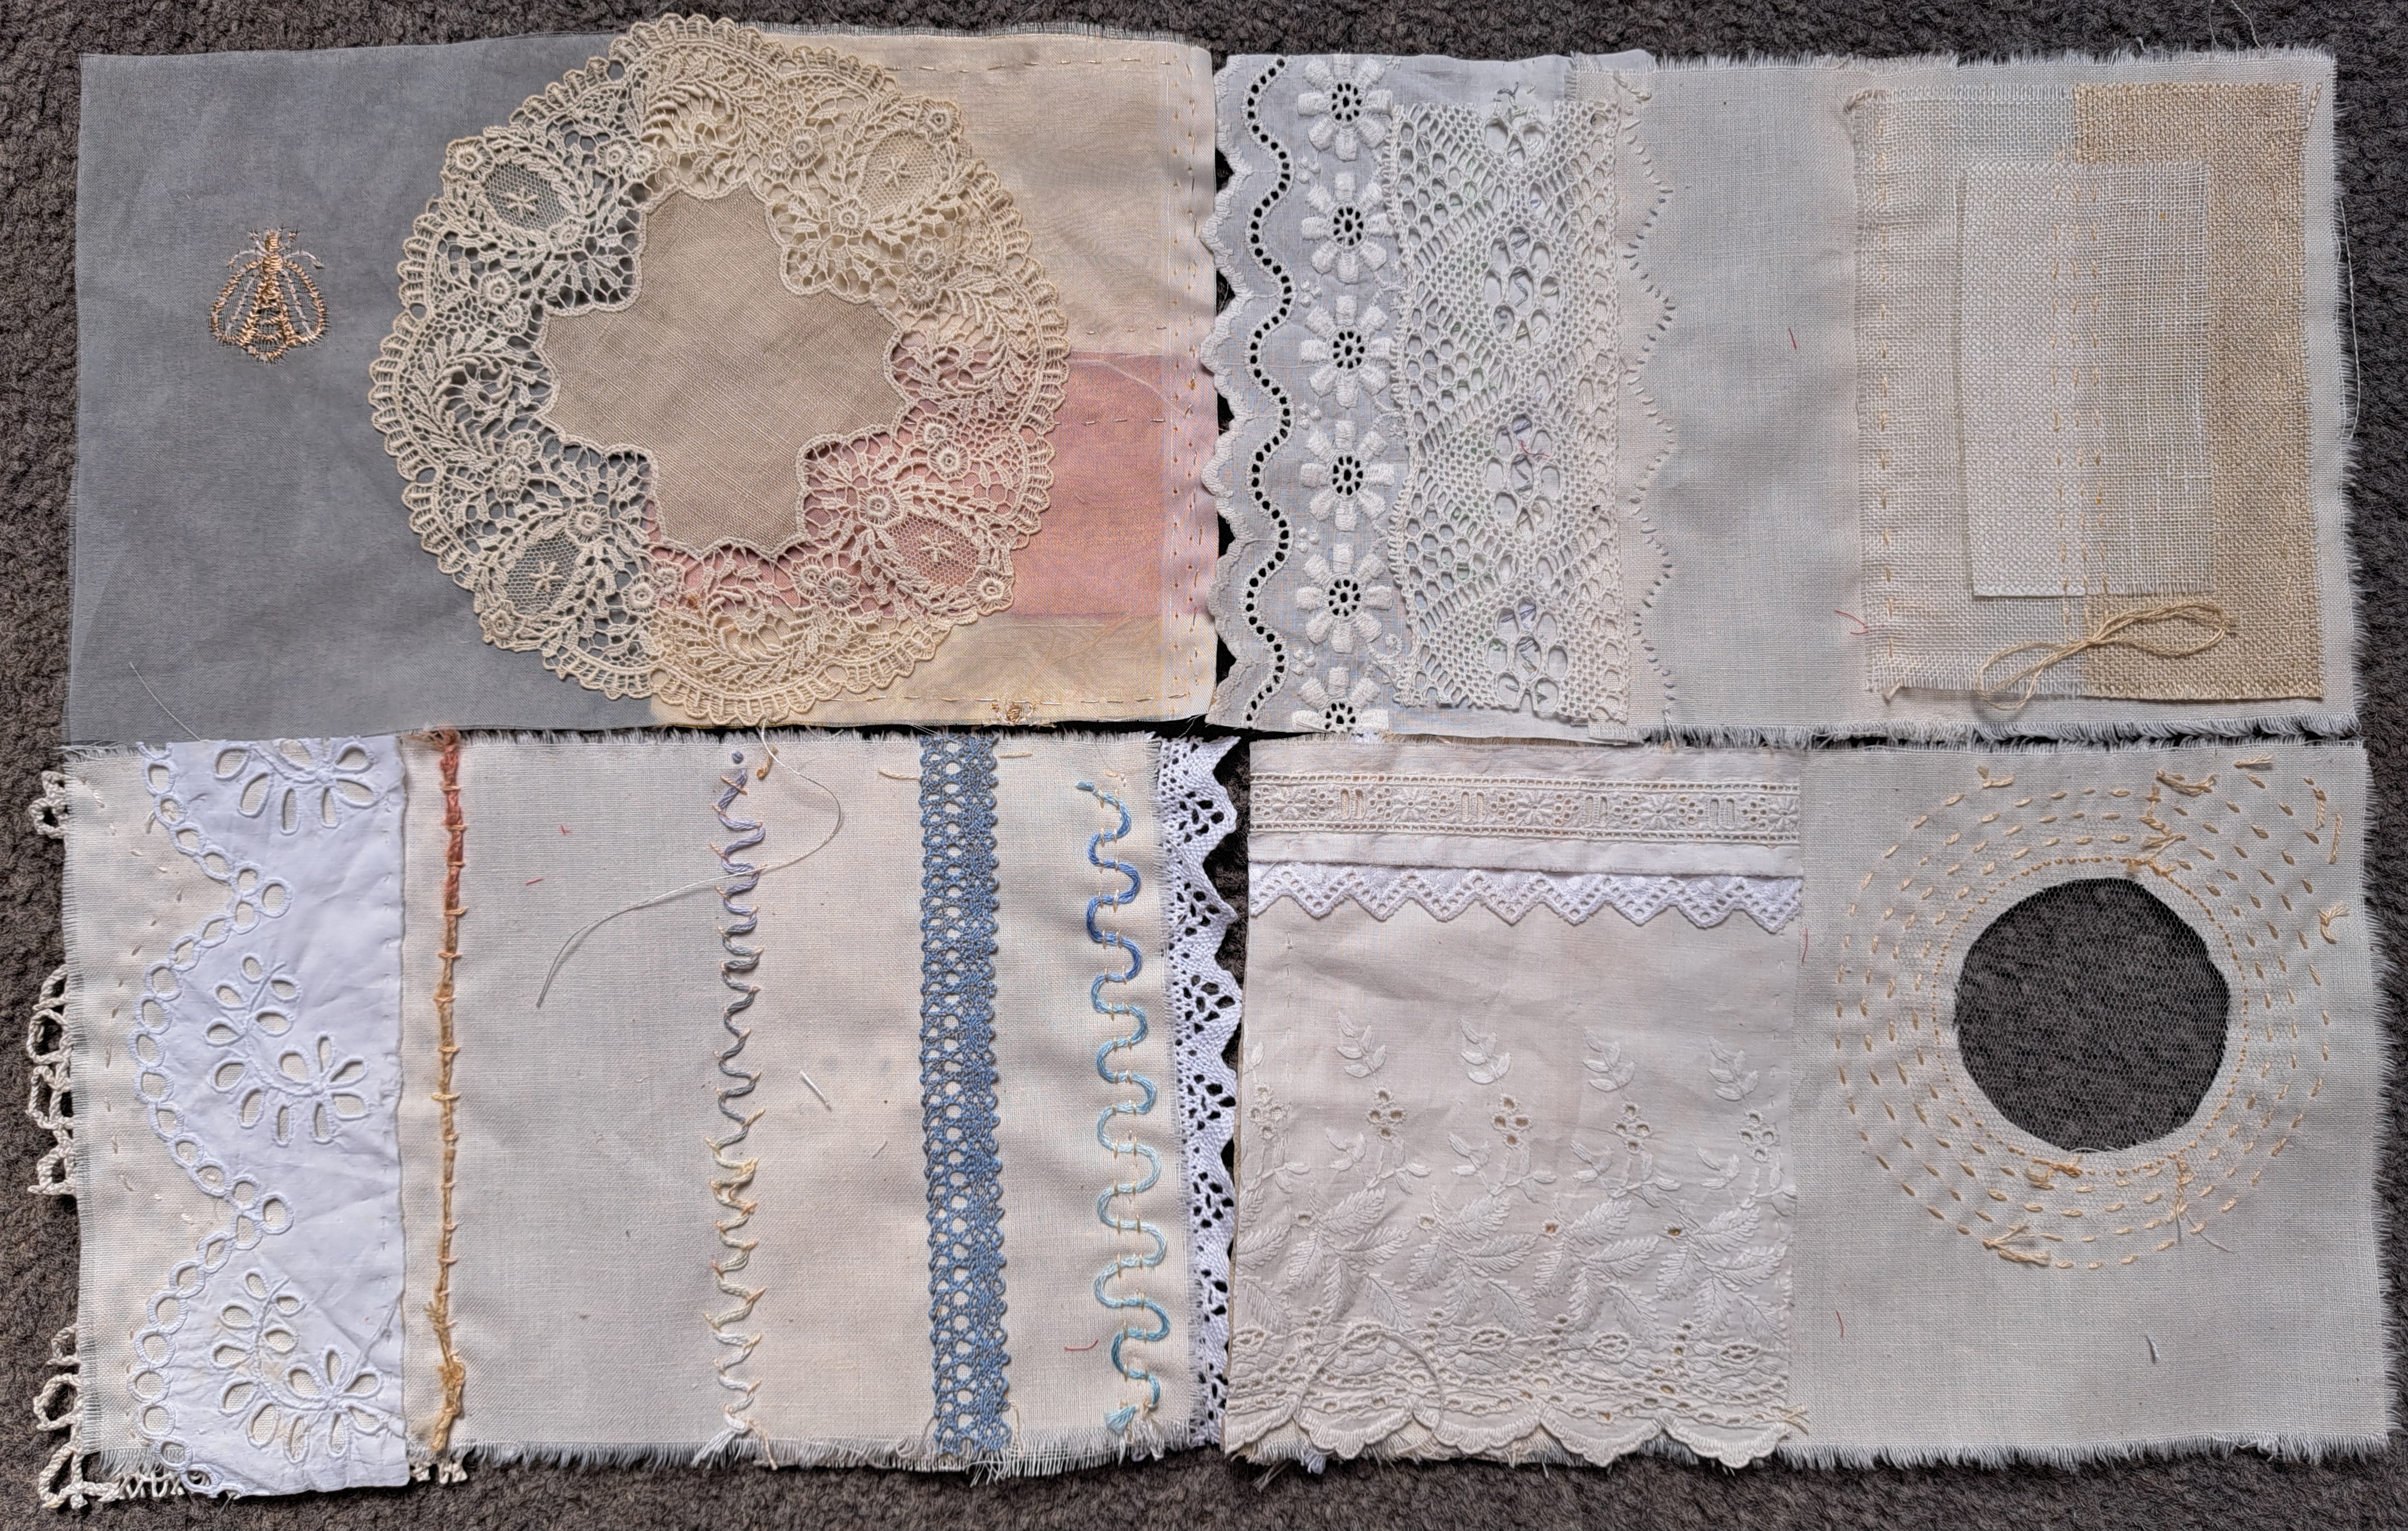
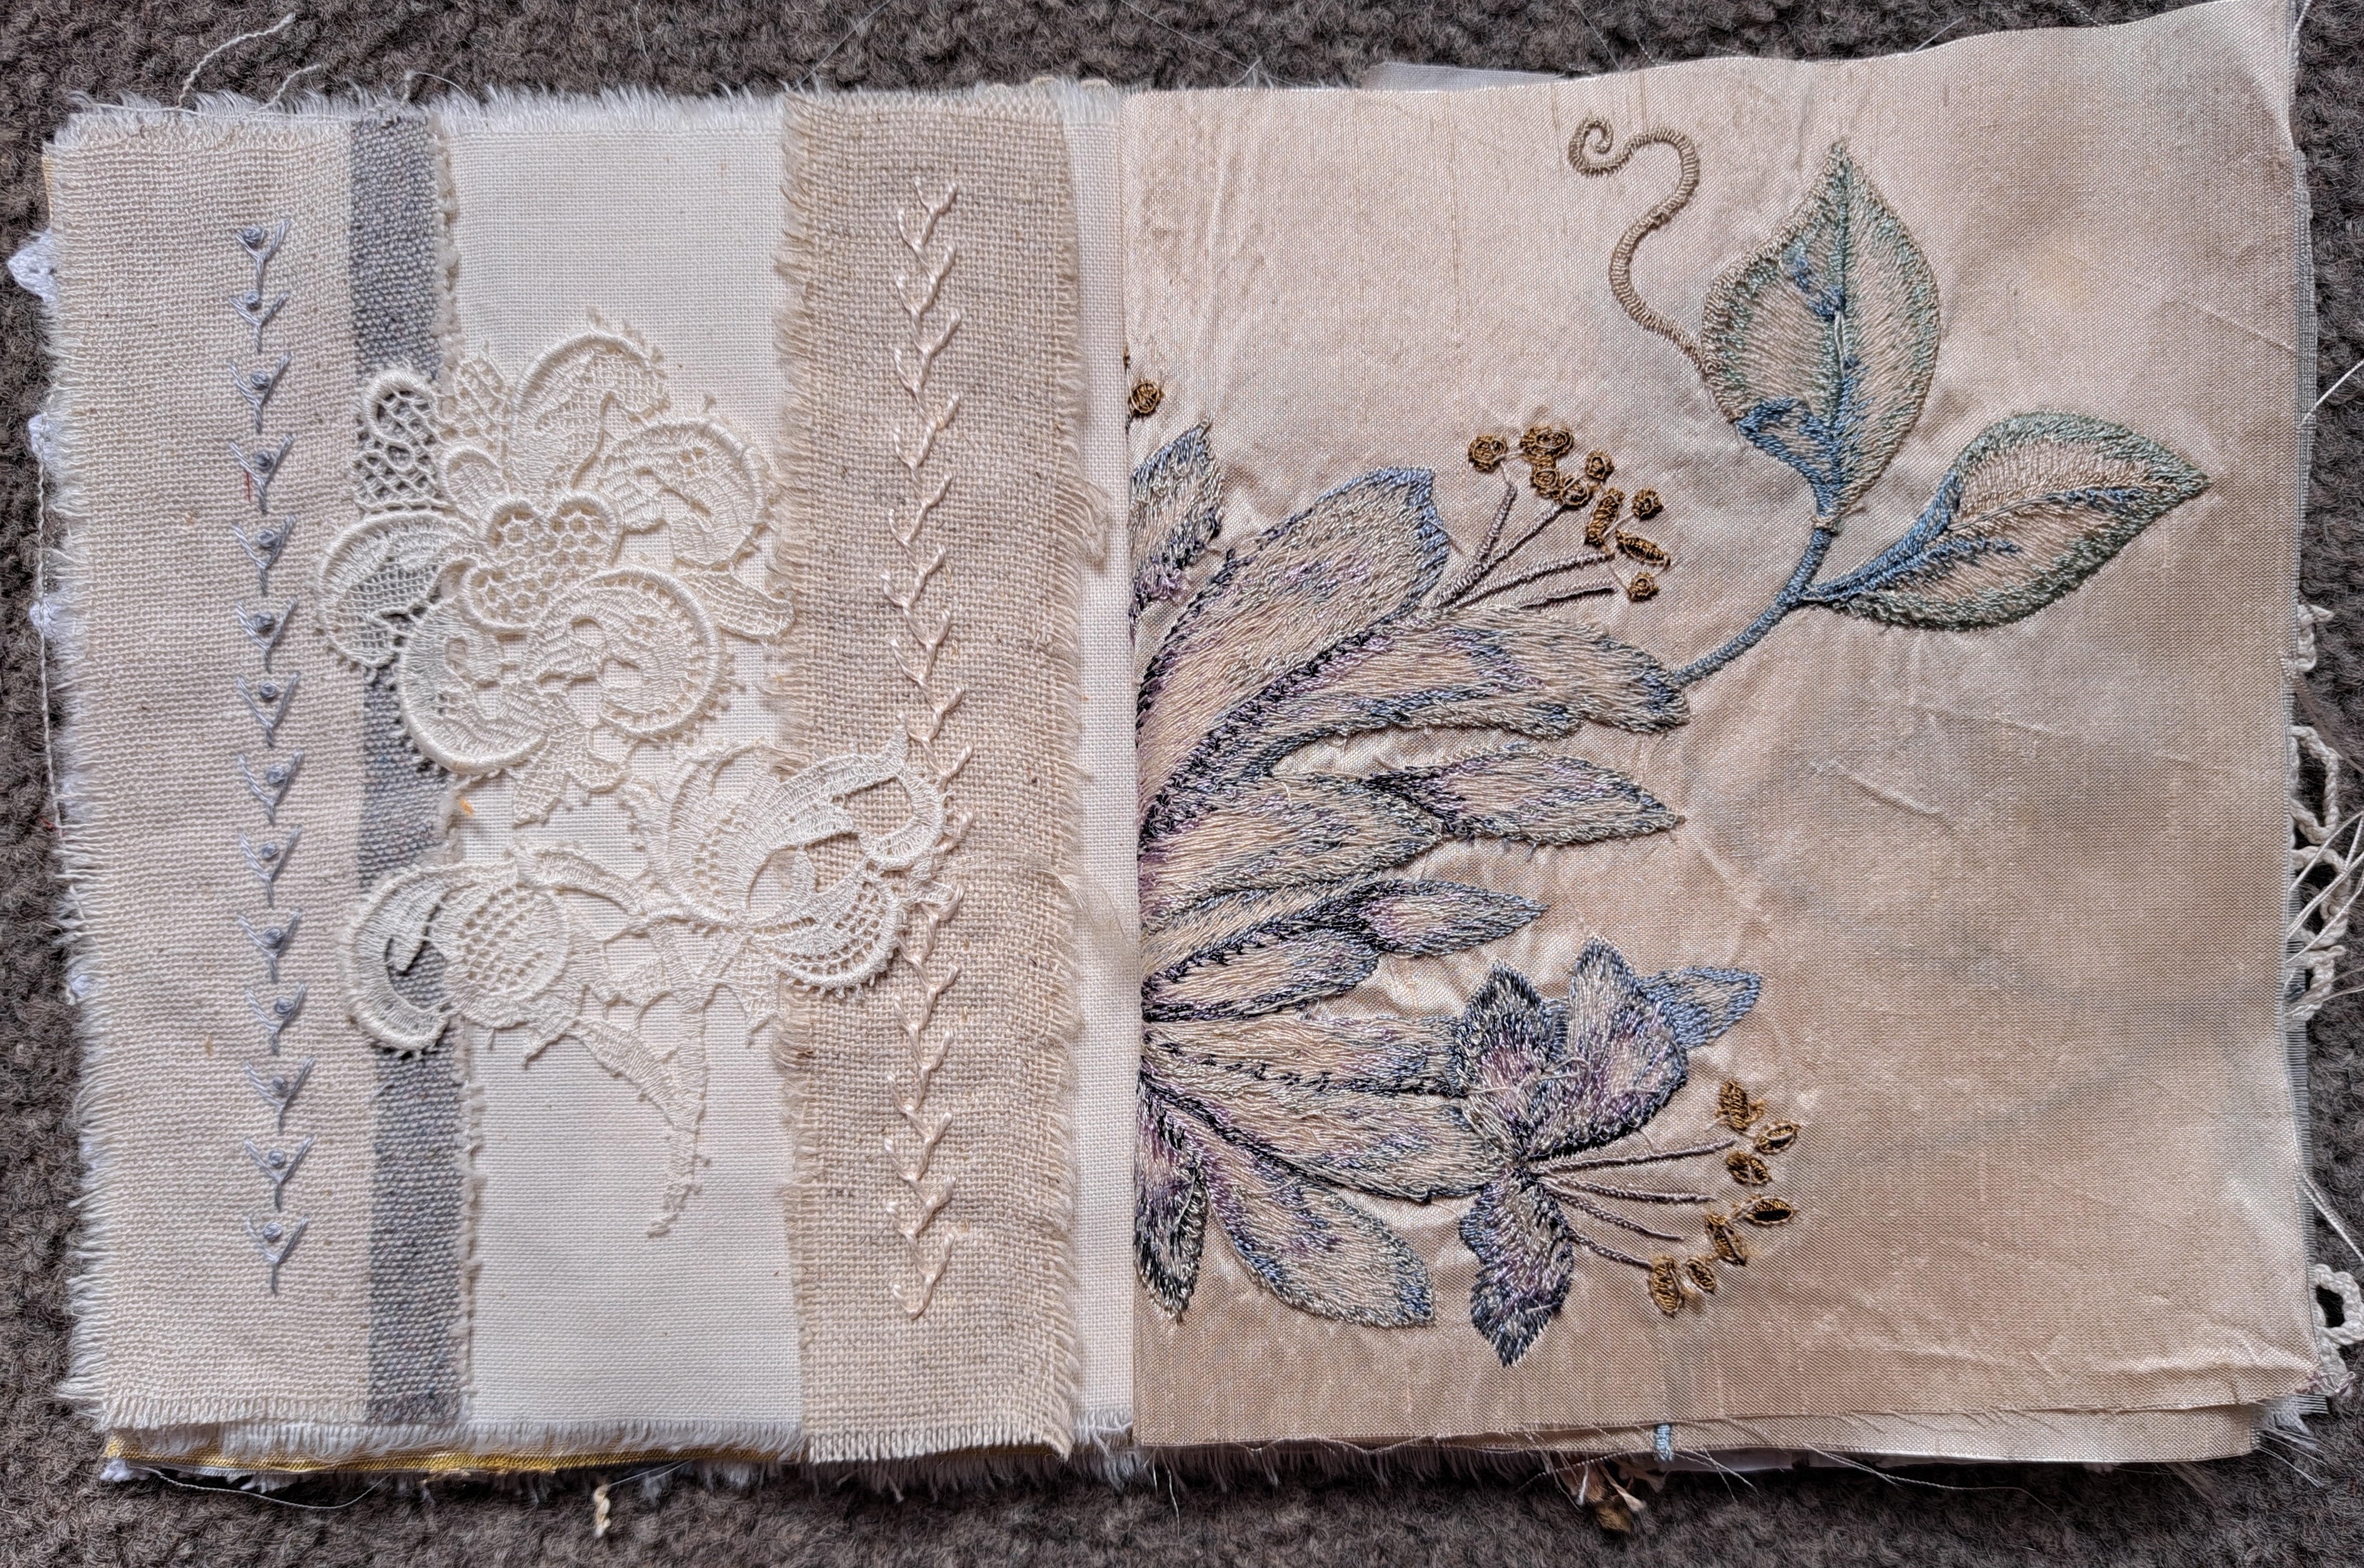
The page with the gold silk strips is designed as the view through the ‘window’, I needed something to mount it on so I used some voile with gold embroidered bees on which I bought probably about 30 years ago in Helmsley! The top piece is from a curtain sample book, it’s just very pretty silk which was too nice to cut smaller so that’s going to be the centre page.
As usual with me projects seem to get bigger than they seemed at the start. Having started making my pages I realised that of course I either had to stitch the backs together or make them pretty. Stitching the backs together would effectively halve the number of pages in my book, so I decided to titivate the backs too.
Some pages I completely covered the back such as the striped linen page with the bow, I wanted something fairly simple for this page as it’s the view the other way through the window. The other half of this page just has a length of lace across the middle. The wavy line of stitching is the reverse of the blanket stitch, I rather like it.
On the page with the blue wiggles I used the stitching from the front and whip-stitched it. I did one in the middle too but that wasn’t very successful, hence the blue trim! The couched thread was threaded up through existing stitching too.
The voile backing the gold silk needed something. I tried a few things but eventually came up with this lace doilley. There’s a vintage shop in Otley which has a basket of scraps, damaged textiles etc, it came out of there. Initially I was going to cut it up so it would just be behind the silk, but then I had the idea of centralising it so it makes the bee side pretty too.
Sometimes the pages worked well together by chance, this is the back of the centre page, it tones beautifully with the linens on the left.
I’ve one more bit to do before I stitch it together and dye it…scary stuff as I’ve not done eco-dying before. The back of the window is going to have a ring of silk , I’m using bondaweb to give the window support…well I would if I could find some! I’m sure I didn’t use the last bit, but I’ve had to order some more. Once that arrives I can stitch the book together, Deb gave us a few different ways of doing this. I’m planning to use wool felt for the cover which I will stitch afterwards, I’m going to add a few extra textiles into the ‘pot’ when I dye it.
The main sample Deb showed us was tea dyed with rusty nails etc. I’m not a brown person, I like blues and greens and purples! However she had one sample made using green tea, which made a much nicer blue/grey colour. So I now have a box a green tea bags ready! I do have some iron filings which I might sprinkle in as I think I might need it as a mordant. I’ve ordered a wooden flower press which is just two pieces of wood and some strapping, I’m hoping that will work as a press. I’m thinking of adding a few leaves and flowers to the pages, see if anything happens, I might just add a few blobs of silk paints too to give a bit of colour.
I’ll try and take some photos before it goes in, then I think it’s a matter of watch this space…
If you get the chance to go on one of Deb Cooper’s workshops I can highly recommend it, it was simple stitching but it still managed to push me out of my comfort zone and inspired me to work on and finish my piece. I loved the way she made the eco-dying simple too, using things we usually have at home. Just follow the link at the top of the post to find out about her workshops .


It sounds like an enjoyable workshop.
Wishing you a speedy recovery from your op.
LikeLiked by 1 person
Thank you, it was fun!
LikeLike
🤣 I’m assuming you aren’t referring to your op.
LikeLike
It was fascinating to follow your progress with this, Margaret. I am curious to hear and see how the dying goes. About a year ago I played with tea dying, and enjoyed it. I used black tea ~ loose and tbags ~ but the blue/grey of green tea sounds useful. I hope you are recovering well.
LikeLiked by 1 person
A few more days and I can have a peep! I’m recovering OK thanks 🙂
LikeLike
I hope your restful week has gone as well as this all looks, and you’re back to 100% in no time! 💕
LikeLiked by 1 person
Thank you, I’m getting there 🙂
LikeLiked by 1 person
💕
LikeLike
👍🏼👍🏼
LikeLike
Pingback: Wet Lines and Edges | thecraftycreek
An enjoyable process, right up my street! Looking forward to seeing the dying outcome.
LikeLiked by 1 person
It’s been fun so far, itching to have a peep and see what’s happening!
LikeLike
Oh goodness, I’m lost in admiration that you’re able to apply yourself to sewing so quickly! I find anaesthesia knocks about my concentration too much. It makes these pieces even more admirable. I hope your recovery continues smoothly.
LikeLiked by 1 person
As this was the sort of stitching with no rules, it was perfect for post GA brain fog!
LikeLiked by 1 person