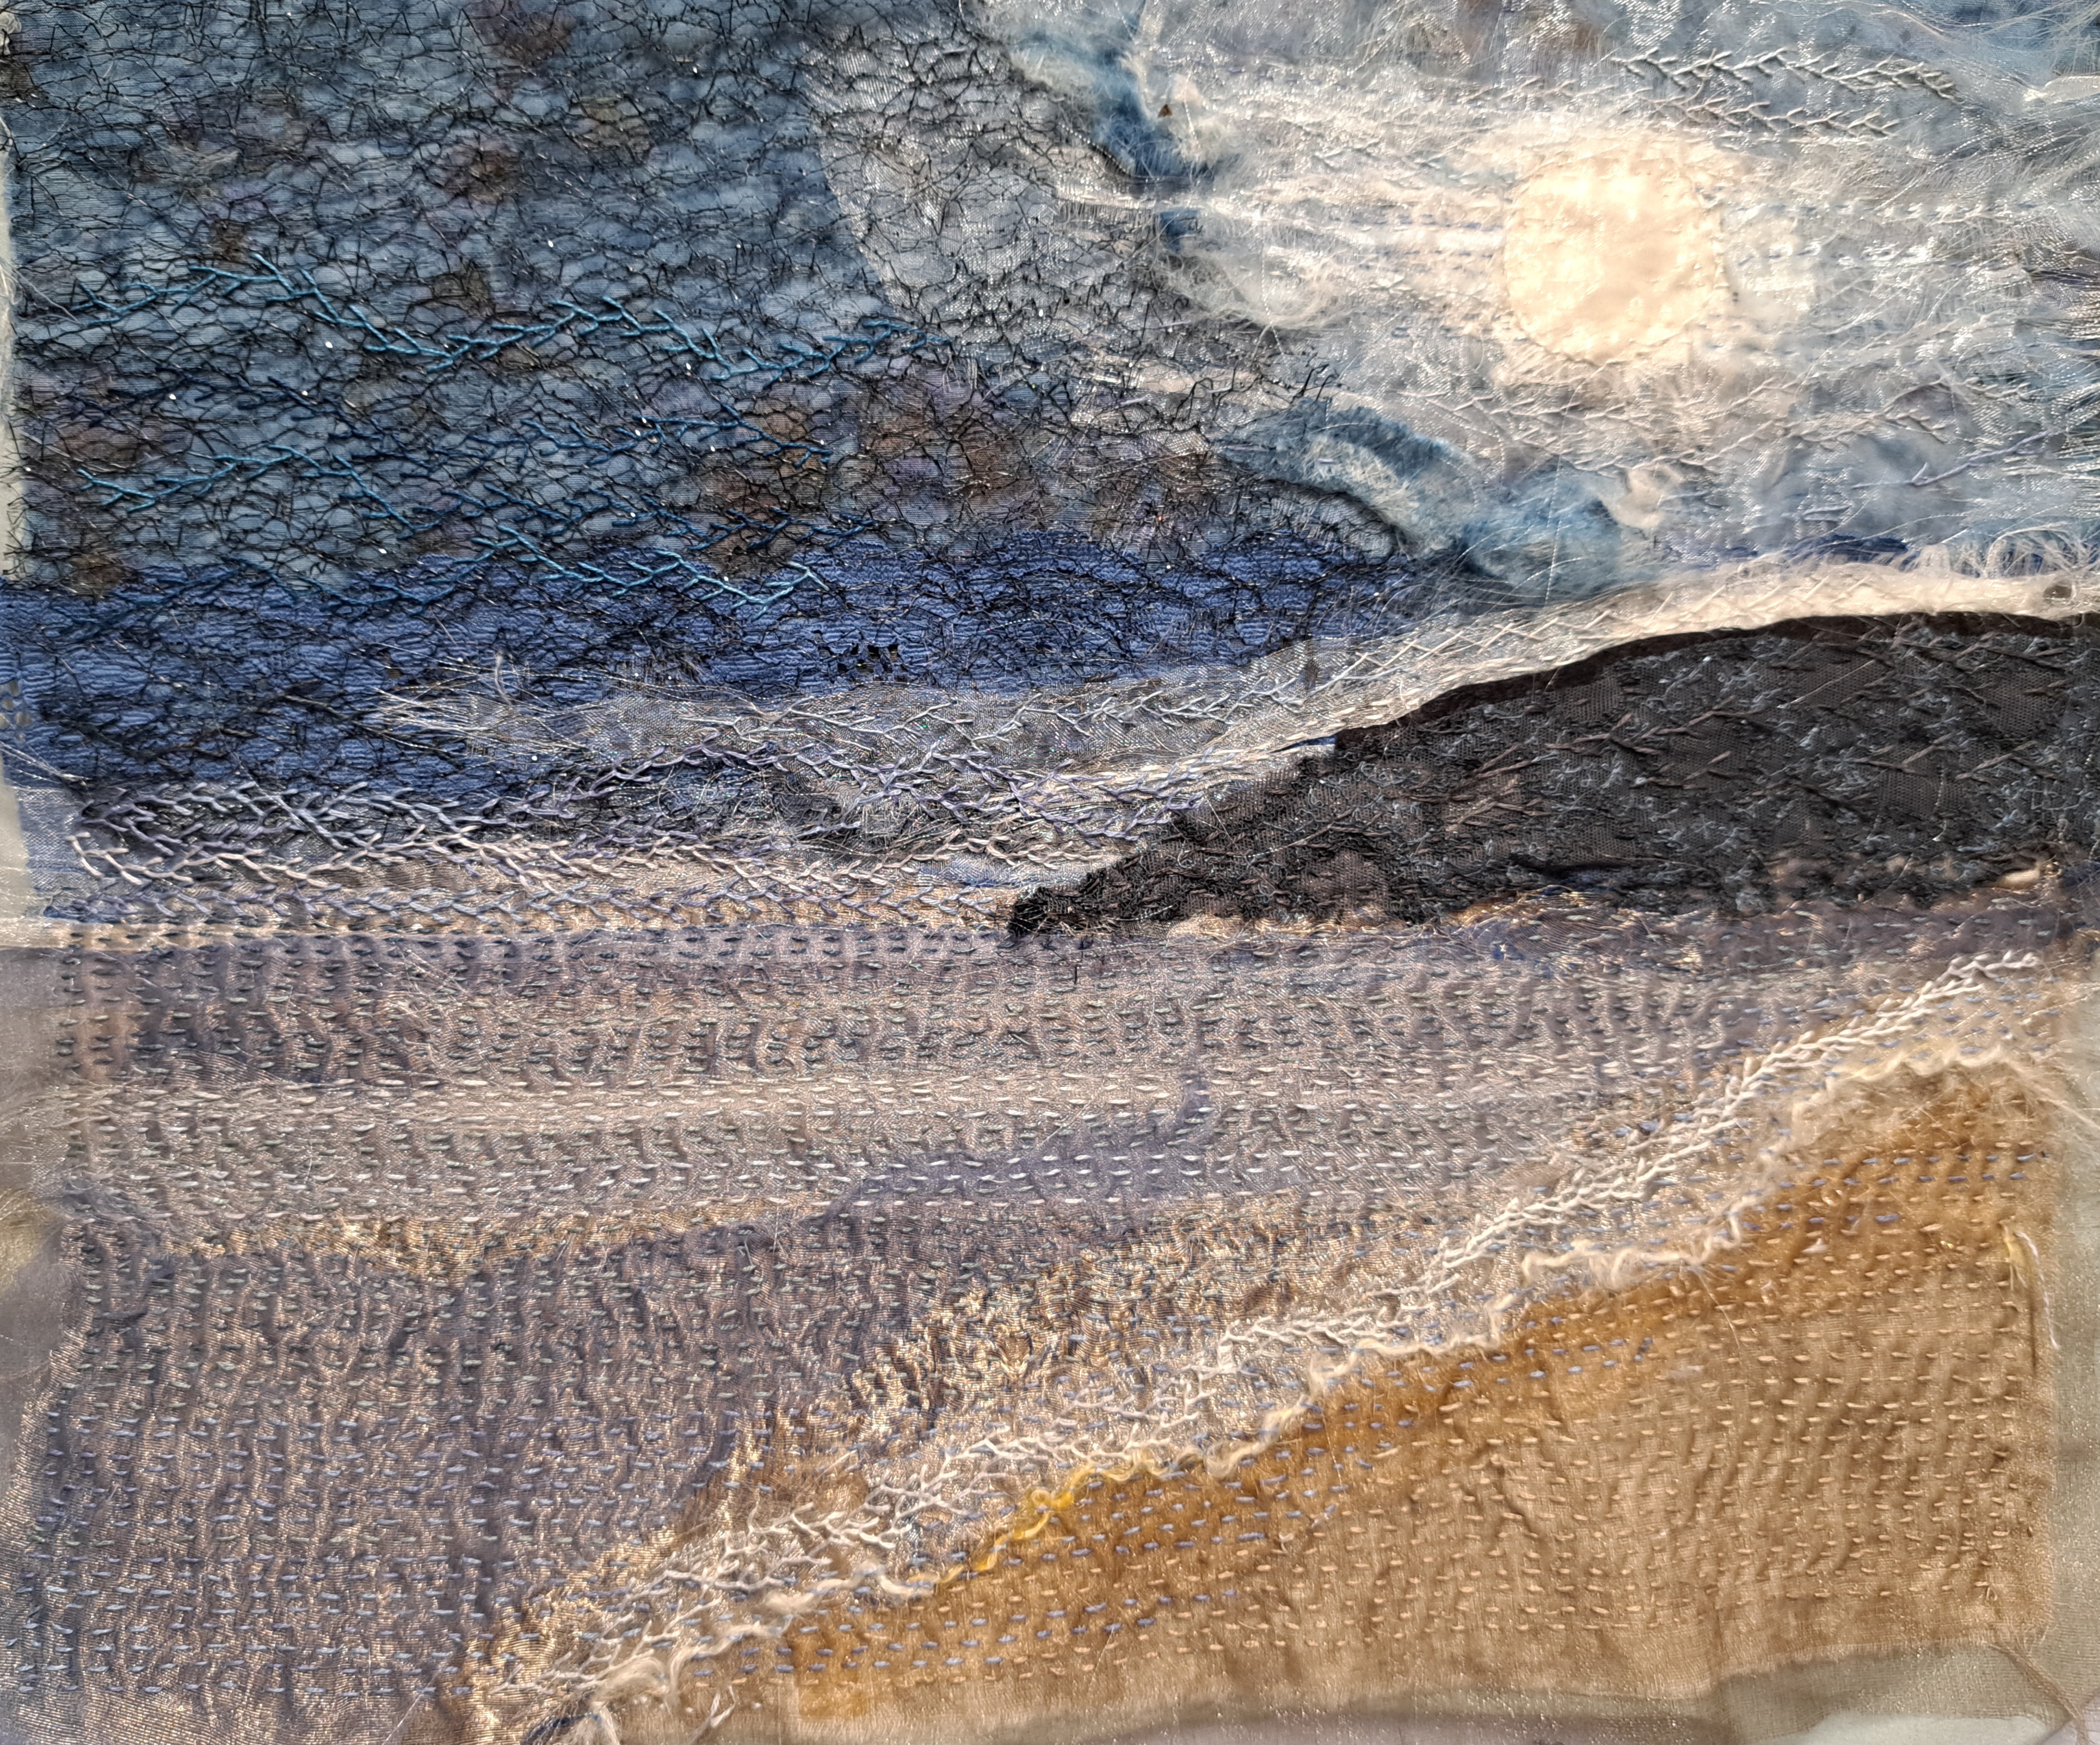
I think I’ve finally finished my seascape, I say ‘think’ as I posted on facebook that I’d finished it two days ago, then added a bit more…it’s that kind of piece!
I started this at a workshop organised by Skipton Stitchers with Laura Edgar, an amazing textile artist who uses lots of different fabrics, lots of worn or torn pieces, layered up and then embroidered….way out of my comfort zone!
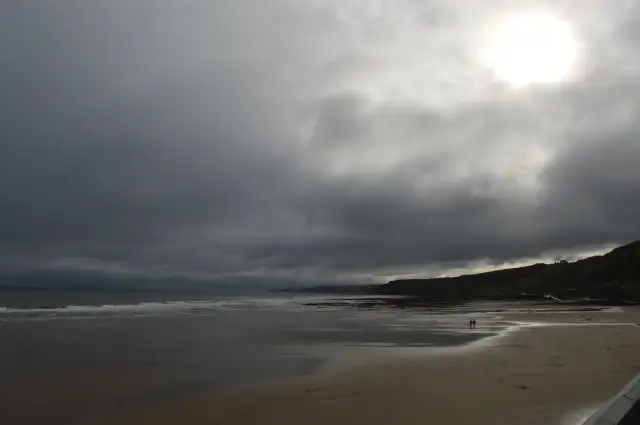
We all took a picture we wanted to use as inspiration. My photo was Scarborough’s South Bay under a moody sky, it’s one I took a few years ago on one of our walks…
After a day’s workshop I had the rudiments of a collage and I’d started tacking fabrics down. I used layers of organza, lace and tulle over various fabrics to create the basic image.

I then started stitching it. Last time I shared it with you I was working on the sky, with lots of meandering feather stitch. I fiddled with the headland fabric a bit as it just looked too dark, despite being that dark on the photo it just looked too much in stitch. The criss-cross pattern you can just make out is some dark grey lace. A few more feather stitches gave some texture to the dark silhouette of the headland.

Next I tackled the sea. In the photo is very calm. I decided to just use lots of running stitch, I wasn’t sure if that would lose the glassy nature of the flat sea, but I really like the effect and I think it does look calm. I used several different shades of embroidery thread, stitching two or three rows in one colour before changing over. I love the way it’s merges the colours of the sea.
For the waves I started stitching a wave of feather stitch, intending to do several intertwined ‘rolls’, it didn’t look right though so I unpicked all but one.
I stopped the stitches at the breaking waves on the shore. After a bit of pondering I stitched the beach the same way. I was still a bit stuck on the waves when I found a fluffy textured yarn. I did running stitch down the wave and then whipped it with the textured yarn. I actually did two rows but again it looked too much so I unpicked one…it’s been very much trial and error stitching this piece!
I still had a gap between the sea and the sand, I looked at the photo again and realised I needed to bring the blue of the sea onto the sand, to merge the too areas…more running stitch…but I was finally happy with the bottom part.
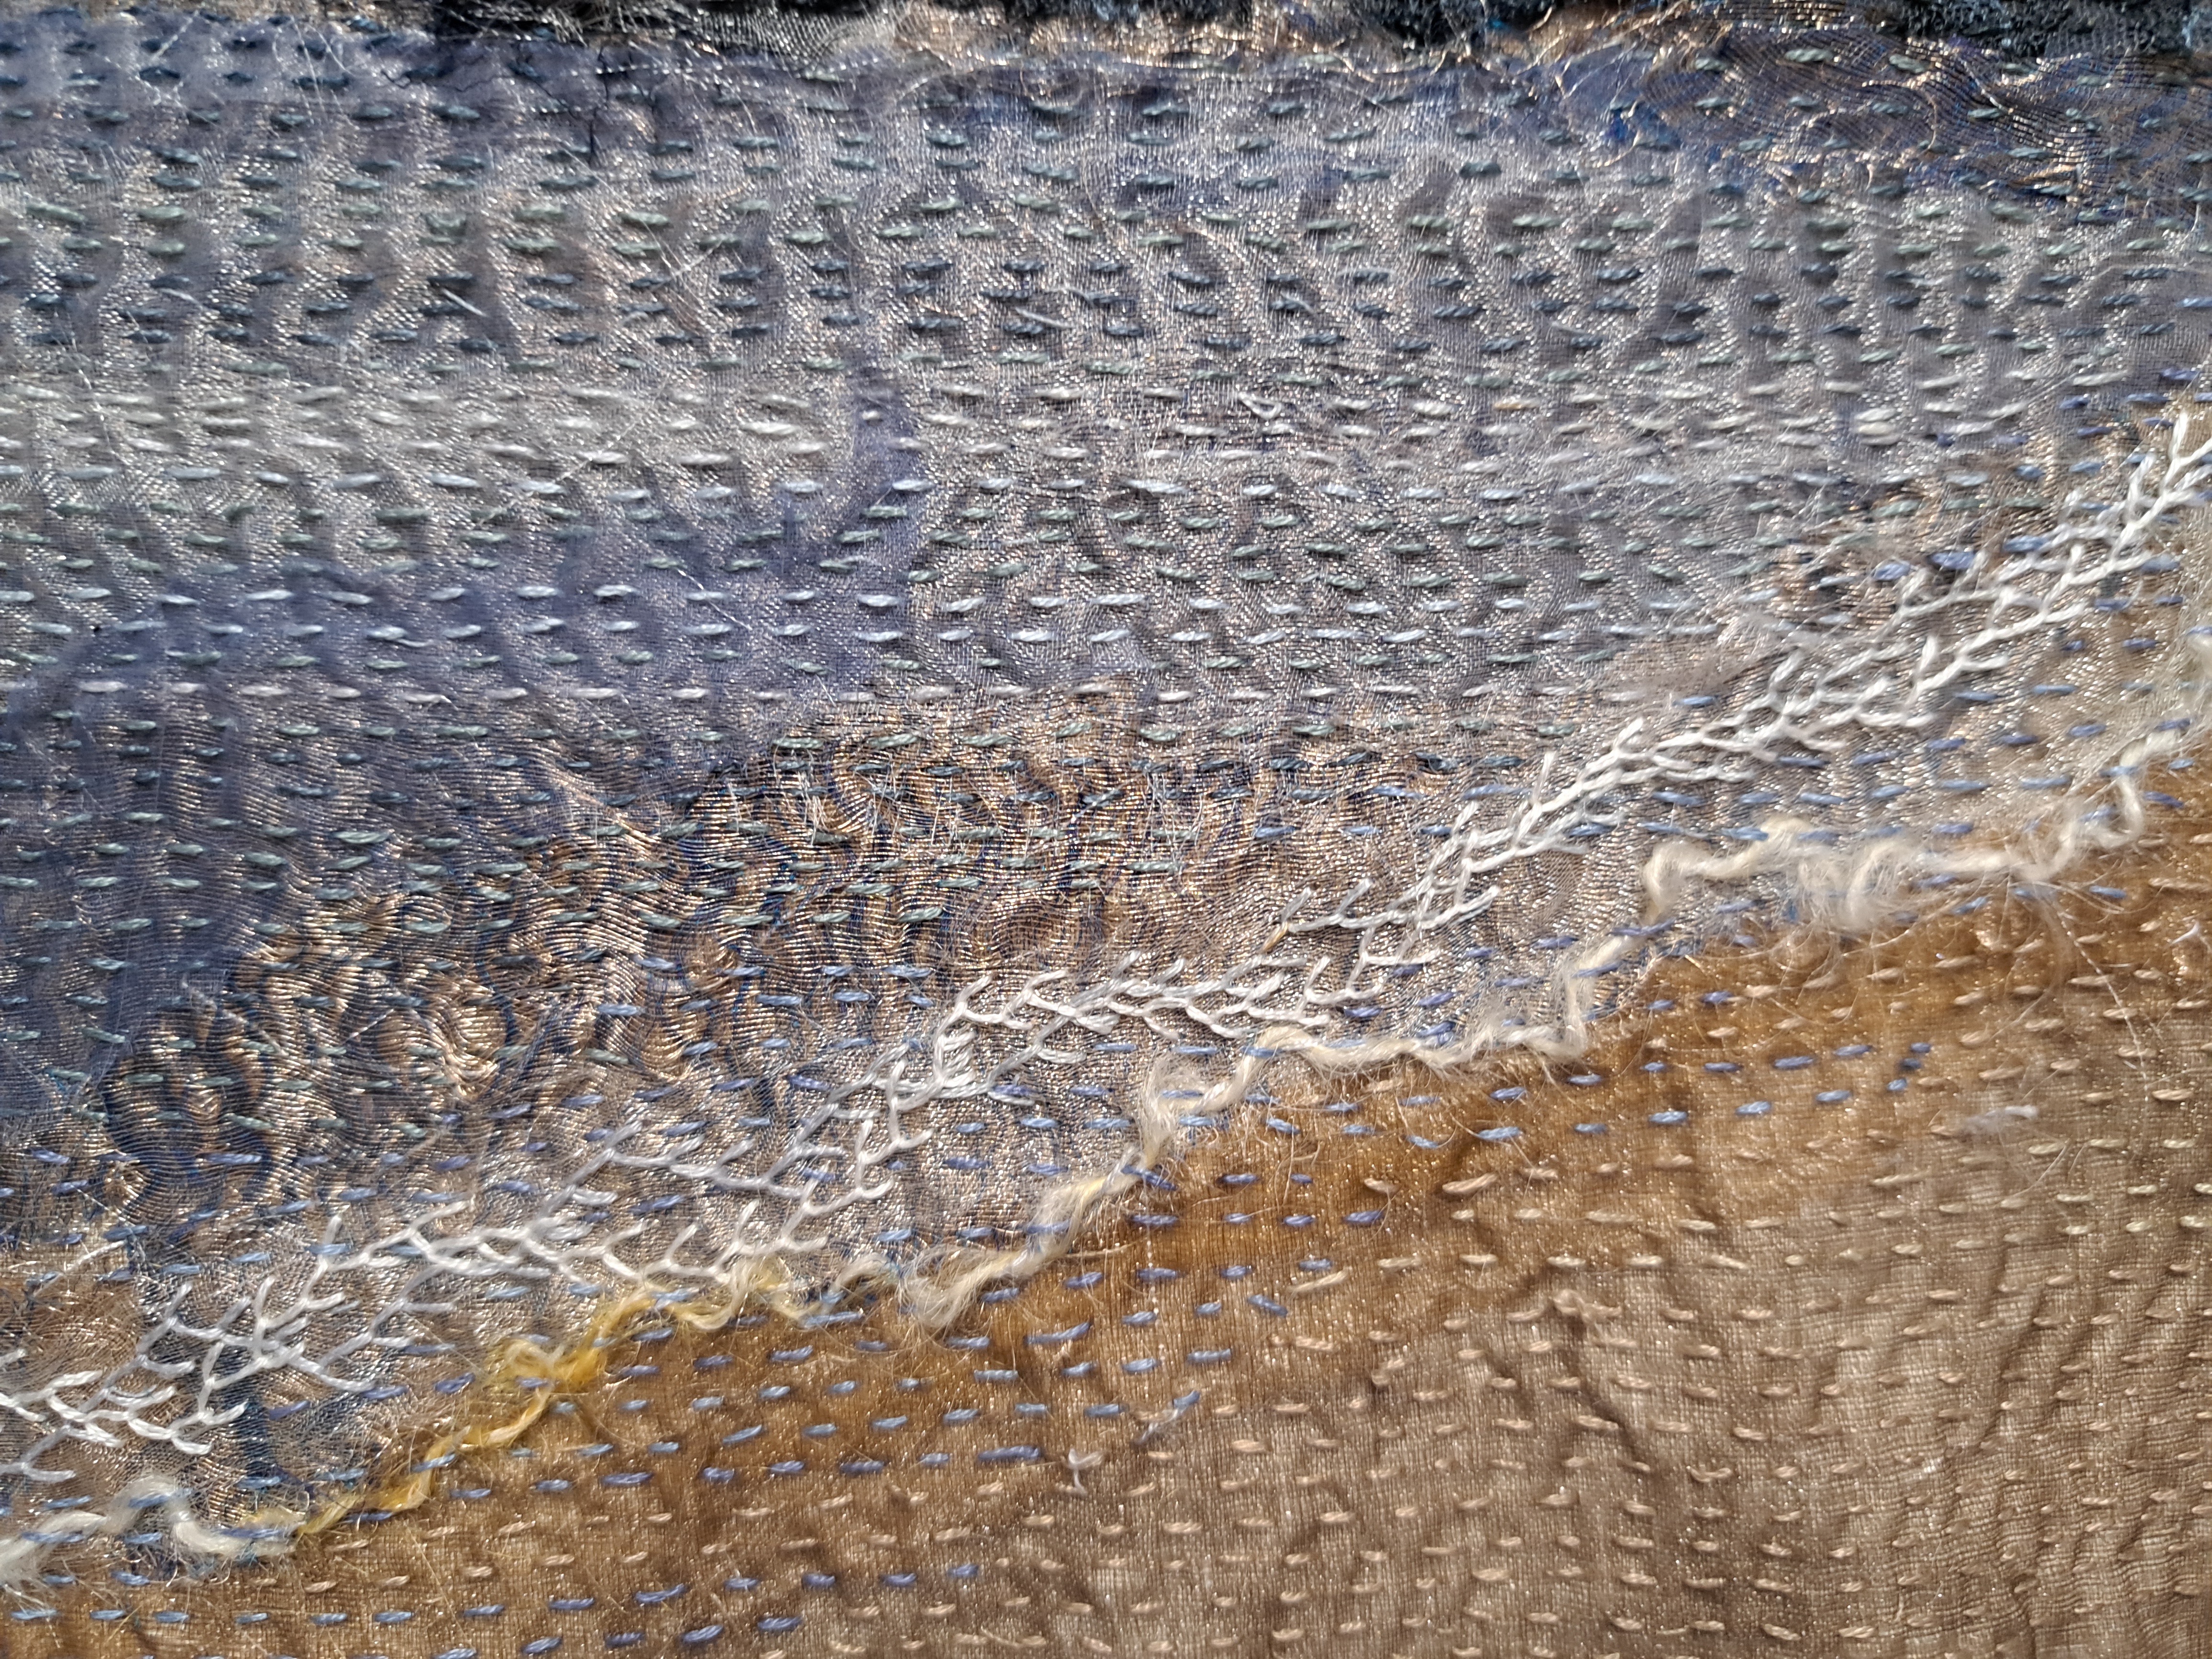
Next area was the sun. I was pleased with the general effect round the sun, but it needed softening. I stitched round the sun with some silver thread to help it to gently stand out. I then stitched thinly torn strips of organza, some folded in half to add opacity. I added wisps of ‘fluff’ and some blue silk fibres teased from a tube. I stitched with a very light grey or warm white at first, but then realised, like with the sand, I needed to bring the blue into it.

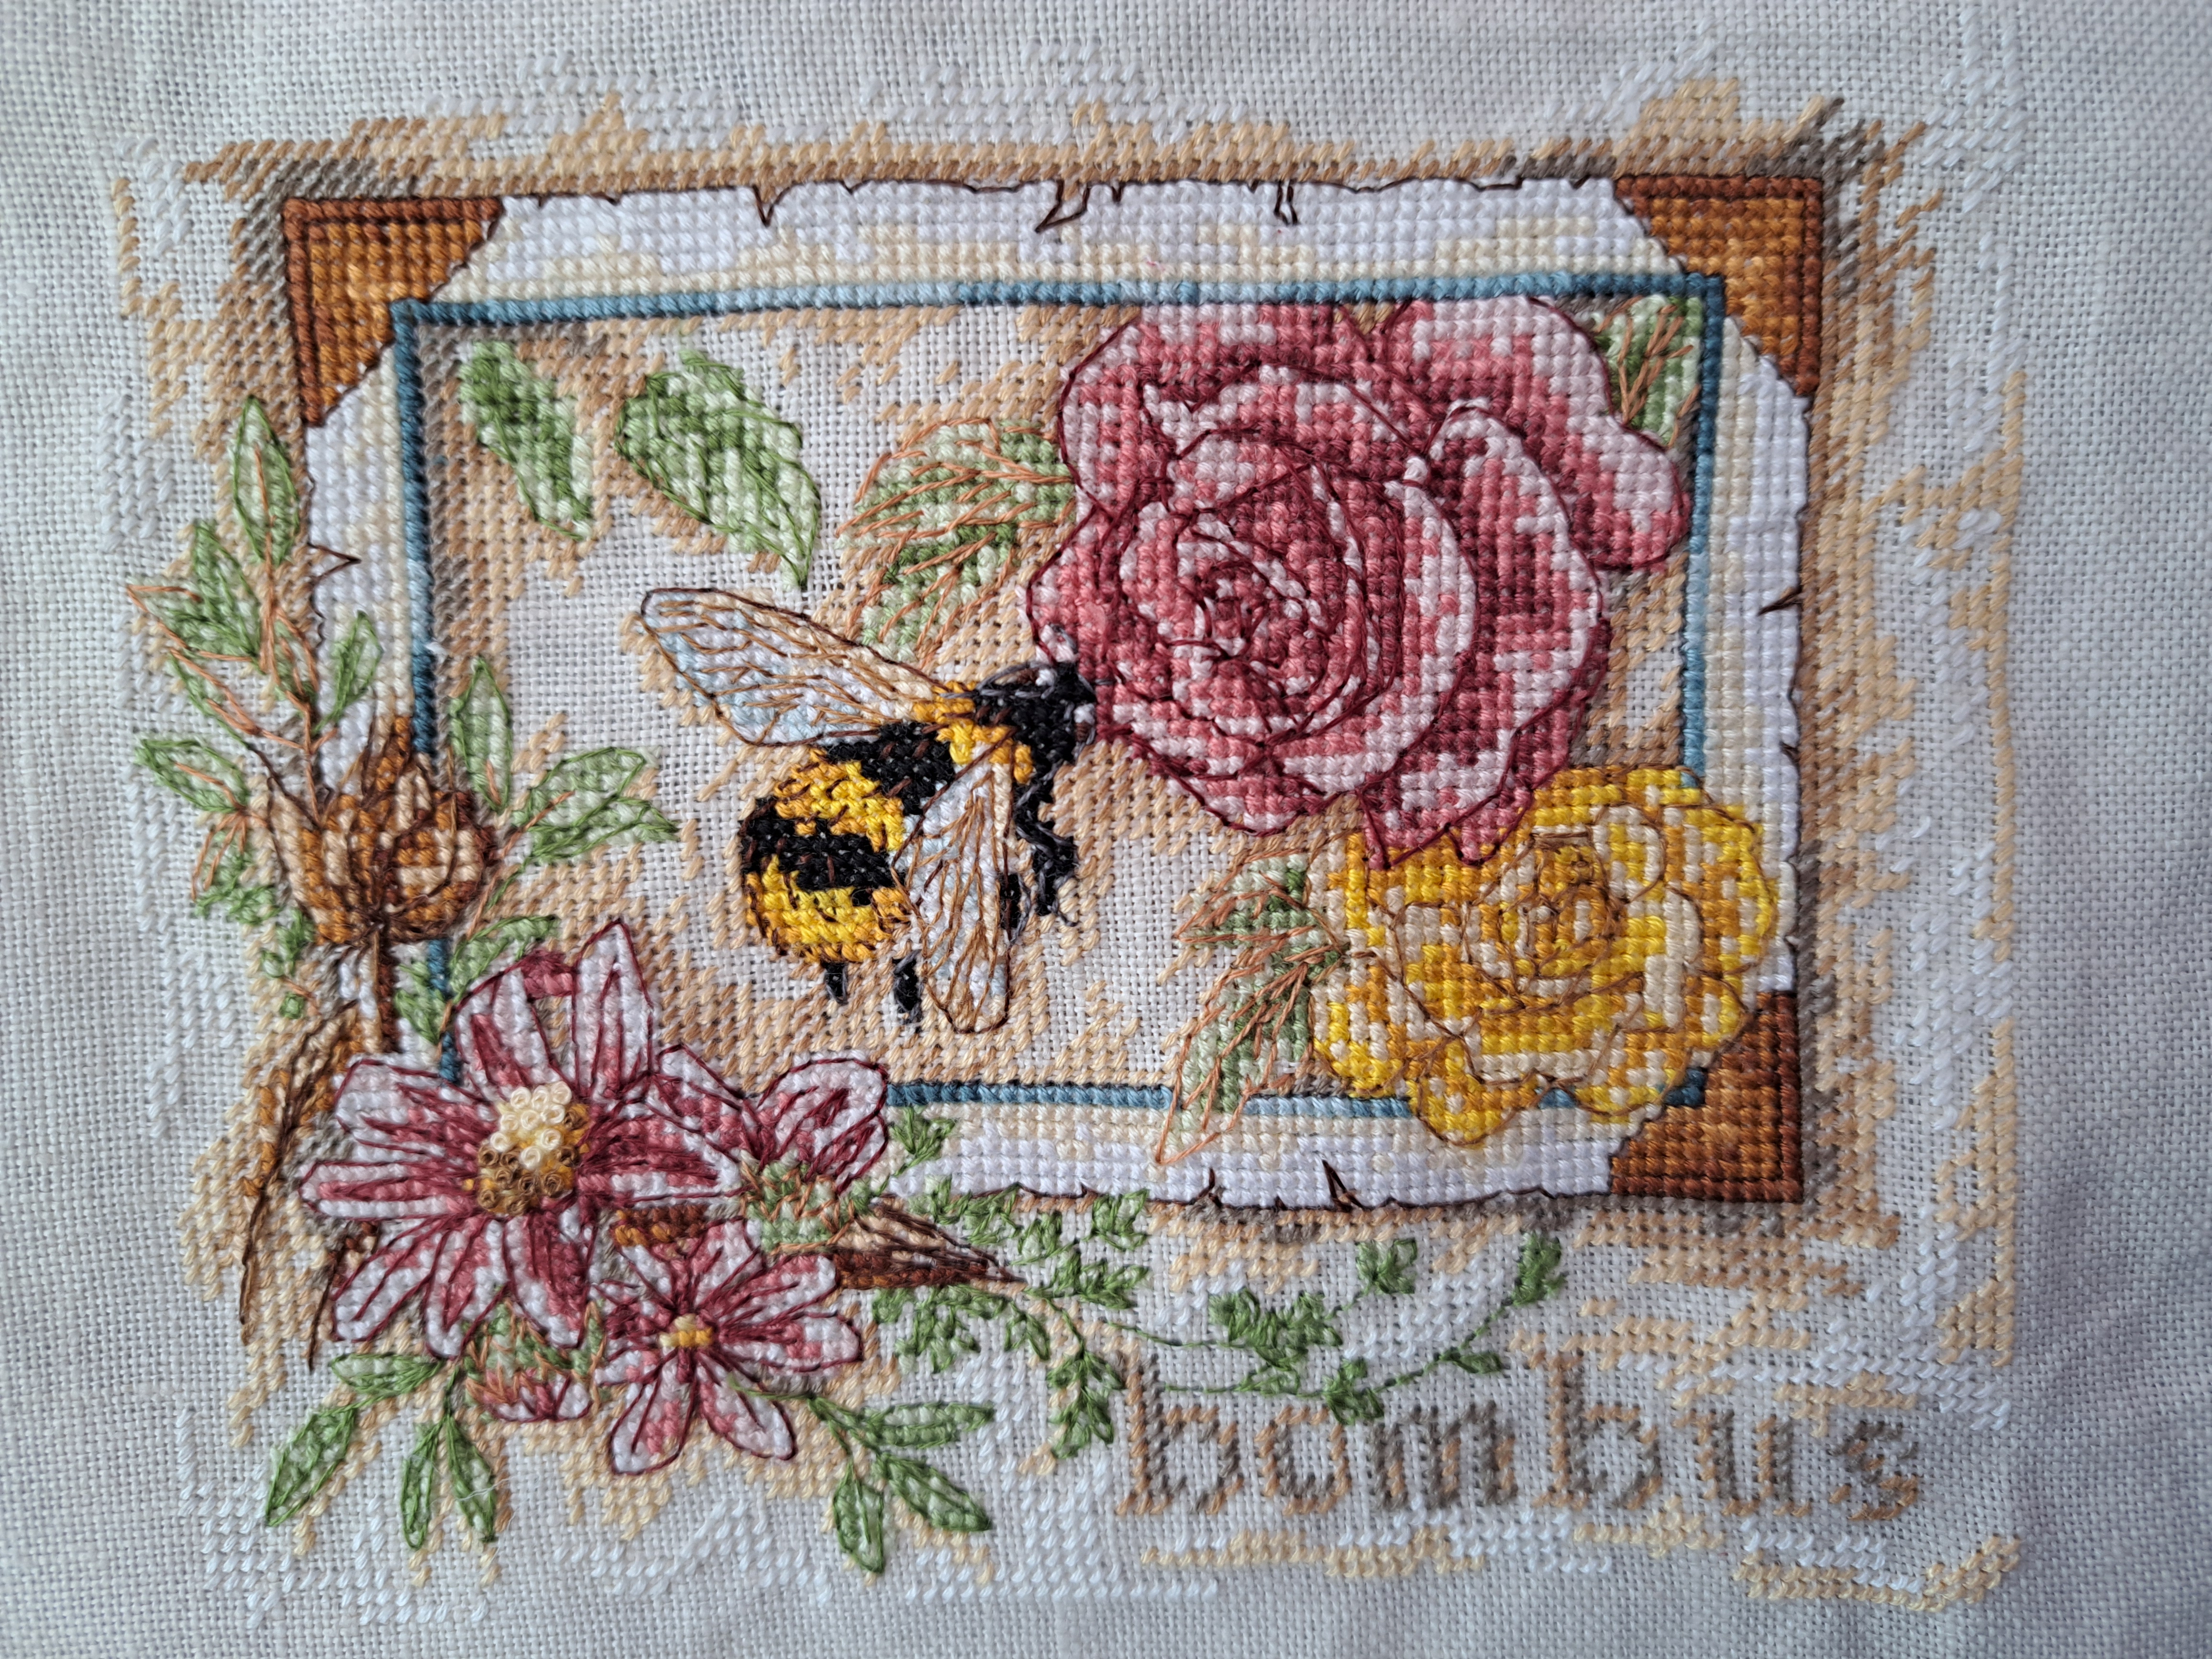
So this is my finished collage, I think I might get this one framed! I’m well chuffed with it.