Decisions!! Help please!

Sometimes quilting can get quite stressful, not the relaxing past-time it’s meant to be! I’m trying to choose colours for the next border for my Down the Rabbit Hole quilt and I’m on about my sixth attempt at colour combination, so I decided it was time to ask for help…

This is my quilt so far…

The next border has got half dresden circle flowers in the centre of each side. The sunflowers in the corners will be completed next month onto this border too. My background is a lovely passion flower design from Lewis & Irene, soft grey with a touch of that limey green. I think my problem is that the pieces are fairly big, so they appear quite dominant, all the colours I’ve tried are already in the quilt in either the flowers or the houses but somehow they seem stronger in the flowers.

This was my first choice, these are from the original layer cake that started my colours. I felt the cream and the olive green co-ordinated with the background colours, but somehow with the purples it seemed very dominant. The flowery purple on the right side below is the outer border fabric, though there is another pieced border in between.

I tried my gorgeous bee fabric, fussycut with a bee on each petal, with olive inbetween or a blue/green. I love the bee, but is it too fussy against the background, getting a bit lost.

bees with cream…

I like my softer shades of purple inside, but is it better with the original outside, maybe with the bees in the centre!!

Any thoughts welcome as I’ve lost the plot 🙂

Update!

How about this one, getting better? I couldn’t face cutting a whole set again, but hopefully it gives the idea! I think I need to sleep on this one!DSC_0003 (2)


Posted in Down The Rabbit Hole, Quilting, Serendipity | 27 Comments

Jam Jars & Tent Pegs

Last year I had a fantastic time at a Women’s Institute camping weekend called Tea and Tents. It was awesome, 560 ladies from all over the country,lots of crafting and lots of fun, it was a bit like Girl Guide camp with alcohol! It was the 3rd Tea & Tents and it’s almost been a victim of it’s own success, last years tickets sold out in 13 minutes!! More importantly it became pretty stressful for the volunteers who organised it. They decided to take a year off, and from this several other smaller camps have sprung up this year. My friend and I decided to go to Jam Jars & Tent Pegs…

…it was amazing! It was held in Lytham St Annes which is a seaside town  on the west coast near Blackpool. I have to admit I didn’t see anything of Lytham, but it’s meant to be very nice with a great beach! Our home for the weekend was the Scout campsite. It has great facilities with a big hall and kitchen, activity barn and hot showers (very important!!) Even better, my friend Donna bought a caravan a month before, she very bravely towed it to camp so we could sleep in comfort! There were just over 100 ladies there which was a nice number, you had a chance of getting to know people! Some had come over 200 miles from near the south coast!


20170623_173030On Friday I had booked a workshop on willow basket-making, it started at 1pm and I naively thought we’d be finished by about 4pm, so I was quite surprised when Cassandra, our tutor, said it was booked until 7pm! Luckily we cracked on and most finished around 5 or 6pm.

Cassandra is a great tutor, very patient, she lives in an eco village in Wales where she grows her own organic willow, which she then weaves into beautiful baskets and sculptures, as well as running workshops.She had an amazing range of willows, lots of different colours to add a bit of variety to our baskets. I didn’t realise there were so many shades of willow!

20170623_141554

She taught us how to hold the basket handle between our knees whilst we worked on the base and how to (hopefully!) weave it without getting kinks! It was amazing how different all the baskets came out. I was really pleased with mine, it’s my first attempt and it’s a useable basket! I’m thinking of using it to collect eggs from my chickens as it’s just the right size.

DSC_0003 (1)

Cassandra has written a post on her blog, Green Living Muse, about the weekend, it’s a lovely description of how she saw it as a non-WI member.

20170623_173622

DSC_0003On Saturday morning I joined a decoupage workshop, the glue and tissue paper version, we could make a bottle and a goblet, I didn’t fancy the goblet so I decoupaged a paper fan which we’d been given in our welcome pack, I used a paper napkin with birds on, I stuck them all down and then applied a light coat of clear varnish. It looks really pretty, almost chinese style. I managed to fold it up again once it was fully dry without the varnish cracking. I’m not sure when I’ll use it but it looks pretty! The idea with the bottle is that you pop a short length of Christmas lights inside.

DSC_0002

Sunday morning found me teaching silk painting. It’s the second time I’ve run a silk painting workshop and it seemed to go really well. There isn’t time for students to use gutta so I buy gutta printed card insets so everyone can concentrate on the painting instead, mixing and blending the colours and using salt on the wet paint. They did some beautiful cards and a few said they were going to try it at home.

20170625_122059

So what did I do the rest of the time (apart from the beach party on the Friday night and the talent show on the Saturday night!) I decided against the clay pigeon shooting, or the wakeboarding, zumba or yoga…

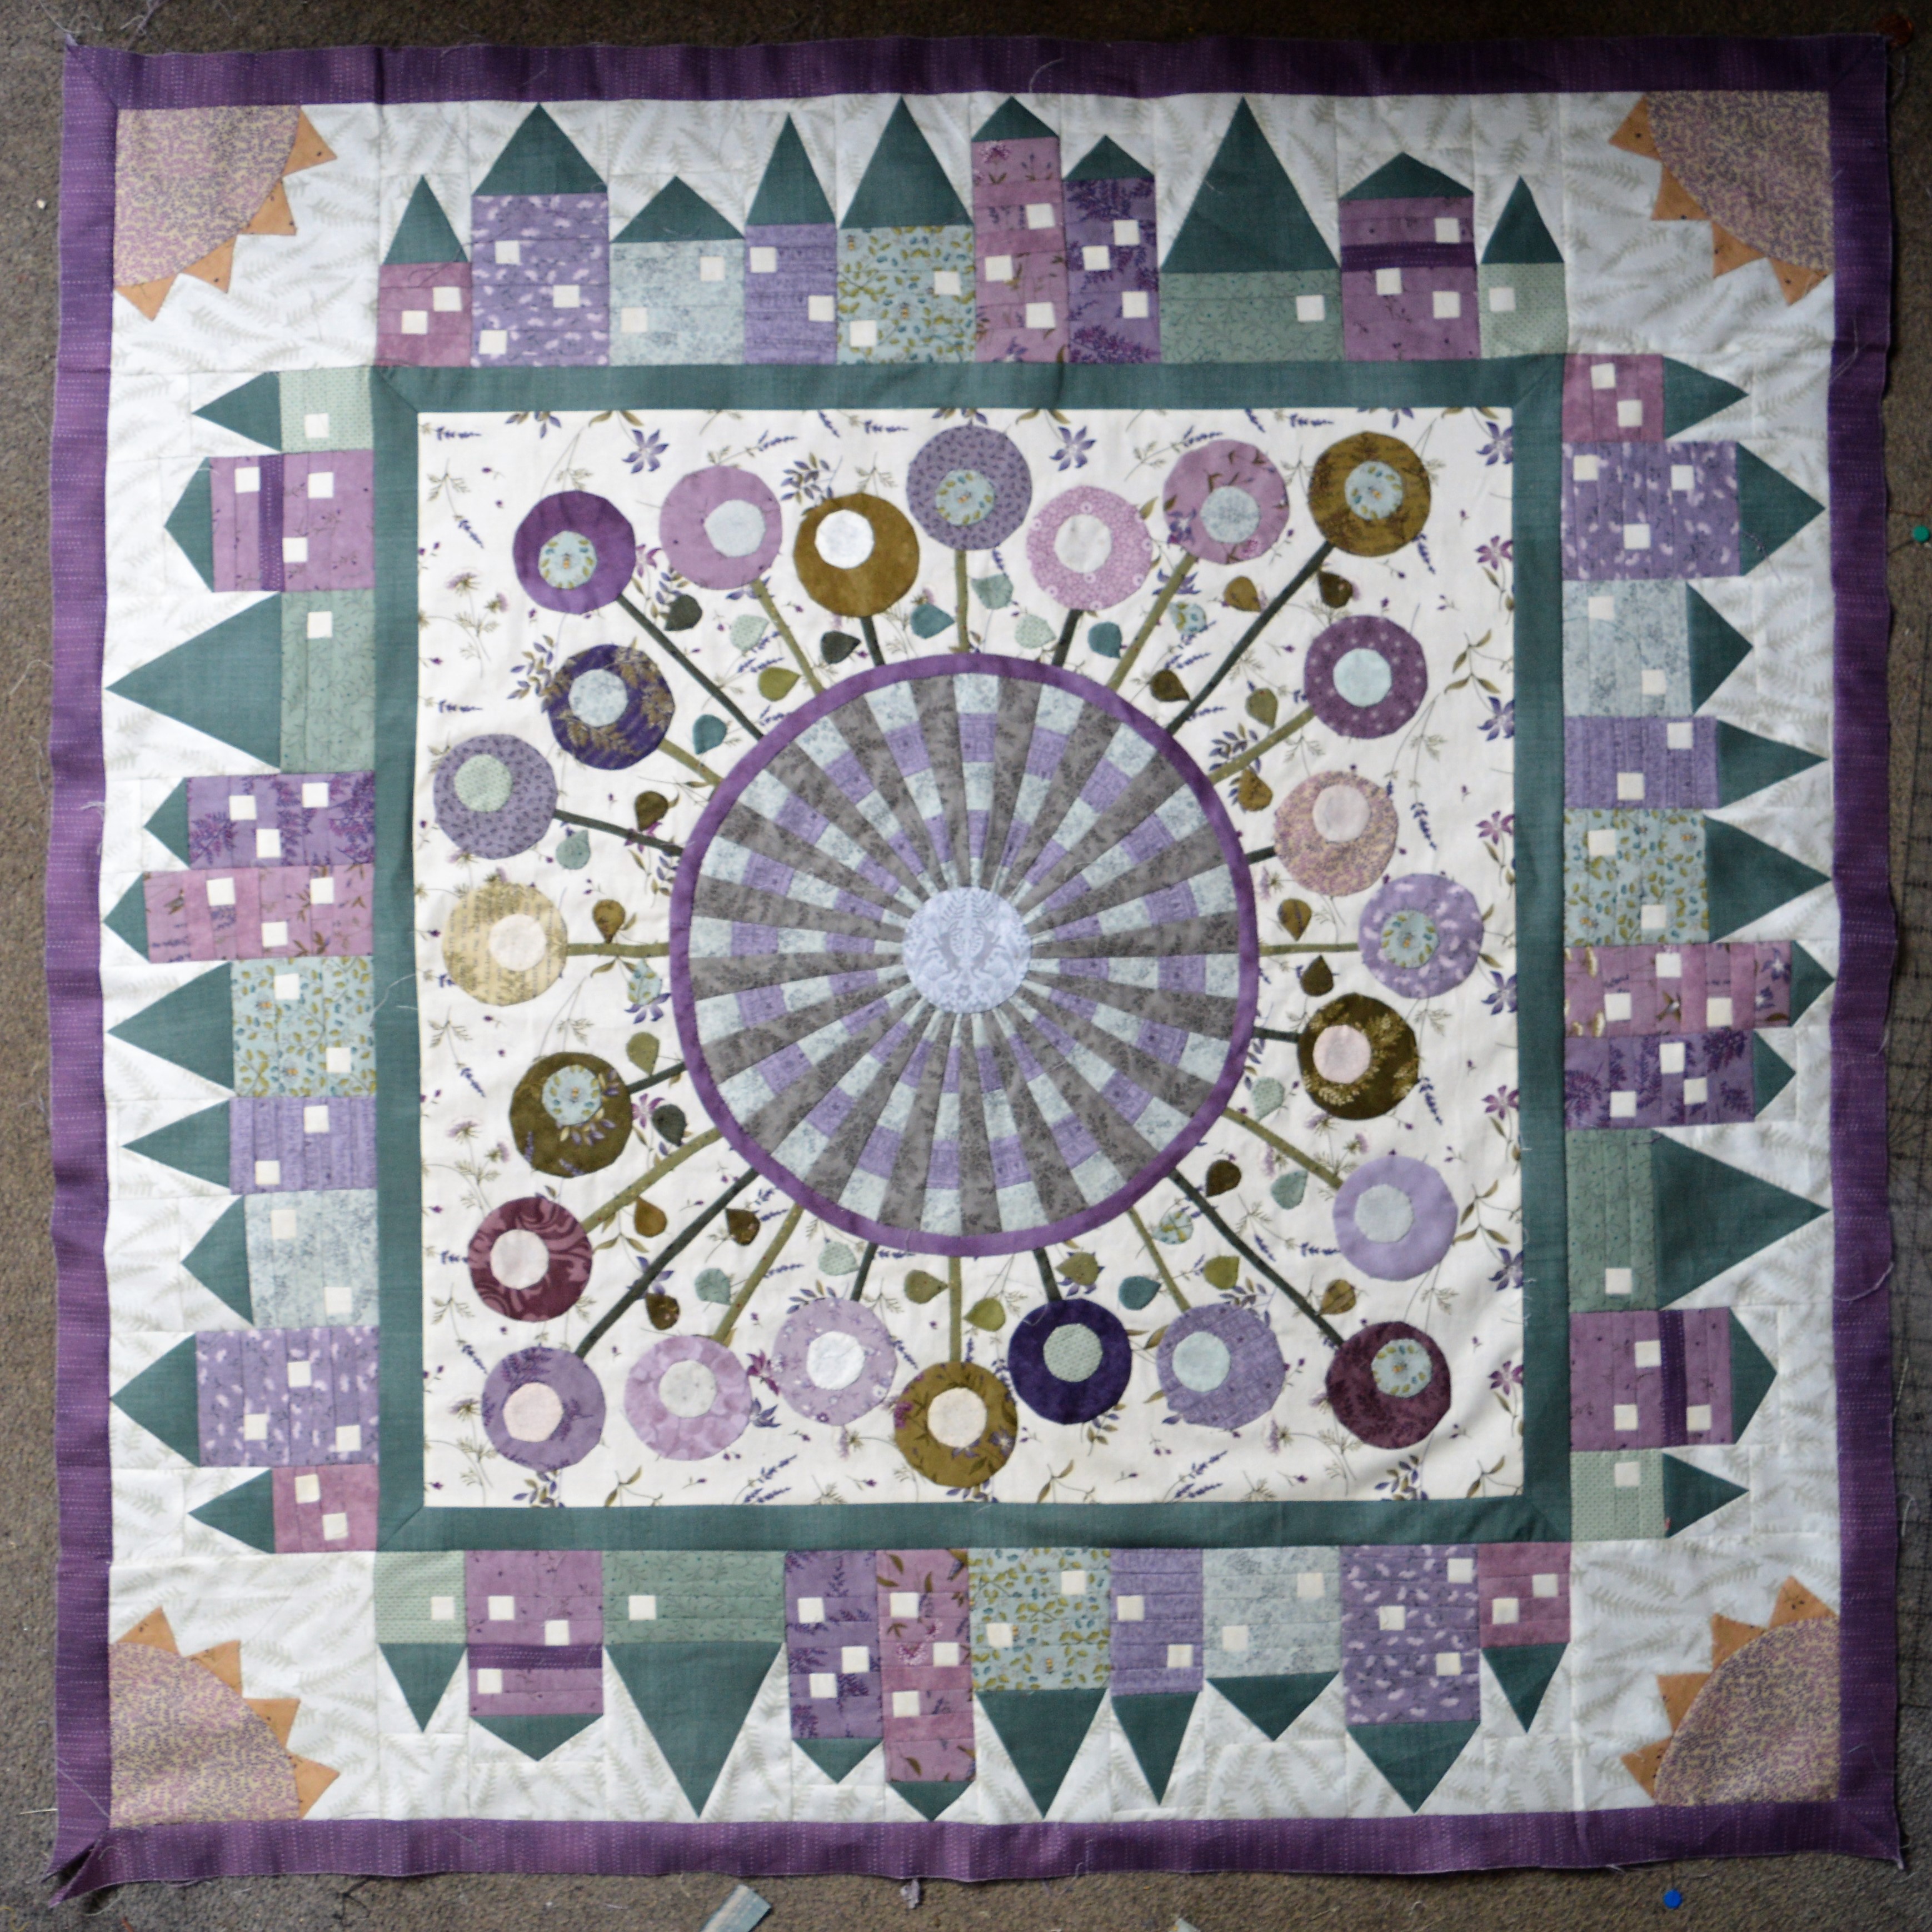
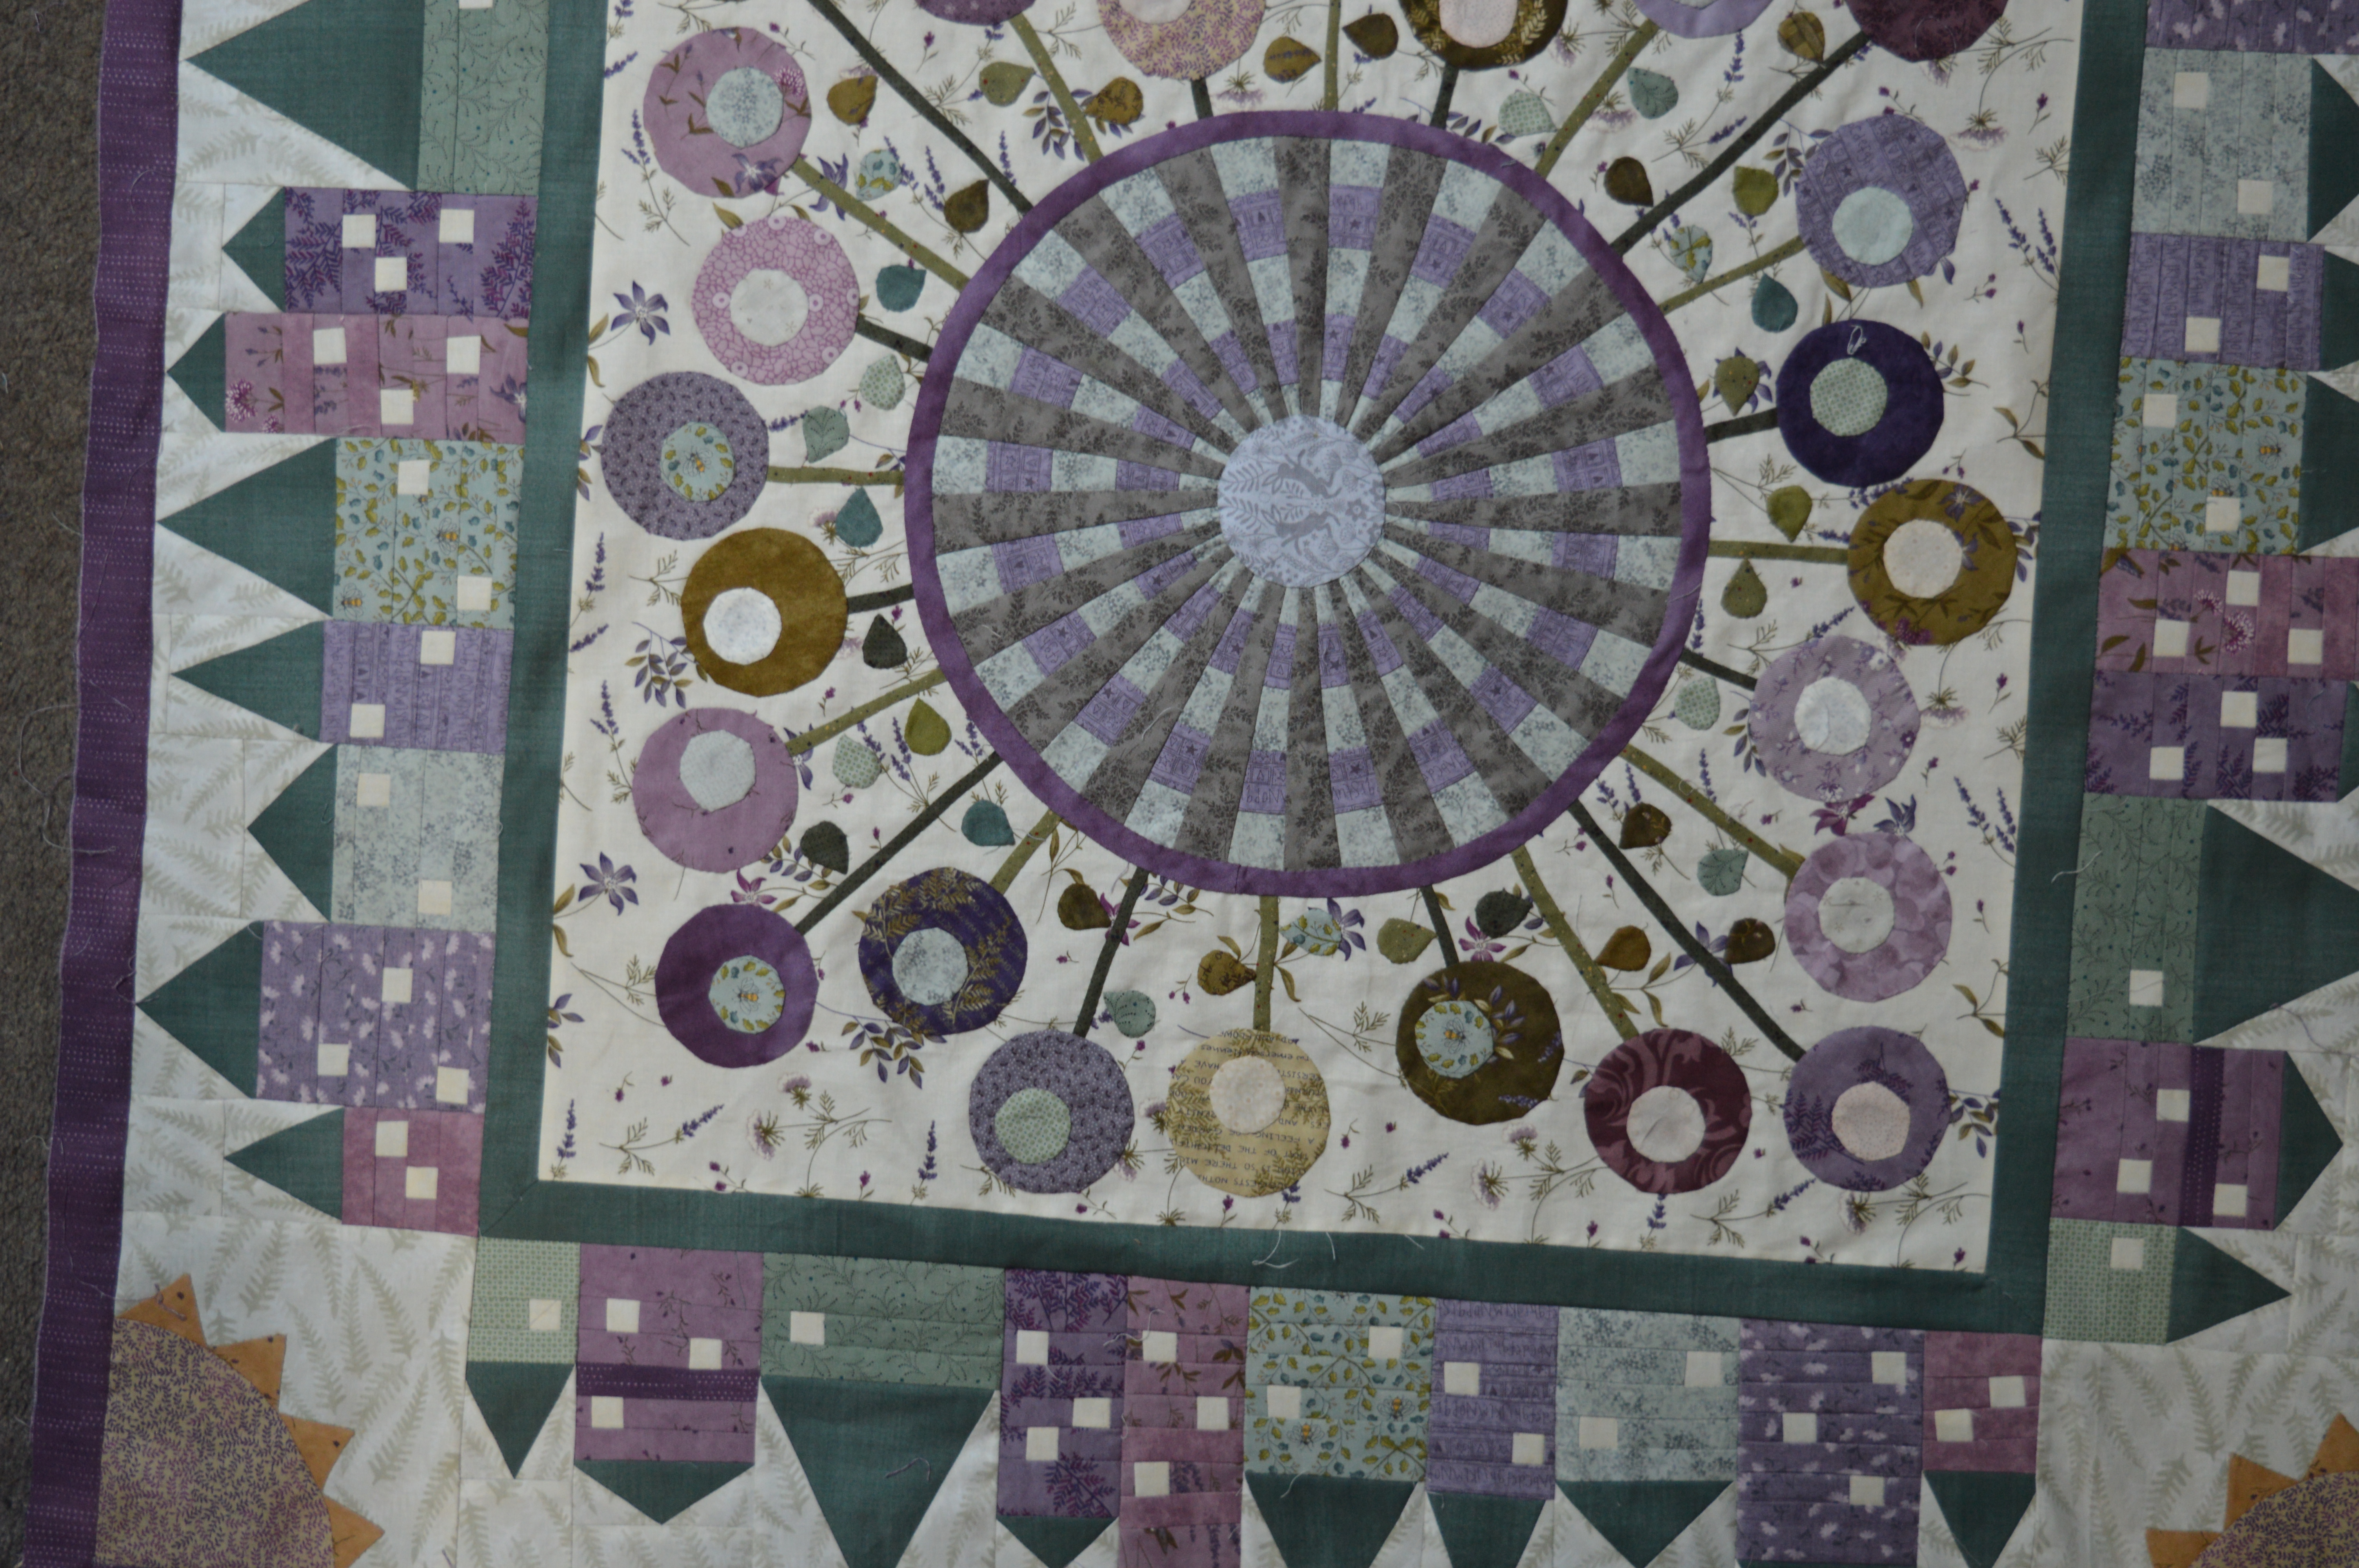
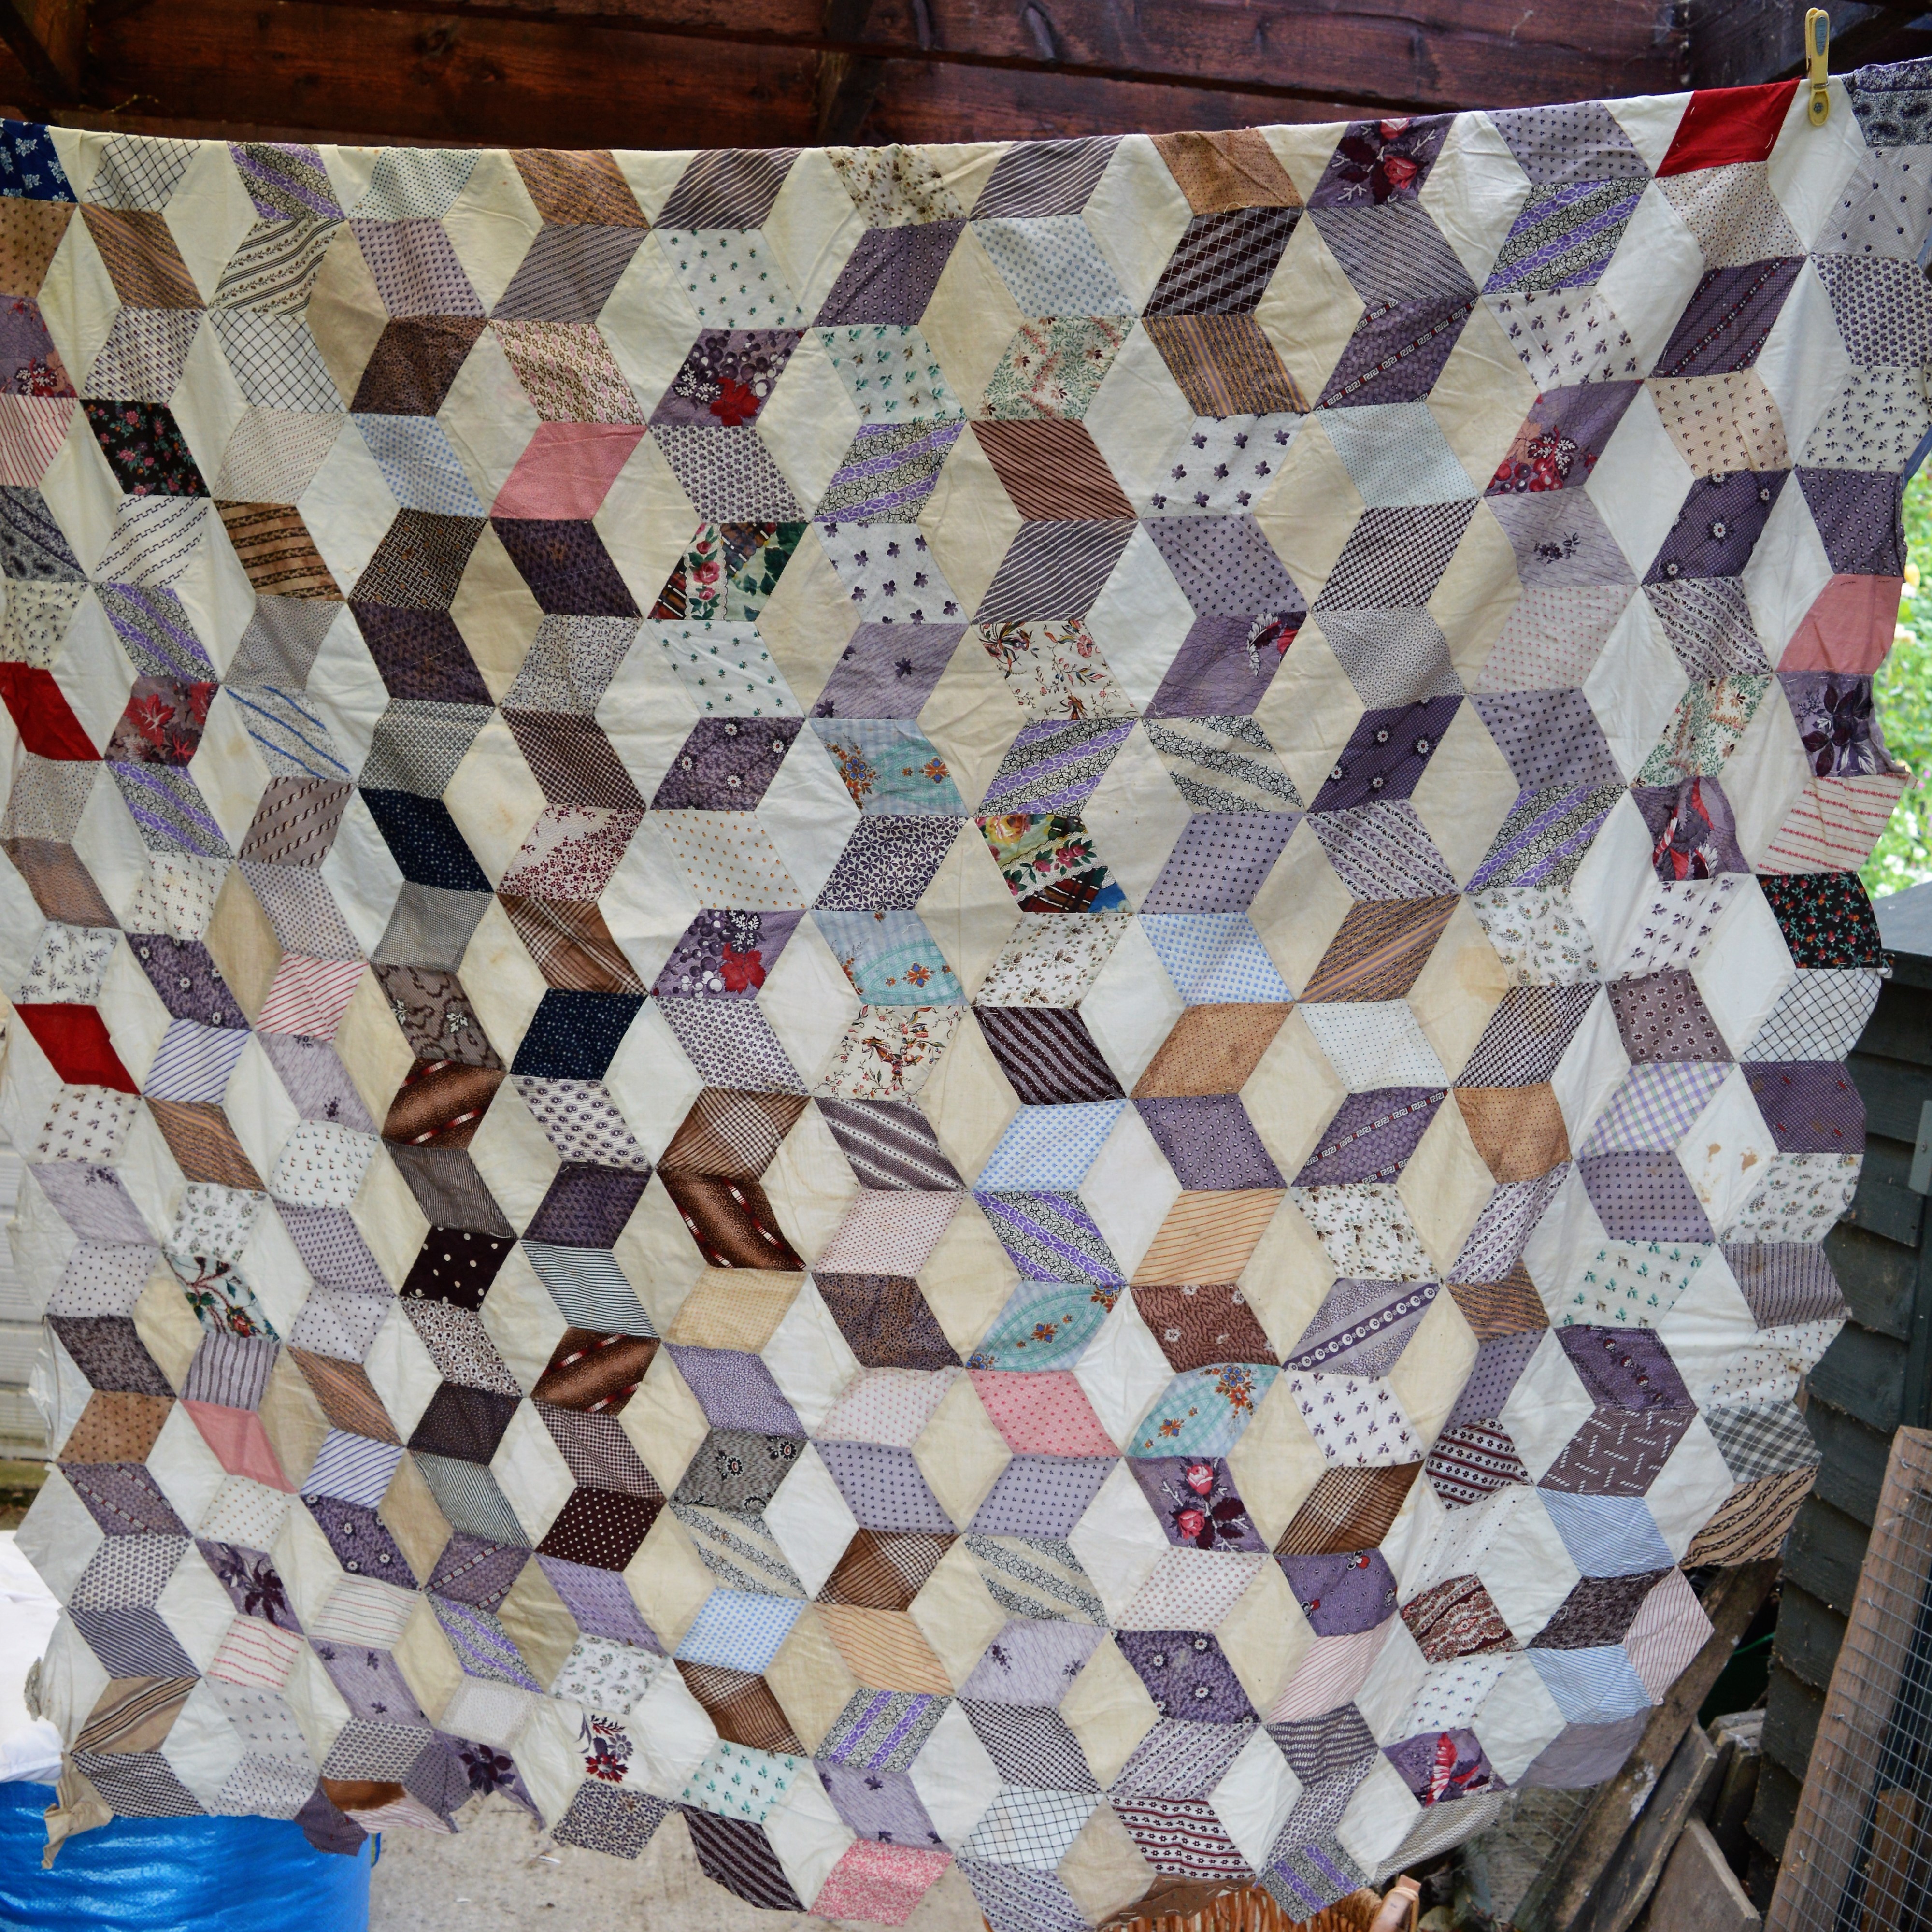
We made a quilt! It was the amazing idea of a lady called Kay, she planned and organised it superbly! Her idea was that we would have a quilt retreat, anyone could pop in and make just one, or several blocks. These would then be stitched together and the quilt raffled. Kay is going to sandwich and quilt the top at home and post it to the lucky winner.

Kay had cut the fabrics before hand, a gorgeous batik square and strips to go around it in lots of different colours. About four or five of us took sewing machines. It was wonderful as ladies who had never quilted before popped in to sew a block, a few were immediately hooked and stayed longer, By Saturday afternoon 80 blocks were made, we spent ages trying to arrange them so the colours and the density were evenly spread…and even longer trimming them all to the same size! Finally  we started to sew it together.

20170624_123347

Kay had an ingenious way of stitching them together, it’s hard to describe but basically we stitched pairs together in a strip of 10, leaving the connecting thread in between. We could then stitch the next row on, again without breaking the threads, and so on until all 80 blocks were stitched together downwards, but also connected across. It was then fairly easy to stitch the strips together, knowing it was all laid out correctly.

By mid-morning on Sunday, the quilt was complete. Doesn’t it look amazing! It was a wonderful project to be apart of.

DSC_0009

We had a fantastic weekend, made new friends, caught up with old ones and we’re already looking forward to Jam Jars and Tent Pegs 2019!


Posted in Crafts, Serendipity | Tagged , | 12 Comments

Lizzie Stitching Wallet SAL

A few weeks ago I signed up for a stitch-a-long with Faby Reilly. I’ve stitched a few of her designs as I love her style, so when I saw she was starting a stitch-a-long for a sewing wallet I signed up immediately. It’s a wallet with a scissor holder, needlecase and mini pin cushion, perfect for taking to Embroiderers Guild.

I ordered some French Lace Permin evenweave linen, it’s 16 count which is about the smallest I can manage these days and luckily it was the size she recommended!  French lace has a touch of soft green, it’s quite difficult to photograph as in electric light it definitely looks beige, but it’s actually a really pretty shade which works perfectly with the pink and green colour scheme. It has the advantage too of allowing the ecru flowers to show up a bit more (they’re easier to sew too)

The first pattern release was about ten days ago, it’s the cross-stitch base of the first side of the wallet (it folds in three) we’ve got two weeks to stitch it in as the next pattern will be released on Monday. I managed to finish stitching it this afternoon. The measuring grid she suggests stitching up the side proved very useful for accurate stitching, this will be used for whip-stitching the wallet together afterwards too. I’ll certainly be using this tip again as I’m hopeless at long distance counting! You can see it quite clearly on the photo at the end, it marks every 5 and 10 stitches.

I’m pretty sure the flowers are lisianthus, hence the name Lizzie, which is lovely as I had lisianthus in my wedding bouquet, they’re beautiful flowers.

So this is my Lizzie Stitching Wallet so far, I know it will look gorgeous when Faby weaves her magic with the back-stitching. If anyone fancies joining in it’s not too late, just click over to Faby Reilly Designs, I think you’ve got until the second installment comes out on Monday.


I’m linking up with Kathy’s Quilts for Slow Stitching Sunday, why not follow the link and see what everyone else has been stitching by hand.

Posted in embroidery, Serendipity, Stitch-a-long | Tagged , , | 15 Comments

A Hard Lesson in Mitres!

I have just finished this months Down the Rabbit Hole sewing. It’s a block-of-the-month quilt by Sarah Fielke, I’m loving it, though it is pushing me out of my comfort zone. I tend to procrastinate when this happens and I ended up a couple of months behind. Luckily this month Sarah gave us a light month so I’ve managed to catch up.

This is where I was last time I showed you, forty houses made but only twenty stitched on. This month we made the corners, bringing a bit of sunshine to the quilt. I toyed with fabric choice for ages, the starting point with my fabrics was a Moda range called The Potting Shed, there are some soft gold/tawny ones in the range but I only have a 10″ and a 5″ square of each one. I know in the next border I will be stitching the other 3/4’s of the sun, so I wanted to make sure I had enough. In the end I worked out I had enough for four sets of points in one 10″ square, as there are 4 different prints I’ll use a different one for each set of points. The circle is a pretty, soft purple pattern which reminds me of watery sunlight at dawn.

The suns are hand appliqued, Sarah is gradually introducing new techniques, so this month was how to applique inside points. They all went together pretty easily. I think I’m getting the hang of hand applique now!

It was then fairly straightforward to stitch the suns to the houses and then both borders to the quilt. I checked measurements across the middle and everything seemed hunkydory so I stitched on the purple border, made neat mitred corners and then measured again…

It was perfect in the middle, but the outer border was an inch out and the edges were a bit wavy!!! Sarah is stressing to us the importance of getting the border measurements correct as with a medallion quilt each time we add a new border any mistake would be multiplied. I did briefly consider fudging it with a couple of discreet tucks, but I knew I would regret it so out came the seam ripper!

I took the purple border off and half the houses and double checked the green border. I changed my tape-measure as I discovered one of mine is no where near accurate, I used a 2m metal measure instead which I usually have resting on my sewing table. It was a bit unwieldy on the floor but at least I knew it was correct!

After checking and re-checking my measurements I worked out the main problem was my initial mitres on the green border, they look neat but they actually flare out a bit, not a lot but enough to make a difference when I then added another border!

I didn’t take all the houses off, I decided to unpick each mitred corner and hand-stitch it back down again, so it’s not as perfectly neat, but at least it is square!

By this time I was pretty paranoid about checking measurements all the way along the borders! I stitched the purple border back on but left the corners until I was happy the rest was correct, I checked them afterwards with my quilting square…and breathed a huge sigh of relief!!

So I’m all caught up with three days to spare before the next installment comes out!

I’m linking up with Kathy’s Quilts for Slow Stitching Sunday, why not have a look what everyone else is hand-stitching.

Posted in Down The Rabbit Hole, Quilting, Serendipity | Tagged , , | 16 Comments

Flower Lattice Stitch-a-long 12

It’s three weeks since I last posted about my flower lattice, I haven’t spent as much time as I wanted on it as I’ve been concentrating on catching up with my Down the Rabbit Hole quilt, finishing a little hardanger sampler and doing the prep work for a cross-stitch stitch-a-long which has just started! Even so, I managed a good few hours concentrating on this project. Three weeks ago this is how far I had got…

I think the diamond I’m working on at the moment is my favourite in the whole book, it’s got hydrangeas and wisteria, I think it’s beautiful! The hydrangeas were the first flower to tackle. To make these I traced the circles from the book onto a piece of cotton. I then had to embroider french knots all over them. The book recommends two or three thread colours, I just used one of the DMC variegated threads which includes purple, pink and blue, I think it worked pretty well. It took forever to fonish these circles, I took it to embroiderers guild, so I was there from 10am until 3pm and I still had three to do when I got home!

Once the french knots were done I had to make a small running stitch a couple of milimetres out around the circle, cut it out and then gather it up and stitch it on. When I first saw the pictures I presumed there was a tiny bit of stuffing inside, but actually the gathered fabric behind is sufficient. They are so dinky!

The instructions tell you to make ten flower heads, Di (the designer) then explains she actually only used nine…having spent the time making it I was determined all ten were going on my picture! The flower heads are attached using the end of the gathering thread with just a few tiny stitches. I think they’re gorgeous!

I’ve to make some silk leaves next but I need to dye some ribbon again, so I started on the trellis. This is stitched with raised stem stitch, so a framework of straight stitches across the wood is stitched first and then the stem stitch is done over the frame, almost like weaving with a twist, it took a bit of getting the hang of, particularly changing direction, but I got there in the end.

Next I will be embroidering the stems and the wisteria, hopefully that will be finished when I next show you my progress in three weeks time.

There’s quite a few of us taking part in the stitch-a-long, we post every three weeks on our own projects, there’s all sorts of different embroidery to see, why not have a look what everyone else is stitching, just follow the links to see some stunning projects;

Claire, Gun, Carole, LucyAnn, Kate, Jess, Sue, Constanze, Debbierose, Christina, Kathy, Cindy, Helen, Steph, Linda, Catherine, Wendy, Mary Margaret, Timothy and Avis

Everyone is in different time scales, so if there isn’t a post when you first look, check later in the day. If you fancy joining us for the SAL, just send a message to Avis.


Posted in embroidery, Serendipity, Stitch-a-long | Tagged , , | 35 Comments

Vintage Quilt

I’m writing this post hoping someone may be able to help or advise me, or even just suggest where I can go for help…

Last year my daughter was helping to clear her grandmothers house and found, at the bottom of an old trunk, an unfinished patchwork quilt. We’re not sure who made it, Helen seems to think it could have been one of her sisters. Helen quite fancied finishing it. We had a quick look when the trunk came to our house but I must admit, it smelled pretty bad! I couldn’t even say what it smelled of, almost petrolly, but not nice! The trunk and the quilt got stashed at the back of the box room.

Yesterday I suddenly decided to get it out and see just what we had. I was amazed how big the main piece is, it’s about 60 x 85″ at the moment, but there are enough strips of hexagons to make another two rows, which would probably get it pretty much square.

It’s all hand paper pieced, what I love is the paper that she used. It looks like old school books, many of the papers are covered in beautiful copperplate handwriting, as if she was practising her writing. The papers have been removed from most of the main quilt, but they are all still in place in the ones waiting to be attached.

I’ve hung everything on the washing line, hoping to get rid of the smell. There are some bad stains on it, but clearly I can’t do anything about those until it’s finished.

I think the pattern is called tumbling blocks. I’m going to need some extra light coloured diamonds for the final strip of hexagons. I’m wondering about using an old pillowcase as I think new fabric would just look wrong but any suggestions are welcome.

If anyone thinks it’s an antique, don’t touch it, please say so, I don’t know anything about antique quilts. My gut feeling is just that it would be nice to finish and enjoy it, after all, that’s why she started it.

Posted in Quilting, Serendipity | Tagged | 22 Comments

A Meander Round the Garden

I’ve managed to work on the garden a fair bit over the last couple of weeks, just clearing and weeding, but at least I can see some progress…

In the AA garden I’m completely redesigning it and trying to get on top of the weeds as well, I’ve now almost cleared the 7th bed out of 8 and all the footpaths in between. This last bed had a large clump of crocosmia, I decided to replant it on the back lane in the hope of smothering some of the weeds there too. As I dug it up it seemed to get bigger and bigger, coming up in decent plant sized clumps. I think in the end I had over a dozen clumps, so I planted half on the back lane and half behind our summerhouse. Even if they don’t do much this year I’m hoping the bulbs will survive and flourish next year.

I’ve just got a large day lily to move now and then I’m onto the final bed. To give you an idea of size, this area is about 16′ by 20′, I’m being pretty meticulous about weeding it as it’s got a lot of marestail, bindweed and couch grass. Once I’ve cleared it I’m getting some young muscles to help me level it and dig in a split log roll to support the raised beds. I’m thinking of a 12′ circle of gravel (with about 6 layers of weed suppressant material underneath!!!)  so I’ve got deep beds either end for shrubs etc and beds at the side deep enough to put an arch over the entrance to the garden. This corner of the garden gets the evening sun so we’ll have some seats and a few pots to break up the gravel.

I’ve saved a few plants from this area and temporarily housed them either down by the conservatory or at the other end of the AA garden, its looking quite pretty down there at the moment.

I’ve also refrained from trying to move some poppies, I’m sure these are annual poppies as they come up all over the place, I’ll let them set seed and then dig them up. They’re beautiful shades of purple, quite often only last a day, but so pretty.

Our nextdoor neighbours are putting a new fence up which will be great (more room to put climbers up!!) but there’s been somewhat of a delay so weeds have taken over. I started clearing it and actually these were quite satisfying weeds to clear, things like nettle and buttercup where you can be pretty effective in clearing it. It’s quite a big area behind the summerhouse and over to the lilac. There’s a big philadelphus here which has turned into a bit of a thug, the neighbour has promised me his digger will dig it out, then I can choose some more manageable shrubs! I popped a big clump of crocosmia down here to look pretty and keep the weeds down.

I weeded in the rose bed too, this is more what I call cosmetic weeding, it’s over run with perenial weeds but at this time of year it’s hard to get in with weed killer without risking all my other plants. The bed does look a lot better and at least the plants have room to breath!

For those of you who think my garden is beautiful all over, here’s the reality check, I can be very selective about where I photograph! This is the other end of the rose bed…

…and the gravel path in front of the pond!!

This is why I started taking photos of my garden, so I can appreciate the nice bits and turn a temporary blind eye to my constant battle with weeds. These are some candelabra primulas flowering next to Hubert the Heron. I bought some more at Harrogate show so hopefully next year I’ll have a good show of flowers.

The patio is looking very colourful at the moment, we quite often sit out here with a cup of tea or a glass of wine. The geraniums and the roses are all starting to flower. The deep pink geranium is lovely, big and blousey, it can be a bit of a thug too but the soil there is so awful I’m glad of anything that thrives, it’s in a contained area so it can’t spread too much.

At the other side of the patio is my pots area, the purple sambucus at the back is looking glorious at the moment. I usually cut it back hard every couple of years, and when I say hard, I mean to about 12-18″ tall, I then get a year of beautiful foliage and the following year I get flowers and berries, without it getting too big and boisterous.

Our drive is getting a bit narrow at the moment, it always does at this time of year, my OH starts to mutter about his car, but he knows what my answer will be, as soon as the ceanothus has finished flowering we can prune everything…apart from my rose!

I picked up this rose in a sale a few years ago, it’s called Celsiana, it’s what’s called an old rose (in style) the blooms are pretty but nothing to write home about, they are easily damaged by wind and rain too. But the scent…Wow! it’s a really heady perfume which fills the drive as you walk past. It’s worth growing just for the scent. When the time comes and we have to widen the drive, I will definitely be buying another Celsiana.


Posted in Garden, Serendipity | Tagged , , | 8 Comments

The Sisterhood of the Travelling Sketchbook

It is over a year since The Sisterhood of the Travelling Sketchbook began it’s travels. The journey started in Australia with Anne Lawson who had the idea of a sketchbook that traveled around the world. She made a hand-bound sketchbook from a variety of artist papers with a few of her own sketches in amongst the papers. Anne worked out a route around the contributors and sent the sketchbook on it’s travels…

First stop was up in Queensland with Kate from Tall Tales from Chiconia  who stitched a beautiful feather using foundation paper piecing, isn’t her writing gorgeous too!

Sandra aka Lady Red Specs from  Please Pass the Recipe drew a great picture of aubergines to go with her recipe for ratatouille.

Chas Spain lives in Melbourne and she drew an amazing pictorial map of a cycle route into Melbourne, in the sketchbook it unfolds like a secret letter! I think the roundels which illustrate the route are stunning.

Sandi, who lives in Wandin East, wrote one of her poems in the sketchbook, I love the imagery in this poem.

The Sketchbook then left Australia and flew on to America where it visited;

Alys from Gardening Nirvana made a sisterhood quilt from all the entries so far, it makes a lovely record of the journey at the halfway point.

Sue at From The Magpie Nest stitched two lovely patchwork pictures all embellished with wonderful beads and charms together with lots of embroidery.

Usha from Creative Crafts DIY created an eclectic patchwork of images using lots of creative techniques.

After Usha, the sketchbook travelled across the Atlantic to Europe, first stop was Greece;

Marina, of Athens Letters , wanted to create something to reflect Greek history, she drew a fascinating picture showing Poseidon and the Goddess Athena.

From Greece the sketchbook travelled over to France to visit Tialys. Tialys does some amazing sketches with her sewing machine, I love her style and the picture of the five ladies with the world behind them captures the spirit of the Sisterhood of the Travelling Sketchbook.

Constanze from Textile Dreamer is in Germany, her embroidery reflects beautifully the winter scenes when the sketchbook was with her.

From Germany the sketchbook finally arrived in Britain, in Wales to be precise, with Jan who blogs at The Snail of Happiness

Jan crocheted some gorgeous mandalas from local Welsh wool. I love the words she wrote around it, in case you’re getting a crick in your neck trying to read it on the computer, this is what she wrote;

Encircling the earth: The skill of hands, the love in our hearts. Brought together by our creativity and kindness, although we are separated by hundreds of miles…our shared passions bind us together. One sisterhood, representing one world, united in love.

I finally completed my entry, an embroidery of Catbells with nine inchies representing my favourite walk up Catbells in the Lake District. I found a green page which set of the inchies beautifully. I wondered about writing more to explain the images, but in the end I decided to keep it fairly simple with a brief discription of the walk using a silver gel pen.

Tomorrow I will post the Travelling Sketchbook for the final leg of it’s travels. It’s flying back to Australia to Trish who blogs at Sounds Like Wish

Being a part of this project has been an amazing experience, it’s great how creativity has brought us all together with such a wide variety of skills, artists, poets, quilters, embroiderers. Thanks to Anne for organising The Sisterhood of the Travelling Sketchbook.

Posted in Serendipity, The Travelling Sketchbook | Tagged | 10 Comments

Stars in the Travelling Sketchbook

Tomorrow at my Embroiderers Guild meeting we have the penultimate swop of our travelling sketchbooks, at the July meeting I’ll get my own back again and see what everyone has been stitching for me. In the meantime I had an entry to make for this months book…

We could pick our own themes for this project, my book will be all about mountains, but the theme of the travelling sketchbook this month was astronomy, so it’s all galaxies, milky ways etc. I fancied stitching  a starry night, I remember when my mum used to have a cottege in Wensleydale the skies up there have minimal light pollution, so they seem so blue and just full of stars, the more you look the more stars you see. I did my usual mooch round pinterest and a couple of images caught my eye, they used shisha mirrors…

I ordered some 12mm shisha mirrors off eBay and went on YouTube to find out how to stitch them on – what would I do without my computer! You basically need to make a grid of stitches around the mirror, it surprised me just how close to the middle these were, it also appears that the more stitches you do at this point, the better. You do need a good support mesh to hold the mirror in place, at first I was trying to do a neat organised grid, but I found it easier to just keep going round until I had a decent grid.

Once the grid is in place it is used to form a type of buttonhole stitch which holds the mirror in place. It took me a while to get the hang of it and they are still not perfect, I think I need a bit more practise! This was my first attempt, a practise one, as you can see I changed how I did the stitch half way round and it did seem neater.

I used ecru perle thread to stitch the shisha mirrors on, then I just had to embroider a design round them to look like a starry night…

I collected a few threads and stuff together. The background fabric is a quilting cotton left over from Helens black and white quilt, its like a sponged, speckled, very dark grey and black sort of design.  My favourite thread at the moment is an Anchor silver Lame thread, I usually hate stitching in metallic threads as I don’t like the feel of them or the way they behave when you’re using them, but the lame thread is so fine and smooth it is gorgeous to use. It was perfect for all the sparkly bits. I also found some vintage black lace with sequins and beaded scrolls on, I sorted a few beads from my stash and also a couple of extra threads to bring just a touch of colour, a DMC variegated thread in cream, pale blue and silver grey, and one of the silk threads I got off ebay in a plum shade, they’re finer than the DMC and just have a bit of sheen to them.

I sort of made it up as I went a long, using standard embroidery stitches like chain, herringbone, feather and even just simple back-stitch.. I stitched the lace on with a black DMC thread using herringbone stitch as I wanted it held down but it needed to blend in with everything. I decided to use the edge of my embroidery ring as the outline for the finished piece, thinking it could represent a telescope view!

Once I was happy with the embroidery I applied fusible interfacing to the back to give it a bit of stability before I cut it to shape. This is where disaster struck! In a moment of madness I decided to put a wad of batting underneath to help protect the beads, it’s a wad I use when I’m pressing foundation paper pieced quilt blocks. Unfortunately the sequins melted and the batting stuck to them! I’m not sure if vintage sequins are made of different stuff, but these just completely frazzled. More of an issue was the white fluff that was not stuck in the middle of my embroidery. The sequins on the edge weren’t quite so bad and I did manage to pull most of the fluff off, but the fluff in the middle was well and truly stuck! With a bit of lateral thinking I got out my silk paints, found a deep plum colour and painted the fluff, hoping it will look like milky way!! I then added beads (through the original sequin holes!) to distract the eye a bit, hopefully I’ve got away with it!!

I used a silver gel pen to draw around the embroidery hoop, this is a tip I got from Sarah Fielke on the Down the Rabbit Hole quilt-a-long, it’s an acid free archive quality gel pen, so it won’t damage the fabrics, it should wash out if needed, but even on dark fabrics, it just gives a fine sparkly line to follow.

I put the embroidery in the scrapbook last night, wrote a little about it and popped it in my bag ready for tomorrow.

Starry Night Embroidery

I’m linking up with Kathy’s Quilts for Slow Stitching Sunday, follow the link to see what everyone else has been stitching.

Posted in embroidery, Serendipity, The Travelling Sketchbook | Tagged , , , | 16 Comments

Bilberries for Tea with Lizzie

I finished my Bilberry Sampler just in time to start my Lizzie Stitching Wallet tomorrow!

I started this sweet little sampler last month on the train back from Denman College, it’s a mini kit I bought at the Knitting and Stitching Show last year from someone’s bargain basket. It included all the threads, I just had to grab some evenweave linen from my stash so it was the perfect kit to take away.

Unfortunately I realised pretty quickly that I’d picked up 18 count, rather than the 16 count the pattern suggests. Most of the stitches were fine, I tended to use one thread instead of two and it probably means my satin stitch has a better coverage than it would otherwise have done.

I didn’t pick it up again until this week when I signed up for a stitch-a-long with Faby Reilly, I decided I wanted to finish this before I started another project as together with my quilting I’ve got about five different projects on the go! This could either mean I have a short attention span or that I can multitask, not sure which!

This is where I was when I showed you my sampler earlier in the week…

The bilberry border didn’t take long at all, there’s a lot of thread changes for such a small border, but I think it’s really pretty.

The only row of stitching I changed completely from the pattern was the very last one, underneath the bilberries. It was meant to be boxed cross-stitch in perle thread, I felt it would be just too bulky, so I stitched a long-armed cross-stitch. I think it gives a lovely effect in the thicker perle thread, almost like a rope.

I just need to take this down to the framers for a simple picture frame and mount.

Having finished my bilberries I could start the preparatory work for my Lizzie Stitching Wallet. This is a stitch-a-long by Faby Reilly, I’ve stitched a few of her designs now as I really like her style. She uses a variety of stitches, she doesn’t do half cross-stitches, she just uses the back-stitch outline to give the shape, the eye follows that and not the cross-stitches underneath, this also gives a much lighter design effect as it’s not just solid cross-stitch. The mistletoe humbug and the Mothers Day card and presents I stitched earlier in the year were all Faby’s designs.

We’re making a Stitching Wallet, so there’s a scissor holder, pincushion, needle case, all within a pretty wallet. I’ve been planning to make something along these lines for a while, so when her stitch-a-long came up I enrolled straight away. It’s only £6, so if anyone fancies stitching a Lizzie Wallet too, it’s not too late to enrol!

I ordered some 32 count linen in French Lace colour, it’s one of those colours that borders on quite a few colours. In some lights (and on the computer) it’s a very pale shade of green, very pale! In electric light it looks more beige or antique white…whatever the colour, I think it will work well with the DMC threads we’re using. I didn’t want to use the antique white for this as I am planning to use it whenever I go to Embroiderers Guild, I didn’t want it to get grubby too quickly!

Faby recommends a counting outline for her designs. The back-stitch outline is used for constructing the wallet using whip-stitch so it needs stitching at some point anyway, by adding a side stitch every 5 stitches we have a built in counter. This is very useful for people like me who are very bad at long distance counting! Last night I started my outline for one of the main pieces, hopefully it will be ready for Monday when the first part is released.

I’m linking up with Kathy’s Quilts for Slow Stitching Sunday, a celebration of all things hand sewn, so why not follow the link and see what everyone else has been stitching.

Posted in embroidery, Serendipity, Stitch-a-long | Tagged , , , | 19 Comments