A few months ago we had a visitor to our Skipton Stitchers. It was a lady called Sue asking for our help, her mother had died and when clearing her house they found two unfinished hardanger tray mats, could anyone finish them? I was called over to have a look together with another member, I was quite touched that they thought of me but it was also a big responsibility to finish a piece of such sentimental value. At first glance they basically just needed hemming, or edging in some way. I took one and the other member took the other. I did warn Sue it would be several months before I even looked at it as this was before my big European holiday.
I’ve done a little hardanger work, but it is really just a dabble, usually when a kit had a small part of hardanger such as the Strawberry Sampler book. I’ve never done a big piece of hardanger so I am by no means an expert.
When I returned from my holiday I looked into different ways of finishing a piece of hardanger. After googling various stitches I gradually realised it wasn’t meant to be hemmed, the stitched edge was the edge of the cloth, it just needed trimming. I messaged Sue to see if she had any other examples of tray cloths her mother had stitched, she sent me some photos of absolutely beautiful tray cloths, they confirmed my thought that these were meant to have a cut edge.
It was a while before I plucked up the courage to cut round the stitching. The tray cloth is edged with closely stitched buttonhole, so I had to cut right next to the stitching without catching the actual thread. I found my sharpest embroidery scissors and using my thumbnail to push the stitches out of the way.
It was fiddly and took ages but it was finally finished and I handed it over. Sue was delighted with it. When I spoke to the other member…I ended up with the second one to trim as well. This time I thought I’d take some photos in case it helps anyone else with a similar task.
I cut the bulk of the fabric off first to make it easier to handle. As I mentioned before, I used my sharpest embroidery scissors. You need a pair that’s got small blades but that are sharp to the tip, as it is the tip that is most important.
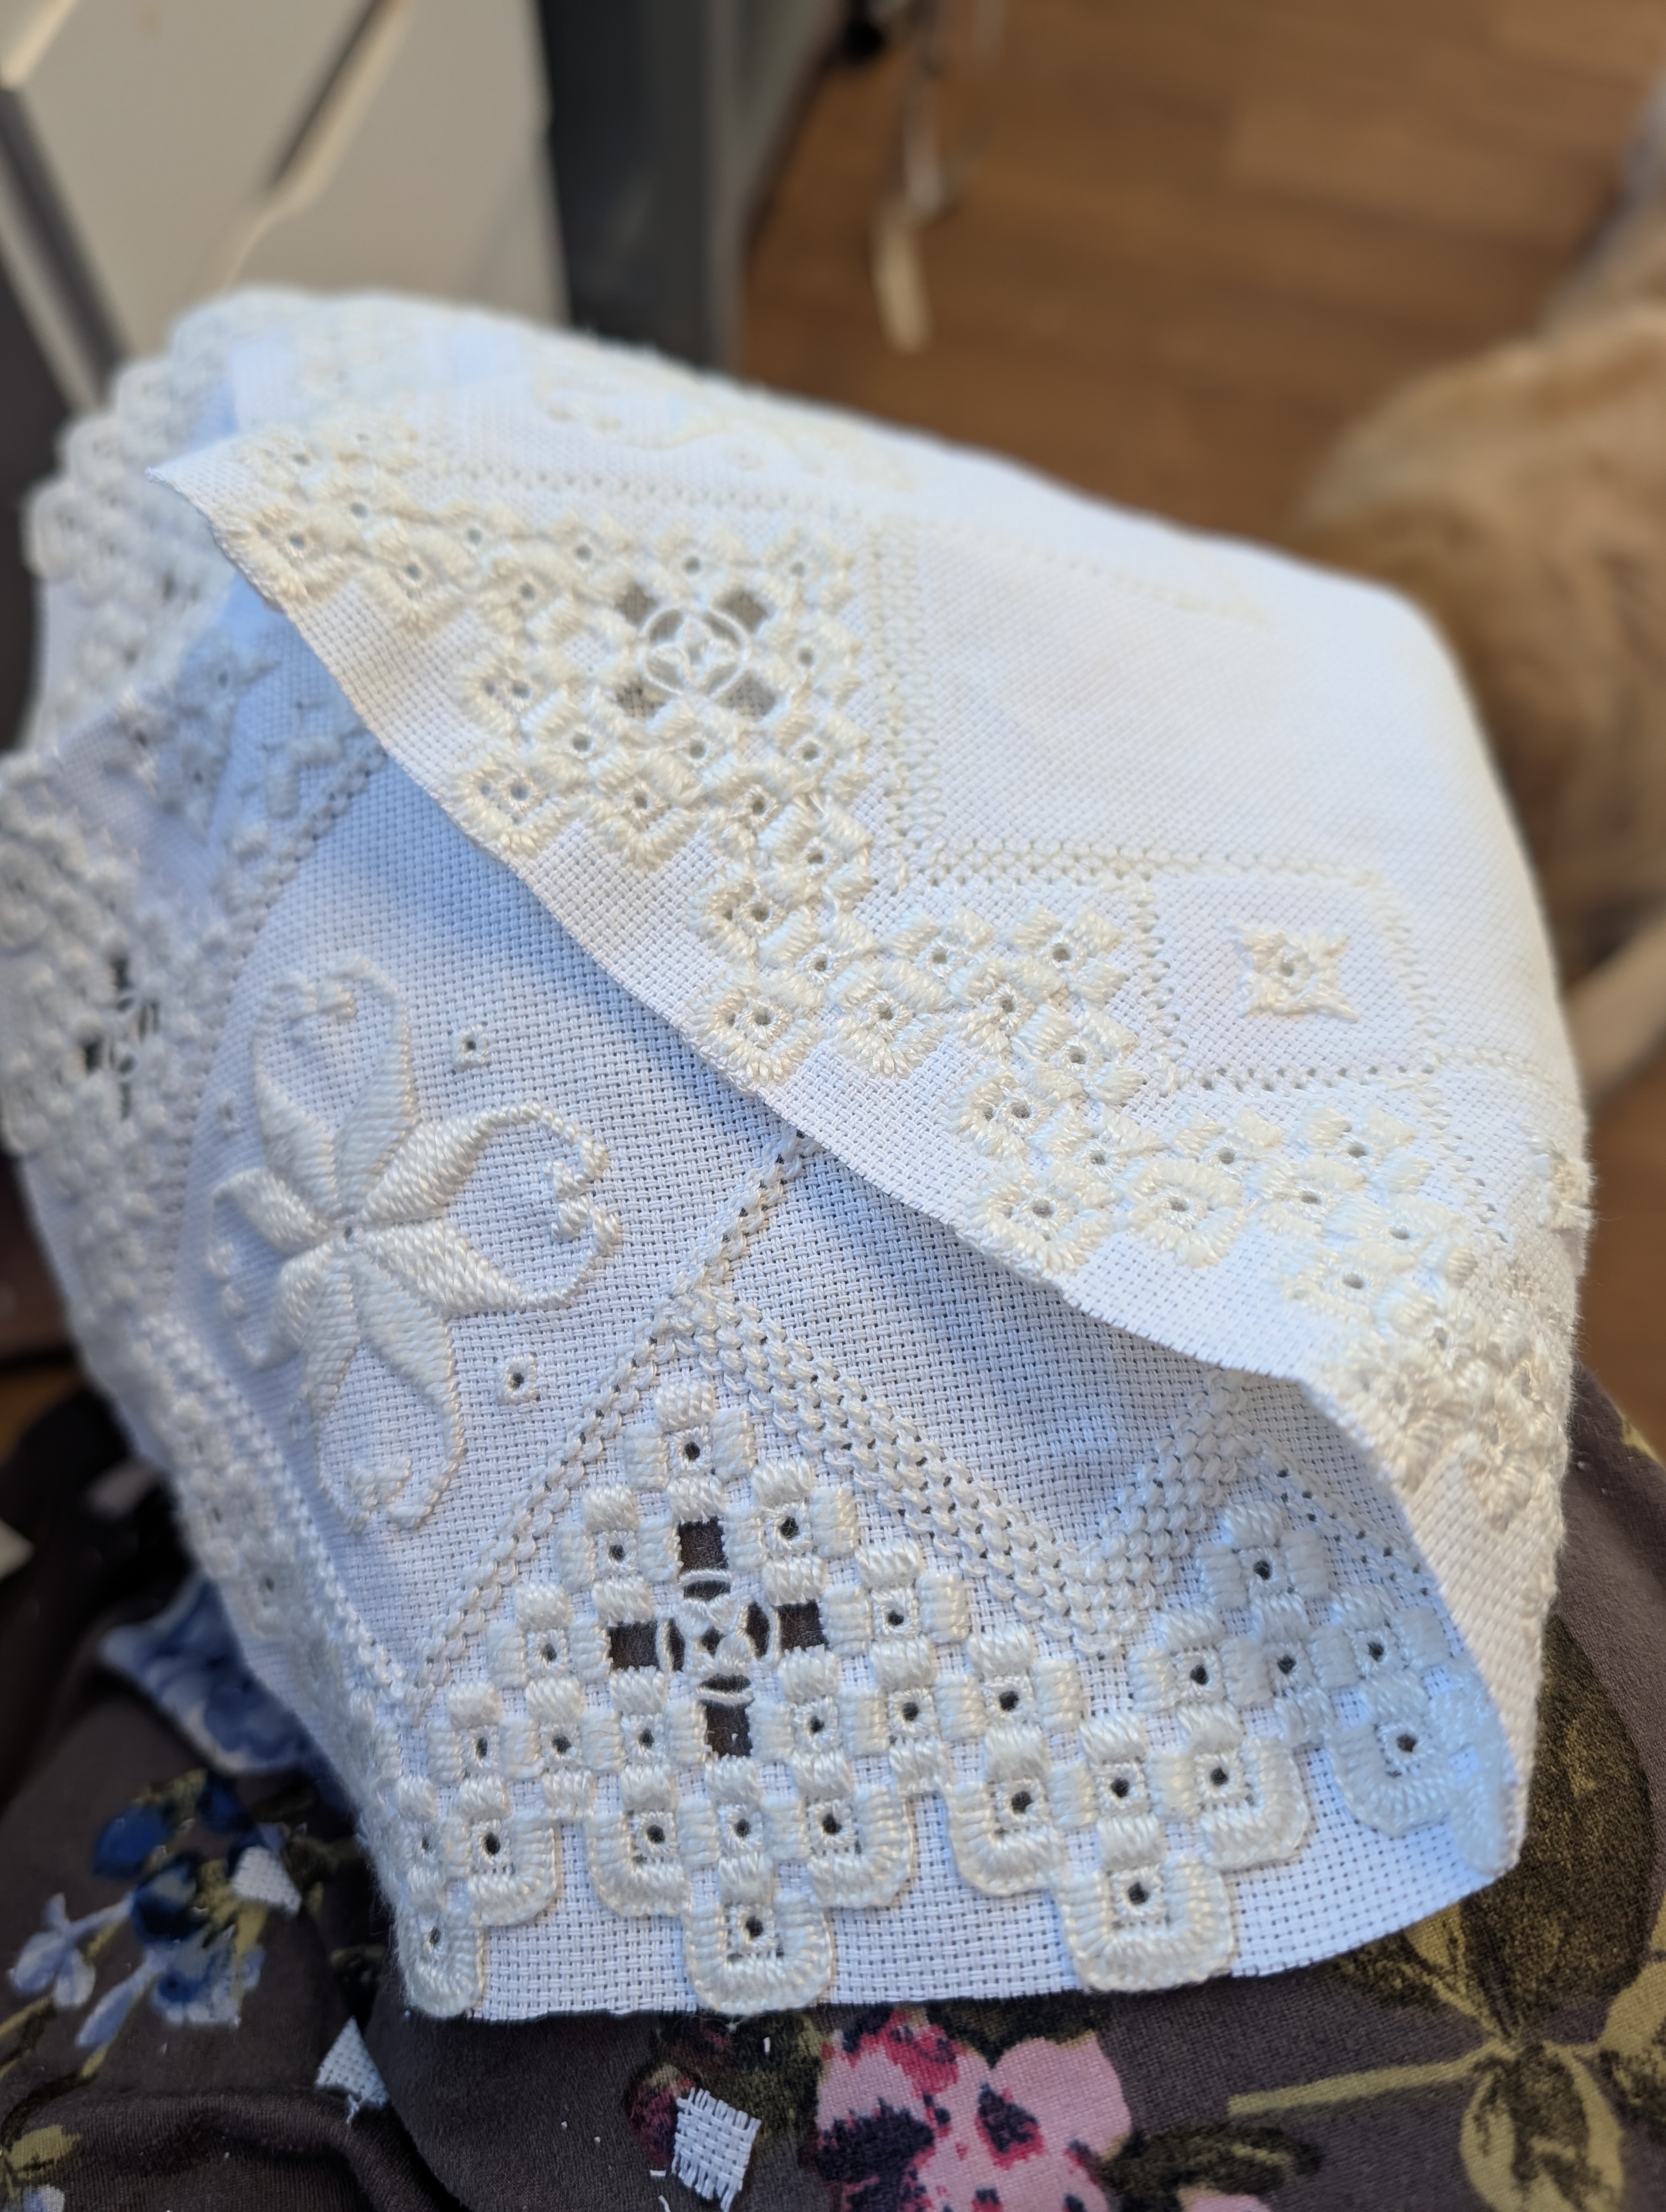
I found it easier this time to cut from the back, that was you can see clearly the threads that need cutting. This was stitched on a fine aida and I also found from the back I could see the grey of the blade though the holes so I knew I wasn’t catching the buttonhole stitch which partially covers the threads from the front. The sharp scissors meant I could easily and precisely cut into the corners.
It took a while, but here’s the finished tray cloth…
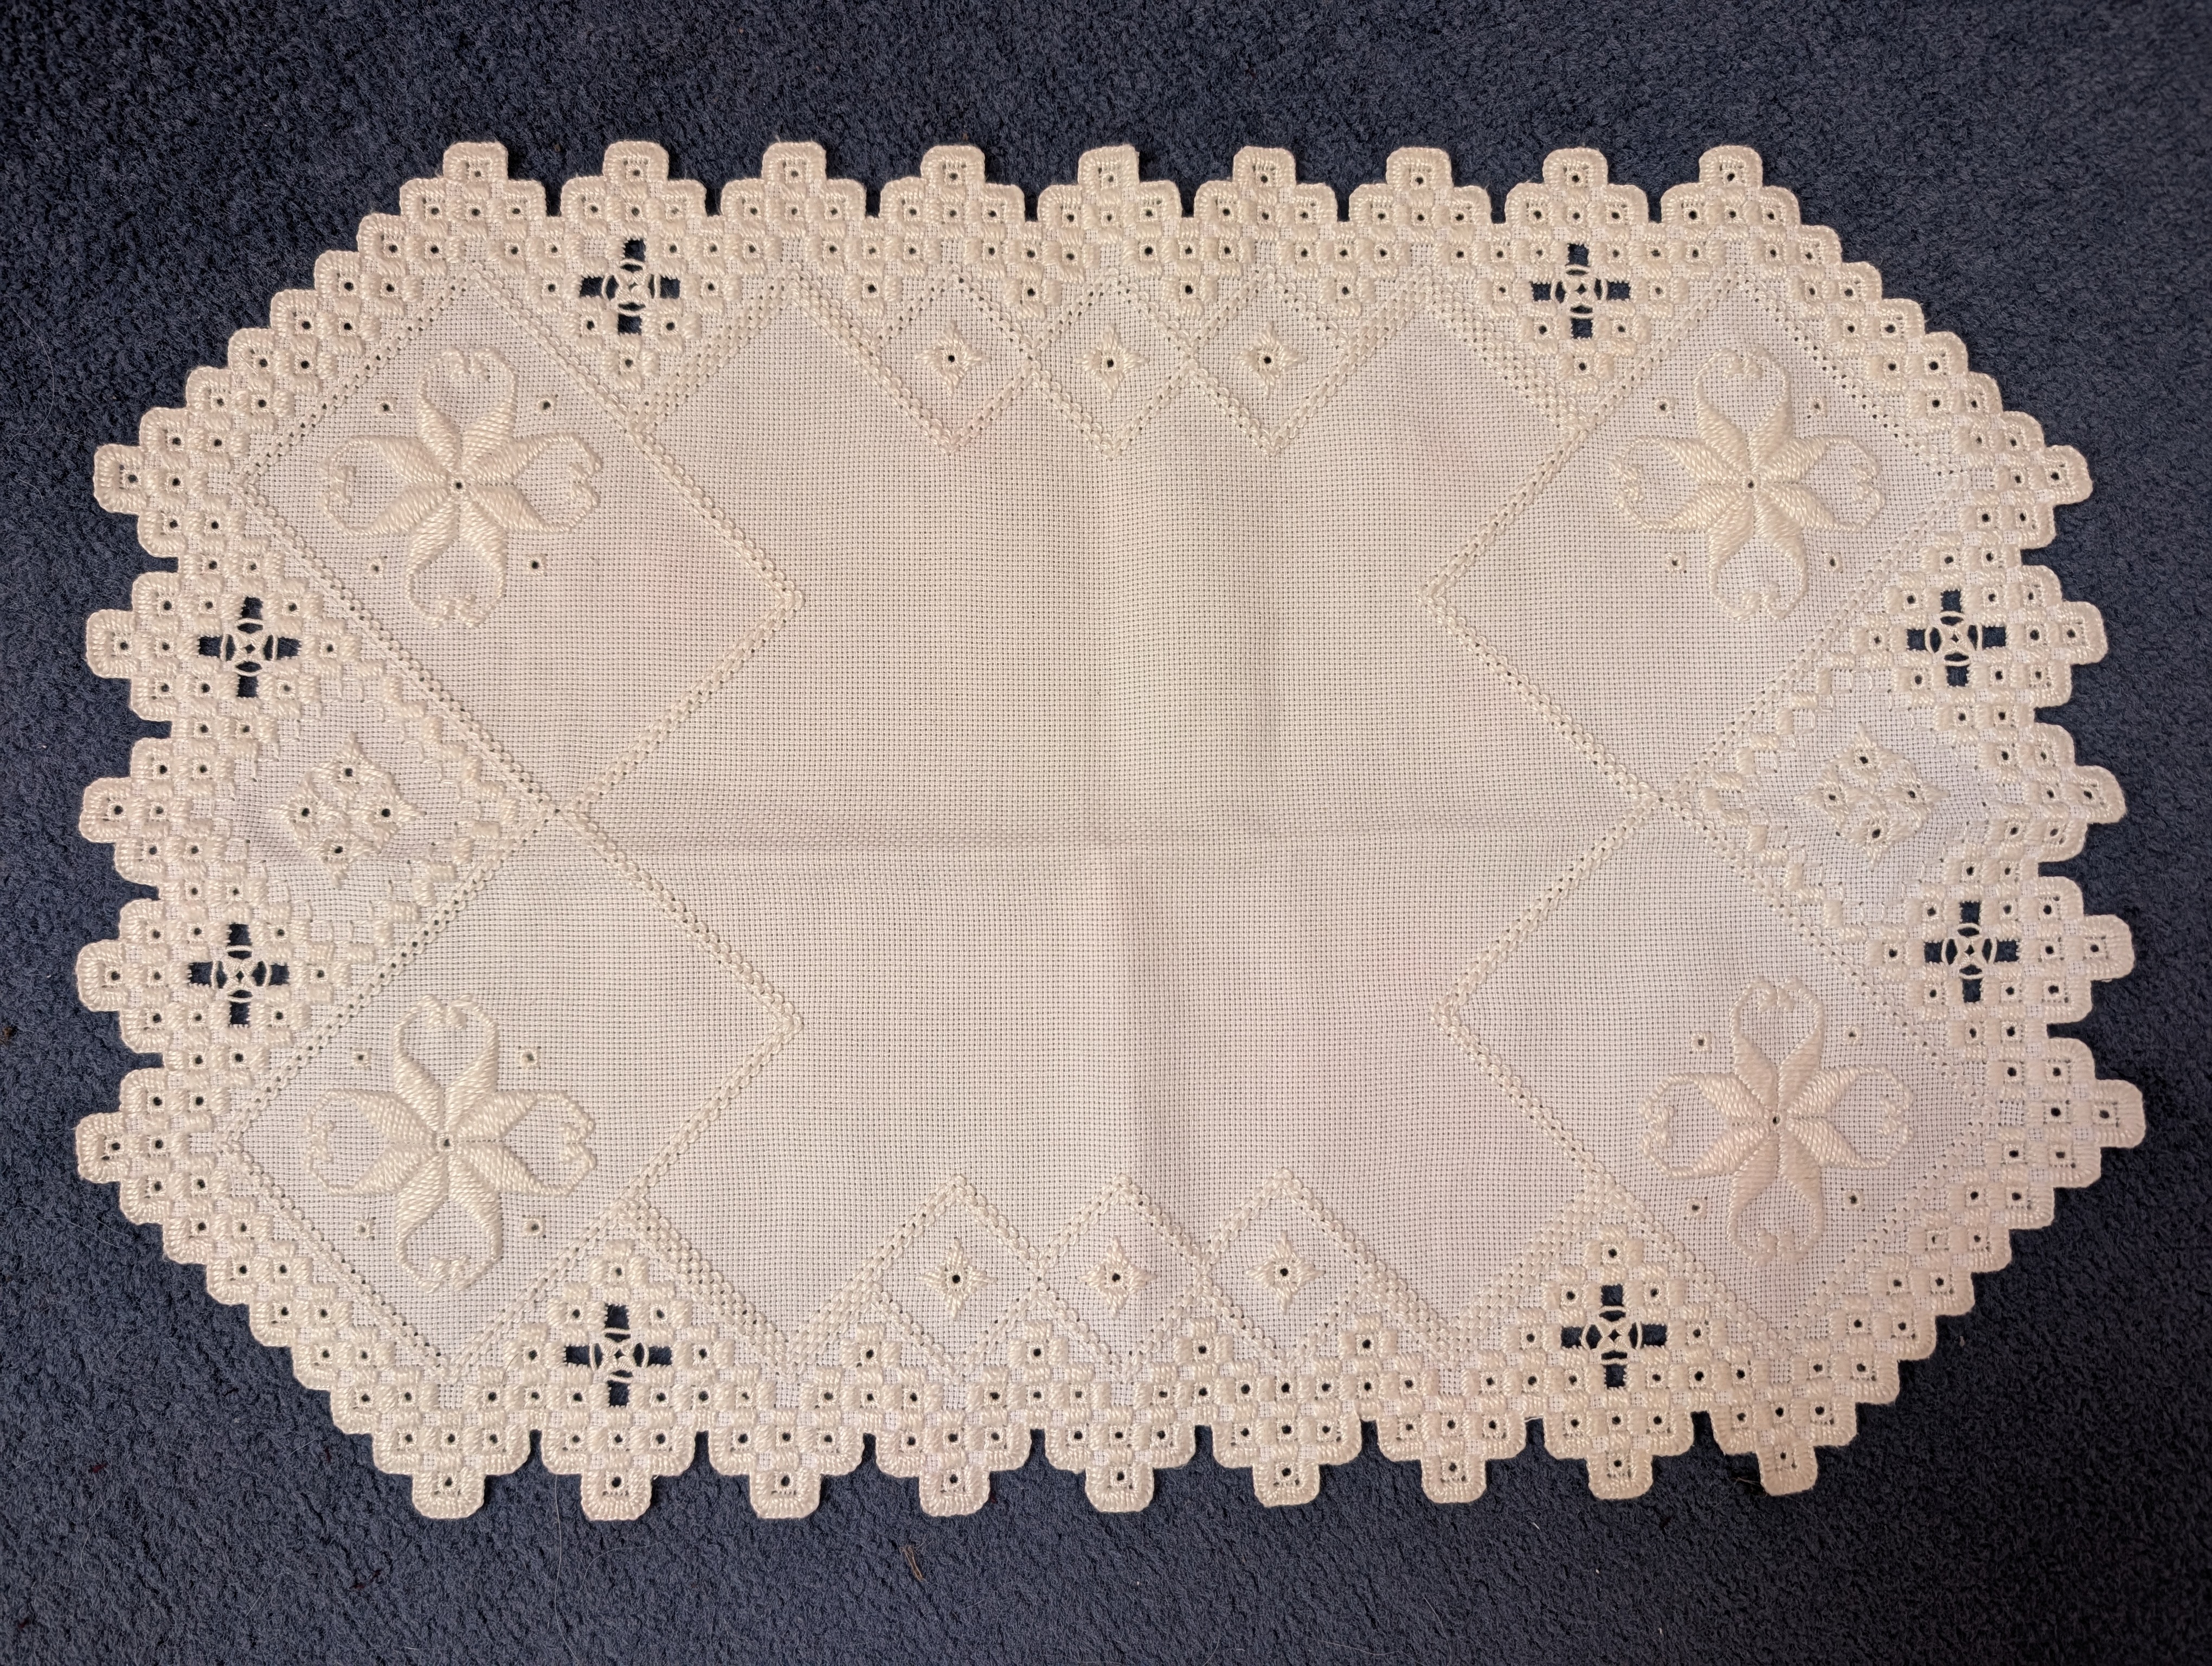
I’m pretty sure the central area was originally meant to be covered in embroidery, but I certainly wasn’t going to start trying to do that. Sue has a usable cloth of her mum’s beautiful work.


You have done a lovely job finishing these cloths. Sue’s mother was an expert Hardanger embroiderer, and you have done her proud. That edge requires concentration — one wrong snip… and I’ve done a few in that style, being a real lover of the technique. I suspect the fabric is 22ct Aida, known as “hardanger”, although original hardanger wasn’t stitched on it (just ask Yvette Stanton). The centre of the cloth is exactly as it should be. Imagine a bowl of flowers sitting in the centre of this lovely cloth. Perfect.
LikeLike