I’ve been a busy bee in my sewing room over the last couple of weeks, trying to clear the decks a bit! One project I have managed to complete is my alphabet of birds fabric book. I’ve been stitching the letters over the last ten months, I had a nice stack of embroideries, all I had to do was make them into a book.
Life would be much easier if I planned from the start how I would create the pages, rather than stitching them first and then trying to work out a method. I had stitched a back-stitch line round each page so having applied a square of interfacing to give a crispness to the pages it didn’t take long to whip-stitch the sides of each page together. I realised fairly quickly that despite trimming the corners and mitring them, then pressing with a clapper board, they were still bulkier than the middle of the edges. This meant that if I was not careful and just stitched the pages together, I could end up with an hour-glass shaped book!

I overcame this by stitching tiny beads in between the pages as I stitched. The corners were stitched firmly together but the sides were separated by a bead every cm or so. It worked and it looked pretty too when you opened the pages. It also meant the pages opened beautifully flat. So far, so good!
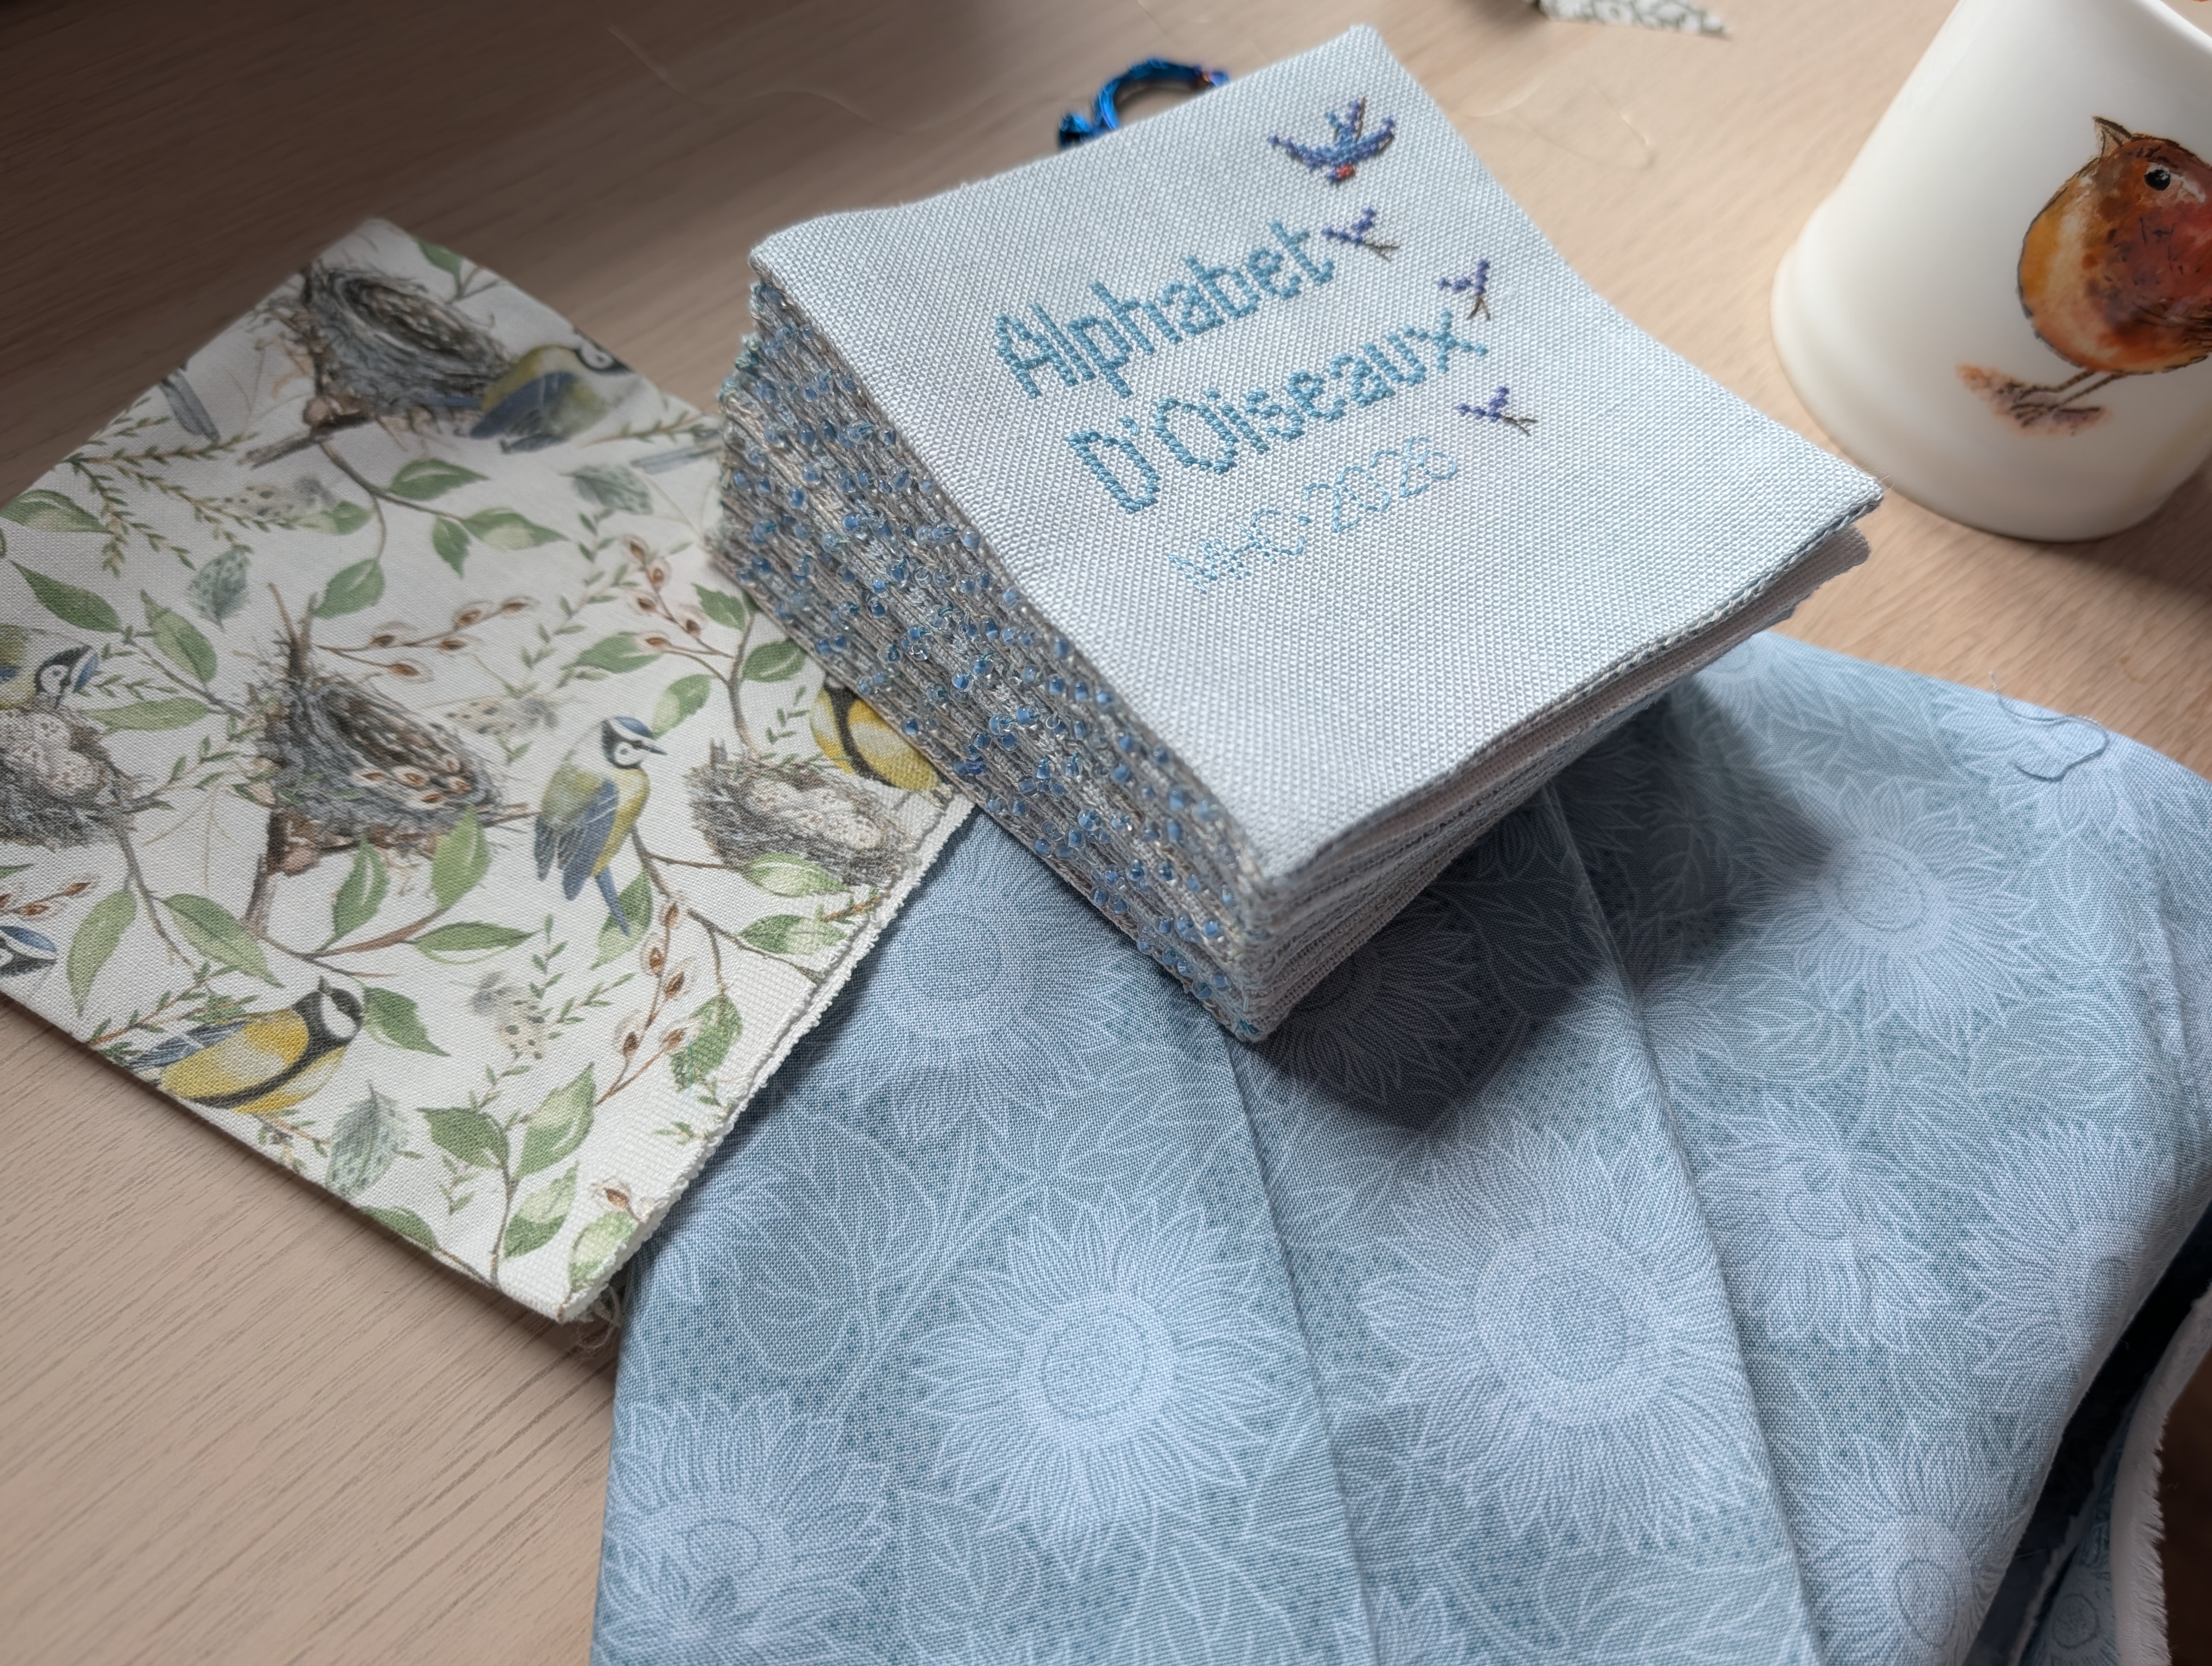
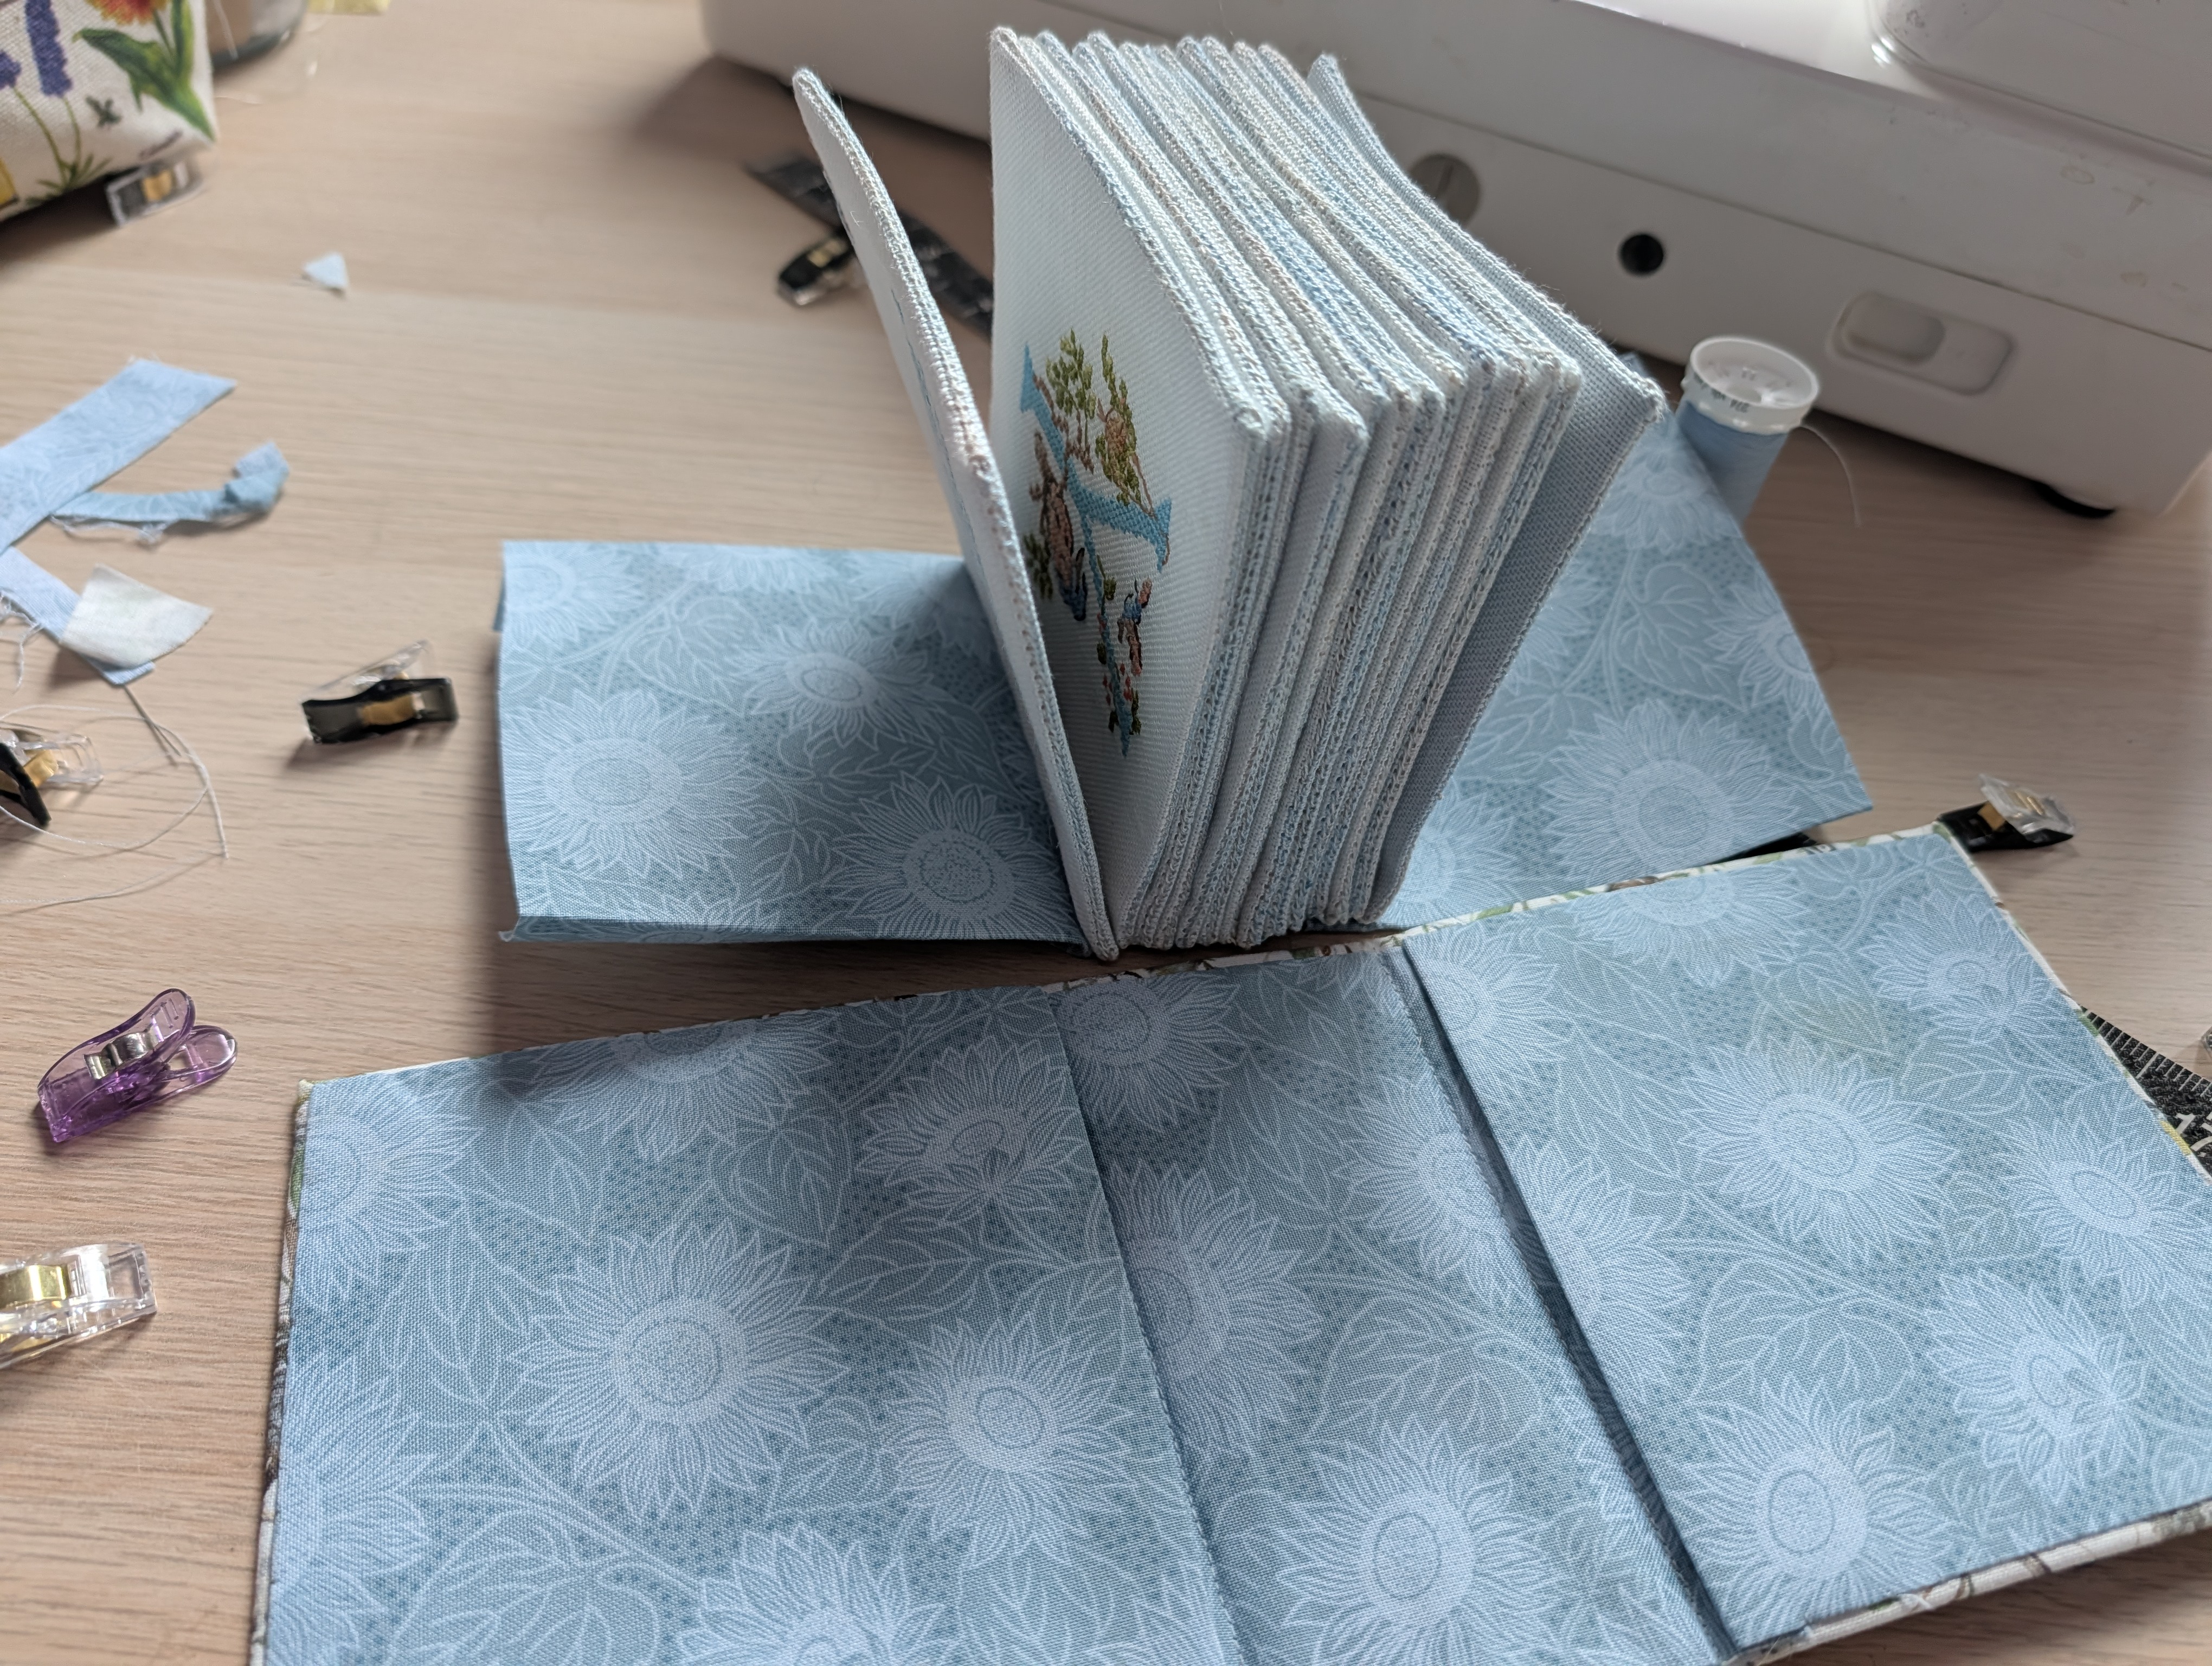
I made a cover using a pretty bird fabric and some bosal interfacing to stiffen it and give it body. I’ve used it quite a few times and it has always worked well. Having pressed the edges over of the cover, I stitched the two squares of lining fabric to the front and back pages, with the idea that I could then just stitch the lining to the cover and the book would be complete…
…only it didn’t sit right and was clearly going to be very difficult to stitch. Plan B was to stitch a lining to the front and back cover, leaving the inner edge unstitched so I could slot in the first lining piece. I managed to get it into the slot, clipped it together with some clover clips, but it still didn’t sit right. One thing I liked with the actual pages was how they sat flat when you opened it and that was lost with the spine attached.
Plan C was a bit more drastic, I cut the spine off the cover, found a nice titled selvedge to cover the cut side, aiming to have an exposed spine with the original front and back cover. Good plan but the covers were just a bit too big! As the bosal is ironed on it couldn’t be trimmed – I tried!
Plan D!!! I made another set of front and back covers, slightly smaller this time. I attached them to the pages with more beads…and it worked! It’s not perfect, but I’m happy! I tried doing my usual ribbon tie closure but it pulled the pages in too much in the middle and over time I would have a mis-shaped book.
I stitched a title for the front with a slightly darker DMC thread, I attached it with bondaweb, I would have preferred to machine stitch round it but I couldn’t get it in due to the bulk head of the sewing machine.
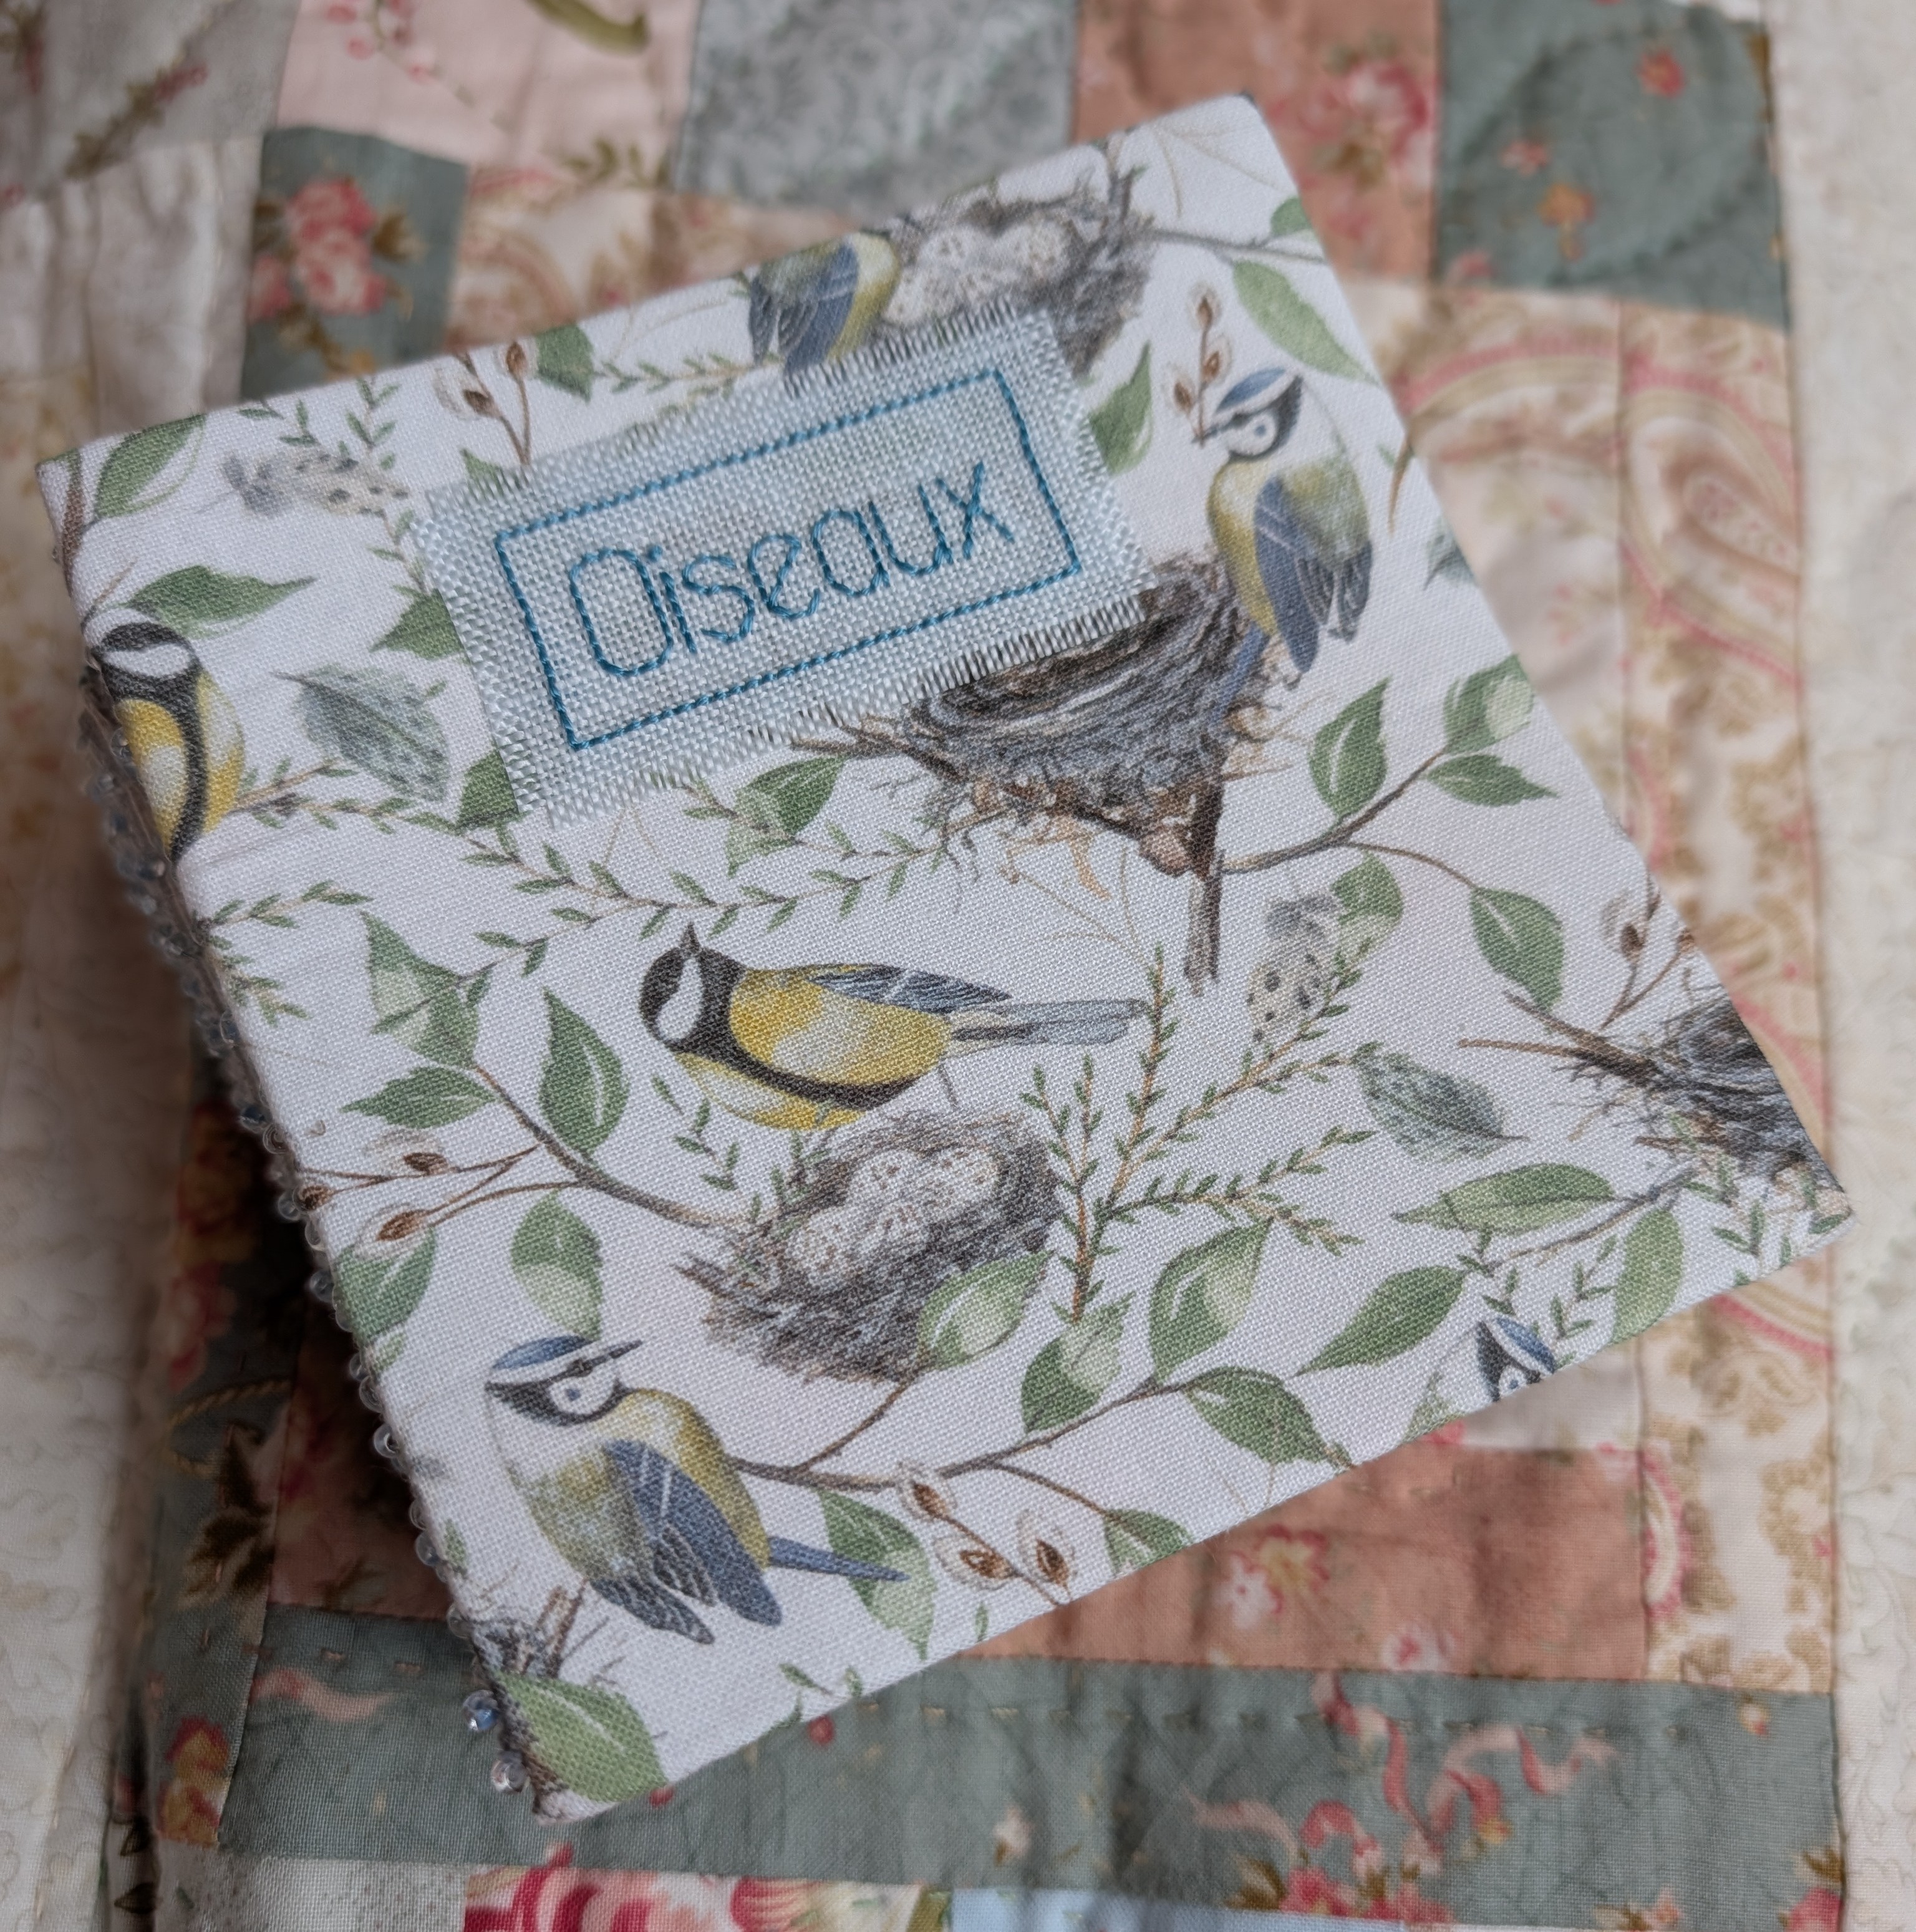
I’m really pleased with my book but I think I do need to plan ahead a little more! I think another time I may add a fabric border round each cross-stitch, just so they’re not as bulky in the corners. I do like the exposed spine with the beads though.
I’ve made a video of my book which is on Instagram, please follow the link if you want to see the whole finished book. https://www.instagram.com/p/Dc3pU7KgTkT/


This is beautiful!
LikeLiked by 3 people
Thank you, I got there in the end!
LikeLiked by 2 people
Very beautifully and masterfully done
LikeLiked by 4 people
Thank you, I’m pleased with it.
LikeLiked by 3 people
Simply fabulous ❣️
LikeLiked by 4 people
Thanks Sharon, I’m pleased with it, even though it was a bit of a battle in the end!
LikeLiked by 2 people
A fab finish with beautiful execution, even if you did resort to Plan D!
LikeLiked by 4 people
Thanks Kathy, I got there in the end!
LikeLiked by 3 people
Beautiful 🤩
LikeLiked by 1 person
Well it looks pretty awesome 🙂
LikeLiked by 4 people
I love how much time and care you’ve put into this project! Ten months of stitching is a real commitment, and it’s wonderful to see your hard work come together. Every project teaches us something new, and your experience is a great reminder that planning ahead can make things easier. Well done, and I look forward to seeing your beautiful fabric book!
LikeLiked by 2 people
Thank you, I really should try to plan my books before I start stitching!
LikeLike
What an absolute triumph of craftiness, craftycreeky! Adding tiny beads between the pages to offset the corner bulk and keep the book lying flat was total genius—and it looks decorative as a bonus! Like kathyreeves said, reaching Plan D only makes the finished piece that much more impressive. I loved reading your reply to nwpaintedlady Sharon; even if it was a bit of a battle, the final ‘Alphabet of Birds’ book turned out so beautifully!
LikeLiked by 1 person
Thank you, I’m pleased with how it worked out…in the end!
LikeLiked by 1 person
😊
LikeLike
Beautiful
LikeLiked by 2 people
These look really nice! 😍
LikeLiked by 2 people
You are quite talented and should be so proud you finished. 😉 I love these!
LikeLiked by 2 people
Thank you, I’m pleased with it.
LikeLiked by 1 person
Nice things
LikeLiked by 2 people
Beautiful ❤️❤️❤️
LikeLiked by 3 people
Thank you, I’m pleased with it.
LikeLiked by 1 person
I’ve been a busy bee, networking and growing, and sleeping lol
LikeLiked by 2 people
This is lovely! Does it say at the end that you stitched it over 10 months and 15 colours? I couldn’t quite catch what it said!
LikeLiked by 5 people
Thank you, it was stitched in 15 countries – I took it on a six week train trip round Europe with my daughter, we visited 11 countries in that time!
LikeLike
The progression from Plan B to Plan D reads like a miniature design essay: each failed assembly preserved one requirement and exposed another. The beads are especially elegant because they solve the corner bulk and flat-opening problem while becoming part of the visual language. If you made a second book, would you keep the exposed beaded spine from the start, or still test a softer spine after adding fabric borders?
LikeLiked by 4 people
Hi, Thanks for your comment, I do like exposed spines on books, but I think if stitching a similar book I would find a different way to stitch the pages together, reducing the bulk at the corners, maybe adding a cotton fabric border round each embroidery.
LikeLiked by 2 people
That makes sense—the exposed spine is such a strong visual feature that it feels intentional, even though it grew from a practical compromise. A cotton border could reduce the corner bulk while keeping the book’s character and the flat-opening structure.
LikeLiked by 2 people
Wow. I am surprised and What’s your name because “Crafty Creeky” is not a real Author Name, right??. Also, as I am reading your blog,I can see that you are writing about Sewing and Embroidery, so you must be a Fashion Designer or Tailor or Sewer. I like Fashion also and my Blog is an educational men’s fashion Blog so do check it out man. I am impressed that it took 10 months for the Fabric Book and at the same time visited 11 countries, 2026 has been good for you..👍
LikeLiked by 3 people
Thank you, Creek is my surname. I just do sewing a crafts as a hobby.
LikeLike