
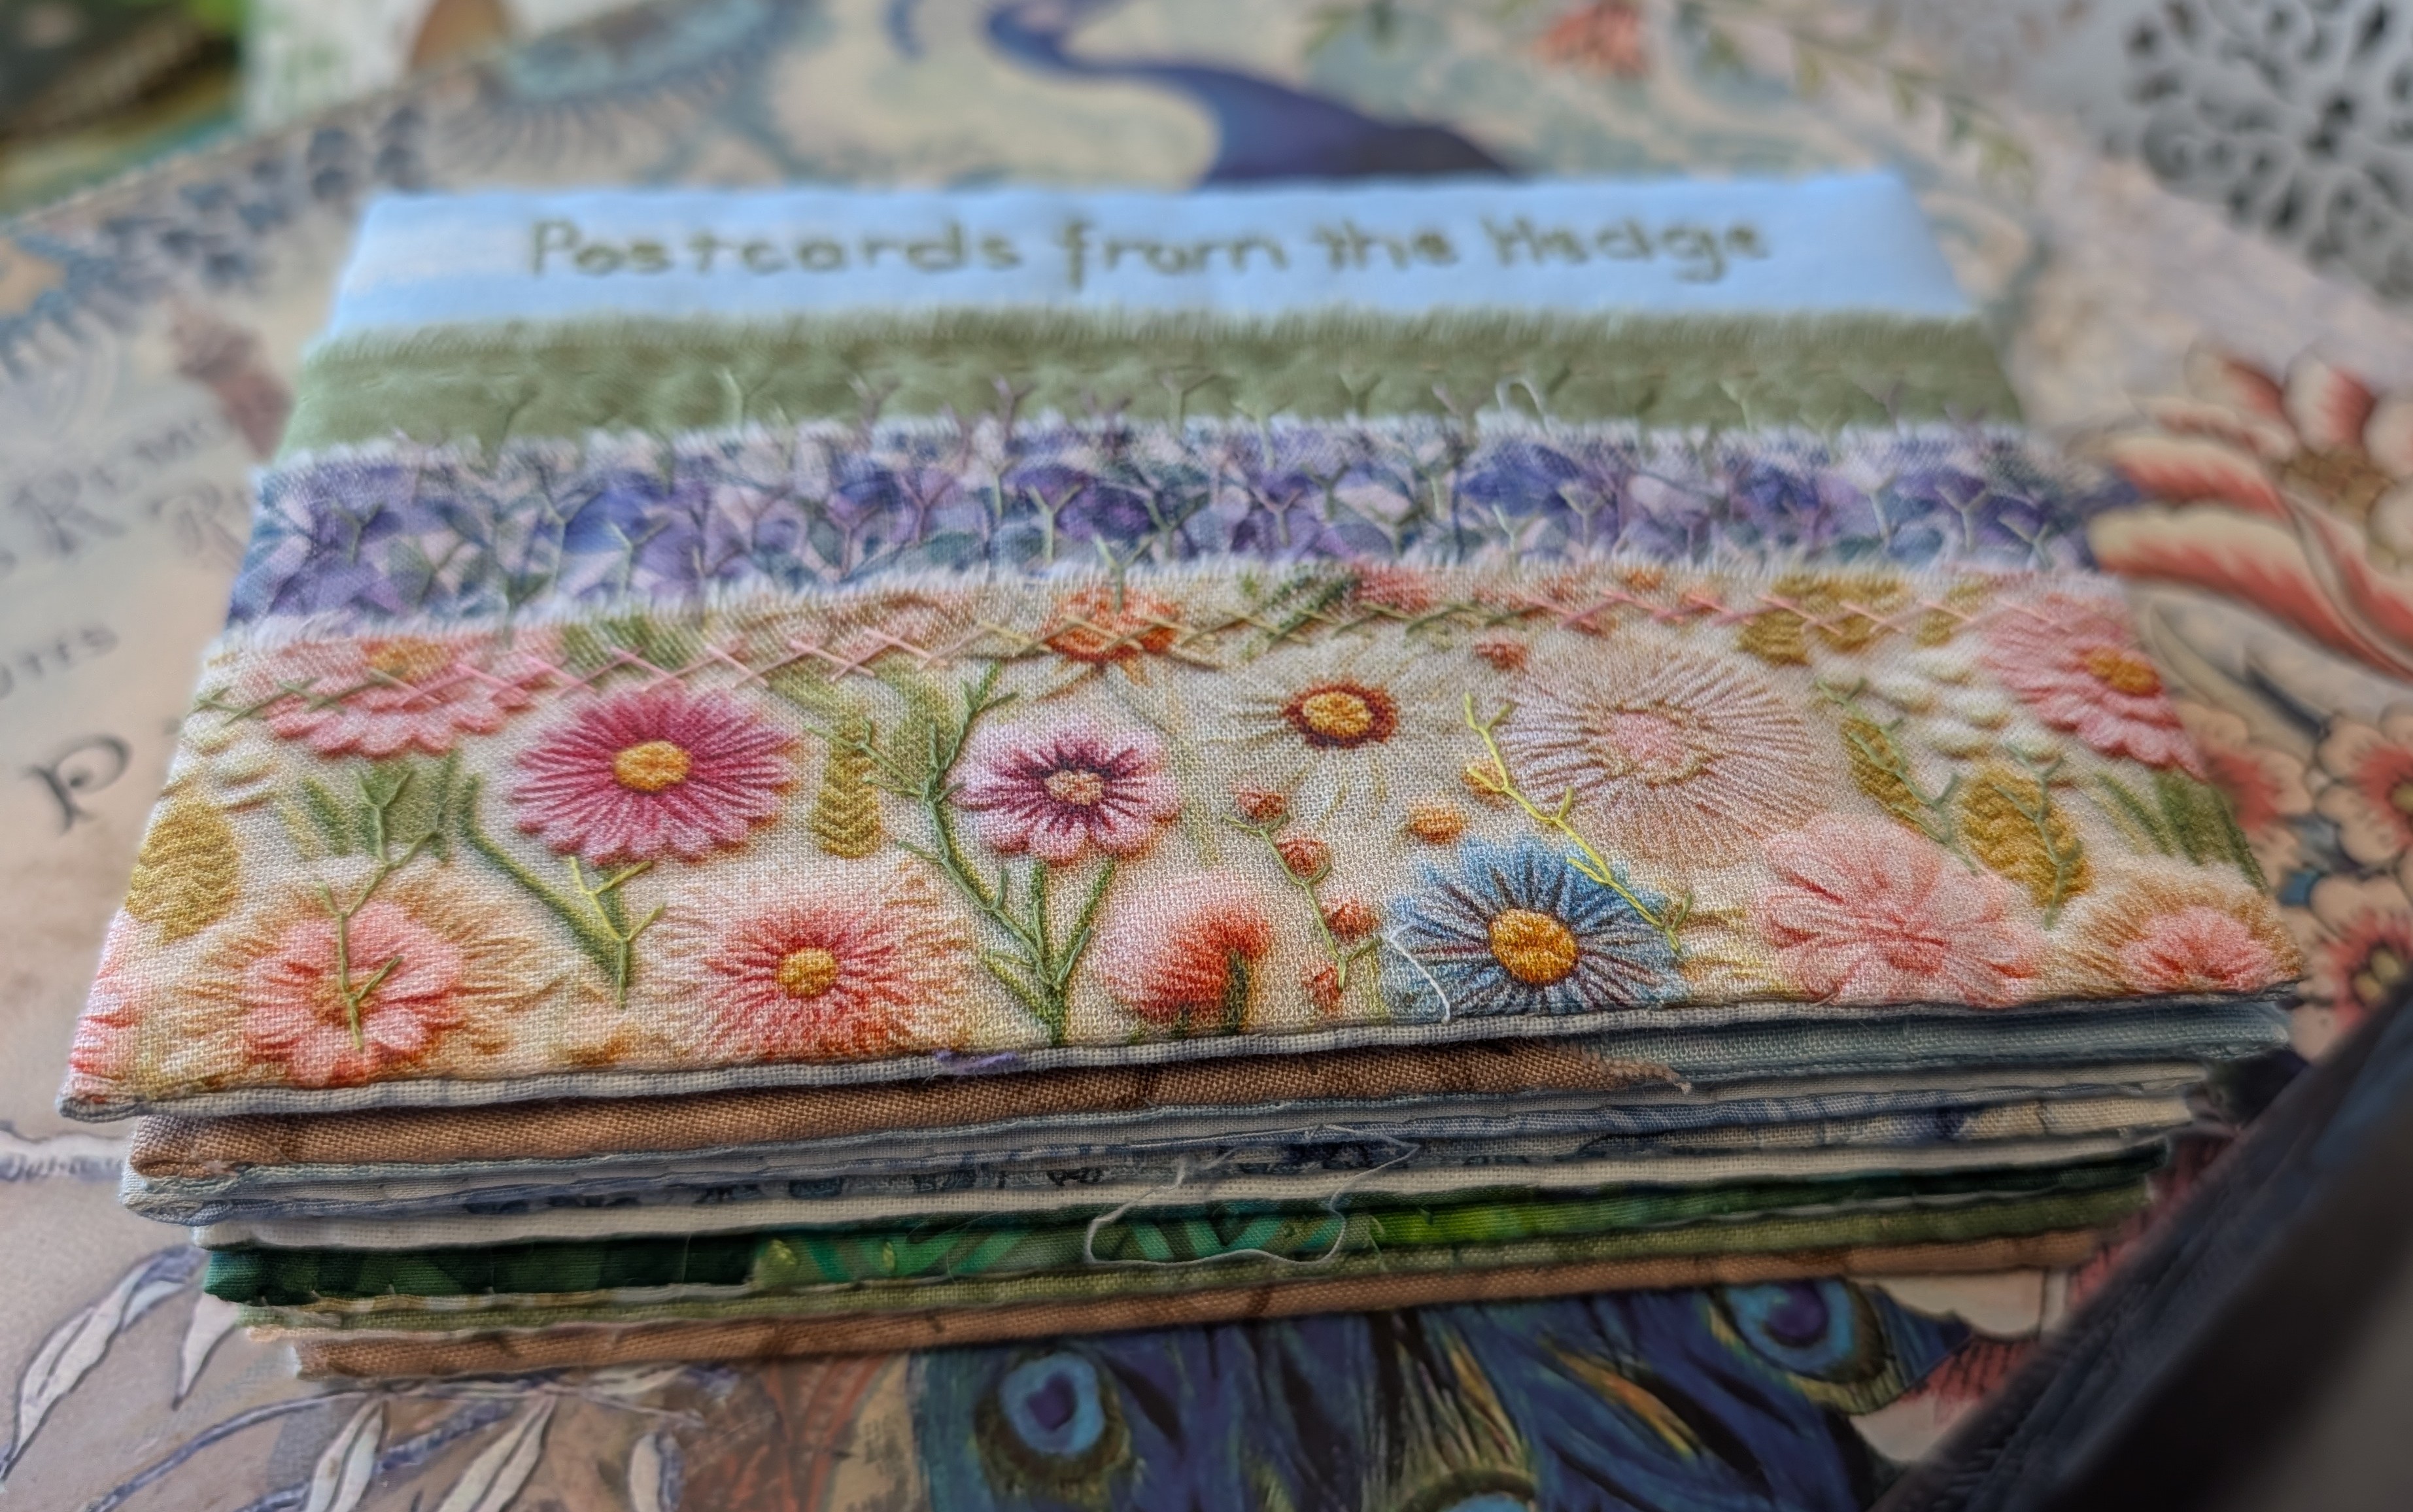
It’s time for a happy dance, I finished my Postcards from the Hedge book! Three weeks ago I had a little stack of prepared pages, I just had to make the cover and work out how to bind the book.
For a while I’ve wanted to make a book with an exposed spine, so the stitching is visible, this seemed like a good one to try it on. I would have preferred to have the binding down the long edge but I realised too late that I had the orientation of the facing pages for that, so short side it had to be.
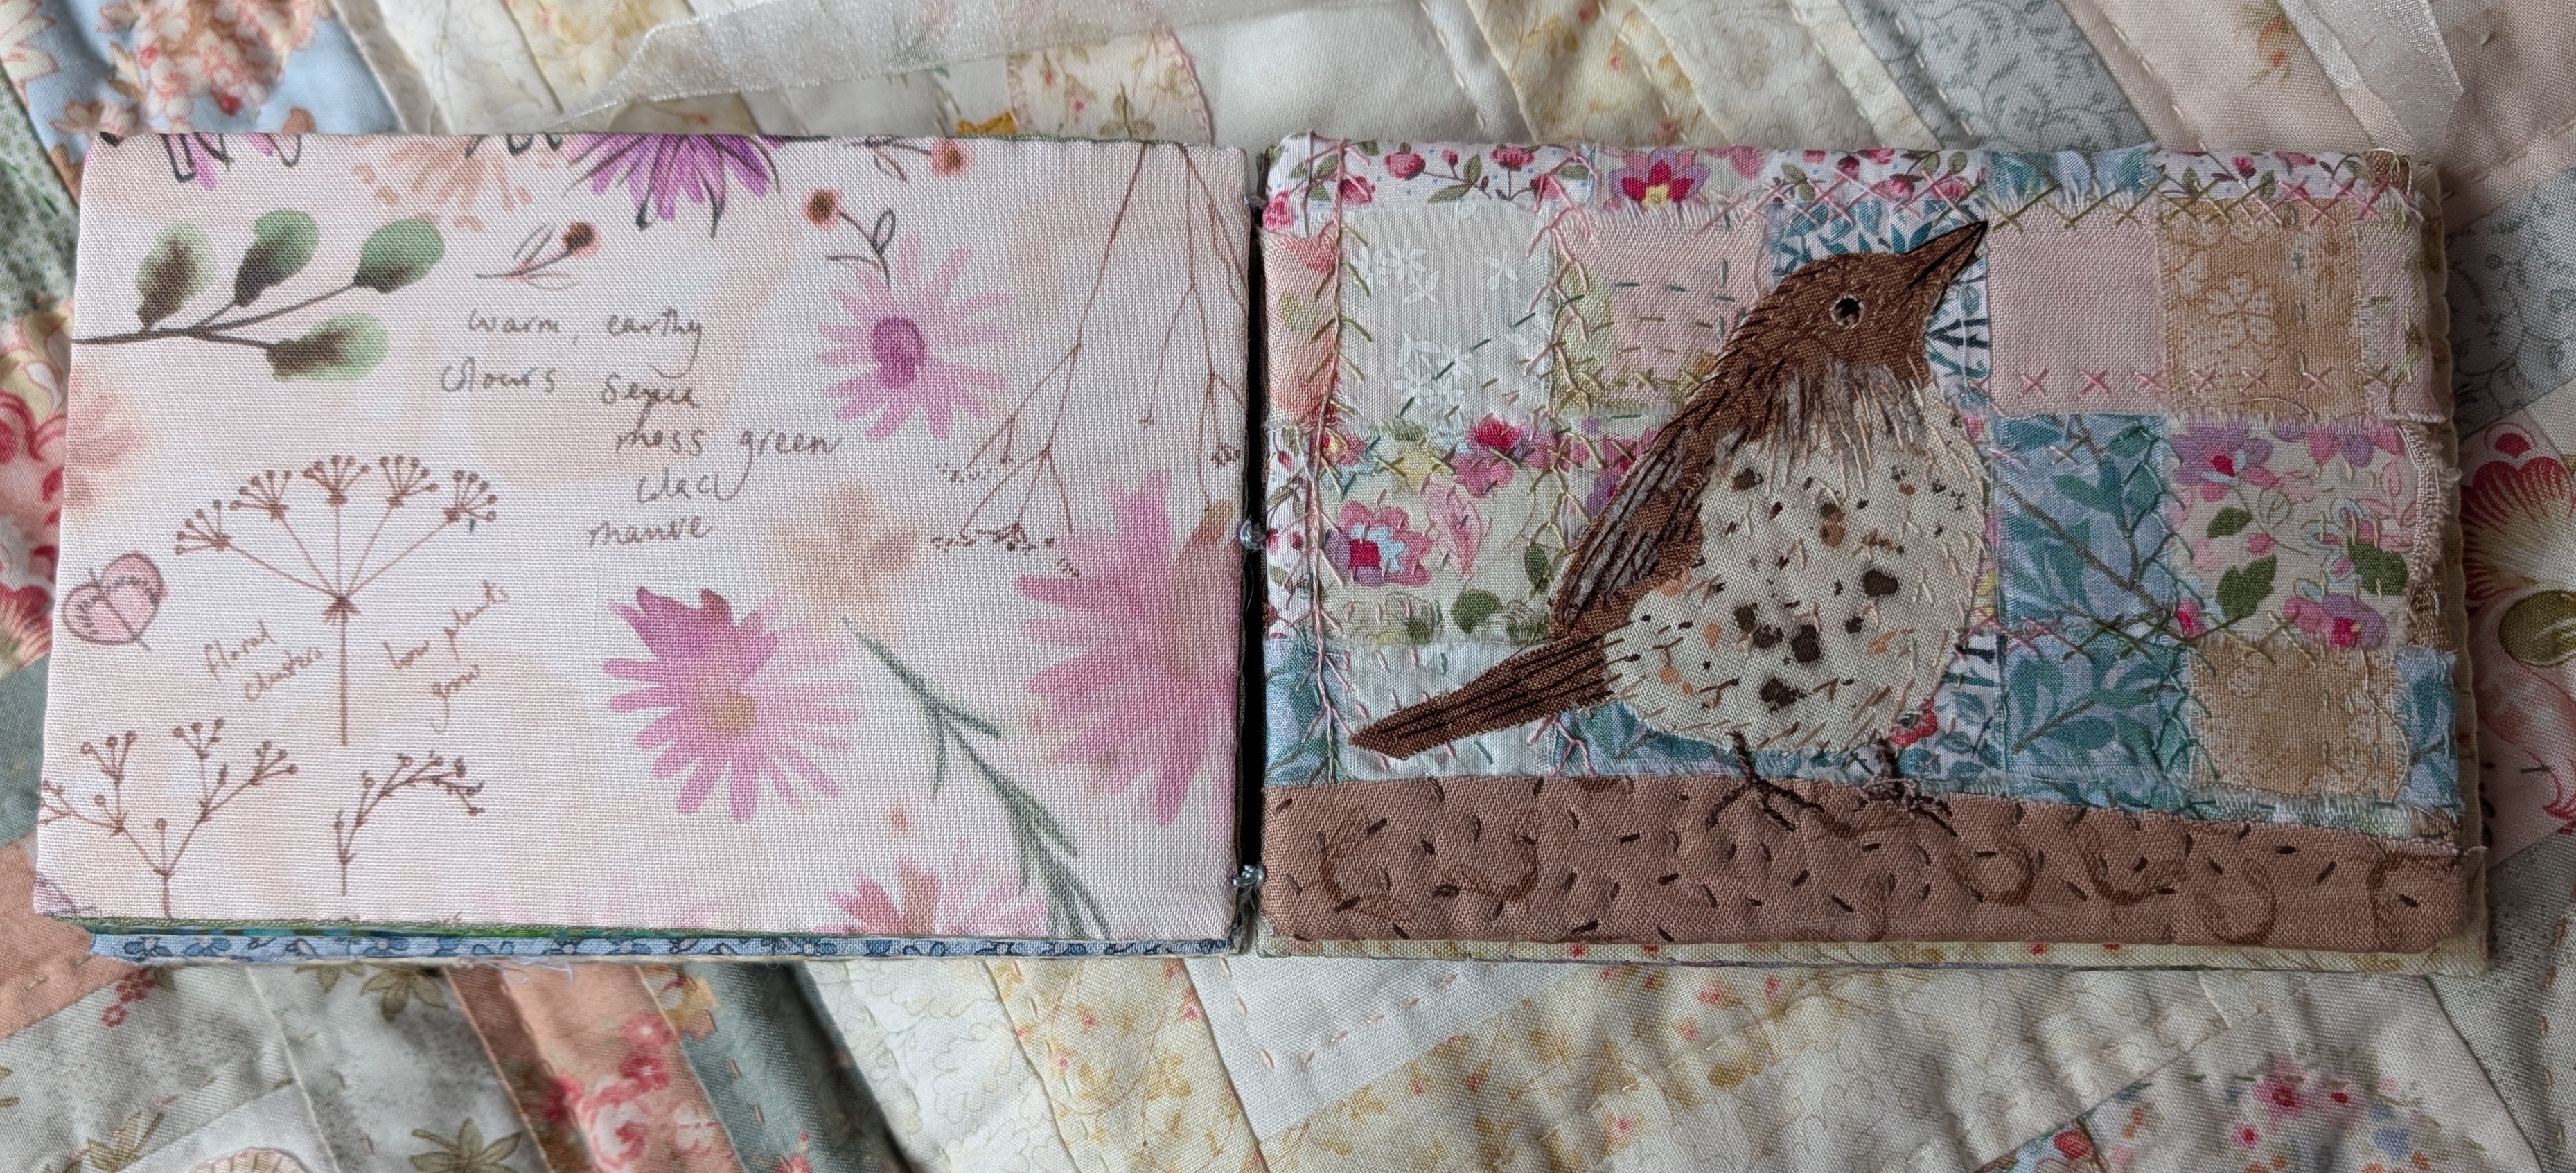
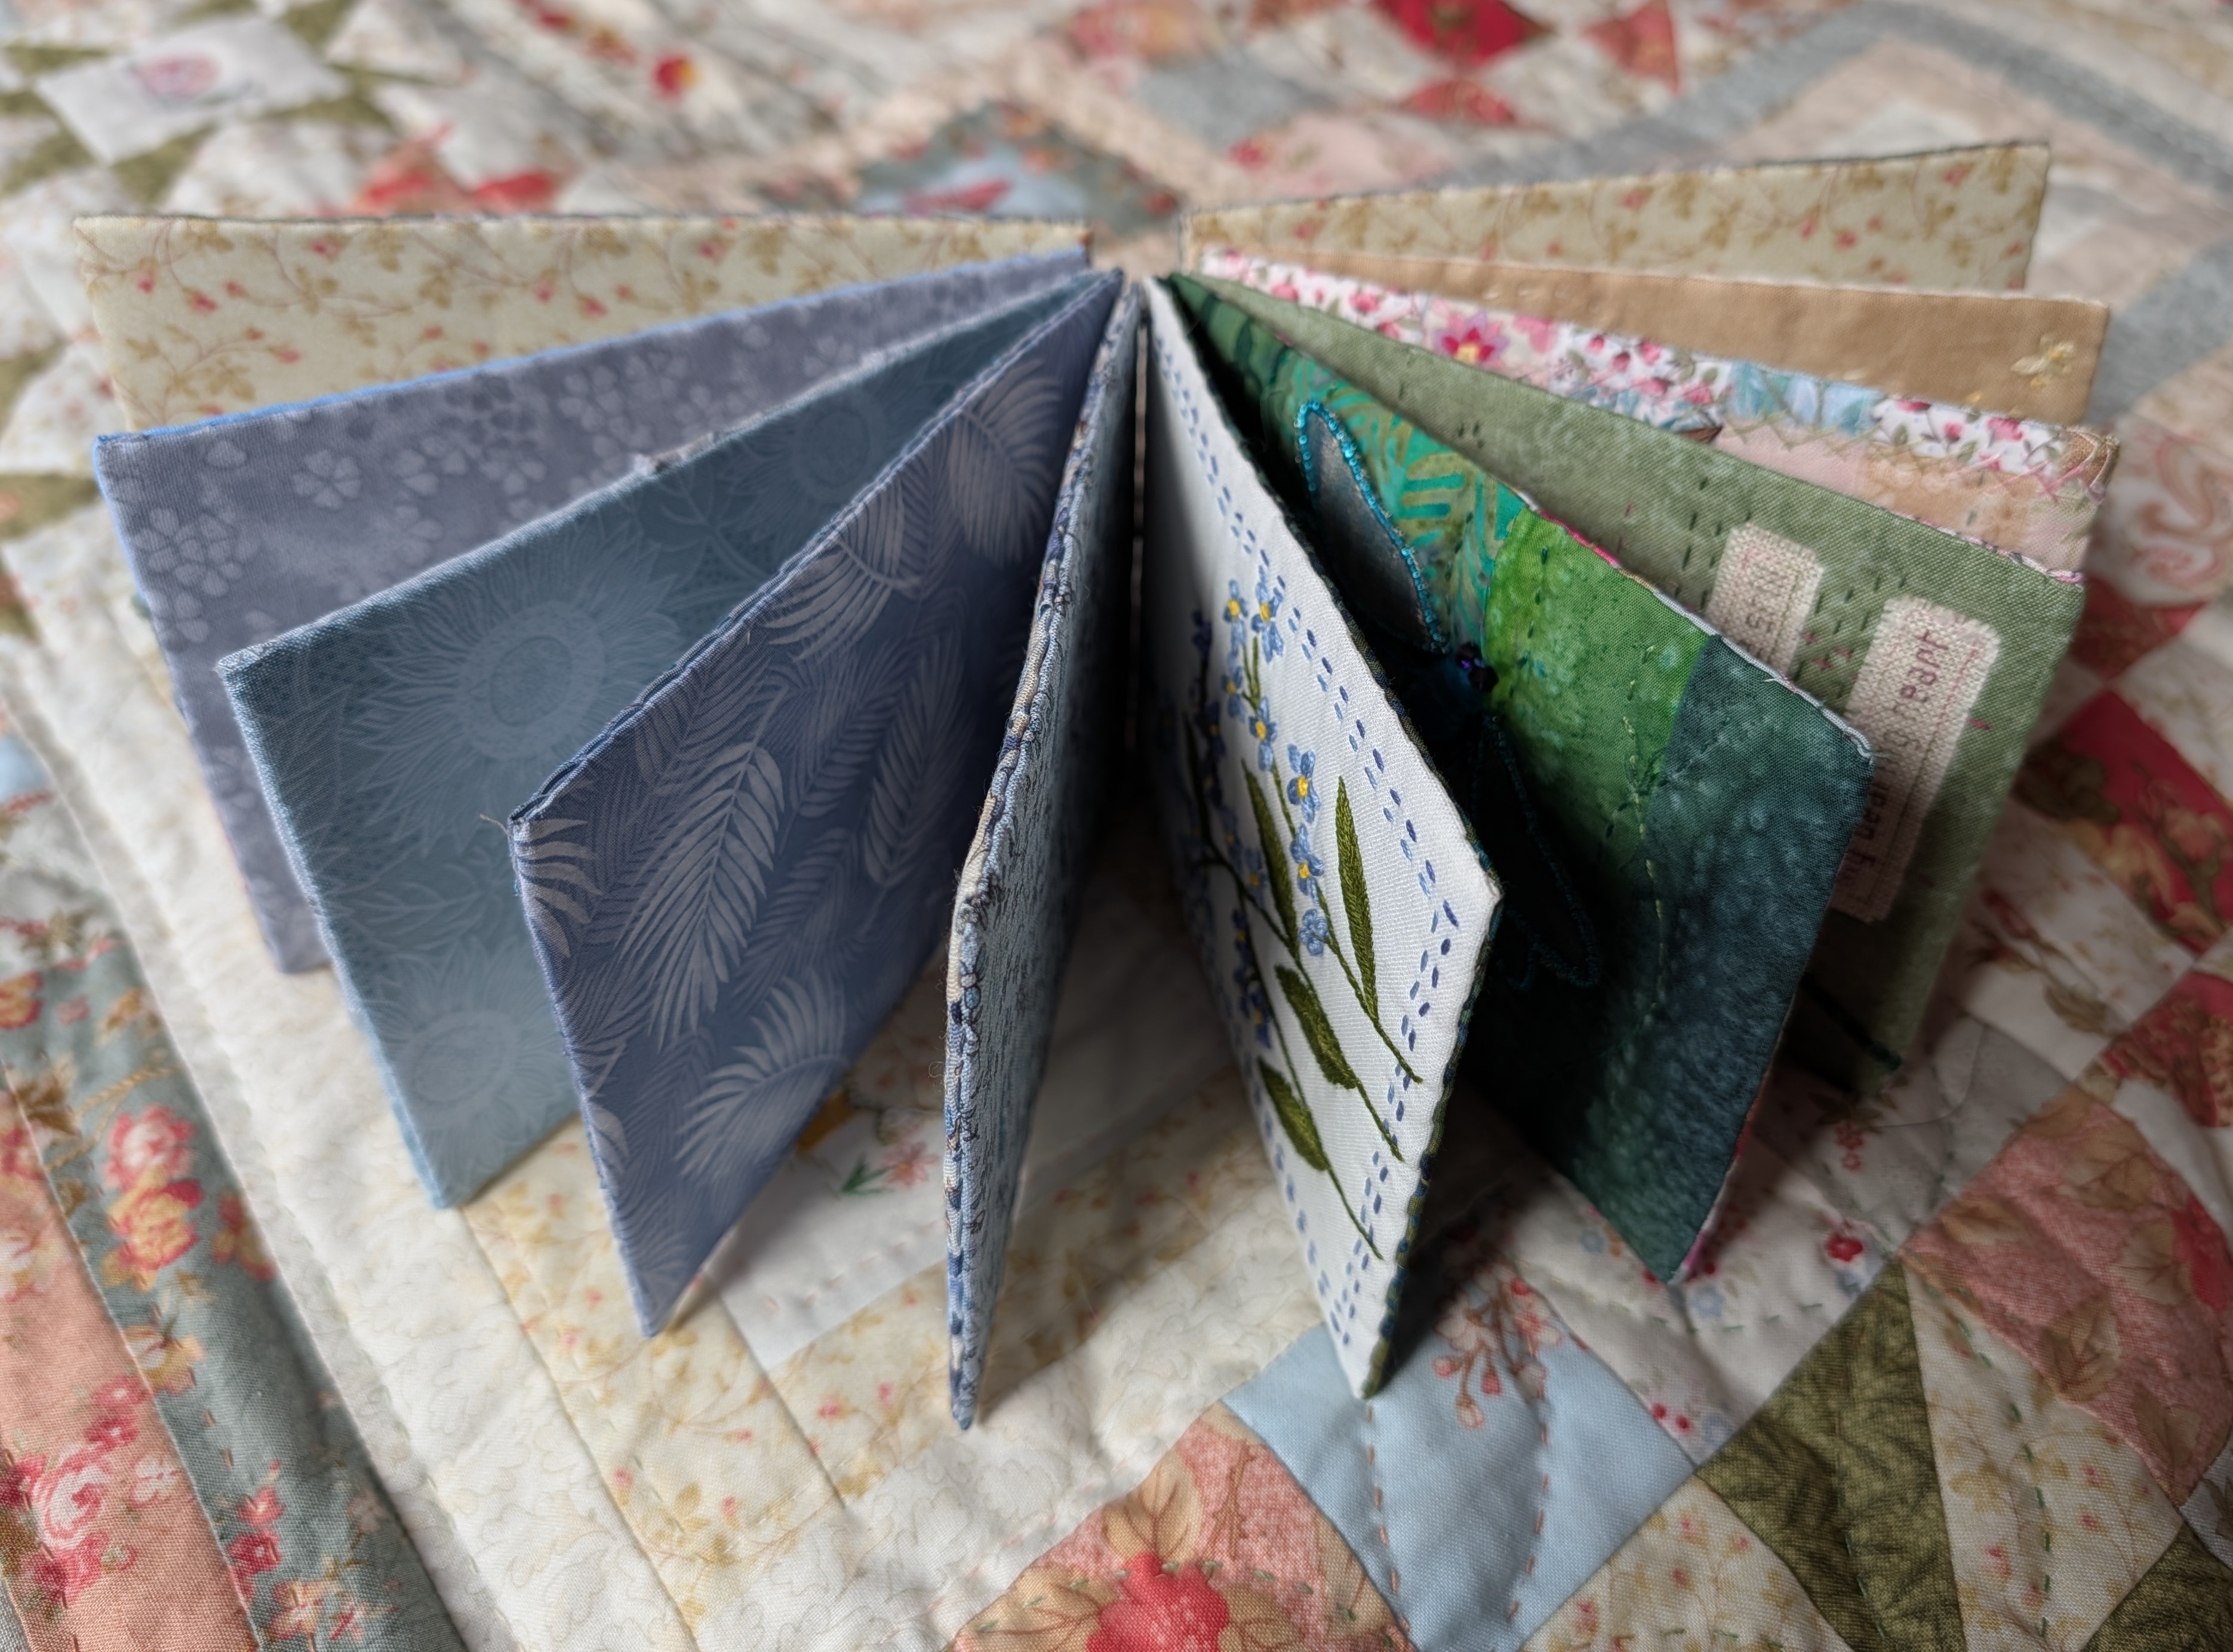
First of all I needed to make a front and back cover. I found in my stash some Lynette Anderson which went well with the theme and the colours, it has flowers and butterflies on but in nicely muted colours, I found a co-ordinating green strip in my scrap box. For the inside I used a pretty green and pink blossom sprig which I’ve had for years, it’s so pretty but I’ve never found the right place for it in a quilt. I used Pellon to stiffen them.
Now to the binding, I looked on Youtube, but instructions are mainly for double page signatures, not for binding single pages. I had to make it up as I went along! I decided to use chain stitch, I chose a perle thread as it was fairly strong but decorative as well. I drew lines across the spine where I wanted the stitching to be using a Frixion pen so I had a vague chance of them looking neat at the end. I wasn’t sure at first if I wanted to do three lines or five, so I marked up five lines, I’ve just realised I didn’t erase the 2nd and 4th so you can just still see them, I’ll have to get my iron out!
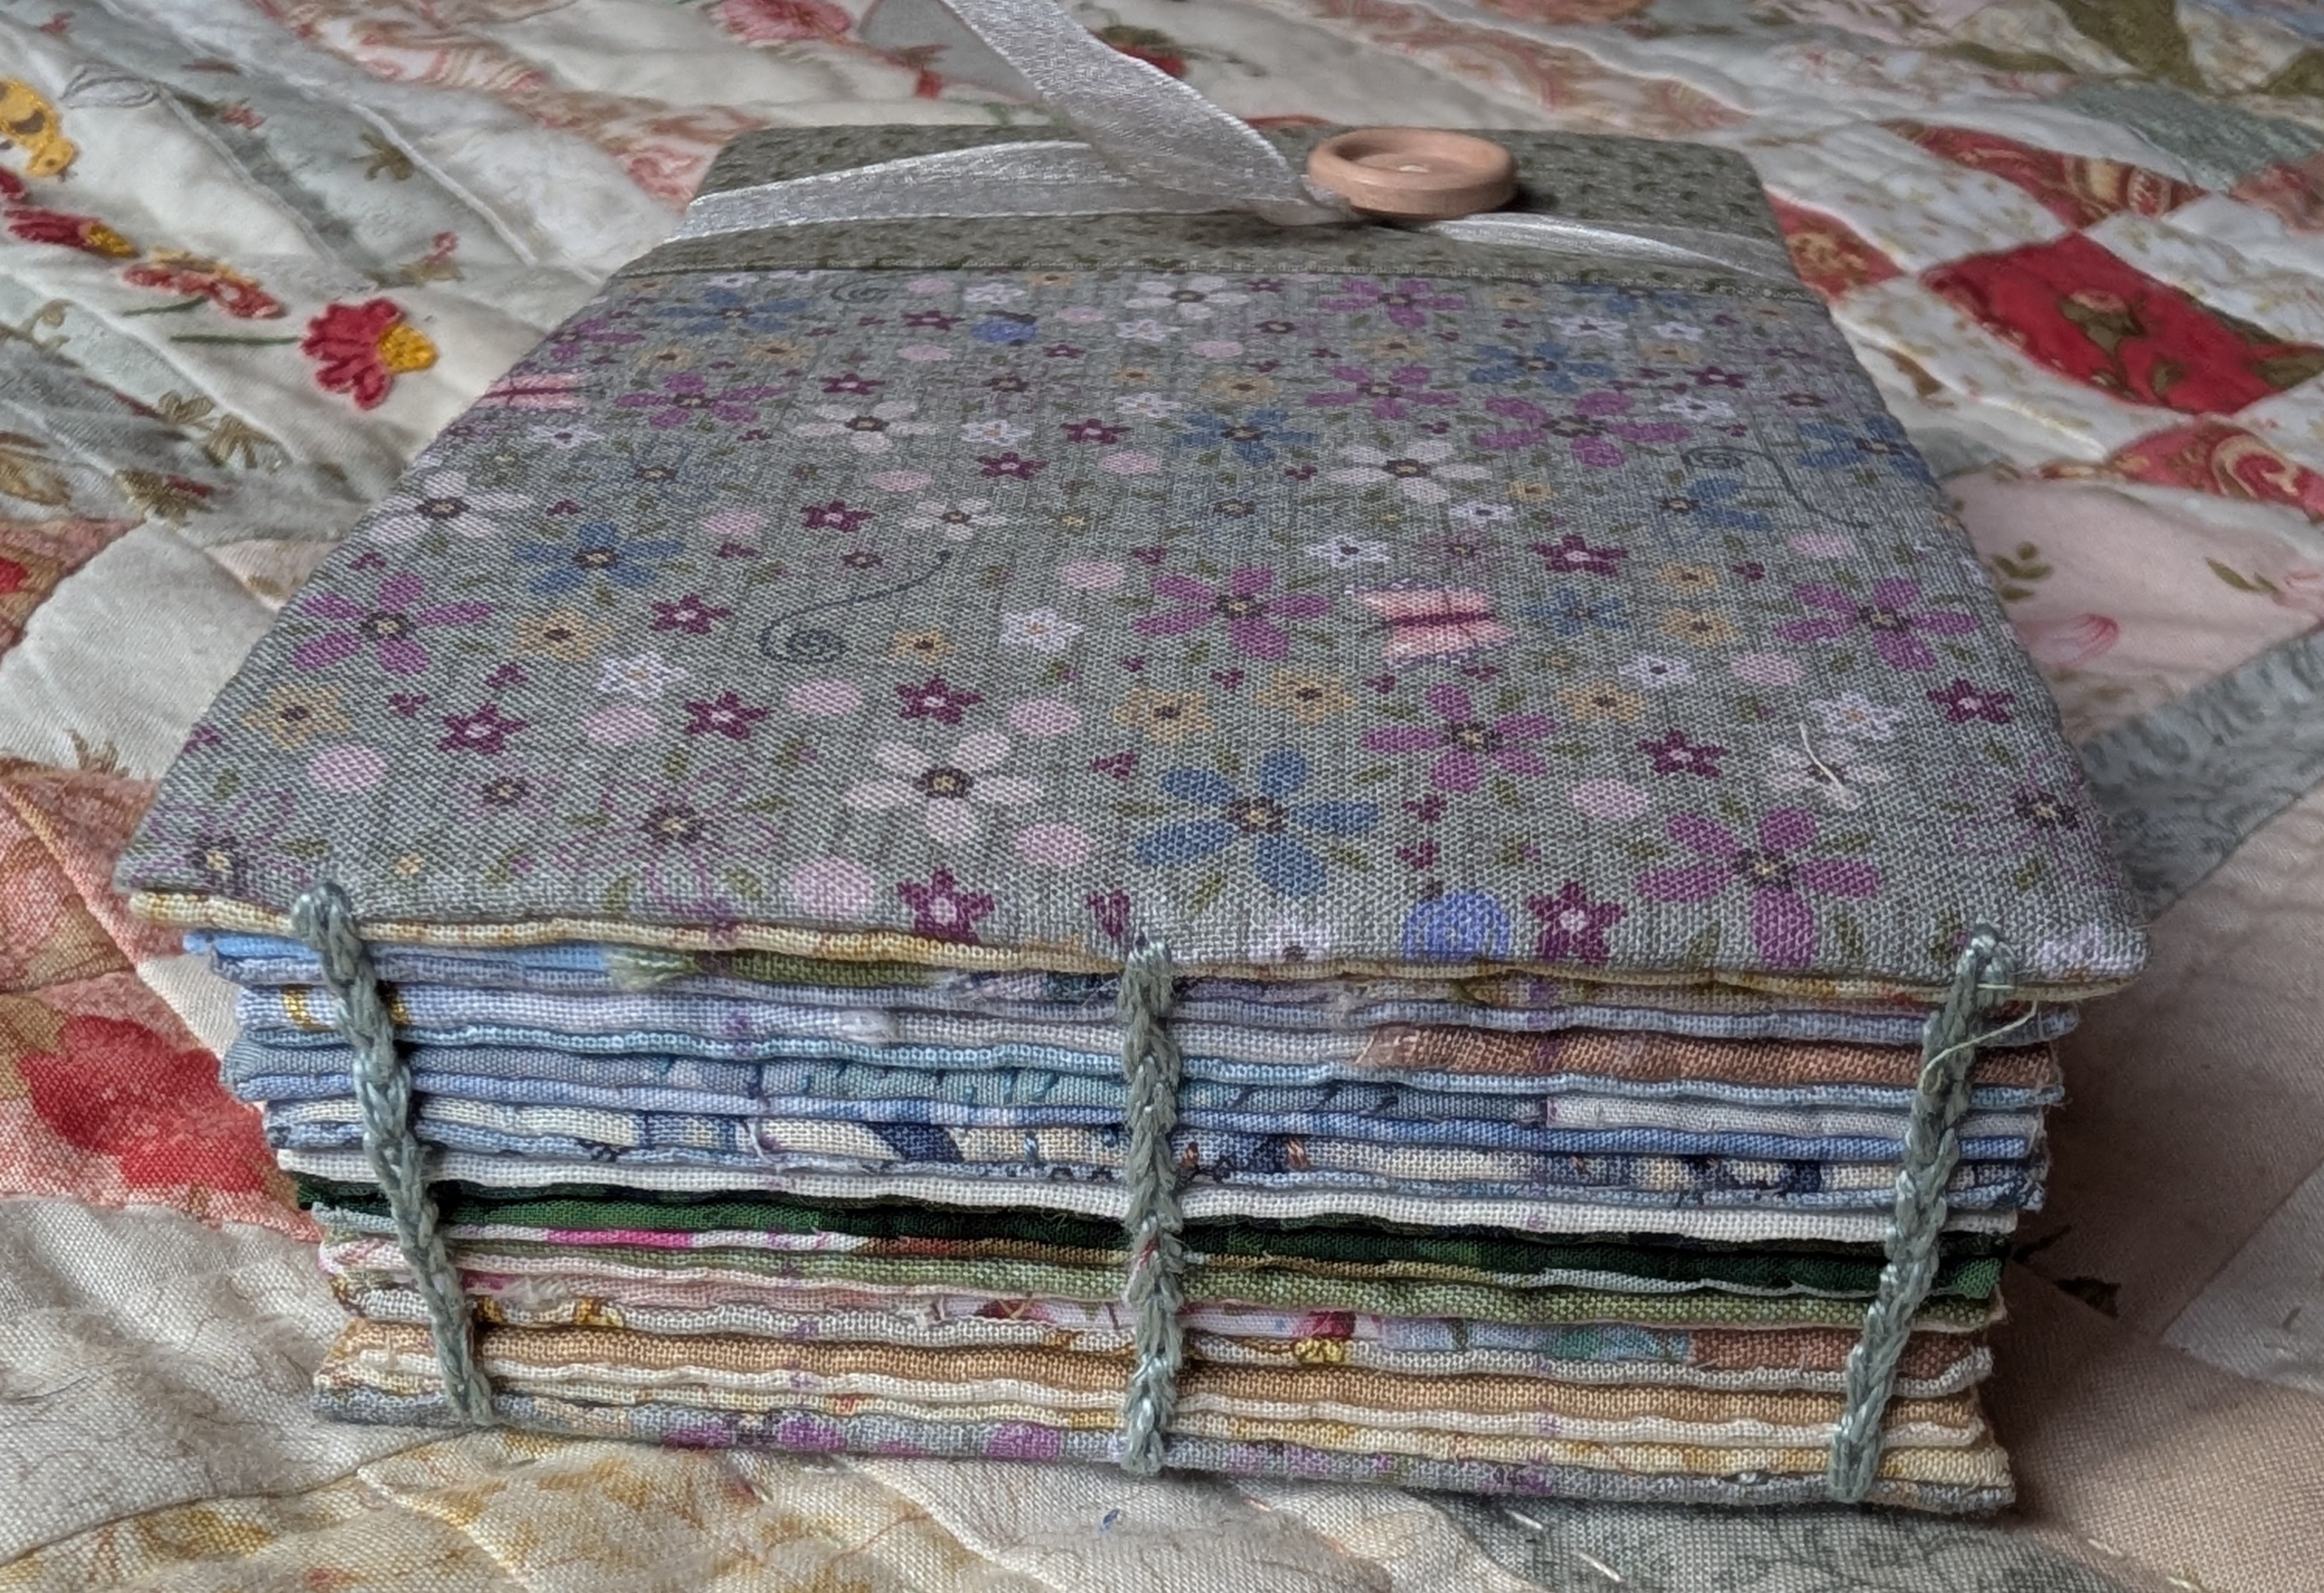
I basically then just stitched a firm chain stitch across the pages, ensuring I caught both sides of the page with the needle. It was fiddly but doable, put it this way, I didn’t fancy going back to do lines 2 and 4, as the more constructed the book was, the harder it was to stitch neatly. I’m pleased with it, I like the way you can see a bit of the stitch from inside.
I like ribbon tied round my books and I certainly felt with this one it needed it to help it stay neat with being a landscape orientation. I found a button in my stash and some organza ribbon, I found a little button to go on the inside to cover up the button stitching. I was thinking of maybe just gluing it over the stitching, but I realised that despite one being twice the size of the other, the holes were in the same place!! This meant I could stitch both buttons on at the same time!
This book has been lovely to stitch and it has introduced me to new ideas and techniques. The designs are all from Rebecca of Featherstitch House, she has some beautiful designs, she was releasing a new design each week, each with a great video and clear instructions. She’s taking a break from designing at the moment for personal reasons, so I do hope she’s soon back stitching and designing soon as she is certainly a very skilled and talented embroiderer.
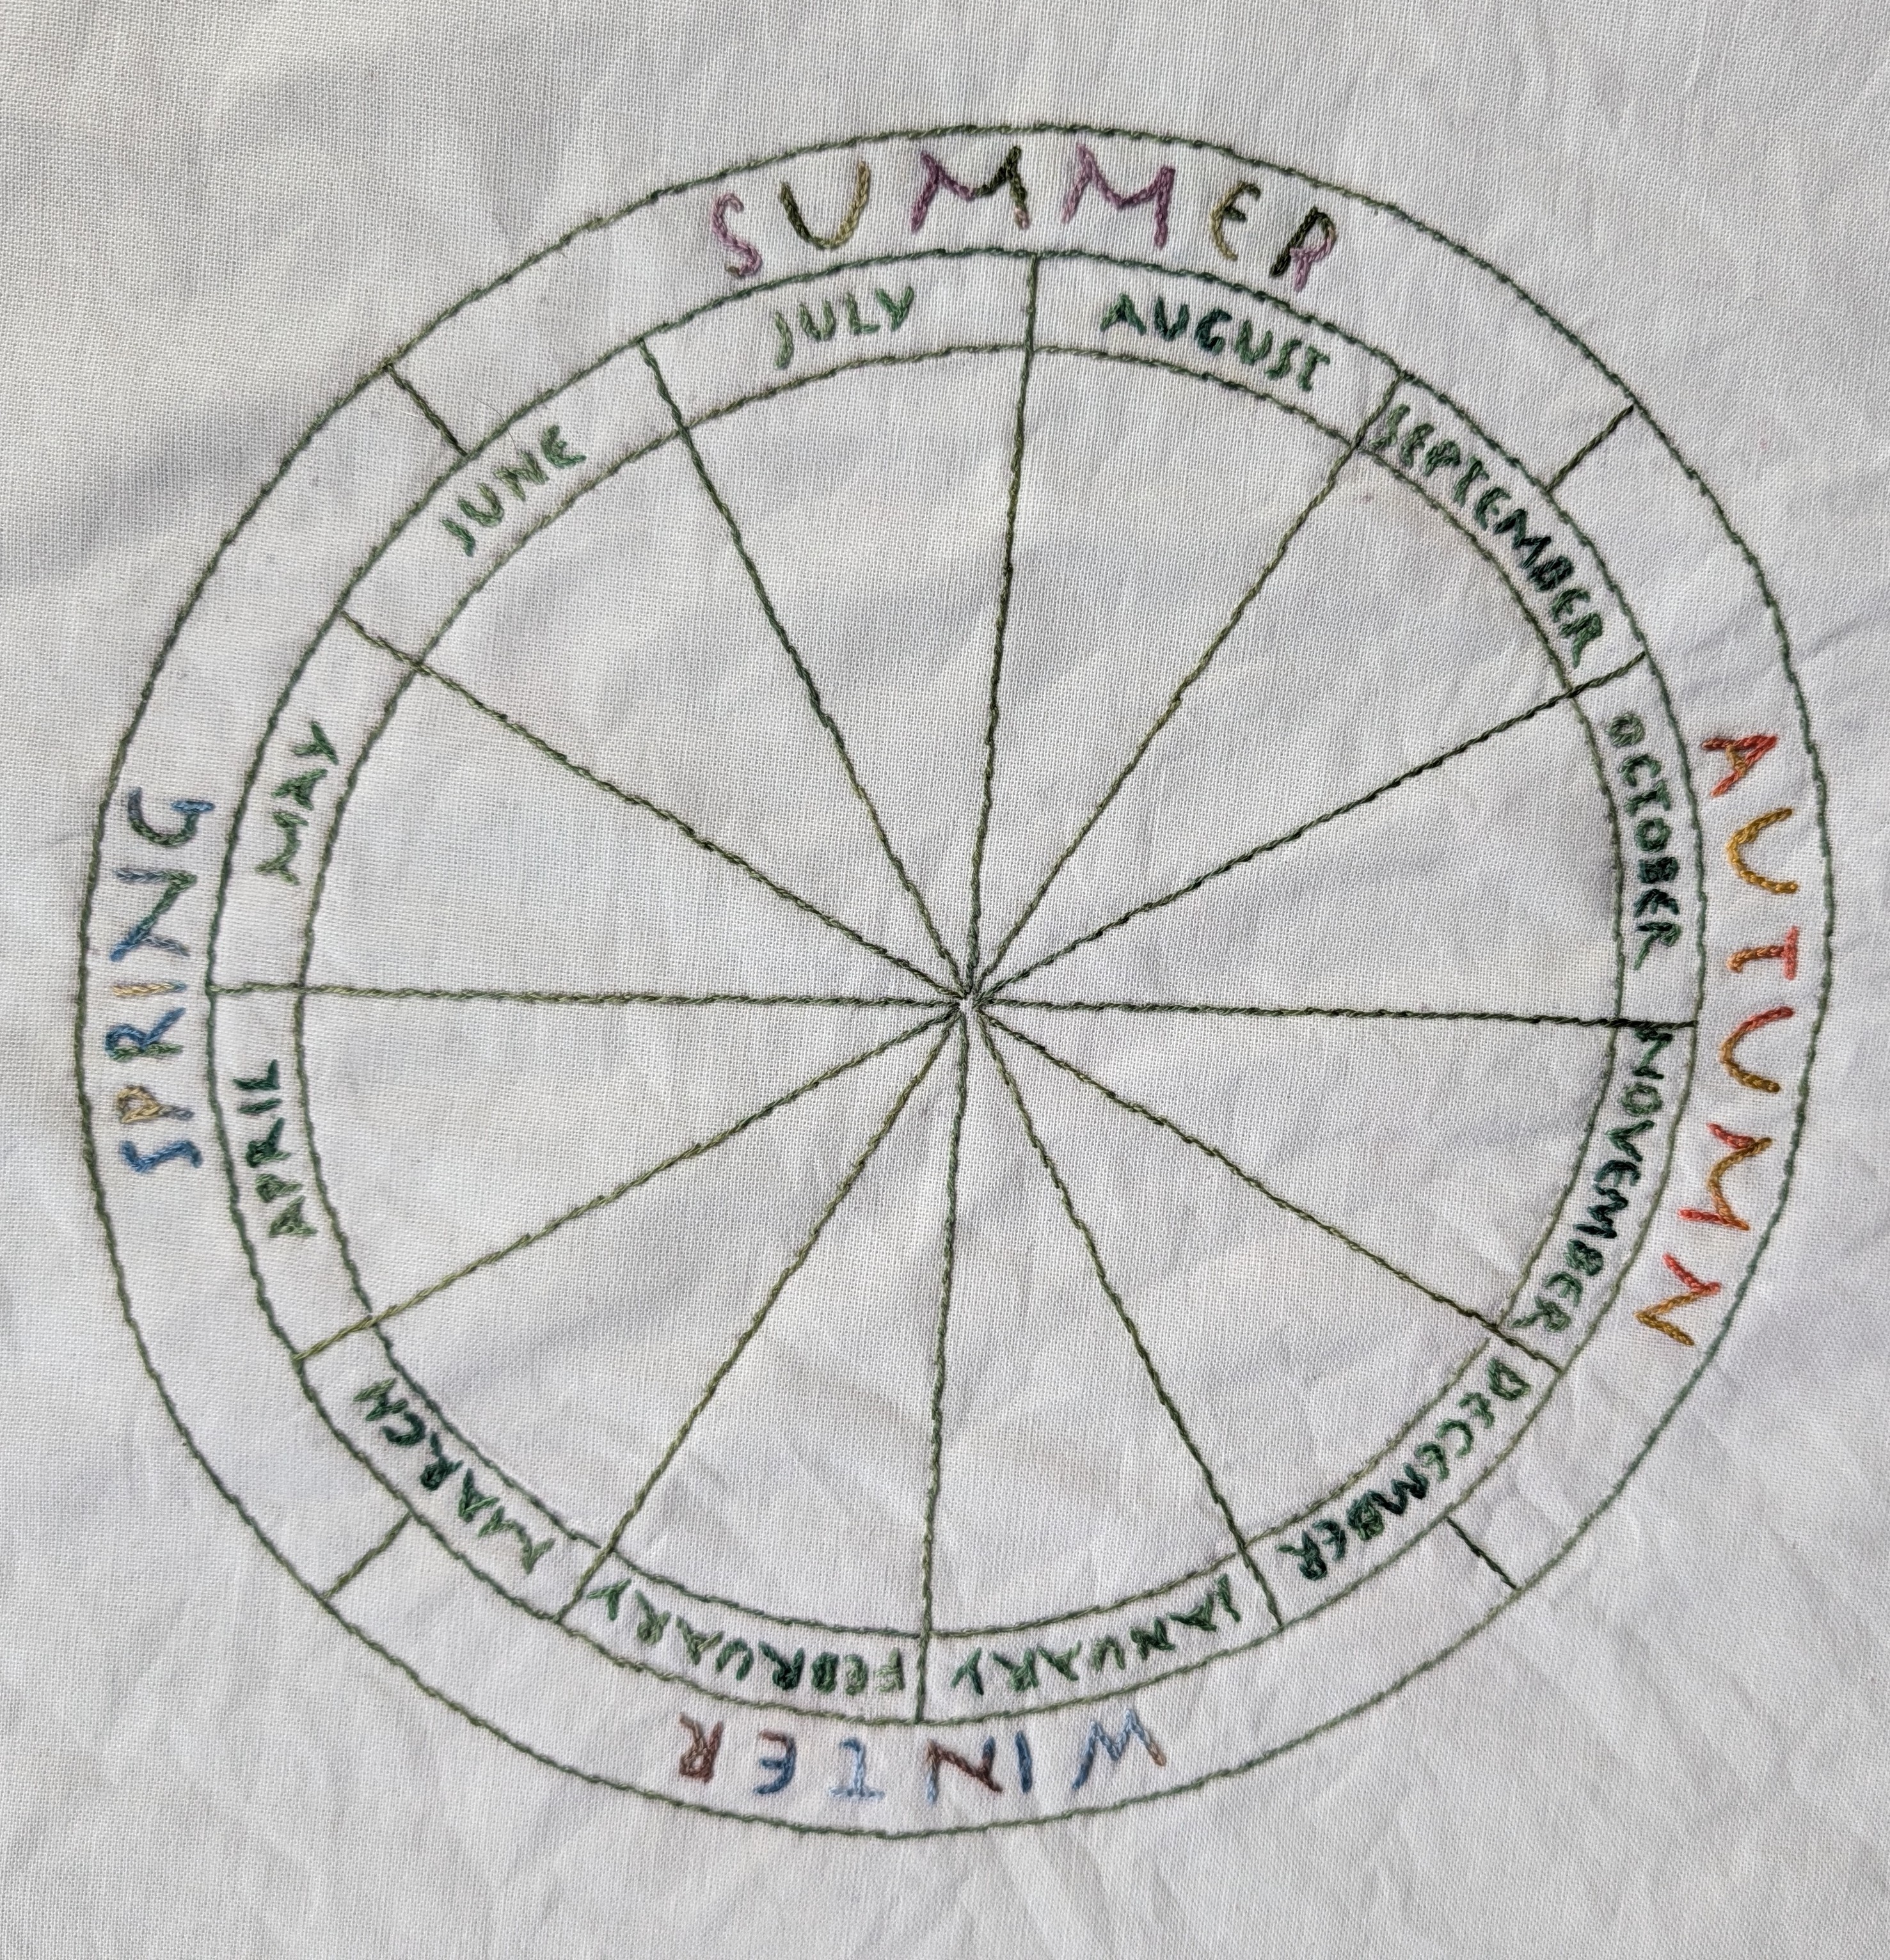
Here’s a quick preview of my next project, a phrenology wheel! I’ve been wanting to do one for a while so I was delighted when my stitch group decided to do them as a group project. We were given the design outline printed on Stick and Stitch which I’ve not used before. It ironed on my chosen fabric, I could then stitch the outline and lettering before rinsing it away. I could have left it on to design on but apparently it can be harder to rinse out if there is lots of stitching on it. I used stem stitch for the spokes, chain stitch for the seasons and split stitch for the months. As you can see I’m two months behind already, so I’m hoping that by having this for my SAL project, I’ll keep going!
This SAL is organised by Avis, we post our progress every three weeks, please follow the links to see what everyone else is stitching.
Our next updates will be published on 22nd March 2026.
Avis, Claire, Kathy, Margaret,
Sunny, Megan, Deborah, Sharon, Daisy, Cathie,
Linda, MaryMargaret, Cindy, Helen


what a work of art!
LikeLiked by 1 person
Beautiful finish, those books have so much work in one piece, absolute treasure.
looking forward to seeing the next update!
LikeLiked by 1 person
Fabulous project and a beautiful finish. A true treasure 🌟♥️🌟
LikeLiked by 1 person
Your book is just lovely, and the new project looks fun. I had to look it up, and was amazed to see about 30 examples!
LikeLiked by 1 person
Thanks Kathy, she released the designs weekly until around September when she had to stop for personal reasons.
LikeLiked by 1 person
Your work is beautiful. Thank you for posting about this project. I have just purchased January. Warm wishes from Australia.
LikeLiked by 1 person
Thank you, I hope you enjoy stitching it.
LikeLike
What a fabulous finish. A treasure for you and future generations to admire 🙂
LikeLike
Thank you, I enjoyed making this one.
LikeLike
Your book is so beautiful, and I love how you bound and finished it. You create such treasures! Your next project is gorgeous as well.
LikeLiked by 1 person
Thank you, I enjoyed making it.
LikeLike
Beautiful bound and finished
LikeLiked by 1 person
Thank you, I’m pleased with it.
LikeLiked by 1 person
Your book is beautifully finished. I love seeing the books that your work on and assemble. I look forward to following your stitching on your next project.
LikeLiked by 1 person
Thank you, I enjoyed making it.
LikeLike
Congratulations and the cover looks gorgeous!
LikeLike