
Whilst I was on holiday in Cornwall I was also busy finishing an embroidery for Skipton Stitchers, it was meant to be handed in at the June meeting but with the neck issues I was having I didn’t manage to finish (or start it!) in time. I knew I was holding things up so I stitched it and posted it from Cornwall.
This was a group project, a local landmark, Skipton Castle, has agreed to display a piece of our work in the castle. Skipton Castle is an amazing place, it’s over 900 years old and it’s one of the most complete and best preserved medieval castles in the UK, well worth a visit if you’re in the area. We selected a photo of the central courtyard which was then enlarged to about 40 x 32″. It was then cut up into twenty 8″ squares, we were given the piece of photo and some calico, our task was then to reproduce it in stitch as accurately as possible.
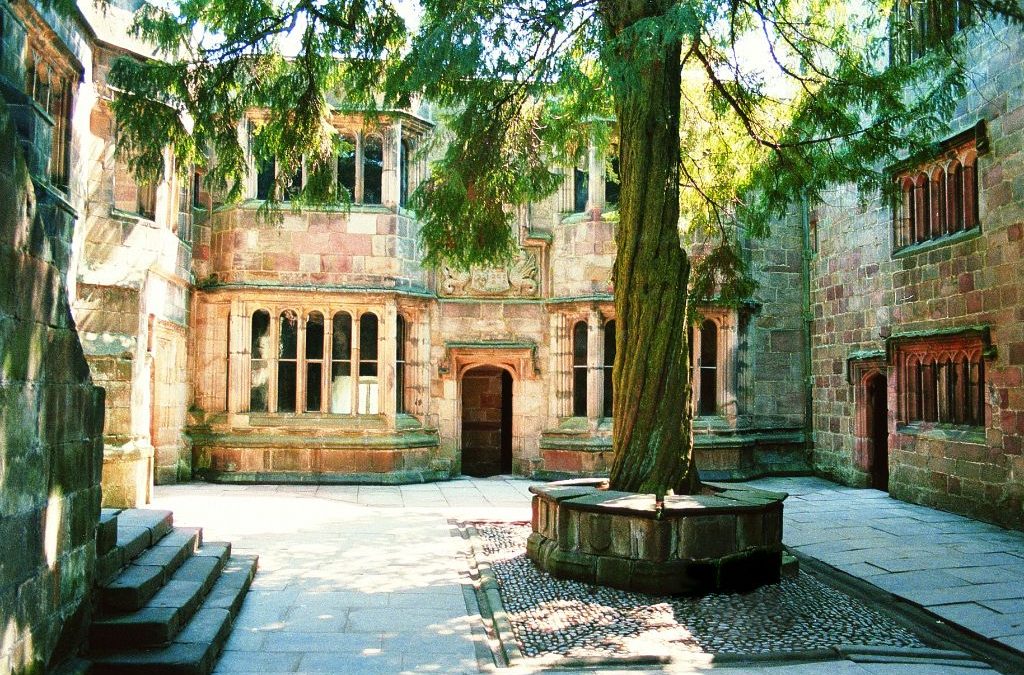
The important thing with these squares was to make them true to size and any major lines in the picture needed to be just right so they would line up with the next block. Now they are all complete they will be stitched together to make one big picture.
We couldn’t choose a square, we were given a brown envelope with a picture and calico inside, presumably so we didn’t all want ‘easier’ squares. My square at first glance seemed fairly straight forward, it’s paving stones in the courtyard, the bit between the steps and the cobbles.. I was quite relieved when I saw how complicated some of the areas would be! I suppose it was straight forward really, it just took a lot longer than I anticipated – it takes a lot of stitching to fill an 8″ square!
I decided to paint the fabric to get the main colour and then embroider the paving stones. My first attempt was painting the actual calico but with the ecru colour of the calico it just looked wrong.
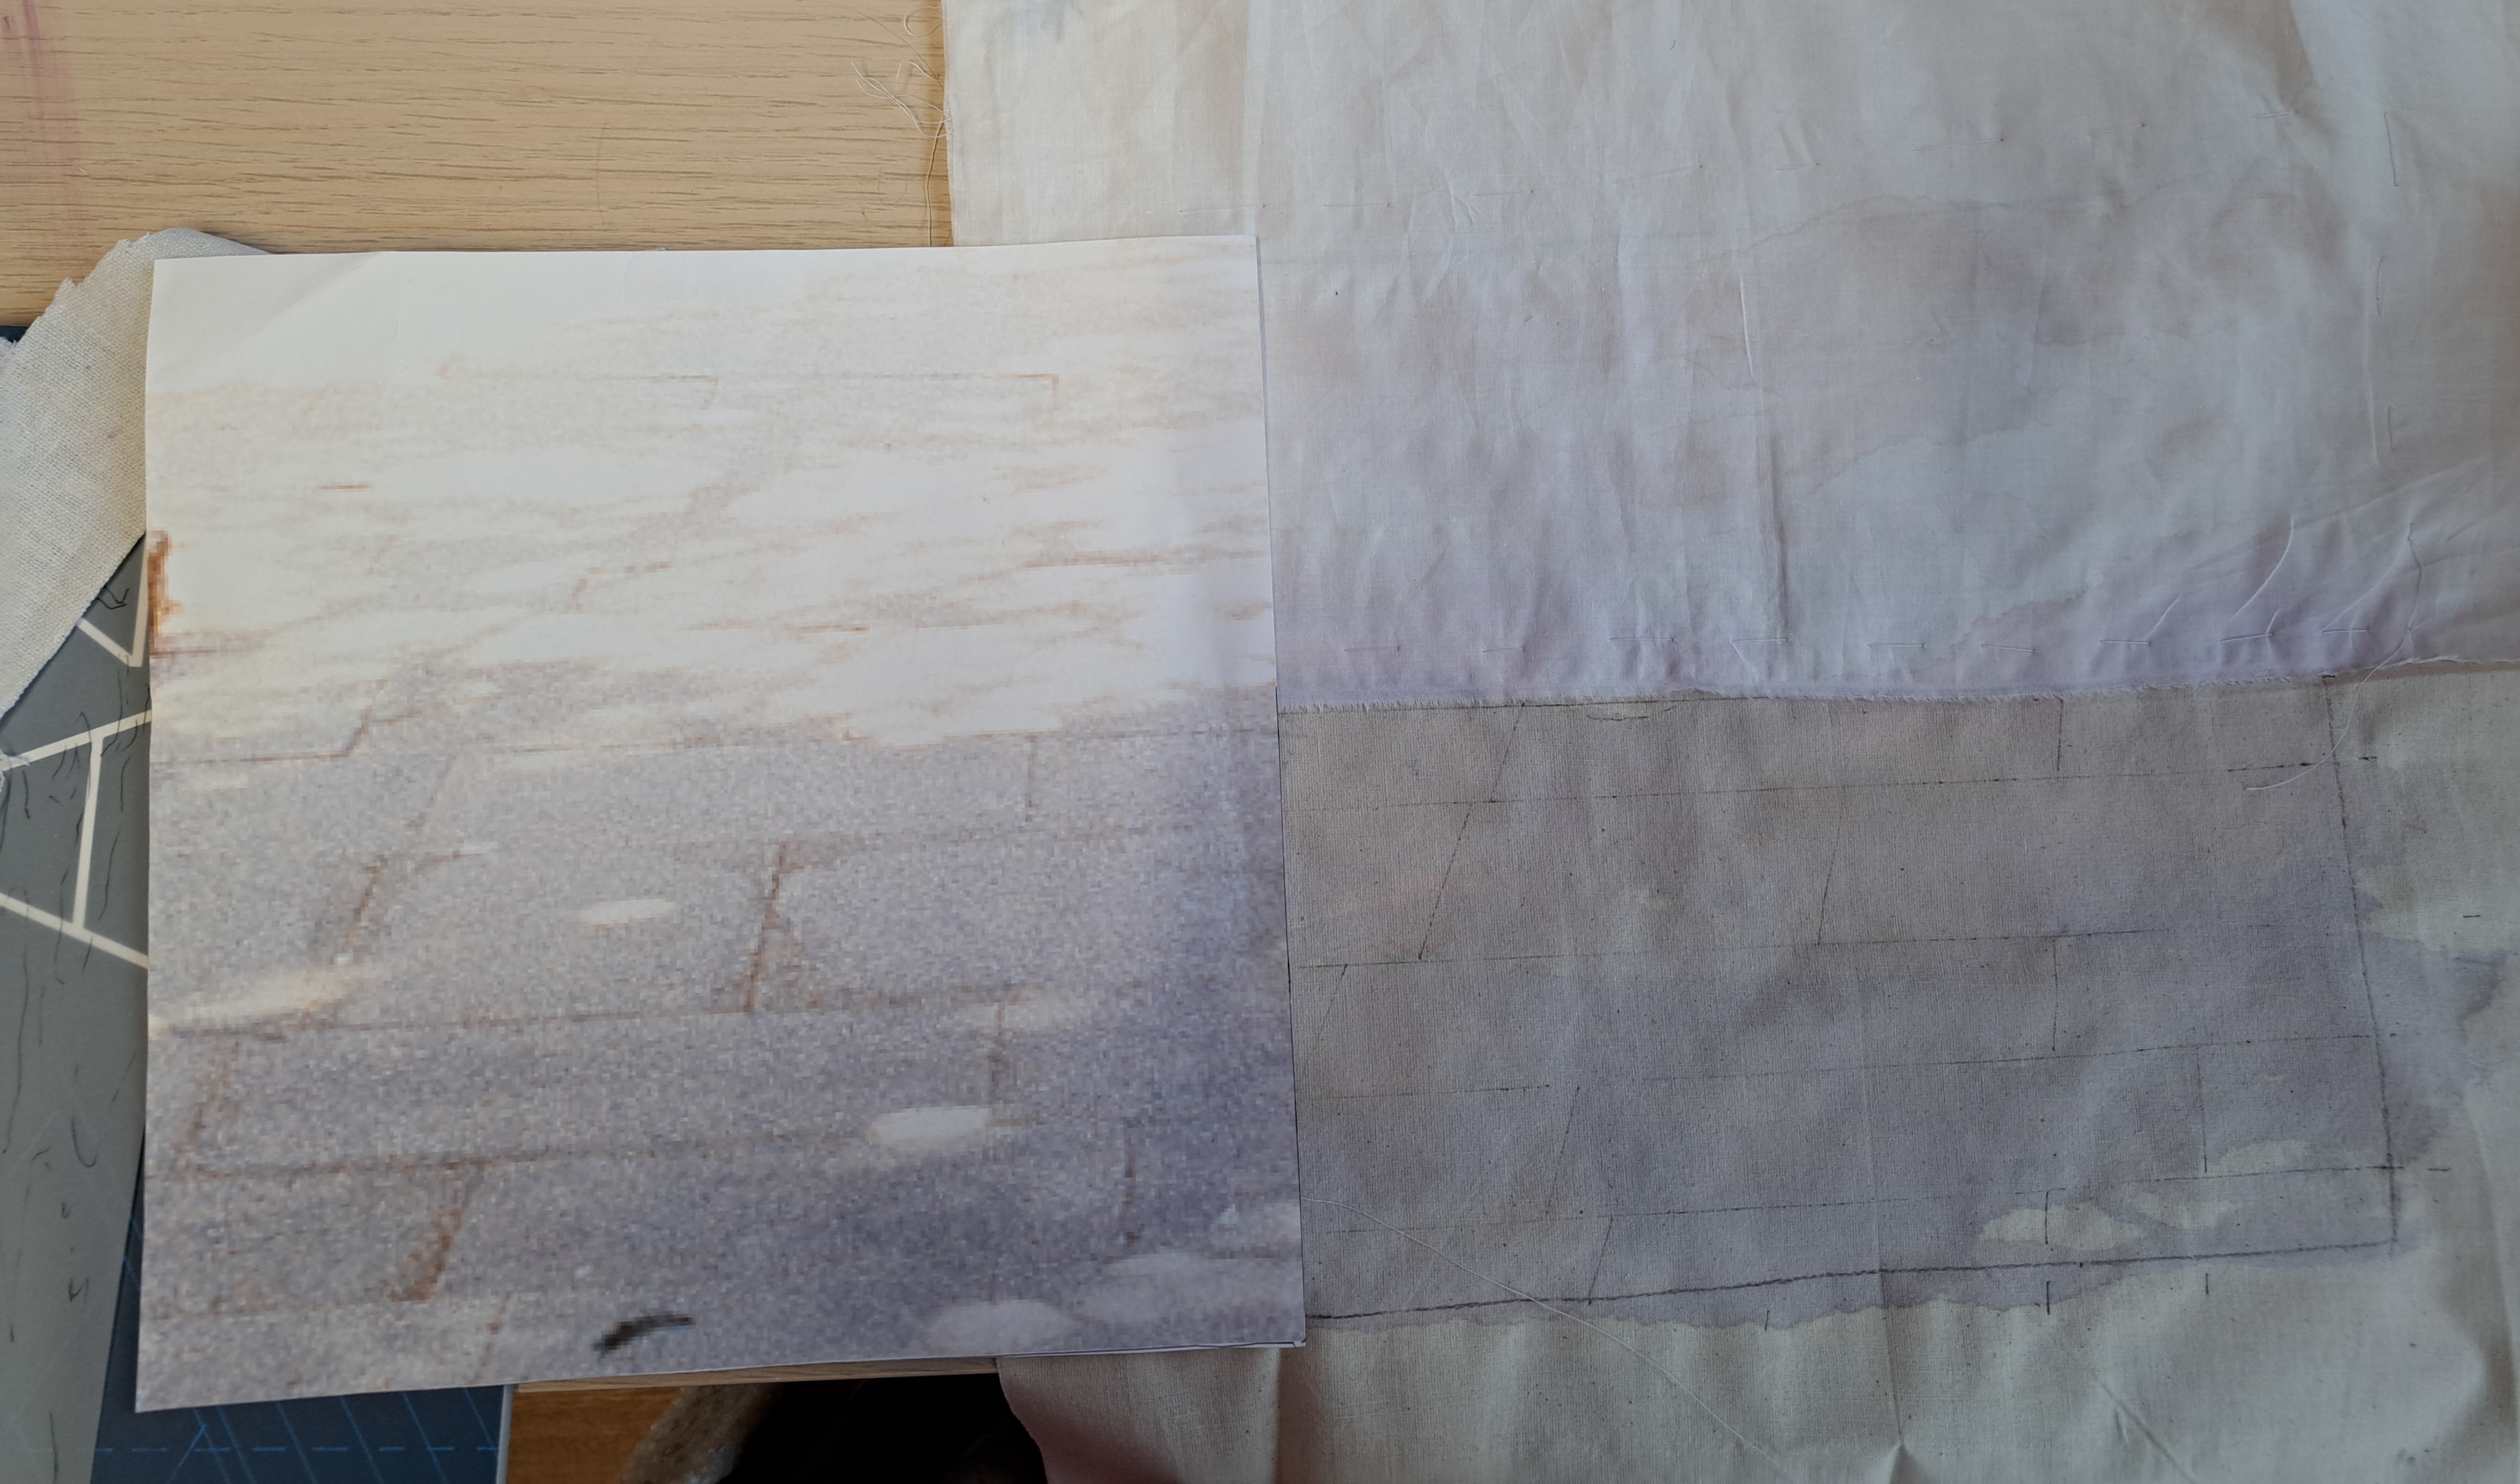
I then decided to paint some fairly textured cotton/linen which does give a nice finish for the Yorkshire stone slabs. The white fabric I had overlaid for the sunny bit still wasn’t light enough so I laid another piece on top!
I sketched the main outlines with a Frixion pen having made sure that they lined up with the photo. I then started embroidering. This is how it look just before I went on holiday…

I used several stitches, running stitch, stem stitch, chain stitch and split stitch, using a variety of threads and colours to try and get the right effect. I decided to miss off the dark thing off the bottom, I wasn’t sure what it was but I was pretty sure if I tried to stitch it it would probably look like a dog poop!! I did check on the original and it didn’t look important to the overall picture!
I probably found the light bits the trickiest as I didn’t really want to embroider the whole of the light shadowy area but I needed to get the effect. In the end I embroidered round the edges of the pattern on the light area and also did some stitching in white.
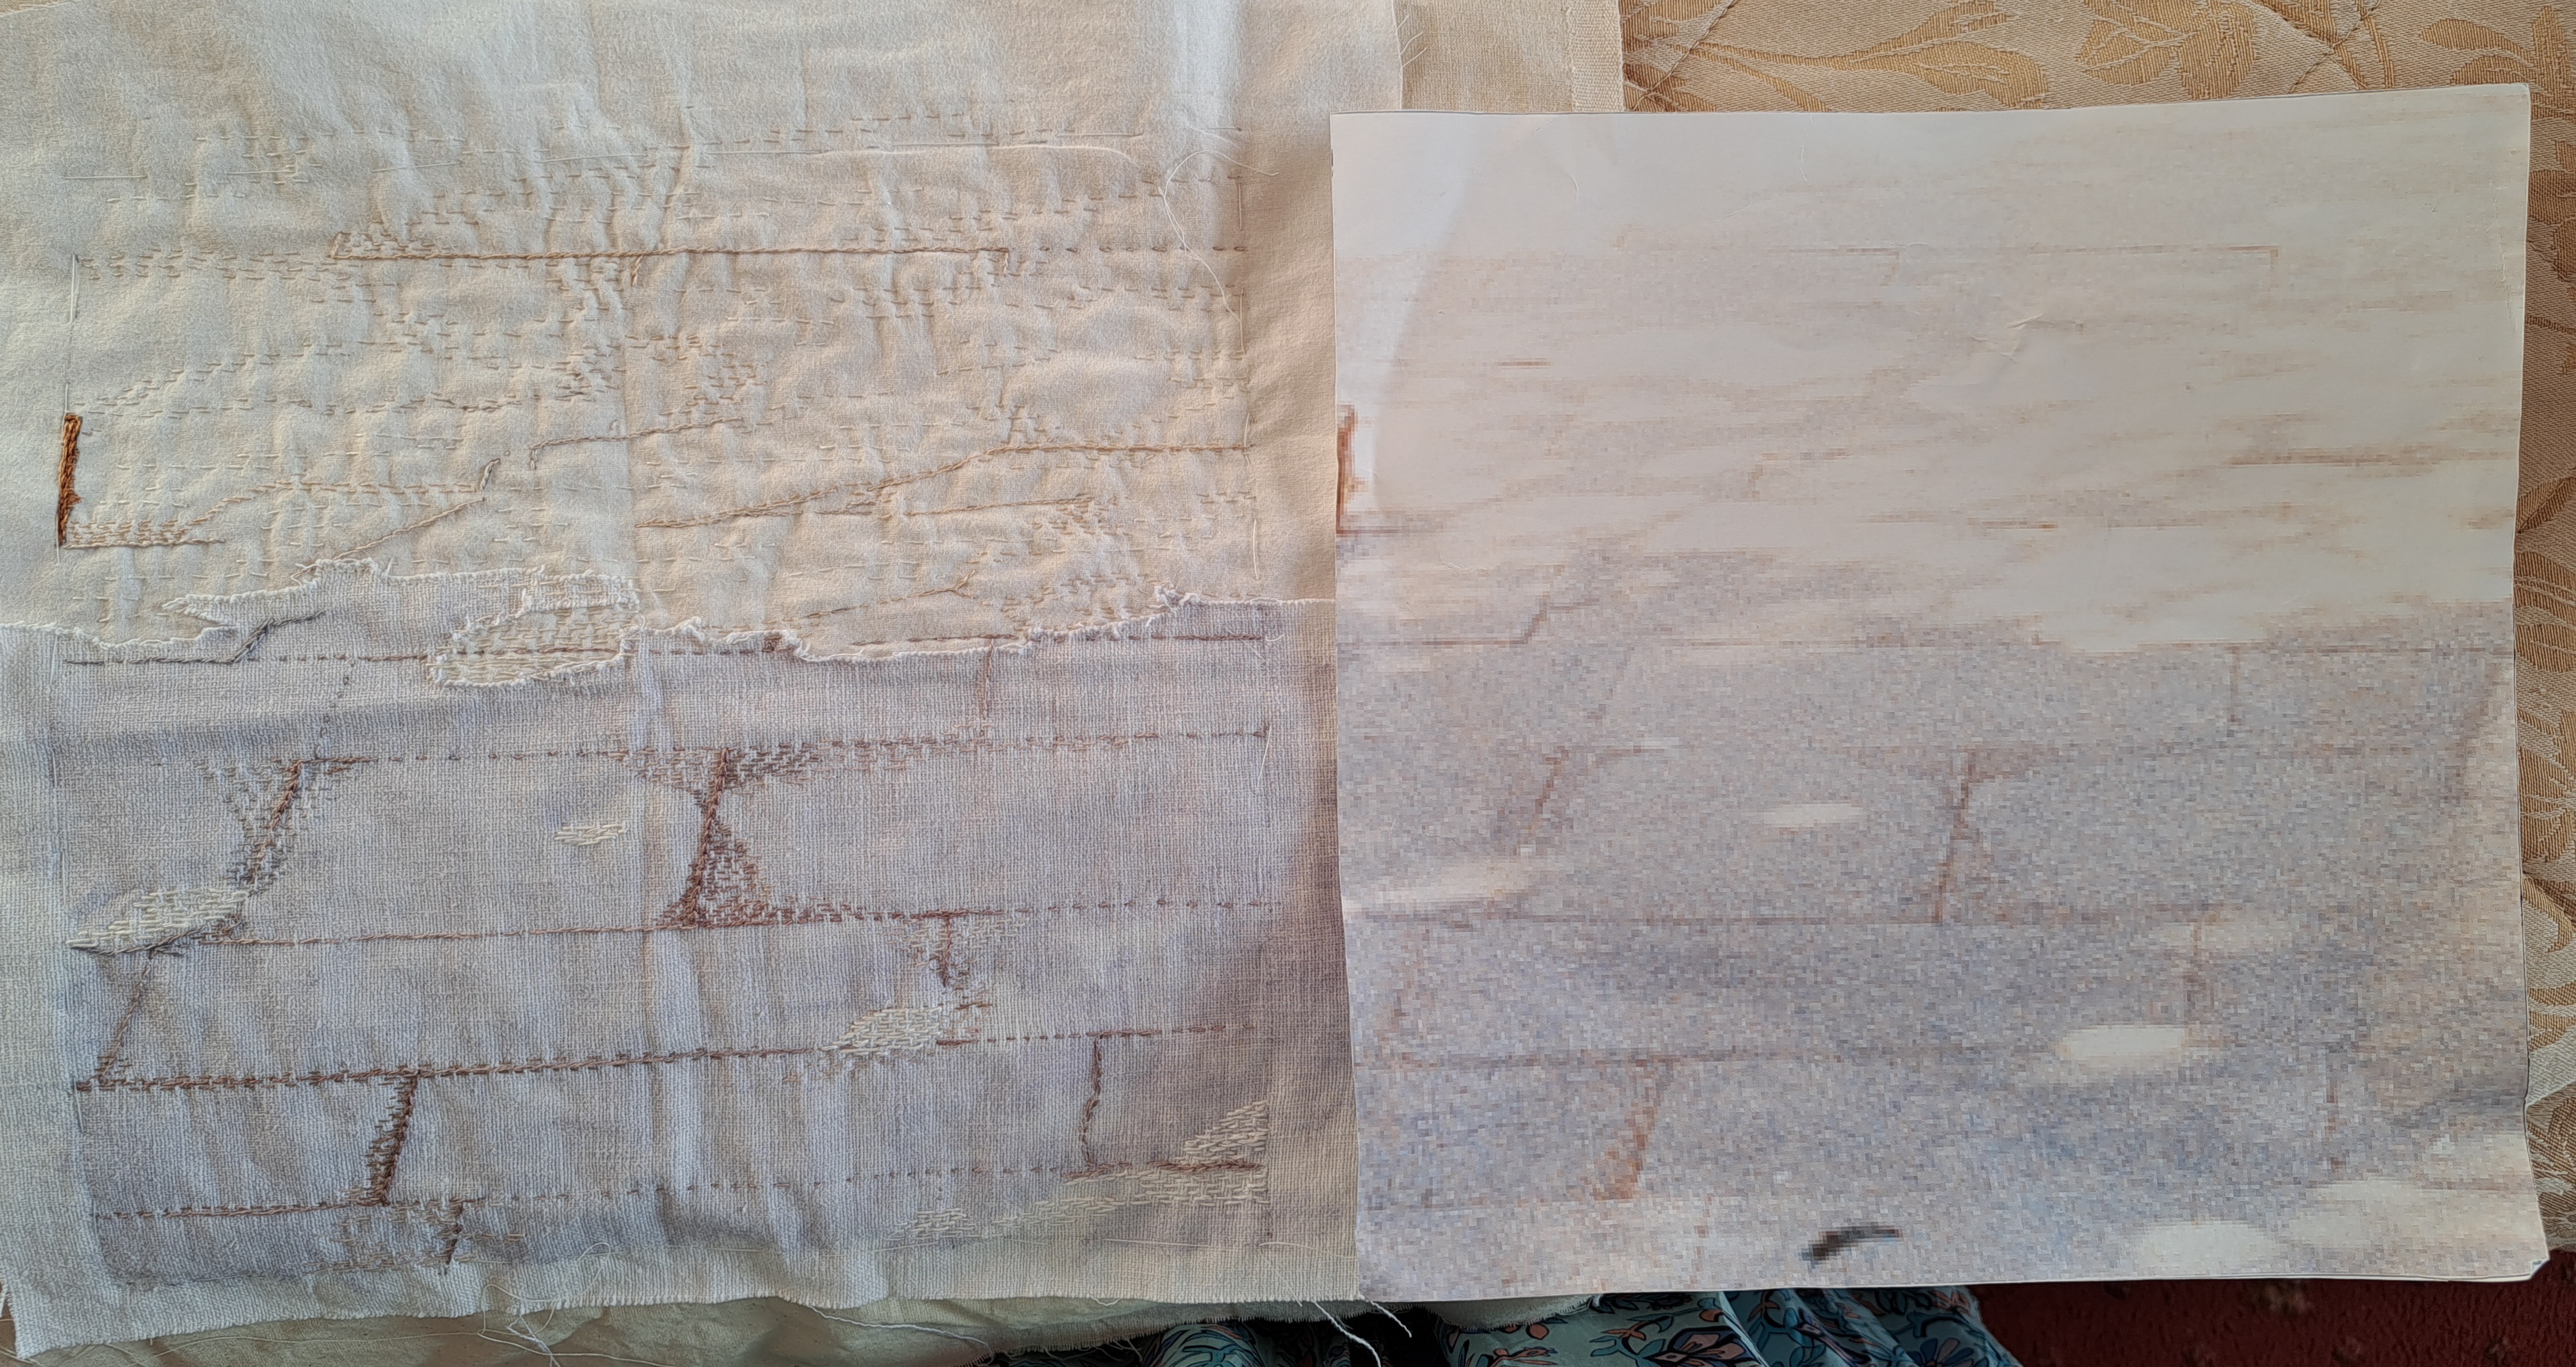
So this is the finished piece, photographed on a hotel bed, I’d removed the Frixion pen with a hairdryer but I didn’t have access to an iron to give it a good press. I was pretty pleased with it in the end. It looks quite purple but then so does the photo, so I’m just hoping it looks OK with it’s neighbours. It was also hard to get the tonal values right, some of my lines and shadows look a little dark but they were actually stitched in pretty light shades, much lighter and they didn’t show up at all. Here’s a closer photo of the actual piece…
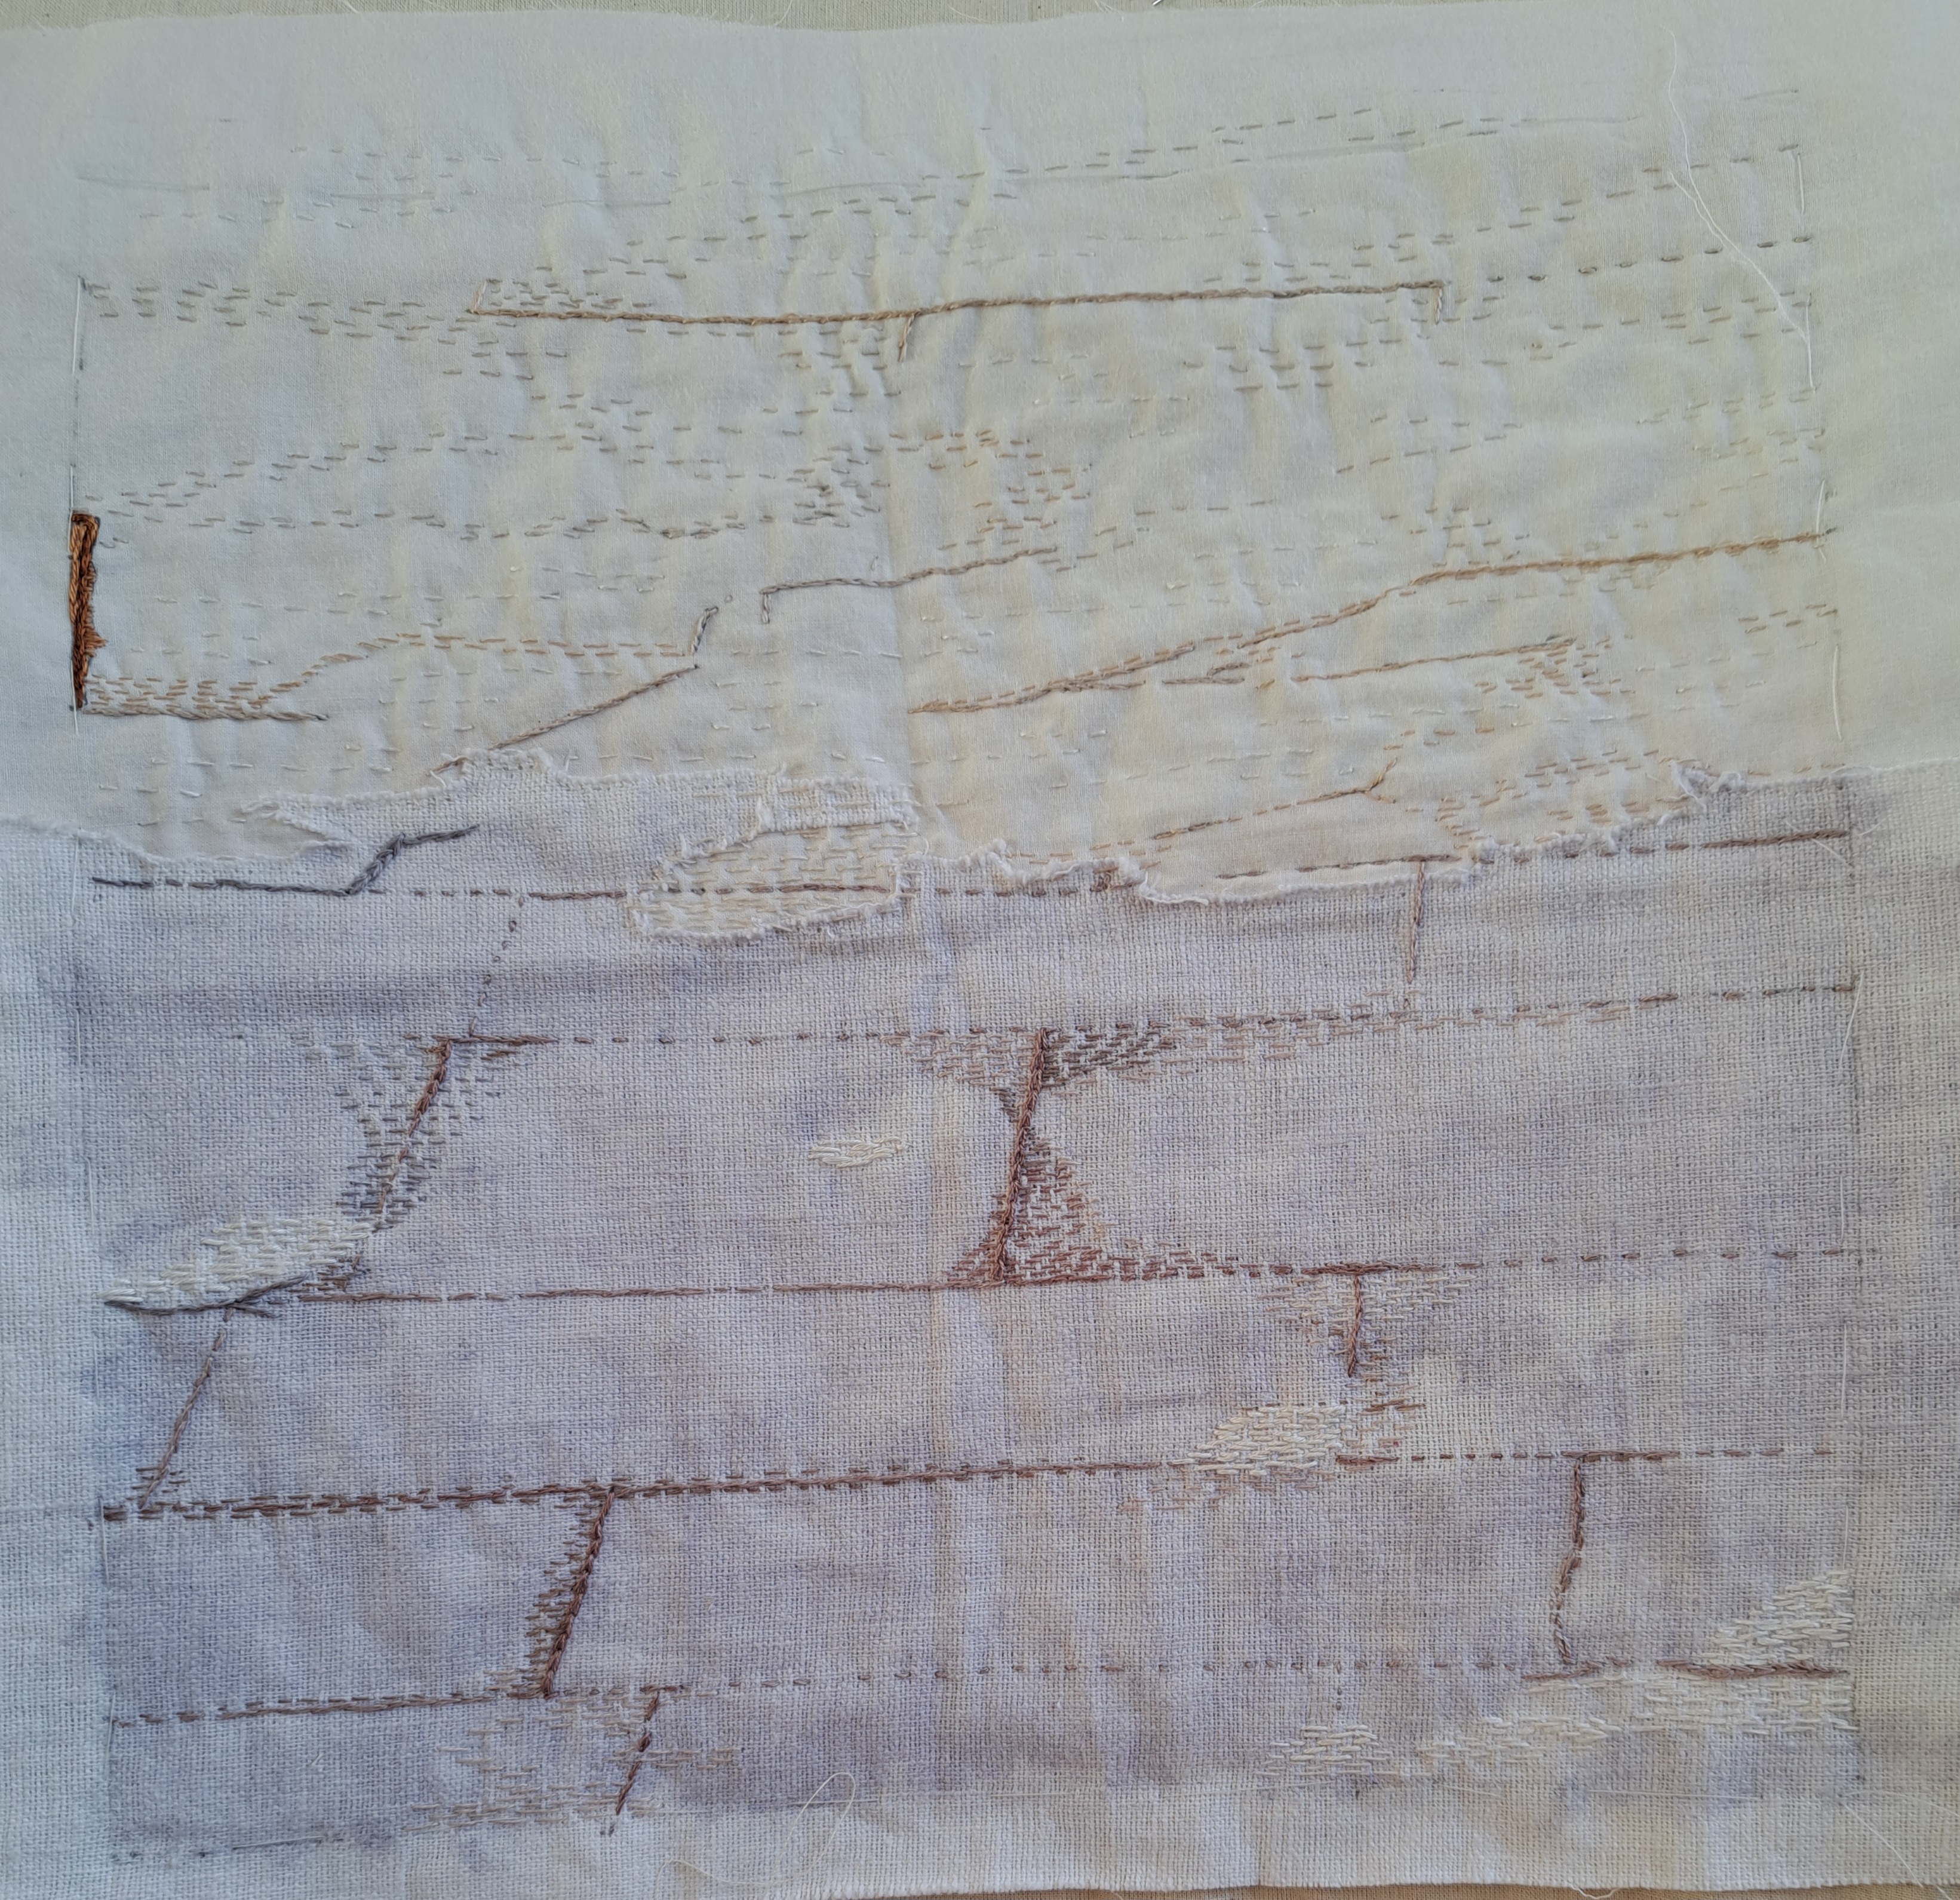
It doesn’t look much stitching when I see it now but over 8″ that’s a lot of little stitches!! I was glad to get it finished and in the post, just in time too as I got a message that day asking how I was doing with it so I was glad to be able to reply that it was in the hands of Royal Mail – who delivered it the next day! When the final piece is finished I’ll post a photo.


What a fun project, Margaret! It looks like you did a great job with your creative piece! 🙂
LikeLiked by 1 person
Thank you, I’ll hopefully see how it fits on Monday 🙂
LikeLiked by 1 person
I’d say you got one of the harder pieces, personally. It’s easy to work with features and shapes, but such delicate lines and light and shade would be more challenging.
LikeLiked by 1 person
Thanks Kate, I did find it quite hard because of the lack of anything concrete. I have to confess that it became quite a chore in the end, but hopefully the finished result will be worth it 🙂
LikeLiked by 1 person
I agree with Kate – yours was a difficult task, and you’ve done marvellously with it. Can’t wait to see the whole thing. What a fantastic project!
LikeLiked by 1 person
Thanks, it wasn’t easy!
LikeLiked by 1 person
An amazing project to be part of. You did a great job of light and dark. Can’t wait to see the finished piece
LikeLiked by 1 person
Thanks Jane, hopefully we might see the initial layout of Skipton Castle on Monday
LikeLike
Great job Margaret – you’ve achieved the shading effect really well.
I see you were down in the South West. Where did you get to in Cornwall?
LikeLiked by 1 person
Thank you, we had 3 nights near Charlestown, 1 night in Penzance and 3 nights in Boscastle, lots of driving for my OH but we had a good time 🙂
LikeLike
what an incredible idea! a giant embroidery kigsaw puzzle of sorts ^^
Your square looks remarkably accurate . . . looking forward to you showing what the complete masterpiece looks like
LikeLiked by 1 person
I think it’s a great idea, it’s just fingers crossed time that it all matches up with it’s neighbouring blocks.
LikeLike
I don’t know about easy, I think that is probably one of the harder squares! You’ve done it beautifully of course.
LikeLike