As I have a couple of weeks recuperating from sinus surgery I decided I may as well be productive, I’m not one for sitting and watching day time TV. I decided to make a concerted effort on my Secret Garden quilt this is one I started last year, it’s a BOM by Raggedy Ruff Designs, I’d done the first panel and then stopped!
Whilst I was starting the decluttering of my sewing room I nosied in my ‘kit box’, which is full of kits waiting to be made, quilting ones, sewing ones and of course embroidery. I realised I have quite alot of Raggedy Ruff designs waiting to be made, three quilts, a stool, a lampshade, a clock…and a few others! I follow Andrea (the designer) on facebook, when she does another design she only makes so many kits up, once they’re gone it’s pattern only, so I tend to buy them, her designs are gorgeous. Here’s a few I’ve done before…


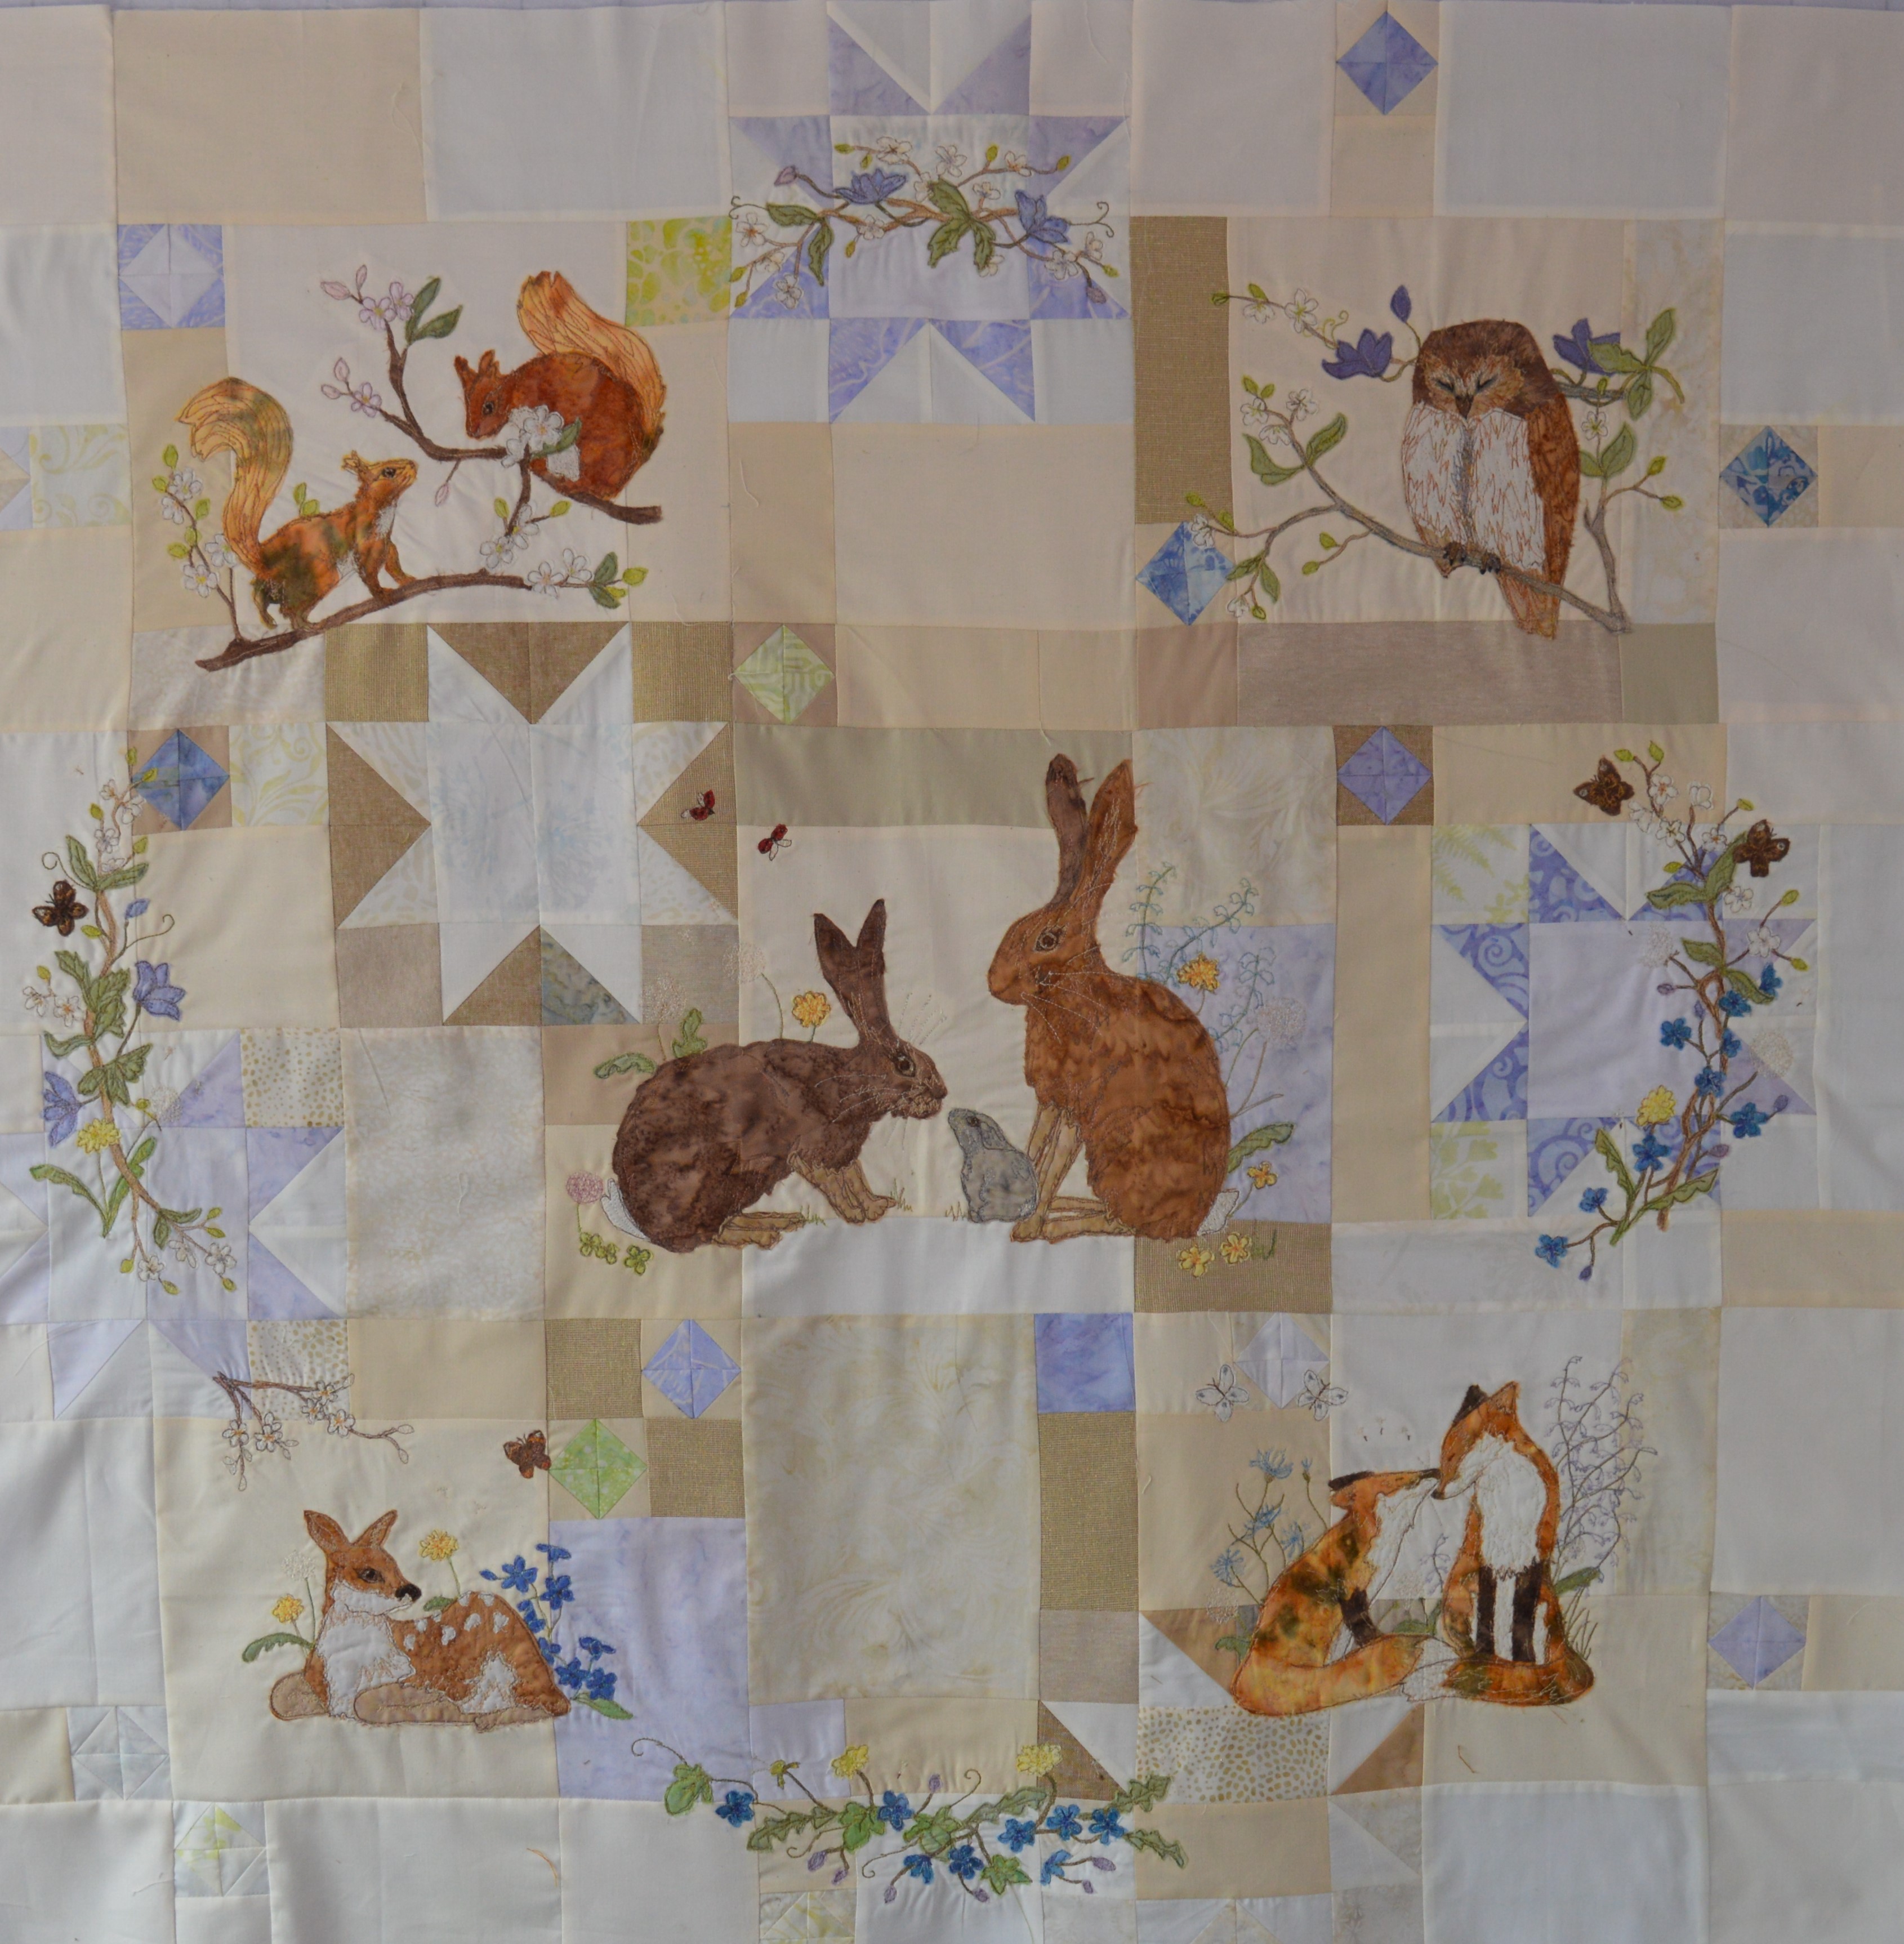
So I decided to start back on the Secret Garden quilt, I think I stopped because it is the fiddliest one I’ve done so far, it’s a very busy design. Although I’ve done quite a few of her designs, they still feel out of my comfort zone, so it doesn’t take much for me to prevaricate too much!!
I rashly thought if I could do a block a day I’d have the quilt finished…I’d forgotten about brain fog after general anaesthetics! The first block took nearer three days!
The first task is to make the background, I love the backgrounds that Andrea creates, full of little spots of interest without taking over the design. Andreas instructions are easy to understand but probably it’s fair to say more complex designs like these are aimed at someone who knows vaguely what they are doing with quilting.
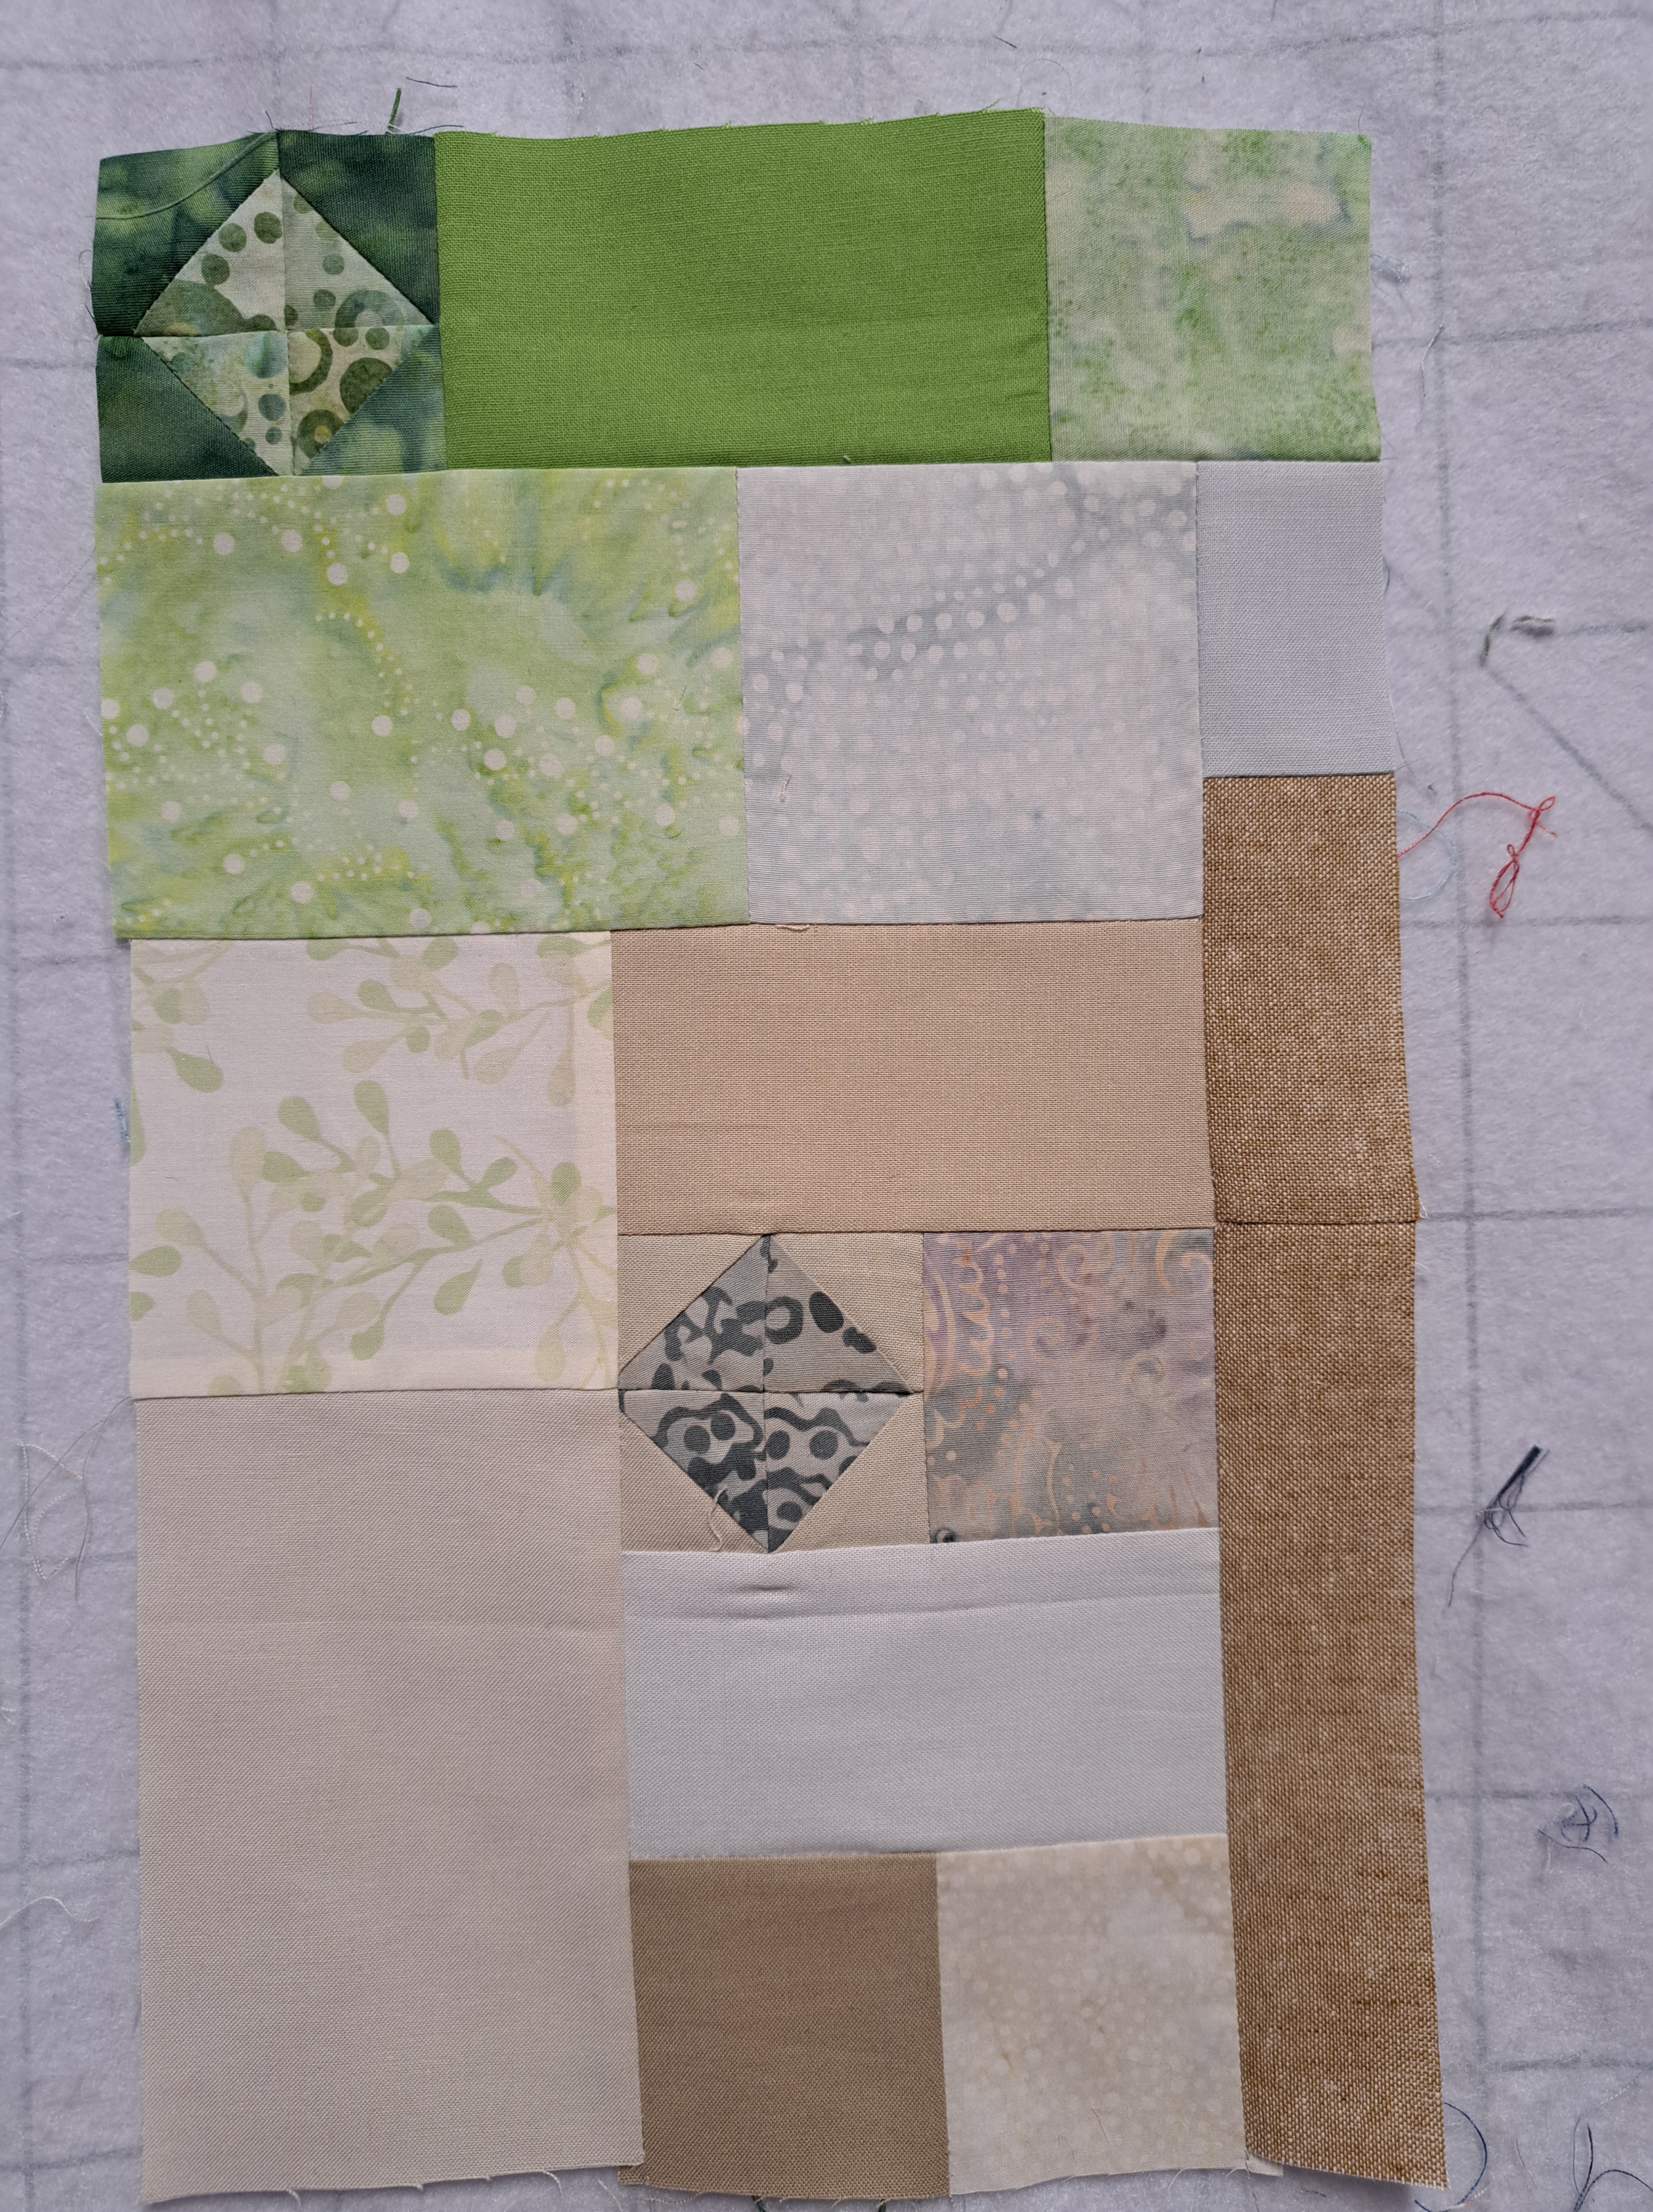
Next, the design elements are traced onto freezer paper, these are ironed onto the chosen piece of fabric so they can be neatly cut out. batik fabric is a tighter weave than standard quilting cotton so it doesn’t fray as much. Once these are all in place I put a tiny blob of fabric glue under each one just to hold it in place before I stitch round. Andrea doesn’t use any glue, she just holds them in place, I’m not that brave!

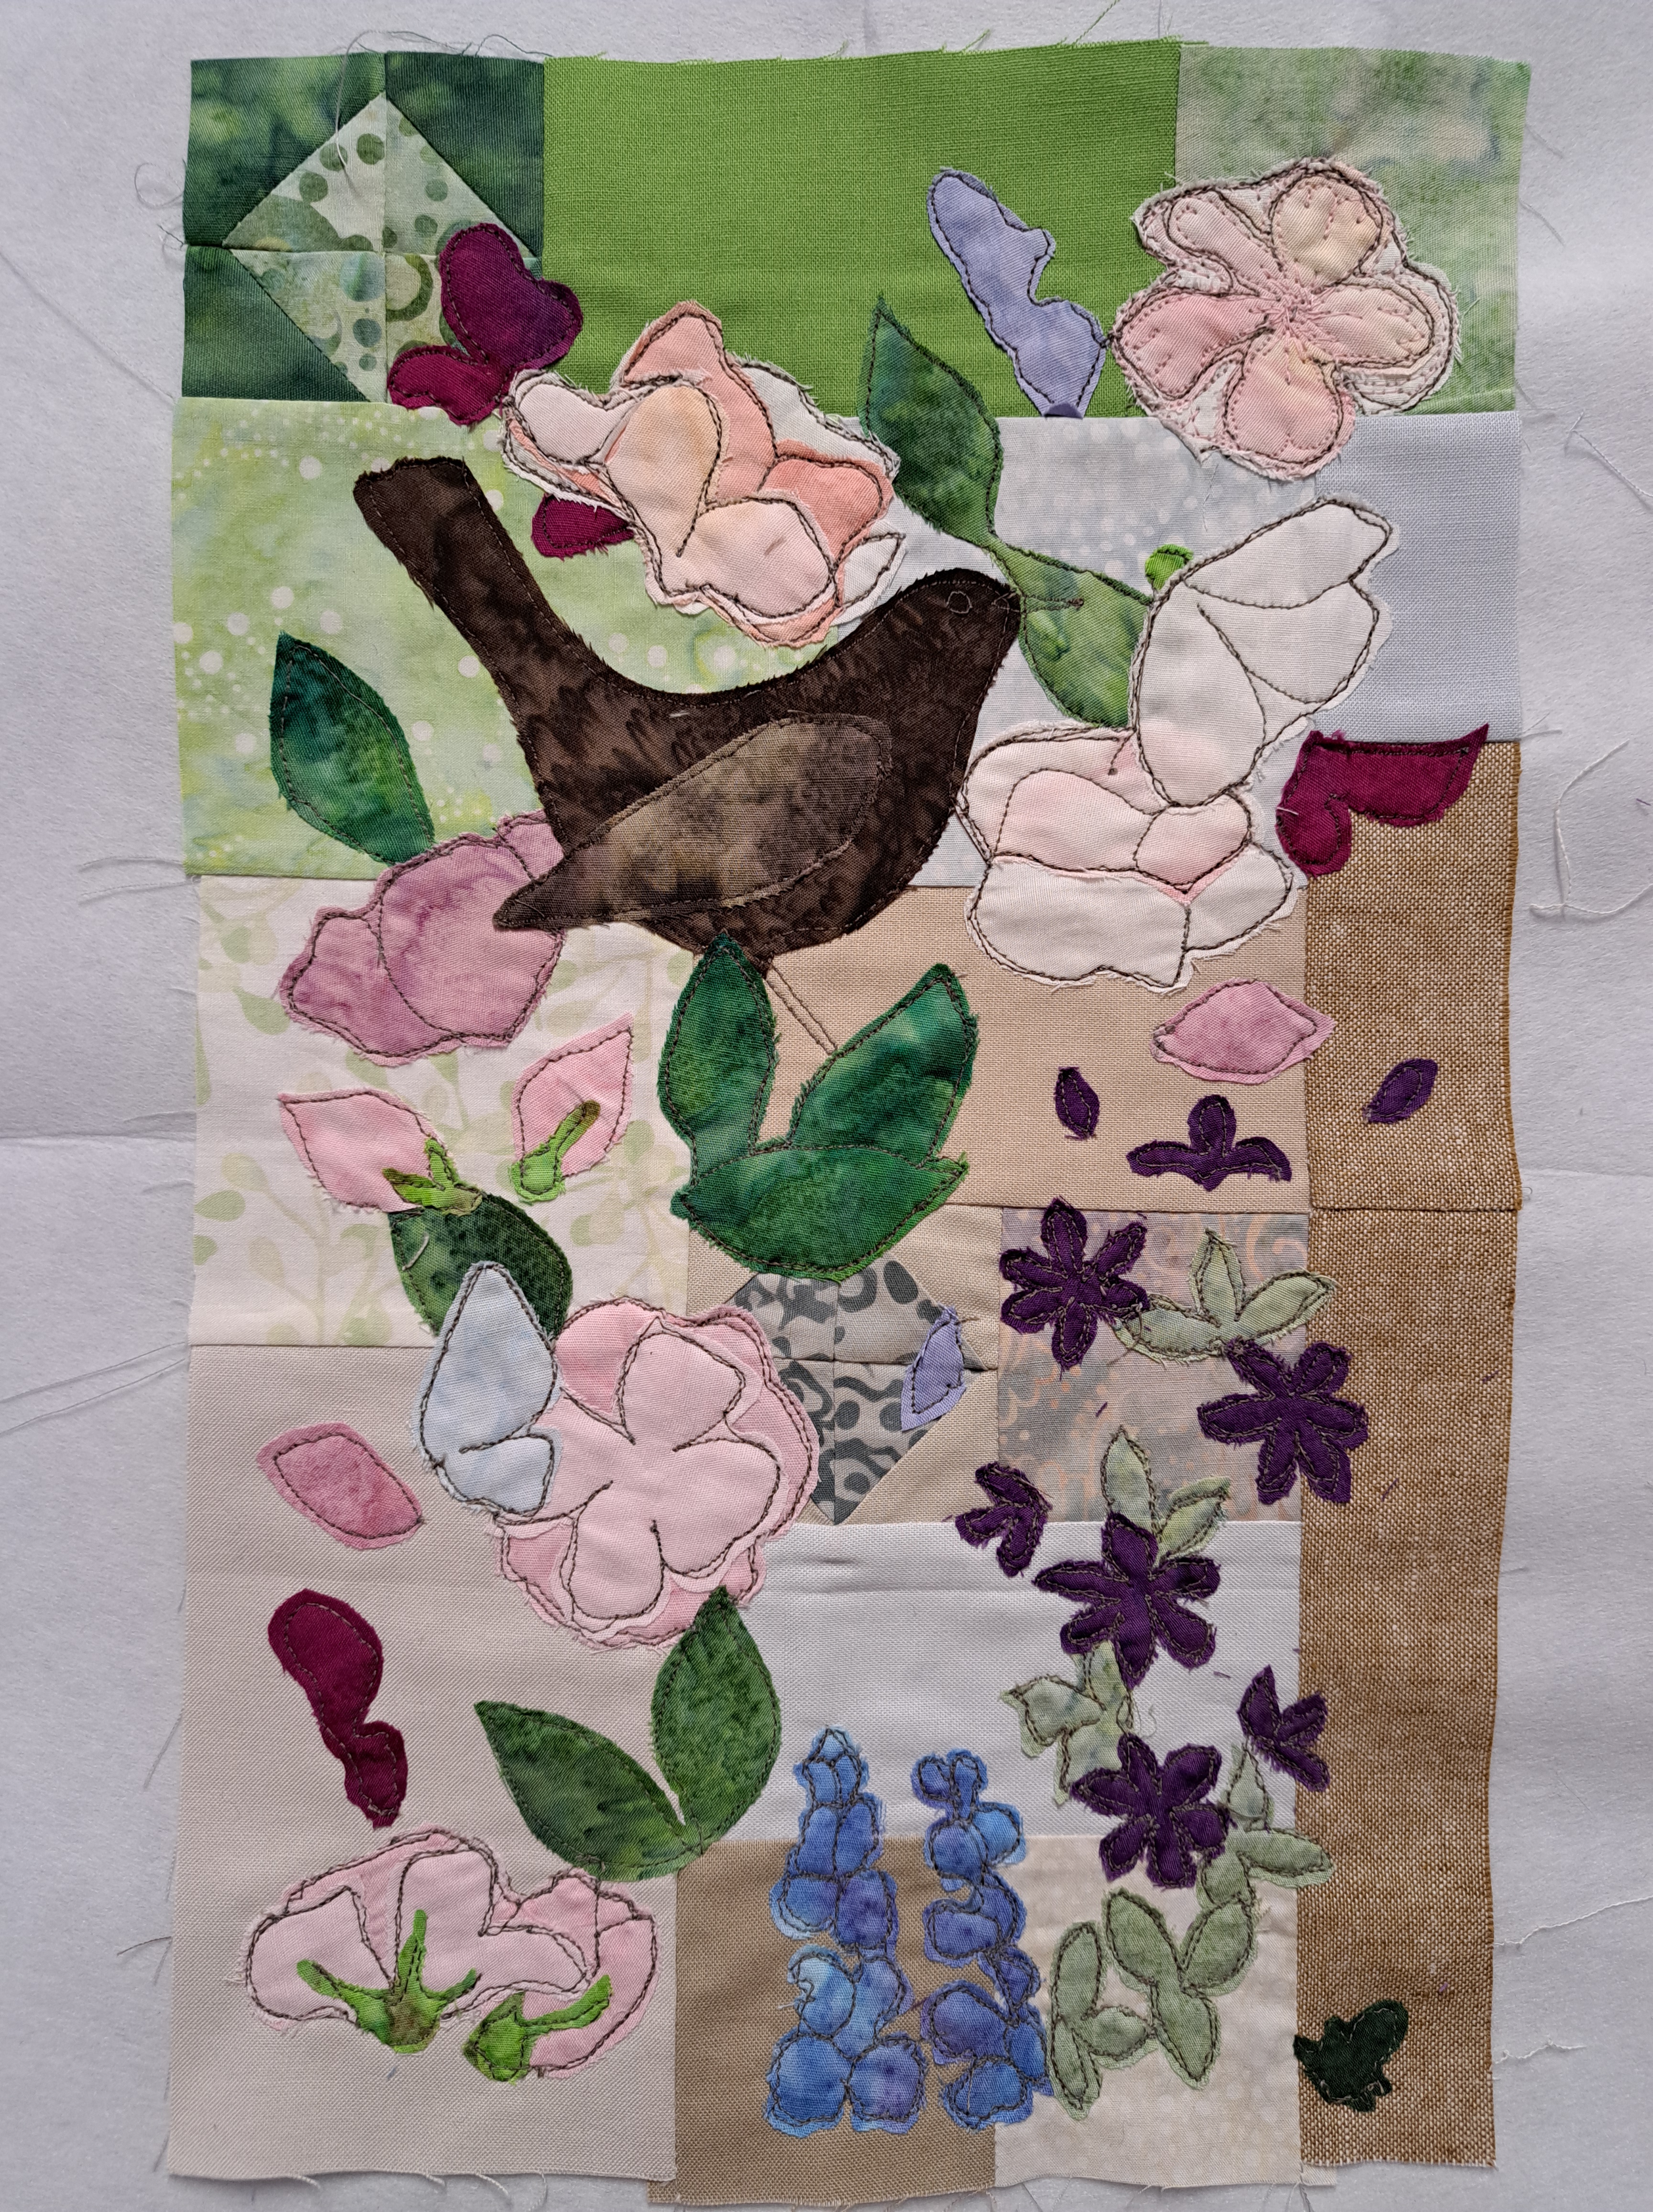
Everything is stitched initially with a soft brown before all the embroidery starts. I used a metallic needle in my machine which I found works better than an embroidery needle as some of the threads are fairly thick and would shred in the needle. I also finally found a way of controlling Sylco thread! It’s been the bain of my life for a while as when ever I tried to use it it was so springy that it would ping off and then somehow wind it’s self tightly round the bobbin spool. I hoped it would be better with my new sewing machine as it’s an upright spool holder but it was still an issue…so I tried just having the spool loose in a box behind the machine, it works perfectly!
So this is what it looked like after the first round of stitching, as you can see my stitching is far from perfect but once it’s finished that doesn’t seem to matter, as my mum used to say from an artists perspective, your eye picks out the best line.
Now it needed all the embroidery, Andrea explains it all and as she says, just take a deep breath and go for it!
Underneath the block is the one I did ages ago which goes underneath this one on the final quilt.

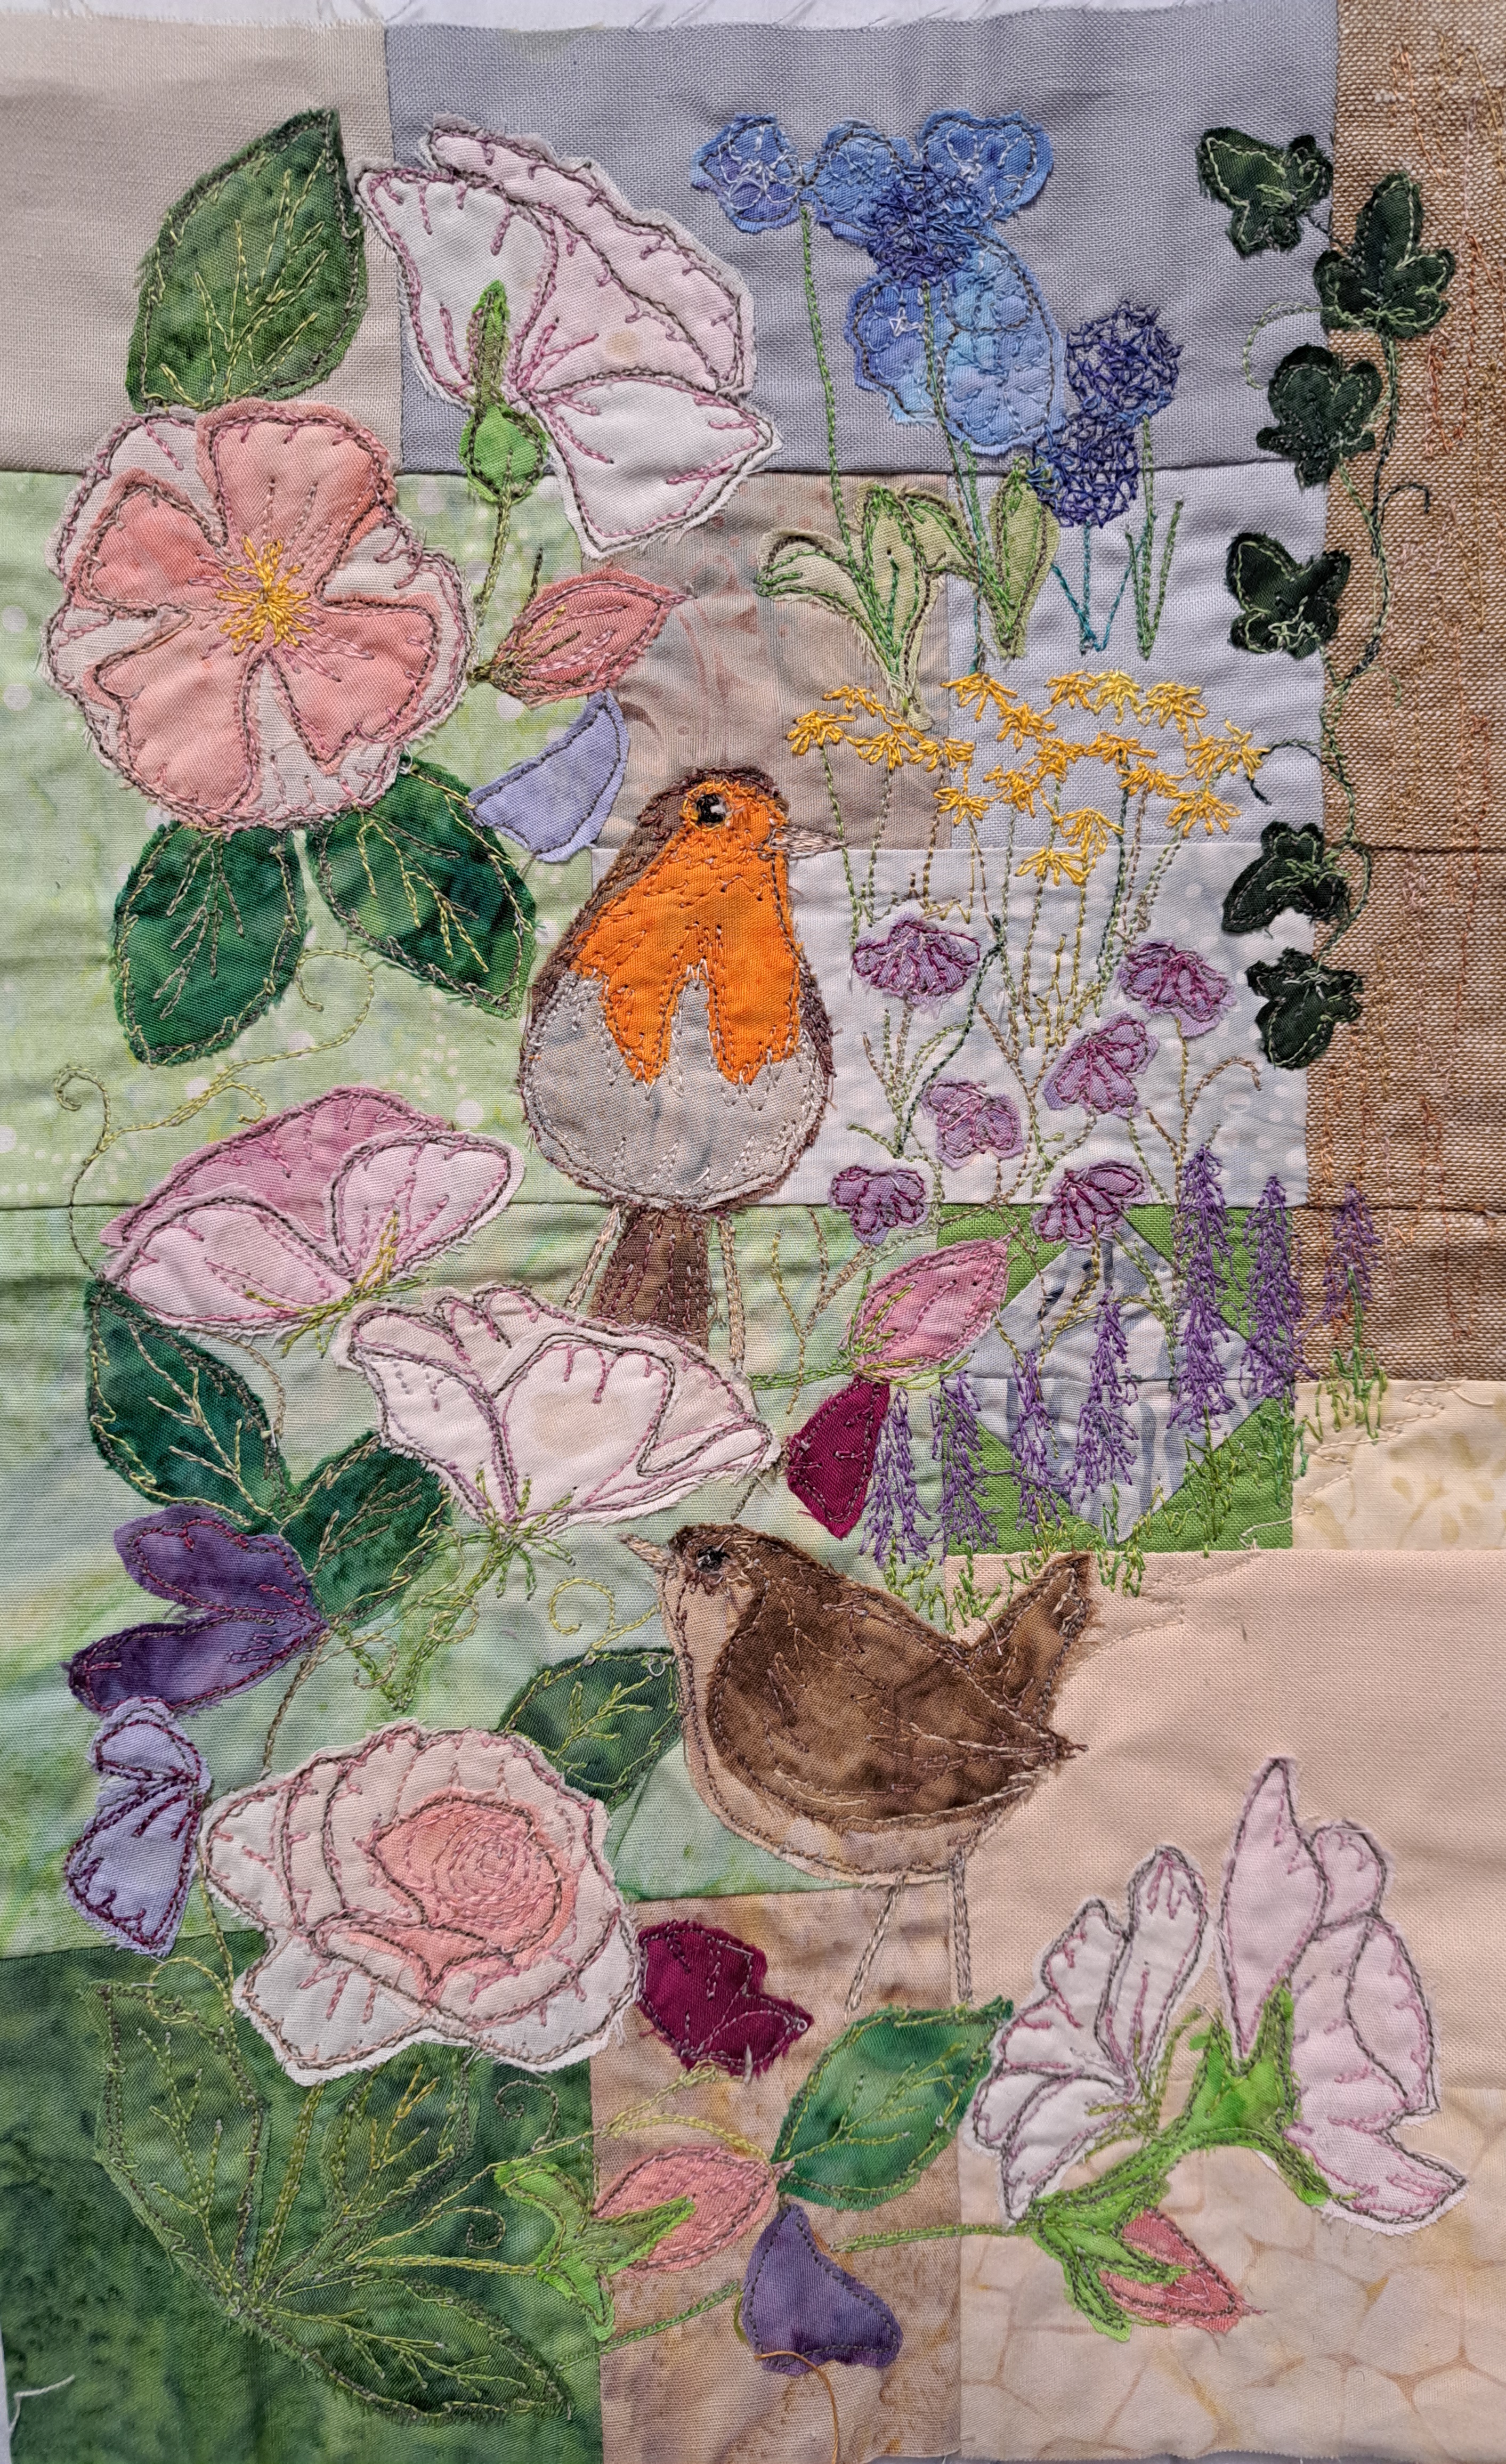
I can see a few stalks that are dangling in mid air a bit but as I’ll have to do some connecting of the design once they’re stitched together, I’ll leave it for now and do it all at the end.
I’ve already got the next block cut out and ready to embroidery, so hopefully I’m on a roll now! If anyone fancies doing one of these quilts but feels a little daunted by it, Andrea mentioned the other day that she is filming herself making the next quilt (which looks gorgeous!) to make on-line tutorials, so it might be a good one to dip your toe into these wonderful designs.


so lovely! actually it’s more than just lovely – gorgeous works for me
LikeLiked by 1 person
you seem to thrive on challenges!
LikeLiked by 1 person
I do like to push myself, just a little out of my comfort zone!
LikeLike
The blackbird is beautiful. Hope the surgery went well
LikeLiked by 1 person
It seems to have gone OK thanks, back to work on Tuesday!
LikeLike
Sounds like you are healing mind, body and soul with this love,y project to keep you occupied, Margaret!
LikeLiked by 1 person