I’ve just finished the first of nine blocks for my Secret Garden quilt. This was a BOM from Andrea of Raggedy Ruffy Designs last year (or may even be the year before!) Things happened and I never got started, but having put my name down for the next block of the month (which is looking gorgeous!) I thought I’d better get my finger out and start this one!
This was the initial layout I shared with you a few days ago…

Everything was laid out ready to stitch down.
The first task with these designs is just to get everything stitched down and secure. Andrea is very adept at just holding everything in place before she stitches it down, I’m not that brave so I put a dab of fabric glue on everything. Everything is outlined with a mid brown thread, Andrea goes round everything twice just to make sure all the pieces are well stitched down. I vary whether I do one or two, there is an element to which if one line is wobbly, the eye automatically sees the correct line, which is very useful if there as wobbly as some of mine!
At this stage it’s very easy to get disheartened as close up the stitching does look messy, I found it helpful to put it on my design wall every so often so I could stand back and see it. For those of you unfamiliar with this type of stitching, this is free motion machine embroidery. Usually when you stitch on a sewing machine there are ‘feed dogs’ under the machine foot which drive the fabric through at the correct speed, regulating the stitch length and keeping the stitch line smooth. With free motion embroidery the feed dogs are lowered, so the fabric can be moved in any direction and the length of the stitches is determined by how fast you move the fabric. It’s like drawing with a sewing machine…easier said than done!
The pink roses were the first area to be tackled with more detailed stitching. I’ve got quite a collection of variegated machine threads now, I bought a set from Oliver Twist’s when they had a half price offer on, there’s always some shades I haven’t got so sometimes I just used ordinary Gutermann thread.

Stems have been added with green thread, calyx have been feathered a bit and veins and serrated edges added to the rose leaves. Variegated thread sometimes looks completely different when it is stitched, the green I started with on the leaves at the top seemed to have alot of brown in it, so I swapped to one that looked initially too bright but it looked much better once stitched.
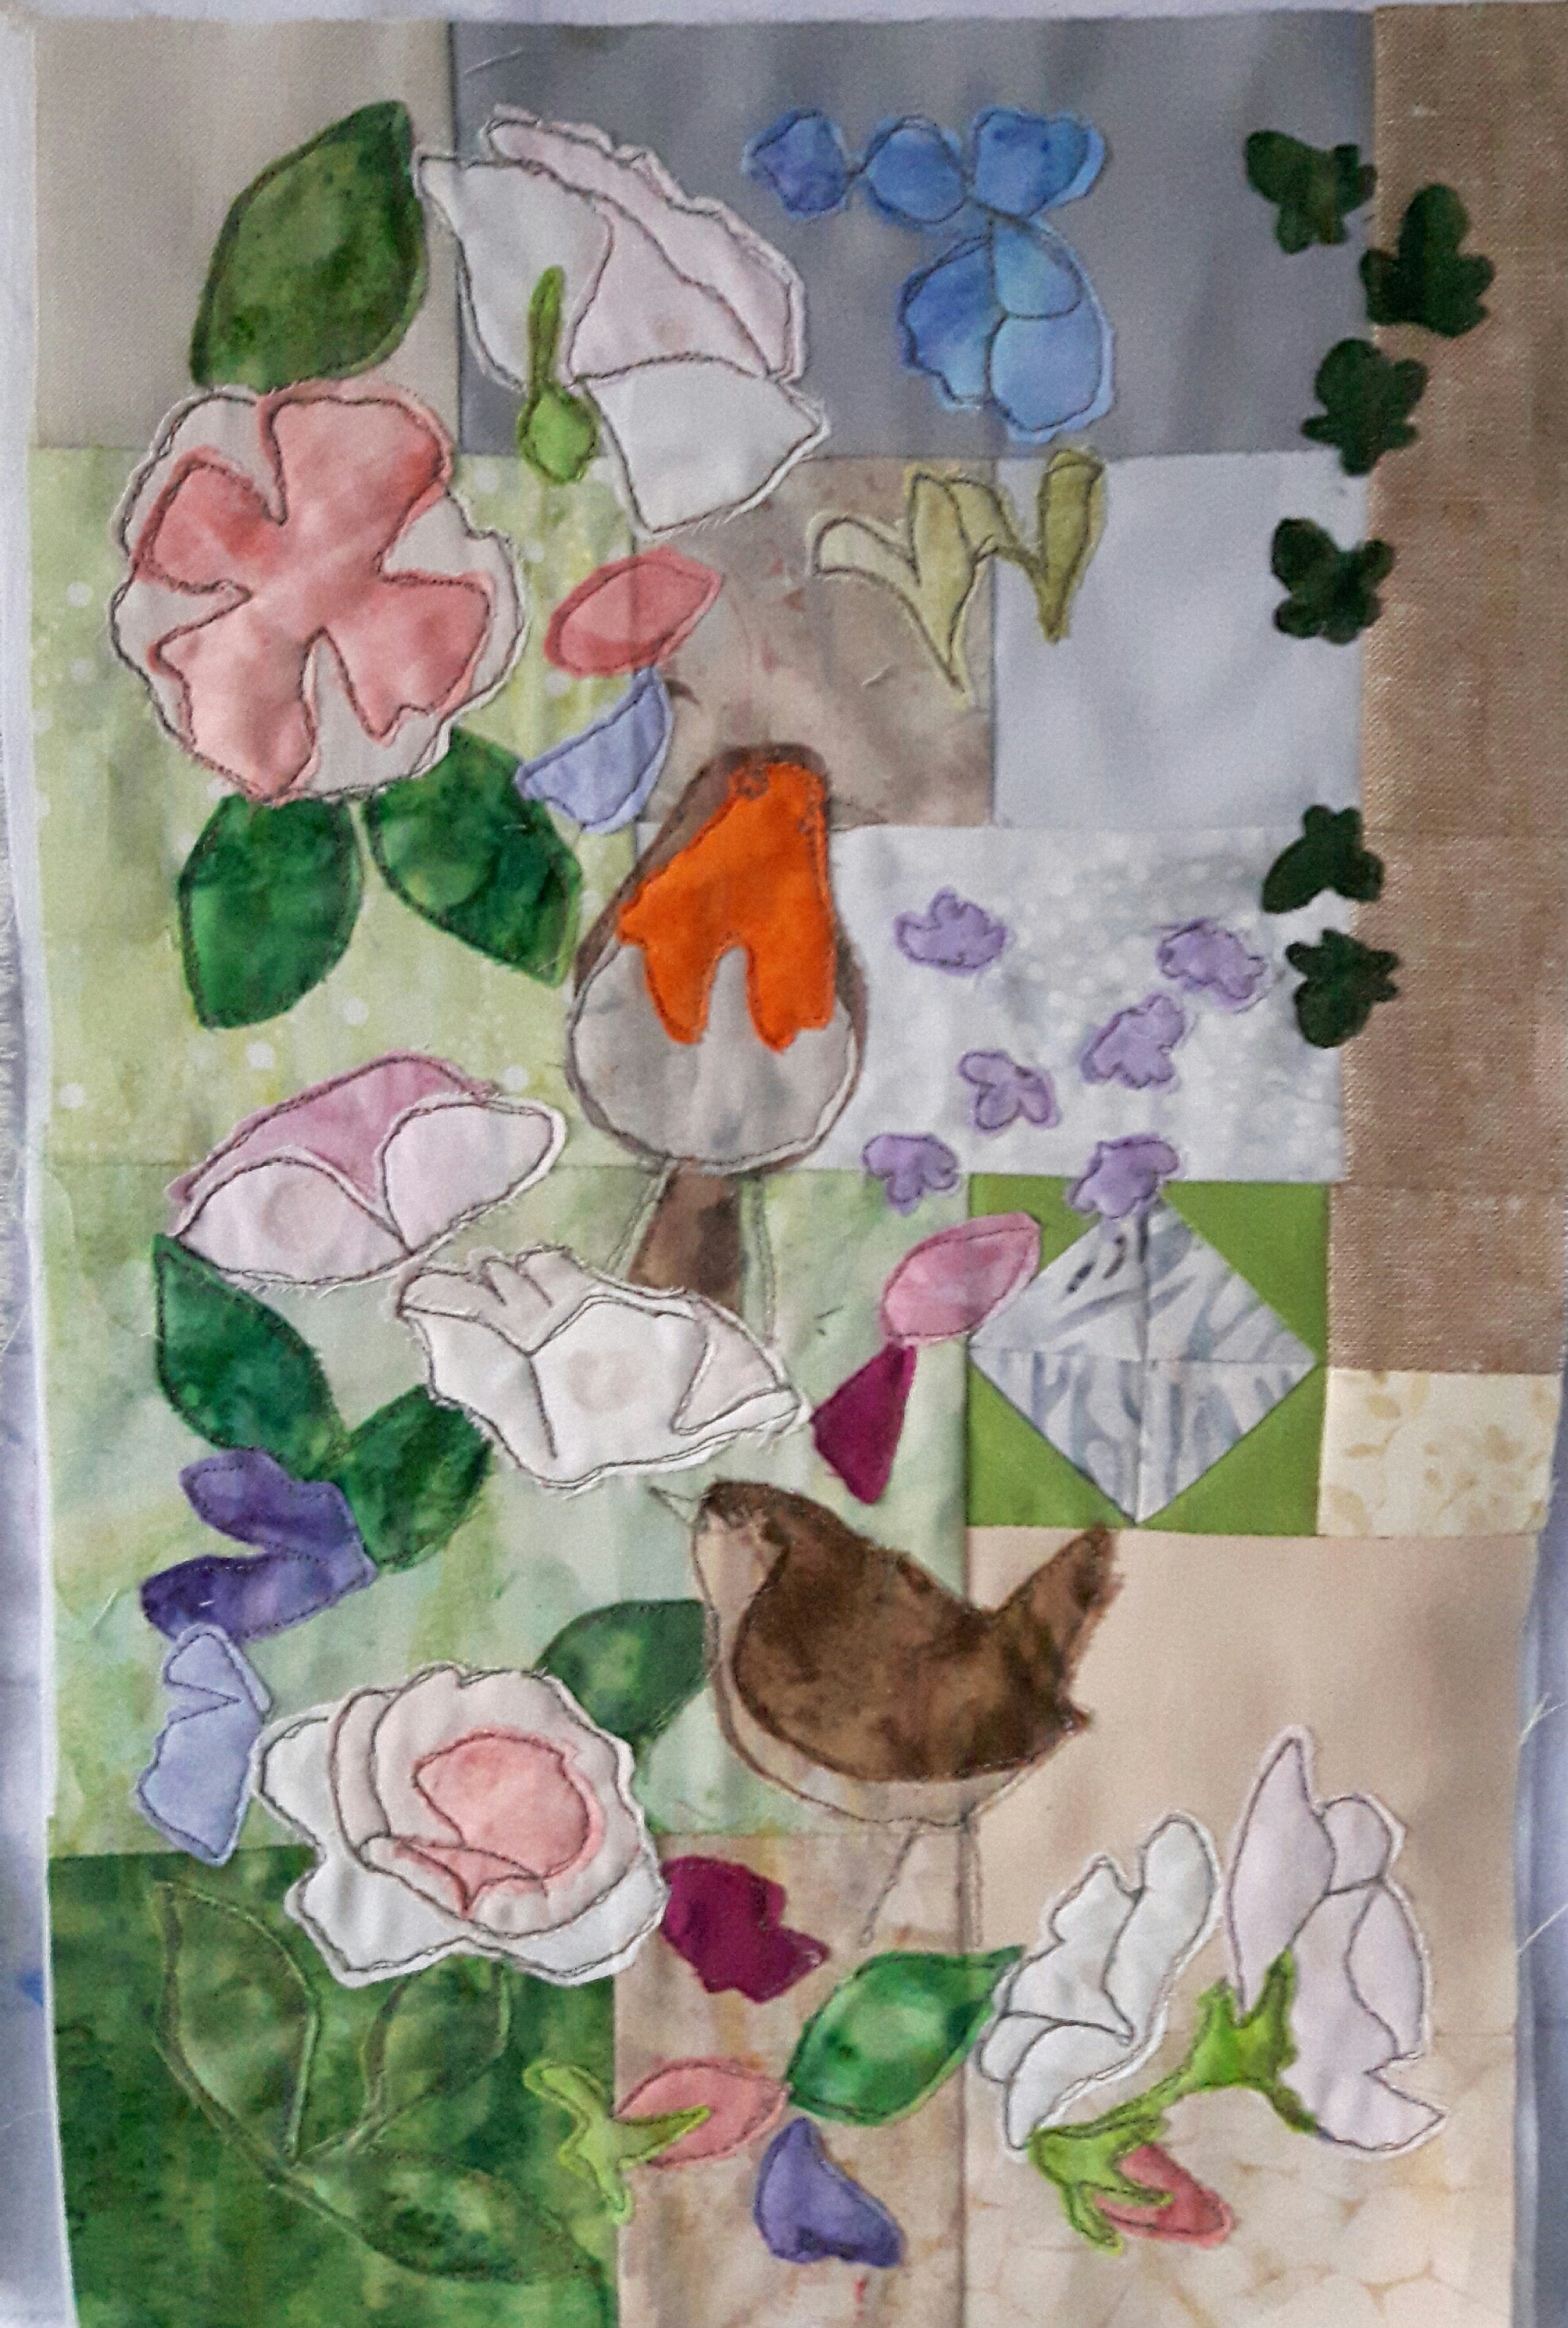
This panel is on the lower left hand side of the doorway to a secret garden, so there is quite a lot of stitching for perennial flowers, I’m not sure mine would pass an ID tests with the RHS but they are meant to be delphiniums (other end of stem is on next block up!) agapanthus (mine are more like alliums) achillea, scabiuos and salvia.
The birds were one of the last things to be stitched, which does have the advantage of gaining a bit of confidence before doing an obvious area. The eyes were the trickiest, they are edged with brown, filled in with black with a white dot…and you can imagine the size of it! Next time I’ll make sure I have a darker neutral thread underneath as the light grey I was using did show on darker colours. In the end I used a black finepoint pen to colour the eye in!
So here’s mine finished panel, it’s about 8″ by 13″, the photo has cropped in a bit tight but the brown area to the right is part of the wooden door to the garden.

It’s going to be a very busy, colourful quilt!
If you like Andrea’s designs but don’t fancy doing the applique she has now started getting panels printed of her initial watercolour design, usually they’re cushion size. They are gorgeous! These could either be used individually or stitched together for a quilt, if you are interested please follow the link to Raggedy Ruff Designs.
The next block has a lovely


This is beautiful!
LikeLiked by 1 person
So pretty, and it’s absolutely ‘you’, isn’t it? I can quite see why you fell in love with it.
LikeLiked by 1 person
another masterpiece in the making ^^
LikeLiked by 1 person
You are getting more new more confident with these! Beautiful job!
LikeLiked by 1 person
Wonderful piece making me daydream about Spring!
LikeLiked by 1 person
That is truly gorgeous. I’m not yet quite brave enough to try this even though I’ve watched most of her YouTube videos. I’ll get there, though. The results are just too tempting.
LikeLiked by 1 person
Her designs are gorgeous, it is just a matter of deep breath and go for it 🙂
LikeLike
It is going to be a beautiful, colourful quilt
LikeLiked by 1 person
Gorgeous!🥰🥰🥰
LikeLike
The finished product is absolutely lovely!
LikeLiked by 1 person