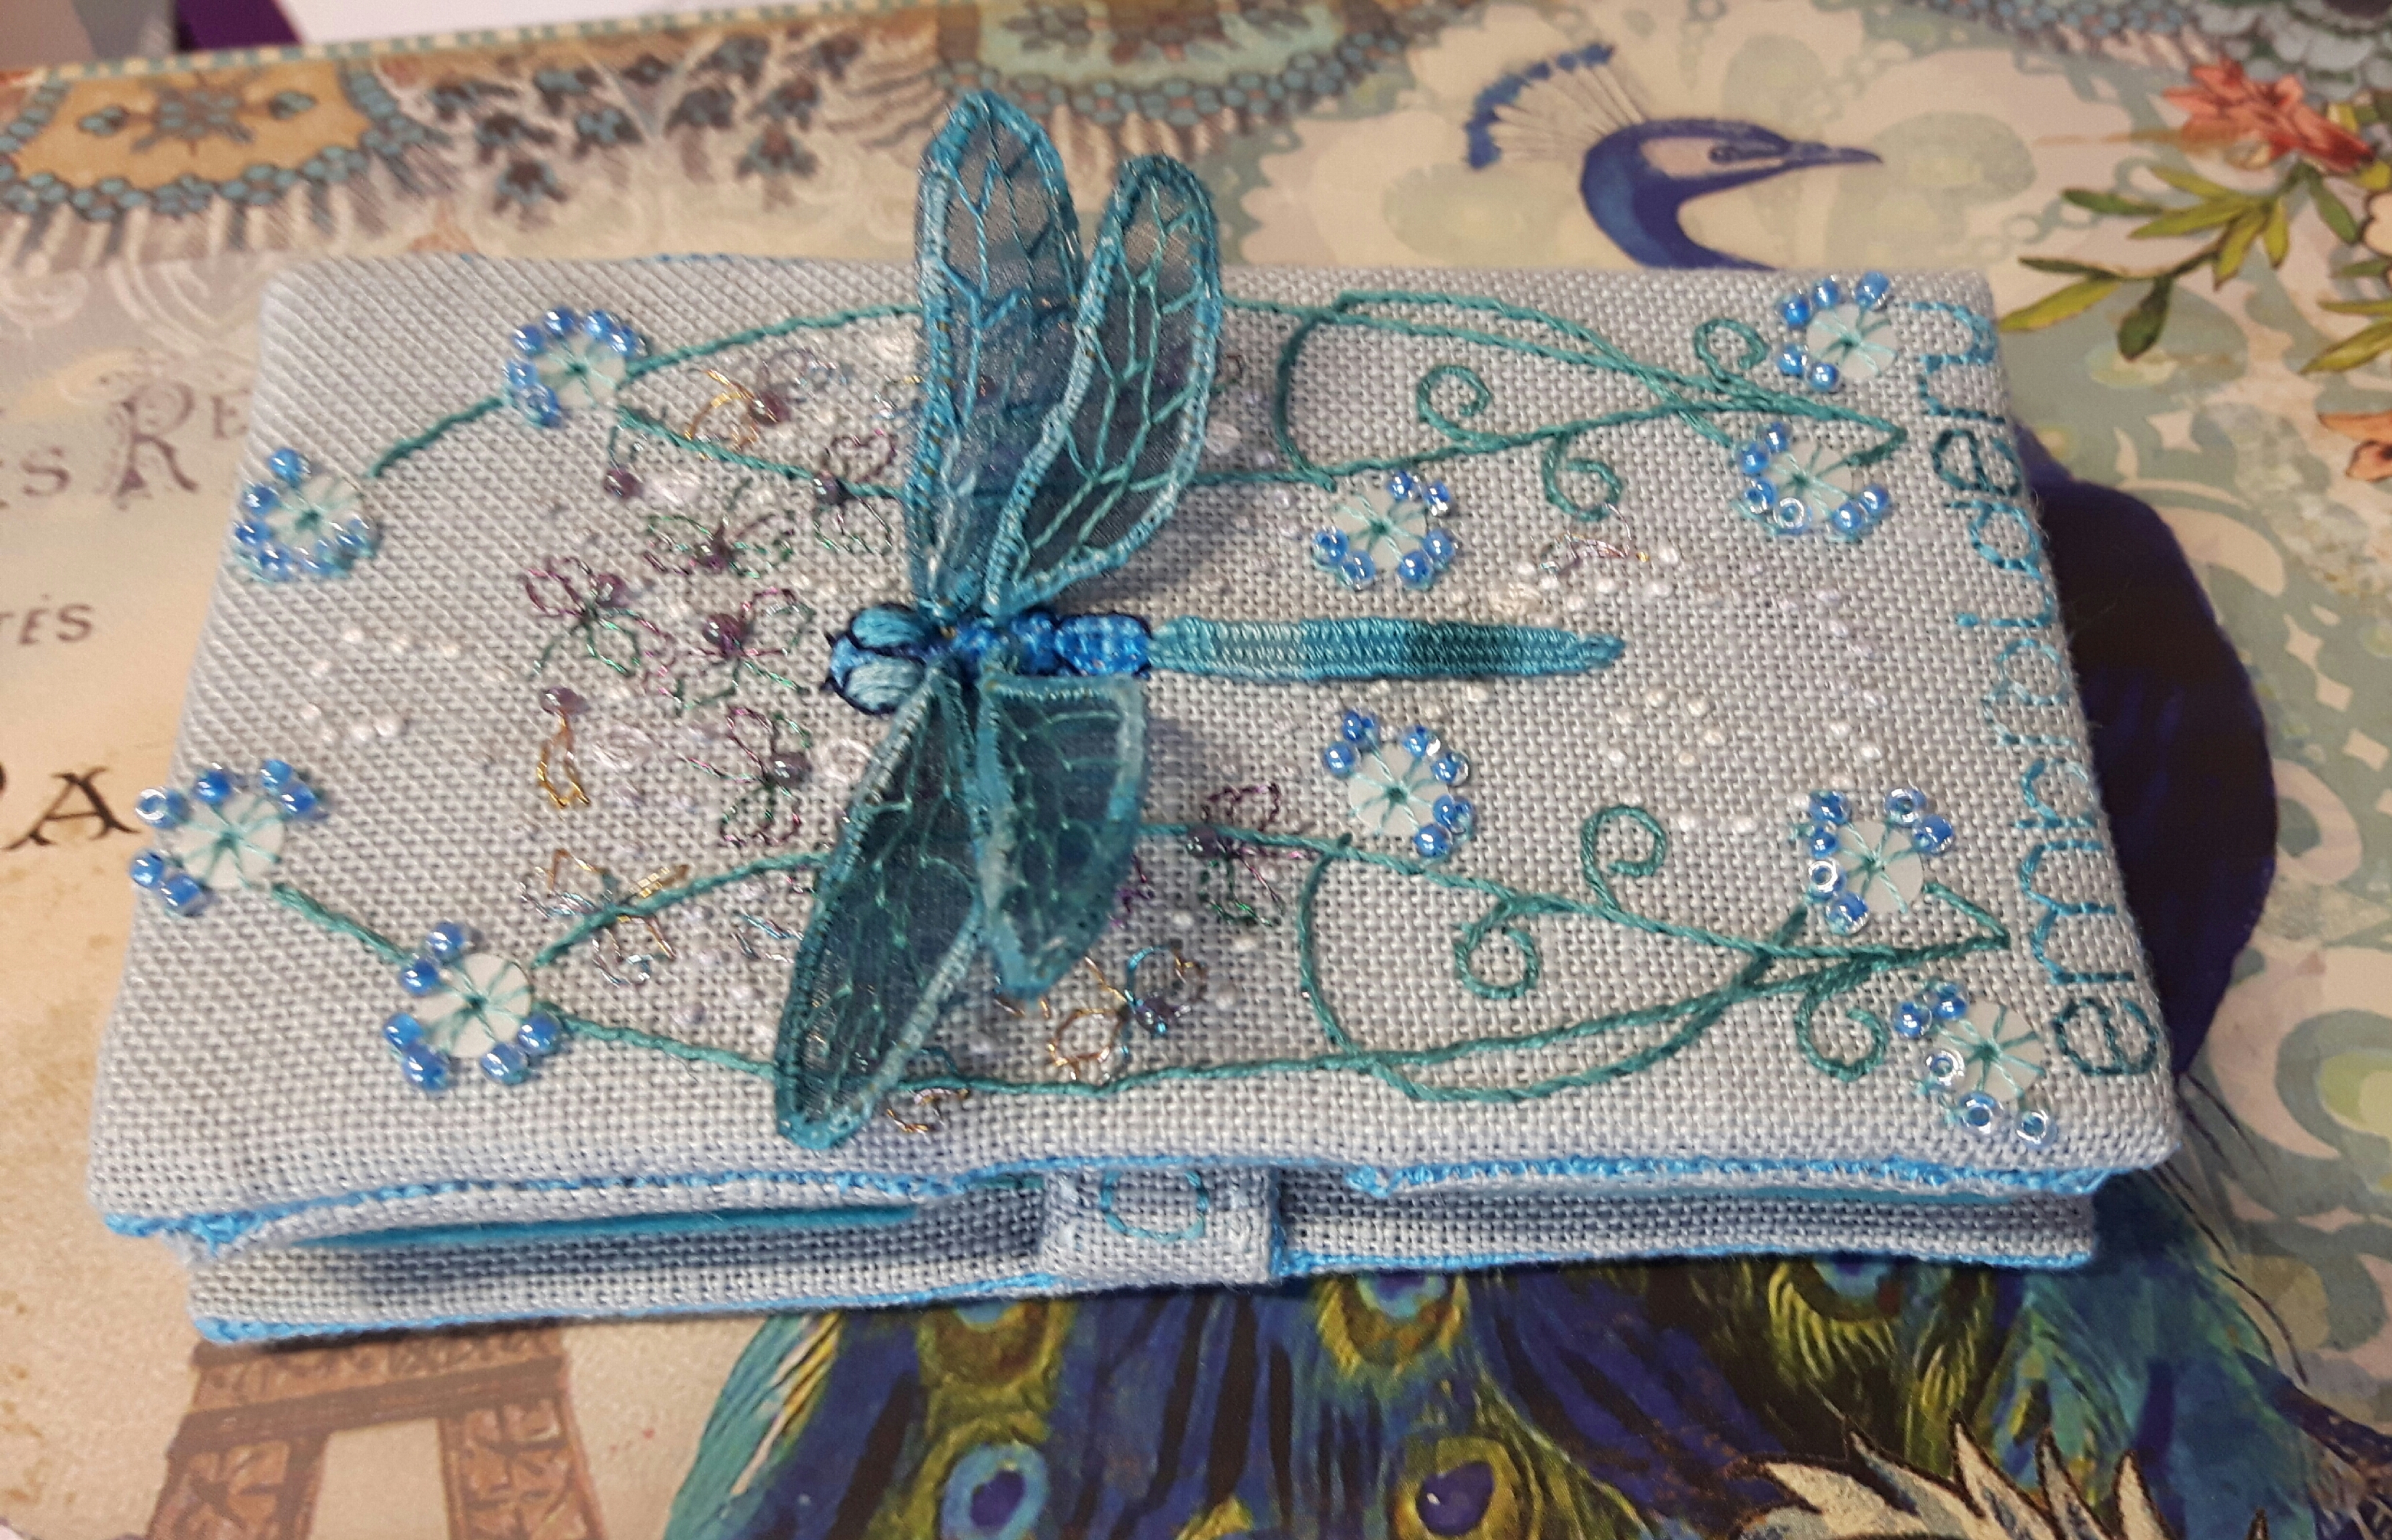
It’s happy dance time, though it nearly wasn’t as I was stitching until about 11pm last night to get it finished. This morning I managed to press it of sorts to make it look a little neater.
Three weeks ago when I last posted about the needlecase I had just started putting it together, whip-stitching the nnedle ads and the thin ‘labels’ together and putting colour specific pins in the dragonfly panels…

Boy was this fiddly to put together!!! It probably doesn’t help that I think I stitch with a fairly firm tension, so whip-stitching 16 count back-stitches isn’t easy – when I made my Anthea book with whip-stitched sides I purposefully did my back-stitching twice the size and tried not to stitch the outline so firm, I seem to have forgotton to relax my tension a bit this time!!
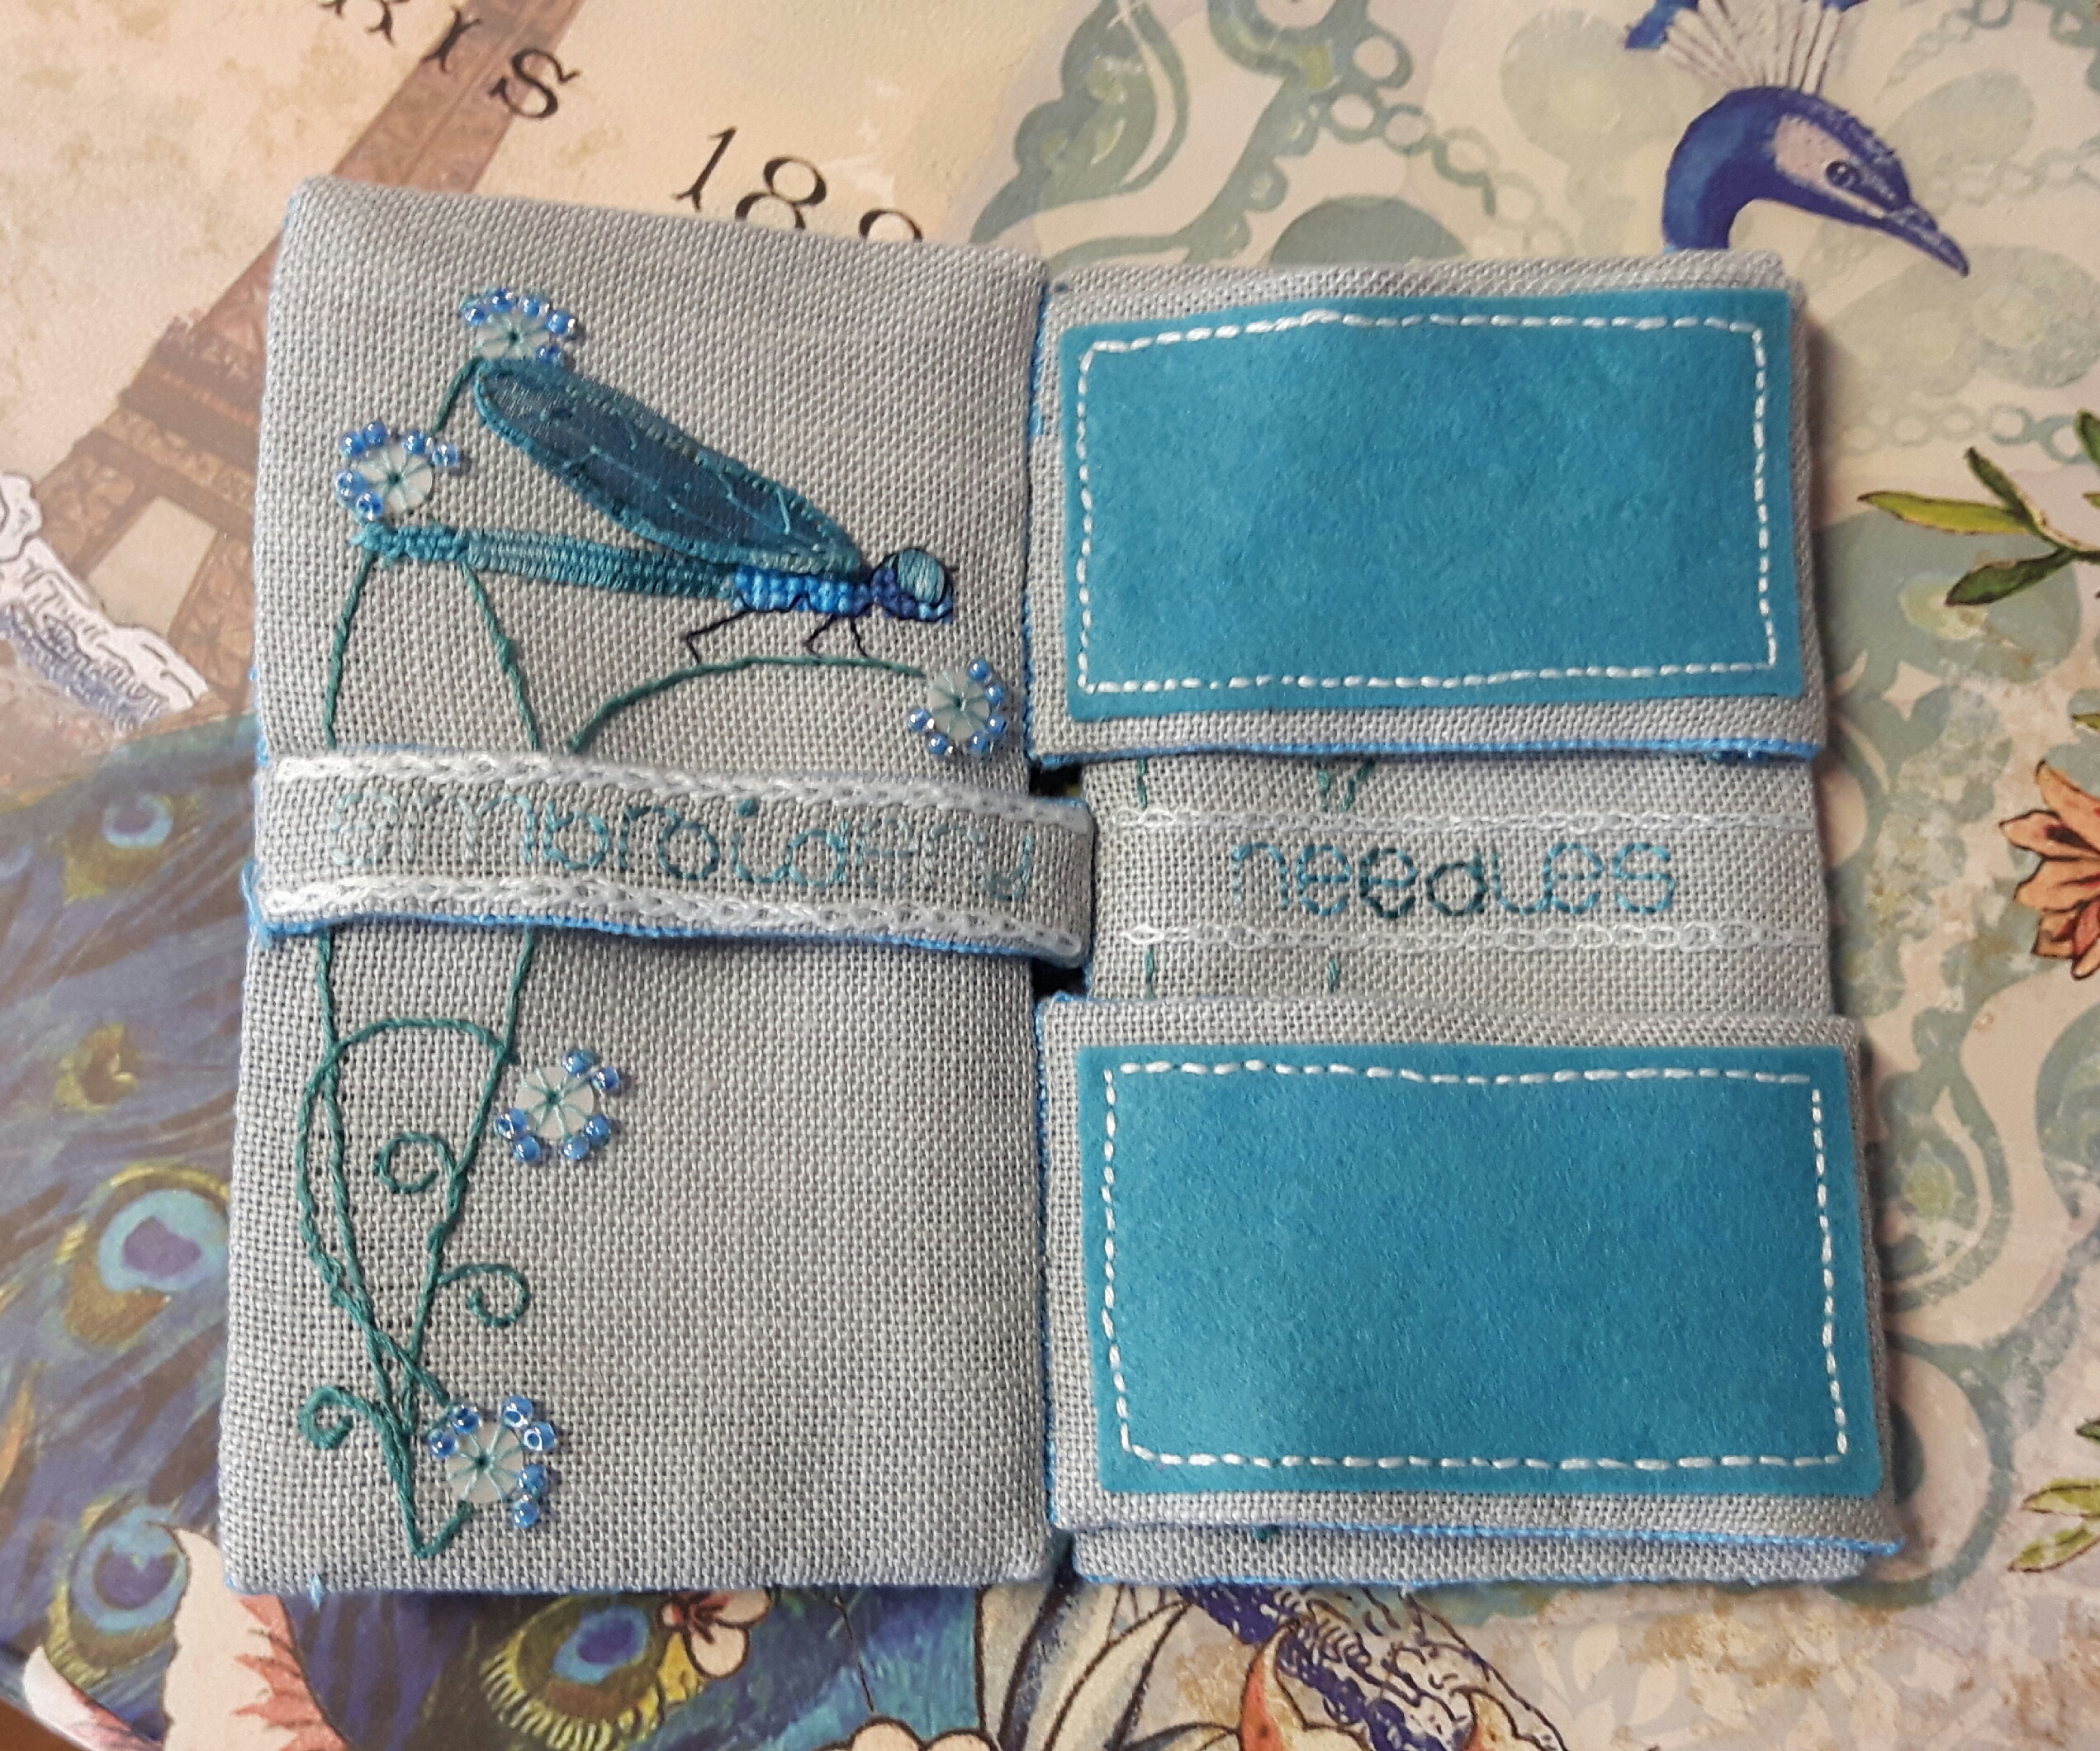
It’s very cleverly made into a Jacob’s Ladder, hence the name Jacquie. Jacob’s Ladders are those things which interconnect to slide between the sides…very difficult to explain! I haven’t any putting together photos as I was concentrating too hard so I’ll just intersperse with photos of the finished needlecase…
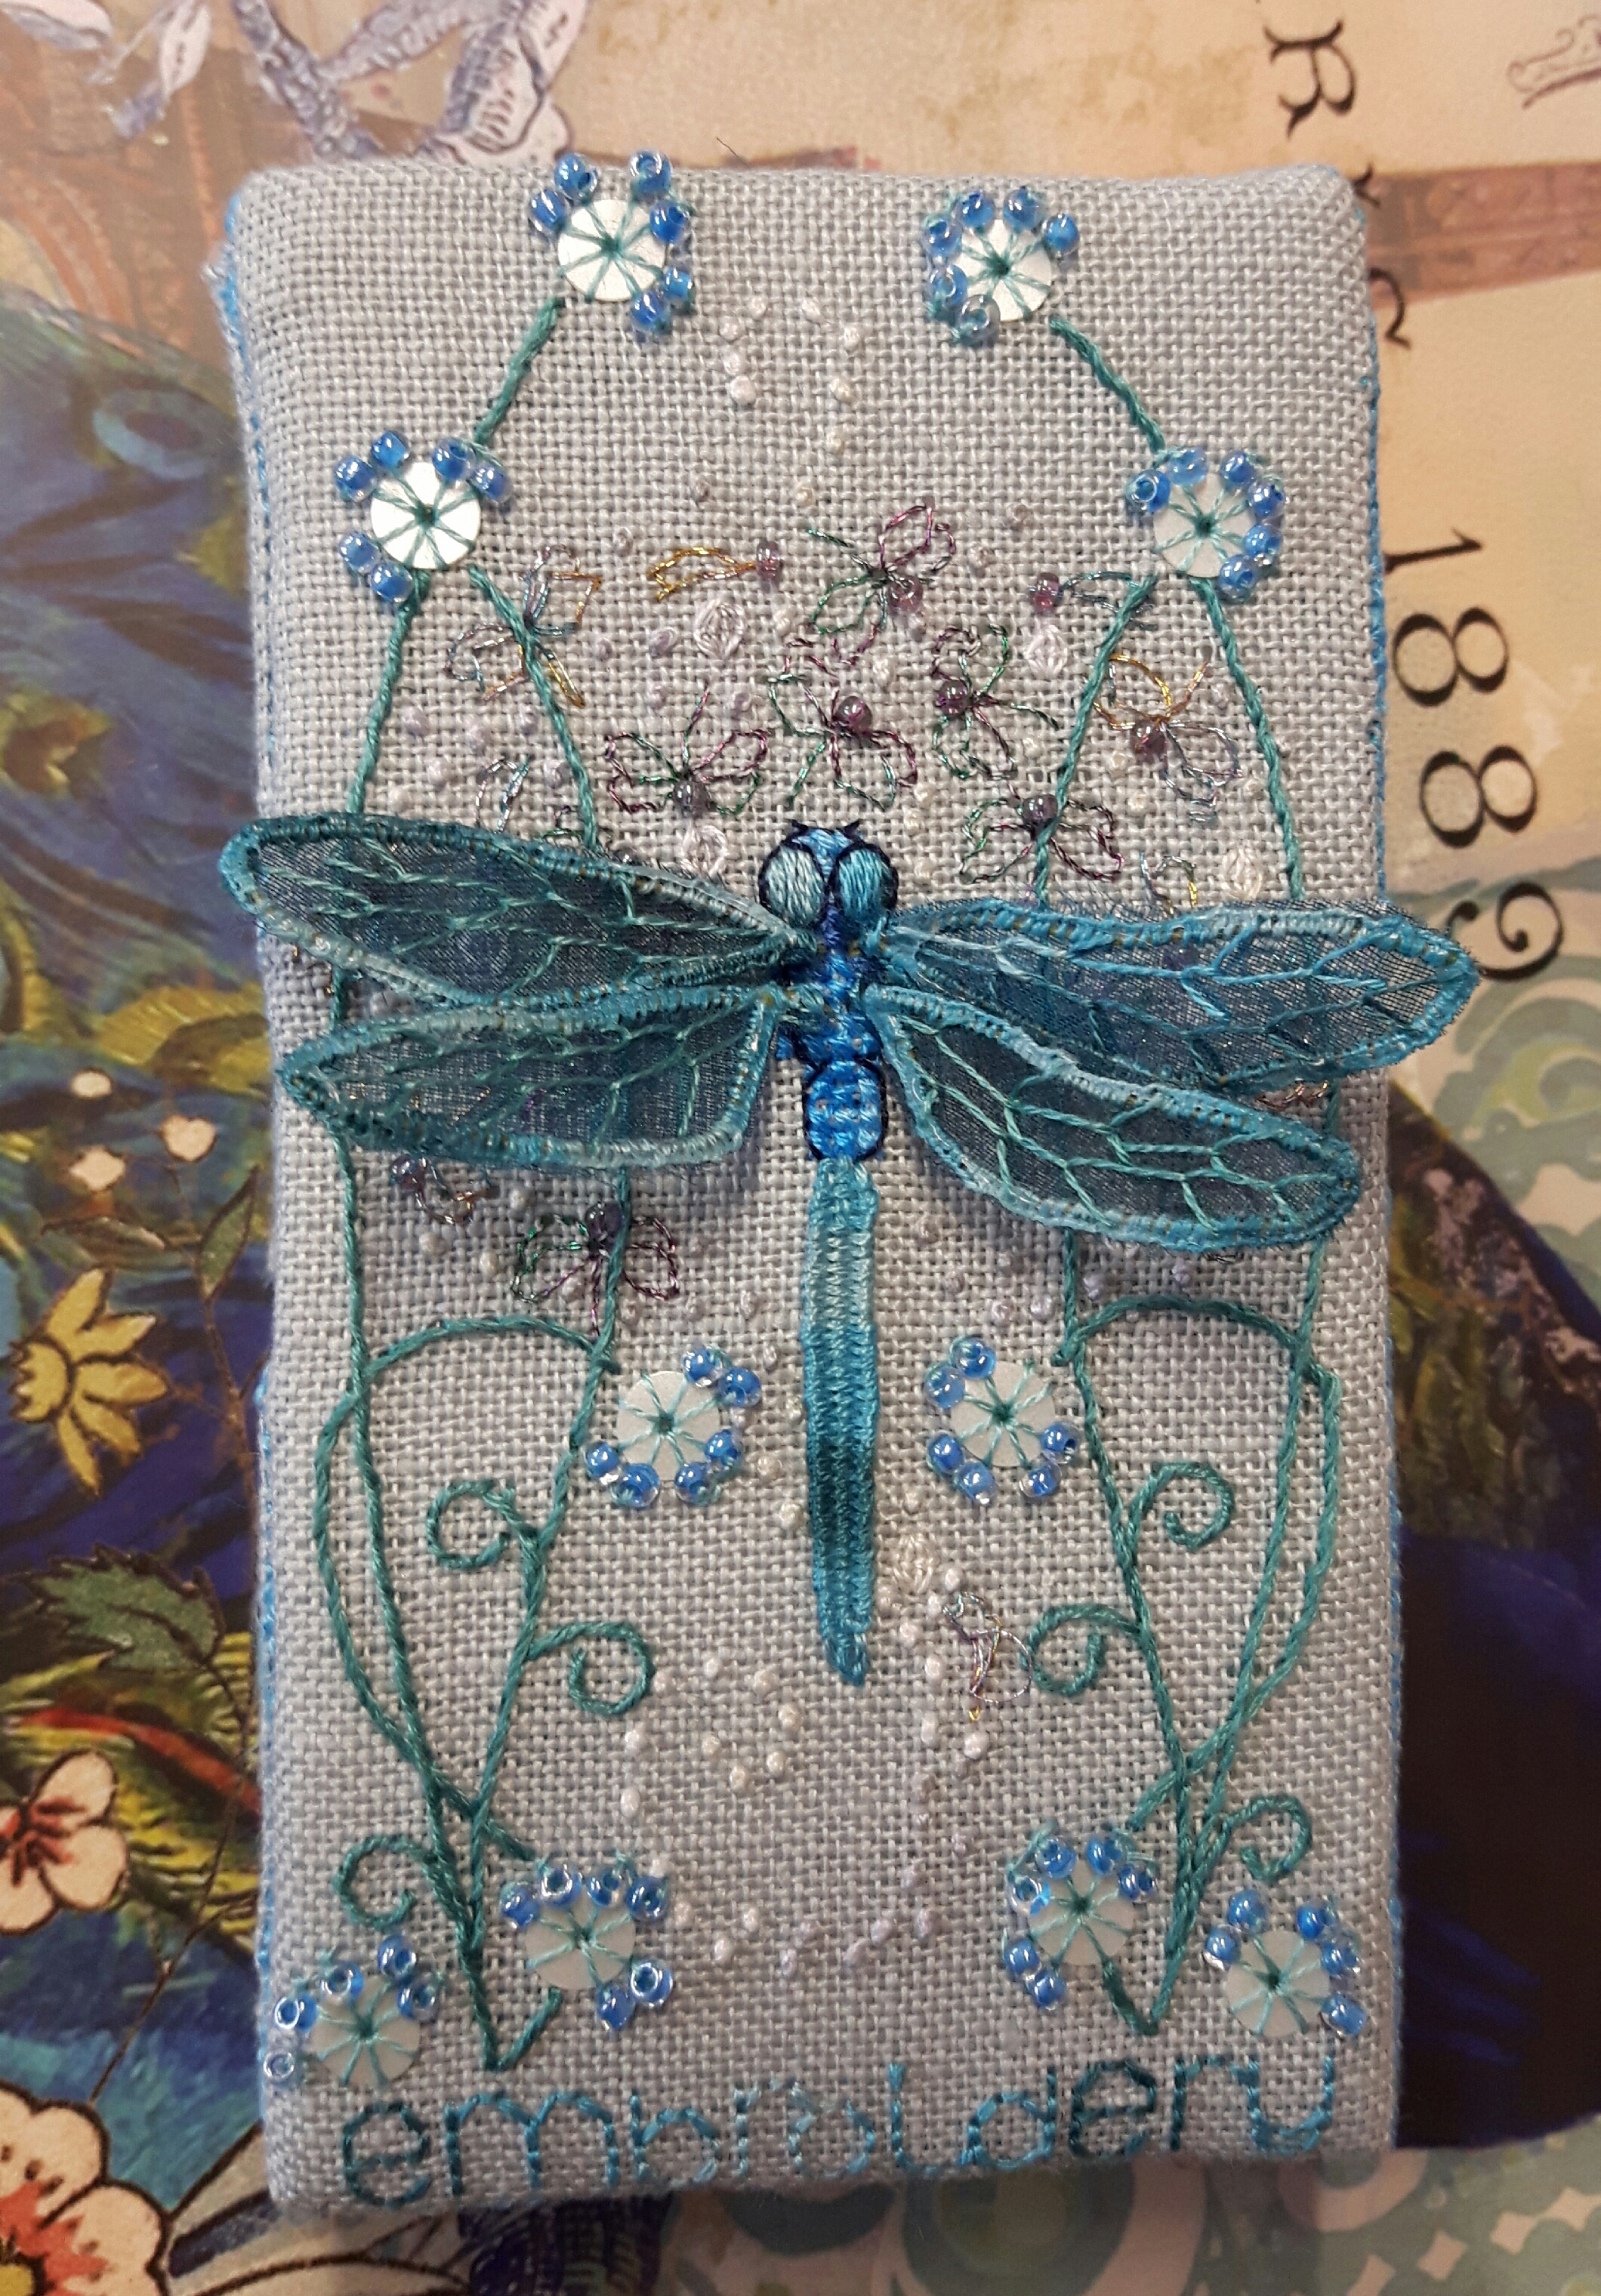
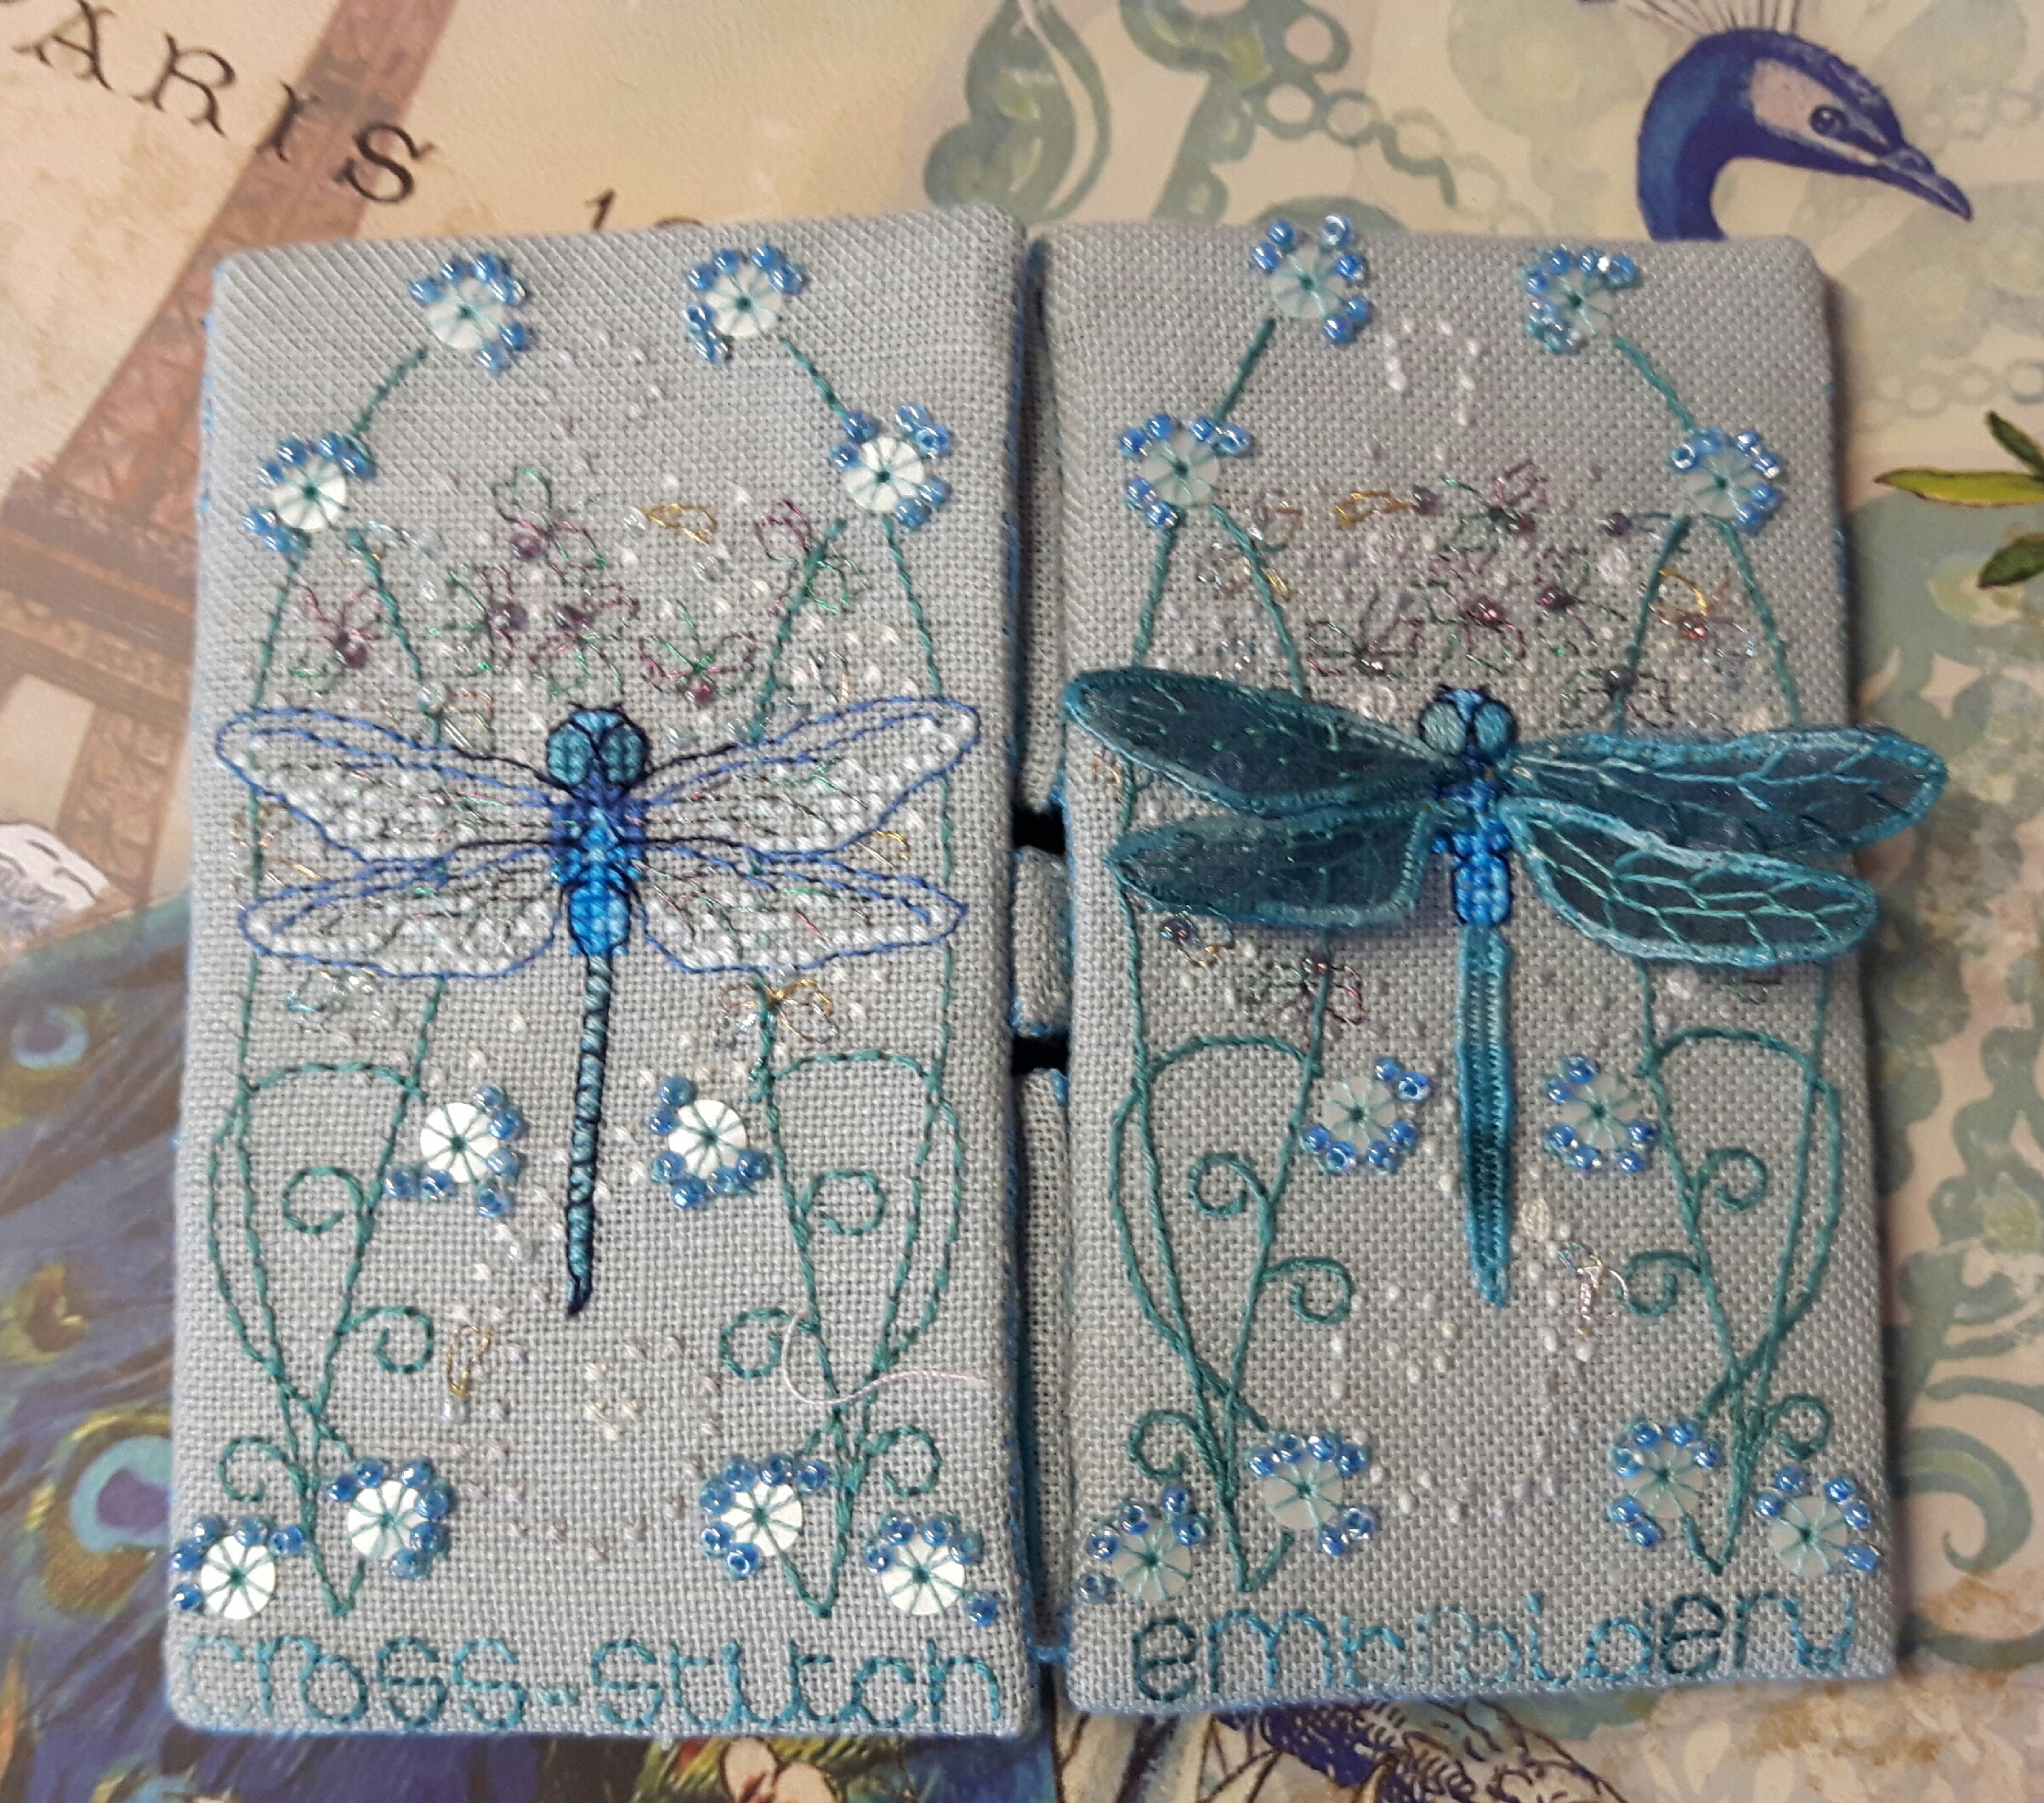
Isn’t it gorgeous!! The first half of putting it together wasn’t too tricky, basically two dragonfly panels were stitched together with the sides of the two double-sided pads and the writing strip whip-stitched in-between the pins at the same time. My main problem was the thread catching on wings or wings getting moved when they were underneath and therefore out of sight. I was quite worried by the end that the metal wire in the wings was going to snap, but, touch wood, they all survived.
The two pages are stiffened with rectangles of non-stick bosal. It’s a bit like a very thick vilene interfacing – when I say thick, it’s a good milimetre thick. It’s flexible and has a nice feel but returns to it’s original shape.
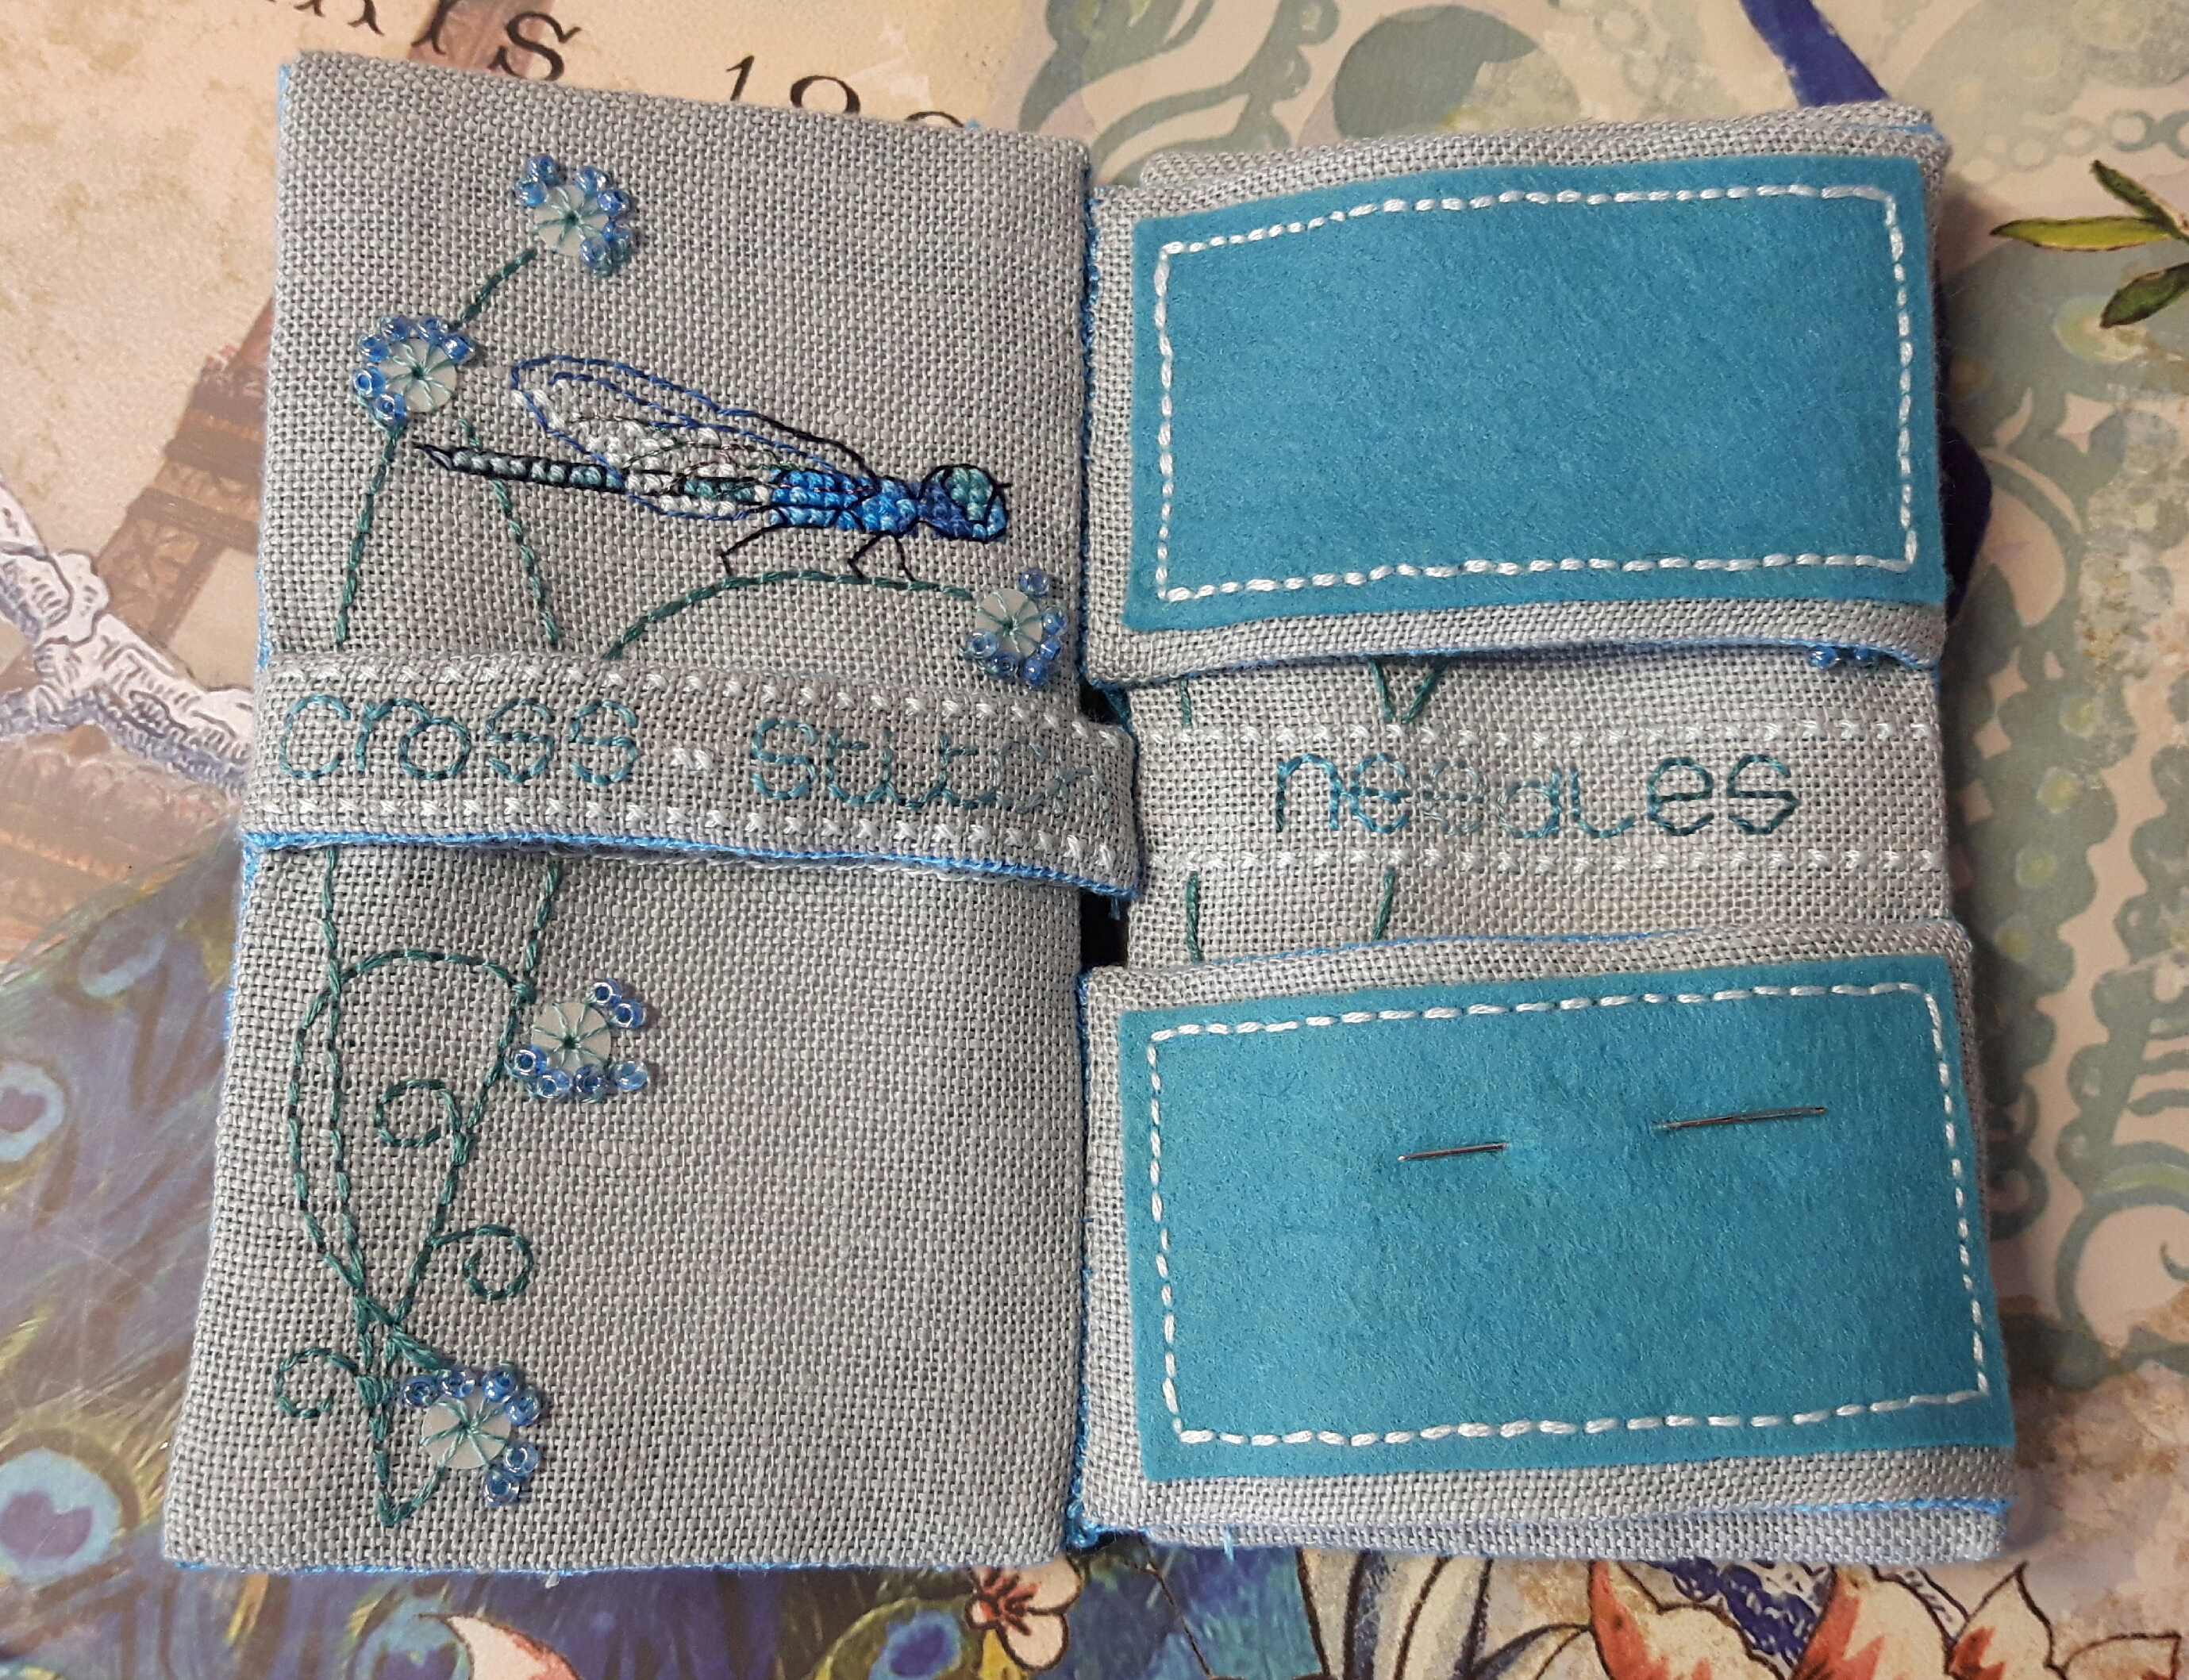
The second half was more fiddly as the last two panels were stitched together with the other side of the pads and word strips. The hardest bit was working out how to fold the word strip right to make the Jacob’s ladder. I had to really concentrate in front of the computer to get it right. Faby does warn that these ten stitches were the hardest bit and I have to agree! Once that bit was stitched the final bit came together fairly quickly.
I gave it a careful press this morning, not easy with delicate dragonfly wings and beads. I protected it with a pressing cloth and hoped my wool mat would absorb the beads. It looked much neater for pressing, though with hindsight I would have been better pressing the pads and words well before the final construction.
It was quite a challenge to put together but I’m so pleased with it, it’s beautiful, Faby has excelled herself again! I love the mix of the stumpwork dragonflies with the cross-stitch ones, it literally pushes it to a new dimension. Faby’s instructions were always clear and easy to follow and it was a great introduction to stumpwork. This is my favourite view…
…I’ve just noticed a loose thread on the photo!!! However much I try to spot threads, there’s always one!
If you fancy making this gorgeous needlecase please follow the link to Faby Reilly Designs, she has some beautiful patterns. If you like the dragonflies but don’t feel up to the construction, I think it would also look beautiful as a standard needlecase with felt pages inside instead.
This SAL is organised by Avis from Stitching by the Sea, we all post our progress on our individual projects every three weeks, it’s great for keeping us motivated! Please follow the links to see what everyone has been stitching.
Avis, Claire, Gun, Constanze, Christina, Kathy, Margaret, Cindy, Heidi, Jackie, Sunny, Megan, Deborah, Renee, Carmela, Sharon, Daisy, Anne, AJ, Cathie, Linda, Helen


This is GORGEOUS! I think I could probably manage the embroidery, but the construction would frustrate me. Happy, happy dance!
LikeLiked by 1 person
I had to really concentrate with the construction, it’s definitely not one to stitch in front of the TV!
LikeLiked by 1 person
You deserve your happy dance. This is such a beautiful and useful piece. Well done!
LikeLiked by 1 person
wow that’s a beautiful finish ^^
LikeLiked by 1 person
Wow so beautiful, fragile and delicate. What a happy dance for you!!
LikeLiked by 1 person
Another stunning finish under your belt Margaret. I wonder what treat we have in store for next time xx
LikeLiked by 1 person
Isn’t it fab! I was quite excited when it was coming together. Thank you for the intro to Faby.
LikeLiked by 1 person
It’s great, glad you’re enjoying Faby’s designs too, I have quite a few on my to-do list!
LikeLiked by 1 person
What a stunning needlecase! Your work is absolutely gorgeous.
LikeLiked by 1 person
Those damselflies are stunning. There’s such a lot of work gone into this and it’s paid off. A very deserved happy dance 🙂
LikeLiked by 1 person
Beautiful Margaret, and an engineering marvel too! I have loved every post on this project!
LikeLiked by 1 person
Wow – this turned out just beautiful. What a stunning piece. Sharing in with the happy dance.
LikeLiked by 1 person
Very pretty
LikeLiked by 1 person
It’s very, very pretty, and my favourite part is still the 3D dragonfly 😍
LikeLiked by 1 person
Thank you, it’s my favourite bit too 🙂
LikeLike
So beautiful!!!
LikeLiked by 1 person
A stunning finish – your expert hands and your creativity would turn anything into a masterpiece! It’s always absolutely delightful to see your work, Margaret! 🥰
LikeLiked by 1 person
Thanks Faby, I really enjoyed this one 🙂
LikeLike
Oh my goodness, Margaret — what exquisite work! You’ve truly made an heirloom (that’s practical too!). Gorgeous work!!!
LikeLiked by 1 person
I love the darker wings on your version. Gorgeous finish and worth the hard work!
LikeLiked by 1 person
Please take a bow. This is spectacular work.
LikeLiked by 1 person
Gorgeous… a real masterpiece! WOW!
LikeLiked by 1 person
Beautiful, the details are absolutely gorgeous
LikeLiked by 1 person