
After working out how to bind my fabric book, the next stage was to make a cover. Having found how attractive the binding can be, another time I might make the covers the same way and just bind the whole book together, but that will wait for another project.
Please note that this is a description of how I made this one, mistakes and all, it’s not instructions of how to do it as such!!

Making the covers is basically a measuring job, working out just how long it needs to be. I’ve included my measurements to just to try and illustrate it.
I measured the book by wrapping the tape measure round it, allowing a little extra at the edges, including front, back and spine, plus of course, a bit for seam allowances. (for this book, that was 15″) I then added extra on for a fold over on each side, I added 9″ in total, so 4.5″ each side as I wanted it to cover the flange I had left myself which was a bit on the skimpy side!!) Width is obviously top to bottom with a bit extra and the seam allowance. (Piece needed was therefore 24″ x 7″)
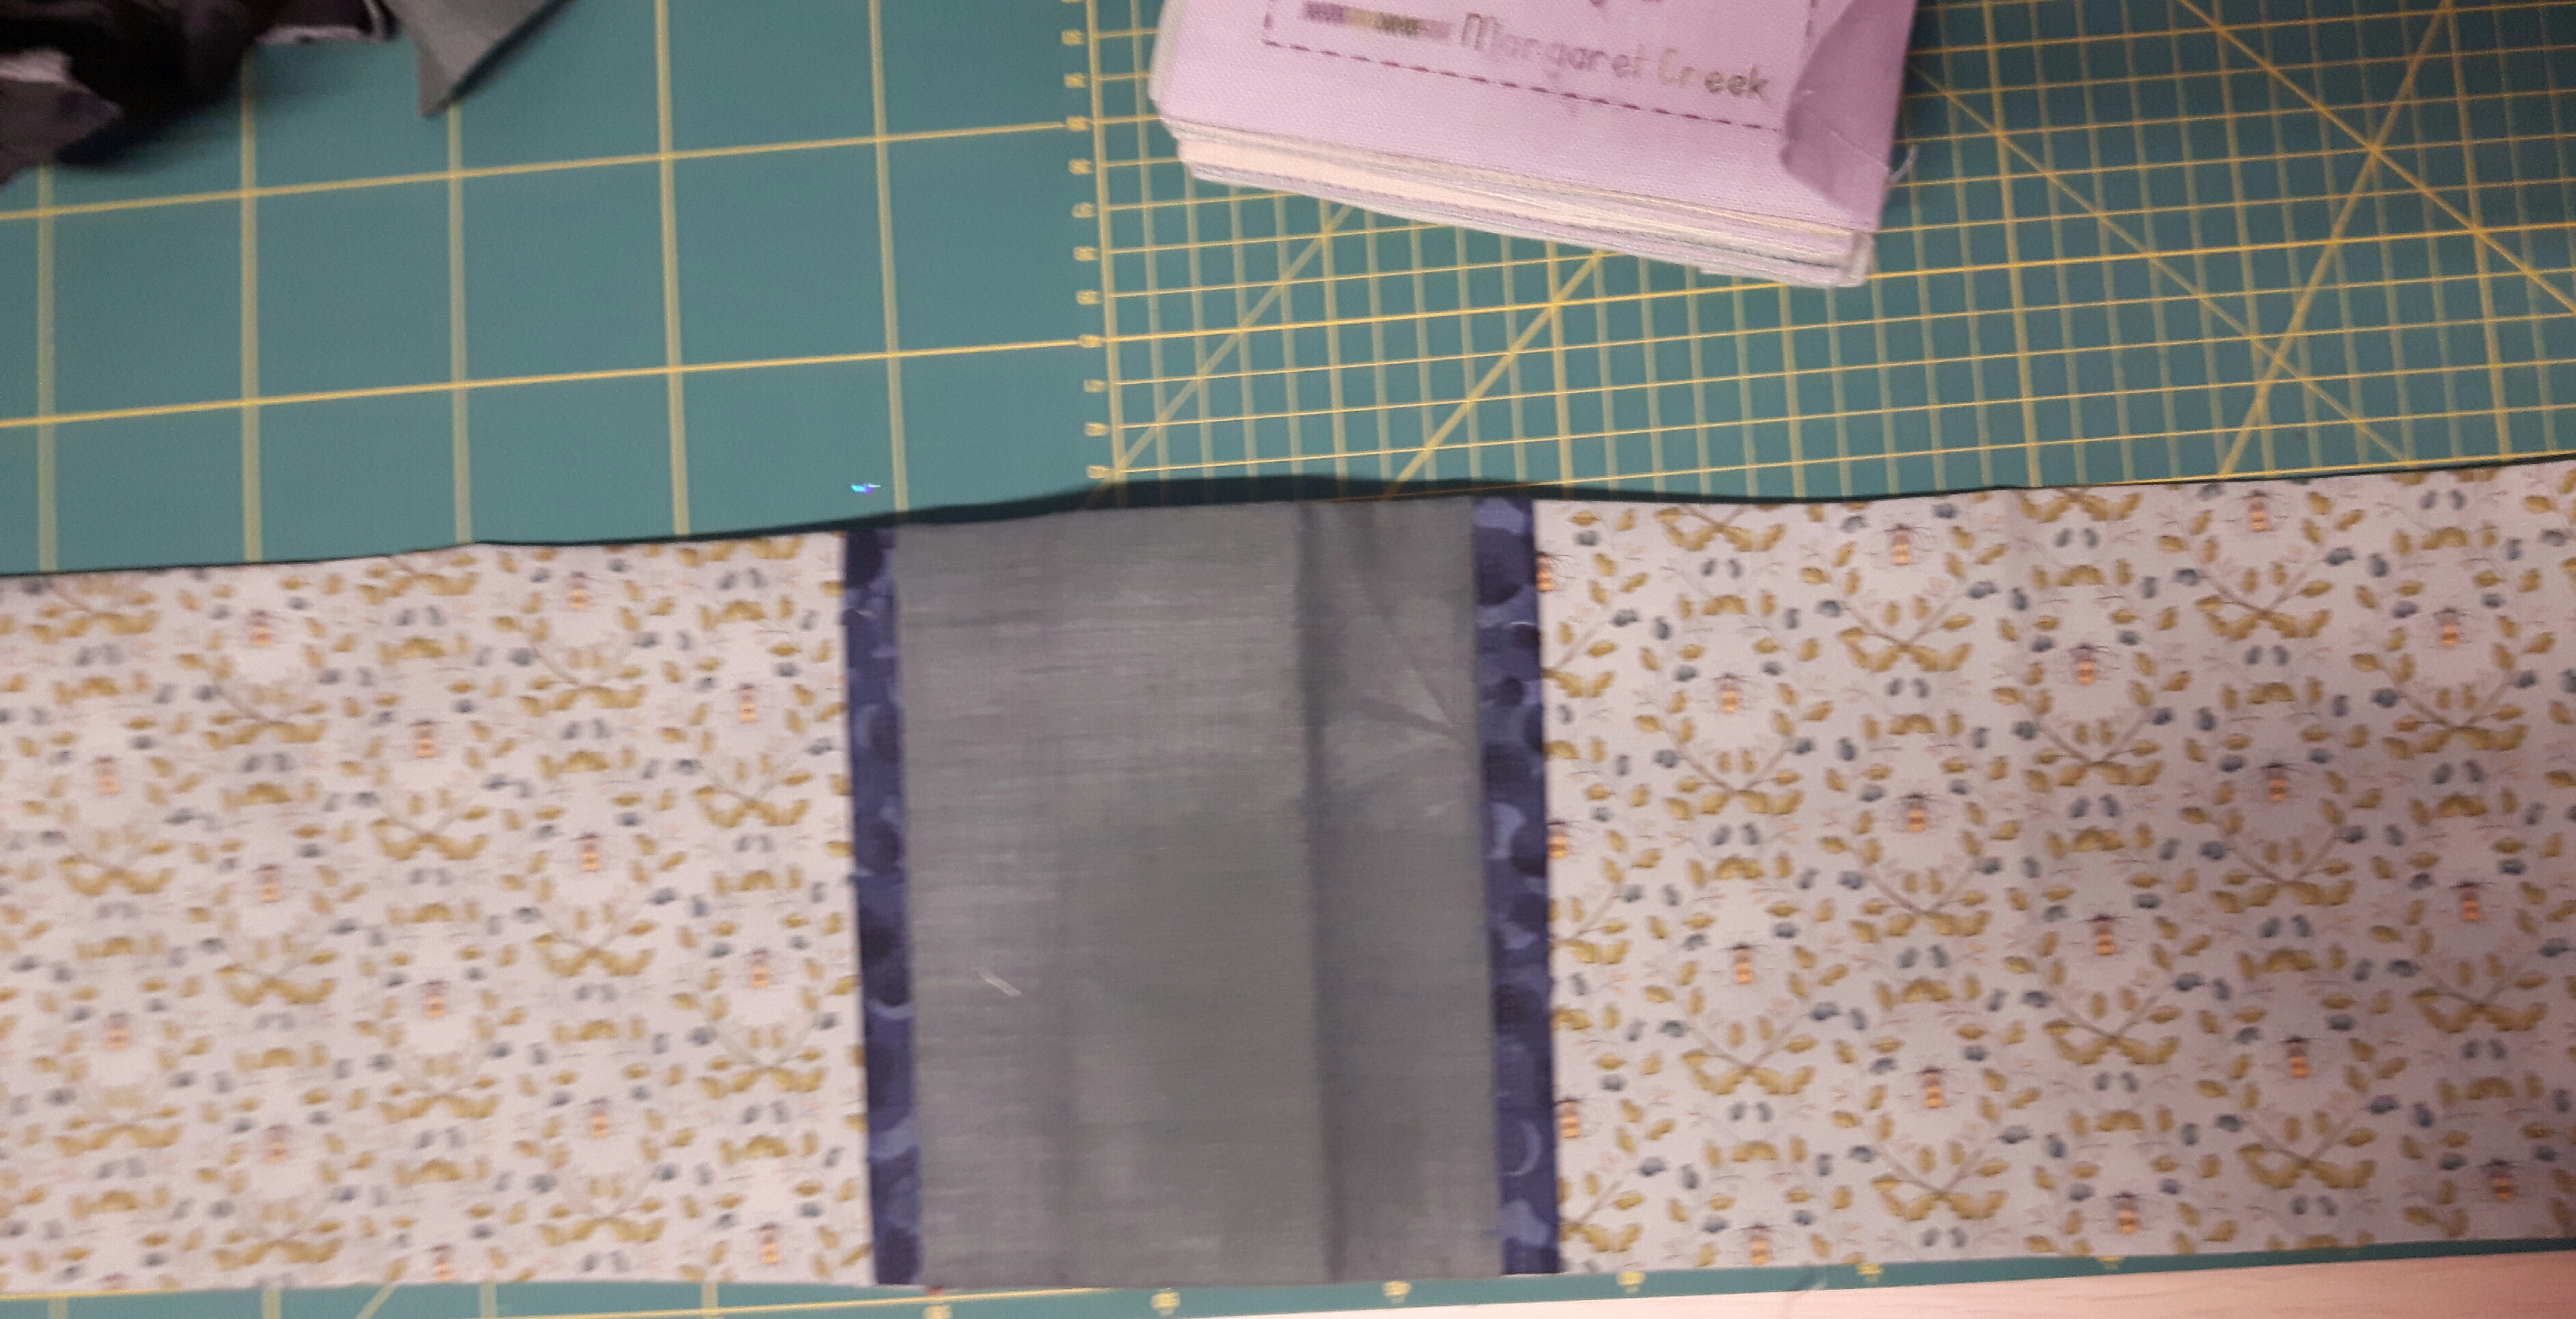
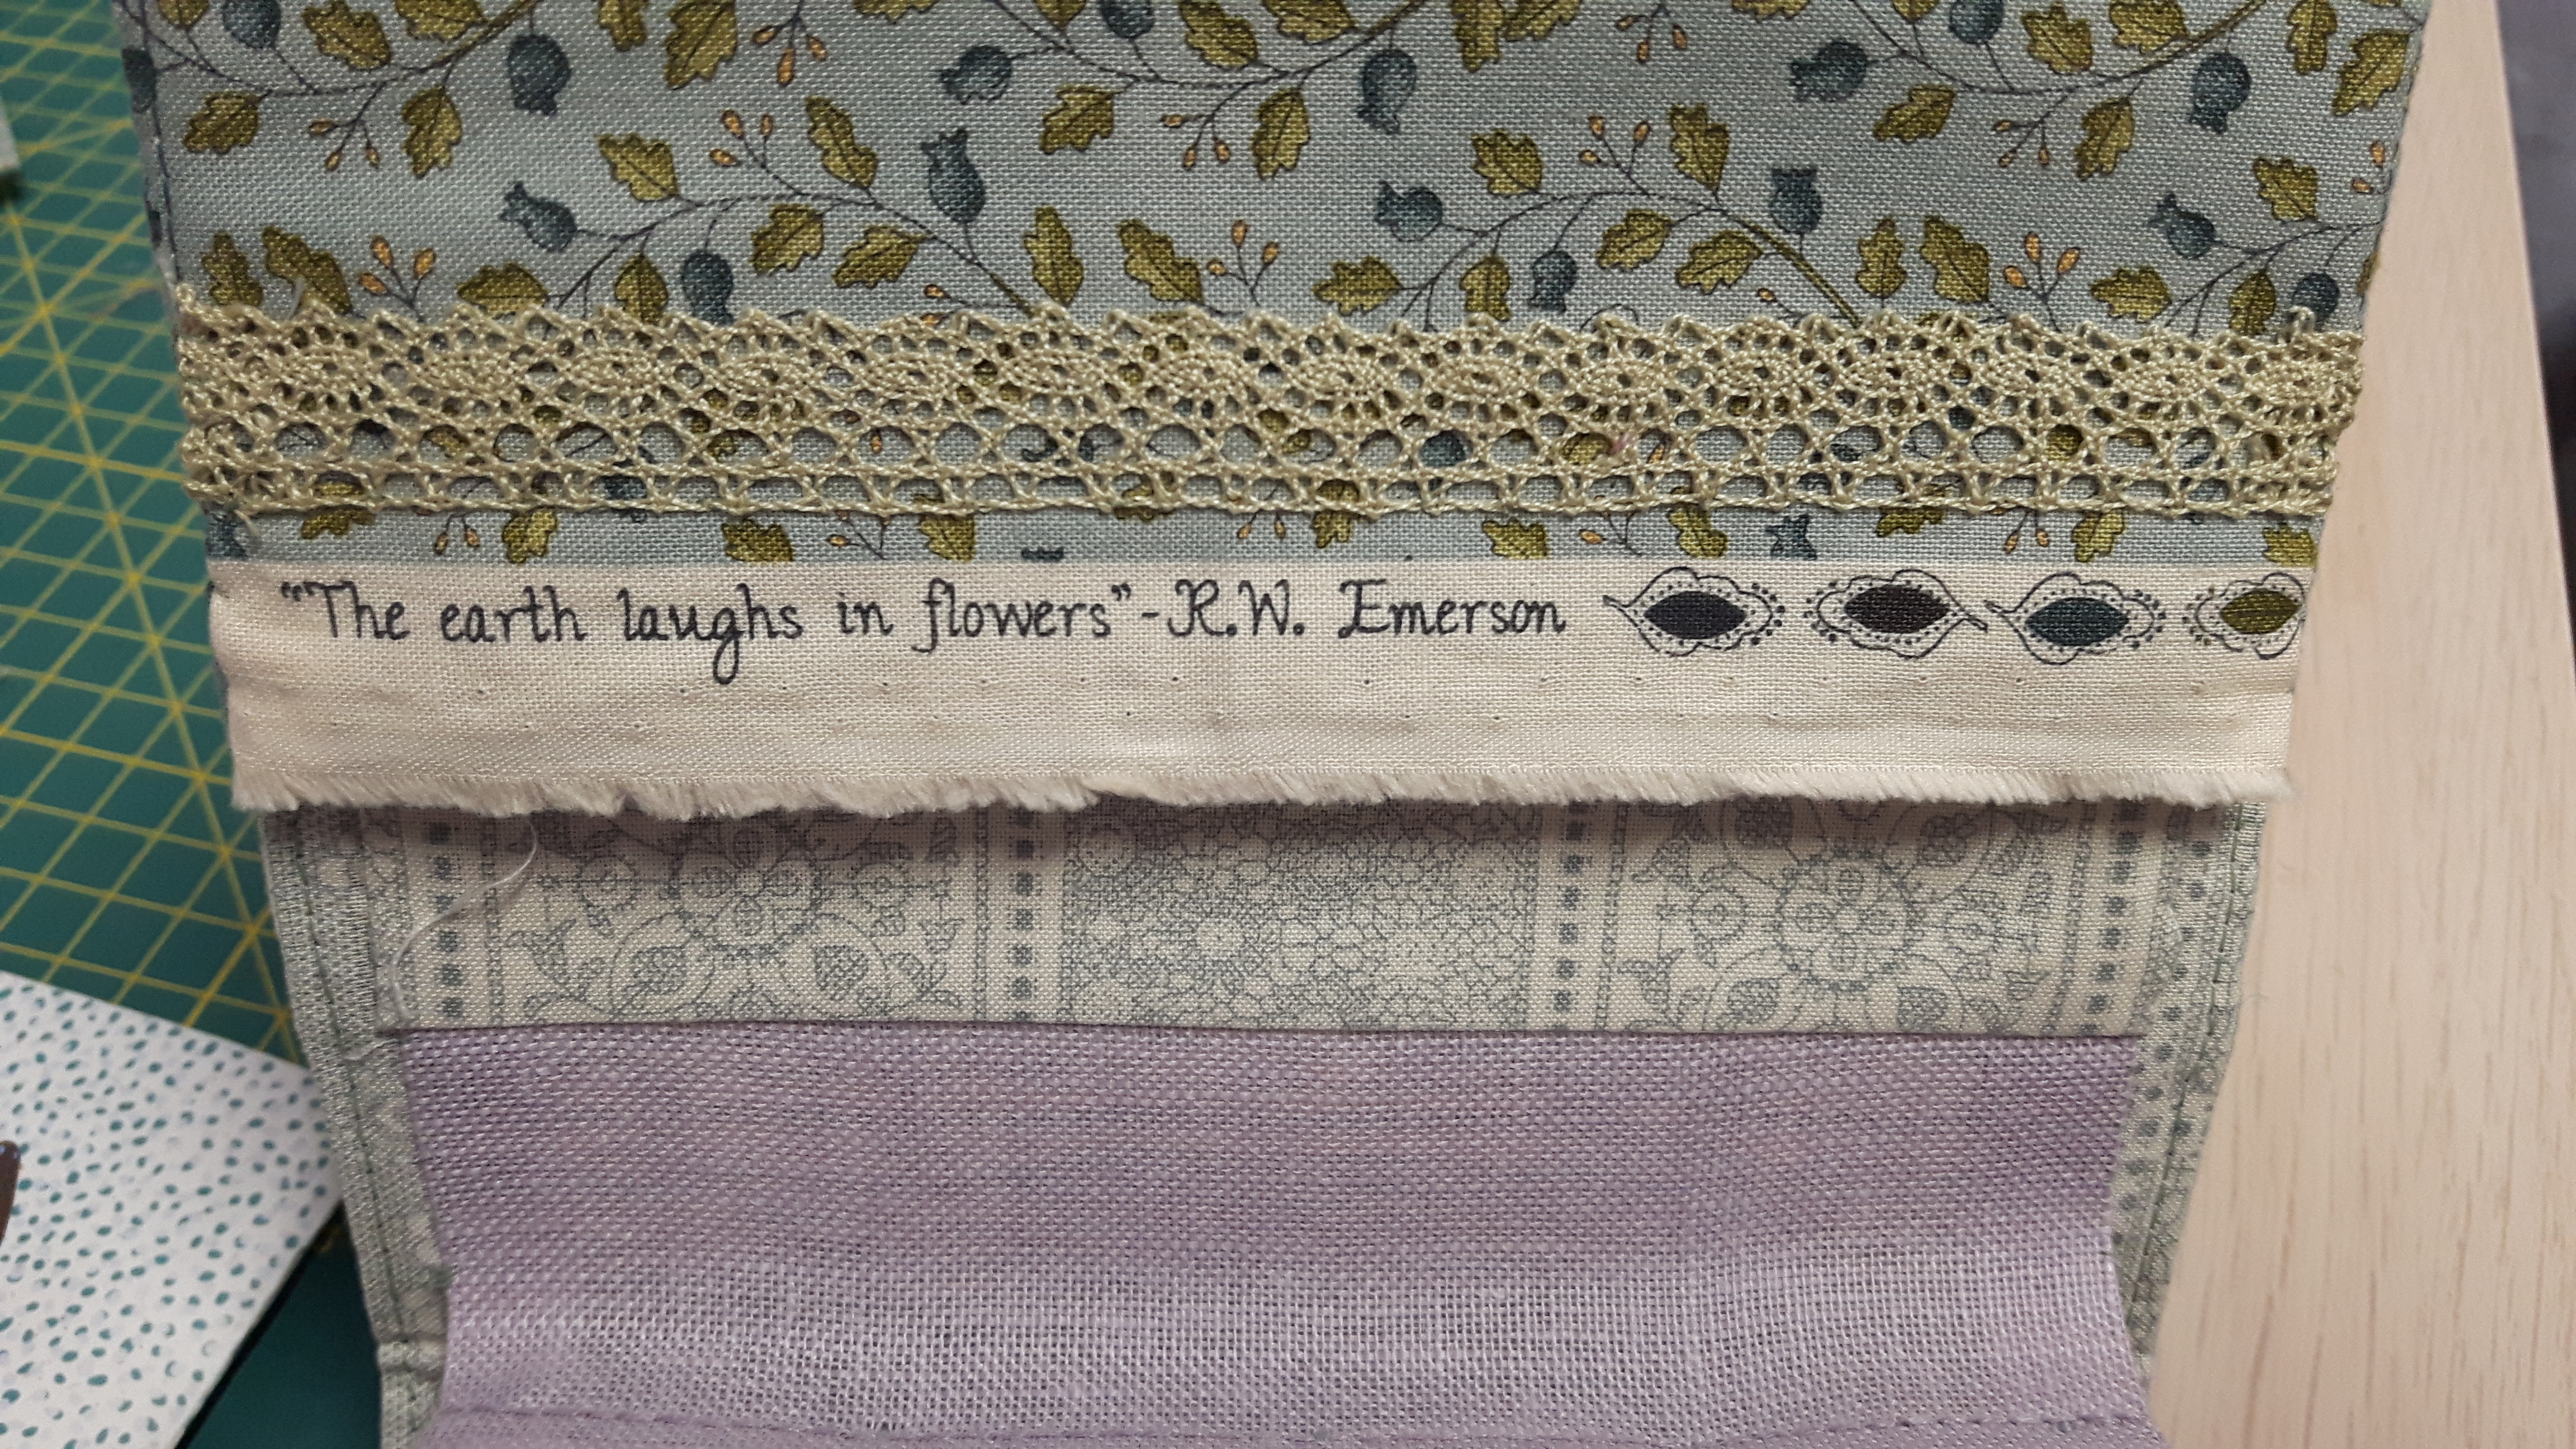
I chose to make the outside from three different fabrics, a plain one around the spine, a narrow fold in dark blue and a bee fabric for the rest. As soon as I saw this fabric was called ‘The Earth Laughs in Flowers’ I had to use it! The maths again was a matter of working out how big I wanted the spine, adding seam allowances again. (My spine fabric was cut at 5.5″ and the bee fabric was cut with a bit extra at 10.5″ twice) The tuck was just a strip cut at 1.5″, folded in half and stitched in the seam.
I stitched the outer cover together then cut a piece of fabric the same size for the lining. I stitched these together leaving one short side unstitched. I turned it and pressed it.
I used Bosal as a stiffener. This is like a super thick vilene which is either adhesive on one or both sides. I like it for textile books as it’s very firm but does have that flexibility which I think blends well with fabric pages. It also takes a fold reasonably well. I cut the bosal to the finished size of the cover (14.25 x 6.5″) I could then slide it inside my cover, checking the spine was in the right place before ironing it to activate the adhesive. I then slip-stitched the end closed and edge stitched right round the cover on my machine.
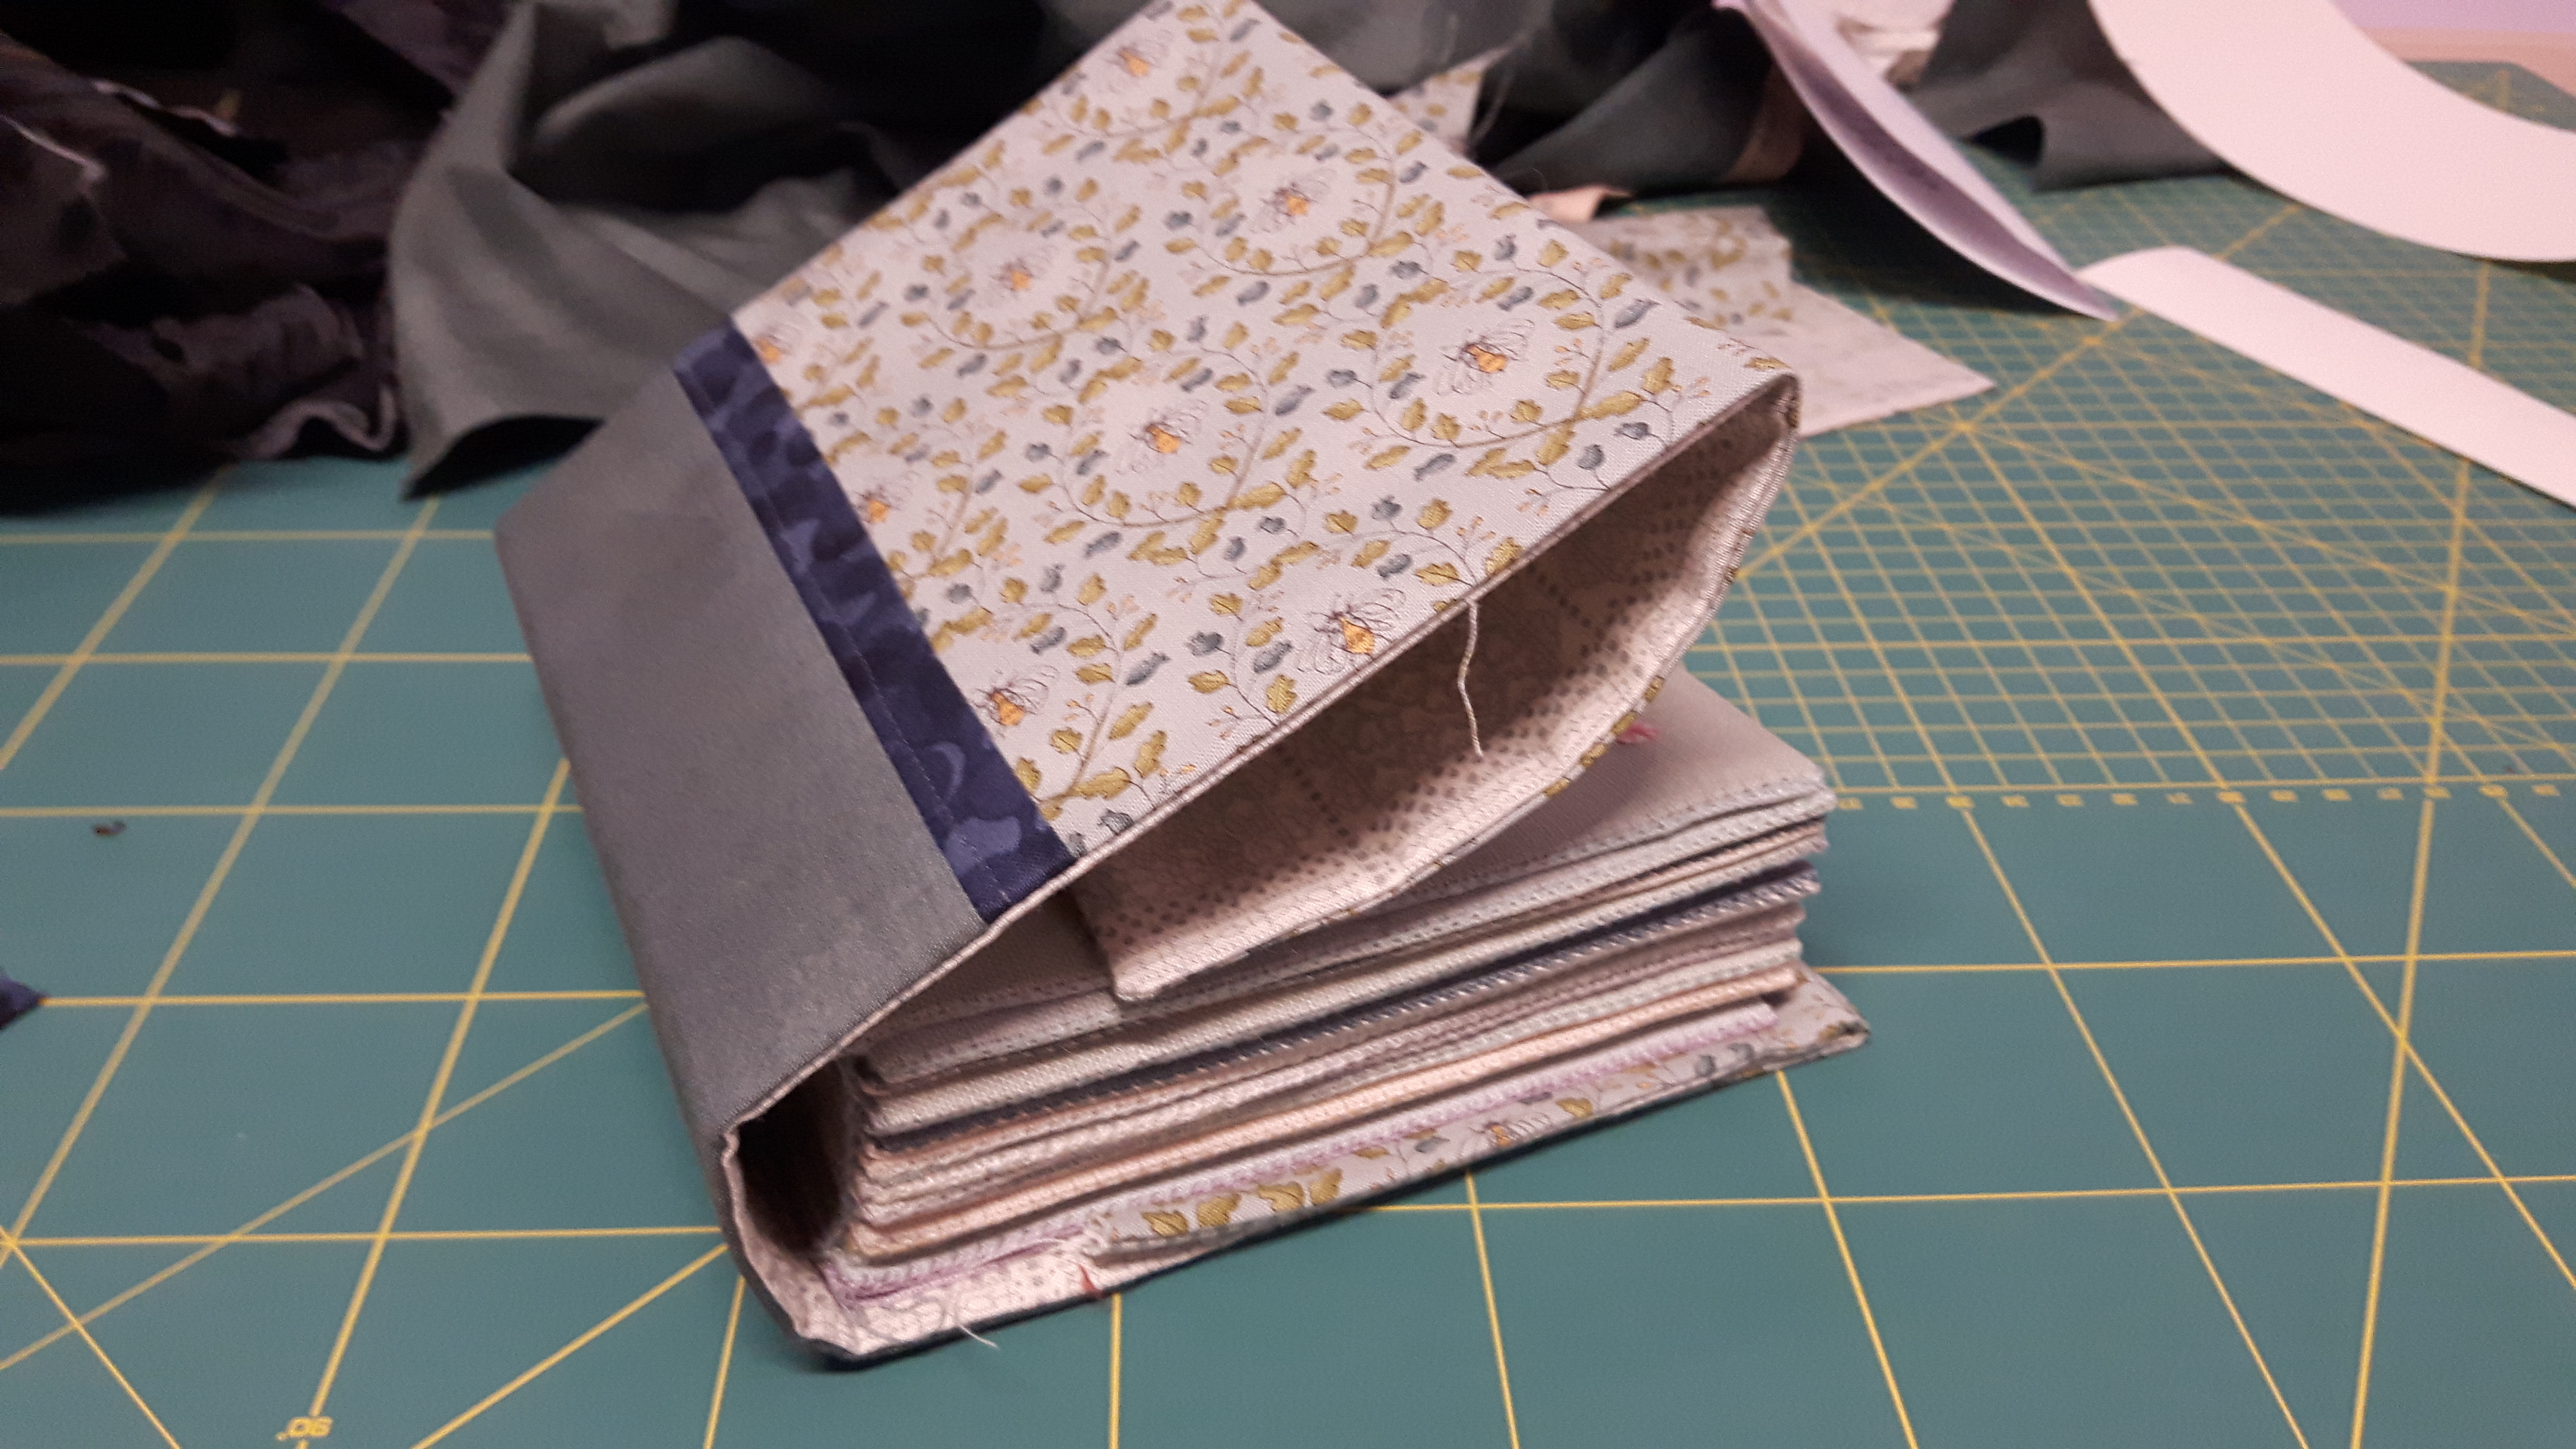
I had left myself a fairly small flange front and back to stitch the pages to the cover, not through choice, but my fabric stash of 32 count linen was pretty depleted! You may also remember that I had a slip up with the scissors when trimming the front page. Of course this ended up in a crucial place!
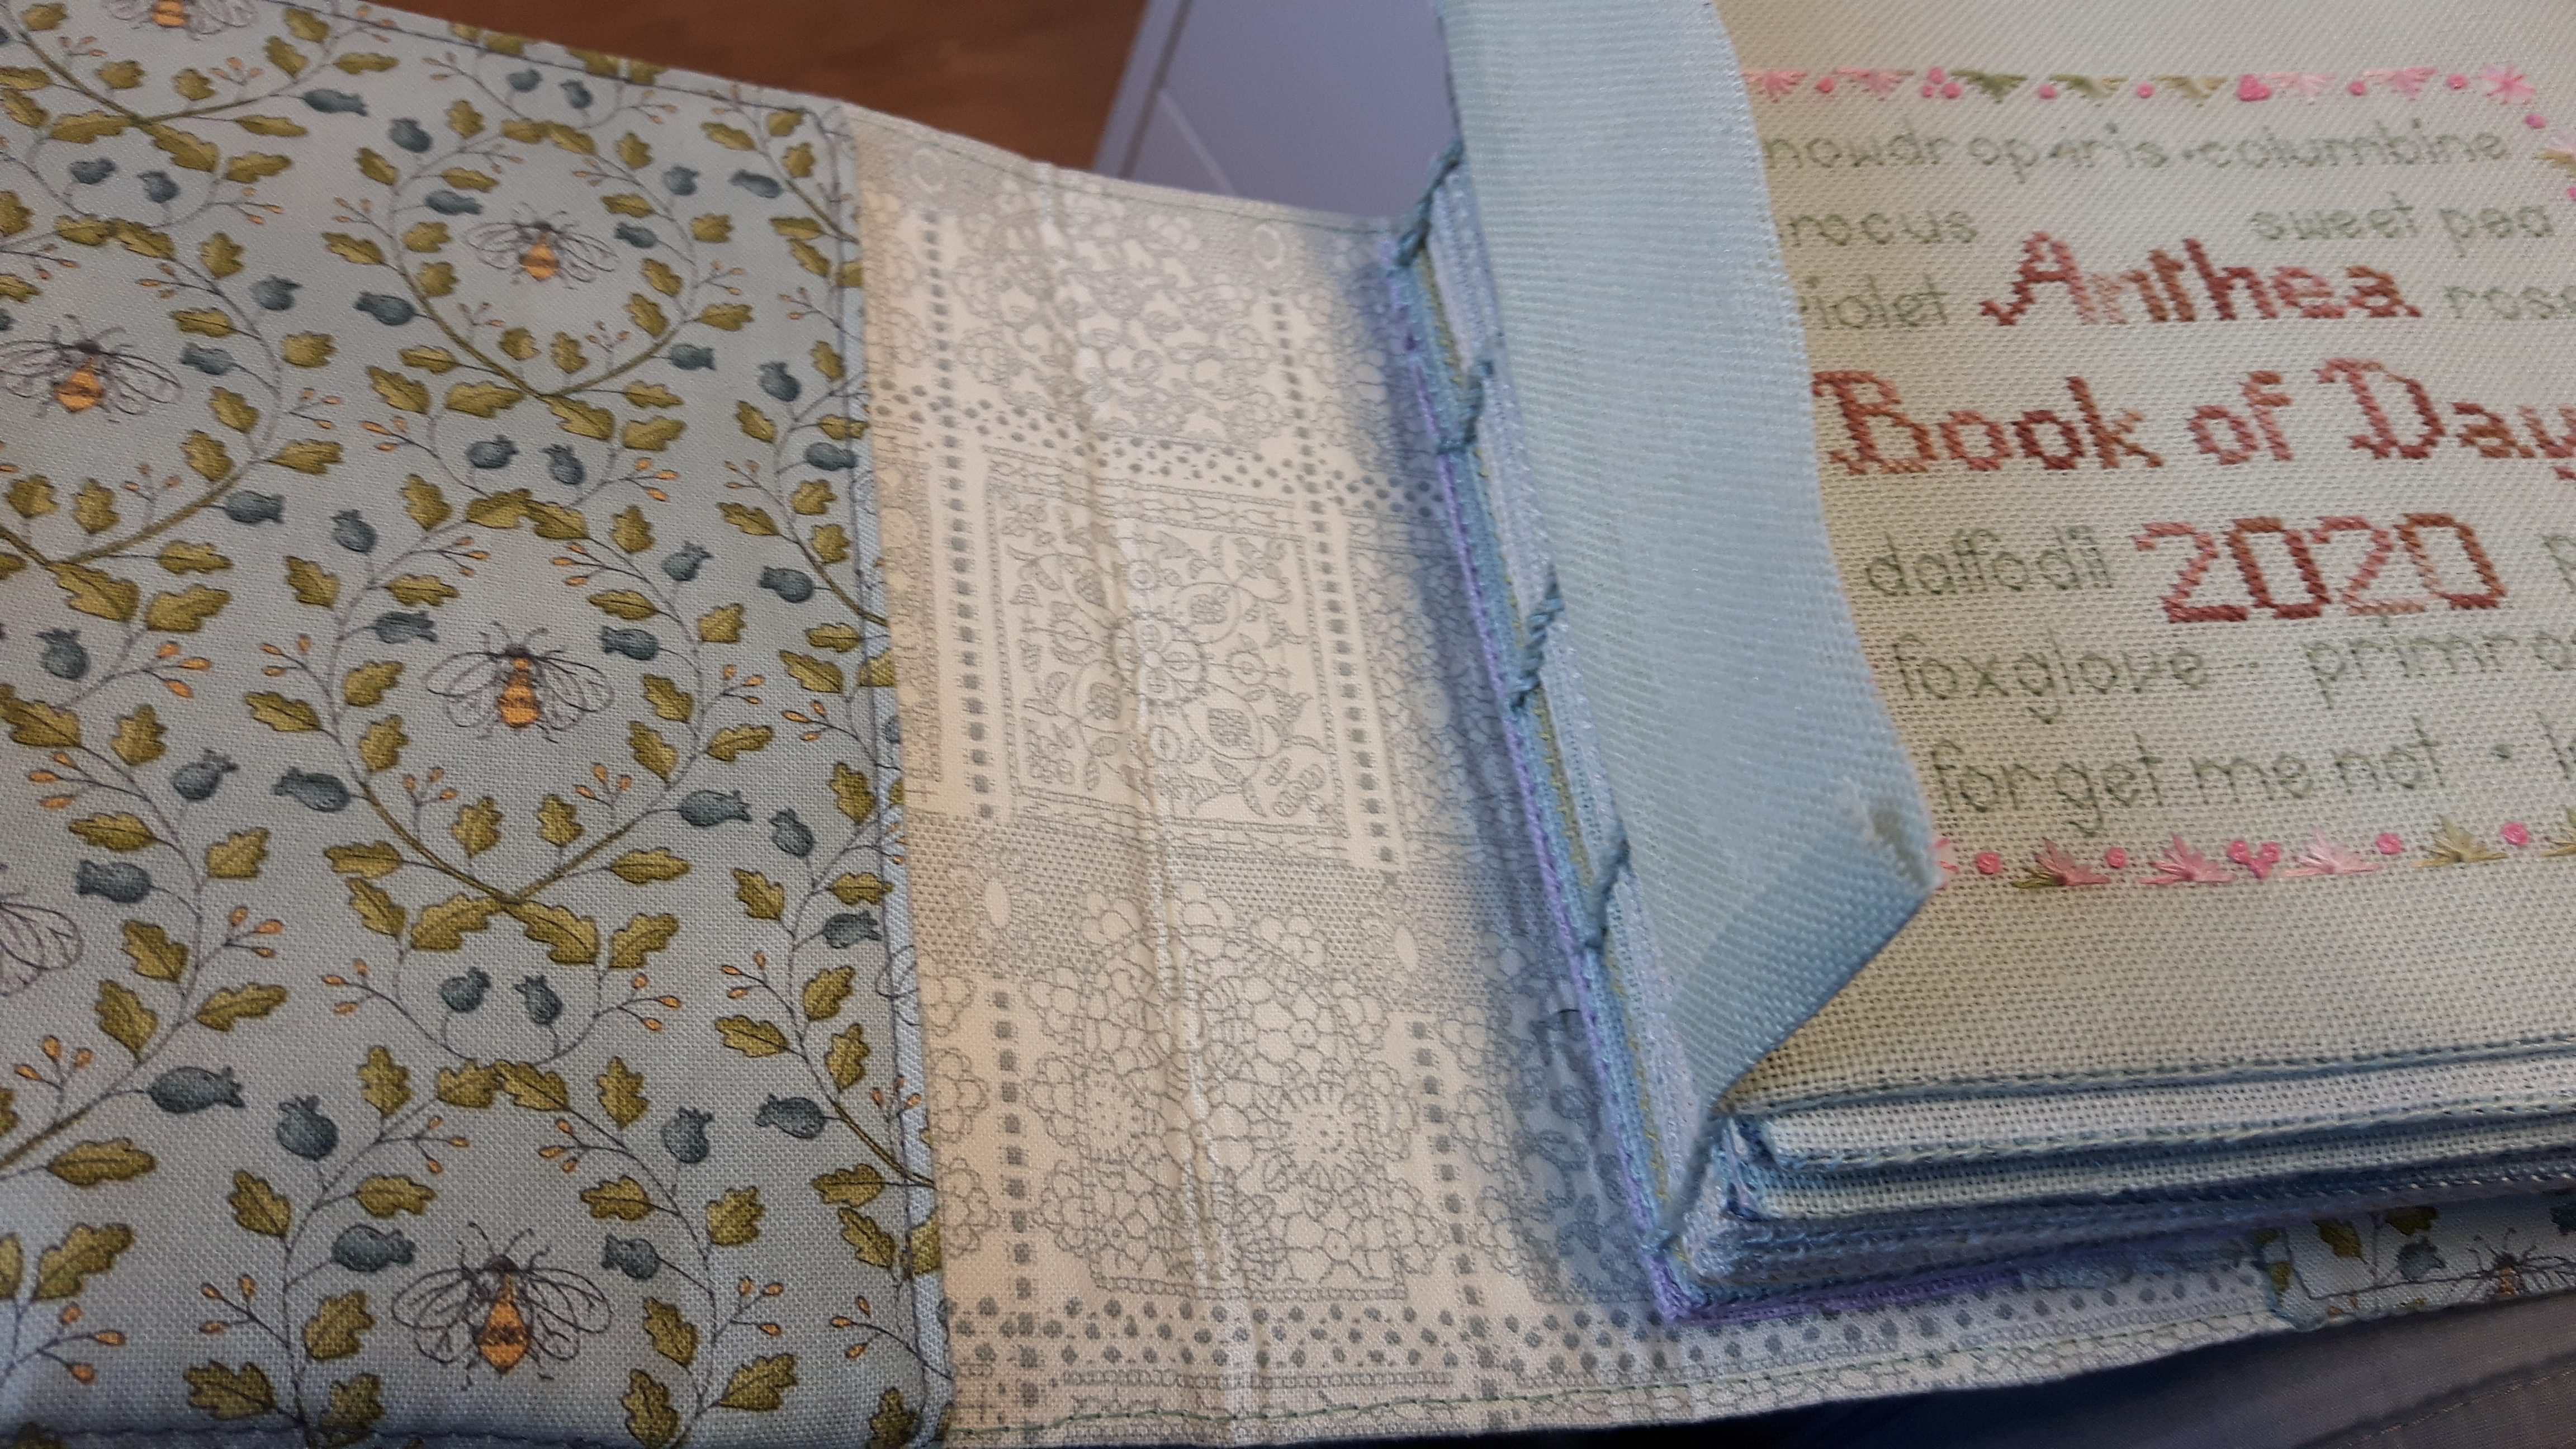
Having bound the book so it would lie flat beautifully, I also realised that if I stitched right next to the page, the pages would lose this feature as the spine of the cover wasn’t flexible. I decided to leave a centimetre for movement, which of course ended up right where the accidental snip was! I did some fudging! I used a strip of bondaweb which stopped 1cm from the pages! It gave me the support in the middle which I couldn’t easily stitch. I stitched down the flap over the edge of the flange and slip-stitched the top and bottom edges of the flap to the front.
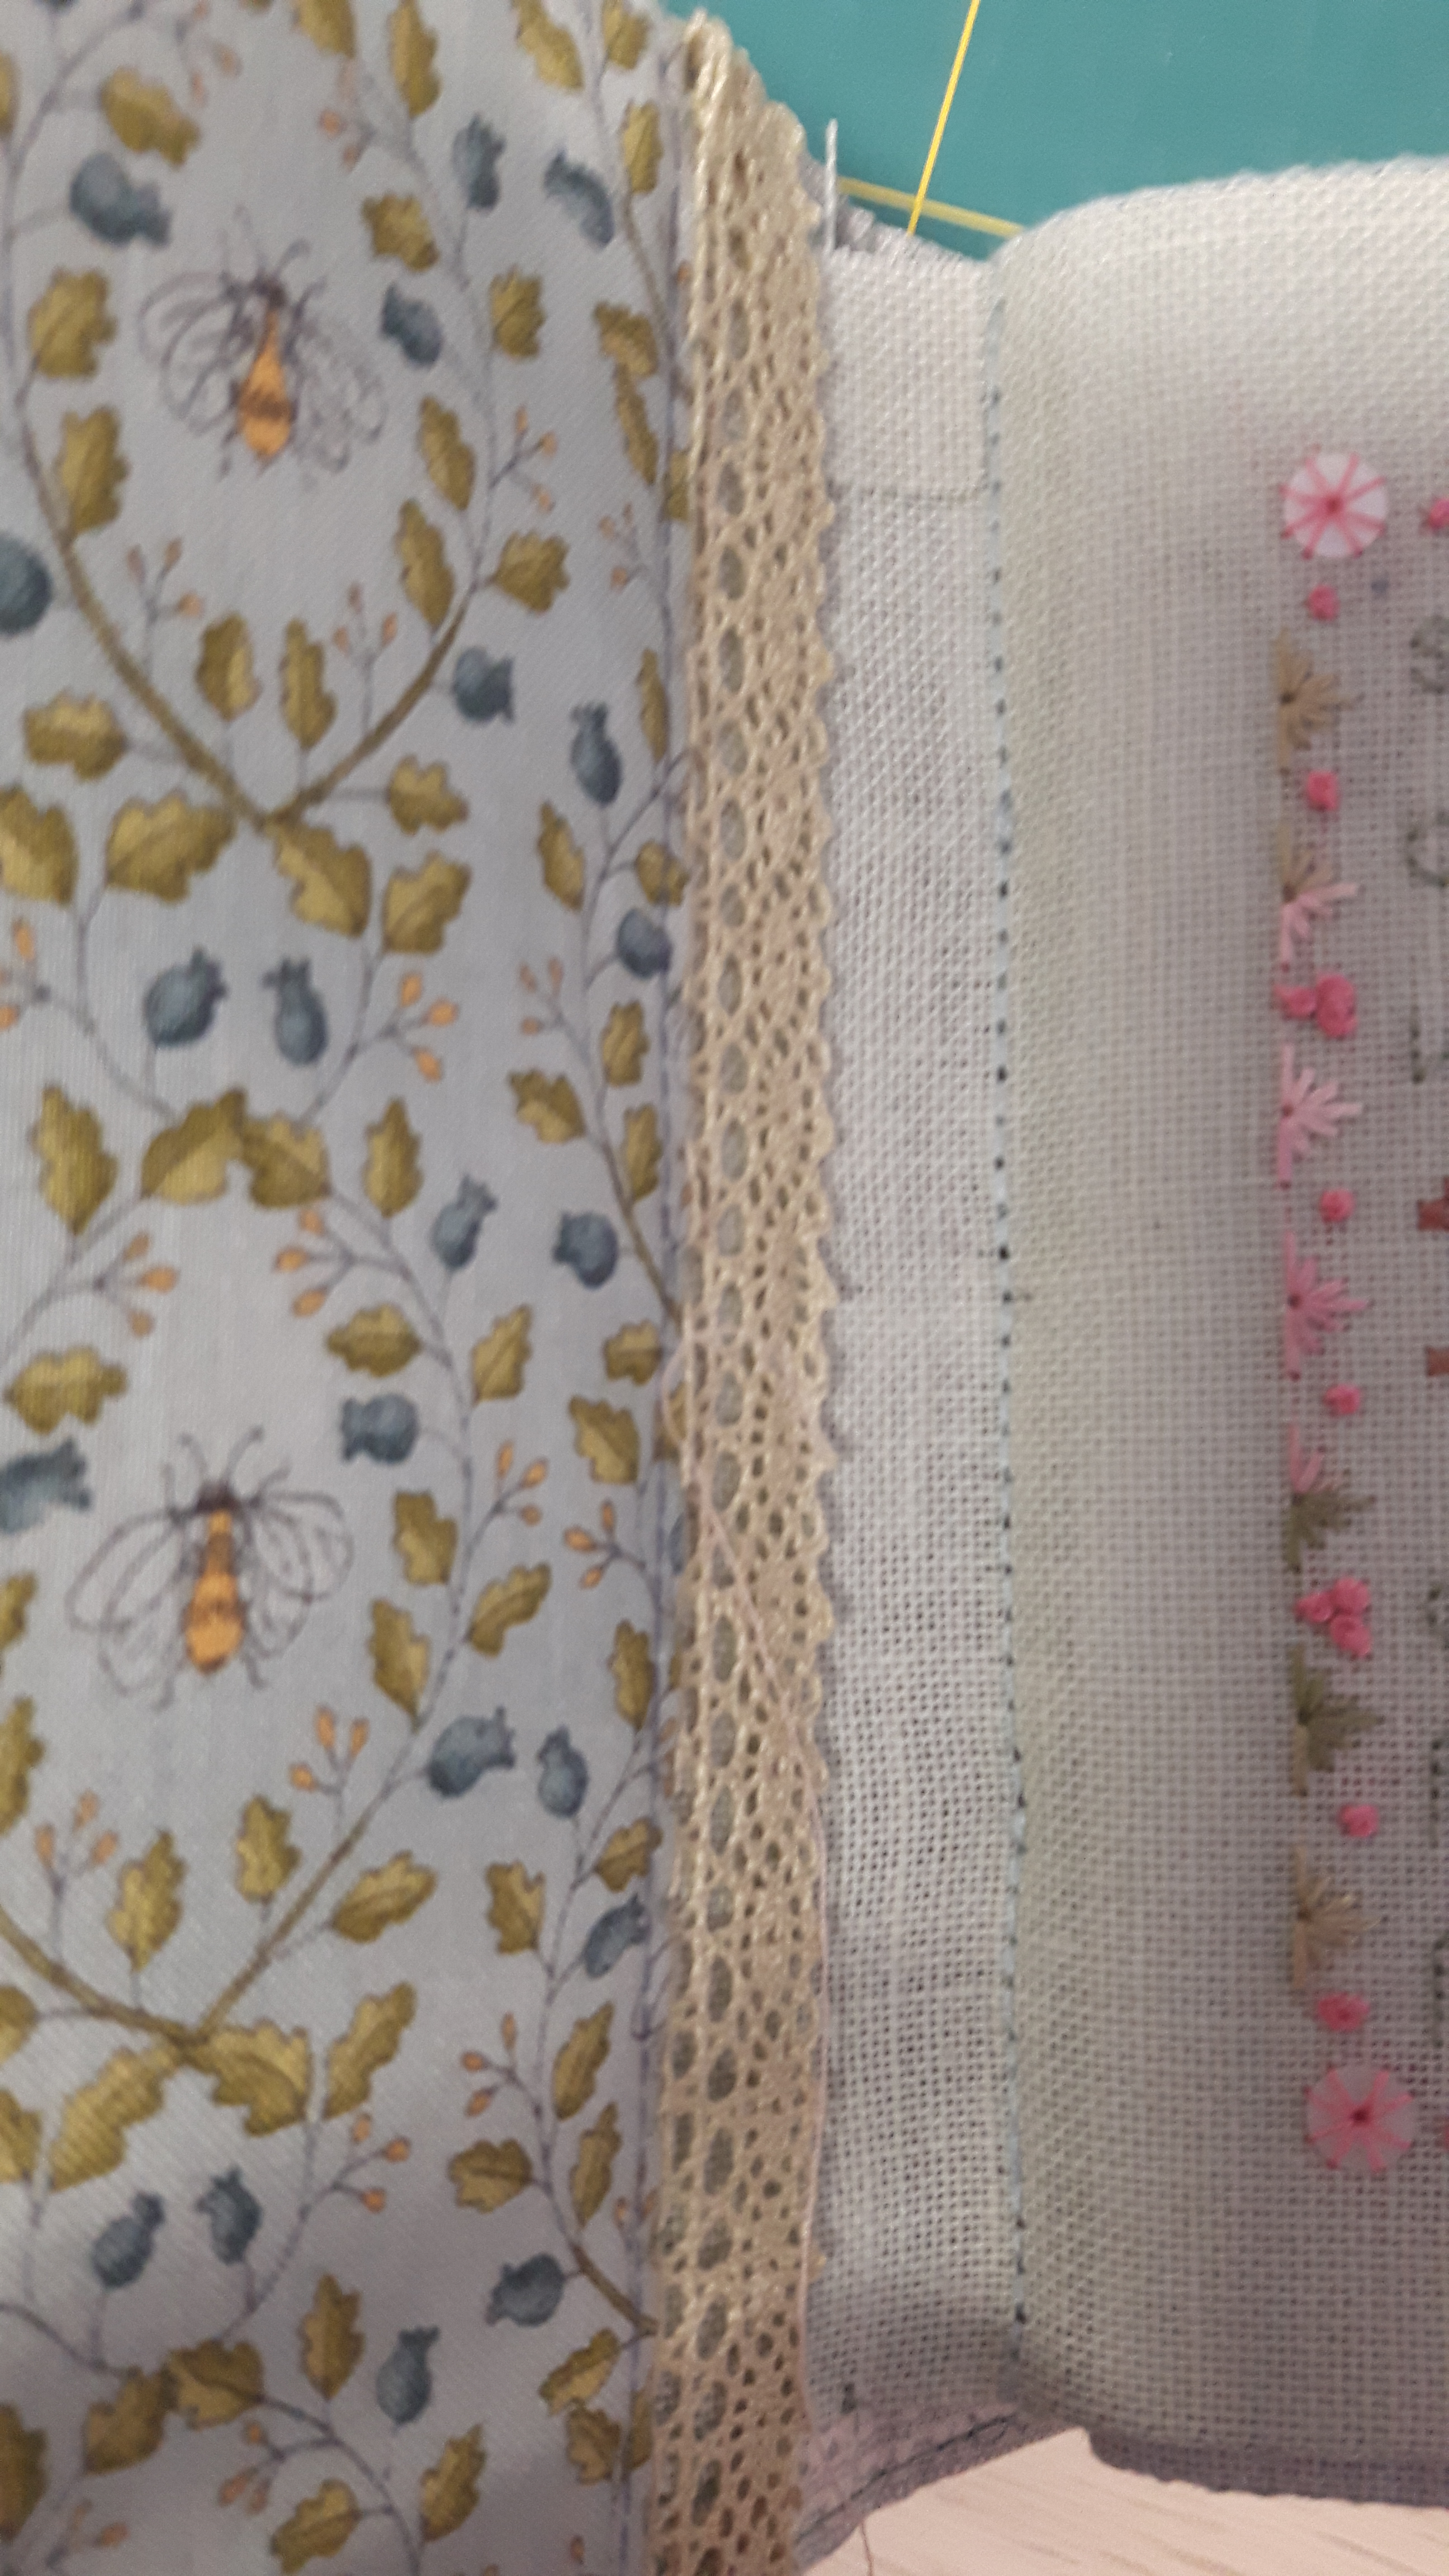
The snip was still concerning me as it was clearly going to be a weak spot. Another fudge required! I cut a little square of linen, used bondaweb to stick it over the offending snip a bit like a sticky plaster…then stitched a strip of lace over the top!!
The back page was a bit simpler. I decided to extend the flange with a strip of the lining fabric as I wanted to use the pocket formed by the flap at the back. Lesson learned here, if you’re using this method, make your flanges big enough! I used bondaweb again to give me that 1cm gap then I could just stitch the extended flange down and slip stitch the flap at the sides.
I blame Anne Brooke of the Stitching 4 the Soul Book for the next bit!!
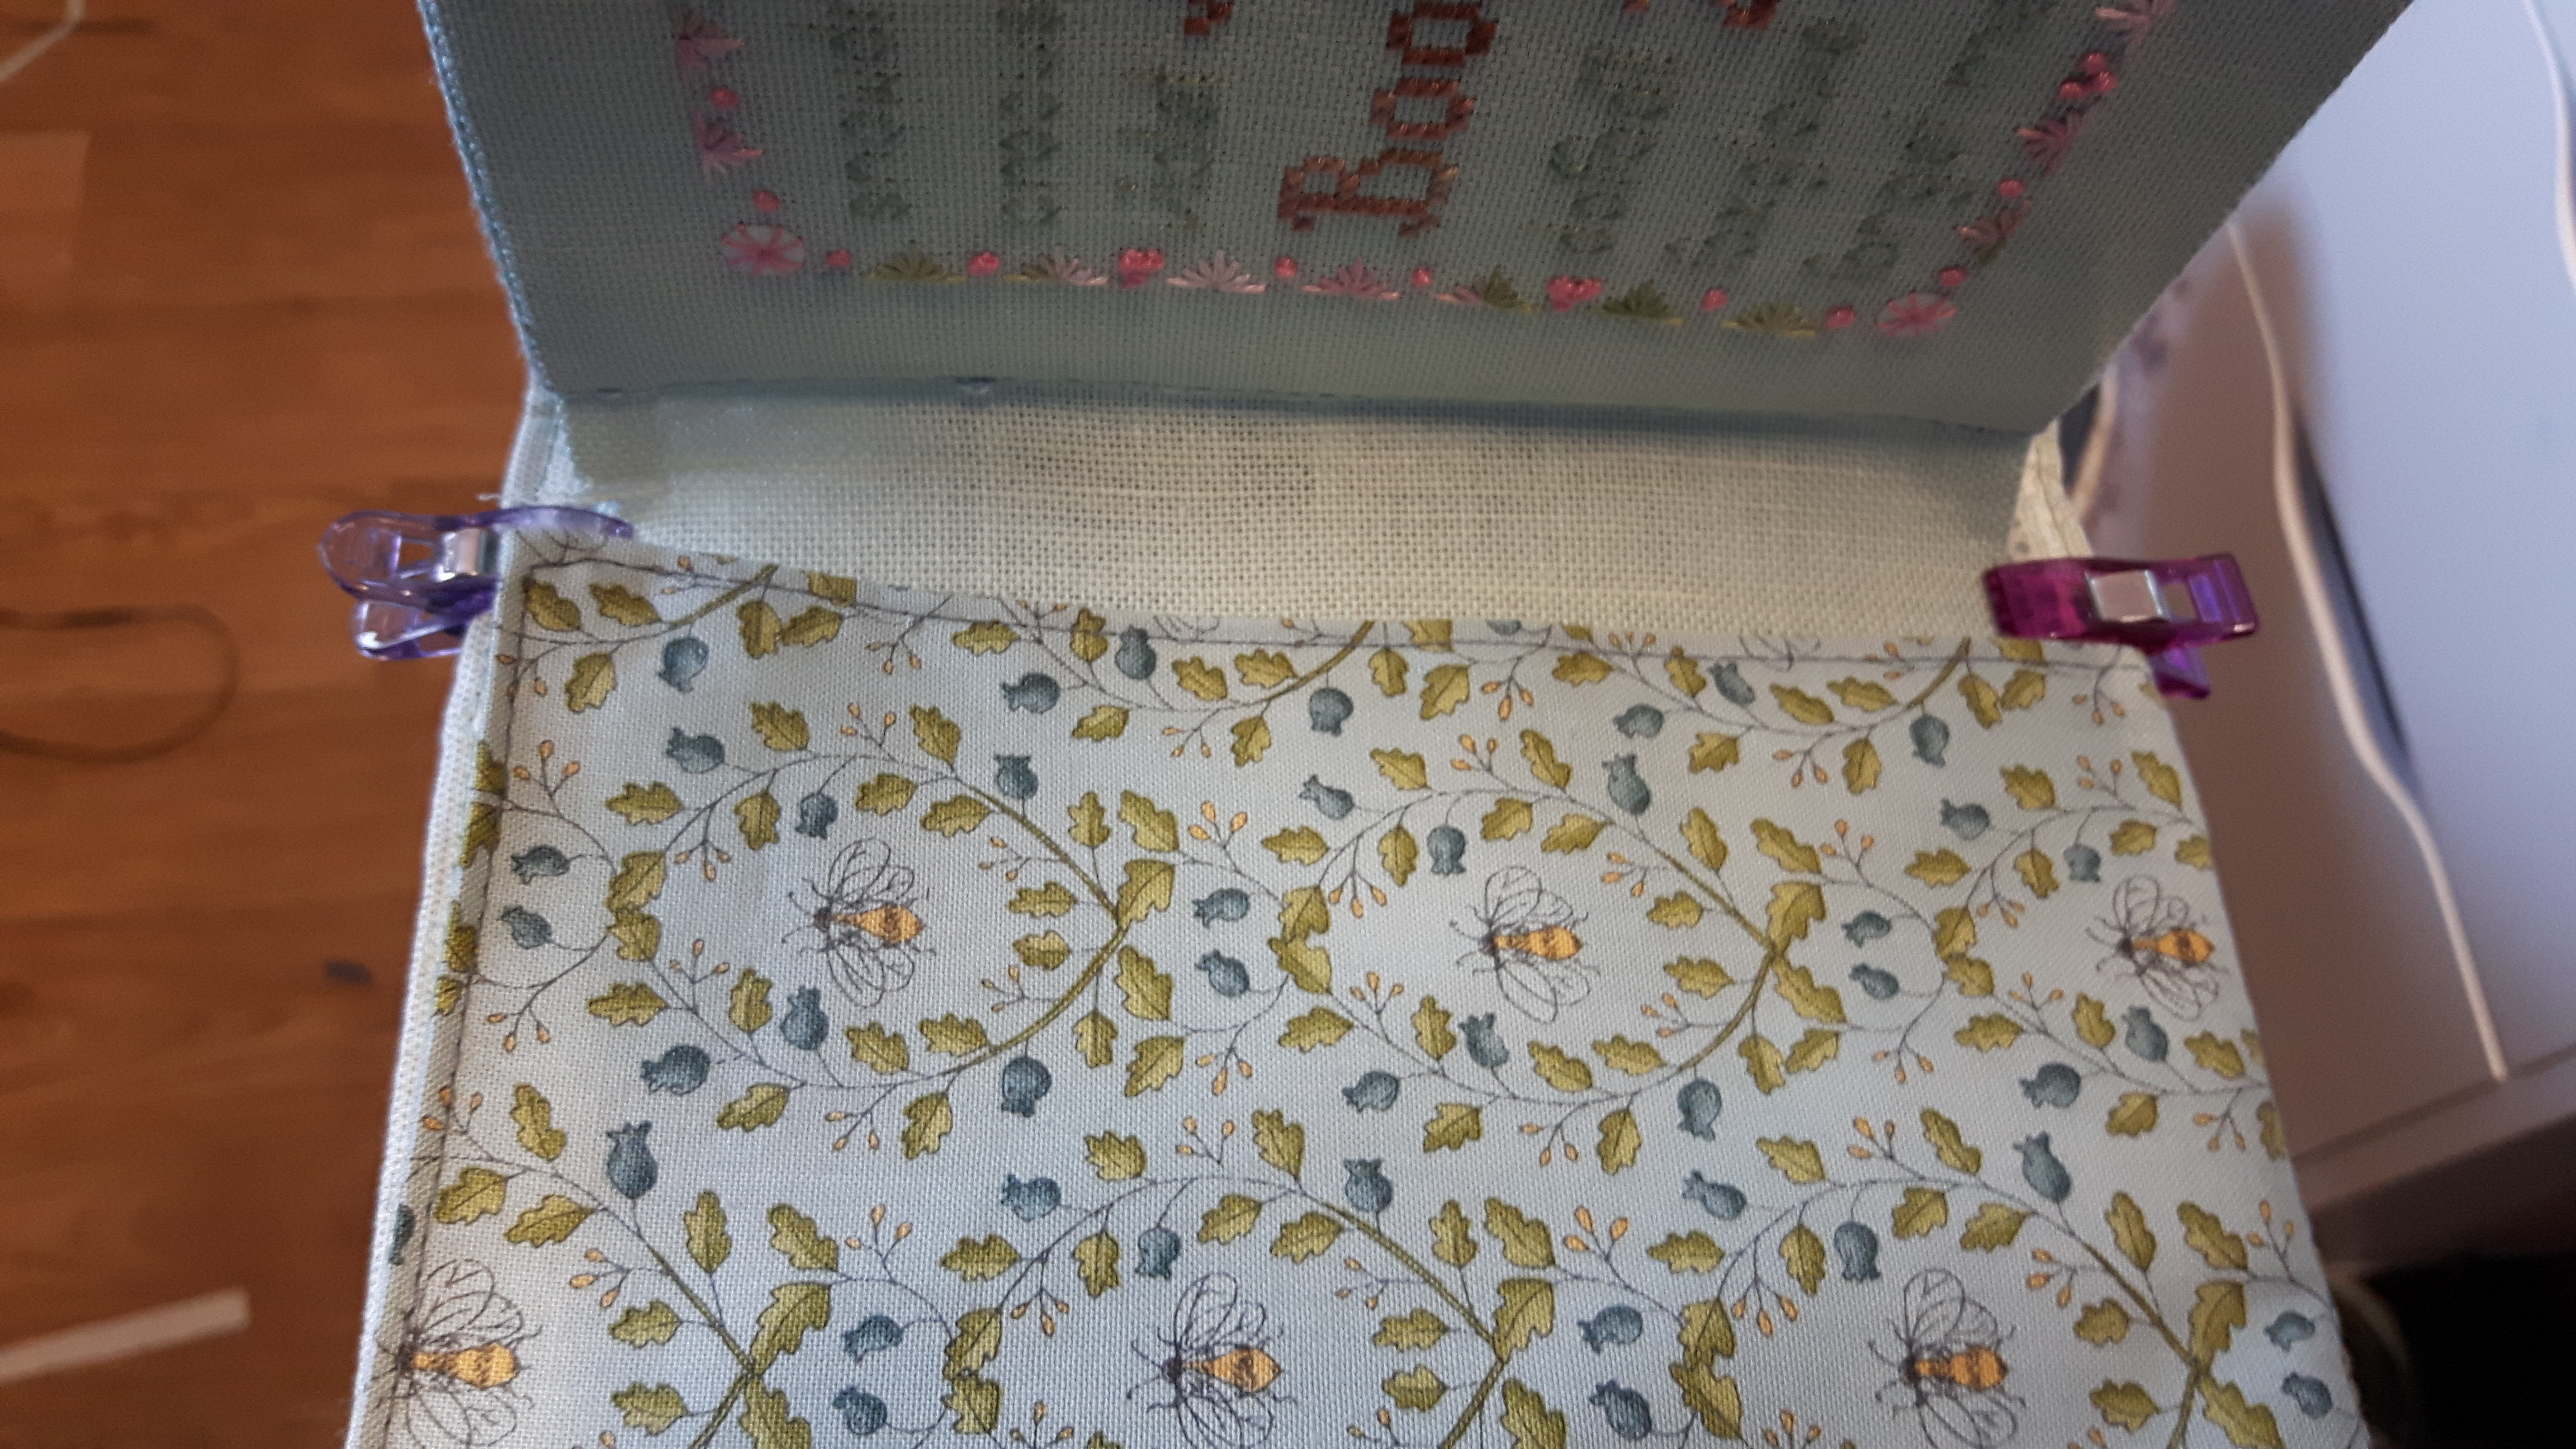
I noticed the selvedge on the bee fabric with the name of the fabric and the colour spots, I decided to include it, so I stitched it onto the inside of the back cover with another strip of lace to cover the raw edge!
All that was left was the finishing touches. I do like tied books, so I found a pretty button, stitched it to the front with a length of braid I made from two DMC threads. I felt it needed a title on the front, so I embroidered Anthea on a scrap of linen, frayed the edges and used bondaweb to stick it on.

All these posts explaining how I’ve made my book have been linked together on the page above called Textile Books. If anything doesn’t make sense, please ask!
Now I’m sure many of you are hoping for the big reveal, the happy dance photos, well I think this post is long enough so I promise I will post my finished Book of Days tomorrow!


Beautiful. Blessings, Judy.
LikeLiked by 1 person
Love it, Margaret! Thank you so much for taking the time to share how you have bound your book! 🙂
LikeLiked by 1 person
This is wonderful! Thanks so much for the Bosal recommendation and some great ideas. Fudging lessons are also the best as, let’s face it, it’s ‘easy’ when it goes as it should in the tutorial but it’s when you encounter the real world problems that you really need the help.
LikeLiked by 1 person
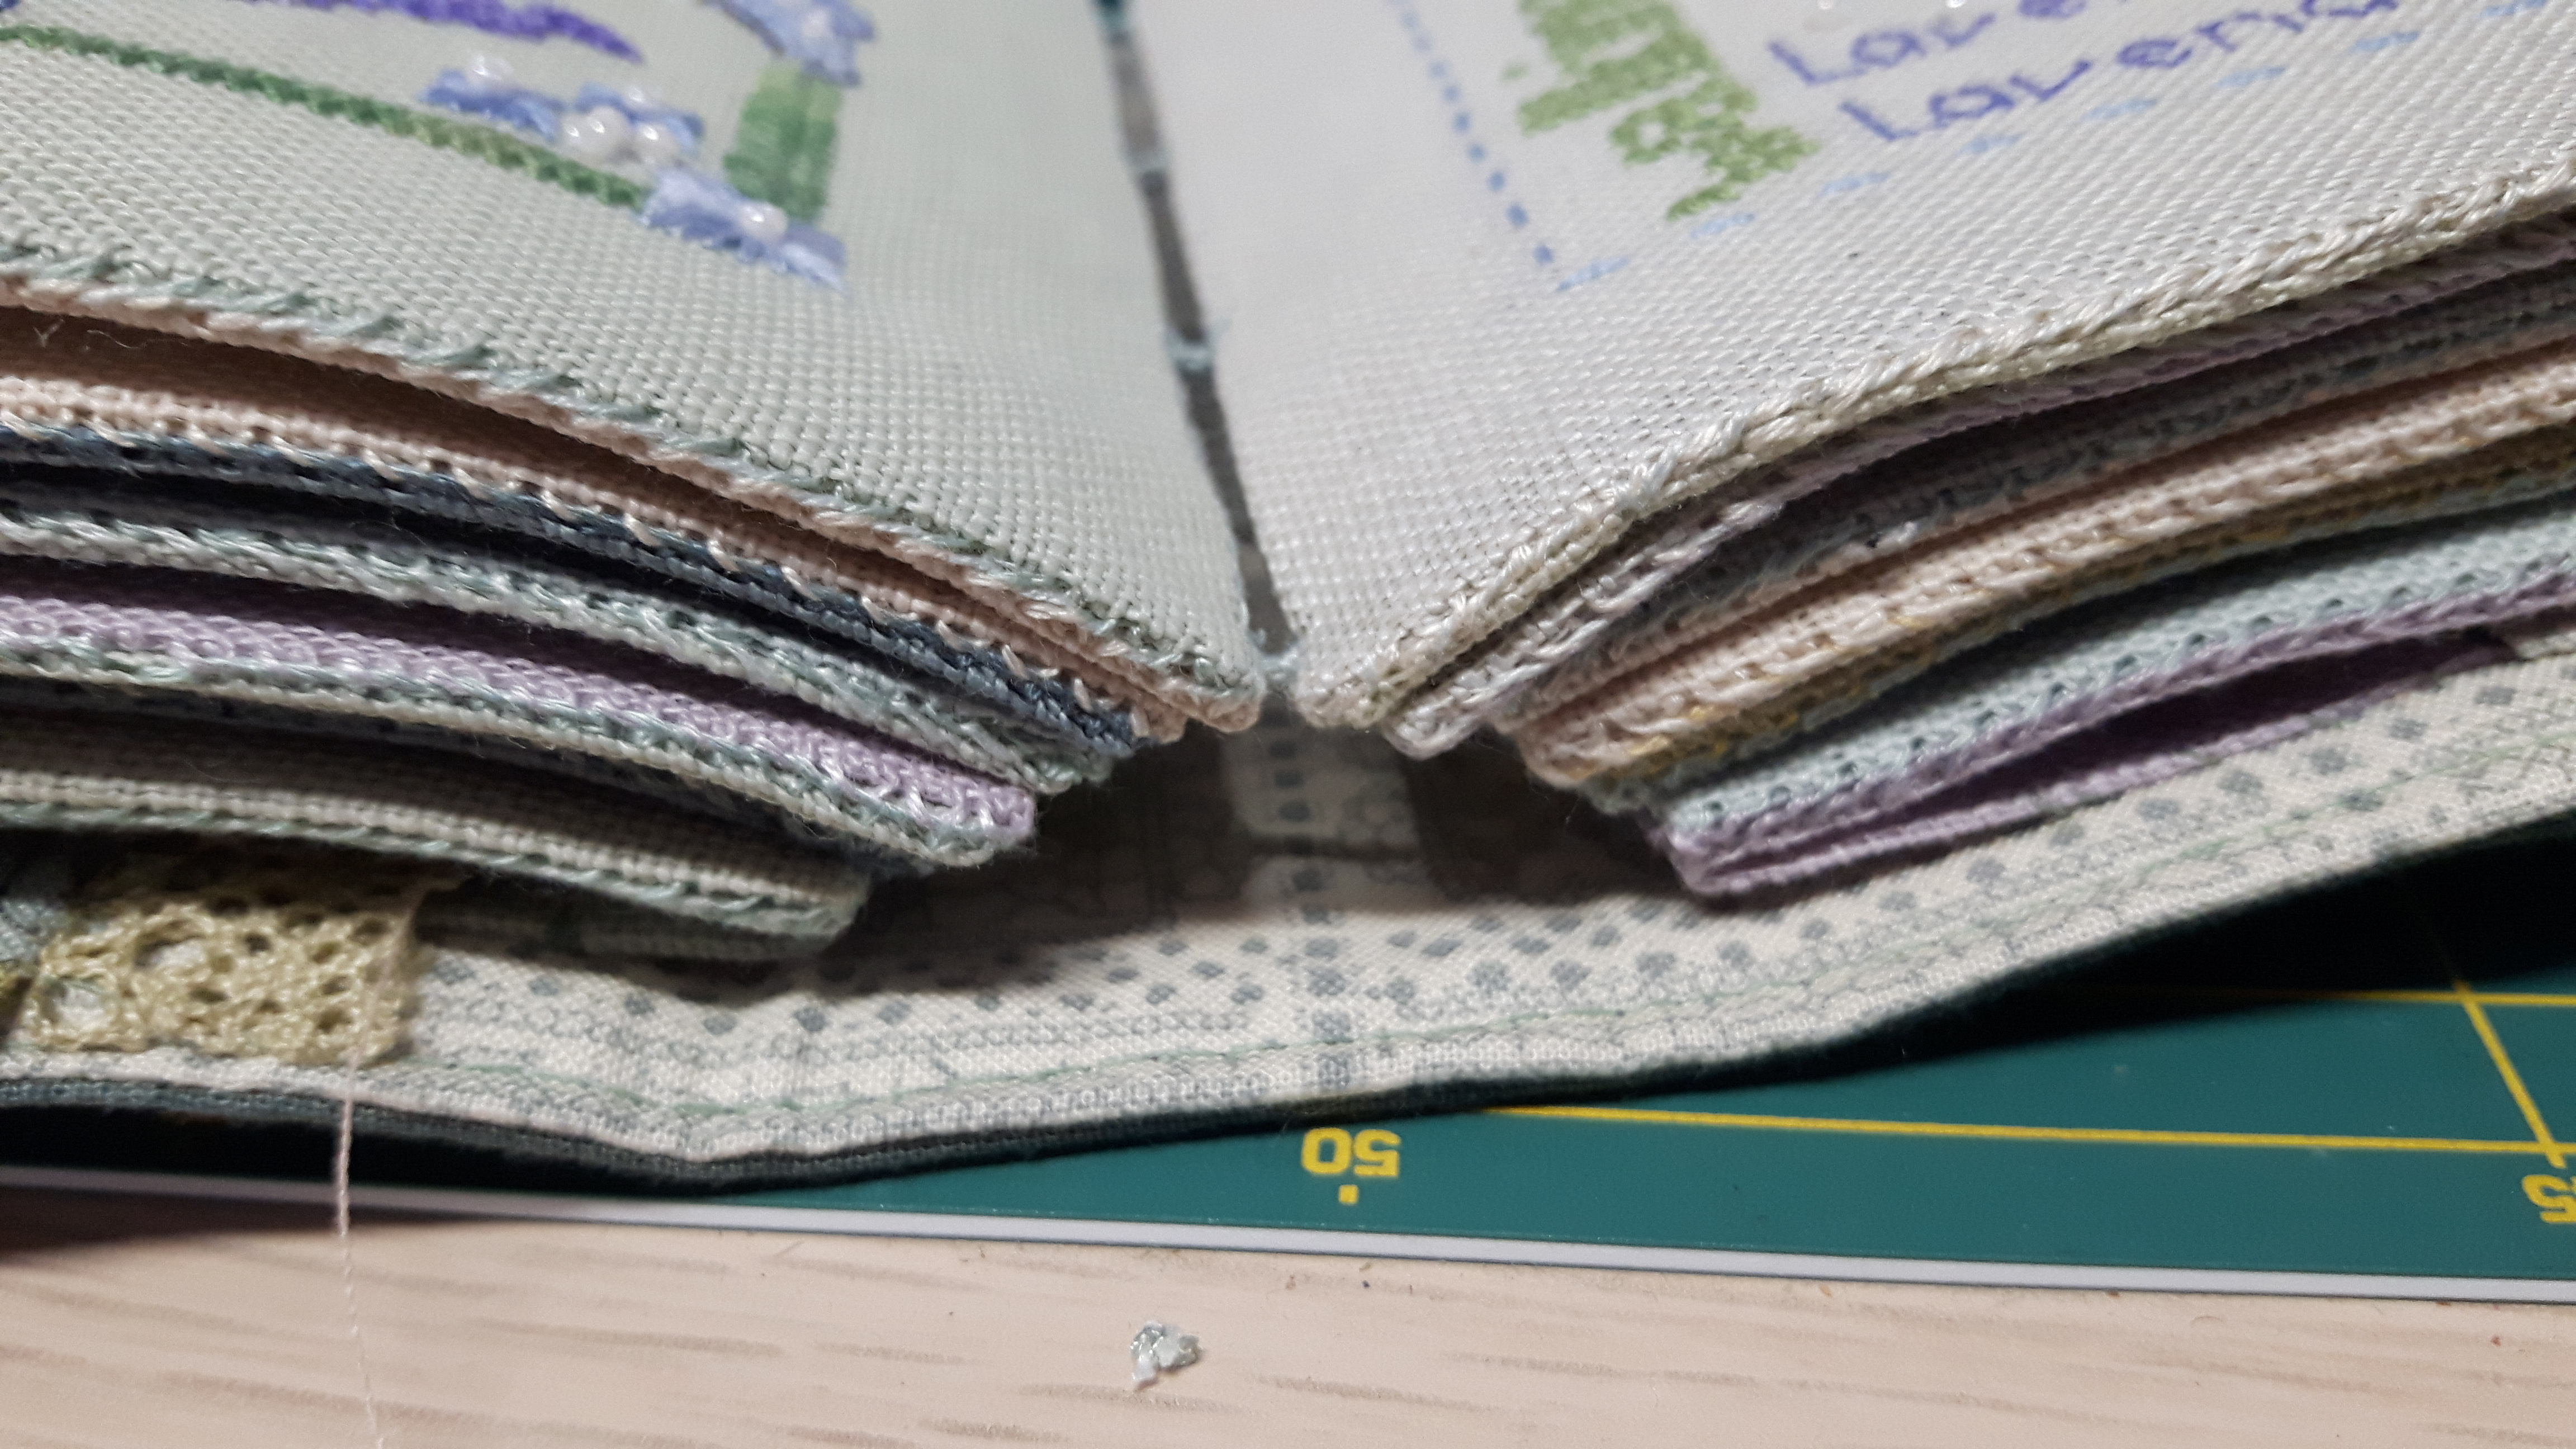
This looks sooo good, what a great job of the cover you’ve made. I also like the way you can see all the edges in the first photo though.
LikeLiked by 1 person
Thank you, I must admit I do like the look of the binding, as I said, next time…
LikeLiked by 1 person
Wow.
LikeLiked by 1 person
that’s an amazing finish to your stitched pages.
LikeLiked by 1 person
Thanks for sharing your steps, Margaret. Excellent job fudging, it doesn’t look like a fudge at all,😉.
LikeLiked by 1 person