
I seem to be in pink mode at the moment!
I’ve a few projects on the go at the moment and one of them is a quilt for a friend, she’s going through difficult times at the moment so I thought I’d make her a quilt. I asked her what her favourite colours are and (to my surprise) she said red and pink. I decided to concentrate on the pink!
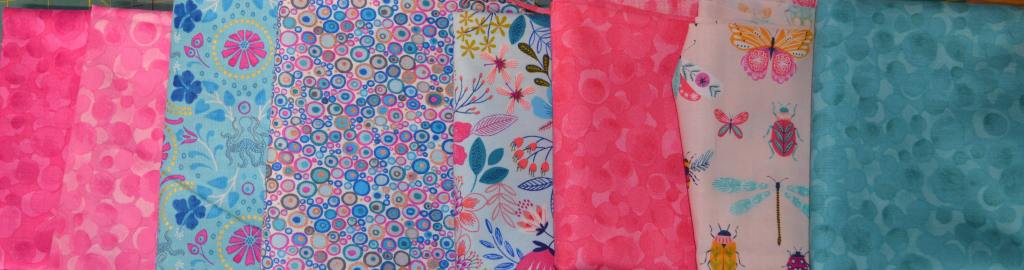
I’m not very keen on buying fabric on line, but needs must, I don’t find it easy to see if the colours work together. I had a look at the wool warehouse site and found you could pull the ones you liked onto a wish page and check how they worked before you bought, it did help. My starting point was the one with butterflies, this gave my the turquoise second colour as well as including several shades of pink. The ‘plains’ with the bubbles on is Lewis & Irene blueberry range, I’ve used it quite a bit recently. In this case I’ve decided they’re bubbles as she likes swimming, especially in the sea! I also realised when they arrived that the teal one with the blue flowers on has also got tiny octopi on it! The coral pink one I admit if I’d been in a shop choosing, I probably wouldn’t have included it, however it’s exactly the shade of some of the butterflies and also flowers on the pale blue one. In real life it doesn’t look quite so orangy, it’ll be fine!
I wanted a fairly quick block, I decided on a disappearing 16 block. The quilters amongst you have probably heard of the disappearing 9 and 4 blocks, this is made along the same lines. The block pattern is for sale on the UKQU site, it’s by Lyn Butler, she’s made it into a gorgeous Christmas mat with lights and darks from a charm pack.
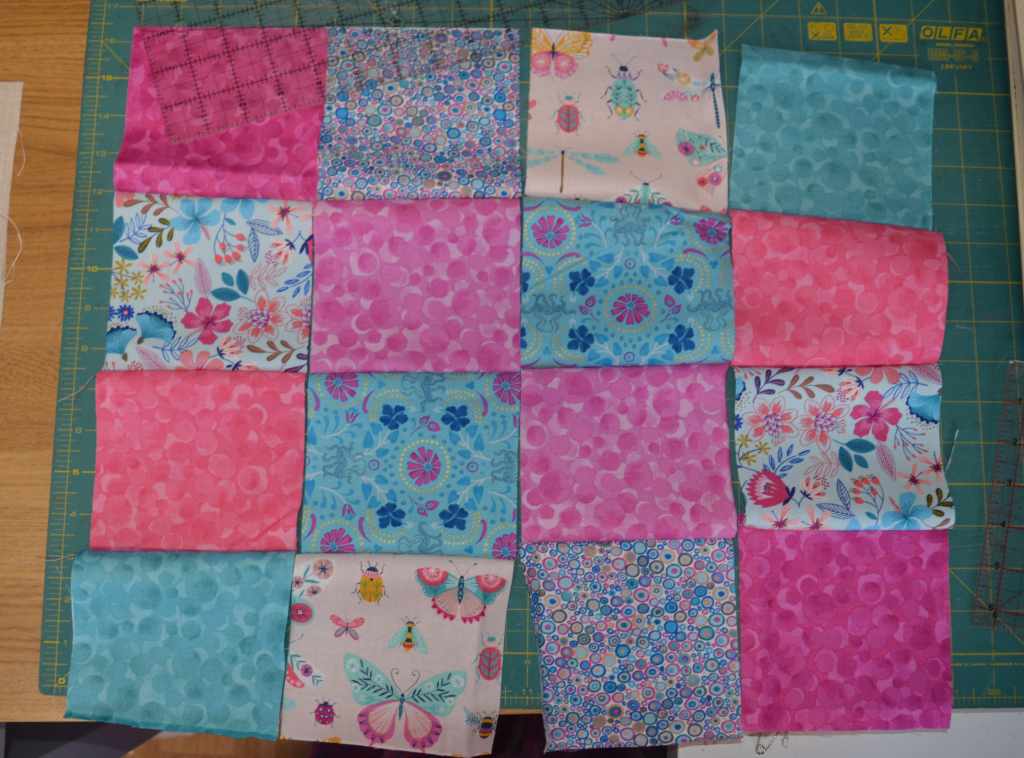
Rather than light and dark, my fabrics worked better as pink or turquoise. I cut a couple of 5″ squares in each fabric and had a play arranging them. Once I was happy I stitched them into a block of 16. I used the chain piecing method which is where you don’t actually cut the threads between the blocks, you just stitch one row of pairs, then add a third square to each row and so on. It does make it easier and there’s no threads to snip!
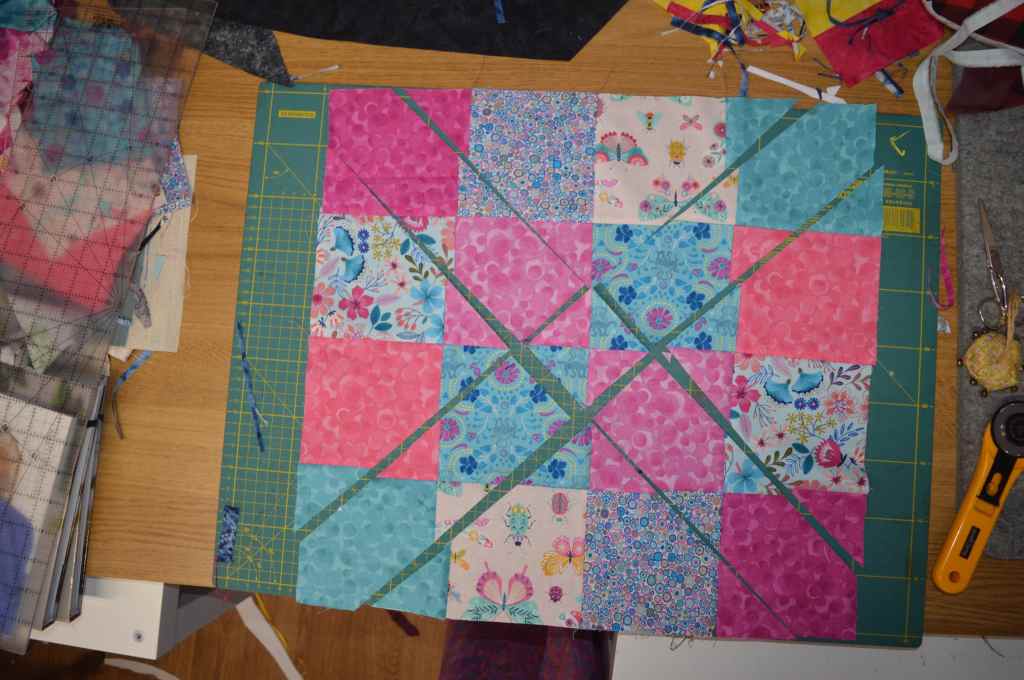
Once it was all pressed it was time for the scary bit! I cut it either side of the diagonal line, turning the board rather than moving the block. The diagonal strips were then moved round one space and the block was re-stitched. After my first block I retrieved my Best Press spray from downstairs and sprayed each block liberally, all theses second seams are on the bias, so you do have to be careful not to stretch the fabric. The starch made a big difference.
If you decide to make this pattern and you want it a little bigger, one thing to bear in mind is the size of the first set of blocks. I thought about using 6″ squares so a set of 9 blocks would make a good sized throw without a border. I only decided against it as my fabric was 21″ wide, so 6″ blocks were a lot more wasteful than 5″ blocks. However, having made my 16 block up, it only just fitted on my A2 cutting board and my 24″ ruler was only just long enough. The bigger blocks would have caused problems.
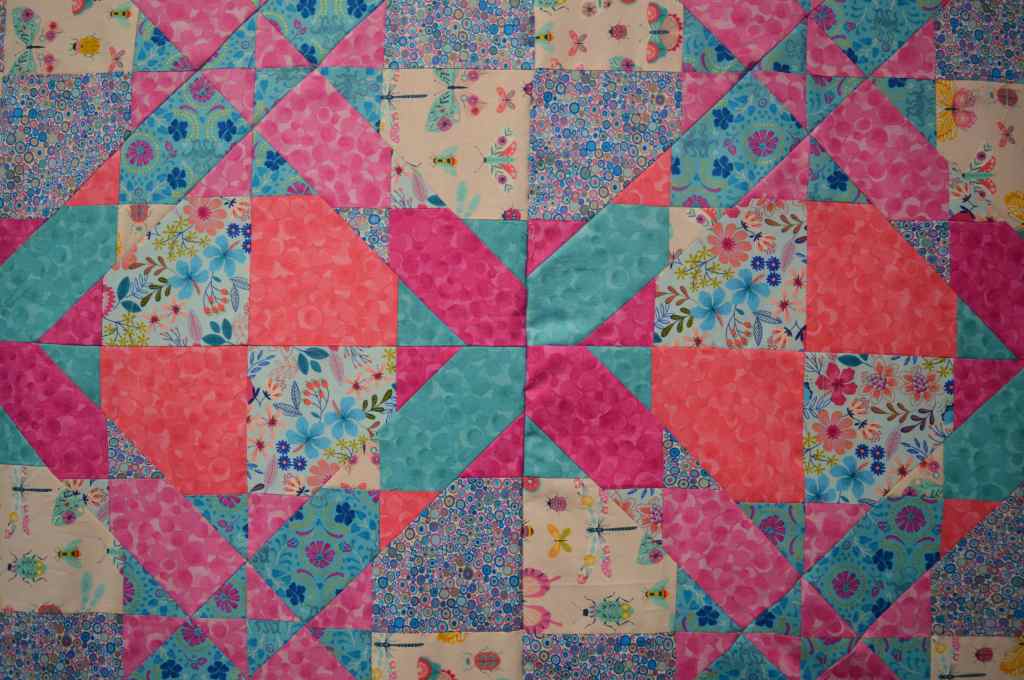
Once the blocks were re-sewn, they measure 17.5″, I made nine altogether and decided on the final layout. With only nine blocks it didn’t take long to stitch them together. I concentrated on getting the square intersections matching rather than the diagonals, I decided they wuld be more obvious if they missed. Some of the diagonals are perfect, some not so!
I wanted it slightly bigger, I had just enough fabric to have a one inch border in the turquoise and a two inch border in pink, I had to use both shades of pink, so I made the corners darker.

I’m pleased with it so far, I’m just waiting for some backing fabric to arrive so I can finish it and post it off to my friend.


Choosing colours online is never simple but you have made an excellent selection – it looks fabulous – I’m sure your friend will be over the moon
LikeLiked by 1 person
What a thoughtful gift, and it will be both beautiful and useful.
LikeLiked by 1 person
what a clever way to slice!
LikeLiked by 1 person
Looks lovely – you are a braver person than me!
LikeLiked by 1 person
Love this technique. Cool quilt.
LikeLiked by 1 person
What a fantastic way to change some squares up! Lovely!
LikeLiked by 1 person
That really is colorful and full of cheer, the blocks are beautiful!
LikeLiked by 1 person
What a lovely idea to make this for your friend – I do hope she likes it.
LikeLiked by 1 person
So do I 🙂
LikeLike
Those colors just make you smile and feel happy 🙂 Your friend will adore it.
LikeLiked by 1 person
At the beginning of your post I had no idea what it was going to look like, and I was surprised at the plain squares in the squares in the second photo. Then the process unfolded, and I could see the beautiful ~ almost magical! ~ quilt you have made for your friend. What a wonderful friendship it must be.
LikeLiked by 1 person
It is amazing how these disappearing blocks work! She’s an old school friend, so over 40 years, she lives at the other end of the country so it’s mainly phone calls these days.
LikeLike
Very happy colours, guaranteed to cheer up anyone!
LikeLiked by 1 person
That’s really lovely. I’m sure your friend will be pleased to receive a hug in the post.
LikeLiked by 1 person
How bright and pretty it is. It will surely cheer your friend up but, I admit, I would have been terrified to make those cuts accurately.
LikeLiked by 1 person
I did concentrate a lot when I was cutting, I was quite surprised I didn’t do a wrong cut 🙂
LikeLike
Pingback: In the Pink | thecraftycreek