
 My old purse which I made last year was starting to annoy me, it was looking tatty, it was only meant as a temporary measure but 12 months later I was still using it!
In July Helen and I had a few days in Amsterdam, I found two lovely quilt shops and in one of them I bought a pack of 5 fat eighths, all in pretty pink and blue flowery designs. I decided there and then I would make a wallet out of them.
 I have a bag making book by Lisa Lam called ‘A bag for all reasons’ it’s a great book and one of the patterns is for a ‘Terrific Trifold Wallet’ It was just what I wanted, several pockets for cards, a section for notes, a smaller part for receipts and a coin purse in the middle. It folds into three, so it’s a handy size, neat and compact.
I’ve got two of Lisa’s books and they’re both great, she also has a website where she sells everything you need to make them!
The instructions are really straight forward and clear, you just have to concentrate as there are lots of stages! It’s one of those patterns where you just have to methodically work your way through!
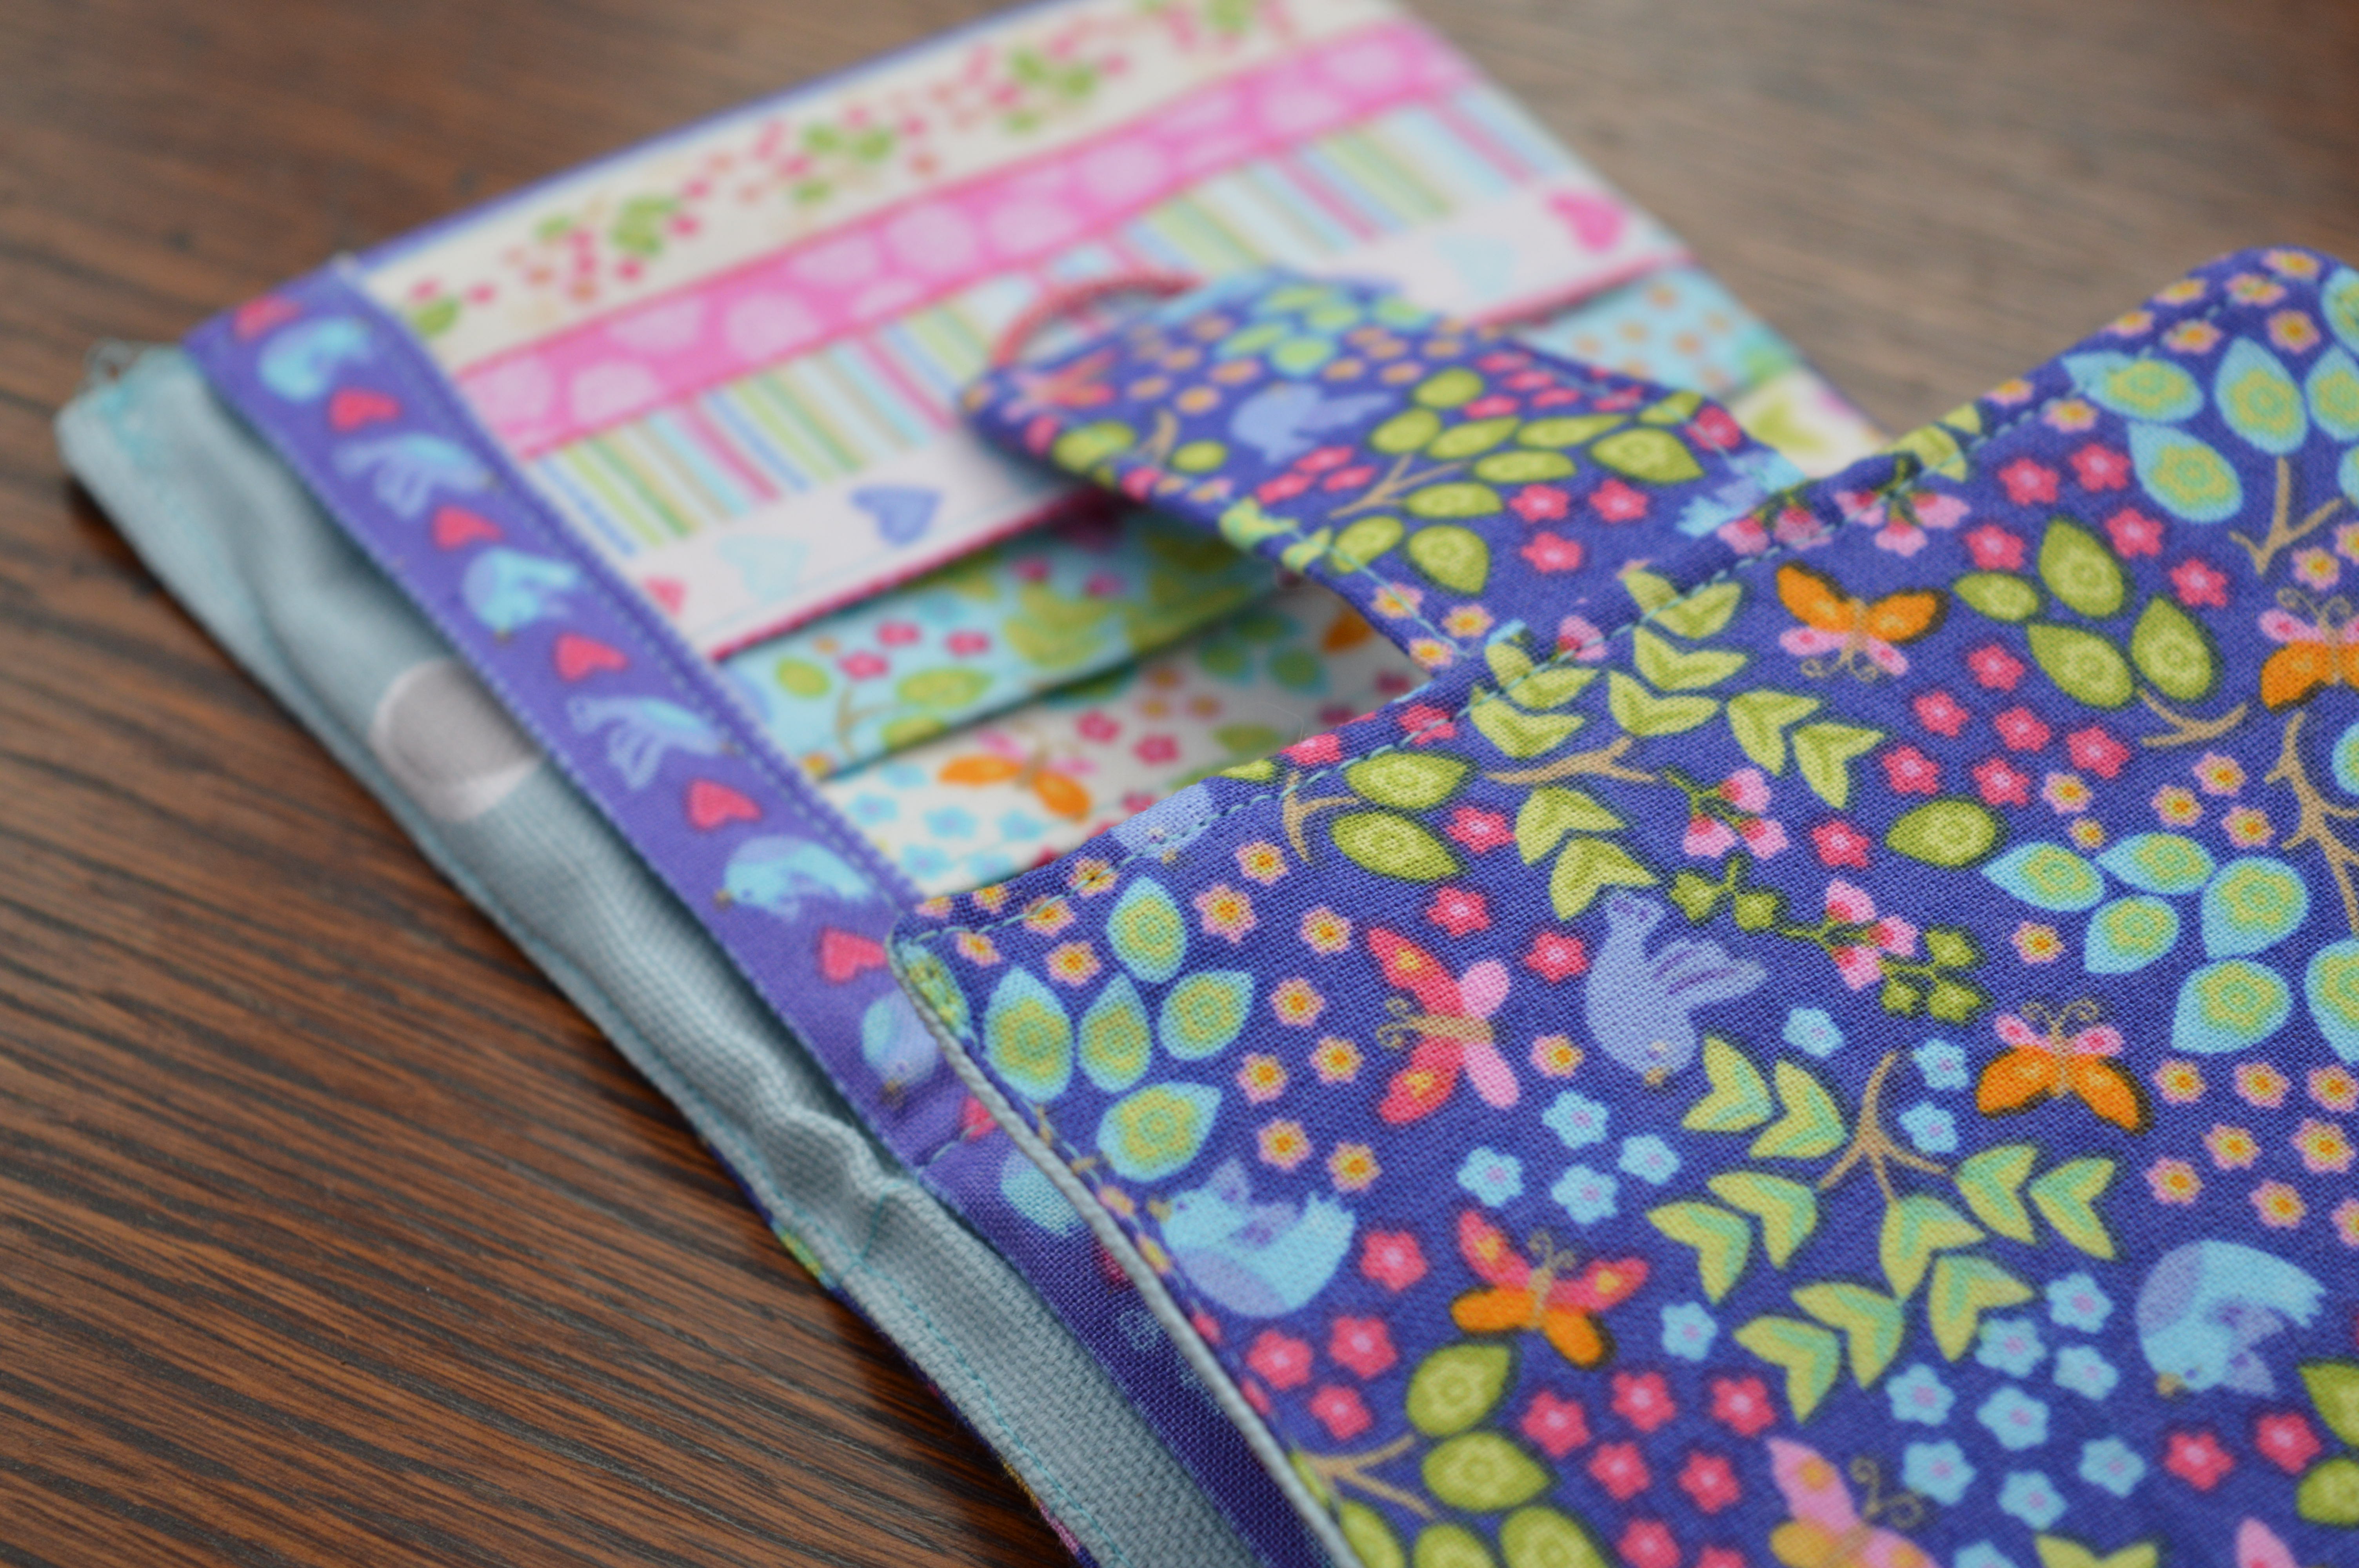 The pattern calls for Decovil interfacing which apparently is really stiff, I didn’t have any so I just used the stiffest I had in my stash. I also confused myself a little as I used different cottons for each area, the lining is furnishing fabric weight, so I found some co-ordinating pale blue spotted fabric. I should have used this for the notes slot but I wanted my pretty cotton for that. Having made up the notes slot with everything attached to the front, I realised it wasn’t heavy enough so I cut a length of the furnishing fabric to line the notes slot.
 Lisa recommends using sewing clips for this, she says (and I agree)it would be impossible to use pins on this project, there are just too many layers! I had been thinking of buying some anyway as Kathy from Kathy’s Quilts had recommended them for binding quilts, so I popped down to Hobbycraft and bought a pack of pretty purple ones! I like them, they’re ideal for bulky sewing.
My sewing machine struggled a bit with some of the layers, particularly once it was turned, the final top-stitching was hard! Lisa recommends trimming all the interfacing so it’s just out of the seams, even so the seam on the bottom edge has about 8 if not 10 layers, what with lining, notes slots, overlapping card slots…and then it’s turned and effectively doubled for top-stitching! After a disastrous attempt at top-stitching the bottom edge first, when the tension went completely and ate my cotton, I decided to start on the thinner top edge and work my machine up to the thicker areas, in the hope that it wouldn’t notice!! It worked!!

I’m really pleased with my wallet, I particularly like the card slots, I used a striped pattern for the outside slot and other patterns for the two inner ones, the effect is lots of stripes, I like it!
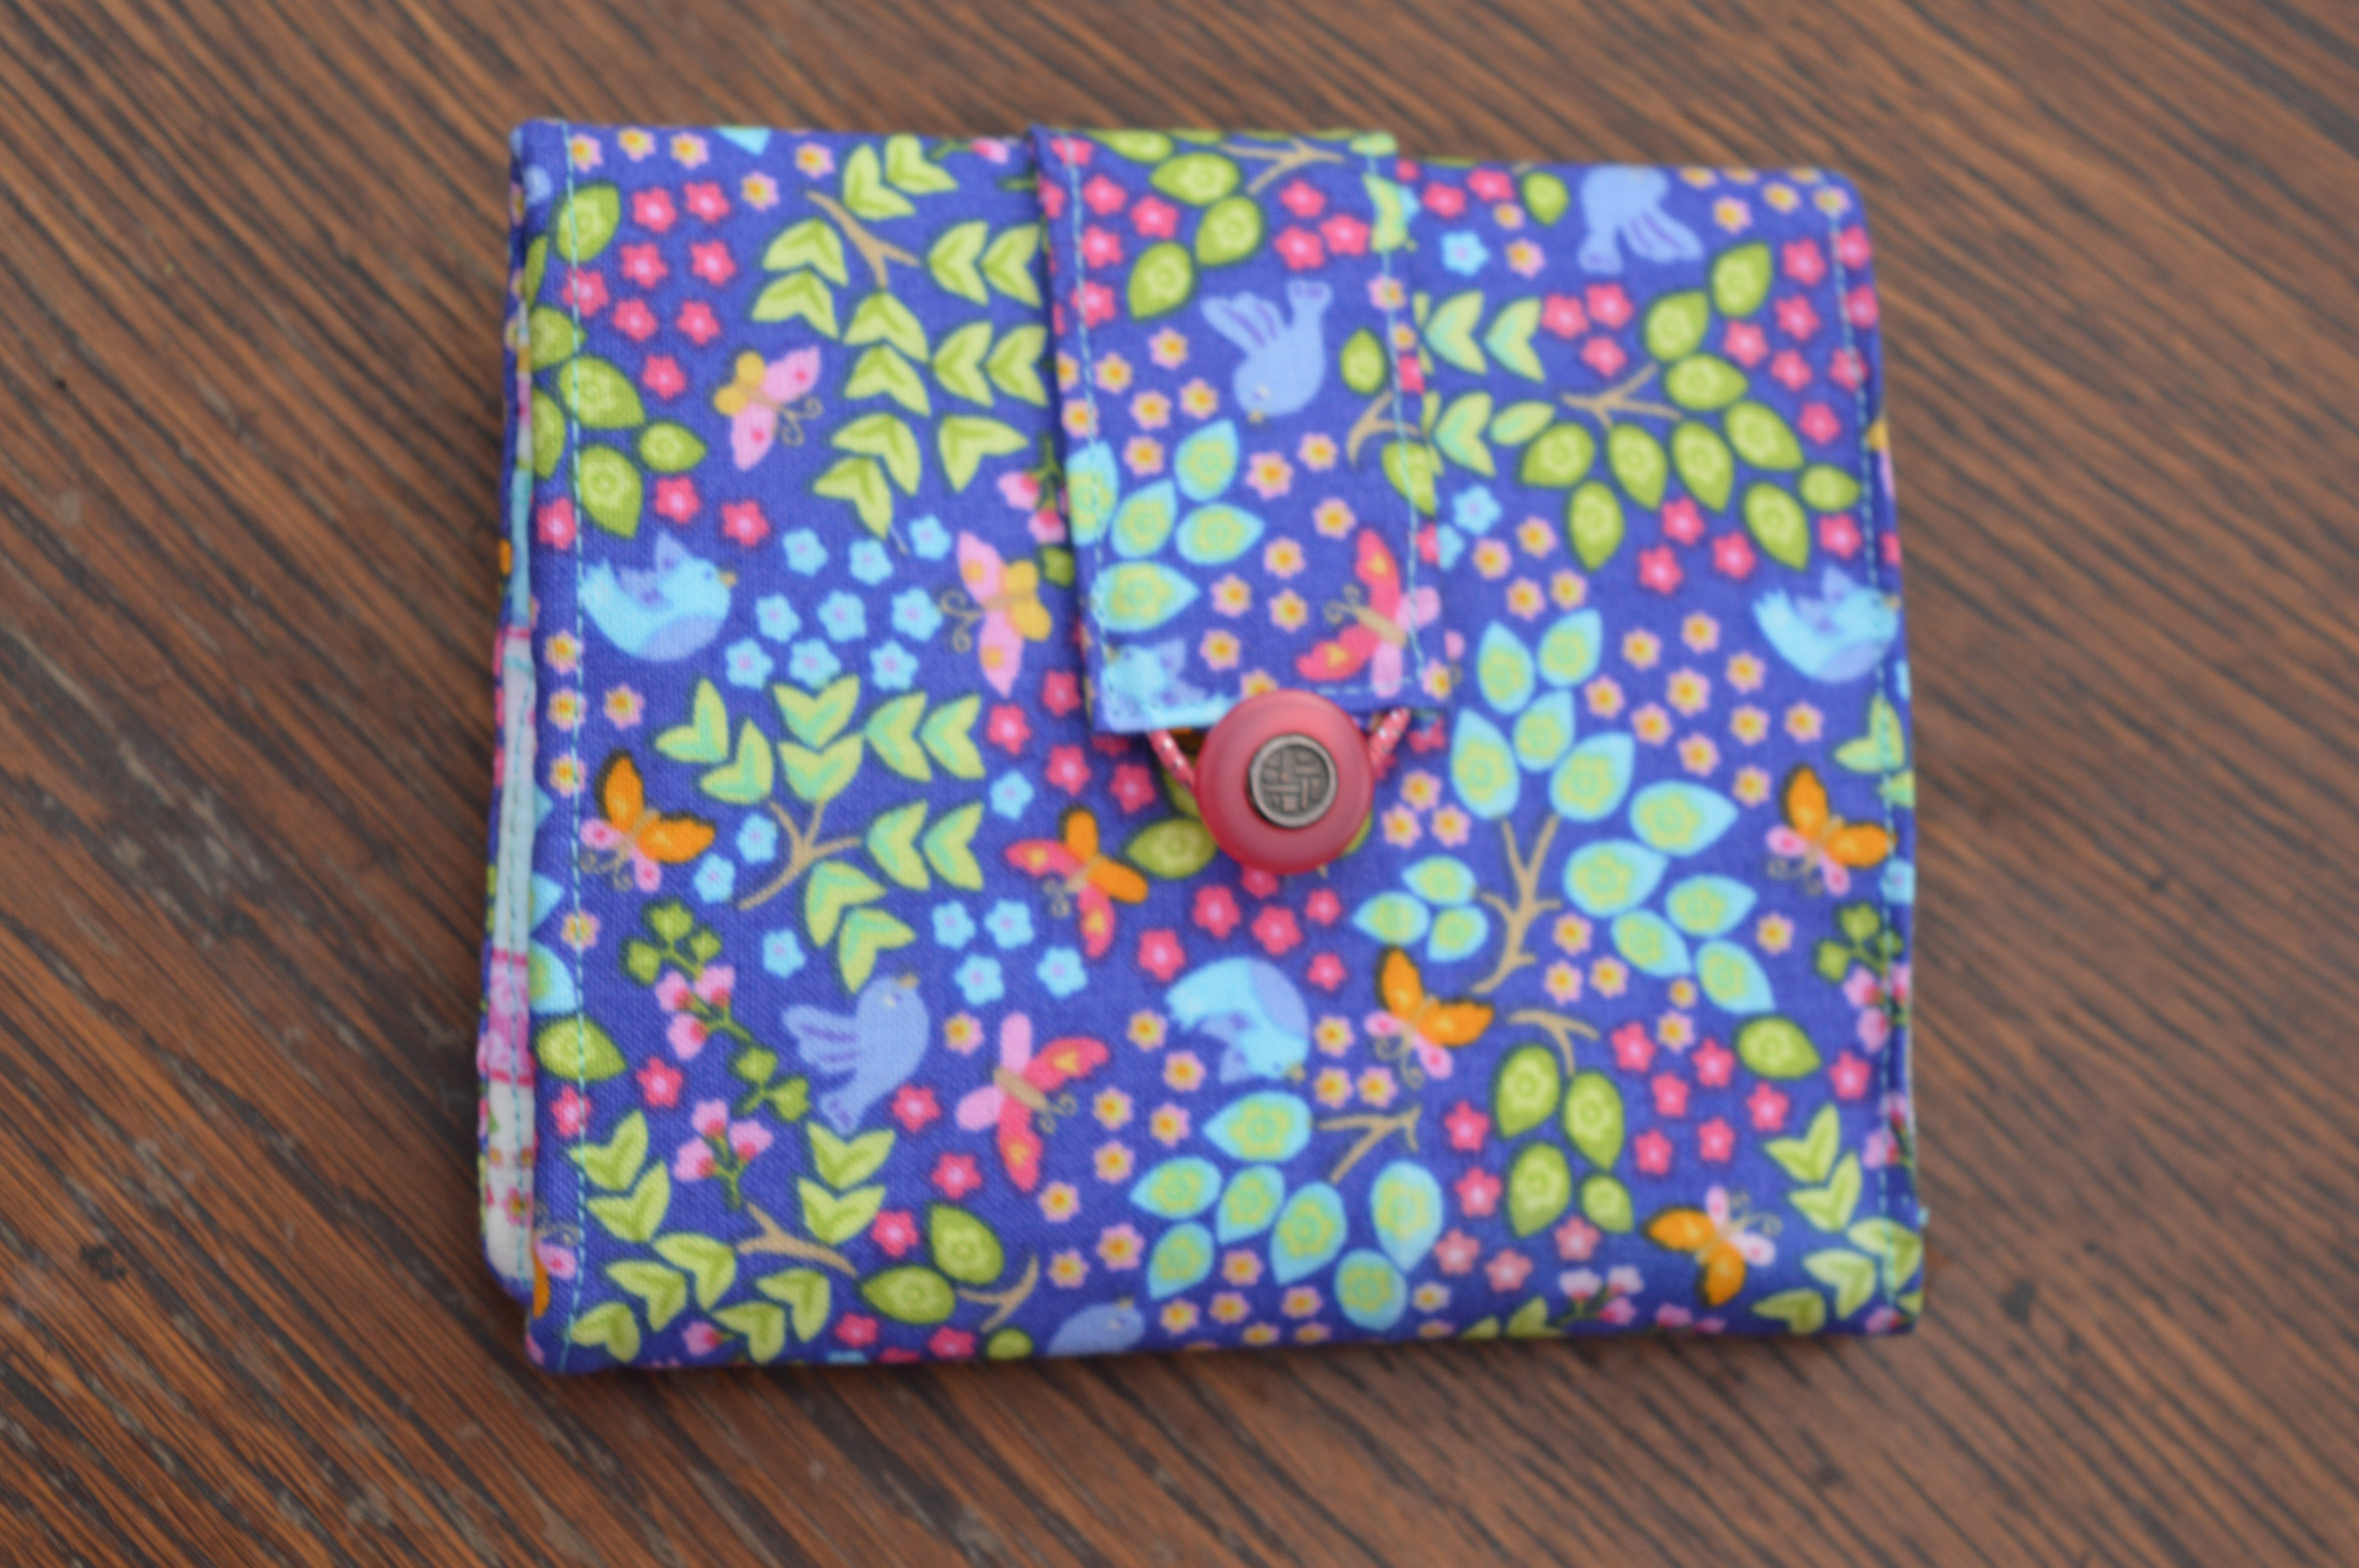 The only change I made to the pattern was the fastener. Lisa uses popper snaps to close it. I prefer a button with an elastic loop so it’s secure however bulky it gets. I was concerned about the coin purse not having a fastener, it just has the flap, but having used it over the weekend at two shows it didn’t seem to be a problem. I did like the pleats in the purse which make it easy to see and reach your change.
I love my flowery wallet, I showed it to Helen though and her reaction was ‘Well you’re not going to lose that one!’ Clearly not trendy for a 17 year old!


Nice job. It’s certainly distinctive! Good to have a book recommendation as I’ve been thinking iof dipping my toe in the water of this type of crafting.
LikeLike
Thank you, the other book of hers I’ve got is the Bag Making Bible, that goes into all the different techniques you can use, like different types of pockets, handles, fastenings etc, with projects along the way, both are very good.
LikeLike