
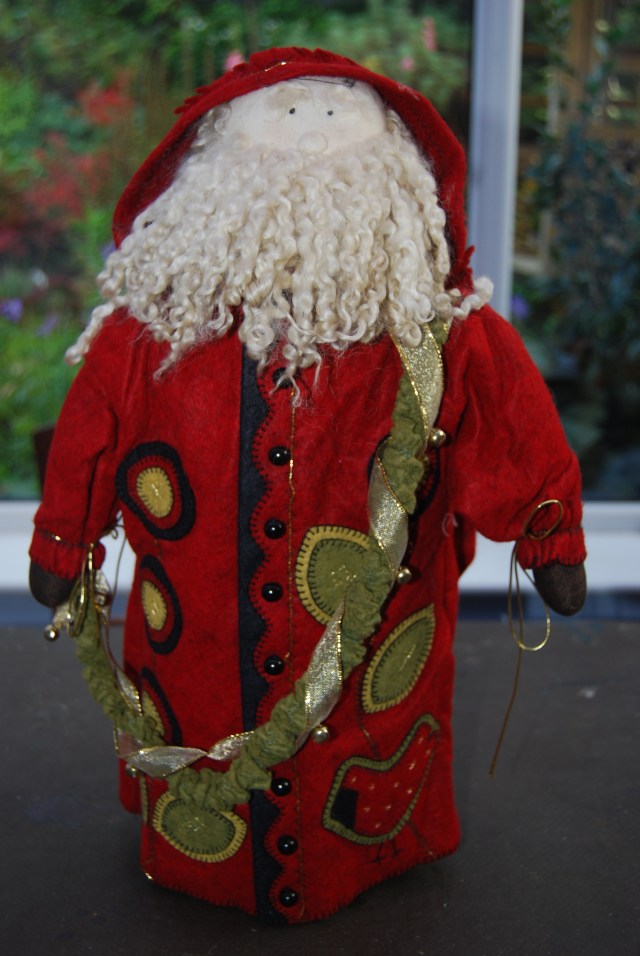
I finished my Father Christmas yesterday, I think he looks great! I made him from a pattern called Christmas Wish Santa, it’s designed by The Button Angel

Santa
of Clitheroe.
He went together fairly quickly, I’d forgotton how forgiving felt is to work with. The embroidery and applique patterns for coat were really clear and easy to use. I spent three or four evenings embroidering his coat, I used a chalk pencil to write the lettering before stitching it with back stitch. The appliqued pieces were attached with bondaweb before stitching with either chain stitch or blanket stitch. I used star buttons instead of applique as I’d had some in my button box for nearly 30 years and I decided this was the perfect piece to use them on.

I found the instructions for sewing him together were not as clear as they could have been, though it was probably me reading them too quick and being impatient! The instructions said join the main body pattern pieces together and add seam allowance. I found the two halves of the body with the embroidery pattern on, this filled two A4 sheets. I duly sellotaped them together, cut it out and embroidered the front. It was only when I came to make it up did I realise there was another pattern piece at the end of the instructions which formed the top part of his body!!! After a few moments of panic I decide to make the extra section a feature, rather than trying to hide it, so my Santa has a yoke on his coat…as I said, felt is a very forgiving medium. If the pattern had just said 1 of 3 I would probably have spotted it!
I varied my technique slightly from the instructions as I prefer to cut out a pattern piece with the seam allowance, then sew it, rather than tracing the final shape onto the felt, stitching round through 2 layers of felt, before cutting out.
I used Wensleydale sheep wool for his beard which has a lovely ringlet effect, although possibly nearer dreadlocks than ringlets! I tried gluing it on but it was getting messy so I stitched it on instead and then covered up the stitching with the white brim. With hindsight it would also have been easier to attach the arms before the beard as it did get in the way somewhat. using aquatic gravel as a weight in the bottom is a great idea, cheap and effective! As a final touch I added a silver bell to the end of his hat.
This is the second Father Christmas I’ve made, here’s my first one…
 This one is probably about 10 years old now, his coat was made separately, embroidered with flowers and made with a fringed hood, he’s gorgeous, probably more of a grown up Father Christmas, where as the new addition is more of a ‘Santa’, fun and cheerful.
Happy stitching!


He is just adorable! 🙂 Very nice work 🙂
LikeLike
Thank you, he was great fun to make!
LikeLike
Father Christmas is awesome!!
LikeLike
Thank you so much, I’m pleased with him!
LikeLike
Pingback: Christmas is coming | thecraftycreek
Pingback: The eleventh hour! | thecraftycreek