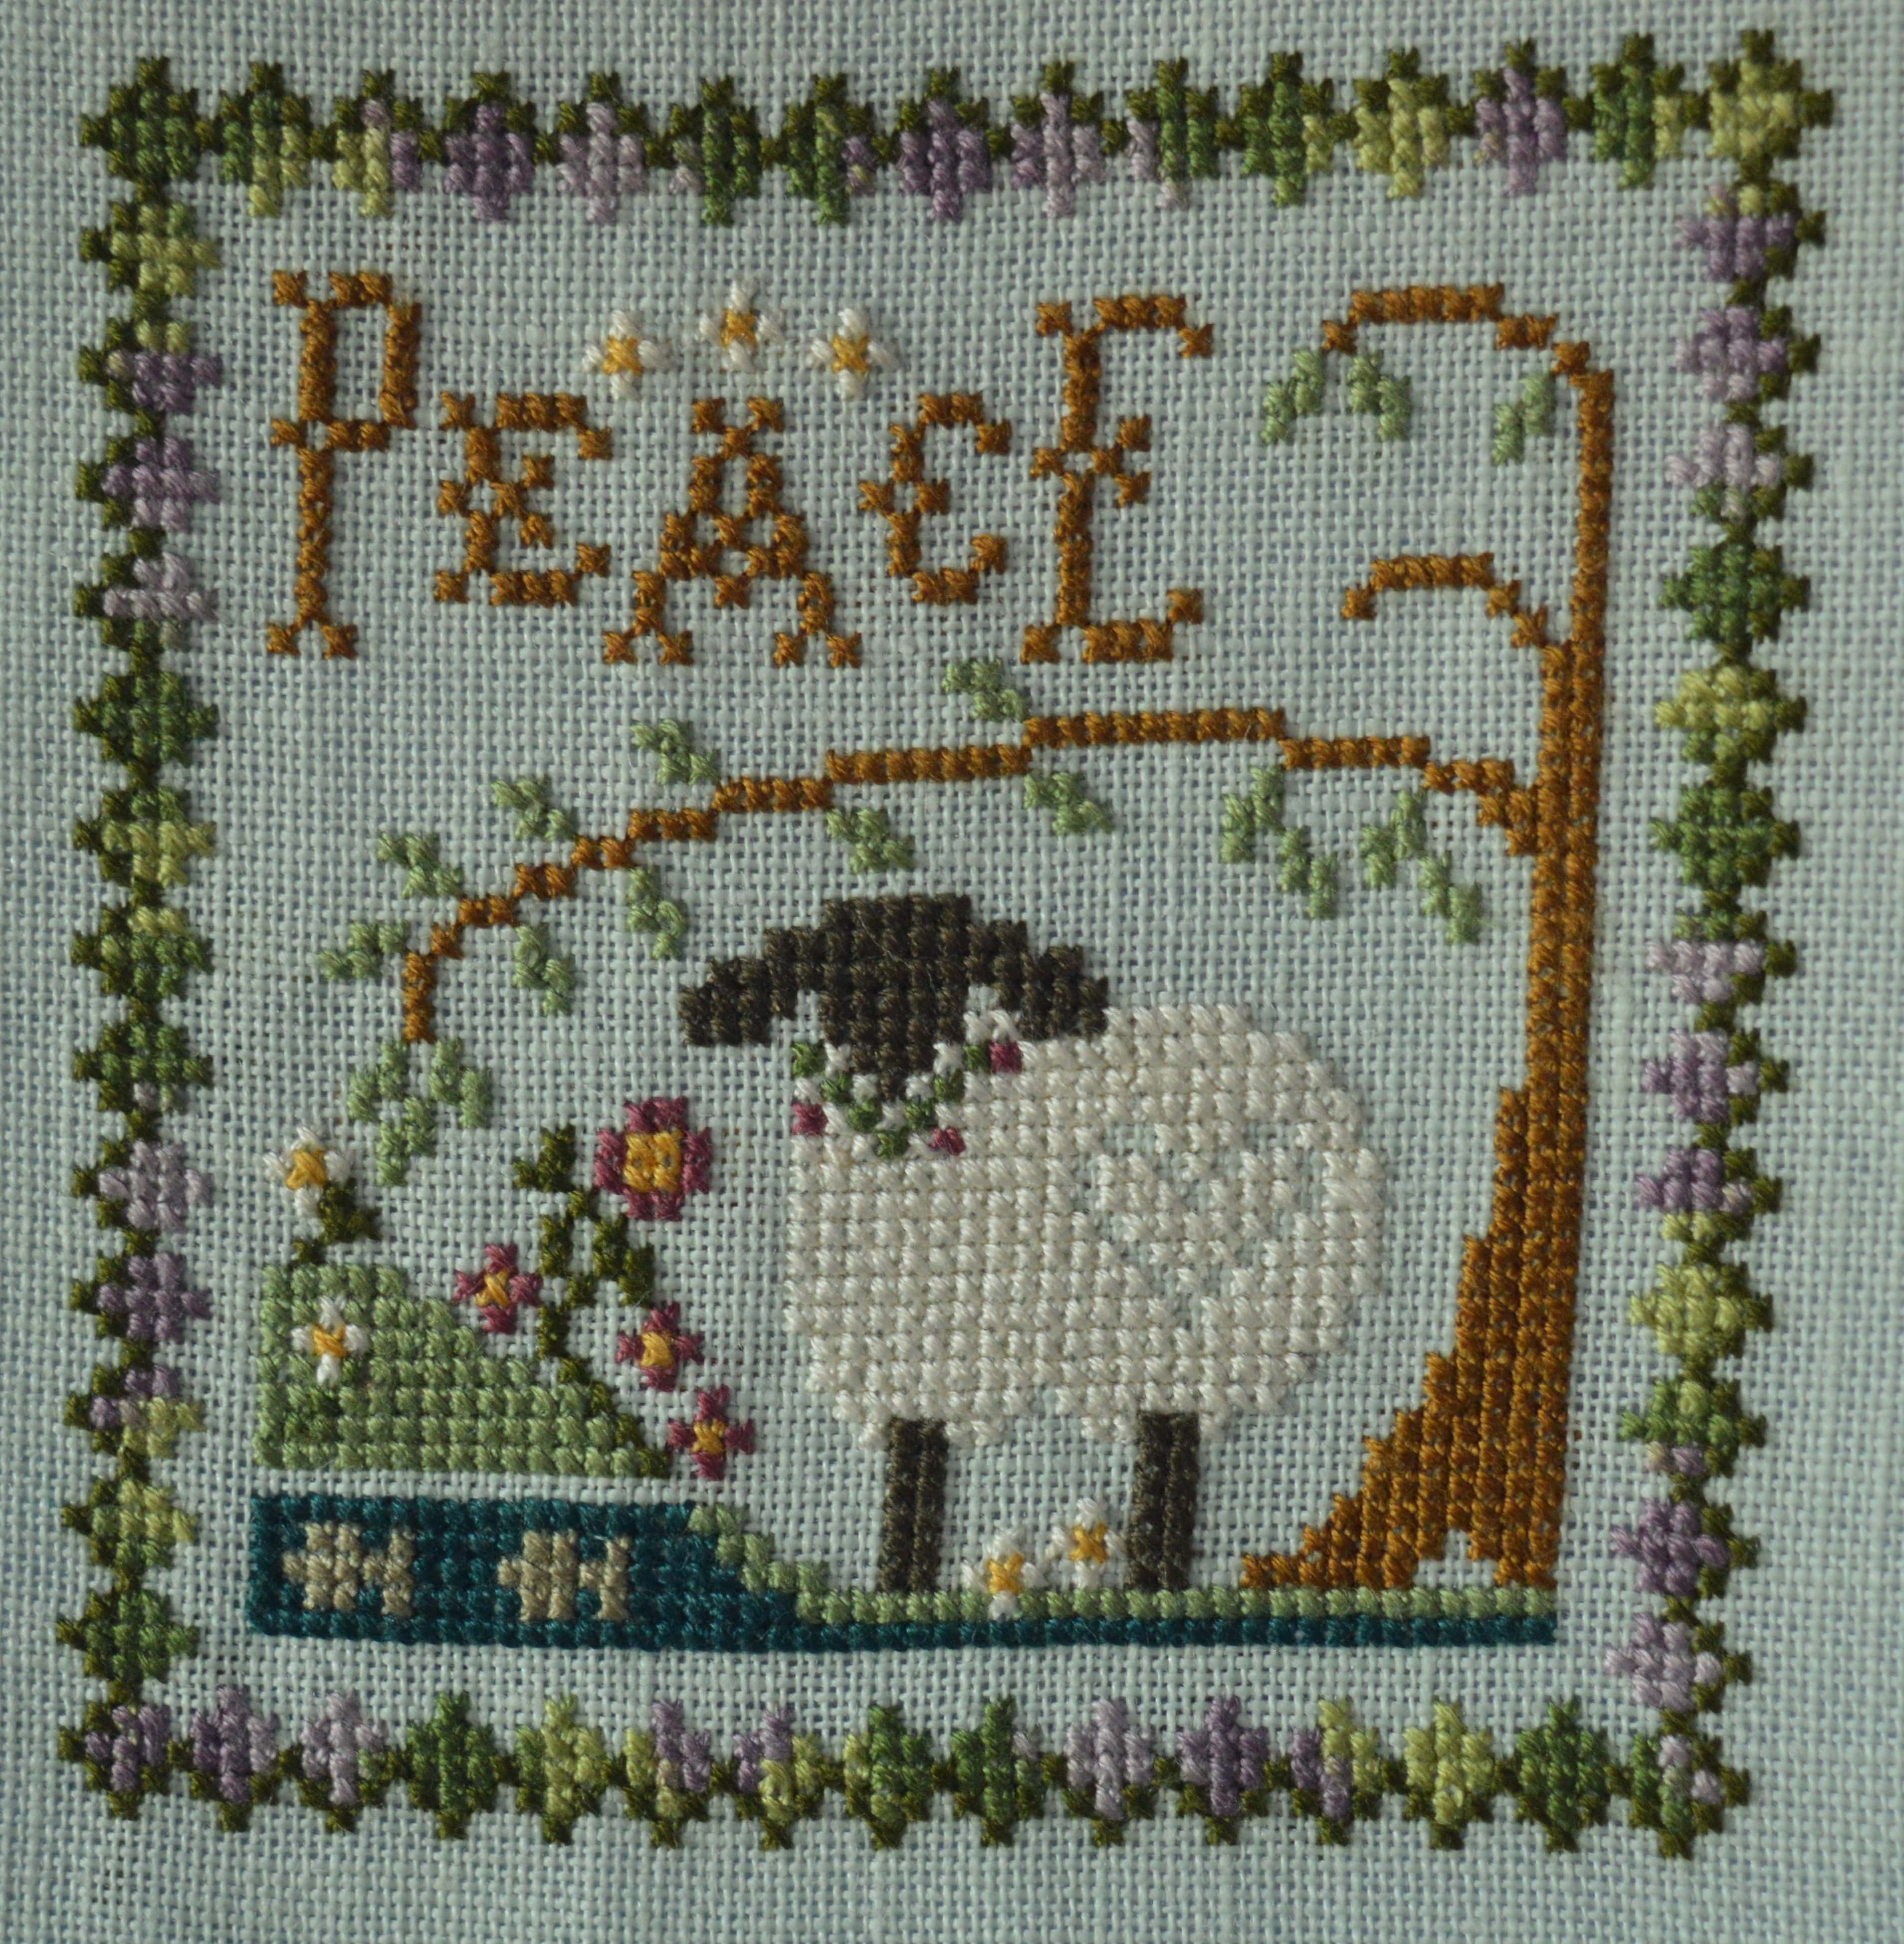
These little sheep cross-stitch designs are not taking long to stitch at all! I’ve finished another one.
It’s quite helpful with them all being from a series as they’re all using the same range of threads. I started a DMC cardboard thread holder at the beginning, added the symbols and numbers, now I just need to top up whatever is getting low.
Anyway, here is my latest finish…
They’re all going to go into a cross-stitch book. These are my sheep one’s so far…
I’m stitching friendship at the moment, I think there’s about twelve altogether in the set, I’m not sure if I’ll stitch all of them or not, we’ll see.
Firstly, apologies for the radio silence, I’ve had computer issues! I bought a new phone so I decided to back up my photos off my old phone, just in case by deleting them off my old phone, they were also deleted off the cloud. Well my computer didn’t like having 6000+ photos added to it’s already nearly full storage and went into major sulk mode. I’ve started deleting unnecessary ones and it’s a bit happier…there are times I hate computers!
Anyway, last week I decided to make another summer dress for our big holiday. I bought this gorgeous cotton lawn a couple of years ago at the Harrogate Show, there’s a regular stall there that has quite a few of these digitally printed watercolour prints, they feel gorgeous, like silk, so I’ve fallen for several over the years. I had 3.5m in my stash and it’s 54″ wide so I had a reasonable choice of patterns.
I decided to make McCall’s 7974 which is a V neck, button through dress, sleeveless option and a high waistline with one of those midriff sections which rise to a point under the bust, not sure what you call them! And of course it has pockets 🙂
I usually decide on which size to cut depending on the actual garment measurements given, bust was a size 12, hips were irrelevant as the skirt is full. Unfortunately it didn’t give waist measurements, probably because the true waist was part of the skirt. A straight size 12 has been OK recently so I didn’t hesitate cutting it out.
It all went together nicely but when I came to try the bodice on it was very snug round the midriff, I also wasn’t keen on the fact that as both sides came up to a point under the bust, if it overlapped for buttons then the edges didn’t meet.
I decided the answer to both problems was to add a placket. I simply cut a strip, made a band and stitched it behind. I could then stitch the buttons on the edge, giving me the extra size I needed whilst ensuring the two sides met nicely at the top. The pretty pink shell buttons were in my stash, I had just enough! I’m doing quite well at using buttons from my stash at the moment.
With the bodice sorted I just had to hem the skirt with a neat narrow hem. The main seams are all French seamed so it looks nice inside as well as out. I’m pleased with it, though I’m not too sure about this style of bodice on me, I’ll wear it on holiday and see how I feel before I decide whether or not to make another one.
We are heading rapidly into autumn here in the UK, however we are flying off to warmer climes shortly so I’m doing a bit of sewing with that in mind. I haven’t done much sewing for myself since I lost weight so my wardrobe is definitely in need of an overhaul. Last week I decided to make a dress.
I spotted this fabric on display on a stall at the Knitting and Stitch show a couple of years ago, I don’t often fall for jersey fabric but I loved the deep lotus flower border print and immediately knew what I wanted to make with it, a simple shift dress.
There wasn’t much left on the roll, 1.4m, but I thought it’s just enough to go round me so there’s enough to make a shift dress, and it was…just!
It was 60″ wide so it was just a matter of finding a pattern that would fit. Newlook 6210 took 1.2m for a straight skirted view…perfect!
There wasn’t much wriggle room to pattern match, though I did re-cut one of the back pieces (it was too long fortunately) as otherwise there was a 1″ discrepancy in the pattern on the centre back, which would have stuck out like a sore thumb.
Rather than going by the measurements on the pattern packet (which would have put me size 14-16) I usually go off the actual measurements given on the pattern piece, then I can decide how much ease I want. I decided to cut size 12 at the bust and waist, grading out to size 14 at the hips.
The basic dress went together pretty easily, but when I tried it on the dress stuck out like wings over the hips! Luckily my daughter was around to make the necessary adjustments, I put it on inside-out and she pinned the hips in until they fitted nicely – next time I’ll just make a straight 12.
I used a stretch stitch for the seams which is like a fine zig-zag. I was pretty please how the neck-line and armholes came out as I haven’t done much sewing with stretch fabrics. The only wobble I had was stitching the split up each side, the pattern said to turn the fabric under twice but when I stitched it it went all wobbly. I called for my daughter as she has done much more sewing of jersey fabrics. She pointed out that this fabric wasn’t going to fray, so just turn under once, but don’t unpick the one already stitched as it will make a dogs dinner of it, just give it a good press. It was good advice as the splits look OK.
It’s a very comfortable dress to wear, I’m really pleased with how it’s come out, I can see myself wearing this quite a lot on holiday.
We’ve been invited to a christening next weekend. I’ve known mum since she was born, I’m what I would call a courtesy aunt. I’ve made her a couple of quilts over the years, I think the first was when she was at uni, and another when she got married…
The Apothecary Cat Quilt
I know the quilts are much appreciated and loved so I decided to make a baby quilt as a christening present.
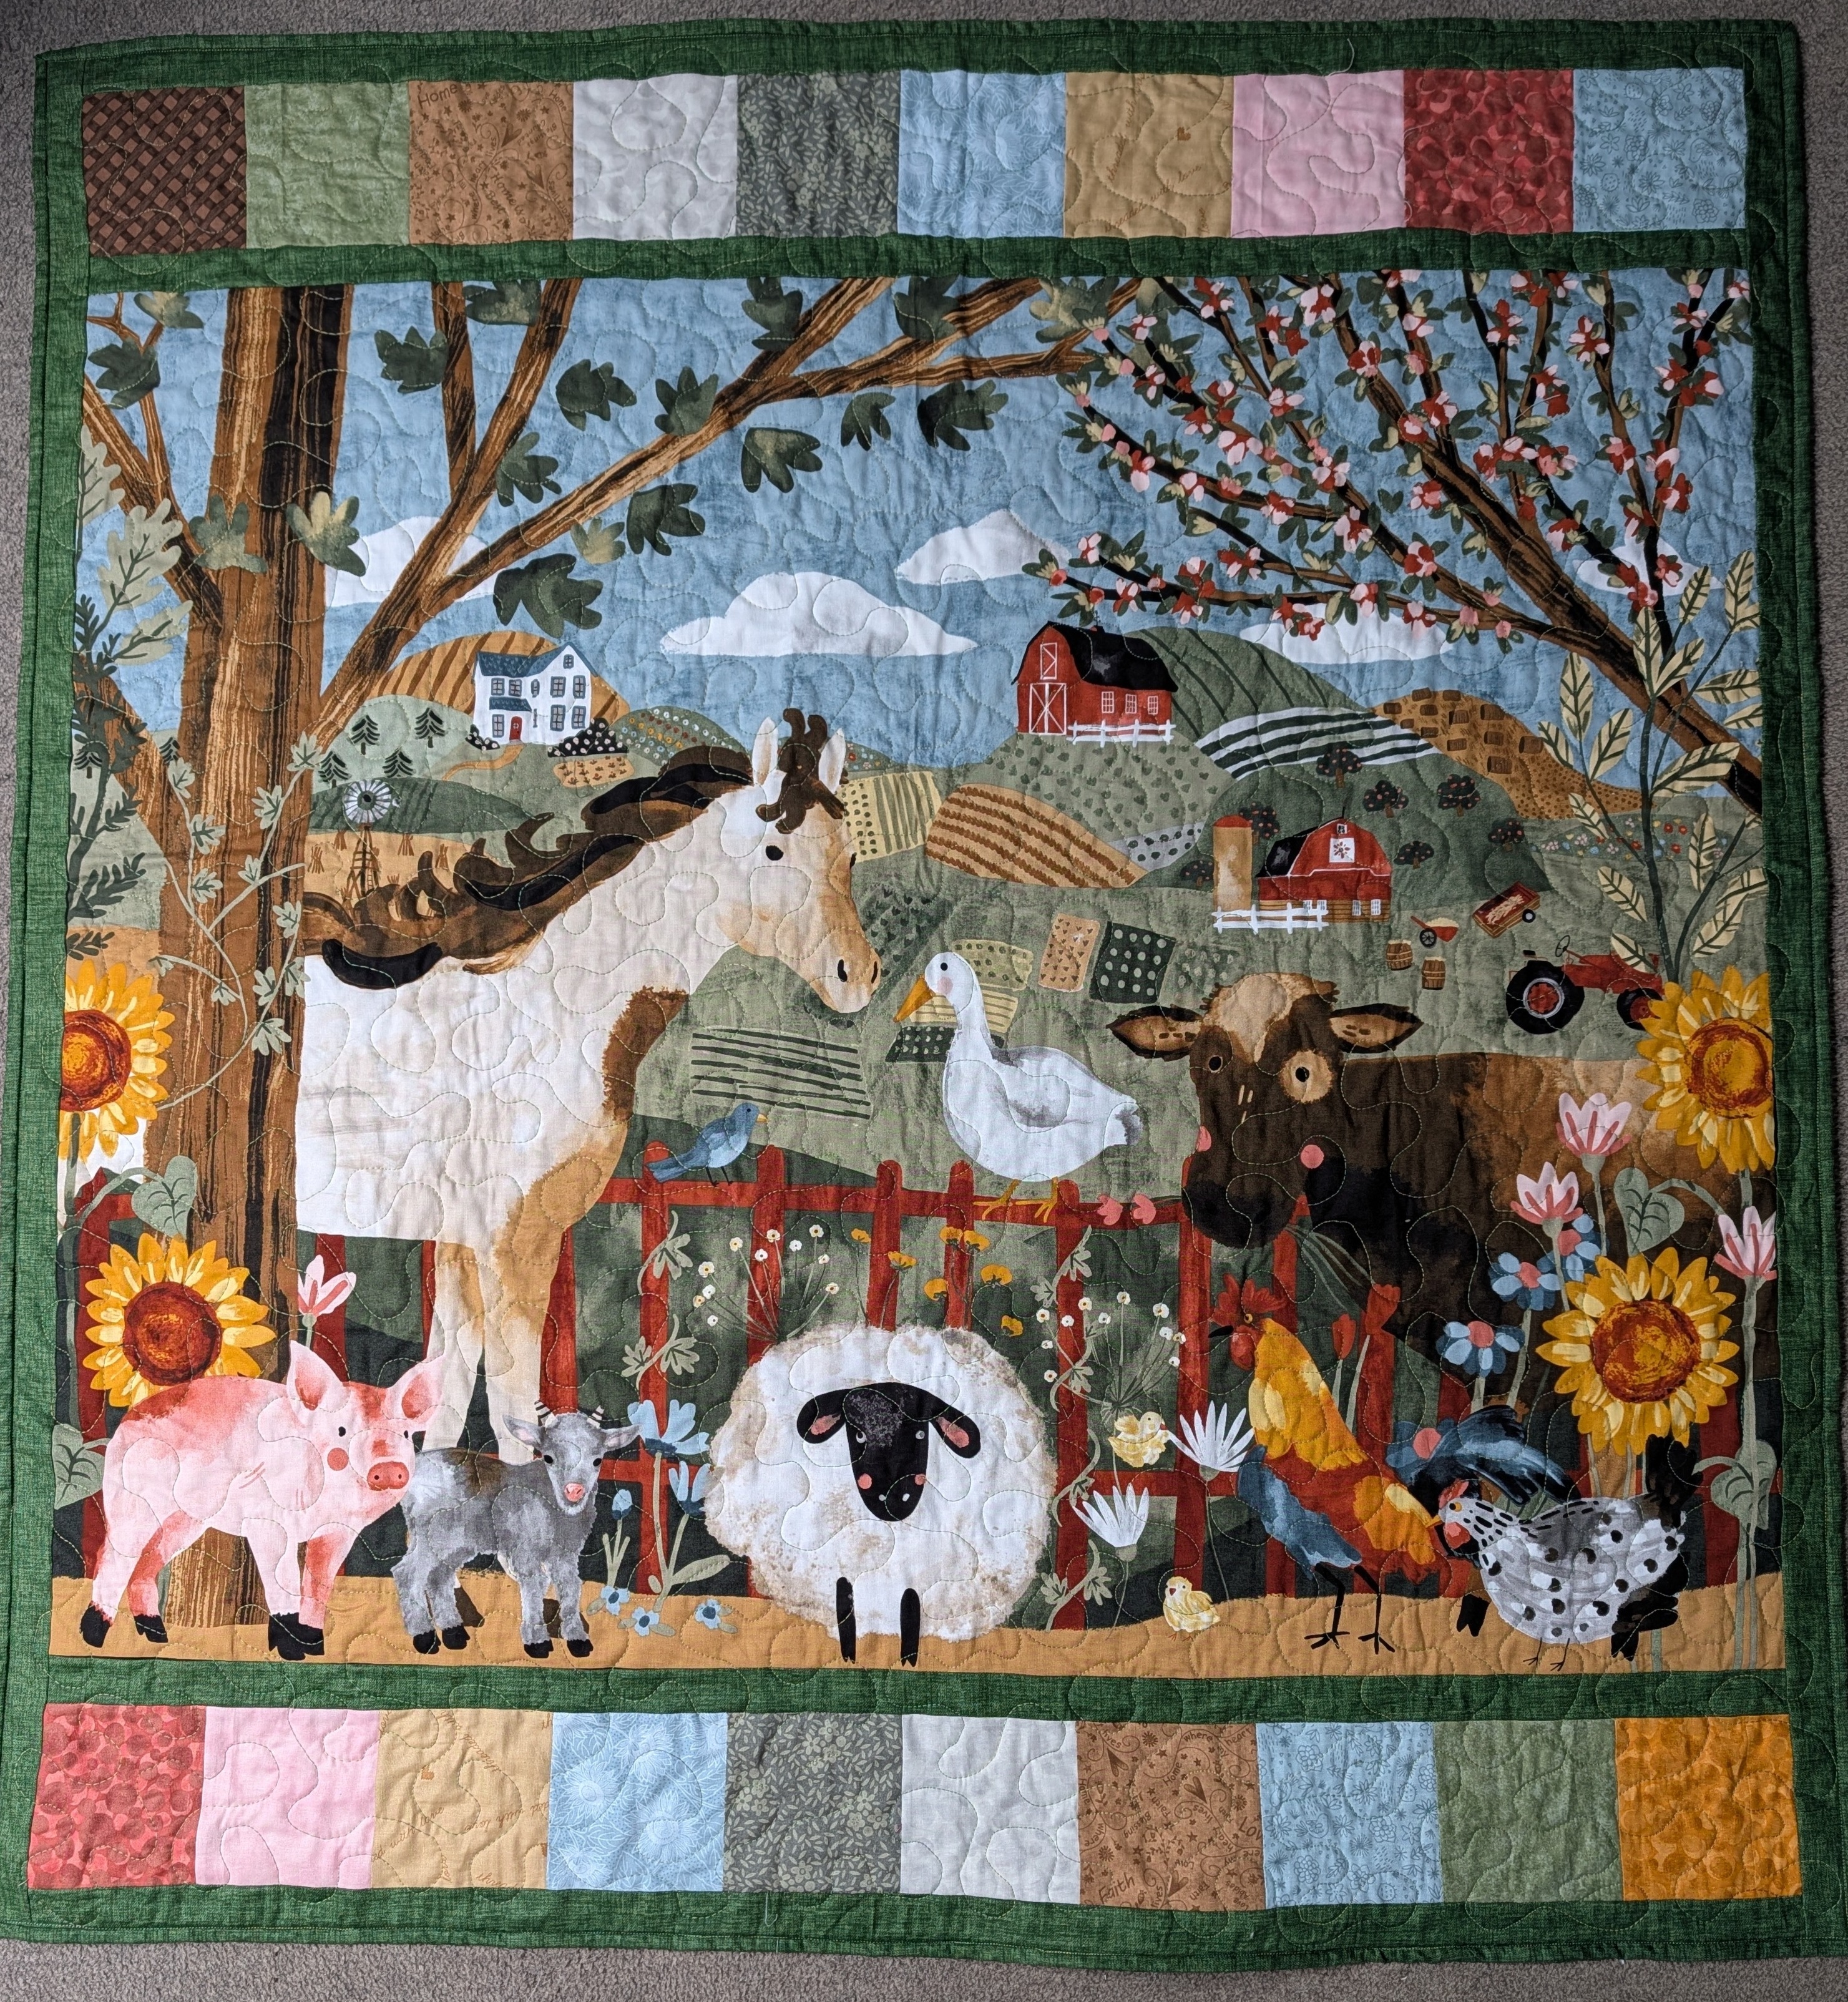
I needed something that was going to be quick to make so I decided to use a panel. I went to the Remnant House in Harrogate where they had a wide selection. This one appealed as it’s not too twee, she comes from a farming family, and a little bird told me the nursery is painted green! Mum also loves sunflowers, so it’s a win-win! It actually would work well as an I-spy quilt as the more you look at it, the more you see! I bought a length of linen look green cotton for the back and binding.
Annoyingly it was landscape shape and obviously I wanted it to be square at least, if not portrait shape. My original plan in the shop was to have a wide green border top and bottom, but having worked out how wide it would have to be I decided on a simple strip of squares instead.
I found some fabric in my stash which pretty well matched the colours. I cut 4.5″ squares and stitched a strip for the top and another for the bottom. I used the green backing fabric to make a narrow 1″ border all round. I was pretty pleased how it came out.
I had some leftover batting which wasn’t quite big enough, so I googled how to stitch it together to make what’s called Frankenstein batting! You basically put the two straight edges abut each other and zig-zag down the middle. I used the uncut edge on each piece so I knew it would be straight. I was pleasantly surprised how well it worked!
I love seeing the quilts smoothed out when I make the sandwich…
For quilting I decided to do a simple meander, starting with a heart at the middle. I used a green variegated thread, the backing is green, same as the borders. My free motion quilting is improving but still is a long way off perfect! There’s a few wobbles where I’ve stopped for a rest or to change my hand position, even though I always stop with the needle down, it still seems to move.
As it’s not too big, I managed to quilt it yesterday afternoon, I then just had to bind it with the same green fabric. I stitched the binding on with the machine, it’s not as nice a finish as a hand-stitched binding but I think for children’s quilts it’s probably more robust.
All I need to do now is think of a name and make a label for the back.
I’m really enjoying stitching these postcards from Featherstitch House. The designs come out weekly though I’m taking a little longer than that at the moment! I think I need to take a day just prepping a few backgrounds and choosing fabrics as I tend to embroider these on an evening sitting on the settee.
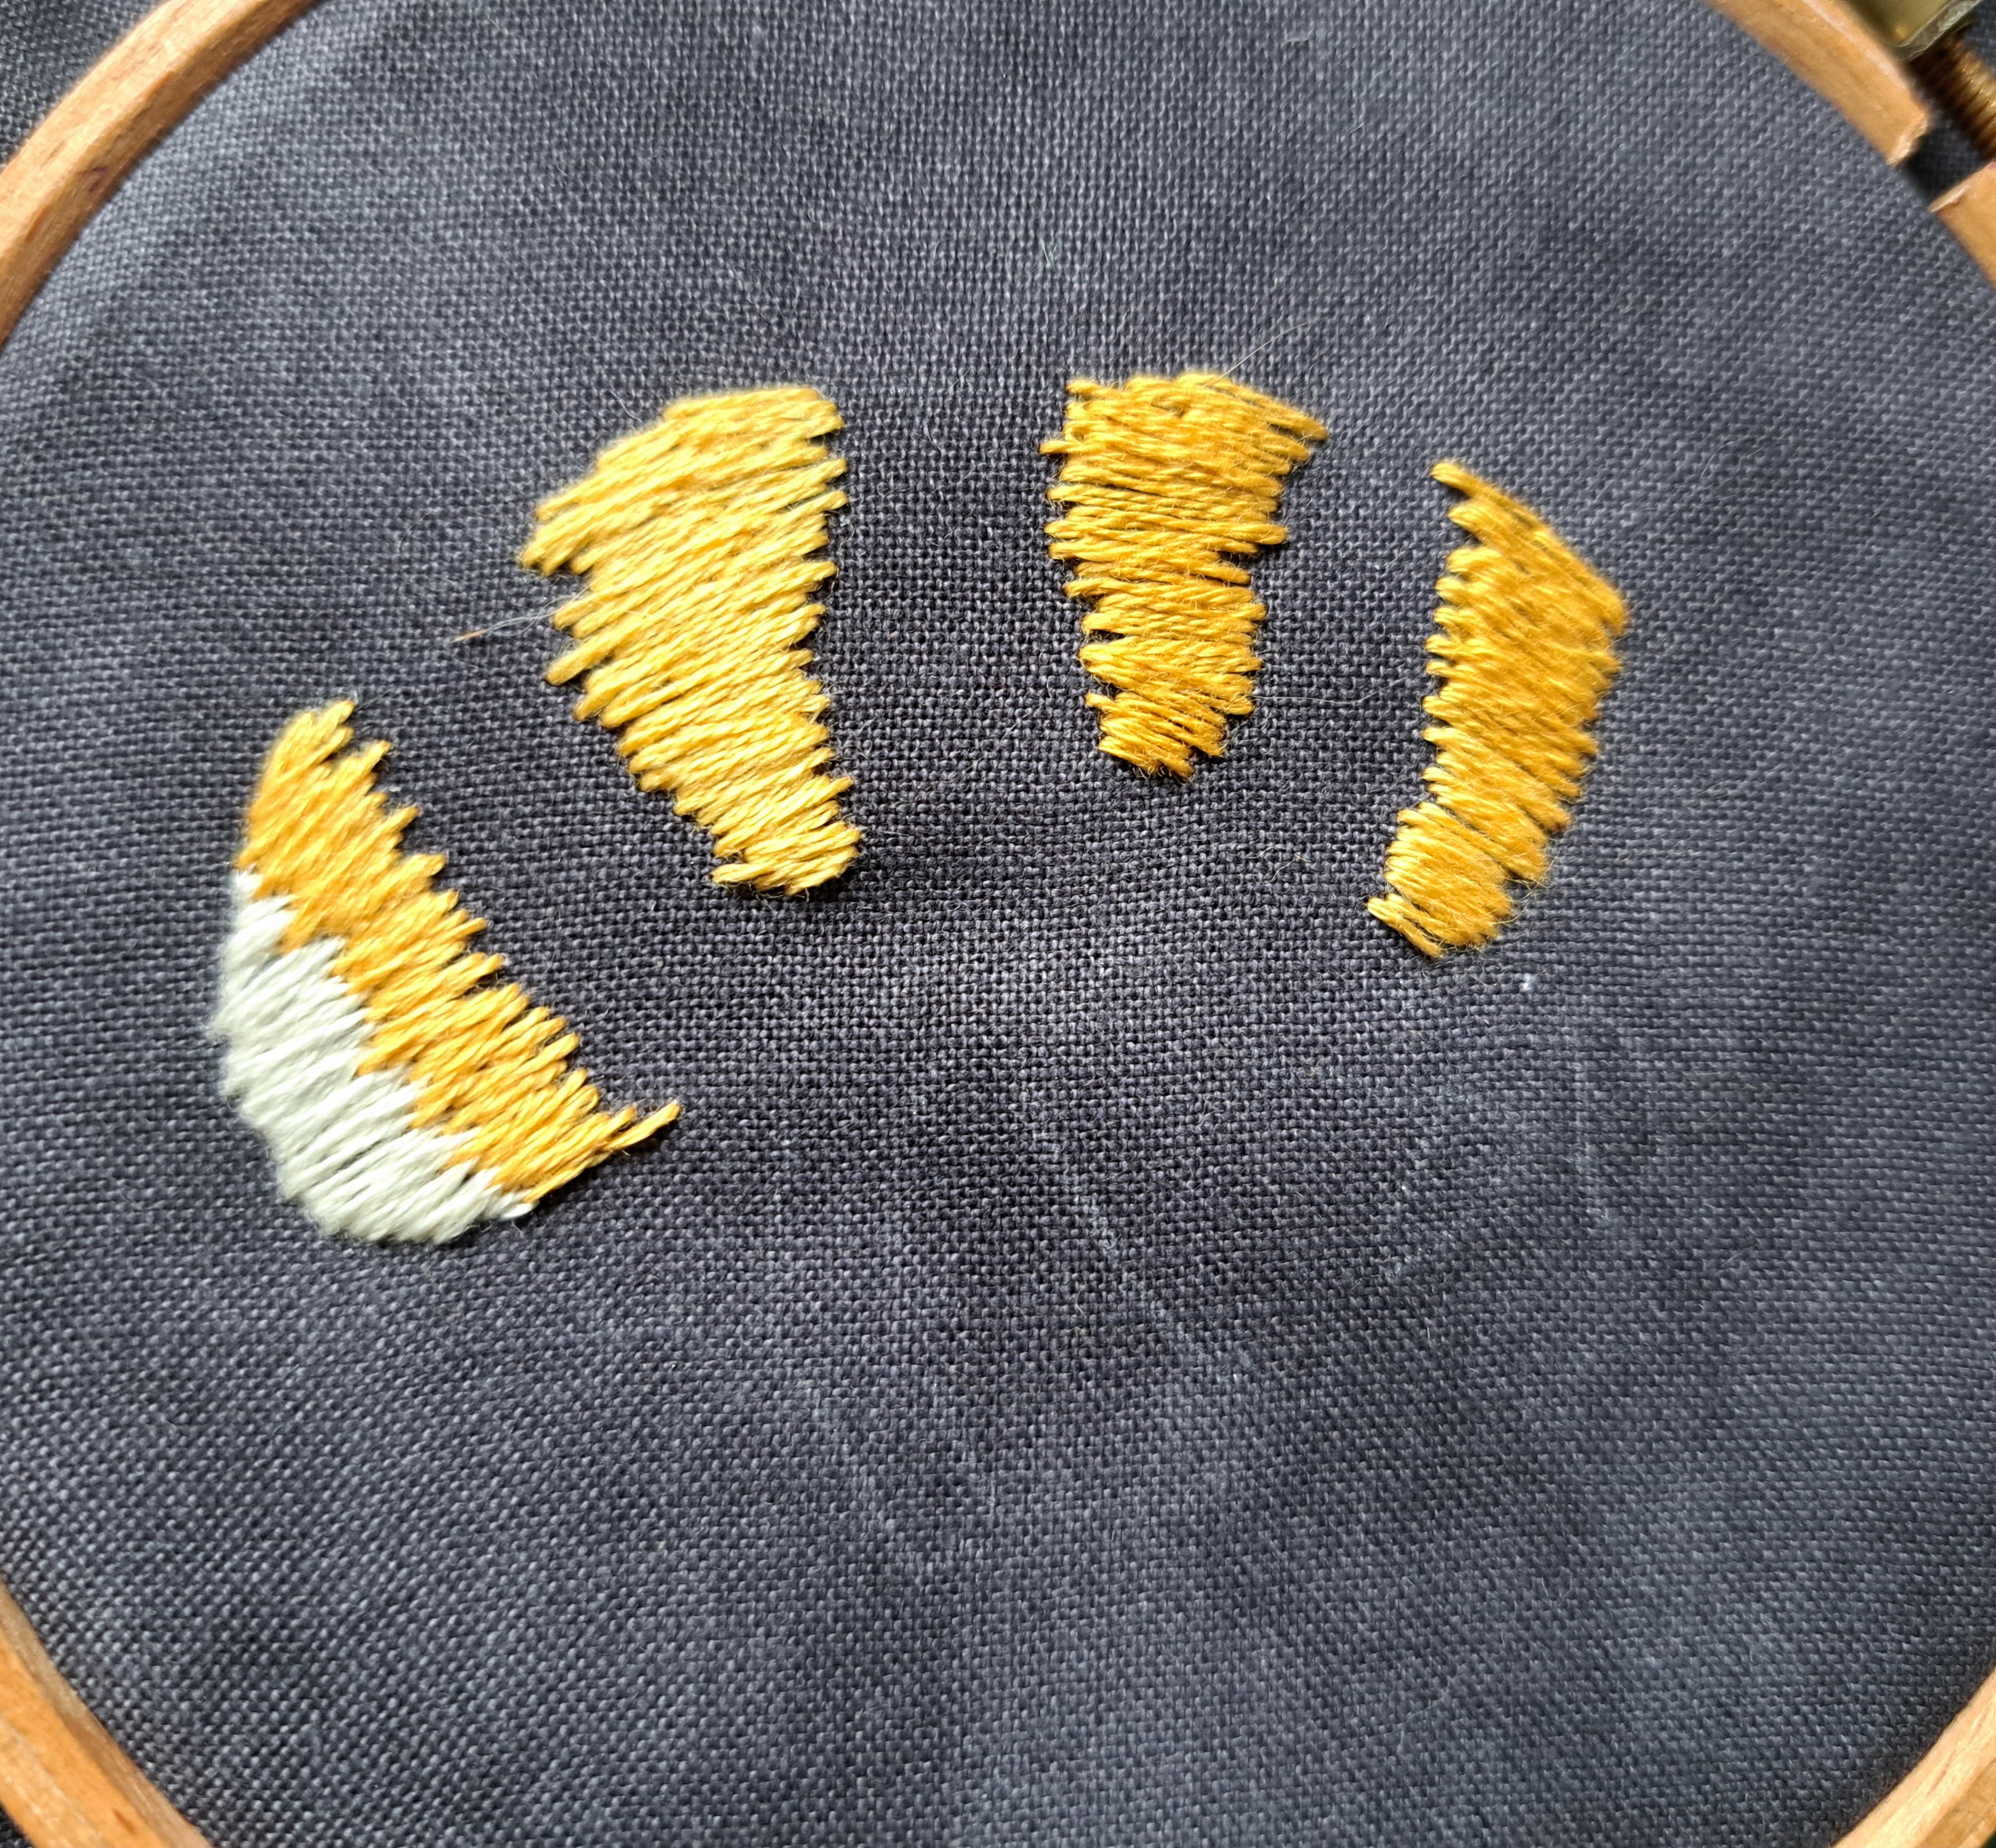
Three weeks ago I’d finished my wren and I’d started stitching a bee…
I’d already stitched the background of flowers on a honey coloured background. The bee is stitched on the black(ish) background which does help getting the density of colour. Once the stitching is finished it’s then cut out and appliqued on. Rachel, the designer, stitched the legs at this point too but they did prove fiddly to then cut out and turn under so I decided to just applique the body and then add the legs once it was stitched on the background.
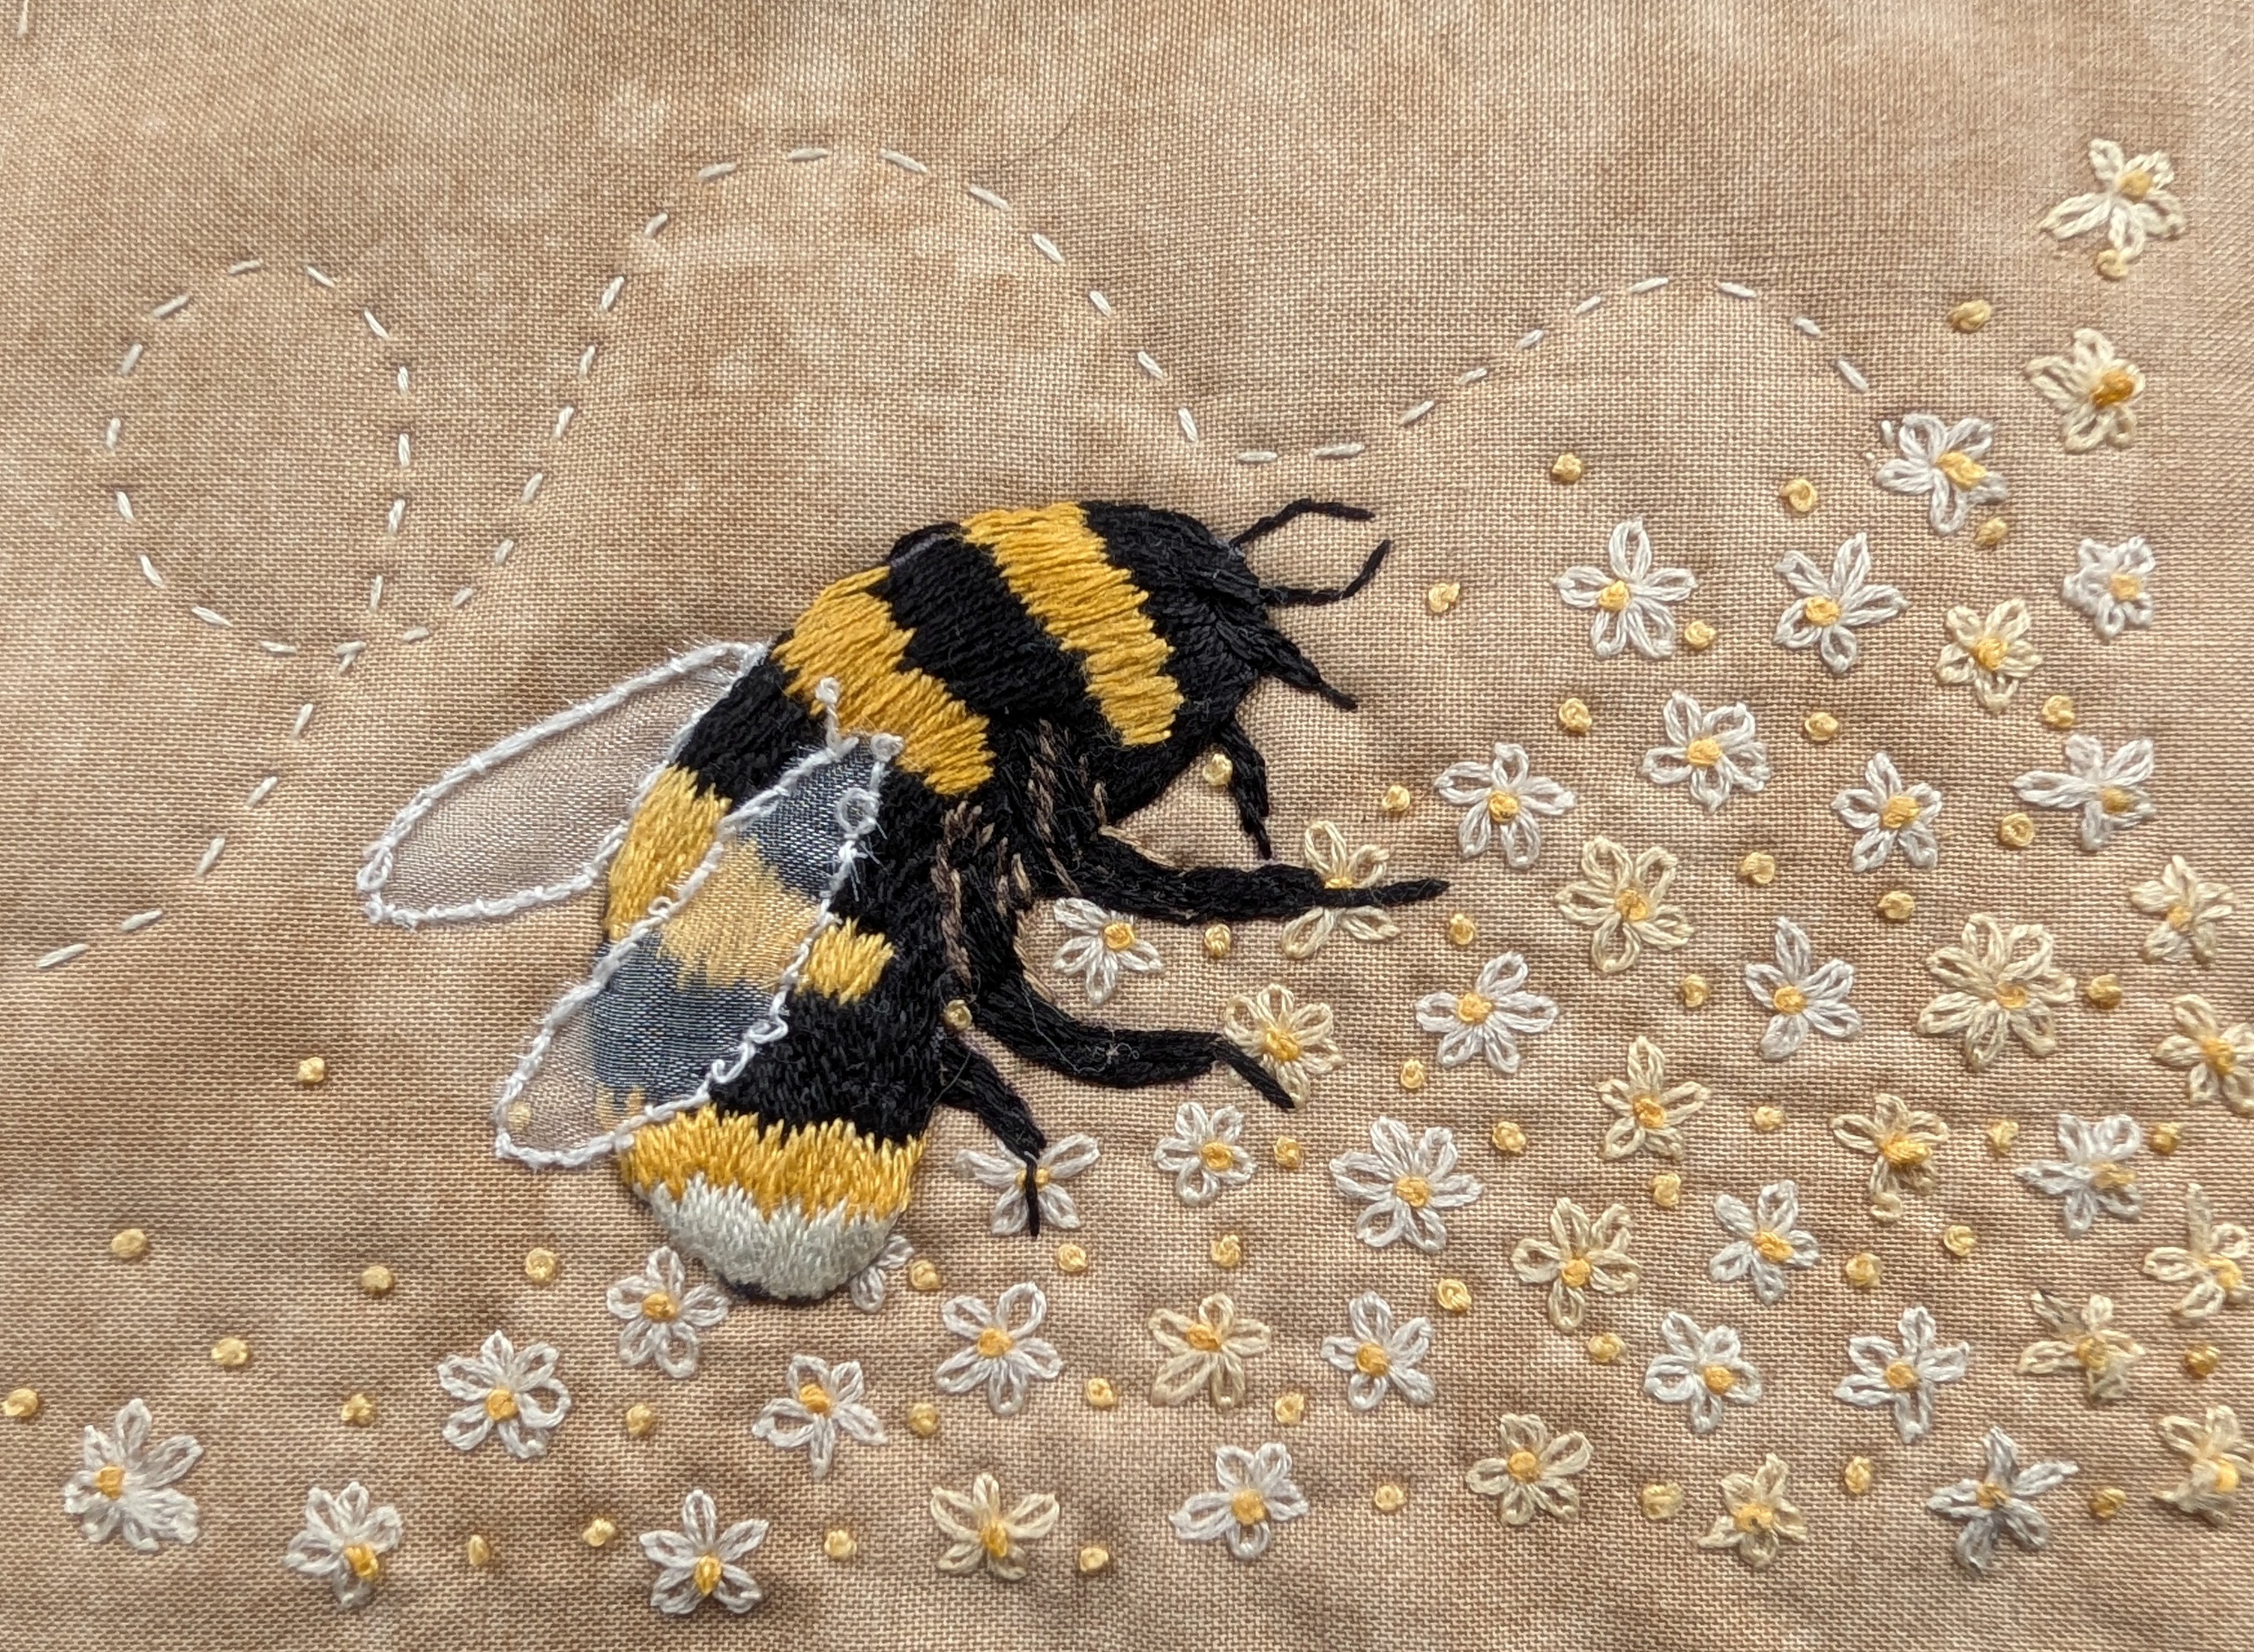
The legs were high-lighted with a mid beige colour, mine looked too light so rather than undo them I just touched them up with a finepoint pen!
The wings were stitched on organza with a back-stitch all the way round which was then overstitched so it could be cut out and delicately stitched on.
My finished bee…
The next postcard I wanted to stitch was one from February, a winter hare gazing at the moon. I was planning to do this last before the bee but I had a disaster with the background! The background uses a little batik to get the dark sky. First job was to melt a candle very carefully in the microwave. I tried with the stump of a ‘proper’ candle but despite quite a few minutes zapping, it wouldn’t melt! I tried a cheap tea light and it started to melt almost immediately!! Once it was all melted I used a paint brush to flick the hot wax onto the white backing fabric. I’d chosen quite a thick cotton, possibly metis, I think with hindsight this was a mistake. Once dry it was then meant to be painted with watercolours, the wax would resist the paint and therefore leave ‘stars’. I couldn’t find my watercolours (still not found!) so I used silk paints instead. Apart from the fact that I wasn’t really happy with my sky, the batik didn’t work. I think because the fabric was thick, the wax stayed on the surface but the silk paints went through and behind the wax.
Take 2!!
I bought some more watercolours, chose a thinner cotton and tried again. The sky looked amazing when it was wet, a dark winters night with a touch of Northern Lights. I was a tad disappointed how much it lightened and murkied when it dried but I wasn’t going to try again, it would suffice. You can see on this first photo with the wide border what it looked like…
The snow is needle-turn appliqued on, the hare and the moon are attached using bondaweb. I used a scrap of metis for the moon as I wanted a heavier cotton so the dark background wouldn’t show through, the bondaweb also helped a bit in adding another layer.
Once the basic shapes were on the stitching bega. The sky and the moon were covered in Kantha stitch. This is an Indian technique which just uses running stitch to create patterns and texture. It can be very neat and regular or free flowing like this one.
I’ve not really done much Kantha before, I was amazed the difference it made to the sky. I was going to use a variegated DMC thread but at the last minute I thought of my machine embroidery threads, in my box I had a dark blue with touches of purple and teal, it was also a little finer than the DMC. It was perfect! It has darkened the sky beautifully whilst blending in to the background. I just stitched lots of wavy lines, it took a while but I love the sky now. The moon is stitched with DMCwith simple circles.
The embroidery on the hare is kept simple with just a back-stitch edge. I’ve just his whiskers to add. Lastly I’ve to stitch some grasses and seed heads in the foreground and another postcard will be finished.
I think I might do some foxgloves next, though there’s a lovely sea scene too and a blackberry one which looks good!
Please check out what everyone else has been stitching over the last three weeks
Well I’m thoroughly enjoying being retired, I’m afraid I haven’t missed worked at all!! I haven’t been quite so productive as I hoped, I think I need to get a bit more organised. I have managed a fair bit of stitching out and about. I’ve stitched in the physio waiting room, today I was stitching in Harrogate bus station! Quarter of an hour here and there soon adds up.
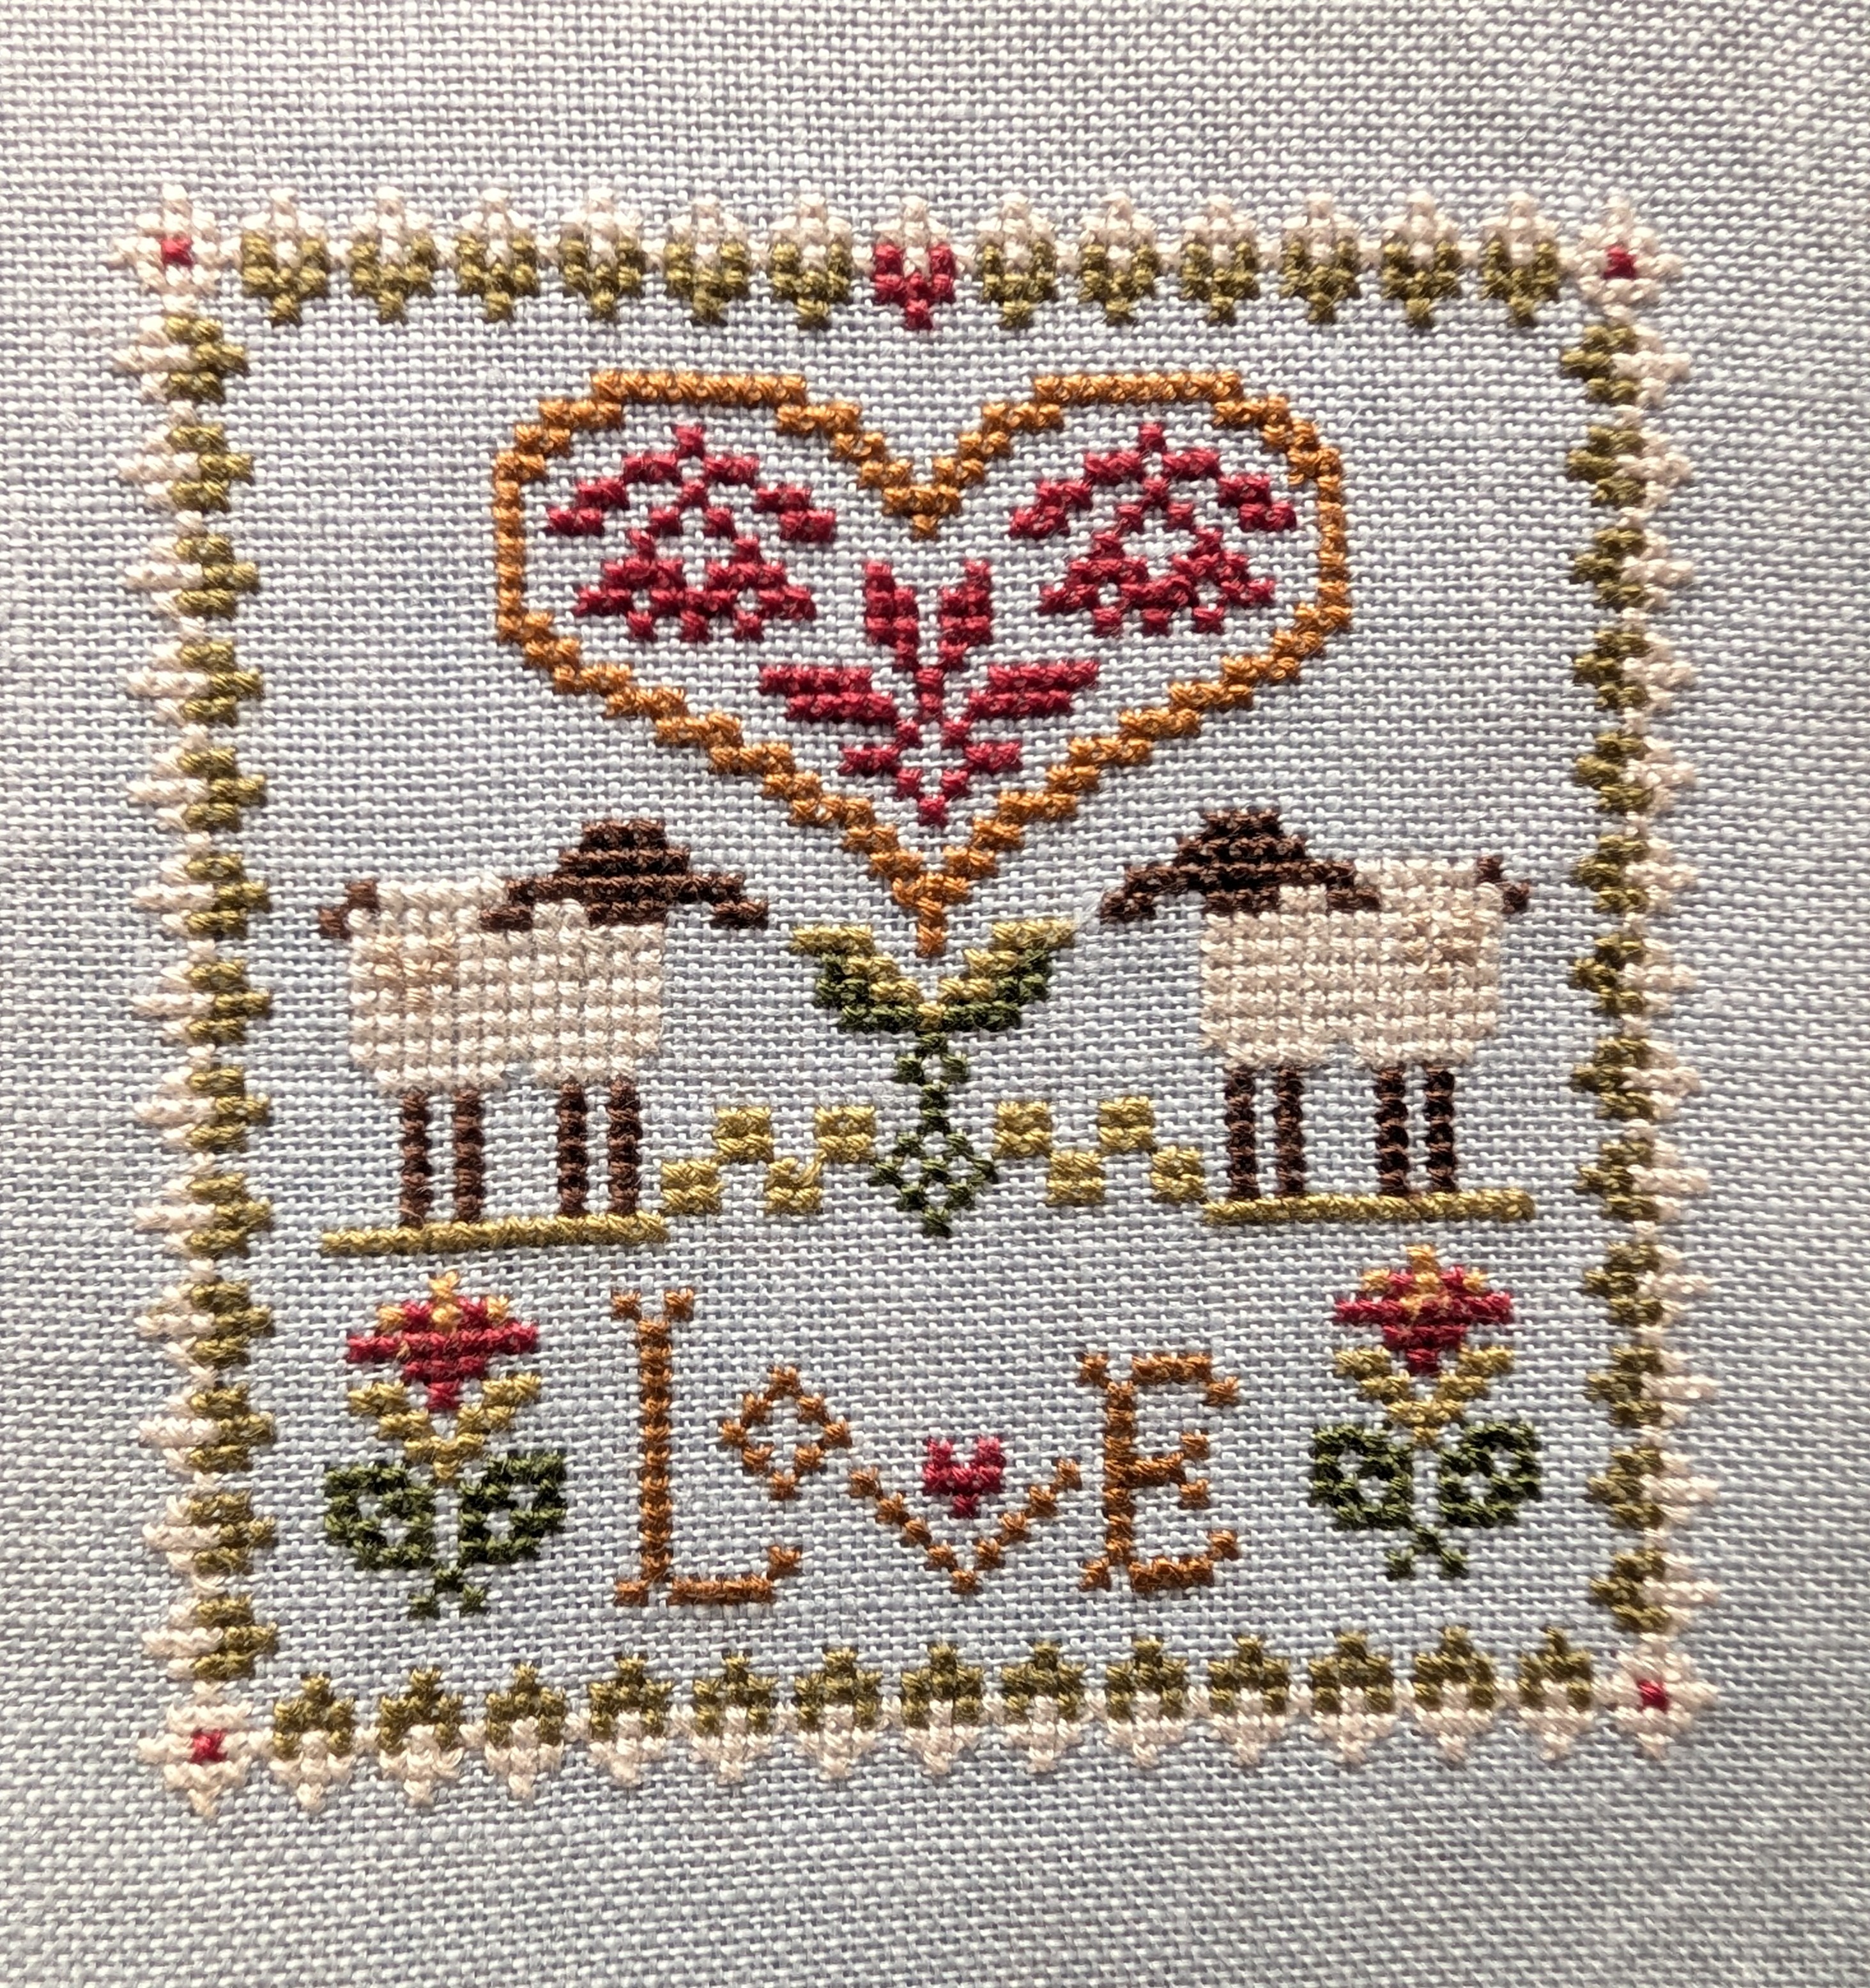
Last time I posted I was making good progress on the Little Sheep Virtues…
Courage is now finished, it goes with one I stitched a few years ago and never did anything with it. These are both going in another fabric book.
I’m now half way through ‘Love’…
They are pretty quick and simple to stitch, ideal for an out and about project. They are meant to have fancy buttons on too of birds and flowers. The ones they recommend are gorgeous but they are difficult to get hold of and expensive here in the UK. I’m going to keep my eye open when I go to the Harrogate show in November.
There’s quite a few in this Sheep series, I’m not sure if I’ll do them all, it might make the book too thick…we’ll see!
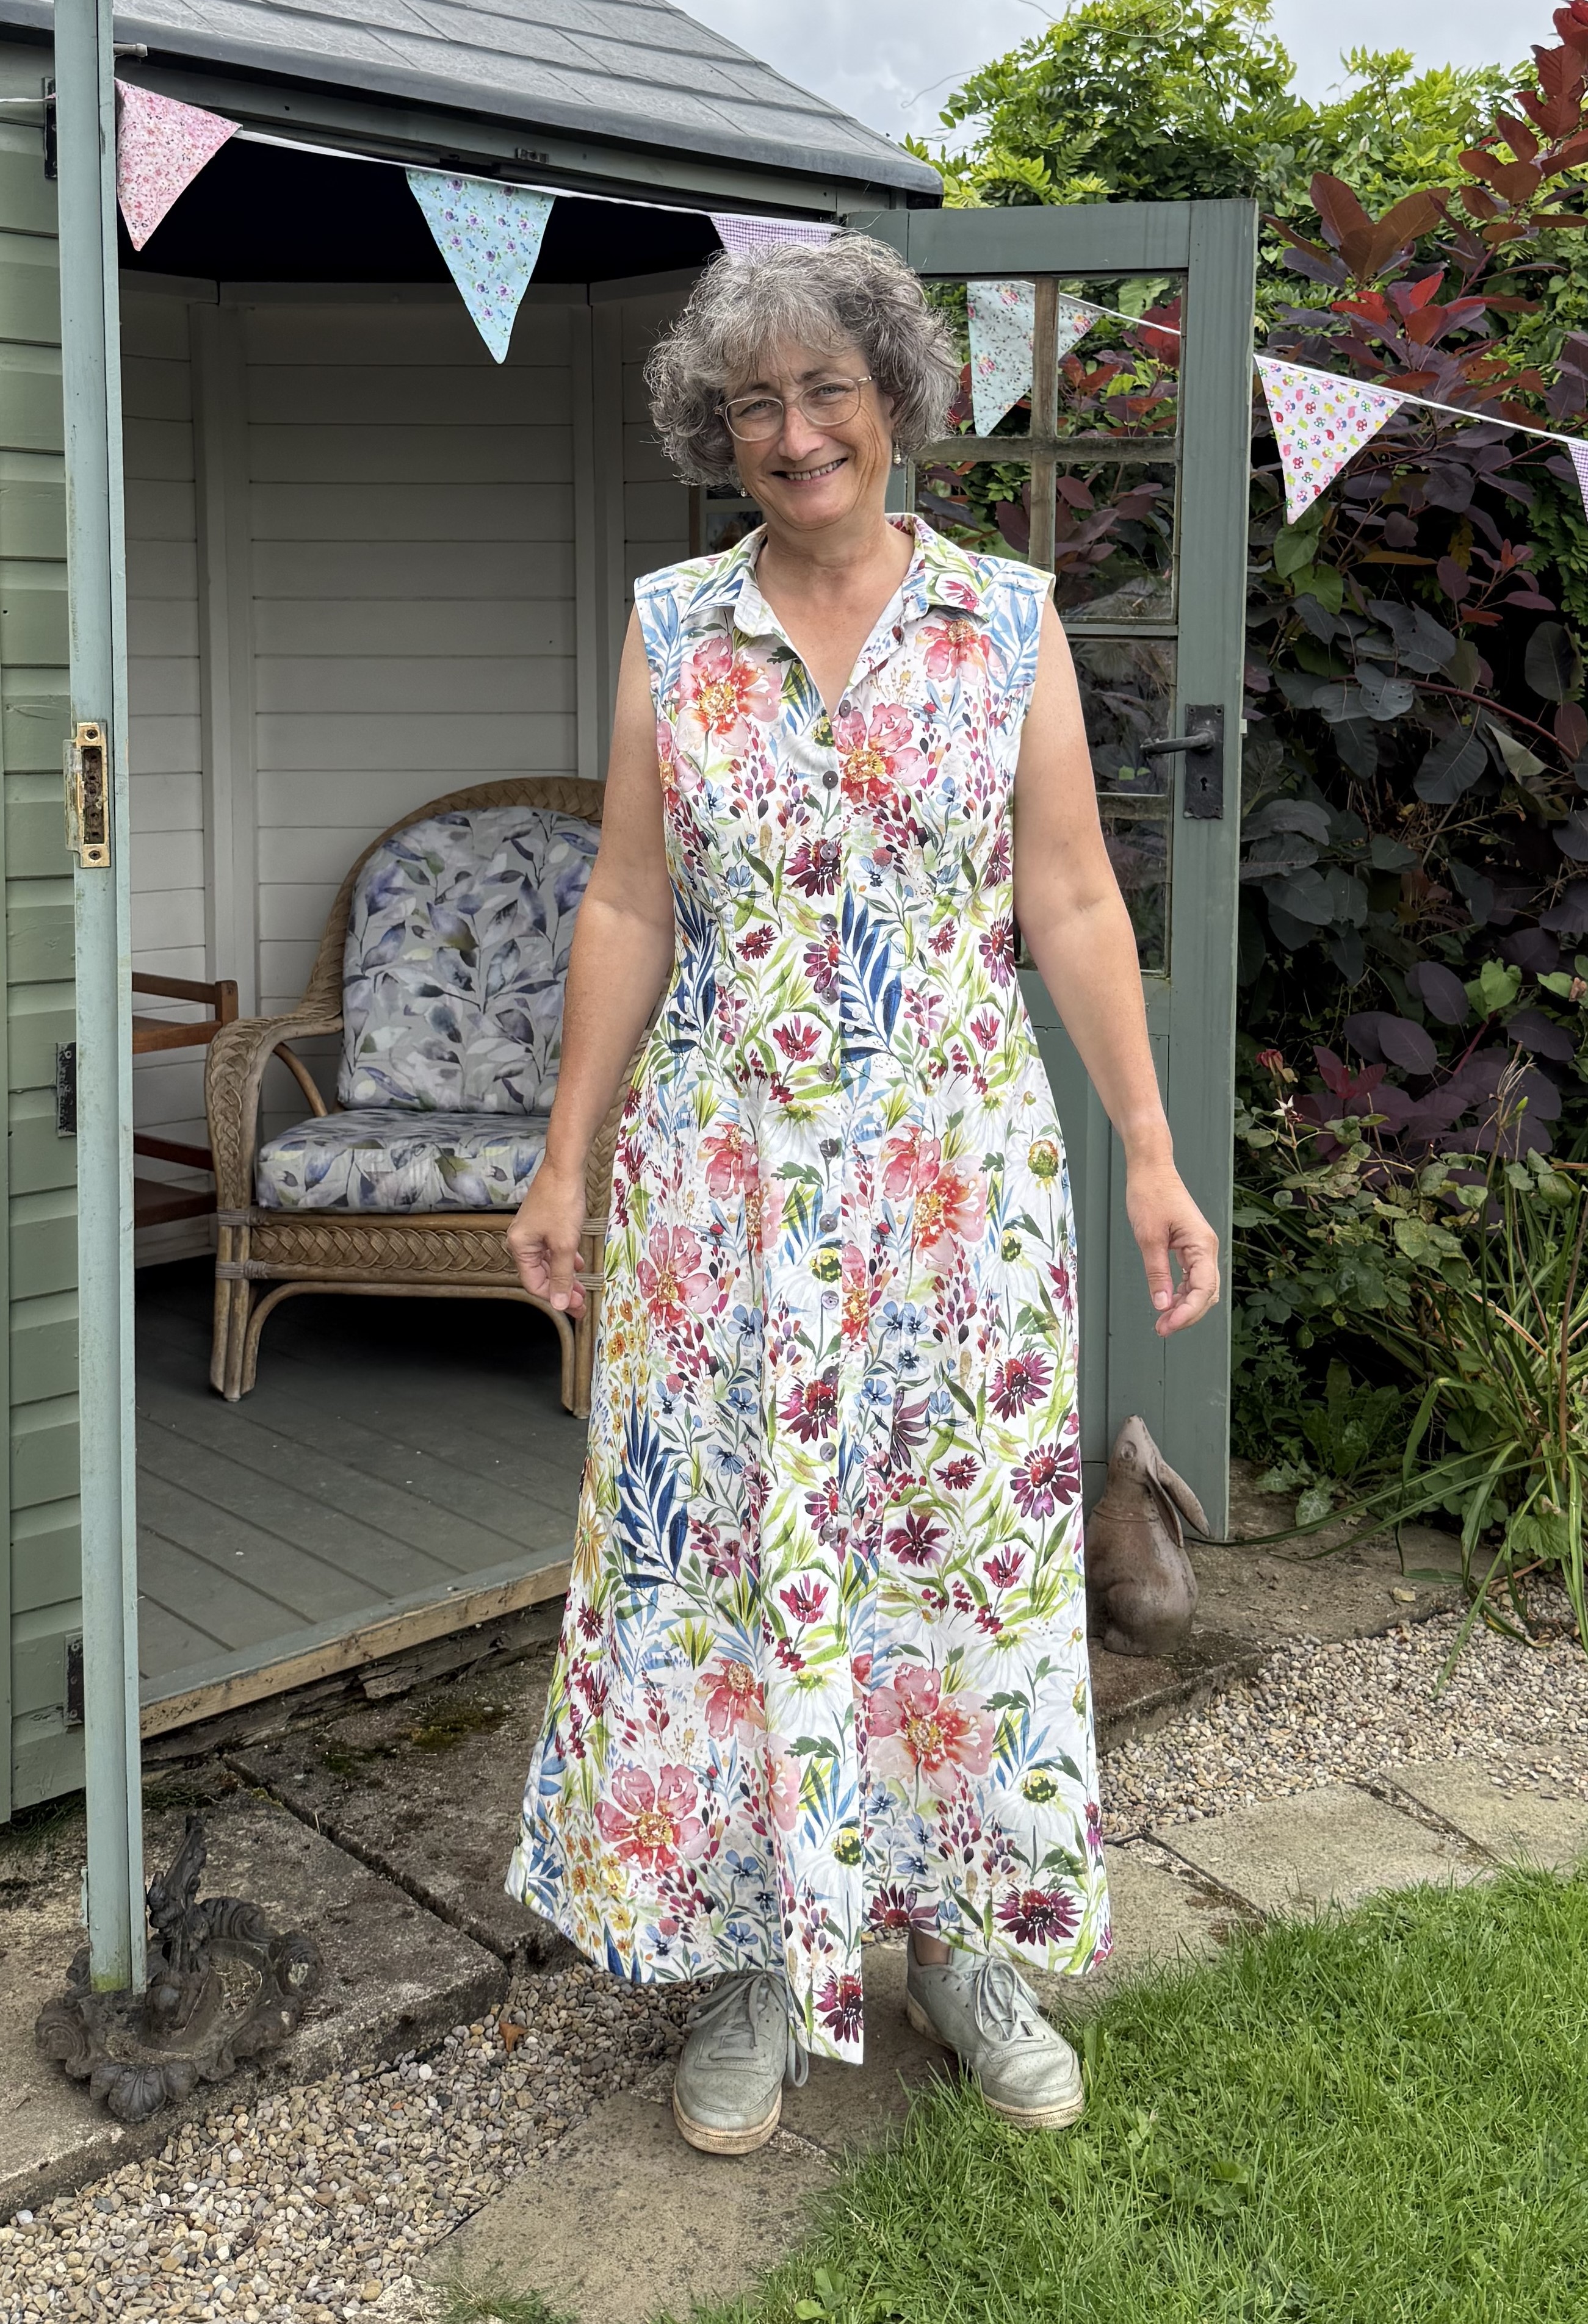
When I planned for my birthday / retirement party I hoped for a hot sunny afternoon in the garden but of course this is Yorkshire and the heatwave broke a few days before! Having said that, we were very lucky with the weather as there was a brief shower at lunchtime and then it stayed dry so guests did sit outside as well as inside.
I decided I needed a new dress for the party. A couple of years ago I bought half a yard of gorgeous flowery quilting fabric. I used it for my birds and blooms book…
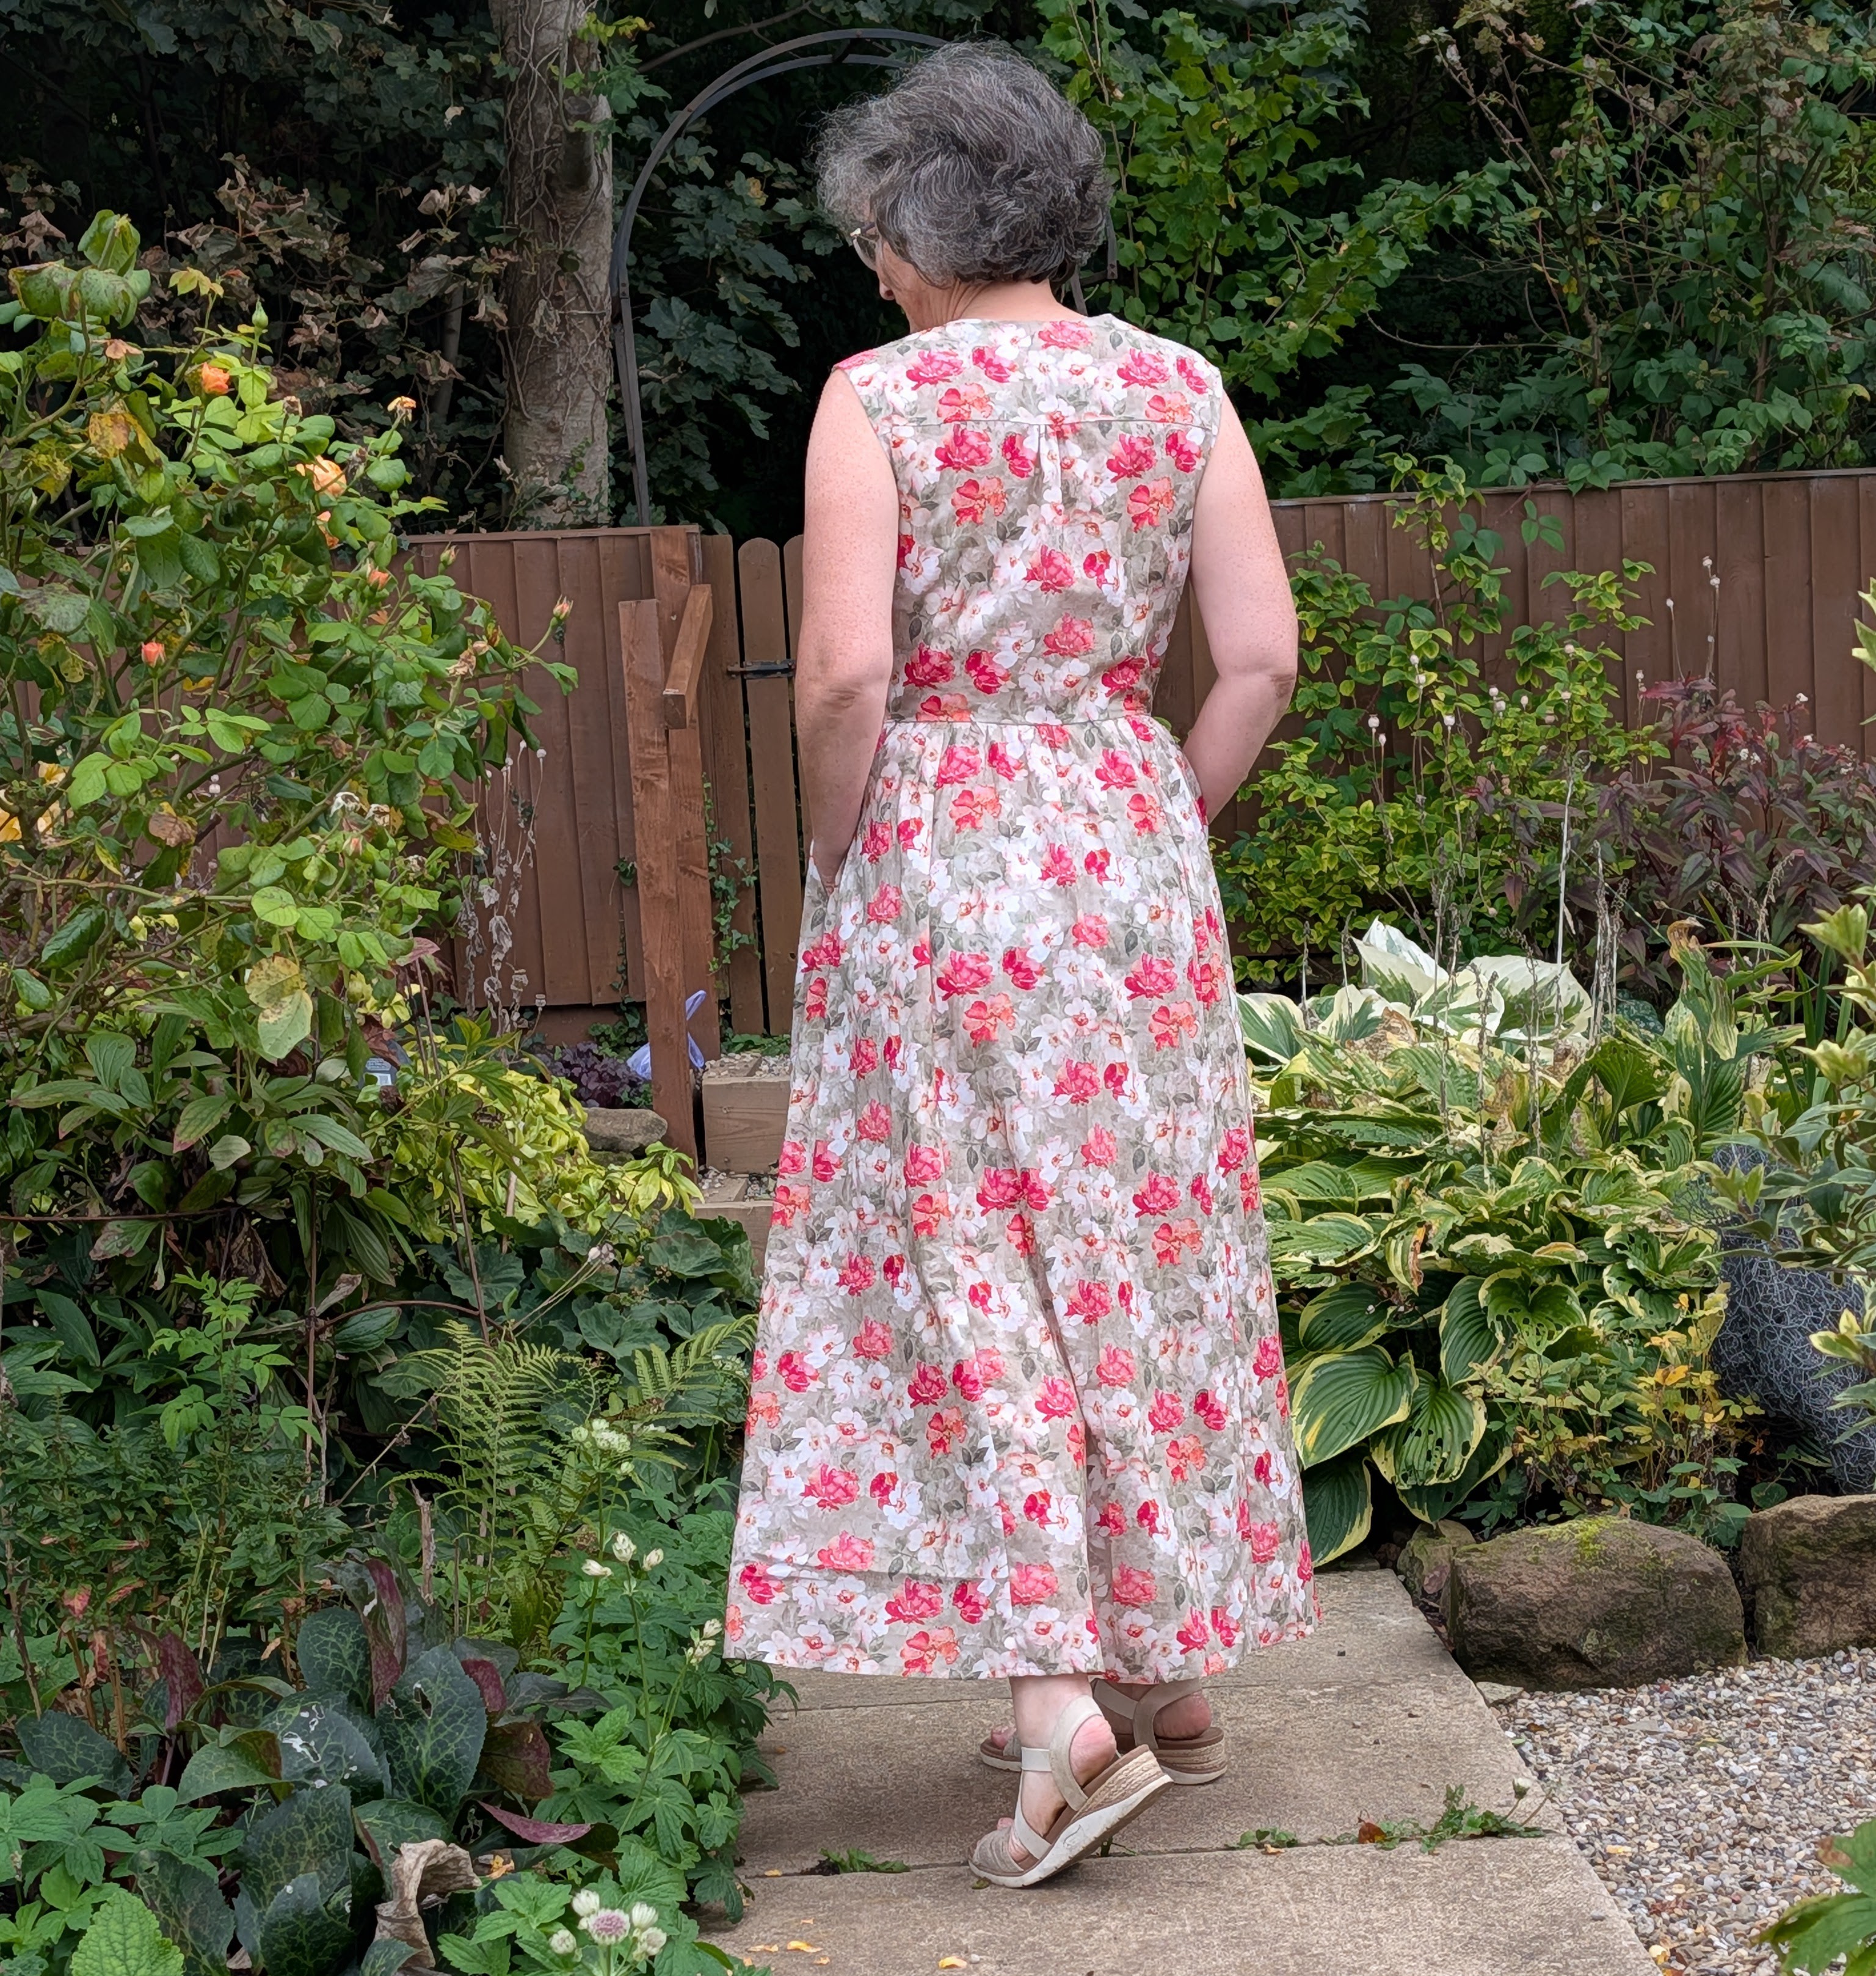
I don’t often buy quilting fabric for clothes as it is pretty pricy here in the UK, average is £15 /m but the more I looked at this fabric the more I wanted to make a dress out of it. Of course it was about two years since I bought it and fabric is usually made for a fairly short time. I searched on the internet and finally found some which had an off white background instead of the green. I got the last piece though as I ordered 3.5m but they only had a 3m piece and a 1m piece, luckily I could juggle the pieces around.
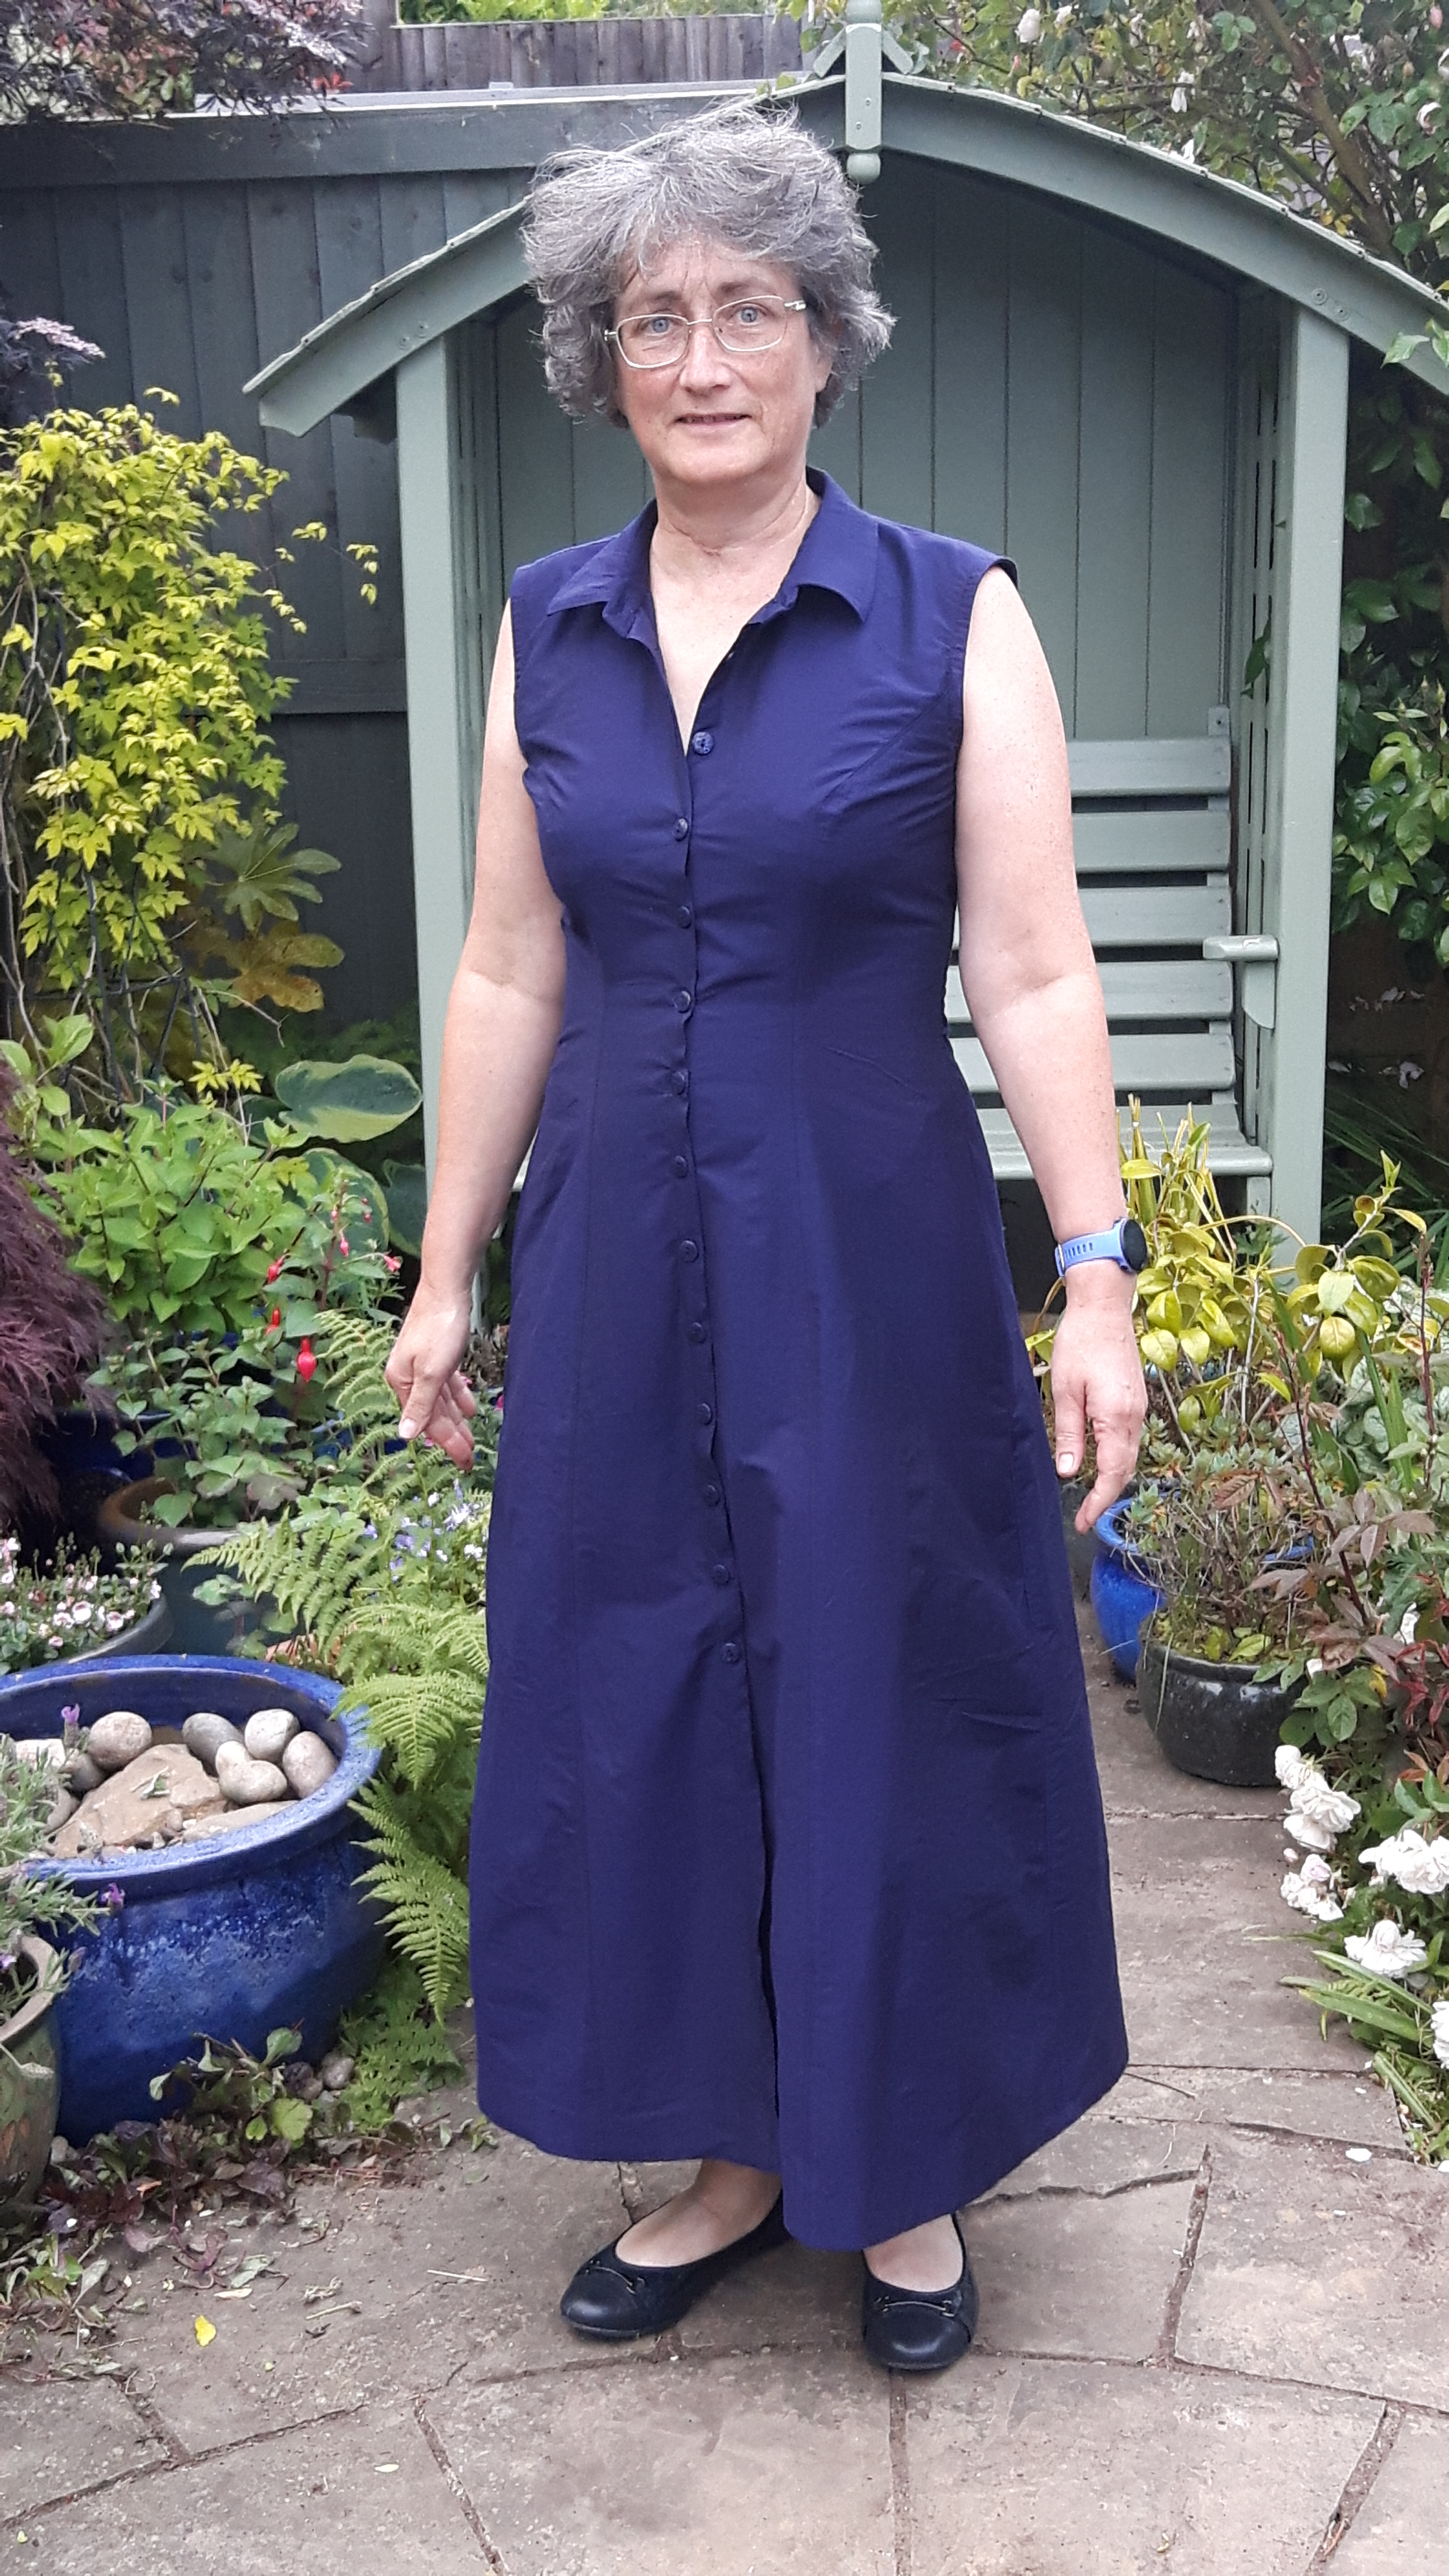
I decided to make a Deer and Doe Bluett dress. I made this back in 2021 in a dark blue silk dupion. It was a little snug when I made it but having lost a couple of stone since then it now fits beautifully and I love wearing it. This is me back in 2021…
I read my post so I knew I’d added 12″ to the length as I do like long summer dresses. I also added pockets as I love a dress with pockets! I cut the dress out to the same size as last time, however I decided to make the seams a fraction narrower (I just moved my needle over 2 points) as cotton does tend to shrink a little with washing and I thought it’ll just give me a little wriggle room.
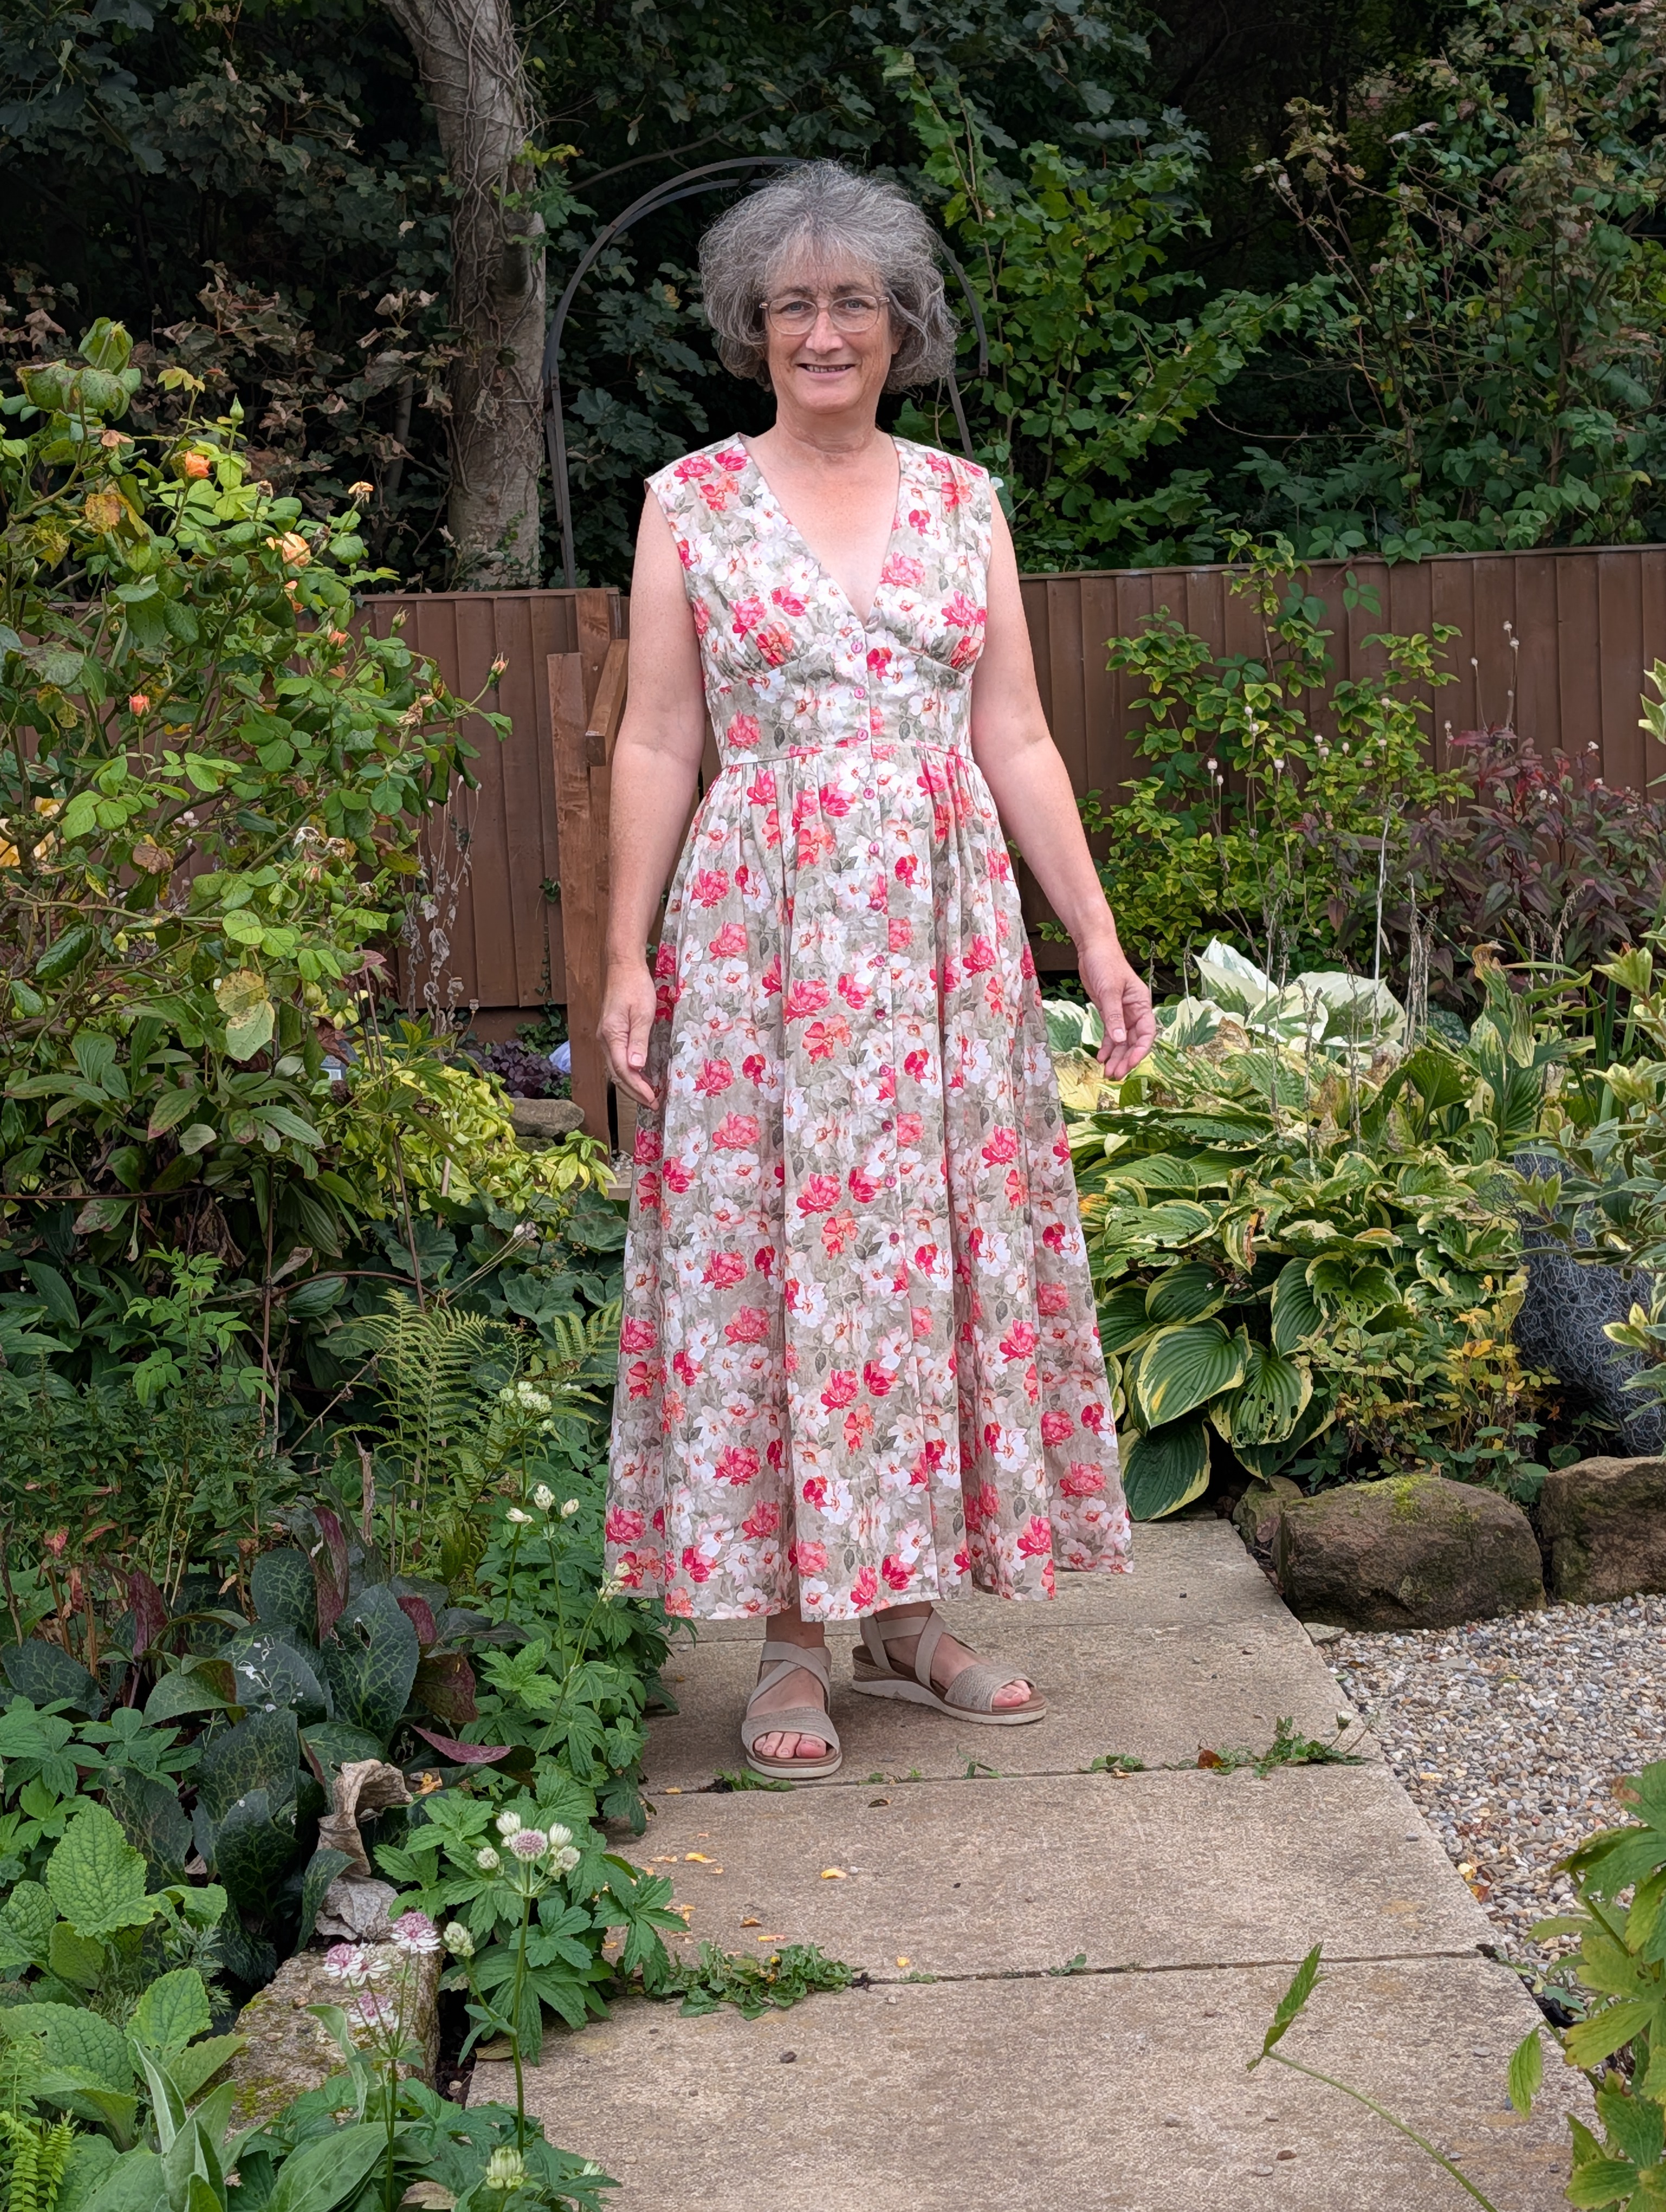
The dress goes together really easily, I would say on the whole the instructions were brief but clear. The only bit I didn’t understand was how they did the binding of the armholes, in the end I just cut some bias strips from some cotton lawn and did it my own way. All the seams are overlocked inside and top-stitched outside, the curved hem is done with a 2.5″ facing.
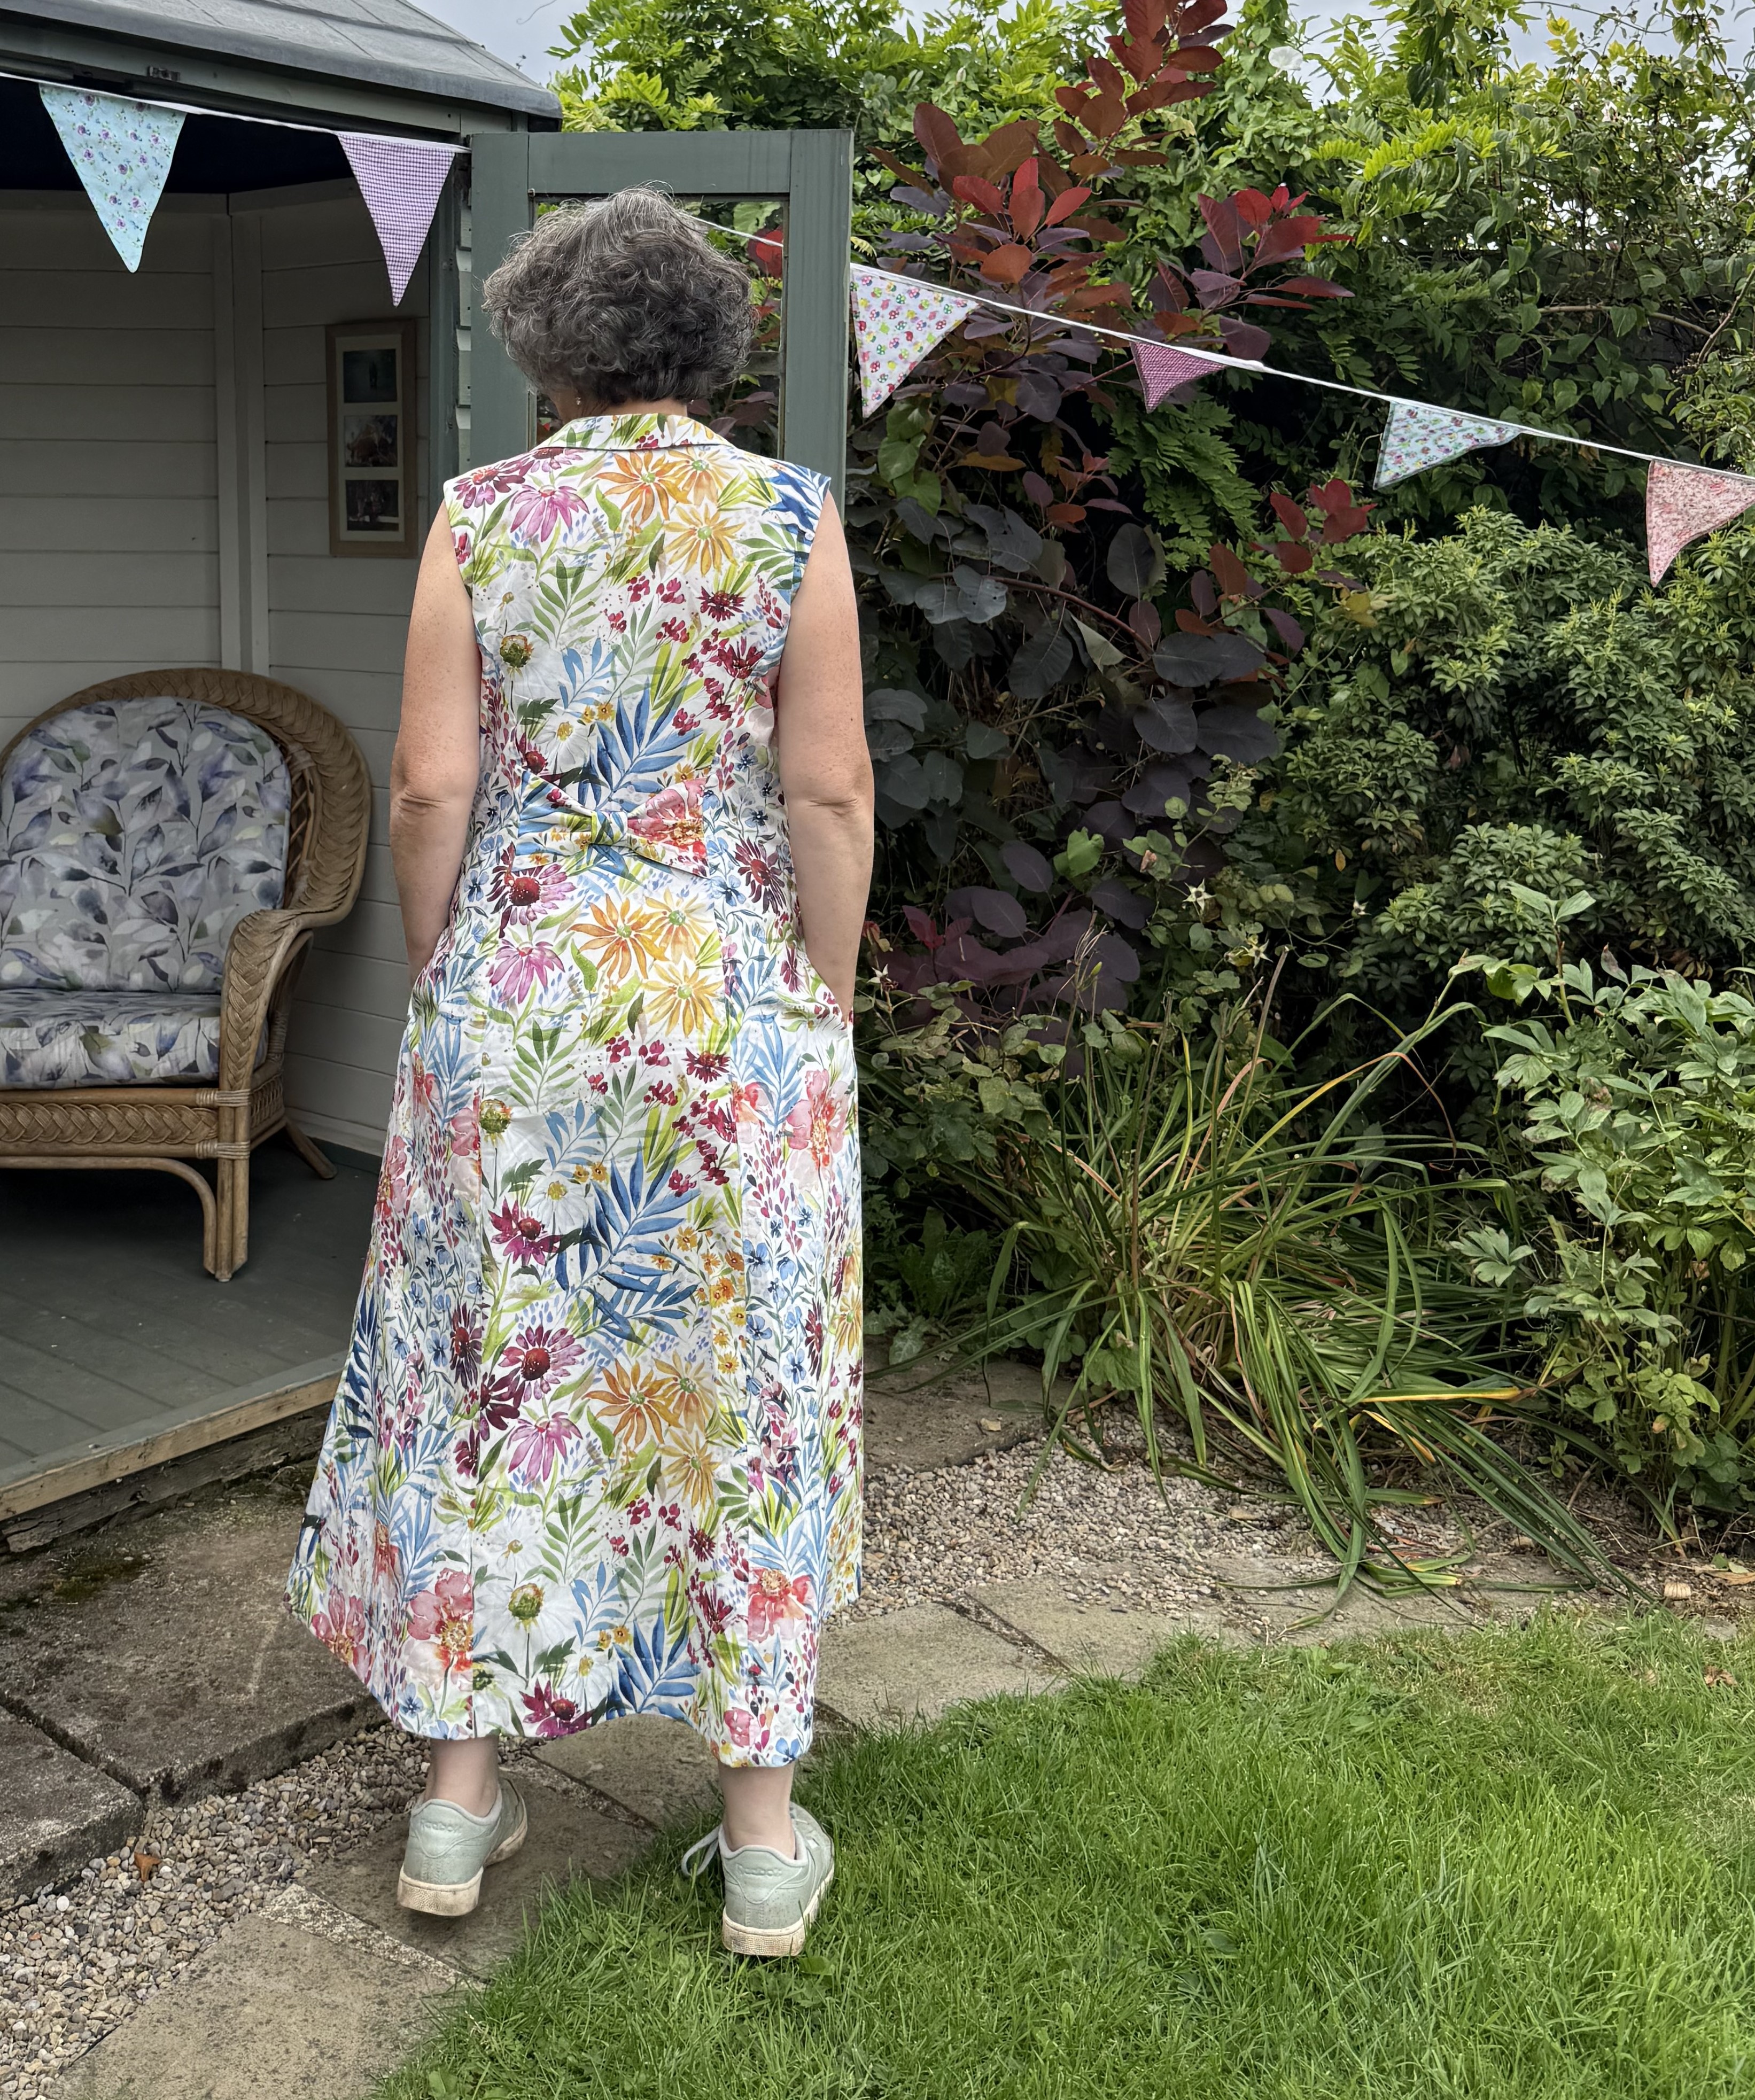
There’s an awful lot of buttons down the front, I actually spaced them slightly wider than the pattern but there’s still about fifteen! For once my sewing machine managed to stitch all fifteen without throwing a wobbly! I managed to find some shell buttons exactly the right size in my stash and I even had enough! I wasn’t sure about the colour as they are a different shade of purple to the flowers in the dress. The alternative was trying to match buttons on the internet which I never have much success with so I decided to go with the ones from my stash. Once I tried the dress on I was more than happy with the buttons as they just disappear amongst the flowers.
I love the dress, I think the fabric is glorious, it makes me smile! It’s lovely to wear too, just the right amount of fitting and a flowing skirt. With hindsight I could have left the bow off the back of the dress as it is lost in all the flowers. The pattern is perfect for slightly heavier, crisper fabrics, I’m sure I’ll be making another Bluett.
I’ve made a little bit of progress on my Christmas runner, not a lot though as I’ve been concentrating on other things. This is a project I actually started back in 2020 but it got put on a back burner for various reasons and then to be honest I forgot about it until I was having a tidy! Last time I posted about it I was half way along doing lines across…
To give you an idea of scale, the embroidered squares are 2 1/4″ square, the runner is around 48* long. I’ve now finished quilting across the runner, next I’m going to quilt down the length of the runner.
I’d used a polyester batting and I’m not enjoying quilting it, it feels really thick and bulky, even though it doesn’t look like a high loft one, maybe I’ve just got used to the feel of the 80/20 cotton ones.
Hopefully next time I share this I’ll have made a bit more progress!
Hand Quilt Along Links
This Hand Quilt Along is an opportunity for hand quilters and piecers to share and motivate one another. We post every three weeks, to show our progress and encourage one another. If you have a hand quilting project and would like to join our group contact Kathy at the link below.
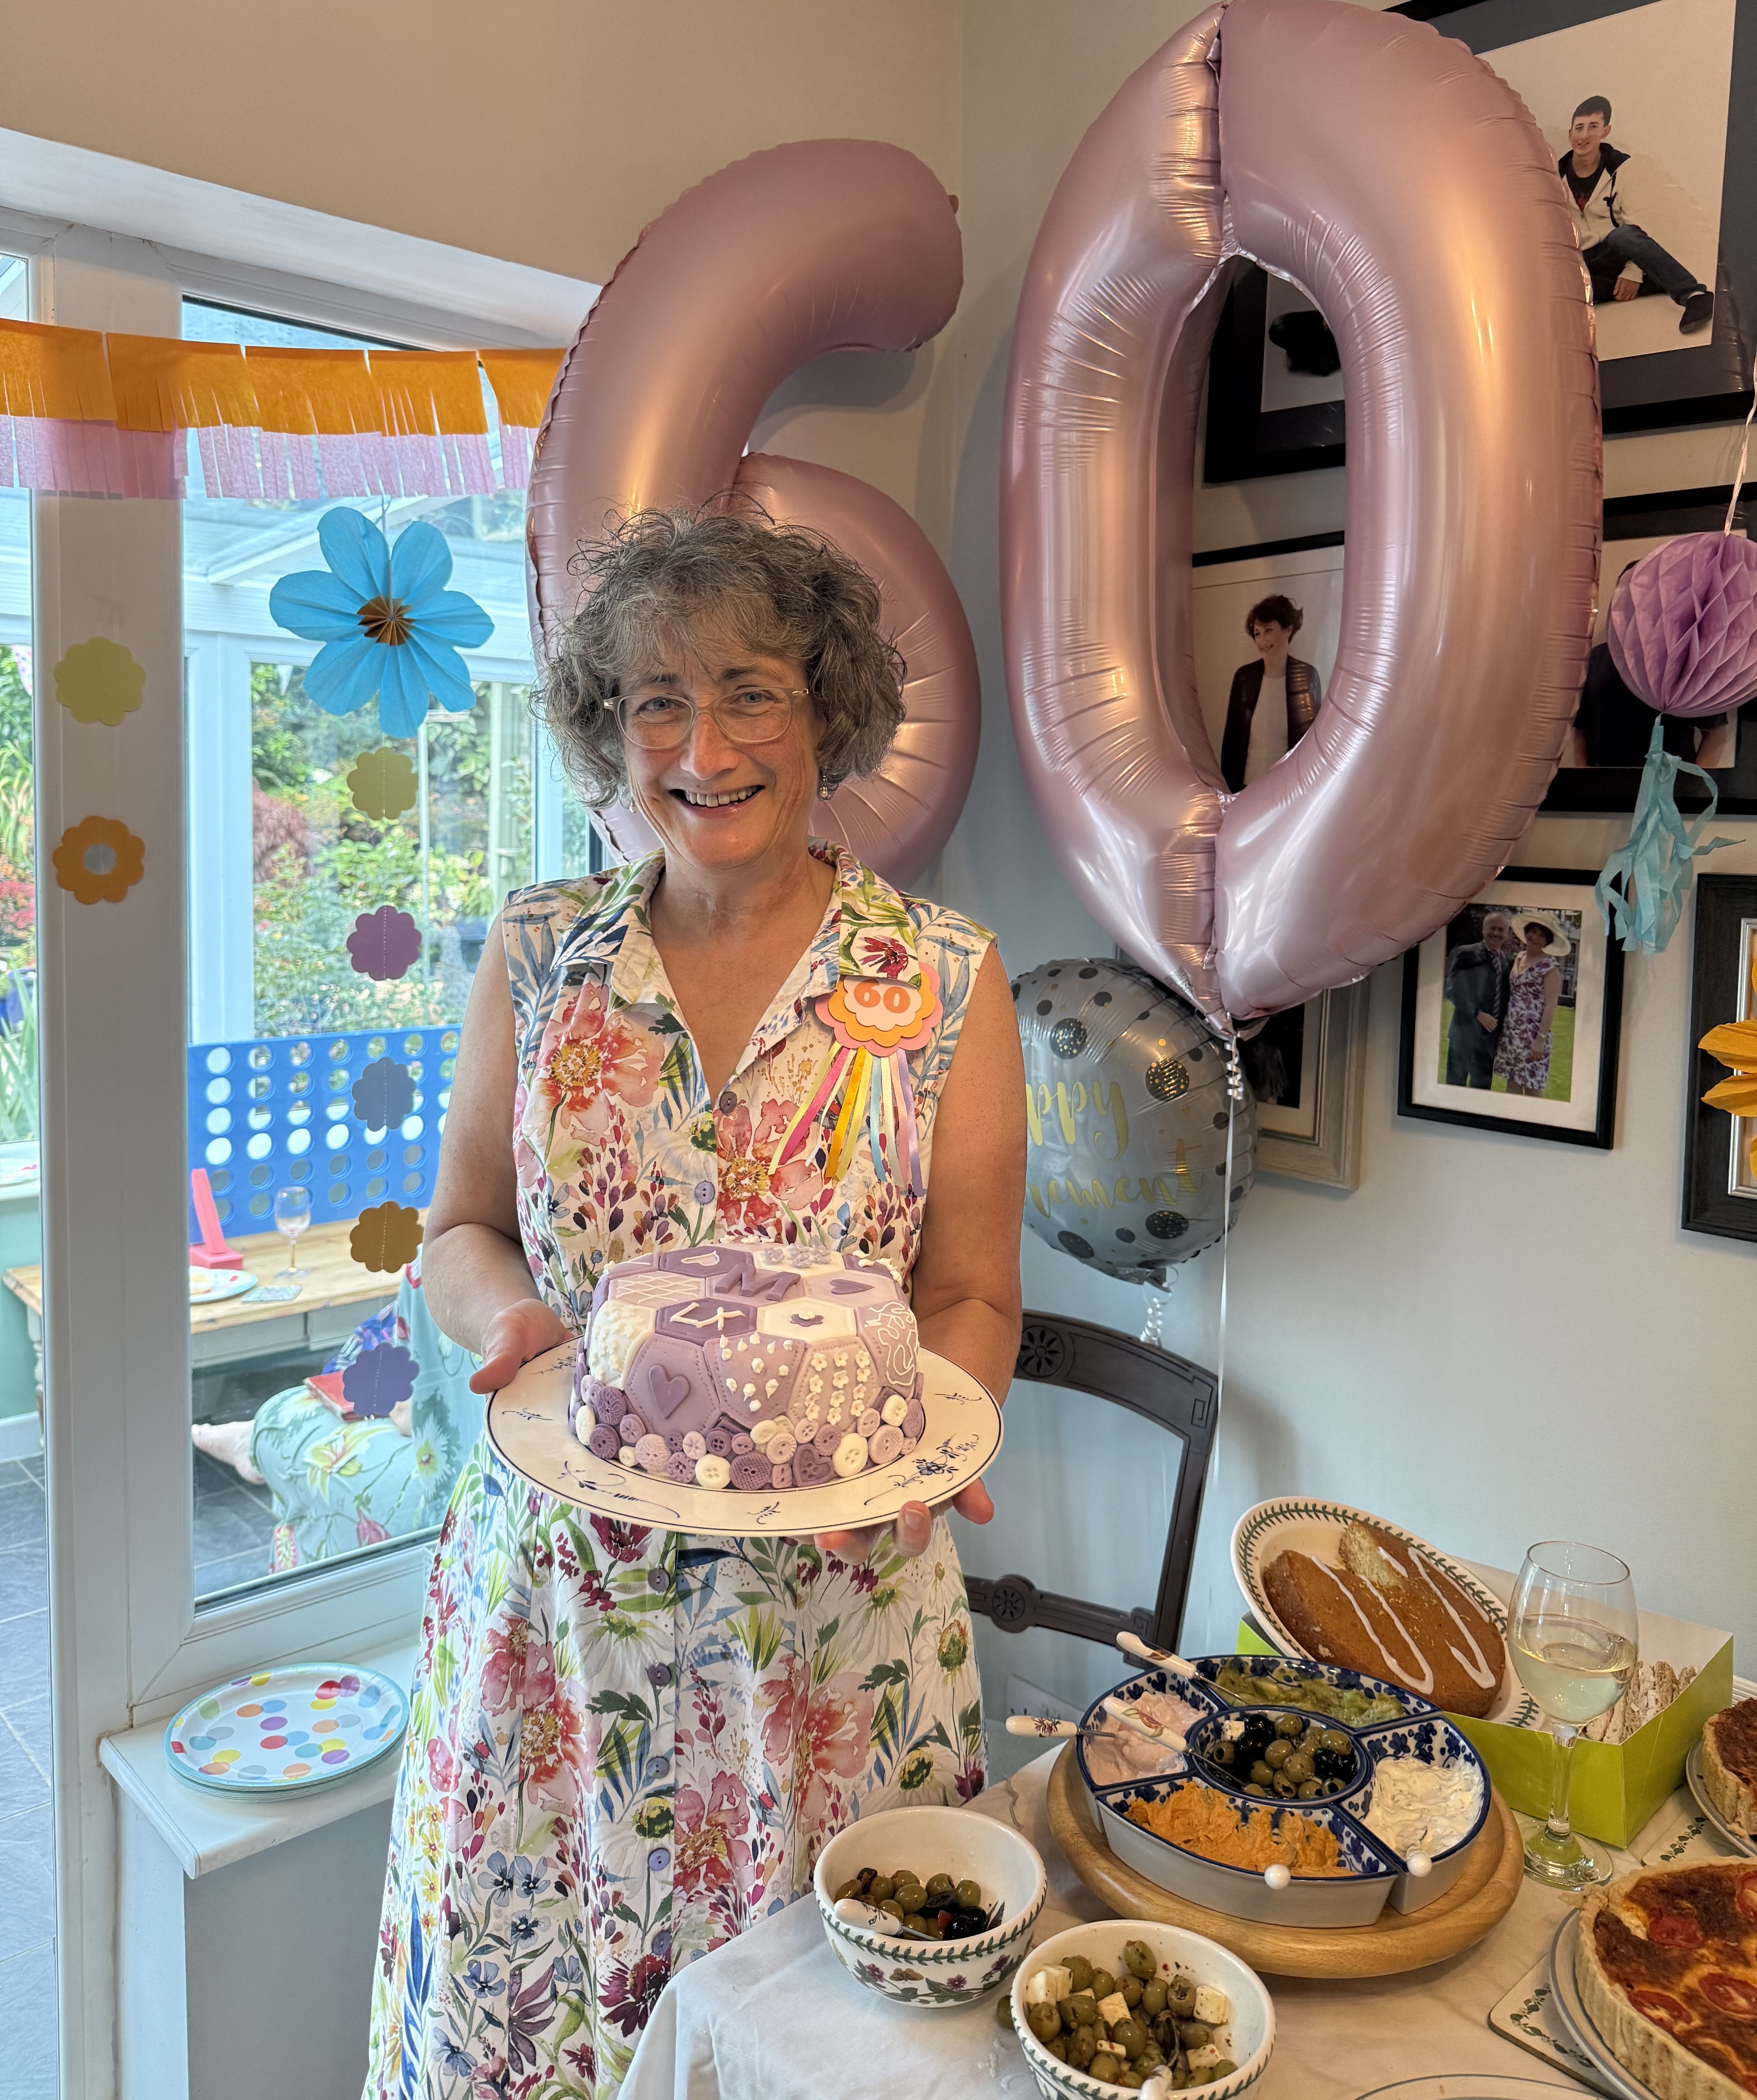
I’ve got a big birthday this week with a bit of a party on Saturday, so I decided to make myself a birthday cake. I made a hexagonal fruit cake a few weeks ago as they do need time to mature, on Monday I decided I really needed to get myself organised and decorate it.
I wanted a sewing themed cake and having perused pinterest I decided on a quilted one. I covered it with a layer of marzipan first. This is stuck on with melted apricot jam, it gives a nice smooth base for the icing and stops any discolouration of the icing too.
I bought some hexagonal cutters and coloured some fondant icing in three shades of purple, leaving some white too. I just use water to stick the icing on, the top was easy enough but it did get tricky trying to work the shapes out round the corners, some are neater than others! I went round the inner edge of each one with a tool that did about six dimples in a row so it looks like stitching.
Once the basic cake was covered I decorated each square with a mixture of fondant flowers and icing, some worked out better than others, those on the side were particularly hard to get neat. I used an alphabet cutter foe my initial and iced LX for my age (Roman numerals, not recommended for 40 as thats XL!!)
Round the bottom I wanted a row of buttons, I had a button mould left over from my 50th birthday cake so they were very quick to make. I’ve a few left over so they can go on some fairy cakes.
It took me most of the day to make but here’s my finished cake…
I’ve made quite a bit of progress since I last shared my handbag project, it’s a nice and easy design so I can easily pick it up for 10 minutes here and there. I usually do a bit when I’m having my morning coffee, or whilst making tea as well as in the bus station when I’ve half an hour to wait for a bus!
Last time I shared my progress I’d almost finished this one…
Since then I’ve not only finished this one, I’ve stitched another two!! They are pretty quick to do! I now have a set of four.
I’m now starting on a series of designs called Little Sheep Virtues. It’s a series of twelve, I’m going to put them all in a book with the ones above. I actually stitched one of the set back in 2020…
I’ve started with the Courage one, they are meant to have special little buttons on too which are gorgeous but pretty expensive here in the UK, so I’ll have to adapt things slightly. Here’s where I’ve got to so far…
I’m not keen on stitching borders so I’m now making myself stitch a couple of threads of border and then reward myself with a more interesting bit!
I haven’t quite worked out a name for this book yet, I was thinking of Vices and Virtues but the numbers and letters one doesn’t really fit into either, so I’m still thinking! …maybe Cross-Words as all the designs involve words in cross-stitch…any suggestions or thoughts welcome.