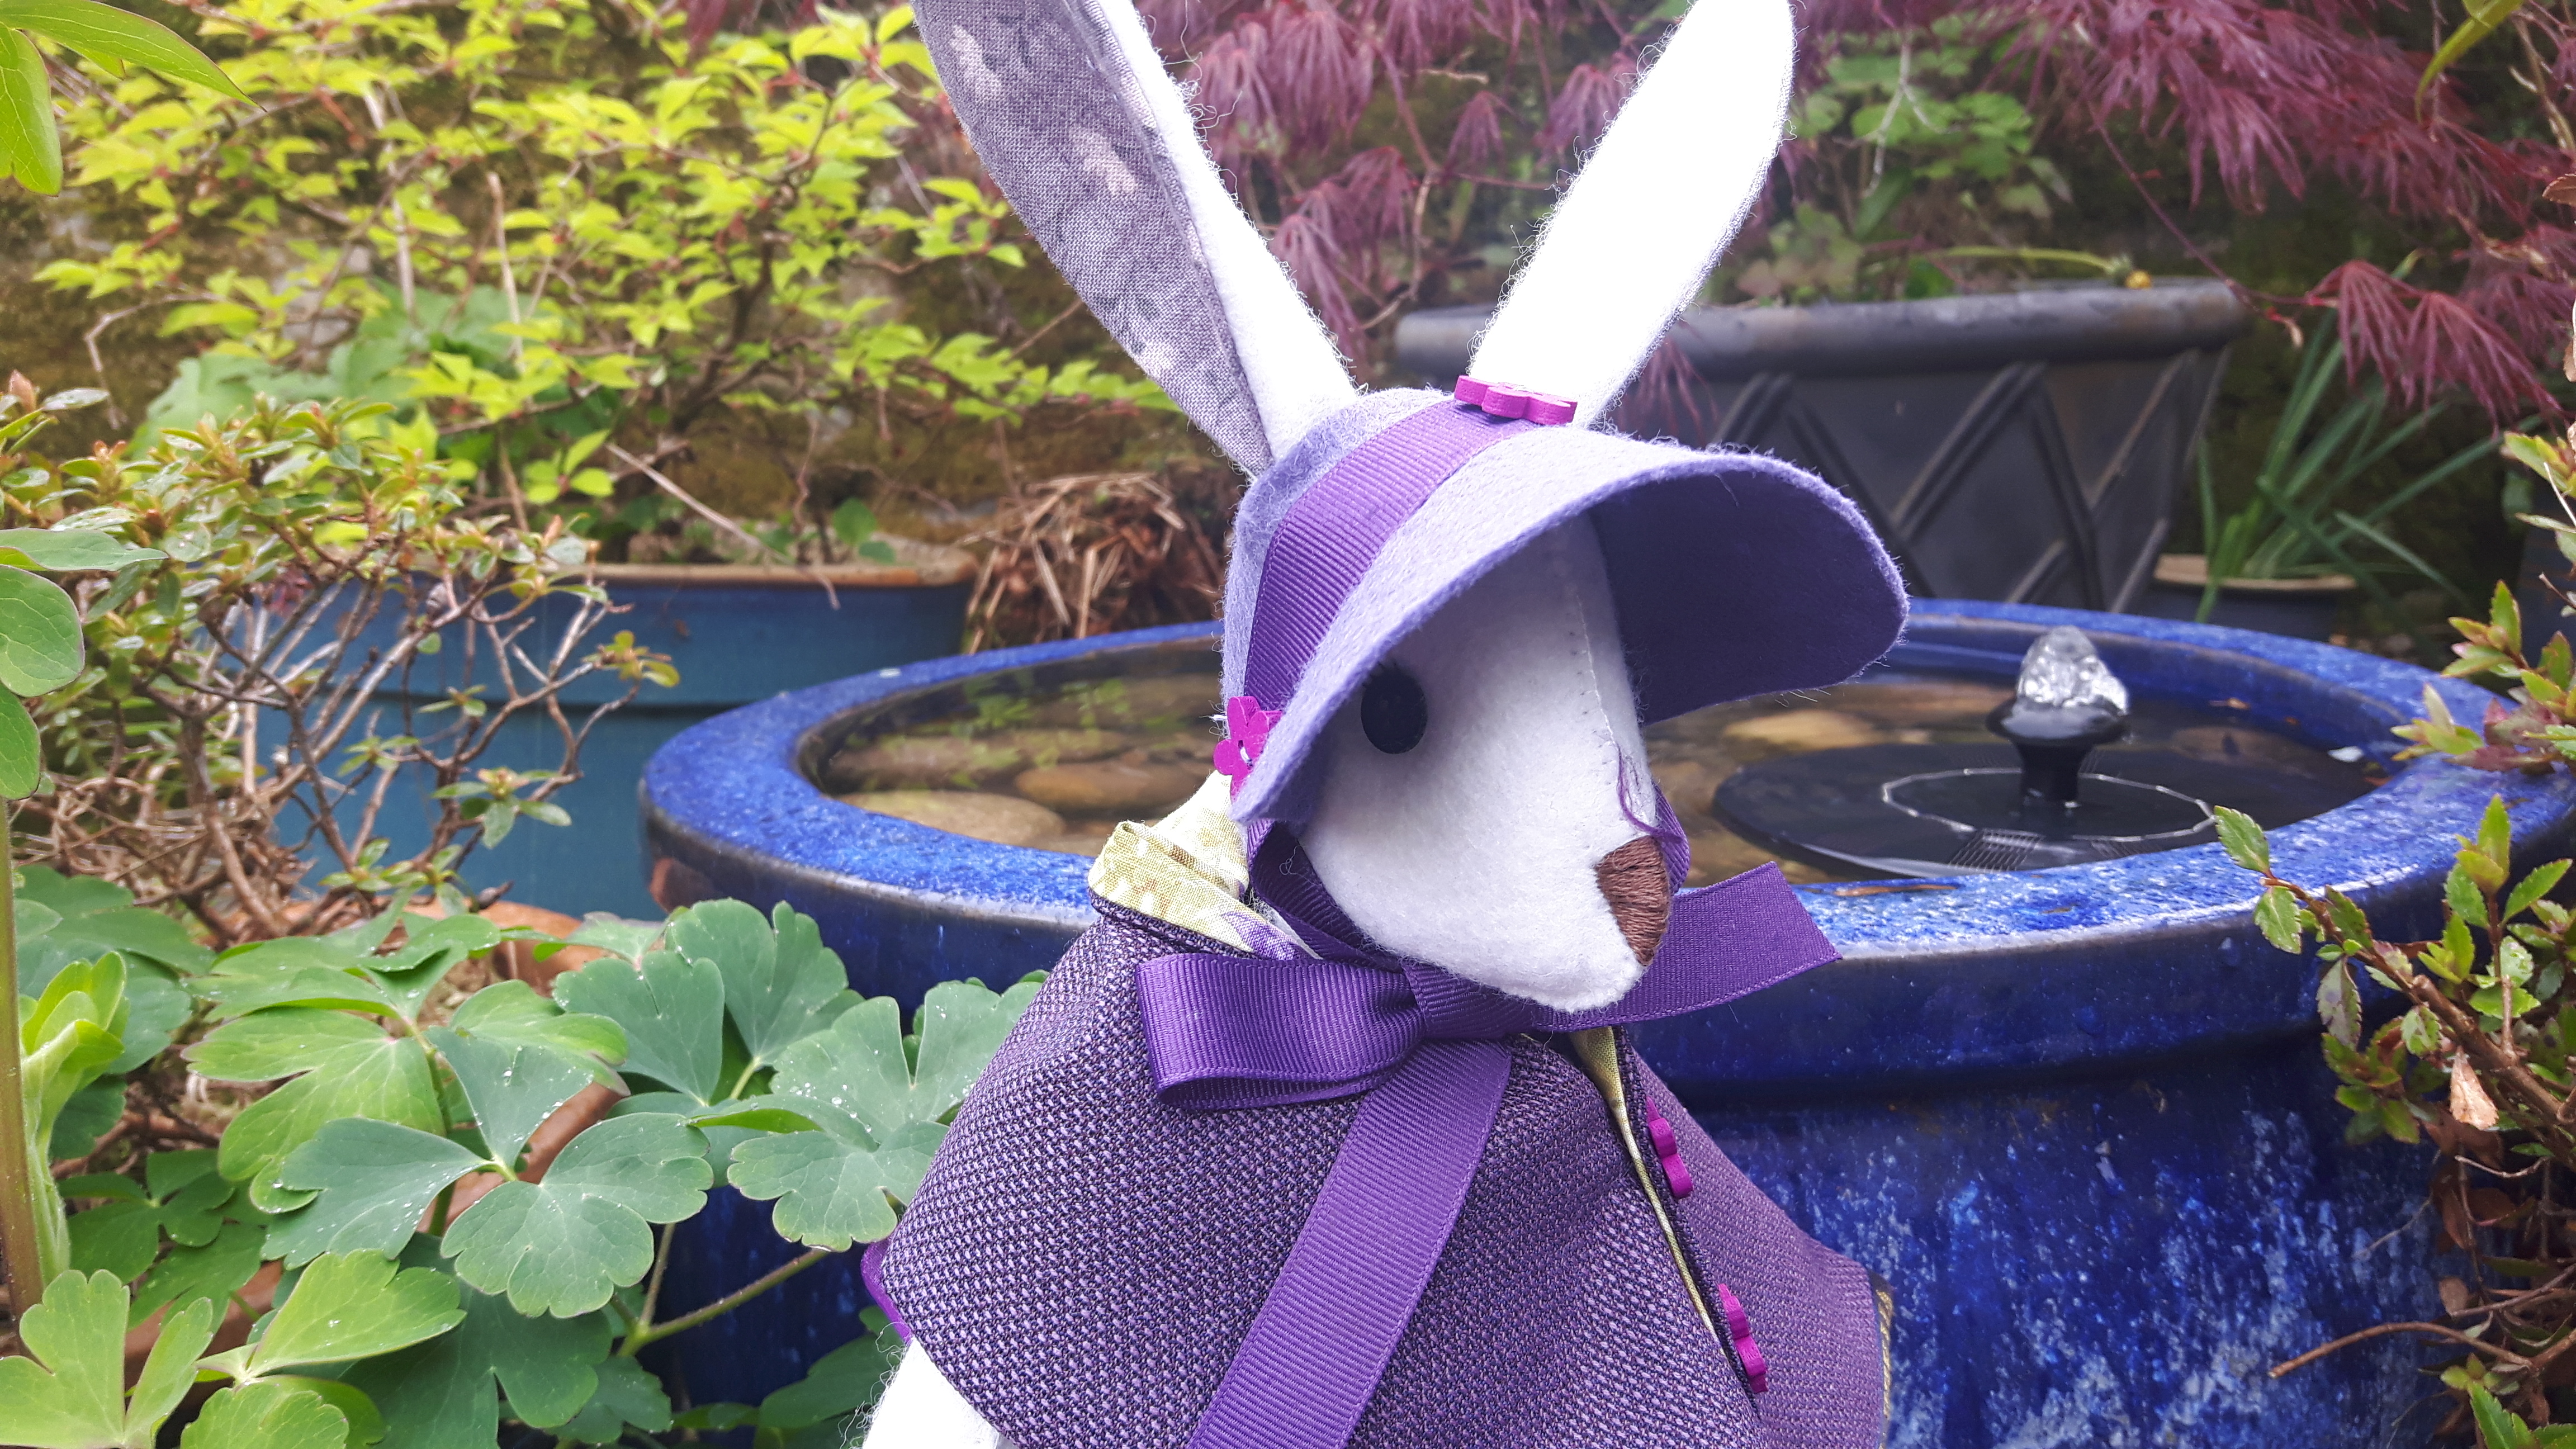
I decided a couple of weeks ago to make a Wilhelmina Woodmouse for my new granddaughter for Christmas, she’s six and her favourite colour is dusky pink. Whilst I was at the Knitting and Stitching show at the weekend I visited the Cool Crafting stand and bought some lovely warm white felt for the mouse and some dusky pink felt for a coat. The pattern is in the Luna Lapin and Friends book, I made three rabbits before, I love making all the different outfits…
This time I wanted to make a mouse, in the book she’s called Wilhelmina. She went together pretty easily, I used some ditsy pink floral fabric for the ears and the feet and used blanket-stitch for the seams. I used Gutermann cotton thread this time and it was really nice to use but feels pretty strong.
She even has a cute curly tail!..
She hasn’t learnt to sit like a lady yet so I think a pair of bloomers are required! If everything goes to plan I’ll be making a top, a wrap dress, a coat and a pair of bloomers! I’ve traced the patterns out of the book, just need to get myself organised.
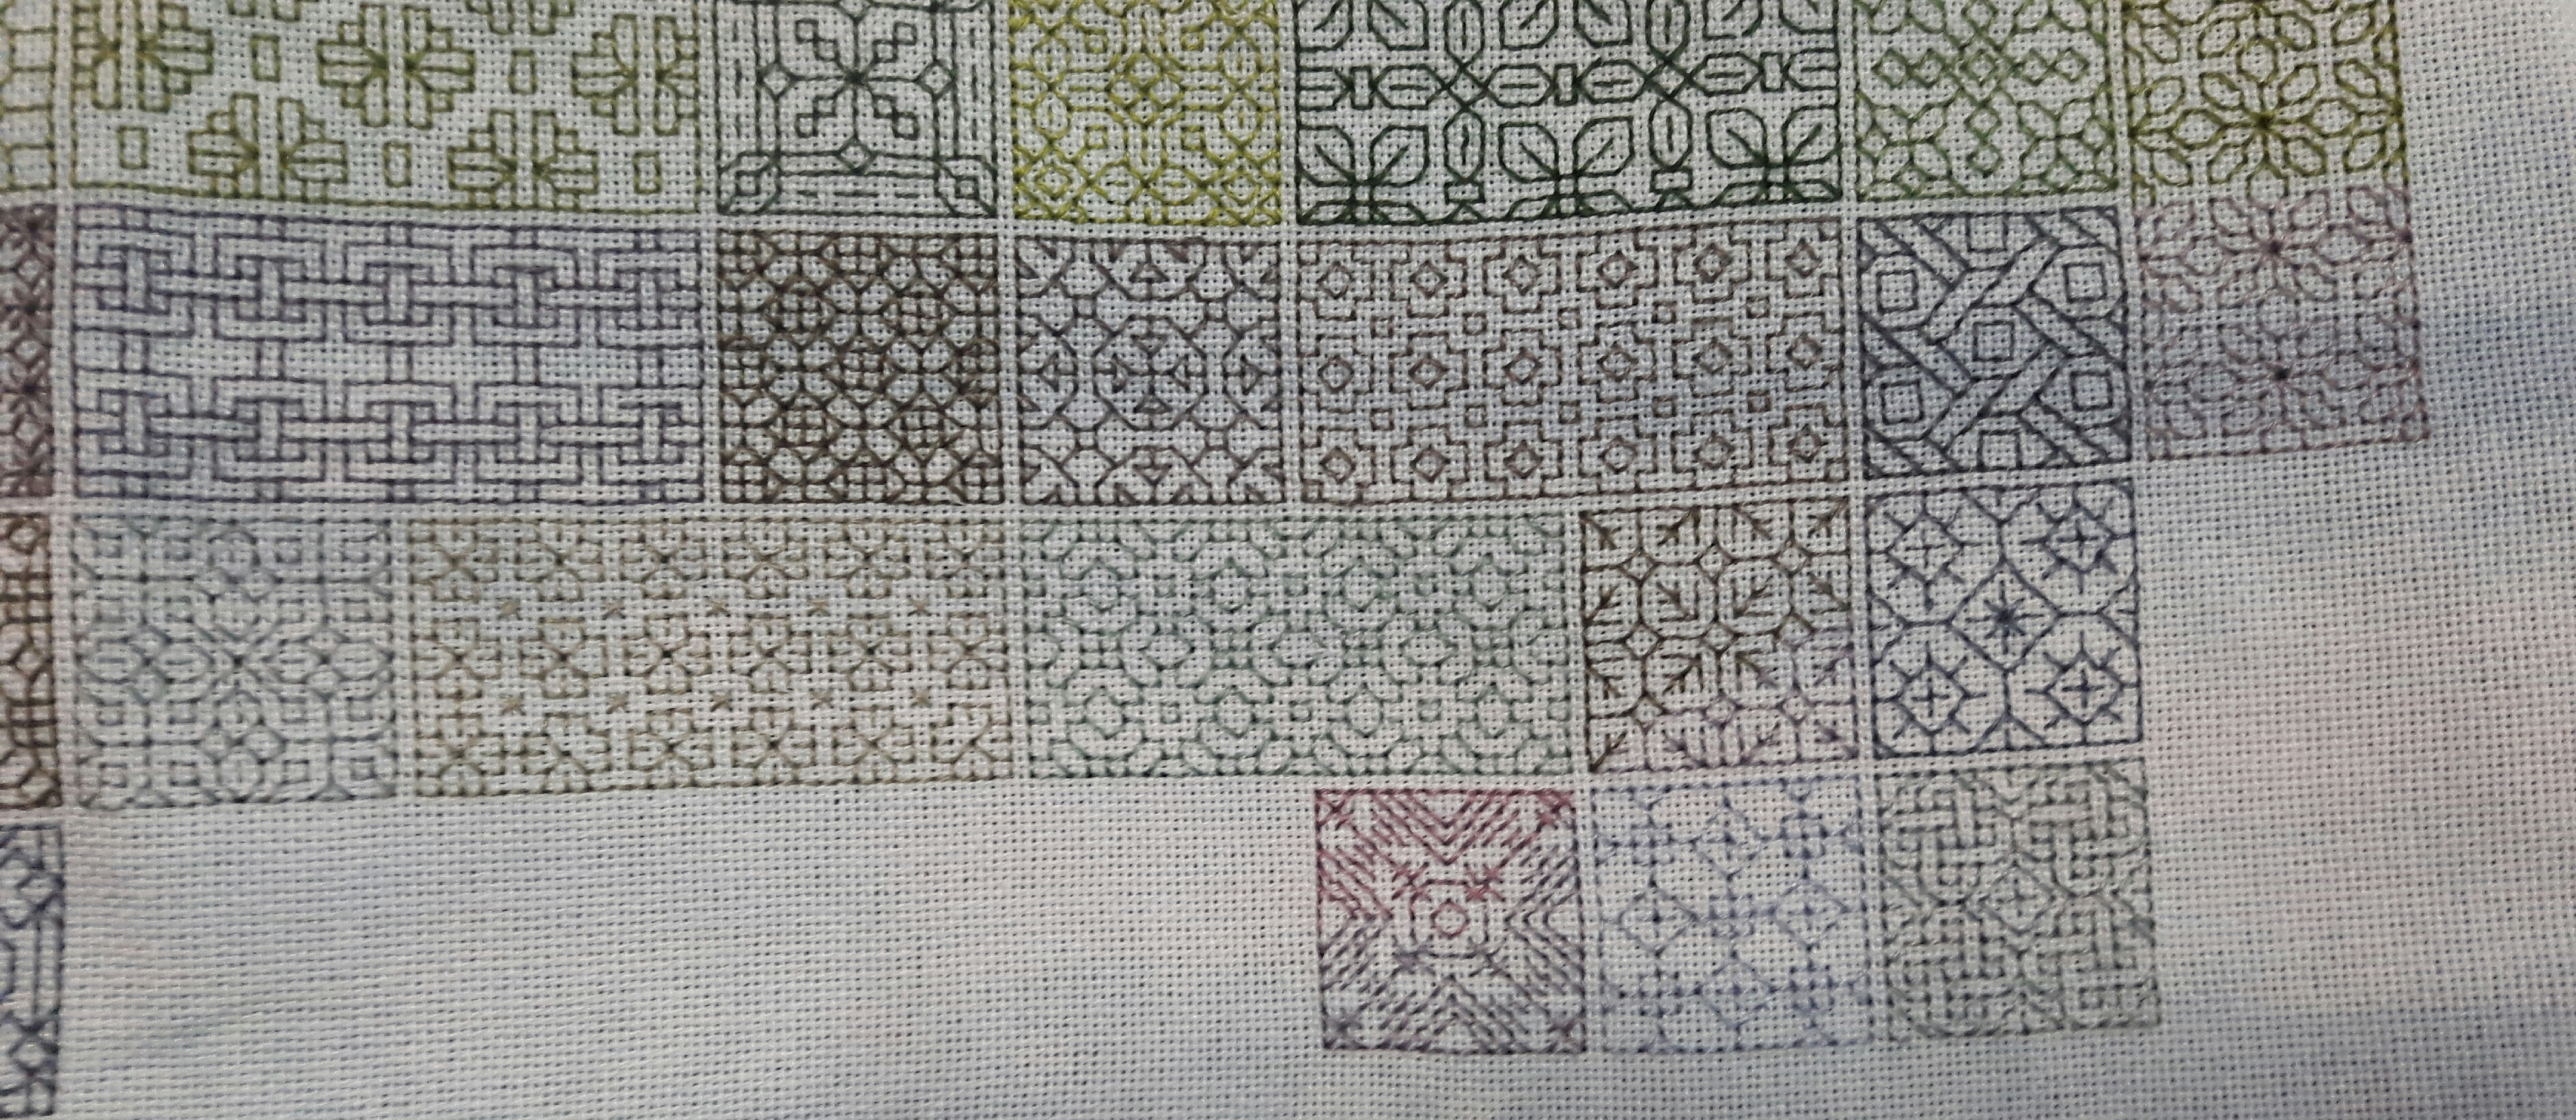
I got a bit behind with my blackwork SAL, this is the one designed by Peppermint Purple with a block released each week, There is a recommended colour scheme which is rather nice, but I decided in January to make mine into a picture of Catbells. Last time I shared my progress here was at the end of September I had just started on the reflection of Catbells…
I’d hardly looked at it since then as I was concentrating on the Jacquie needlecase and the seaside quilt when ever I had hand-stitching time. I took it to my Skipton Stitchers meeting on Monday and caught up on a couple of blocks and since then I’ve caught up for October, just a couple of weeks behind in November…
I’m trying to do the reflections of the lake in varying shades of grey, greeny grey, purply grey, blue grey…you get the idea! It’s proved harder to choose the colours than the actual mountain, it’s not quite coming out as I’d hoped but I also think with these blackwork designs you really need to stand back to see the effect. I’ve also learnt that blackwork and alcohol is not a good combination! I stitched the bottom right hand square on Saturday night after half a bottle of wine and a couple of G7T’s, I then had to undo a lot of it as there were so many mistakes!! It’s still not perfect but it’s good enough for me!
I’m hoping to catch right up by the end of the month and hopefully stitch a bit more of the first border. I’m still pondering about whether or not to outline Catbells to make it show up again, I think I’ll wait until it’s finished and then stick it to my design wall for a few days, looking at it from a distance usually helps. This stitch-a-long finishes at the end of the year, by then I’ll have stitched 52 different blackwork squares.
Last week my friend and I ticked off another of the Dales 30 challenge, we were hoping to do too but the weather conspired against us!
We were climbing Ingleborough but we were also hoping to do Simon Fell too, which is only a short distance away. We walked from Clapham which is probably the most scenic route up, there are several routes up Ingleborough and we’ve done most of them over the years but as the days are getting shorter we decided the nearest and clearest route was probably the best.
Clapham is a very pretty village, we parked up near the old church so it was just a short walk to the path through the Ingleborough Estate. It was a lovely walk up past the waterfalls and past the lake. They’ve put up some information boards since we were last up and we were interested to read that this area is totally manmade, the early owners of Ingleborough Hall built a dam across the narrow valley to form both the lake and the waterfalls below.
The lake was lovely and peaceful with the autumn colour gently reflected, unfortunately I didn’t get a photo as I was lulled into a false sense of security thinking I could get one on the way back!
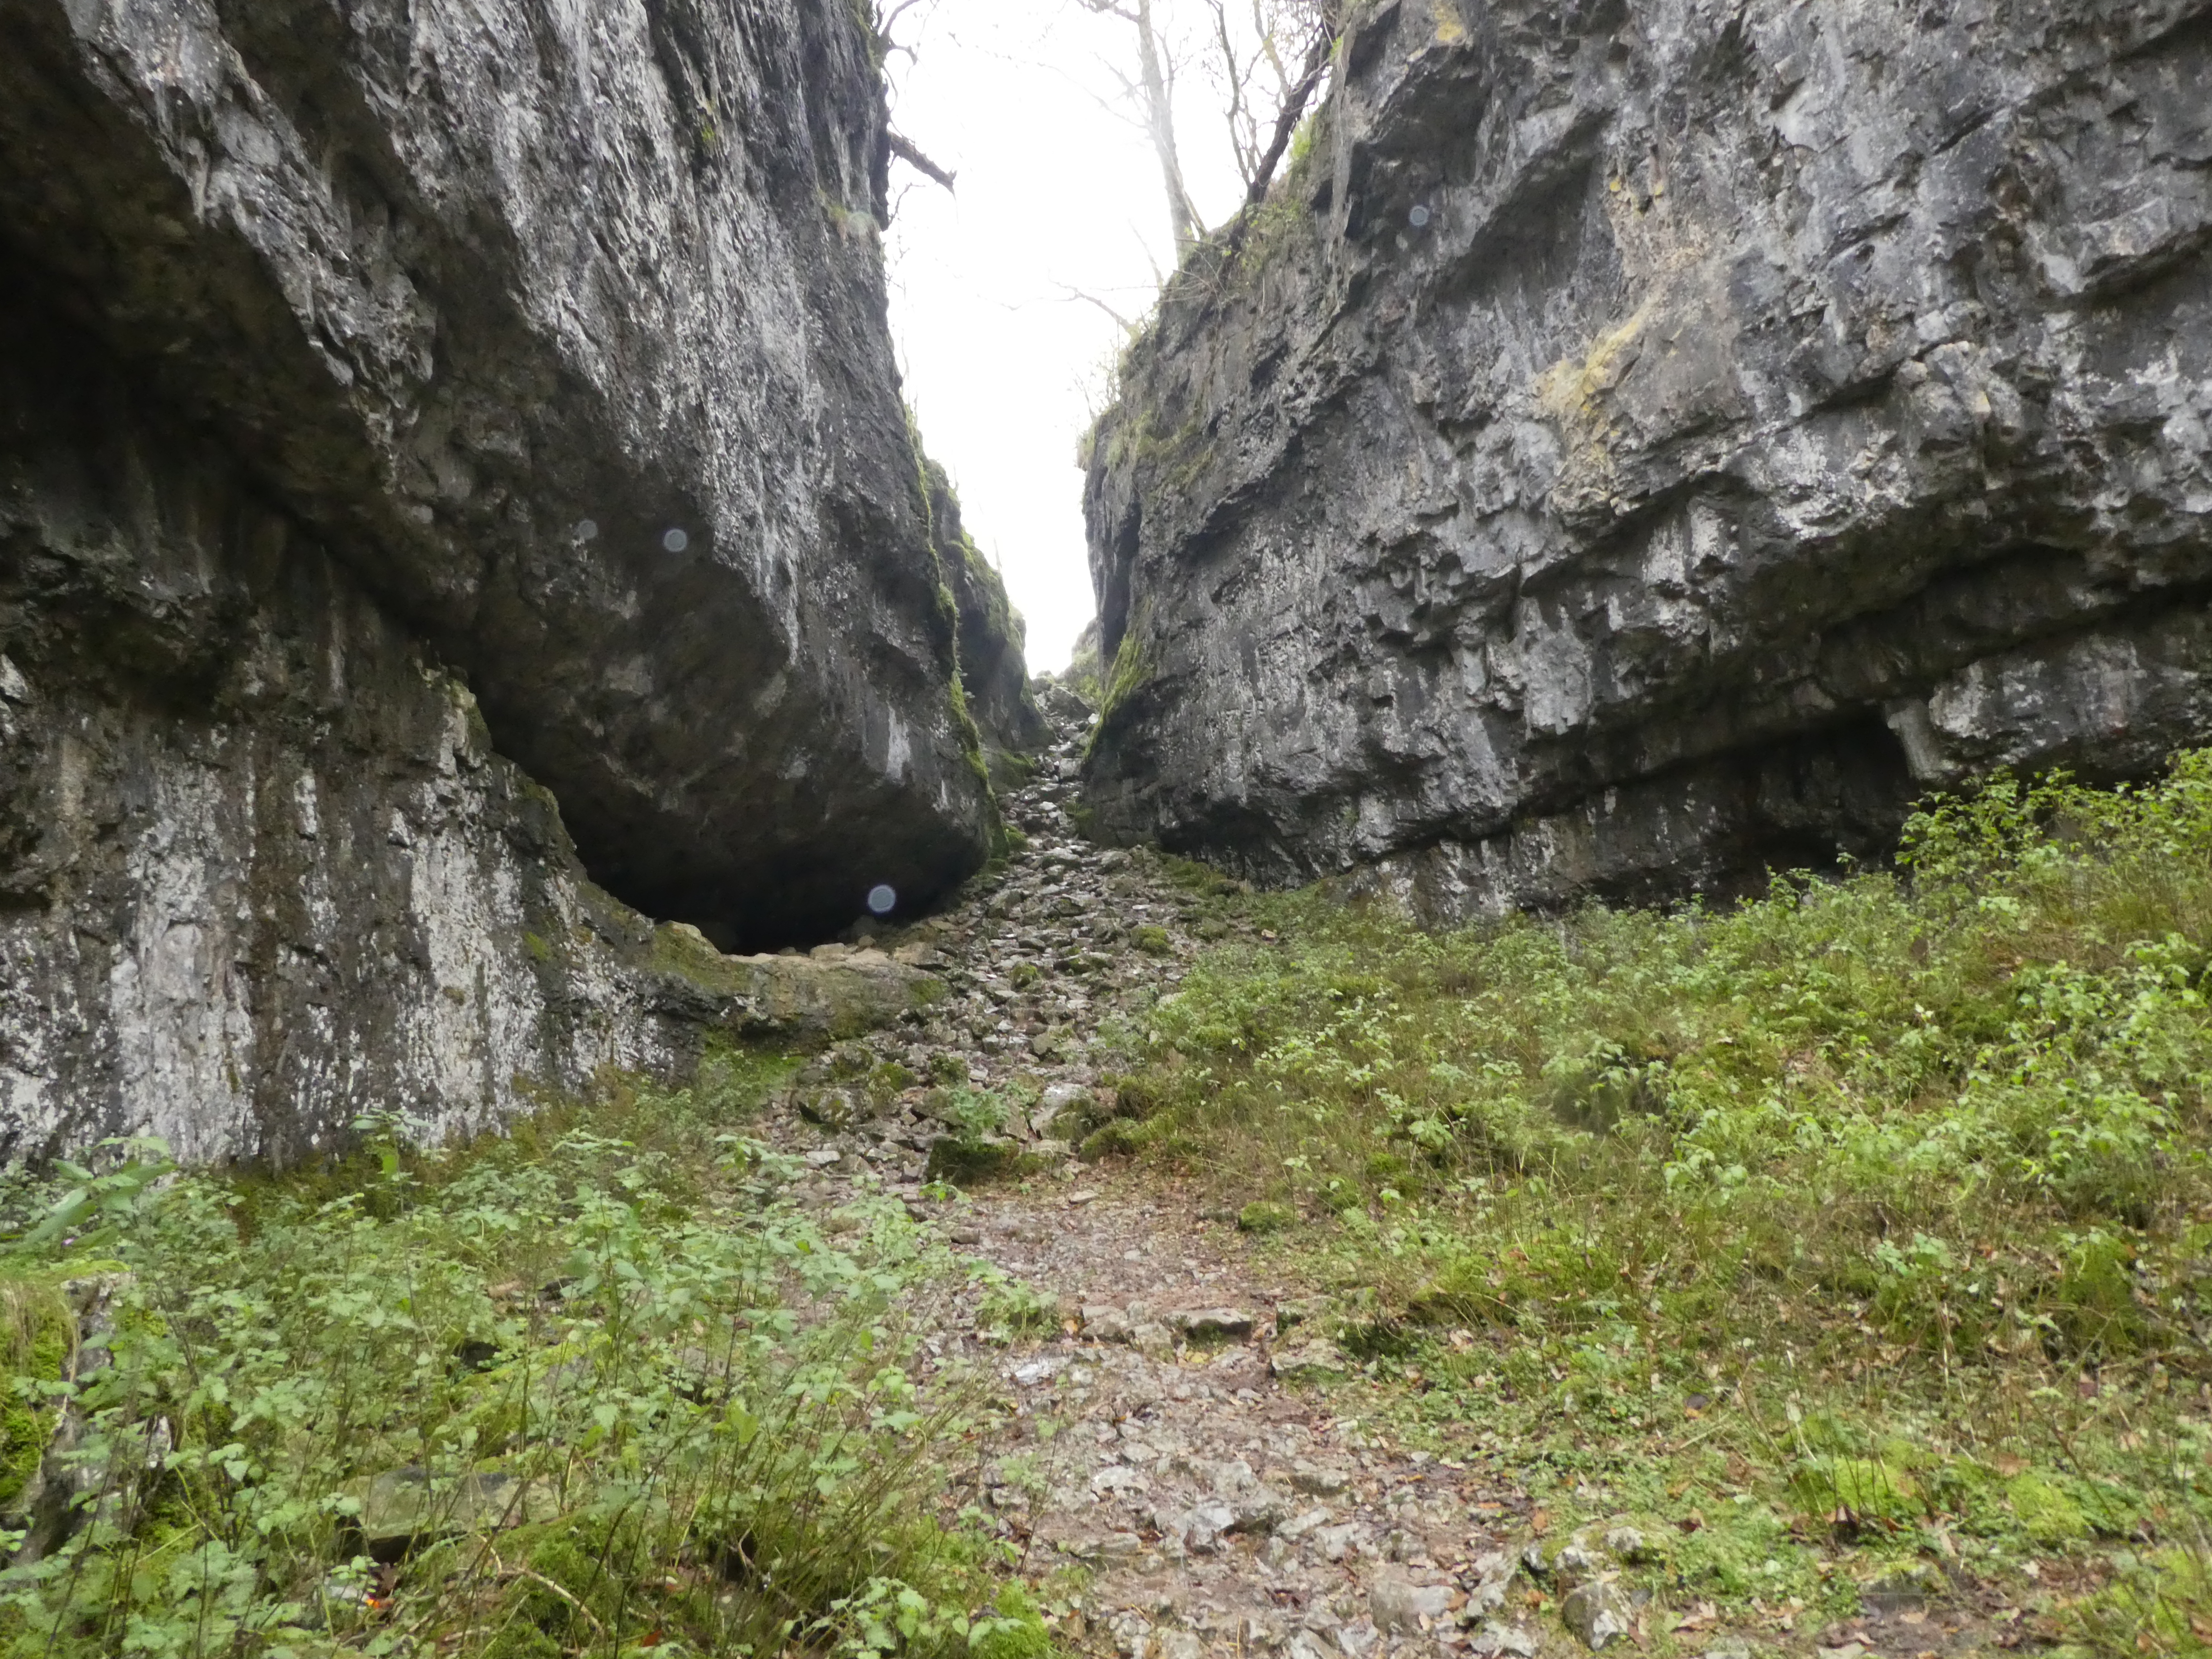
At the far end of the lake is the entrance to Ingleborough Cave, this is open for tours during the summer, there’s a footpath which goes about 500m in, it’s full of stalactites and stalagmites.
We carried on up towards Trow Gill, a steep gorge at the top of the valley. It’s a bit scrambly towards the top as you can see but we just took our time.
Trow Gill leads to the plateau before the final ascent of Ingleborough, the footpath passes close to Gaping Gill, this leads to a huge cavern, it’s so big you could fit York Minster in it. The local caving clubs organise trips down Gaping Gill a couple of times a year, you’re lowered down about 50′ or more on a bosuns chair one at a time, a few years ago I went down with friends and Helen, it was quite an experience. The stream that goes down Gaping Gill eventually comes out through Ingleborough Cave. Experienced cavers can trek through from Gaping Gill to Ingleborough cave, there’s a huge network of caves round there.
Gaping Gill
As you can see from the photo above, the mist had come down!! The higher we climbed the worse visibility got. The top of Ingleborough is quite a large, fairly flat plateau. Unfortunately it has about four paths leading off it is all directions and it’s very easy up there even in good weather to come off the wrong path and end up in the wrong valley.
According to the map there was a straight wall to follow from Ingleborough to Simon Fell, we were very dubious about whether we would be able to climb Simon’s Fell even before we reached the top of Ingleborough, it all depended on how clear the route by the wall was…
…that’ll be a no then!!
We couldn’t even see the dry stone wall seating area which marks the highest point! We had carefully taken a photo of one of the cairns we passed just before the top, so at least we would know we were on the right path down! Just as we reached the plateau there was a length of broken down wall, we sat on it and ate our sandwiches as we didn’t dare leave it and risk losing our sense of direction!
We saw two ladies trying to find a path down, they looked rather unsure so I called over to ask them which path they were looking for, they showed me a very simplified map on the mobile phone! I opened my OS map up and showed them where the other path went, we strongly advised them to stick to the clear (and popular) path down to Clapham rather than risk trying to find the quieter Pennine bridleway in poor weather especially without a proper map. It still amazes me that people will risk going walking in this kind of terrain without a proper map, signals fail, phones go dead, but also you can’t see the bigger picture to confirm where you are or which way to go. OS maps have walls, cairns, potholes, barns, lots of landscape features which all help to confirm where you are.
We retraced our steps to the path down to Clapham, at this point the weather was wind and rain, not the best weather for a walk, so it was head down and keep walking. Once we dropped down through Trow Gill again it was better, just a bit mizzly. It had improved enough by Ingleborough cave to sit on the seats for a welcome coffee and a sticky bun.
Altogether we walked nearly nine miles, we enjoyed ourselves despite the weather – if you walk in November in this country fine weather is a bonus! I think this will be the last of the Dales 30 this year as the days are getting too short for us slow walkers, we’ll do shorter more local walks over the winter and resume our challenge in the spring. We’ve walked eleven of the thirty, so over a third done, not a bad start!
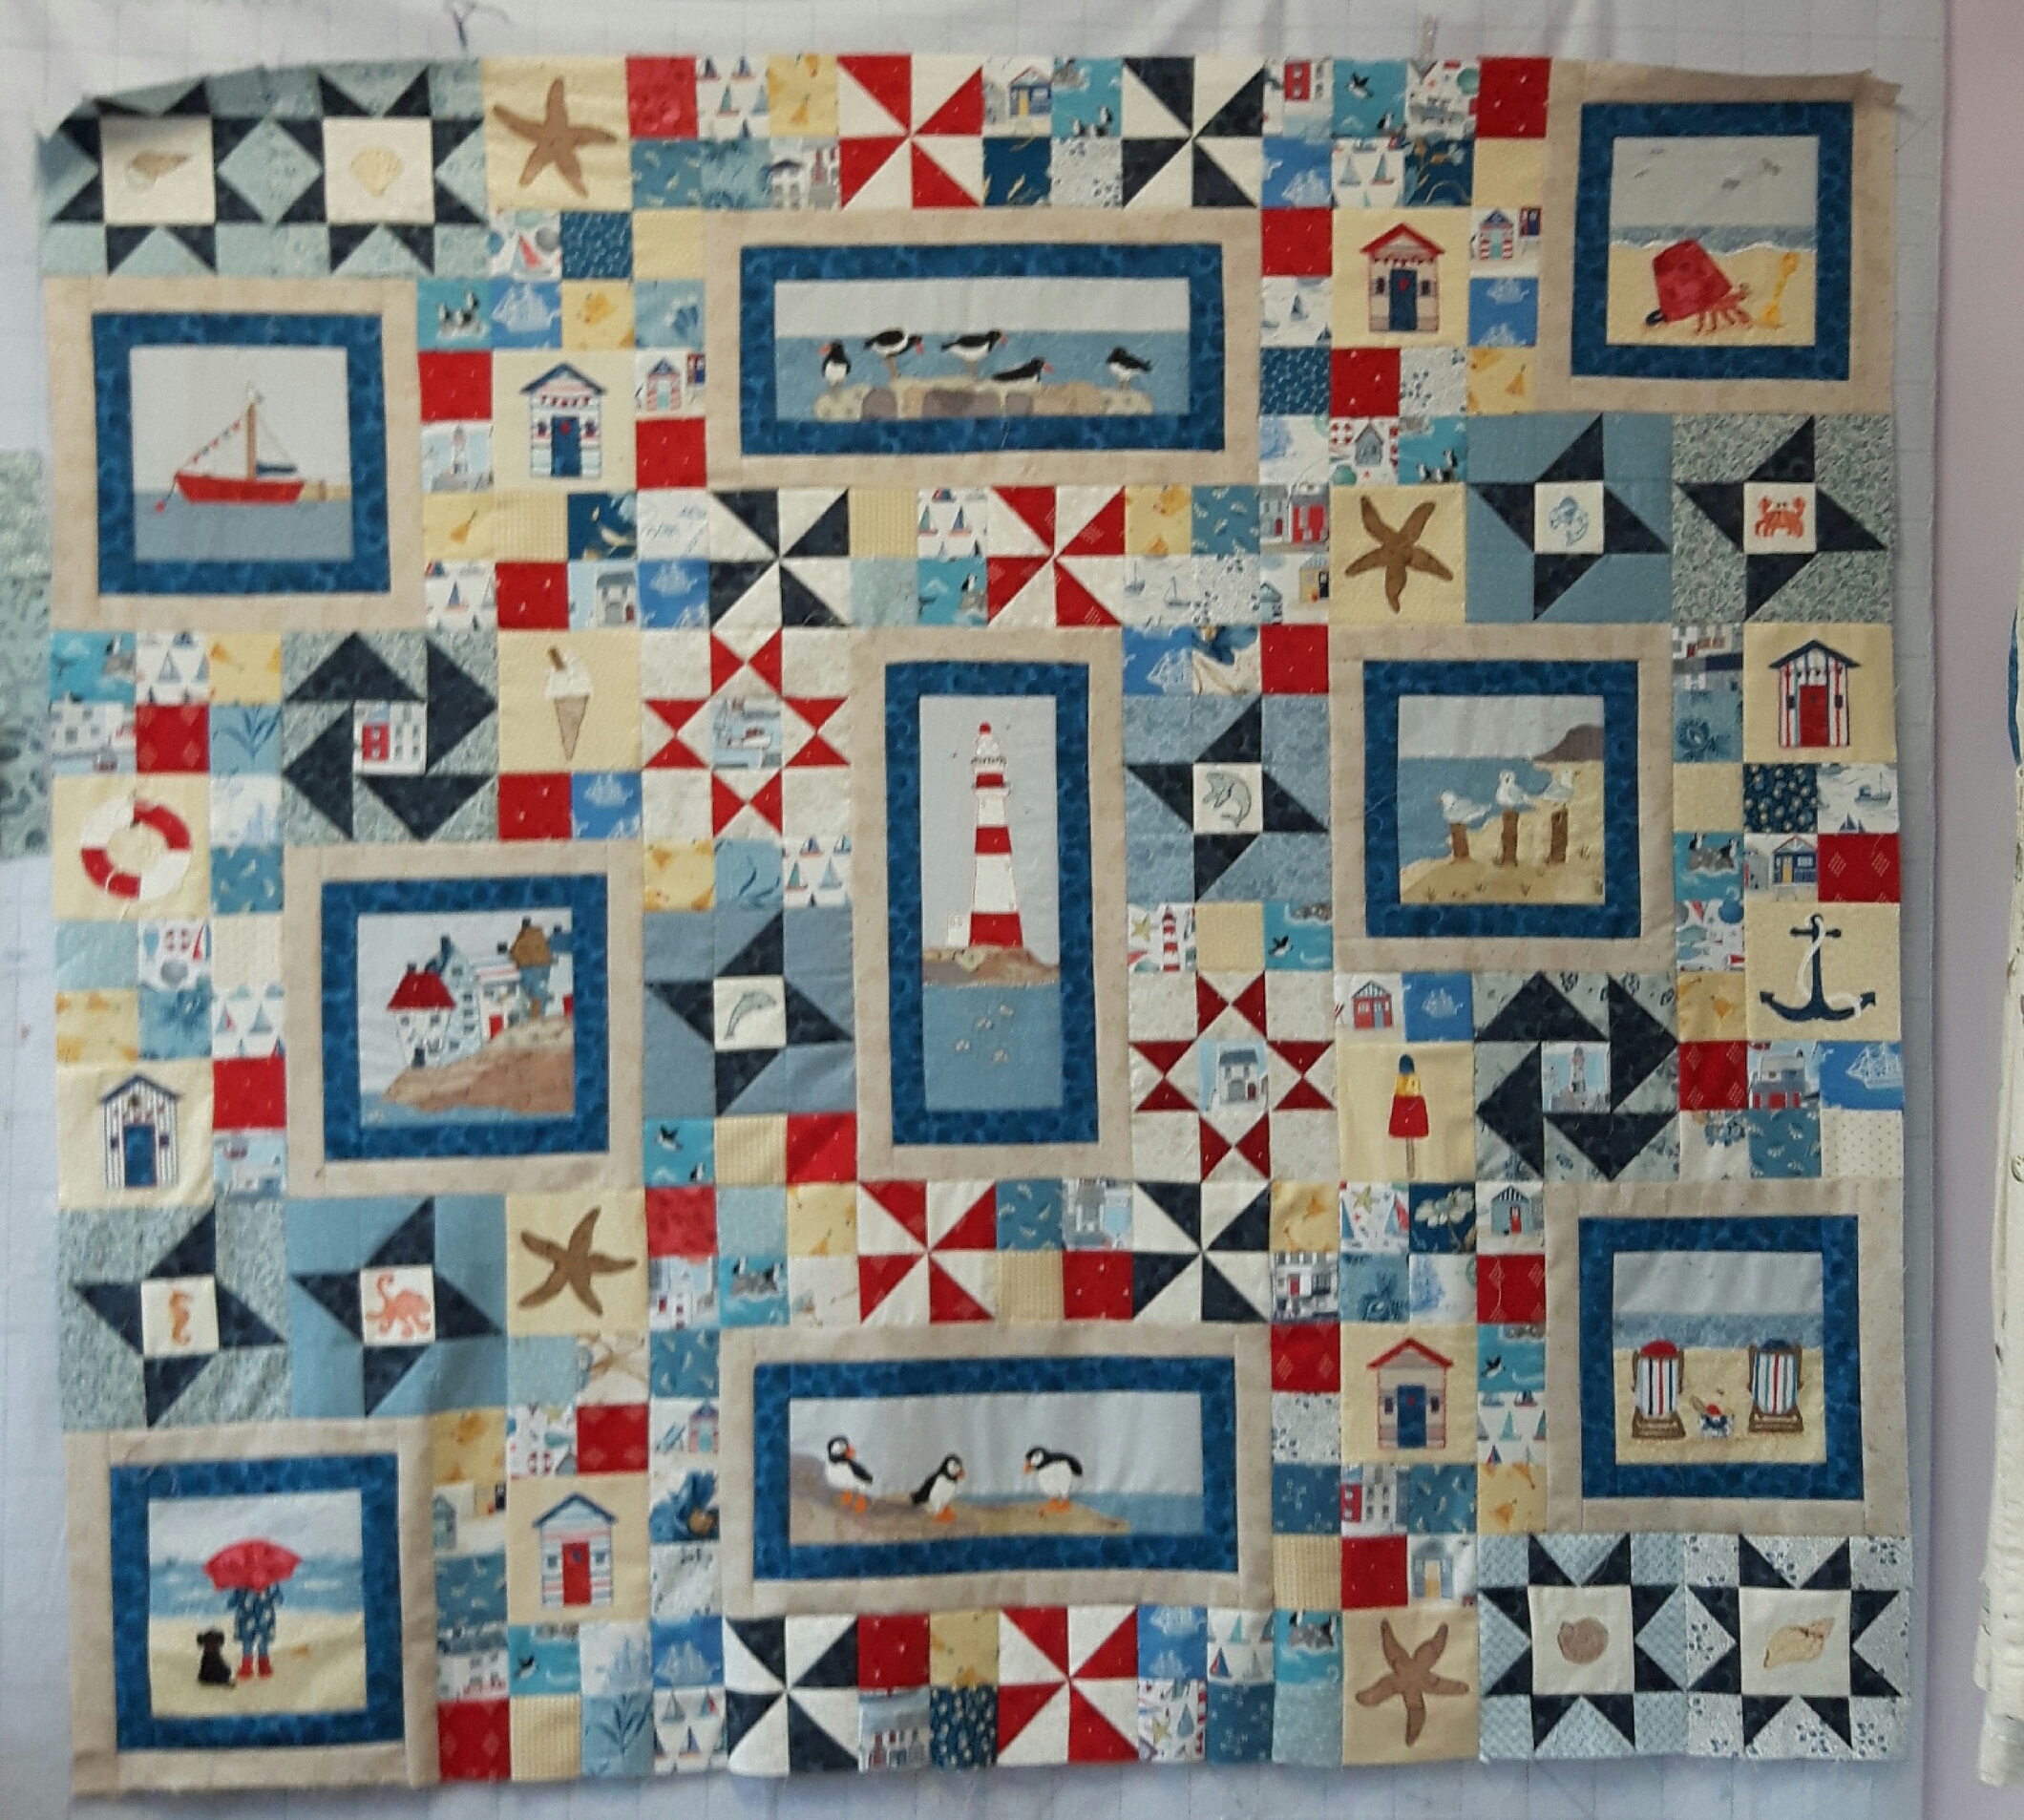
I cracked on with my seaside quilt so I’m having a mini happy dance this week as I’ve finished the main part of the quilt, I’ve just the borders to decide on. This is the quilt in the book by Kathryn Whittingham called The Seaside Quilt. Three weeks ago I had just finished the Rainy Day on the Beach block after embroidering dozens of French knots, as well as finishing the embroideries for the little blocks…
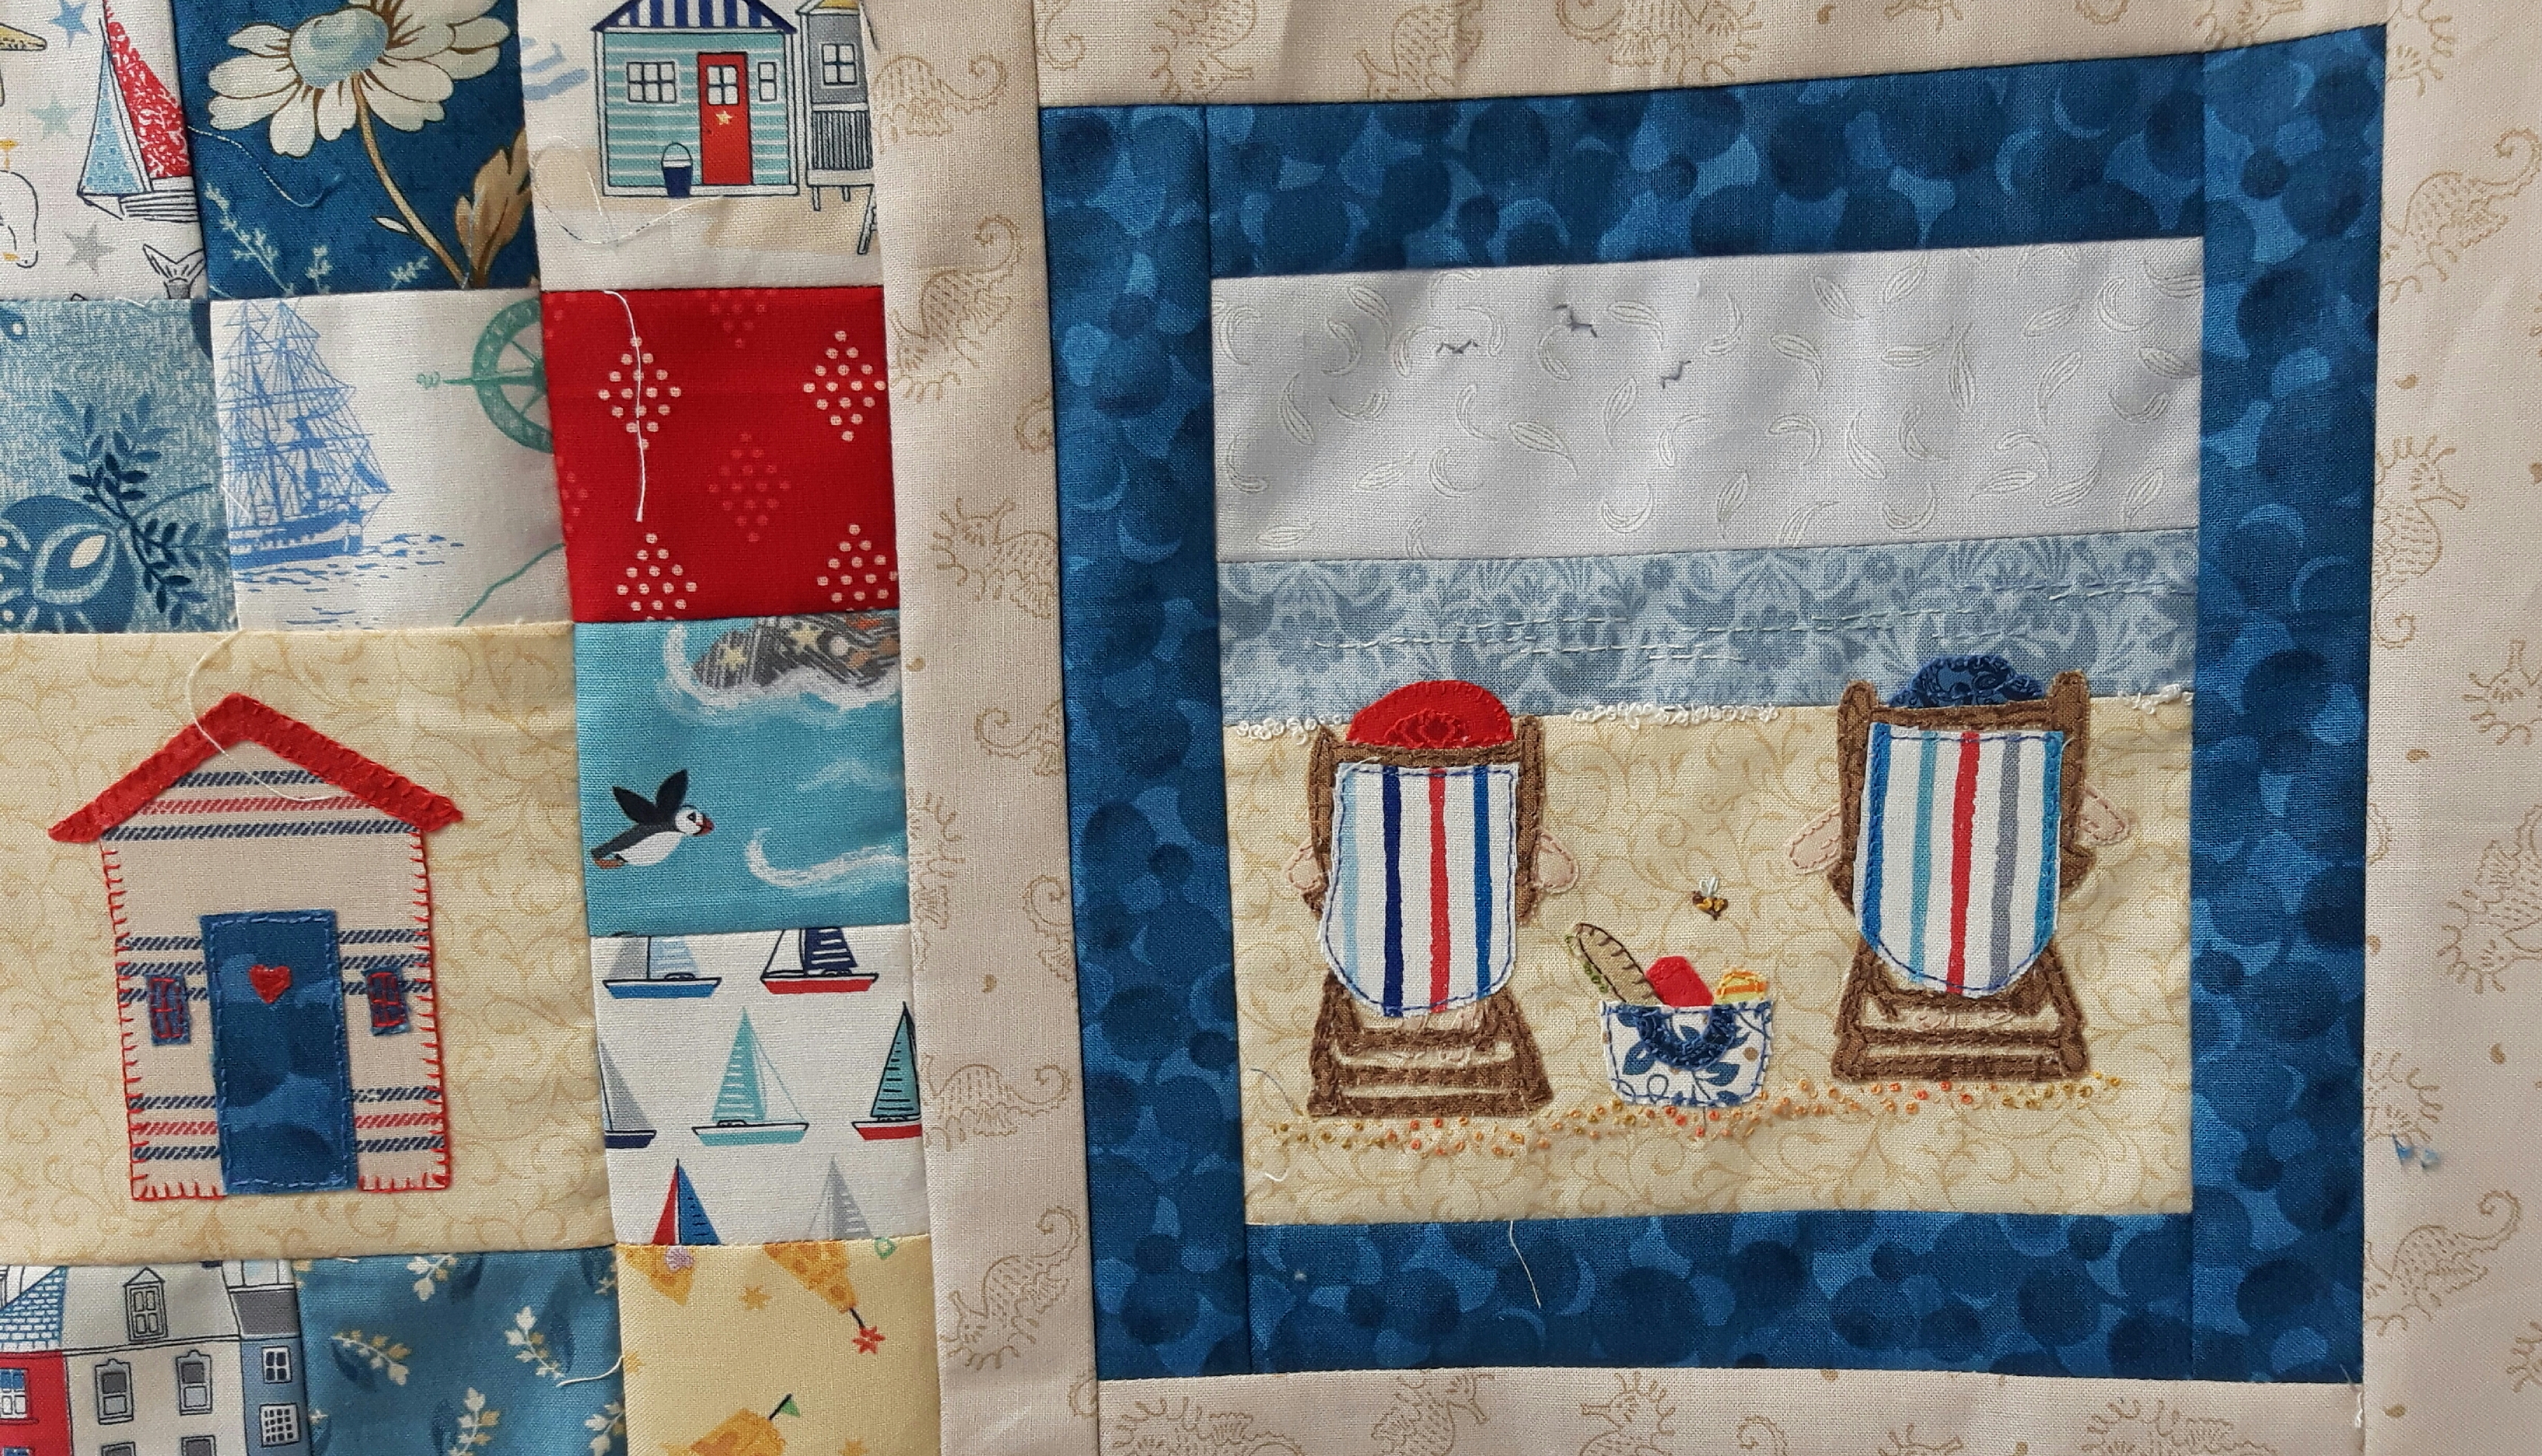
The next block to embroider was of puffins, it’s a lovely block, well anything with puffins on was bound to be cute as they are such endearing birds, though the one on the left looks like he’s thinking three’s a crowd!! The beaks weren’t easy to get right with these, they’re so distinctive too, I ended up looking at images in bird books to try and get something close. There’s puffins over at Bempton Cliffs near Bridlington, it’s an RSPB reserve, I remember going there with my mum and my kids years ago.
The final block to embroider was a couple sunbathing on deckchairs with a picnic. We occasionally took a picnic down to the beach but you do always end up with sand in the sandwiches! The deckchairs were pretty fiddly to cut out and embroider but I got there in the end.
With all the blocks stitched I could start arranging the little squares so I had an even mix of colours around the red and blue pinwheels and the star blocks. Here’s the bottom row complete…
Finally I could stitch the bottom row to the rest of the quilt, I had a little bit of fudging to do with the starfish block, but otherwise it went together nicely. I’m well chuffed with it, it’s such a happy quilt I can’t help but smile at it…
All I’ve got to do now is decide on the border. Kathryn has a simple border with a narrow border in navy blue followed by a wider border in off white with a scrappy border, she says it’s such a busy quilt she wanted a quieter border. I’m tempted with a narrow border in either navy or sand colour, followed by a piano key border using some of my leftovers, maybe with navy binding with a red flange. I finished my Cottage Garden quilt with a piano key border and I do like it and I have lots of fabric left!..I need to have a play I think.
Hopefully in three weeks time when I next post about my Seaside Quilt it’ll be sandwiched and I’ll have started quilting.
Hand Quilt Along Links
This Hand Quilt Along is an opportunity for hand quilters and piecers to share and motivate one another. We post every three weeks, to show our progress and encourage one another. If you have a hand quilting project and would like to join our group contact Kathy at the link below.
I have finally got a new computer! My old one was driving me scatty as it would have to think for at least 10 minutes quietly deciding whether to do as I ask…and then crash!! I’ve spent today trying to remember passwords or changing passwords as the password in my little black book isn’t working! Hopefully now I can catch up on blogs I follow as well as a few posts here.
When I spent a few days in the Lakes with Helen we detoured home via Kendal, of course we were visiting Cool Crafting, the home of Luna Lapin and a wonderful fabric shop. Helen is rapidly building up her stash so needed no encouragement from me, we both left with a carrier bag each…
I bought a light sage green cotton in their sale, it’s quilting weight and I thought it would make a nice winter shirt. Not long after our return home I decided to strike while the iron’s hot and make the shirt straight away, rather than adding it to my stash and forgetting about it.
I decided to make another Archers shirt, it’s a pattern from Grainline Studio which I’ve made at least twice before so I knew it fitted me fine.
Archers Button Up Shirt by Grainline
It’s a lovely pattern, just what I would call a traditional shirt with a two piece collar, a yoke and sleeve plackets. It goes together really well, I’m getting better at the sleeve plackets too!
I’ve already worn it several times, it’s quite a cosy shirt, quilting cotton can be quite structured but this has a nice feel to it. I didn’t even manage a photo shoot before I wore it so here’s a couple of views on Florence, freshly out of the wash and pressed,,,
…and front view…
And I’ve just found some teal fabric in my stash which will be perfect to make a skirt to got with it!
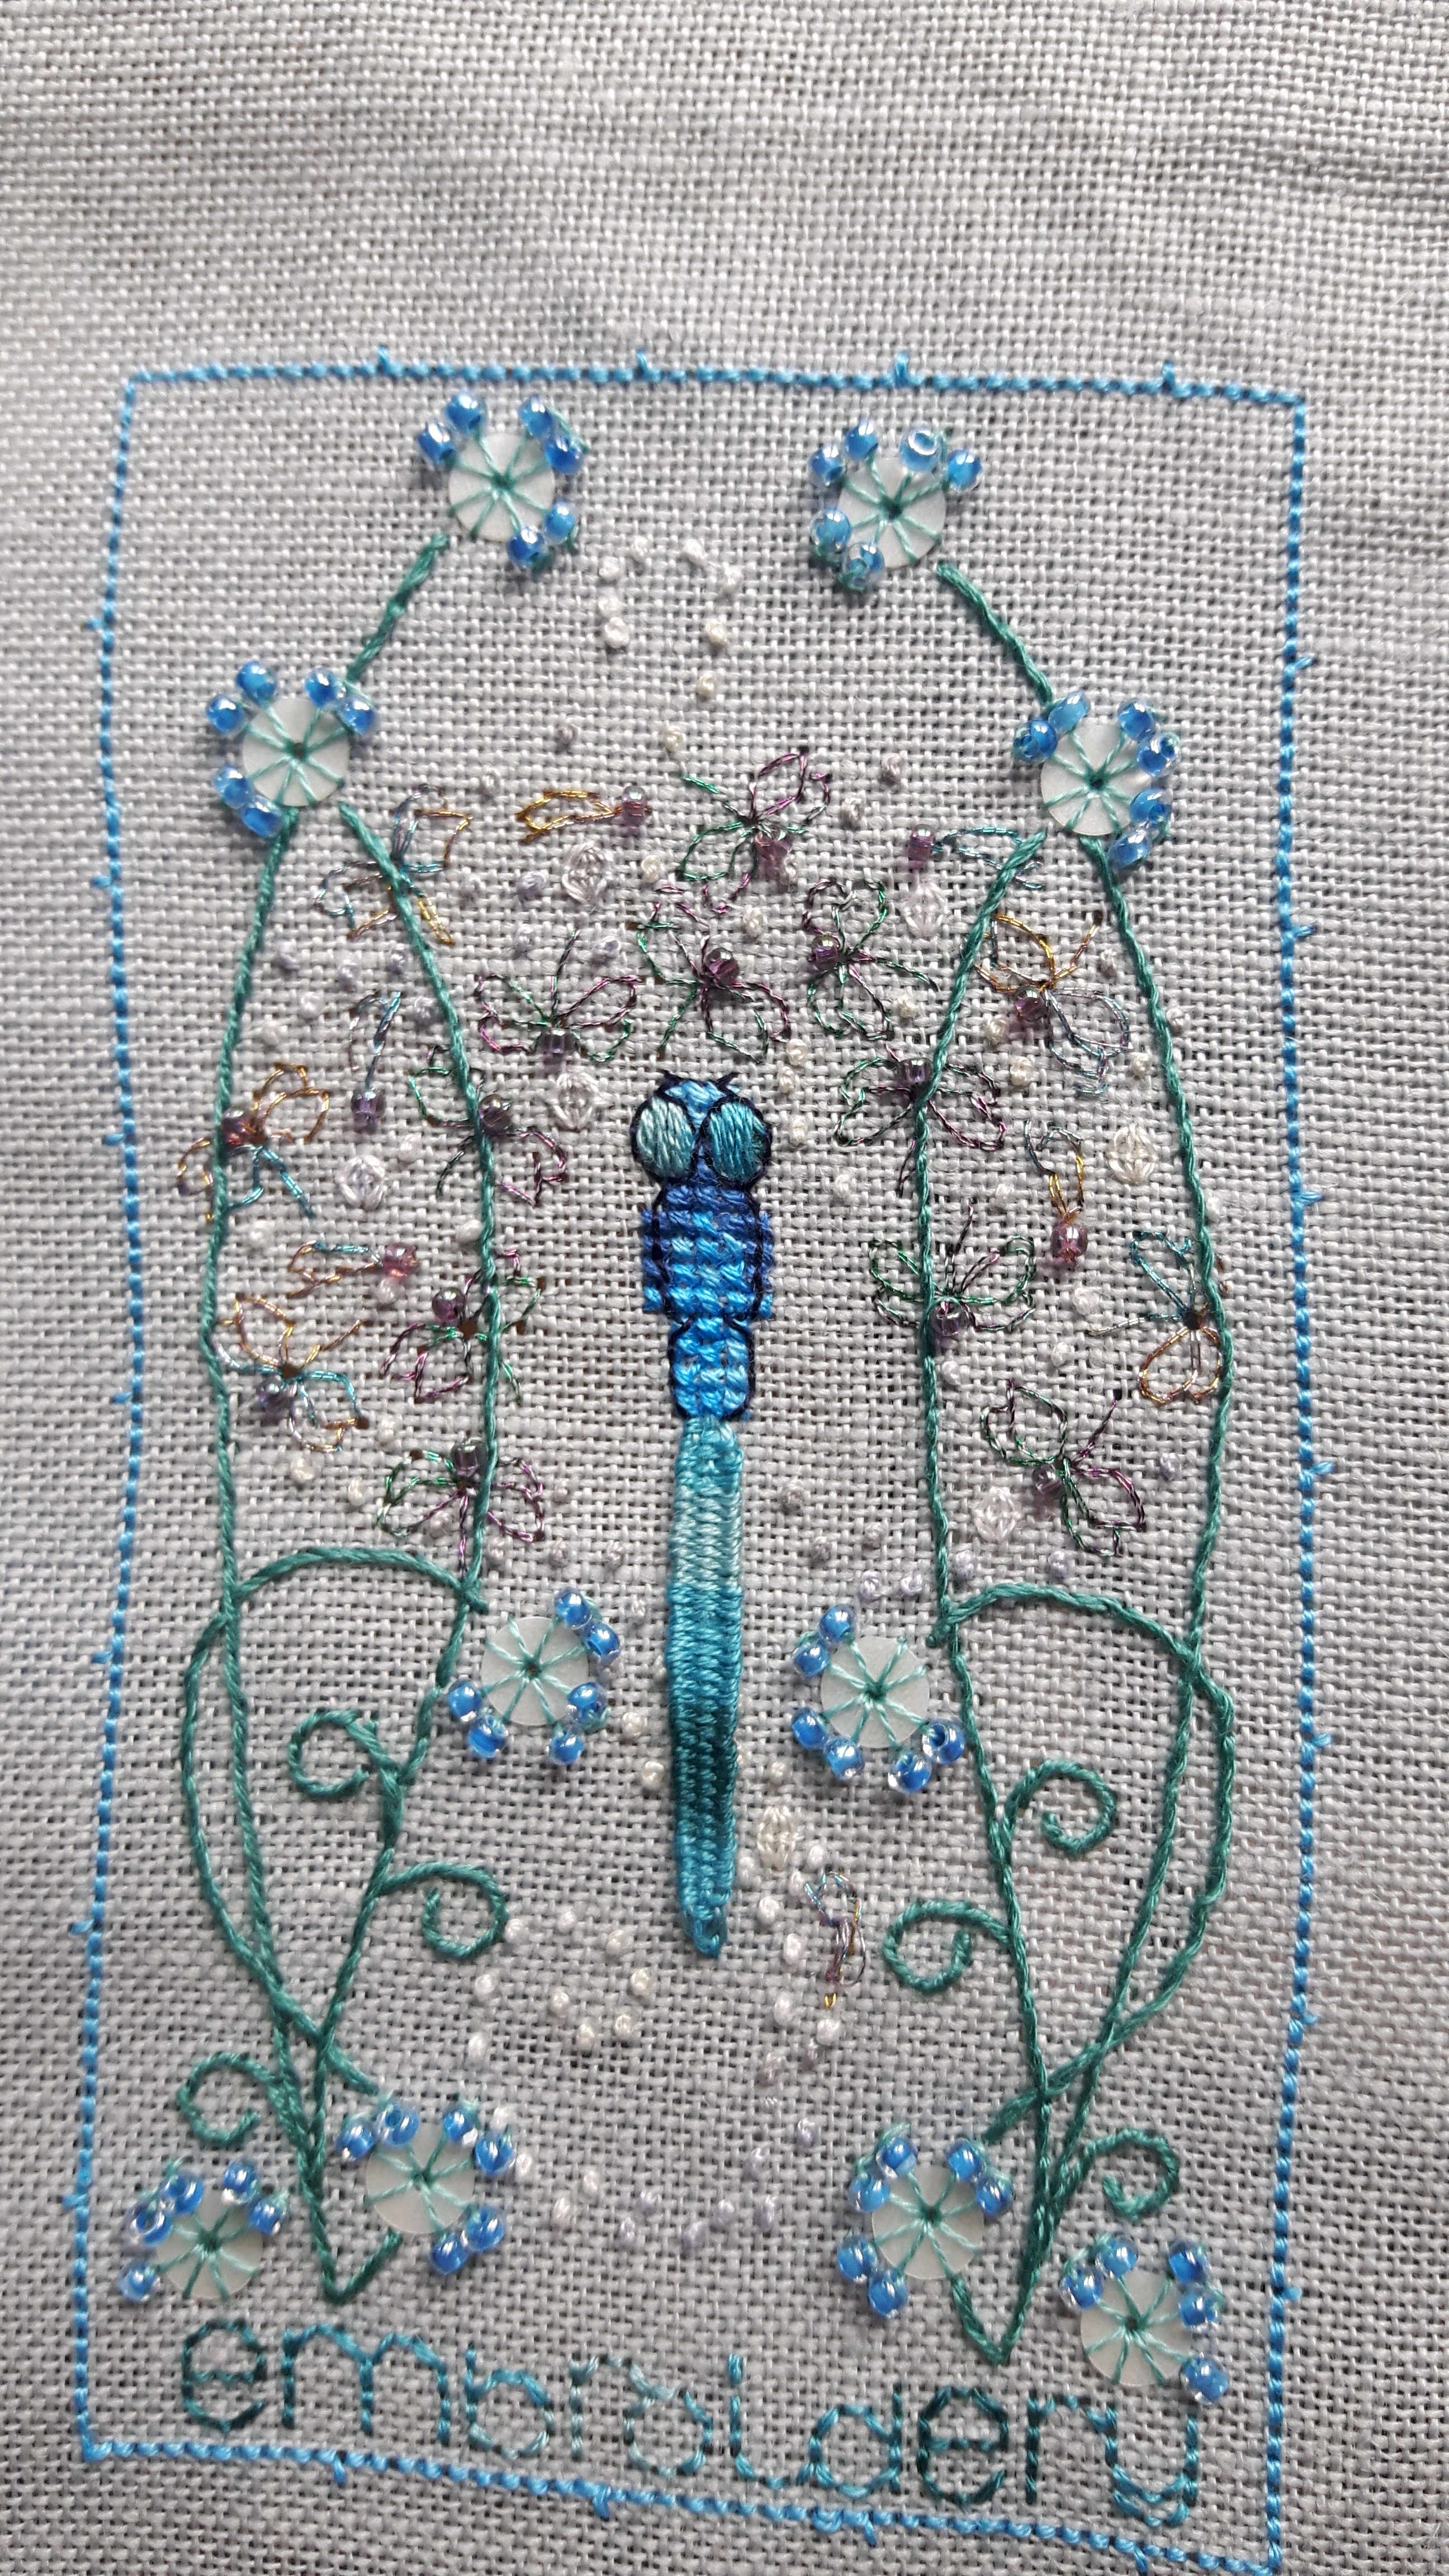
It’s getting quite exciting now with the Jacquie needlecase, we’ve got to the putting it together bit!
Three weeks ago I was just about to start making wings for my dragonfly…
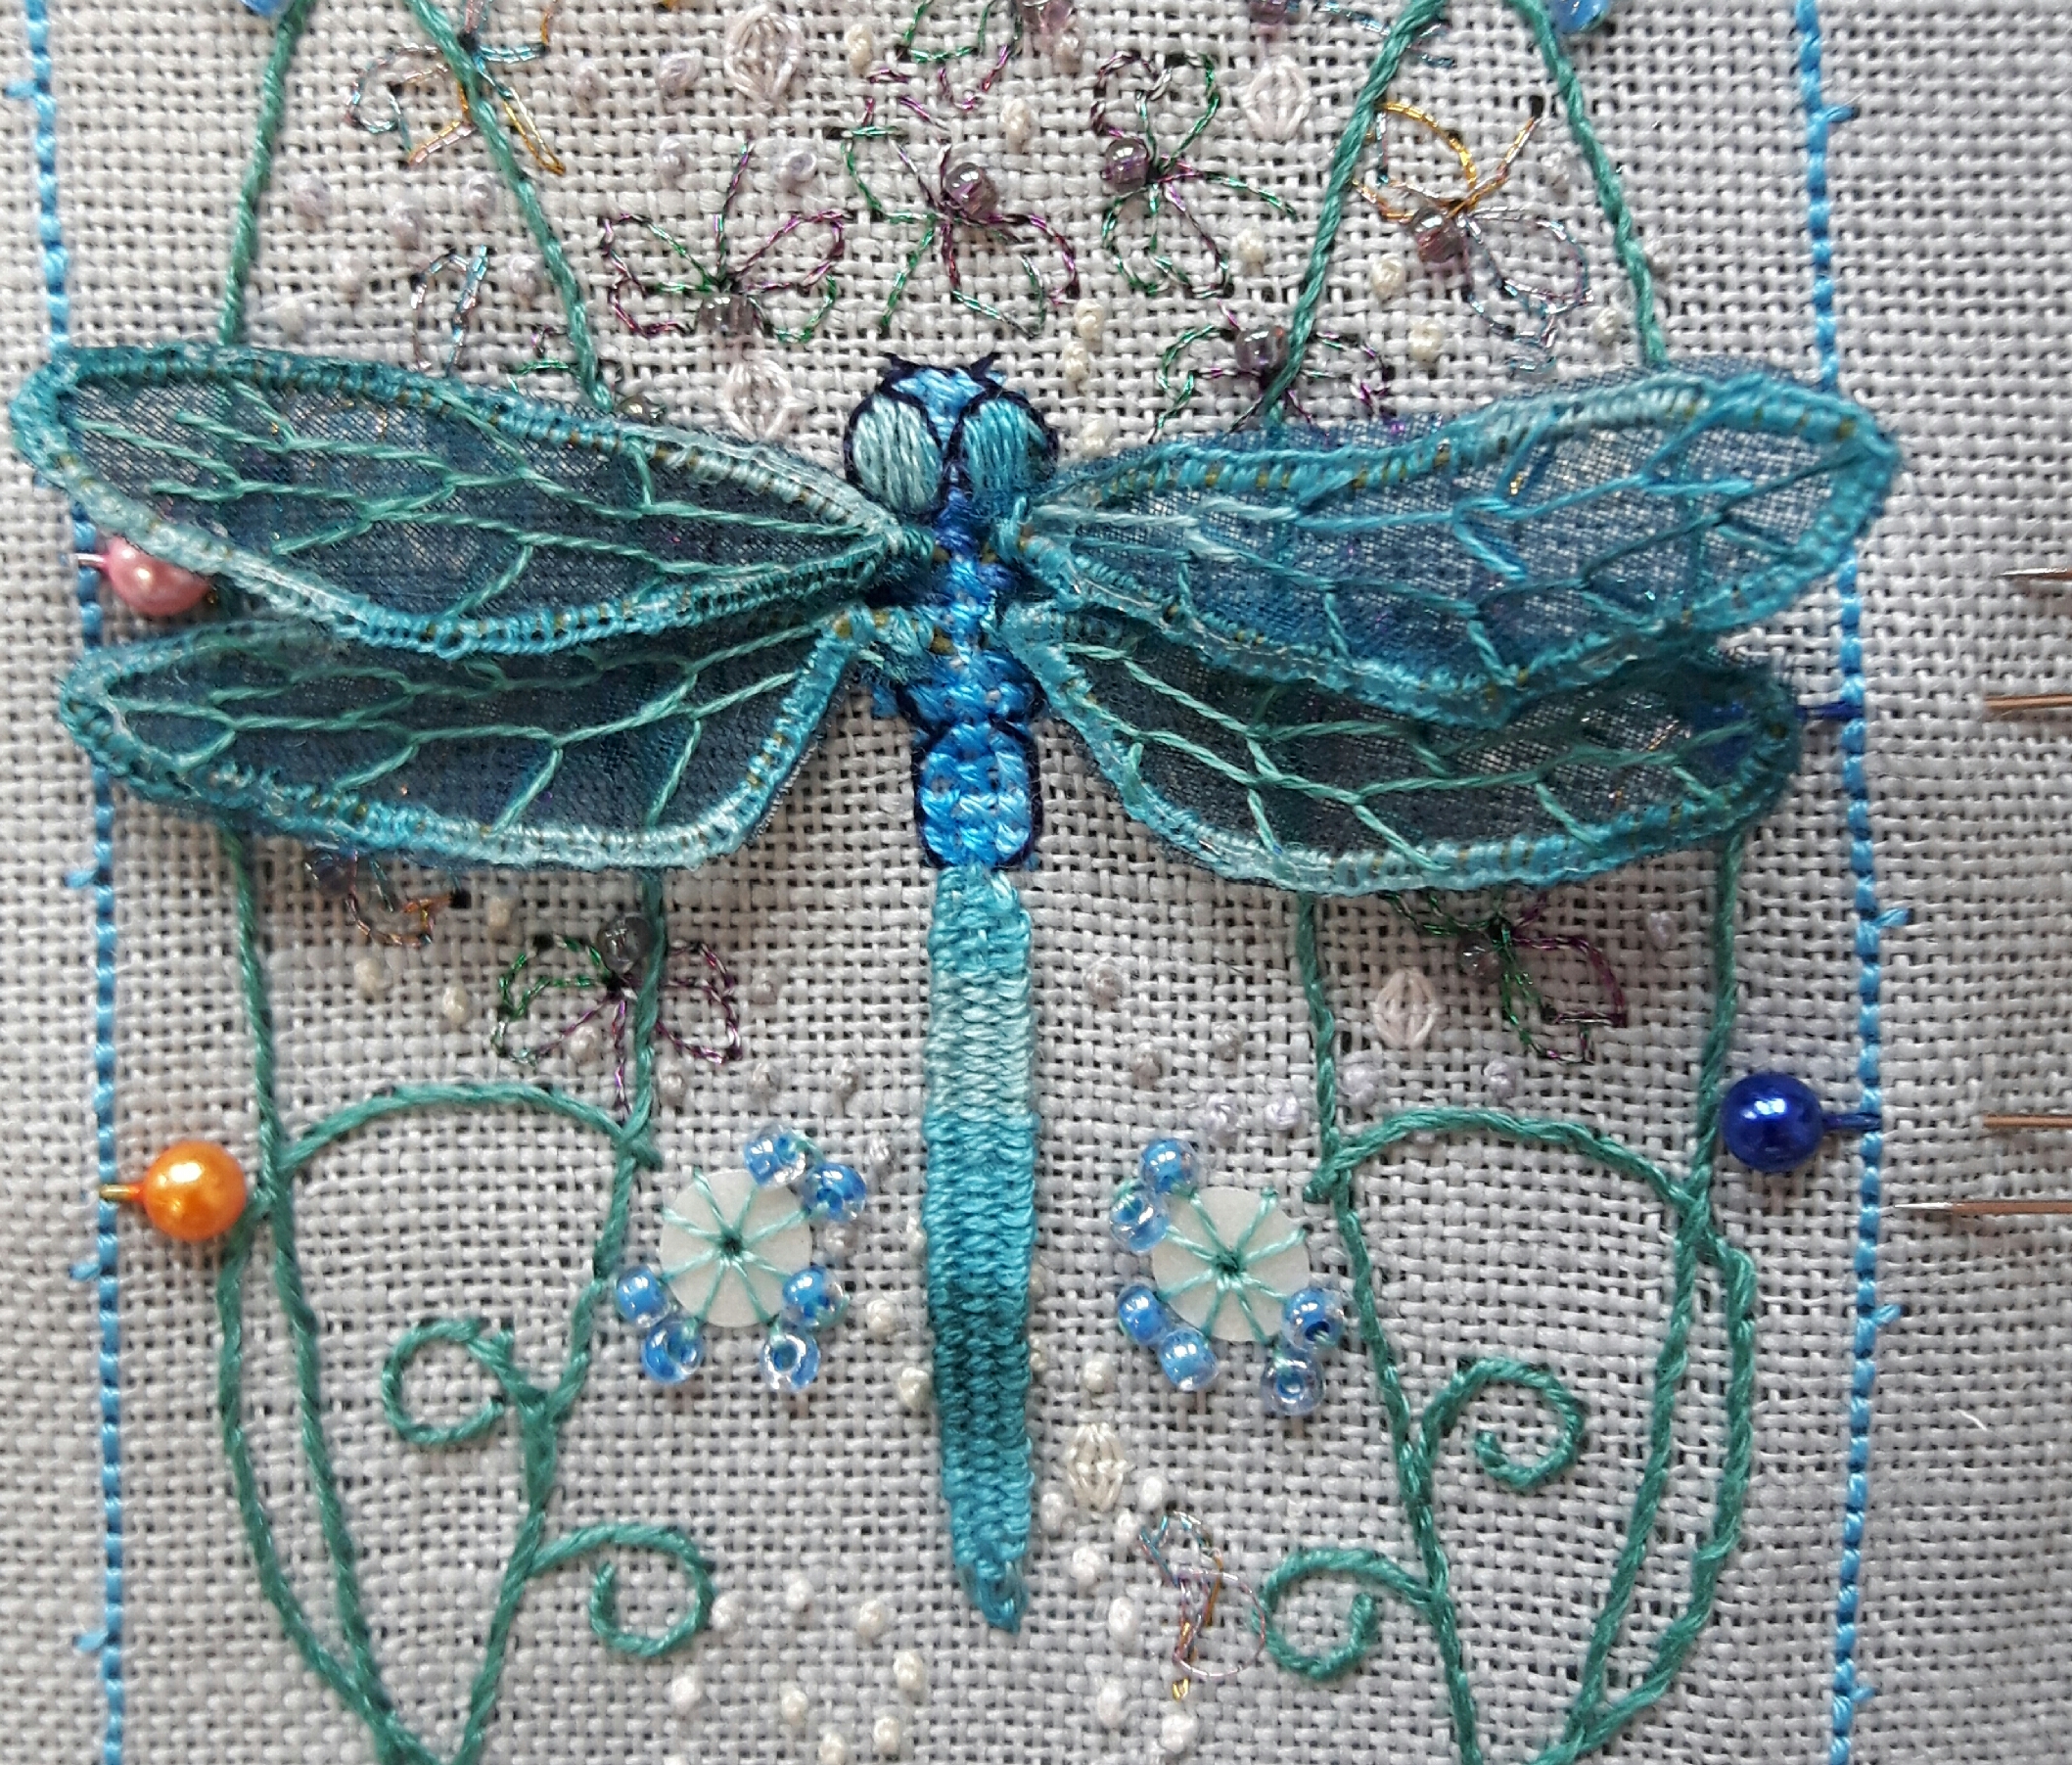
The wings are made by over-stitching wire onto organza, I found a lovely piece of hand-dyed organza in my stash which went perfectly colourwise. I used a single thread of floss and buttonhole stitch to over-stitch the wire, I added some veins and then put a line of fray-check round the edge as back-up for my stitches. Once that was dry I could carefully cut them out, push the wire through the body and stitch in place.
I was so chuffed with the wings I sat in my sewing room with a big grin on my face looking at them! even made another single wing for the other dragonfly as I wasn’t happy with my first one…
Once the wings were secure I could start putting it together, the instructions for this are split into two sections, this week was all the preparation so the four felt needle pads were stitched in pairs using the back-stitched outline, these were whipped together which makes a really neat edge. The two narrow strips with ’embroidery’ and ‘cross-stitch’ on were similarly stitched together.
Next I carefully measure my dragon-fly sections and cut too rectangles of stiff interfacing which neatly fits in between the outlines.
The pins which you will have noticed on the photos were the last part of the preparation. We needed seven different coloured pins as markers for how it all stitched together. I was scraping round for enough different colours but when I happened to be in Boyes in Ilkley this week I noticed a ring of ‘berry’ glass ended pins, they were perfect! These are all carefully placed at specified points, using the stitched markers in the outline, so 2 stitches down, 32 stitches down and so on. Apparently it will all become clear when the final instructions are released next week by Faby. I think I know how it’s going to work,but can’t quite picture it yet, so I’m looking forward to being able to put it together.
If you would like to stitch this dragonfly needlecase, please follow the link to Faby Reilly’s website, she has lots of beautiful designs.
This SAL is organised by Avis from Stitching by the Sea, we each post our progress on our chosen piece every three weeks, which is perfect timing for keeping the motivation going. Please follow the links to see what everyone else has been stitching.
Yesterday my friend and I decided to walk round Harlow Carr gardens rather than going up another of the Dales 30, the weather didn’t look too good and I’d had a heavy day at work on Monday. I was lucky enough to be given RHS (Royal Horticultural Society) membership for my birthday so we could both go in for free and even had a voucher to spend in the cafe!
We had a wonderful time, I realised I’d only ever seen a small part of it with my mum in the past, we’d never walked up into the wooded areas. The trees were beautiful. We were fascinated by the huge variety of ‘fir’ trees, we do tend to clump them all together but in an arboretum you can really appreciate the different characteristics such as the way the branches hang or the shape and feel of the ‘needles’ as well as the size and colour.
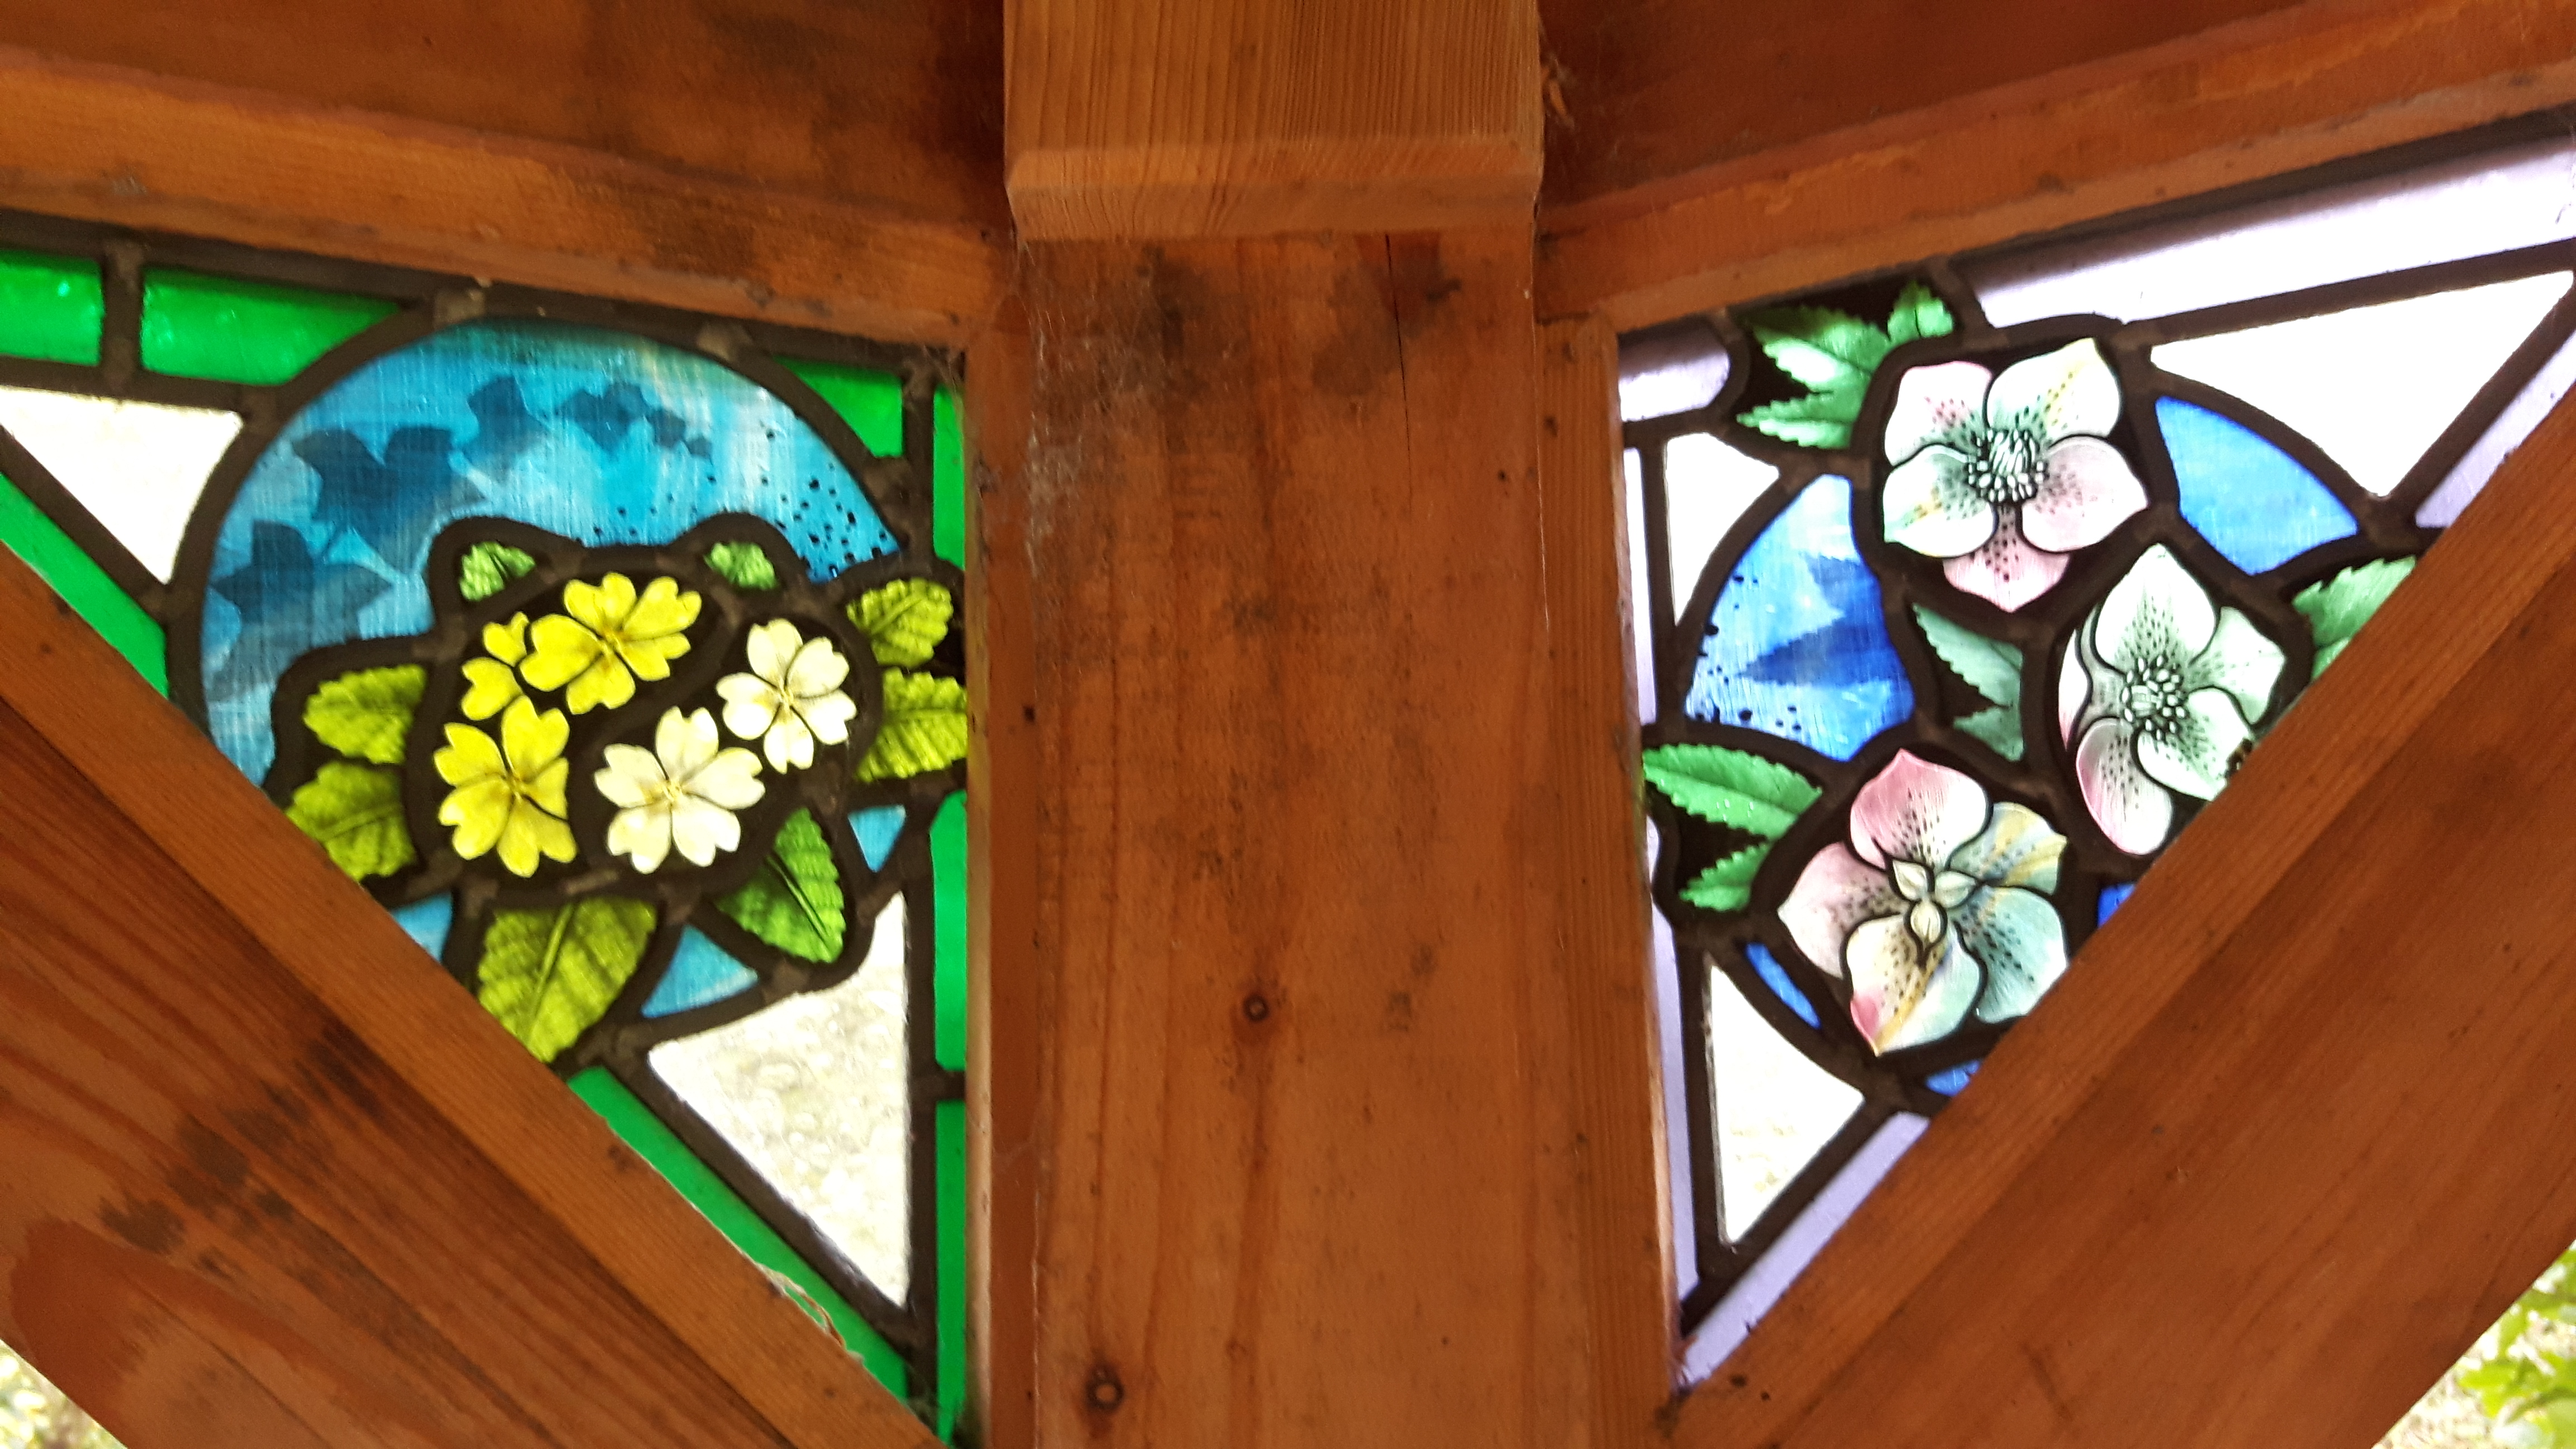
Up in the wooded area there were a couple of summerhouses, one had gorgeous stained glass decoration. There was a different flower pictured in each triangle, about eight or ten in total…
I thought the autumn colour might be coming to an end but there were some stunning trees, one that kept catching our eye in various places round the gardens was Liquidamber, we’d never even heard of it before, but if I can find a smallish one I’m very tempted to put one at the top of our garden, imagine looking out of the window to this every autumn…
After walking through the woods we were ready for lunch, at Harlow Carr there’s a Betty’s restaurant at the top, but there’s also a Betty’s takeaway cafe at the bottom of the hill, as it had turned into a lovely mild autumn day we sat outside and had some delicious mushroom soup…and a fat rascal!
After lunch we explored the rest of the garden, there’s a stream and lake, some gorgeous herbaceous beds, alpine houses, demonstration gardens. Considering we are nearly in November there’s still lots of colour from flowers and foliage.
It was pretty busy as it’s half term holidays for the local schools, it was nice too see so many children enjoying themselves in the garden and it was big enough to still feel peaceful.
We’re hoping to visit once a month, see how the garden changes over the year…and get some ideas for our own gardens. We were very good in the garden centre too, we were very tempted but we resisted, I am going to add some rusted metal dome shaped plant supports to my Christmas list though, they looked great and I think they would work really well with floppy peonies.
There’s a new RHS garden opened in Salford, near Manchester, so we might be having a trip over there sometime too!
I’ve occasionally seen work described as Brazilian embroidery on facebook but I’ve never known really what it entailed. Last week at Skipton Stitchers monthly meeting we had a mini-workshop run by one of our members, the lovely Claire Ketteman. She does regular stitching workshops in the area and is a great teacher.
Apparently Brazilian embroidery is so named not because it originated in Brazil but because the thread used was originally manufactured there. The thread is a rayon stranded thread, very silky and shiny, slippery to use for your usual embroidery, but brilliant for knots, as the rayon thread just slides into beautiful curls. The thread was used without being split so we did need a fairly chunky chenille needle.
Claire had designed a mini embroidery which covered the main knots, French knots, bullion knots and cast-on stitch. I think I’ve only done cast-on stitch once before but with clear demonstrations from Claire we all got the hang of them. Cast on stitch looks a bit like covering a couple of threads with buttonhole stitch, but it’s formed on the needle so you can make it into lovely curls, the yellow flower is in cast-on stitch.
Our piece of Brazillian embroidery is only little – a perfect size for a mornings workshop. I think I might make it into a pincushion or a needle case. It was great learning how to use the thread, so often I buy threads because they look gorgeous and then wonder how to use them!
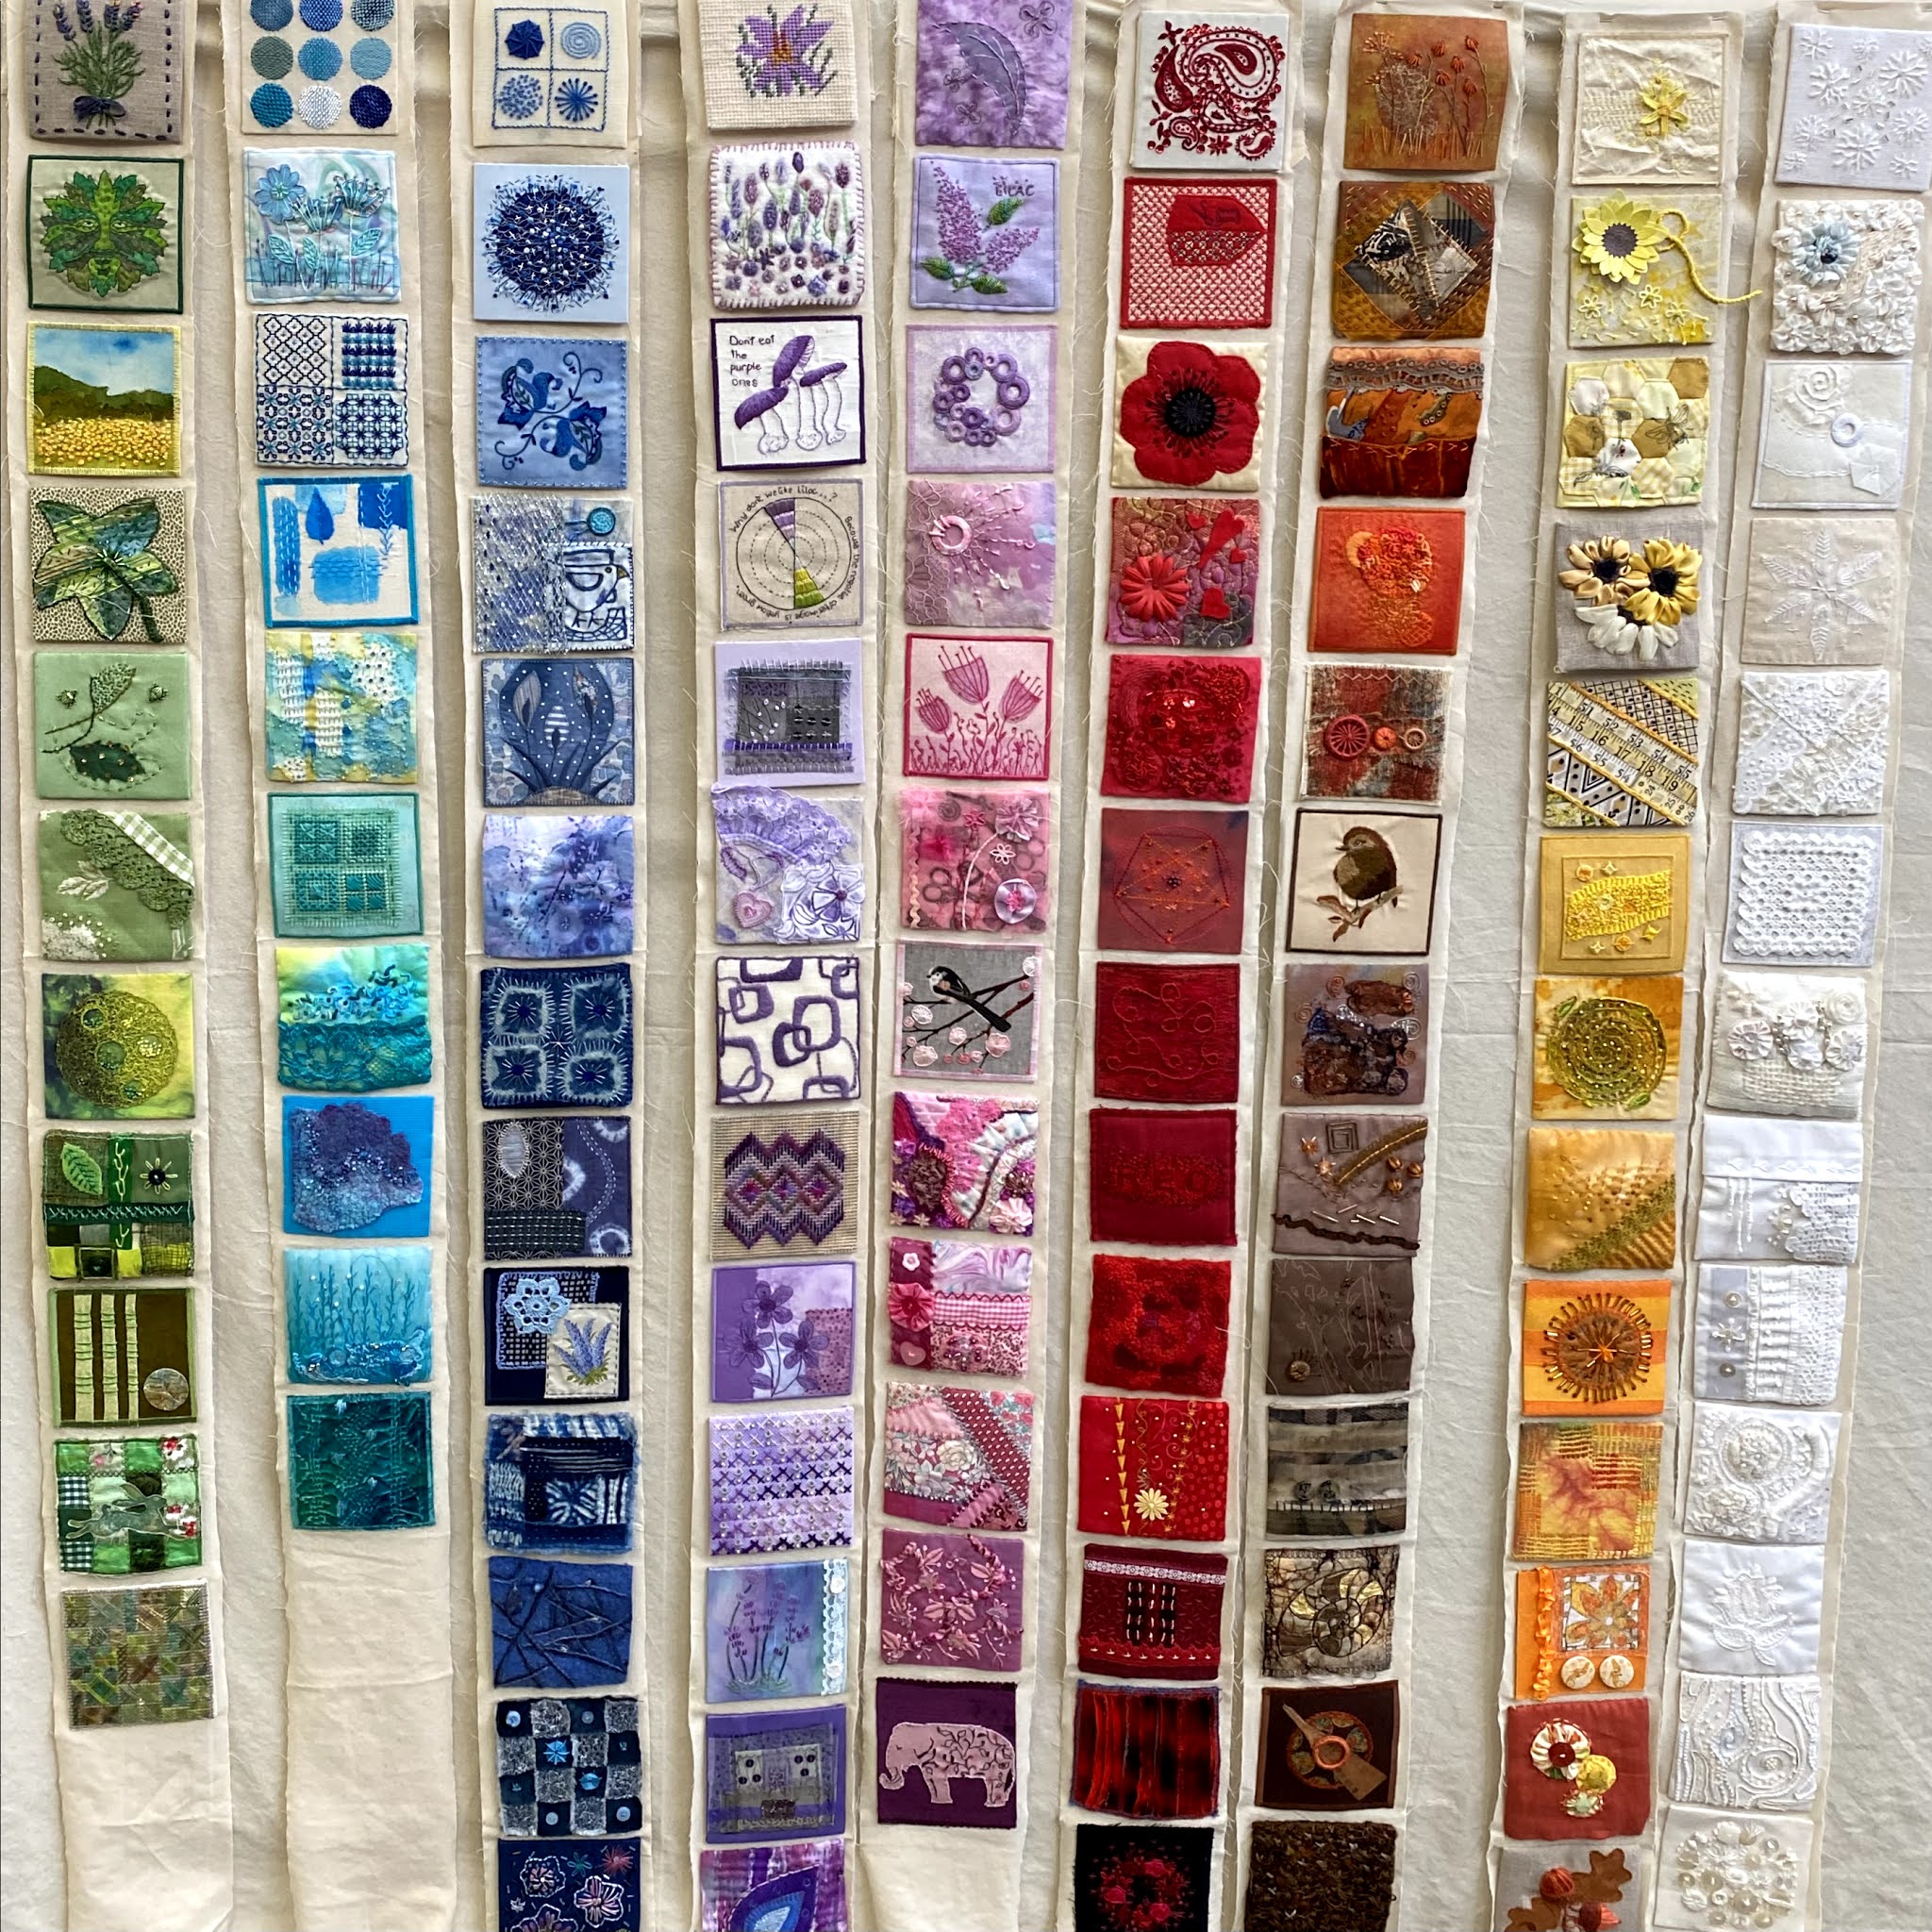
If any of you are within striking distance of Skipton, we have an exhibition next weekend of work we created during lockdown. I’ve a few pieces on show, and there’s lots of amazing embroidery from all our members, all sorts of styles too, modern, traditional, abstract… the rainbow of squares will also be on show…
The exhibition is at Christchurch, Skipton, just over the bridge on the road towards Keighley. It’s on Friday and Saturday and should be worth a visit 🙂
I got myself organised this week with my seaside quilt so I’ve made pretty good progress. This is the quilt from the book by Kathryn Whittingham, she’s the designer of the gorgeous Cottage Garden quilt which I made last year, as I was finishing that one she kindly sent me the book of the Seaside Quilt. I’ve had lots of family holidays round Whitby and Robin Hoods Bay and this happy quilt reminds me of them.
Three weeks ago I had just finished the middle row…
At the beginning of the week I ‘prepped’ a large embroidered block and all the small ones for this last row. By ‘prep’ I mean choosing the fabrics, stitching the background were needed, cutting out and applying all the bondawebbed applique pieces and choosing suitable embroidery threads for them. I put them all in my plastic workbox and brought it downstairs so I could sew a little when I was having my coffee or preparing tea.
First of all I blanket-stitched round two starfish…
Next I stitched round a little octopus and a seahorse, these were very fiddly to cut out and just as fiddly to stitch, they are cute though! I was glad I had chosen a batik fabric for these as the denser weave means to doesn’t fray as easily as standard quilting cotton when you are stitching so close to the edge. To give you an idea of size, the squares they are on (finished) are 2″! They are set in a blue friendship star…
Next I stitched a couple of shells, a whelk and a periwinkle. One of the prints I’ve been using for this quilt has like ammonite patterns, with a bit of careful positioning it was perfect for the periwinkle. These match the shells on the top row, so they are set in a star block…
Finally I started a big block, this one is called ‘A Rainy Day on the Beach’ Our weather is changeable at the best of times, so most people who spend time on the British coastline will have a rainy day on the beach! This one took quite a bit of embroidering. I started off outlining the umbrella and clothes of the lady and her dog. I changed the pattern slightly to make the dog look like Zach, my little black shadow who died a couple of years ago, he loved being on the beach. I was particularly pleased with the bumbleberries fabric I’d used for the umbrella and the wellies, some of the new range of colours has a bit of a sheen to it, so some of the ‘berries’ are a little shiny, it worked really well for a wet umbrella!
The time-consuming bit was the sea, it’s made by overlapping the blue over the sand with a strip of bondaweb and a wobbly line. Kathryn suggests blanket stitch for the waves which I did, it’s stitched the other way up from usual which works well for the crest of a wave but did seem to give a bit of a hard edge, so after trying it out on the waves further back in the sea, I added lots of french knots for the frothy bits. I like it, I think it works pretty well. I did a few neat French knots at each end of the wave but mainly made ‘frothy’ ones by allowing it to loop more….it was an awful lot of French knots so by the time I got to stitching a few for the sand I just did the minimum needed and the lines of seaweed didn’t get a look in!!
Hopefully over the next three weeks I’ll finish two more beach huts and at least one larger block, I can start putting the blocks together too and this bottom row will be complete.
Hand Quilt Along Links
This Hand Quilt Along is an opportunity for hand quilters and piecers to share and motivate one another. We post every three weeks, to show our progress and encourage one another. If you have a hand quilting project and would like to join our group contact Kathy at the link below.
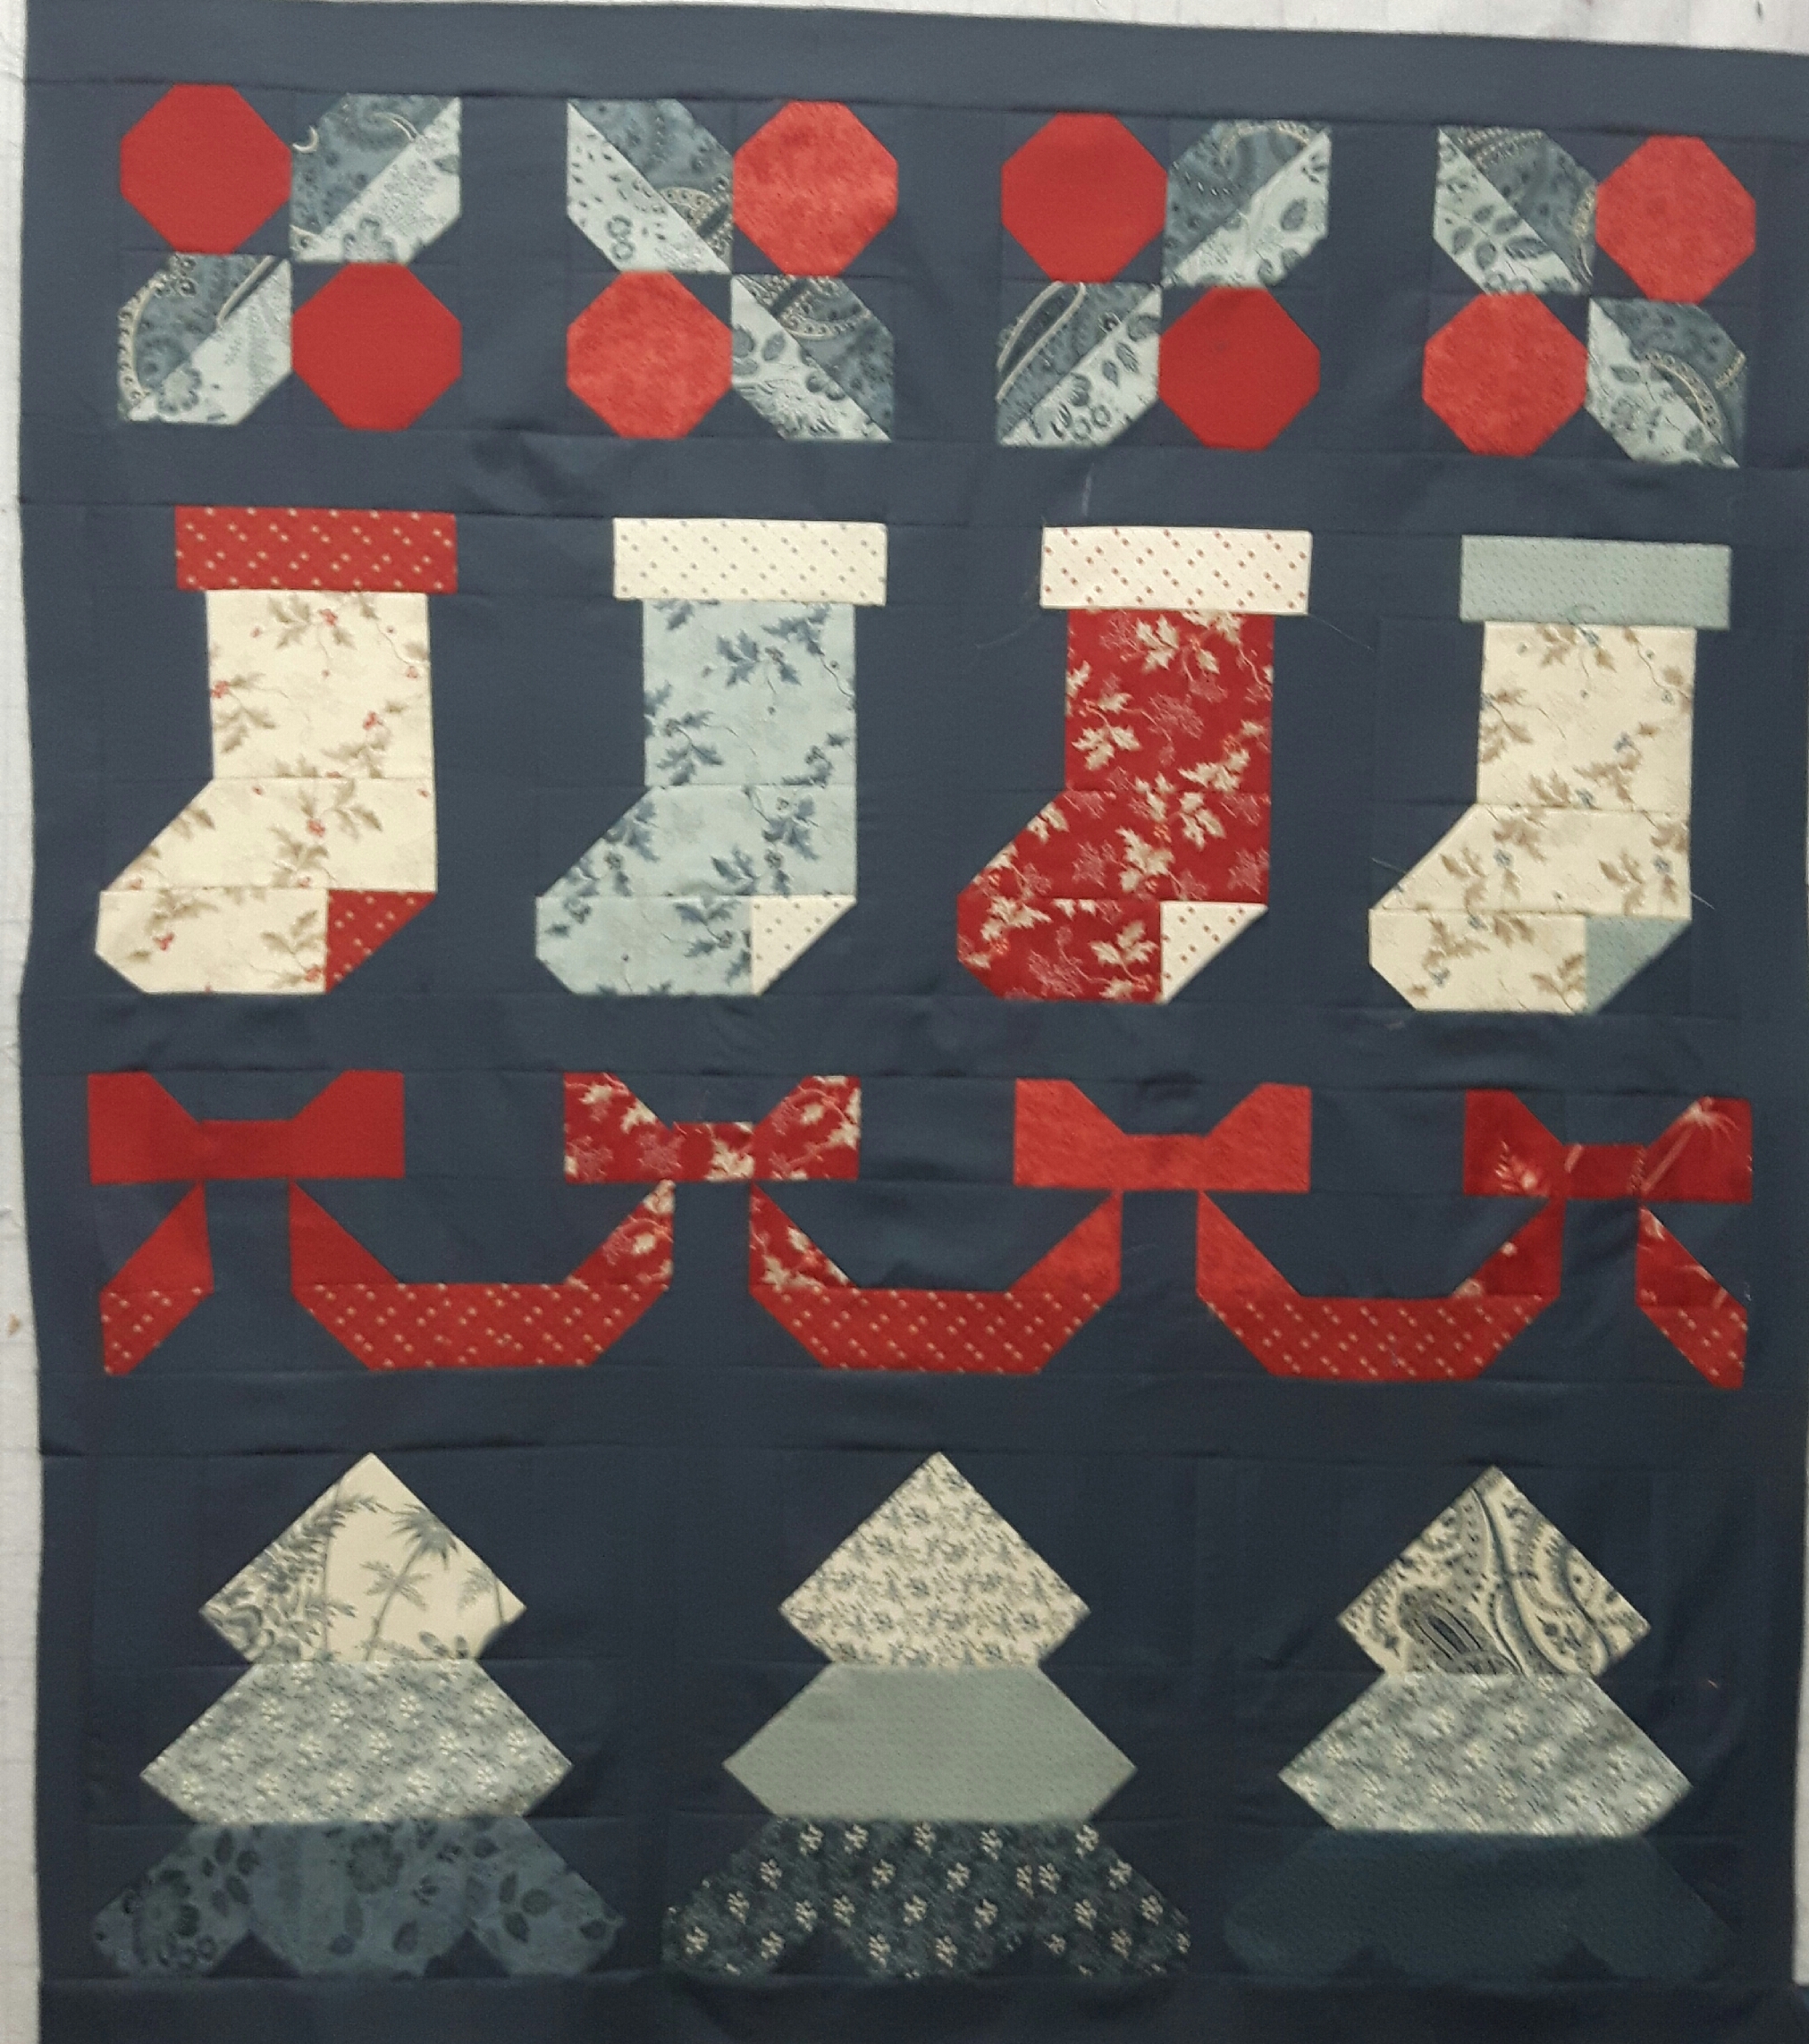
I’ve been pretty busy in my sewing room this week, just not with things ready to share, however I have started quilting my All the Trimmings quilt. This was a free QAL from the Fat Quarter Shop, it just took a layer cake and a bit of plain fabric. As I happened to have a Christmas layer cake I decided to make this little Christmas quilt.
I finished the top a few weeks ago, I was debating adding a scrappy border as I have quite a few squares left from the layer cake, however when I tried it with a few scraps on my design wall it just didn’t work. I decided to back it in the same plain as the front and then maybe use a scrappy binding…
I finally started quilting it this week, I sandwiched it with 505 spray which I find holds everything together nicely without gunking the needle up. I started in the middle with the garland of ribbon. I decided to do a mixture of in the ditch quilting and free motion quilting so I’ve gone round the edge of the bows and then stitched a meander to fill it in. The connecting tails are then quilted with a long zigzag line…
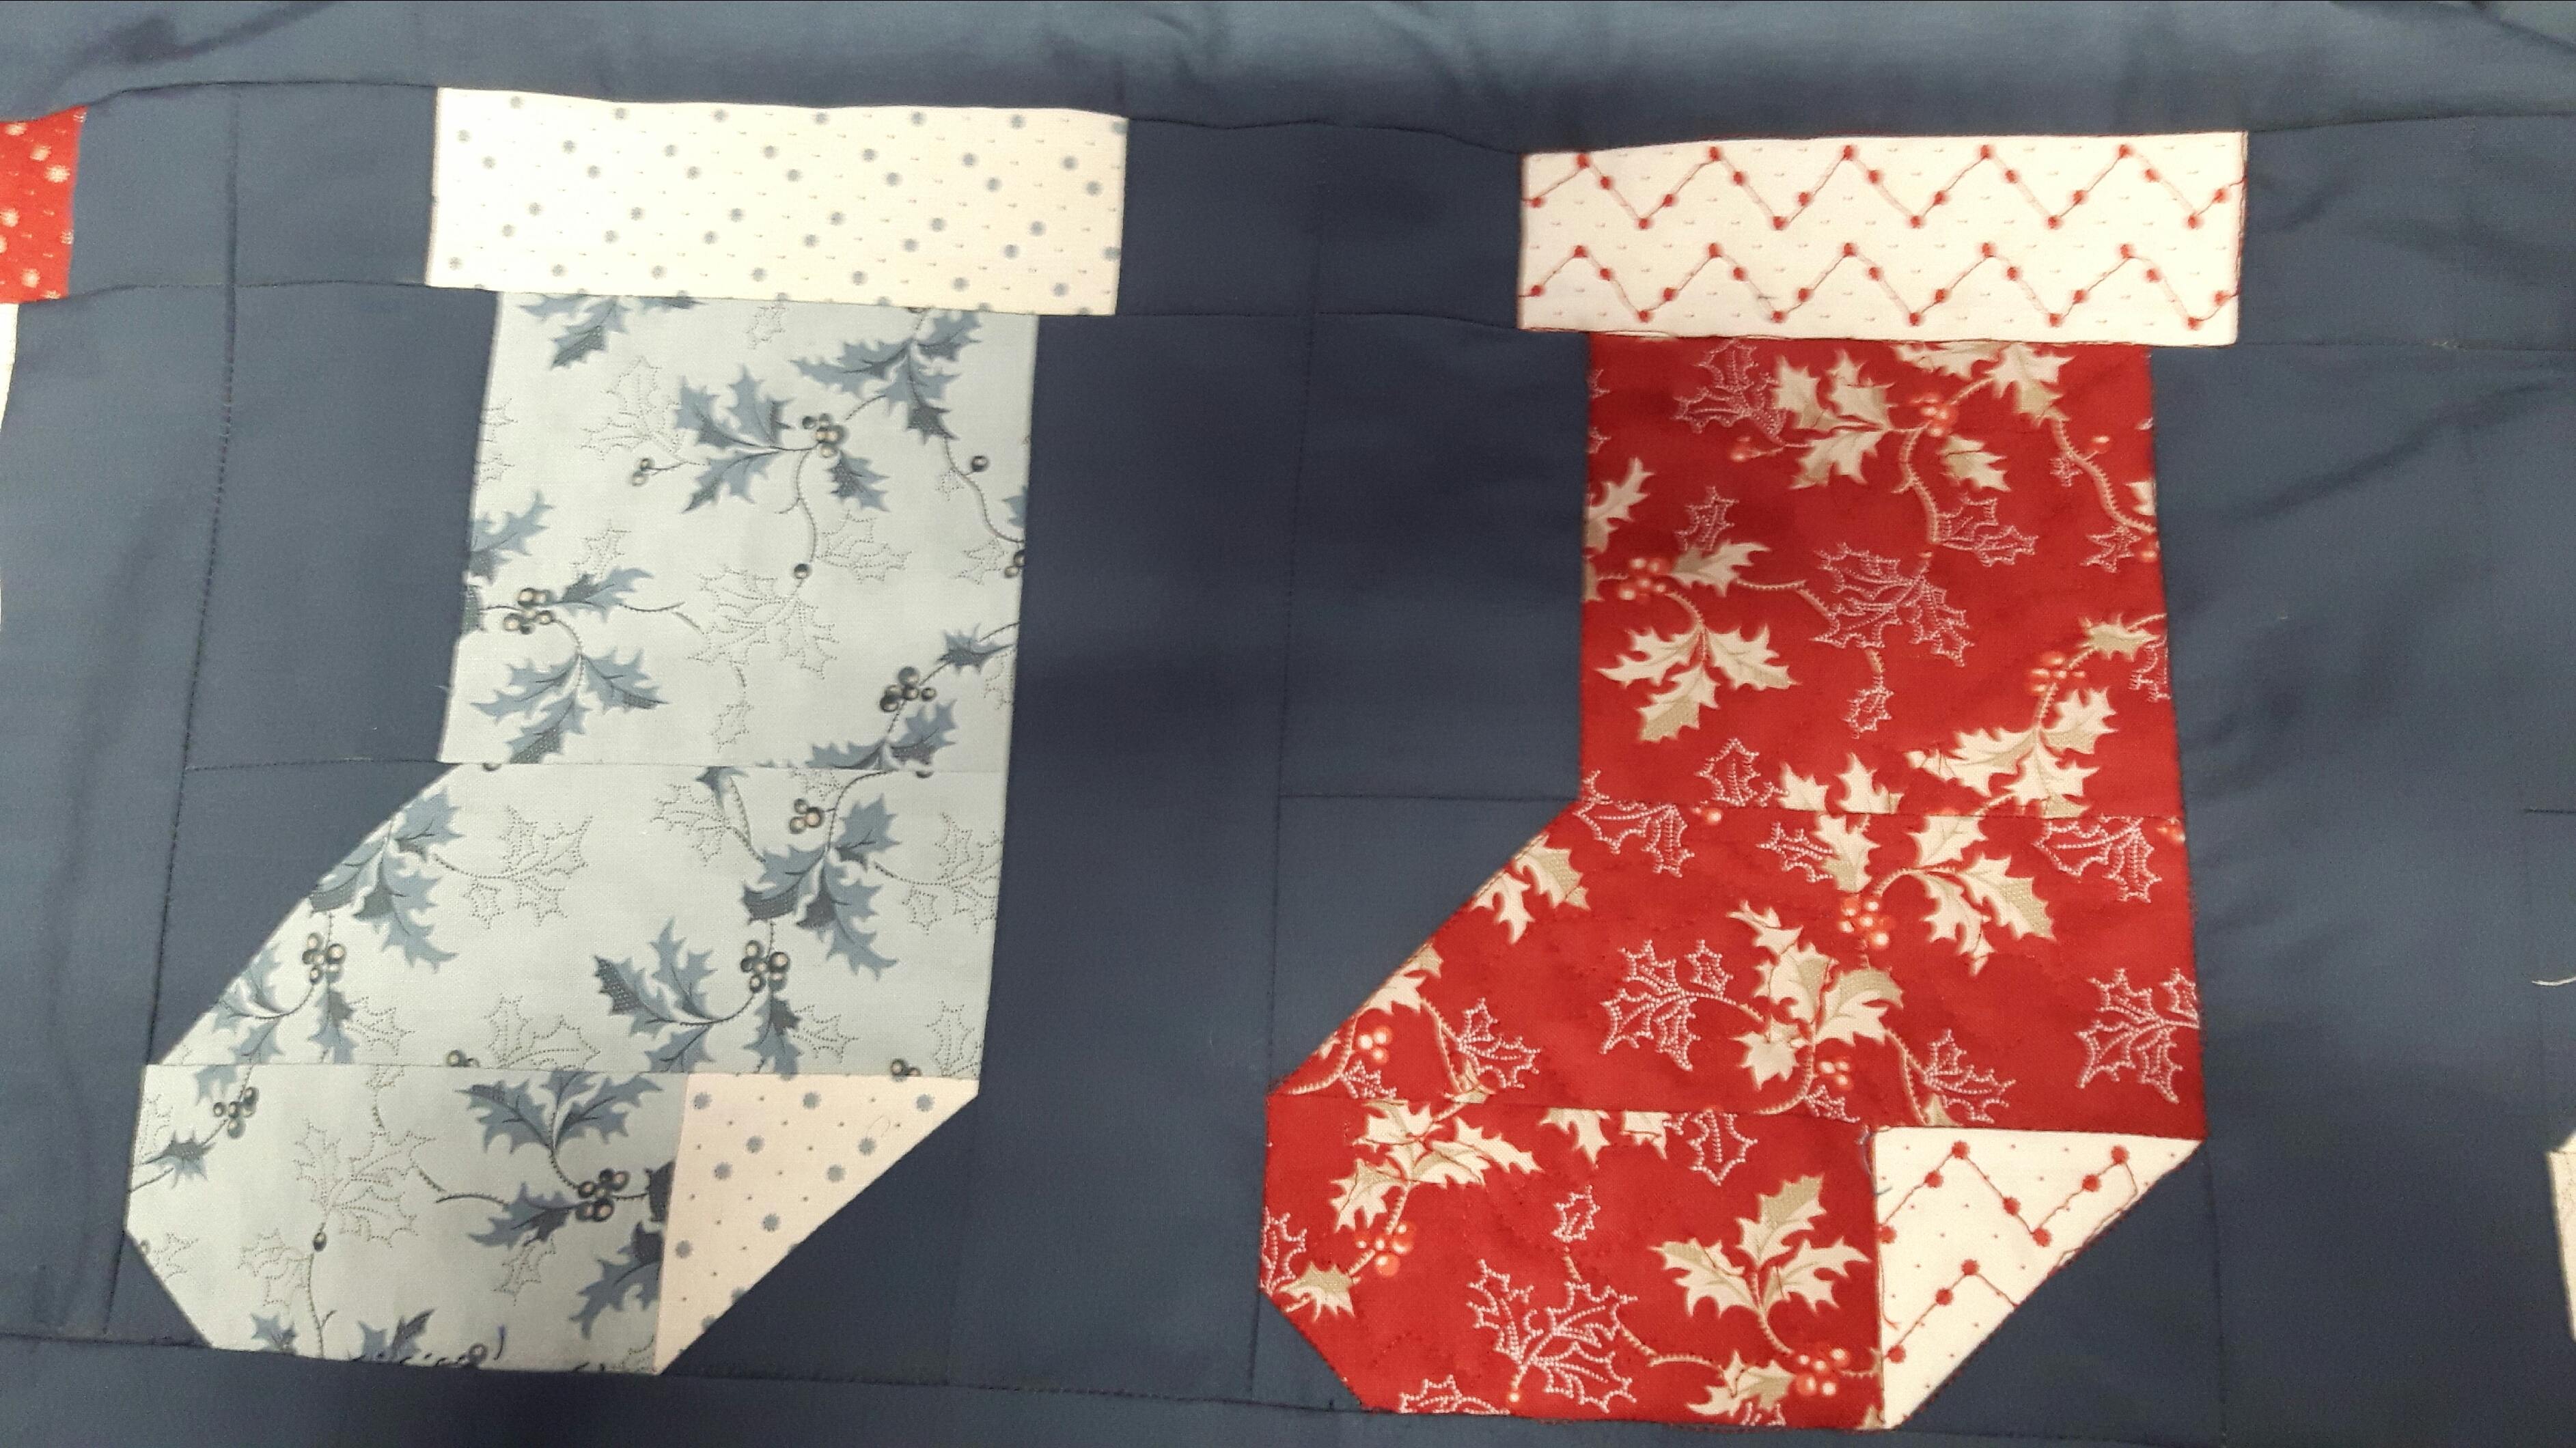
Having quilted the ribbon row with red thread on top and blue underneath it seemed a good idea to start the red stocking above. Again I quilted in the ditch first, I can’t say I’m getting any better at this, it always seems a lot more tricky than it should! For the free motion bit I decided to play a bit of dot to dot on the cuff, stitching two rows of zigzag across the top. For the main stocking I’ve quilted holly leaves, they’re not perfect but I’m pretty happy with how they’ve come out. I think I might use an off white thread for the two lighter stockings though, not quite so obvious as red or navy blue!
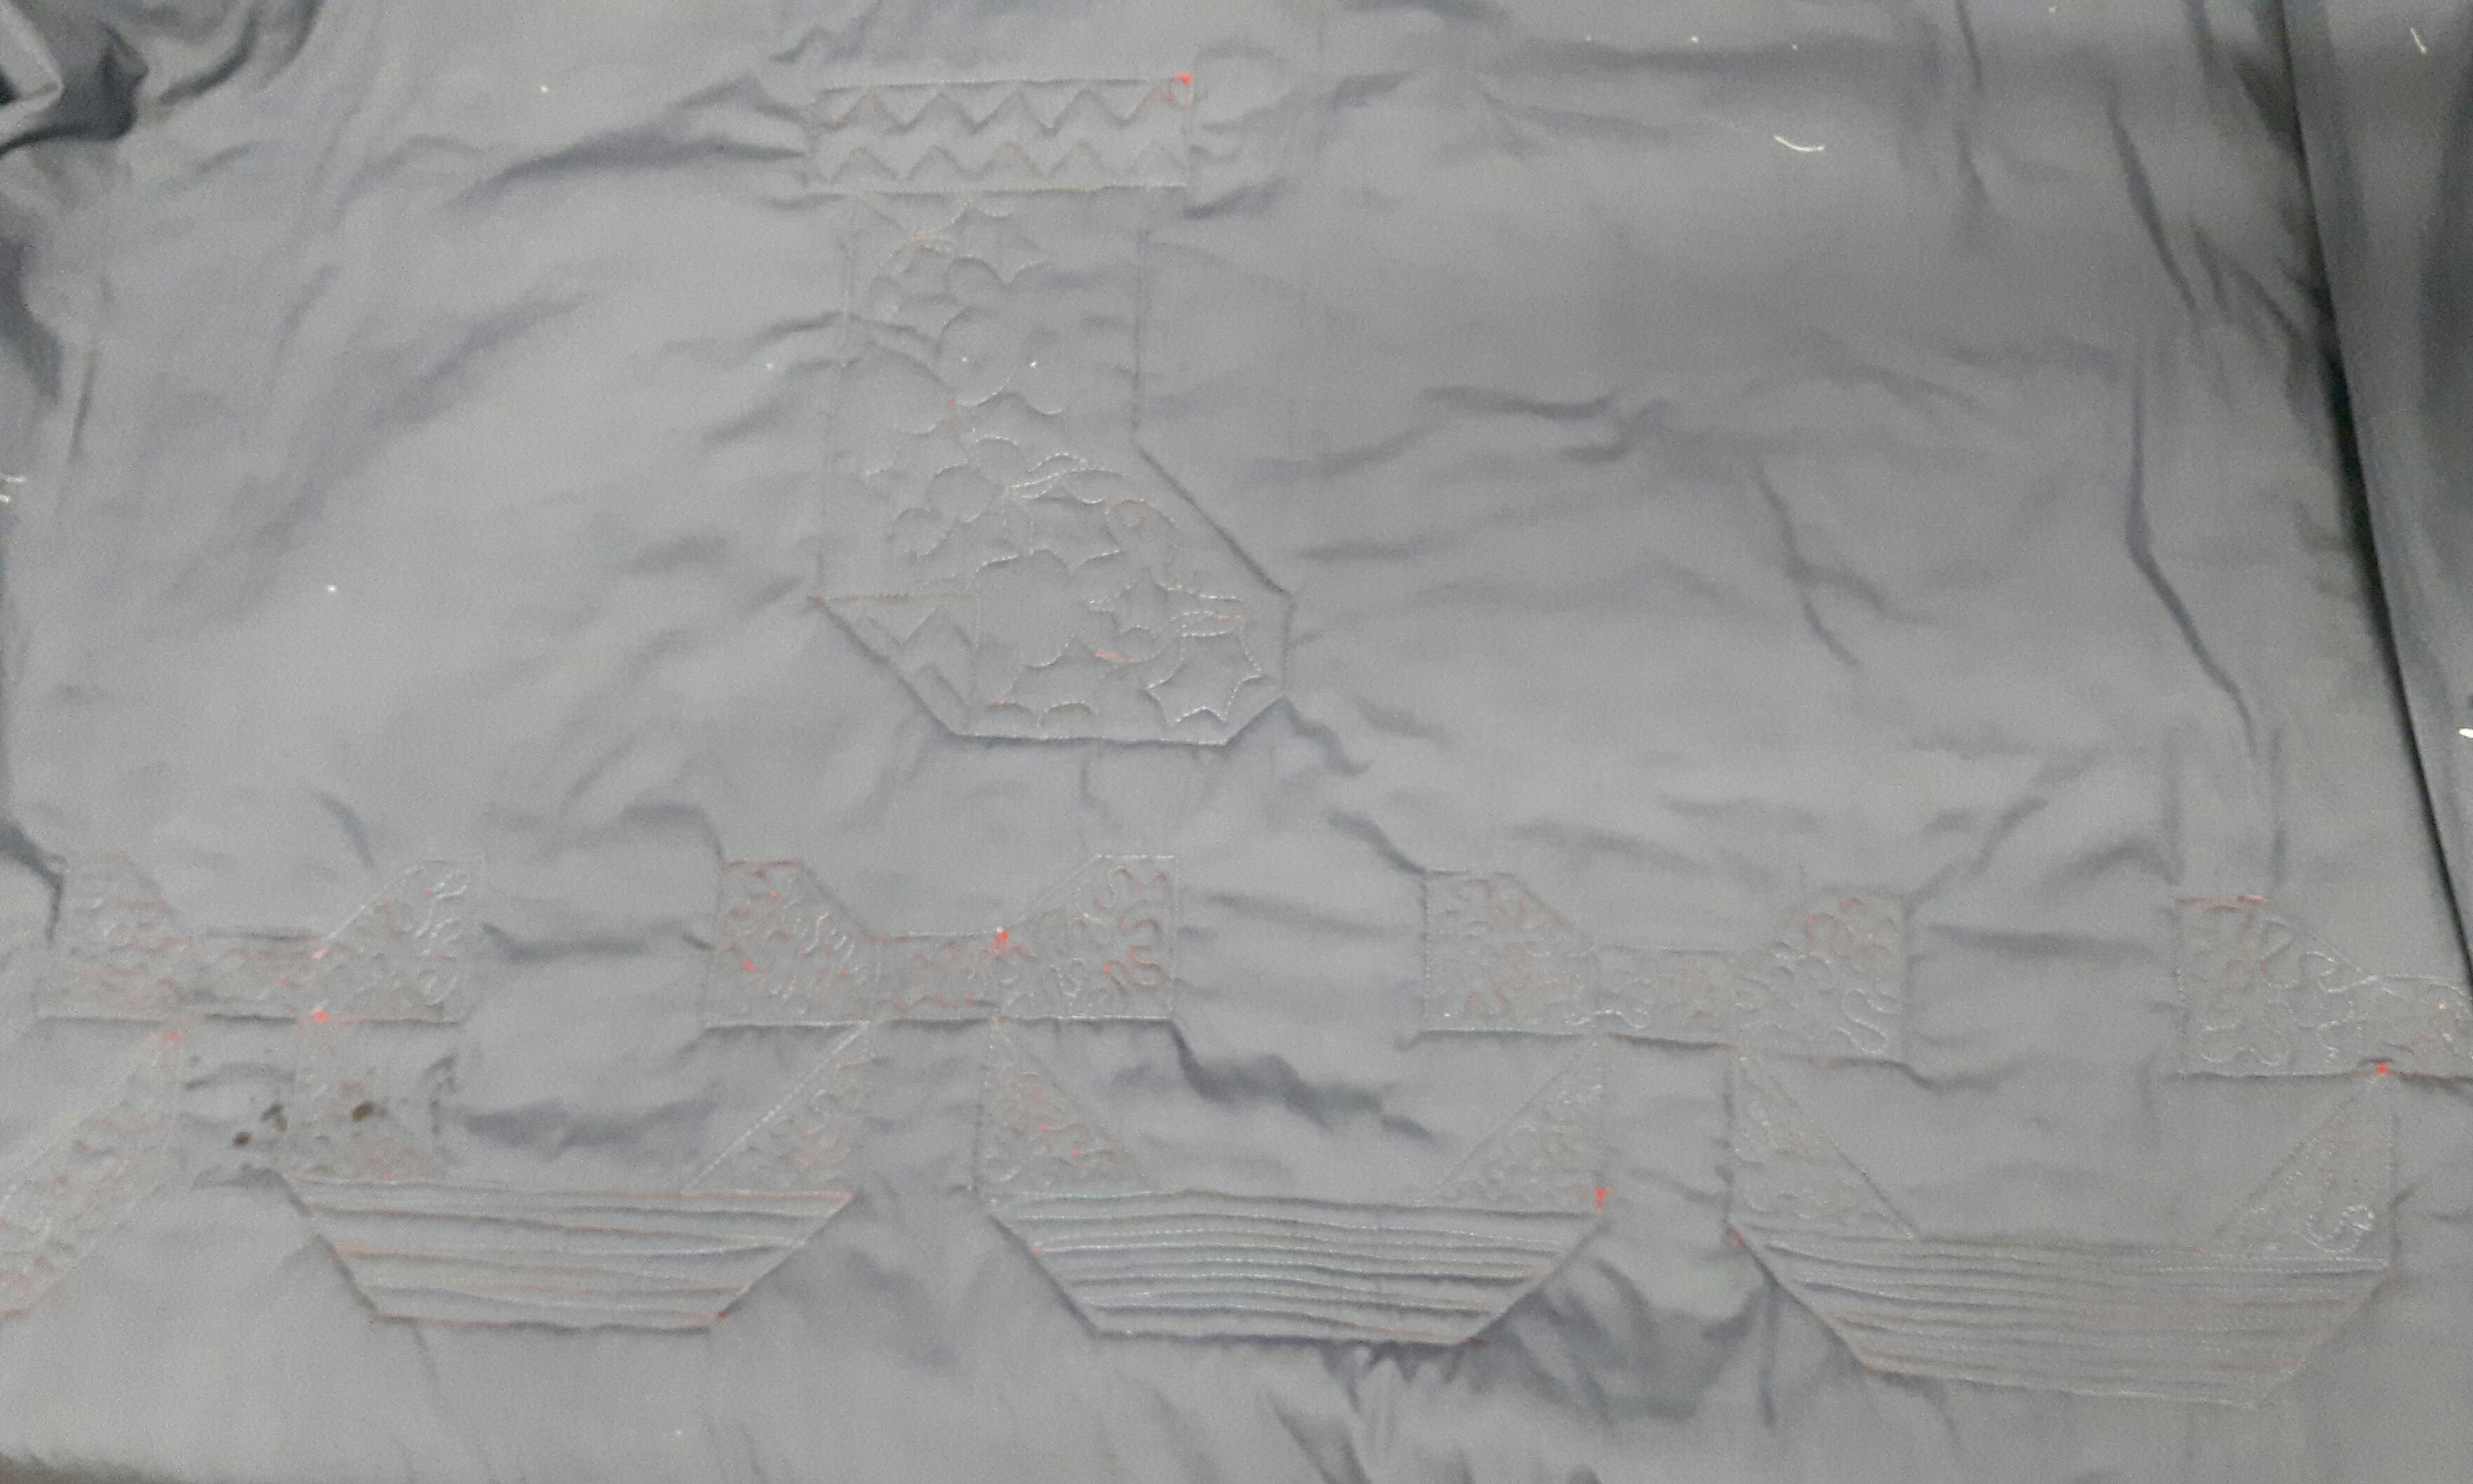
As the quilting doesn’t show up much on those photos, here’s the back view. It’s not a brilliant photo either as it’s artificial lighting so the backing is much lighter than in reality but you get the gist!..
I’m trying to take it steady with this quilt as it’s the first quilt I’ve machine quilted since my neck operation, little by little and I’ll get there.