
It’s happy dance time, I’ve just, this morning, finished my book of cross-stitch words. I’m pleased with it but I can’t say I’ll be rushing to make another slot and tab book!!
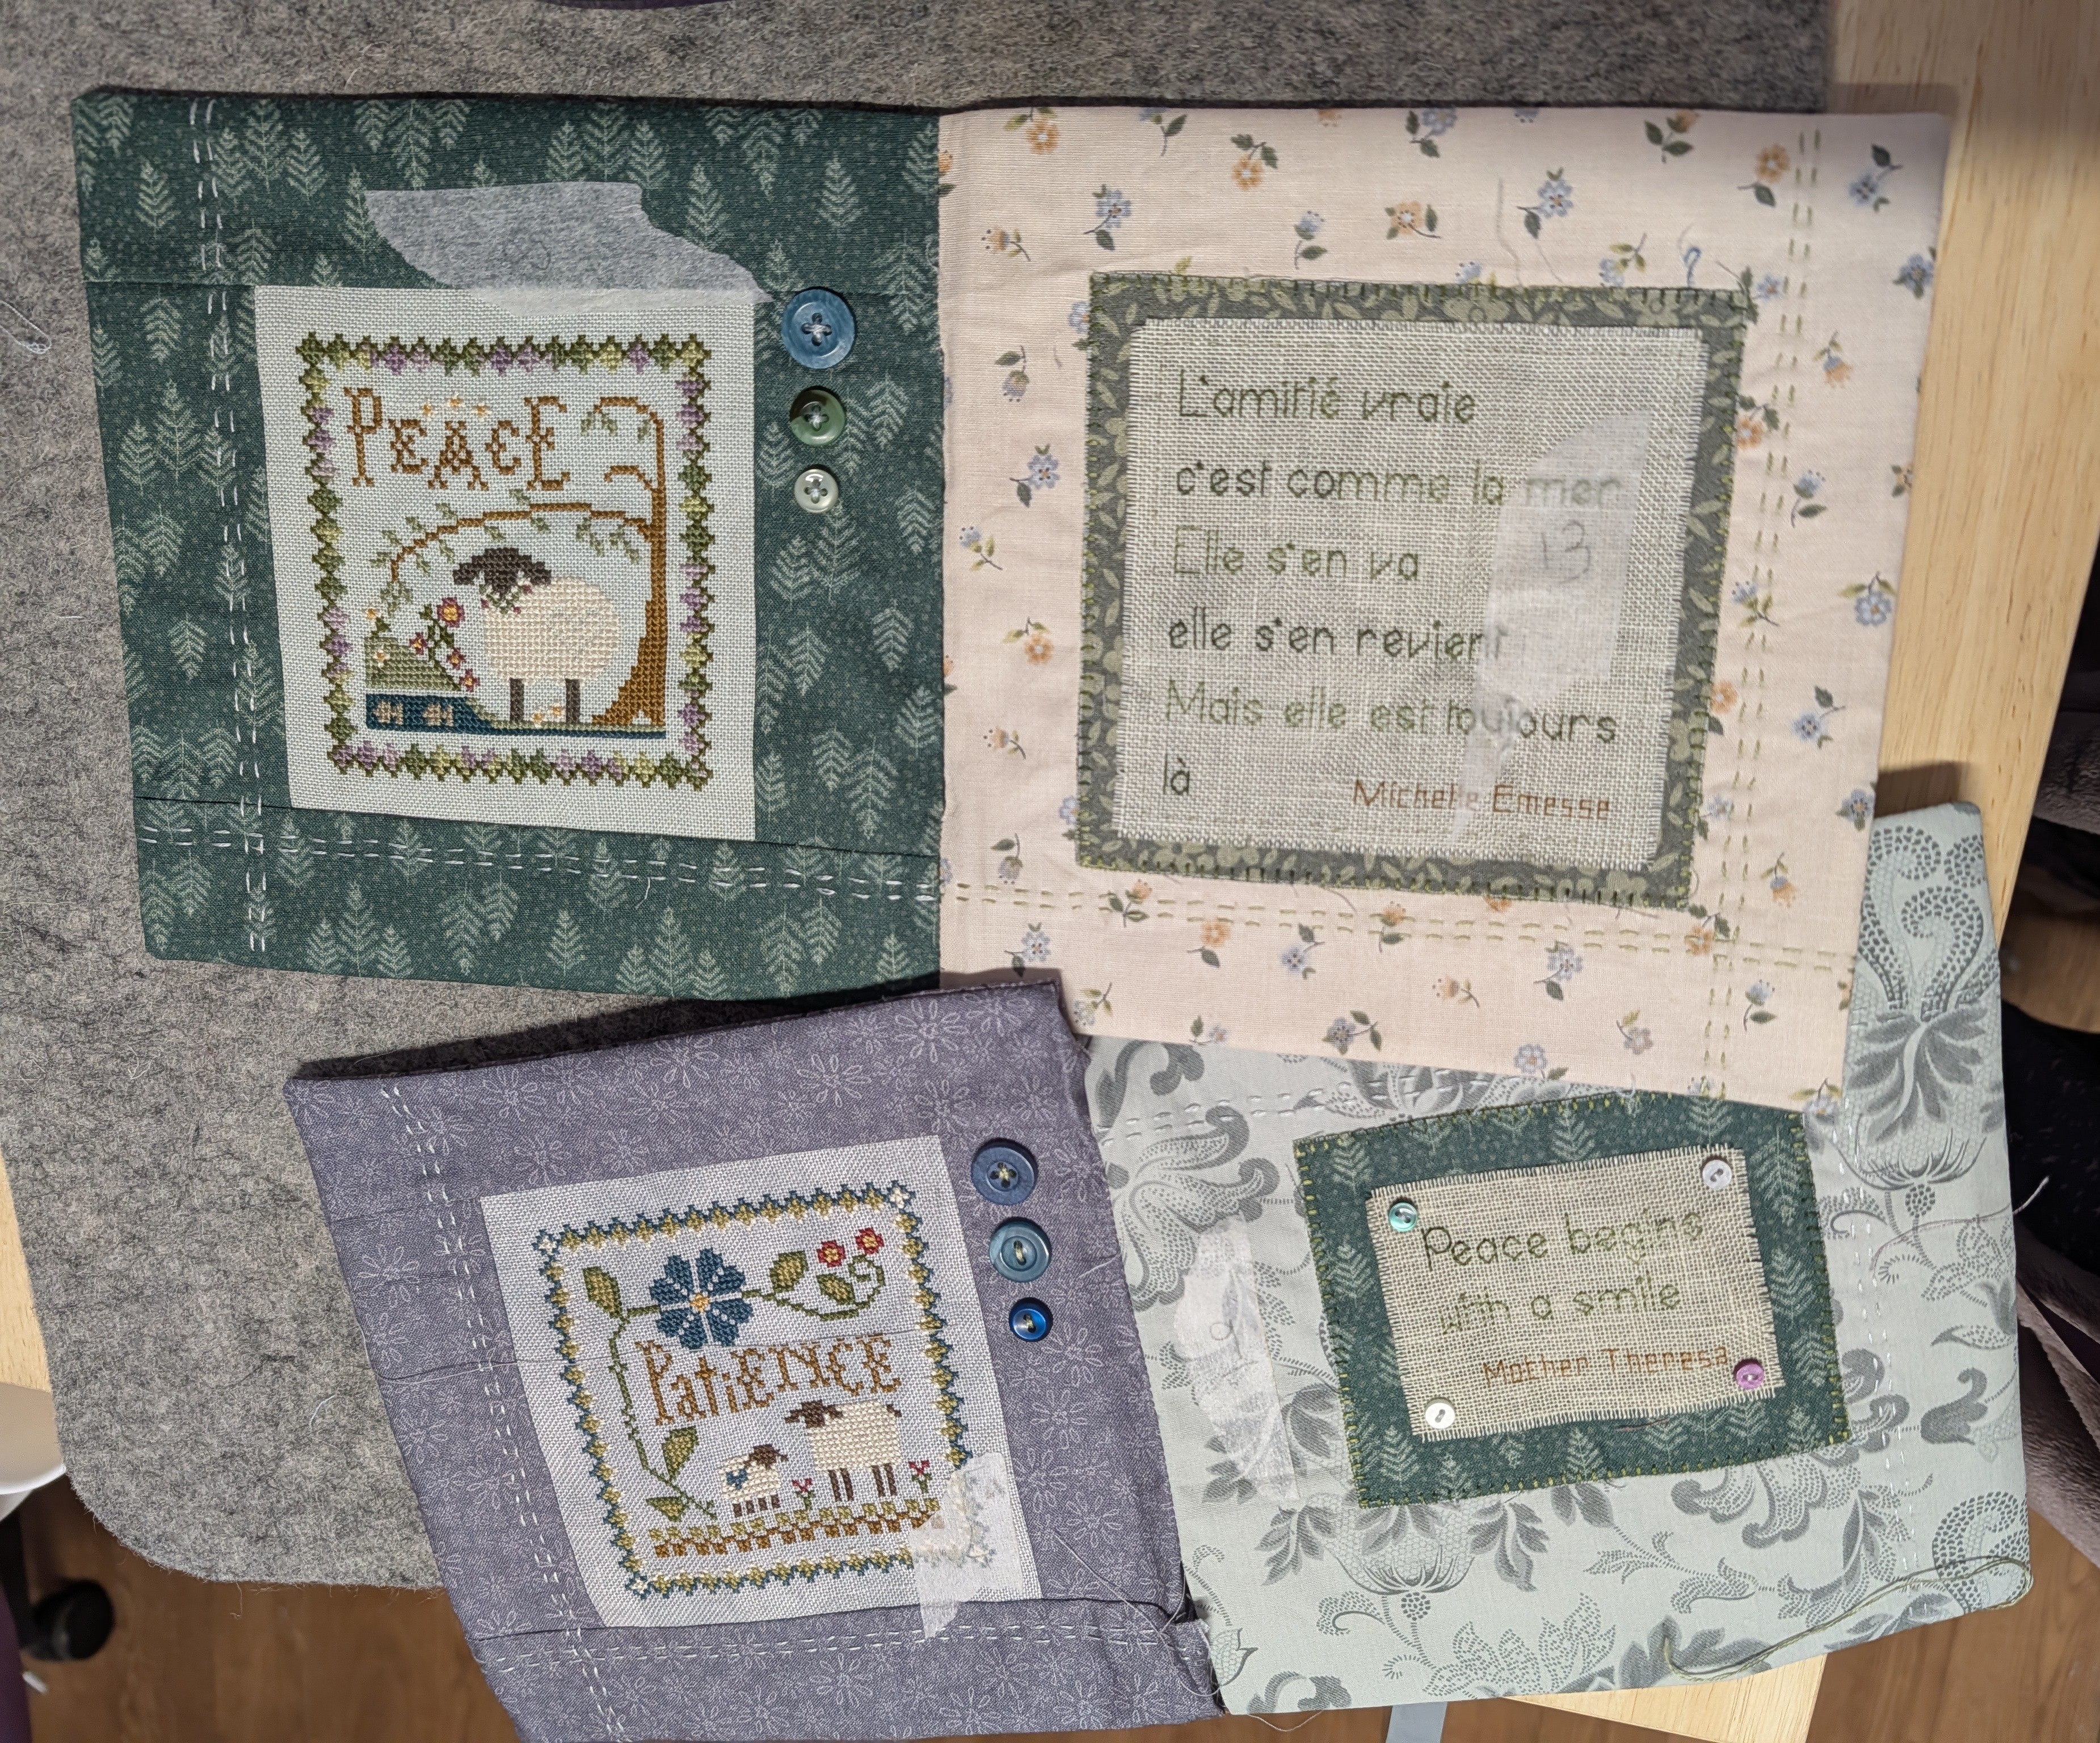
In my last post I shared the finished pages of cross-stitch, a mixture of Little Sheep Virtues, some with apt quotes along side, and some of the Sew Together series…

The instructions for the slot and tab book is on Anne Woods website, she uses it for her ‘100 days of stitch’ books, they’re very good instructions, very clear, but you do have to concentrate during the construction…a lot!
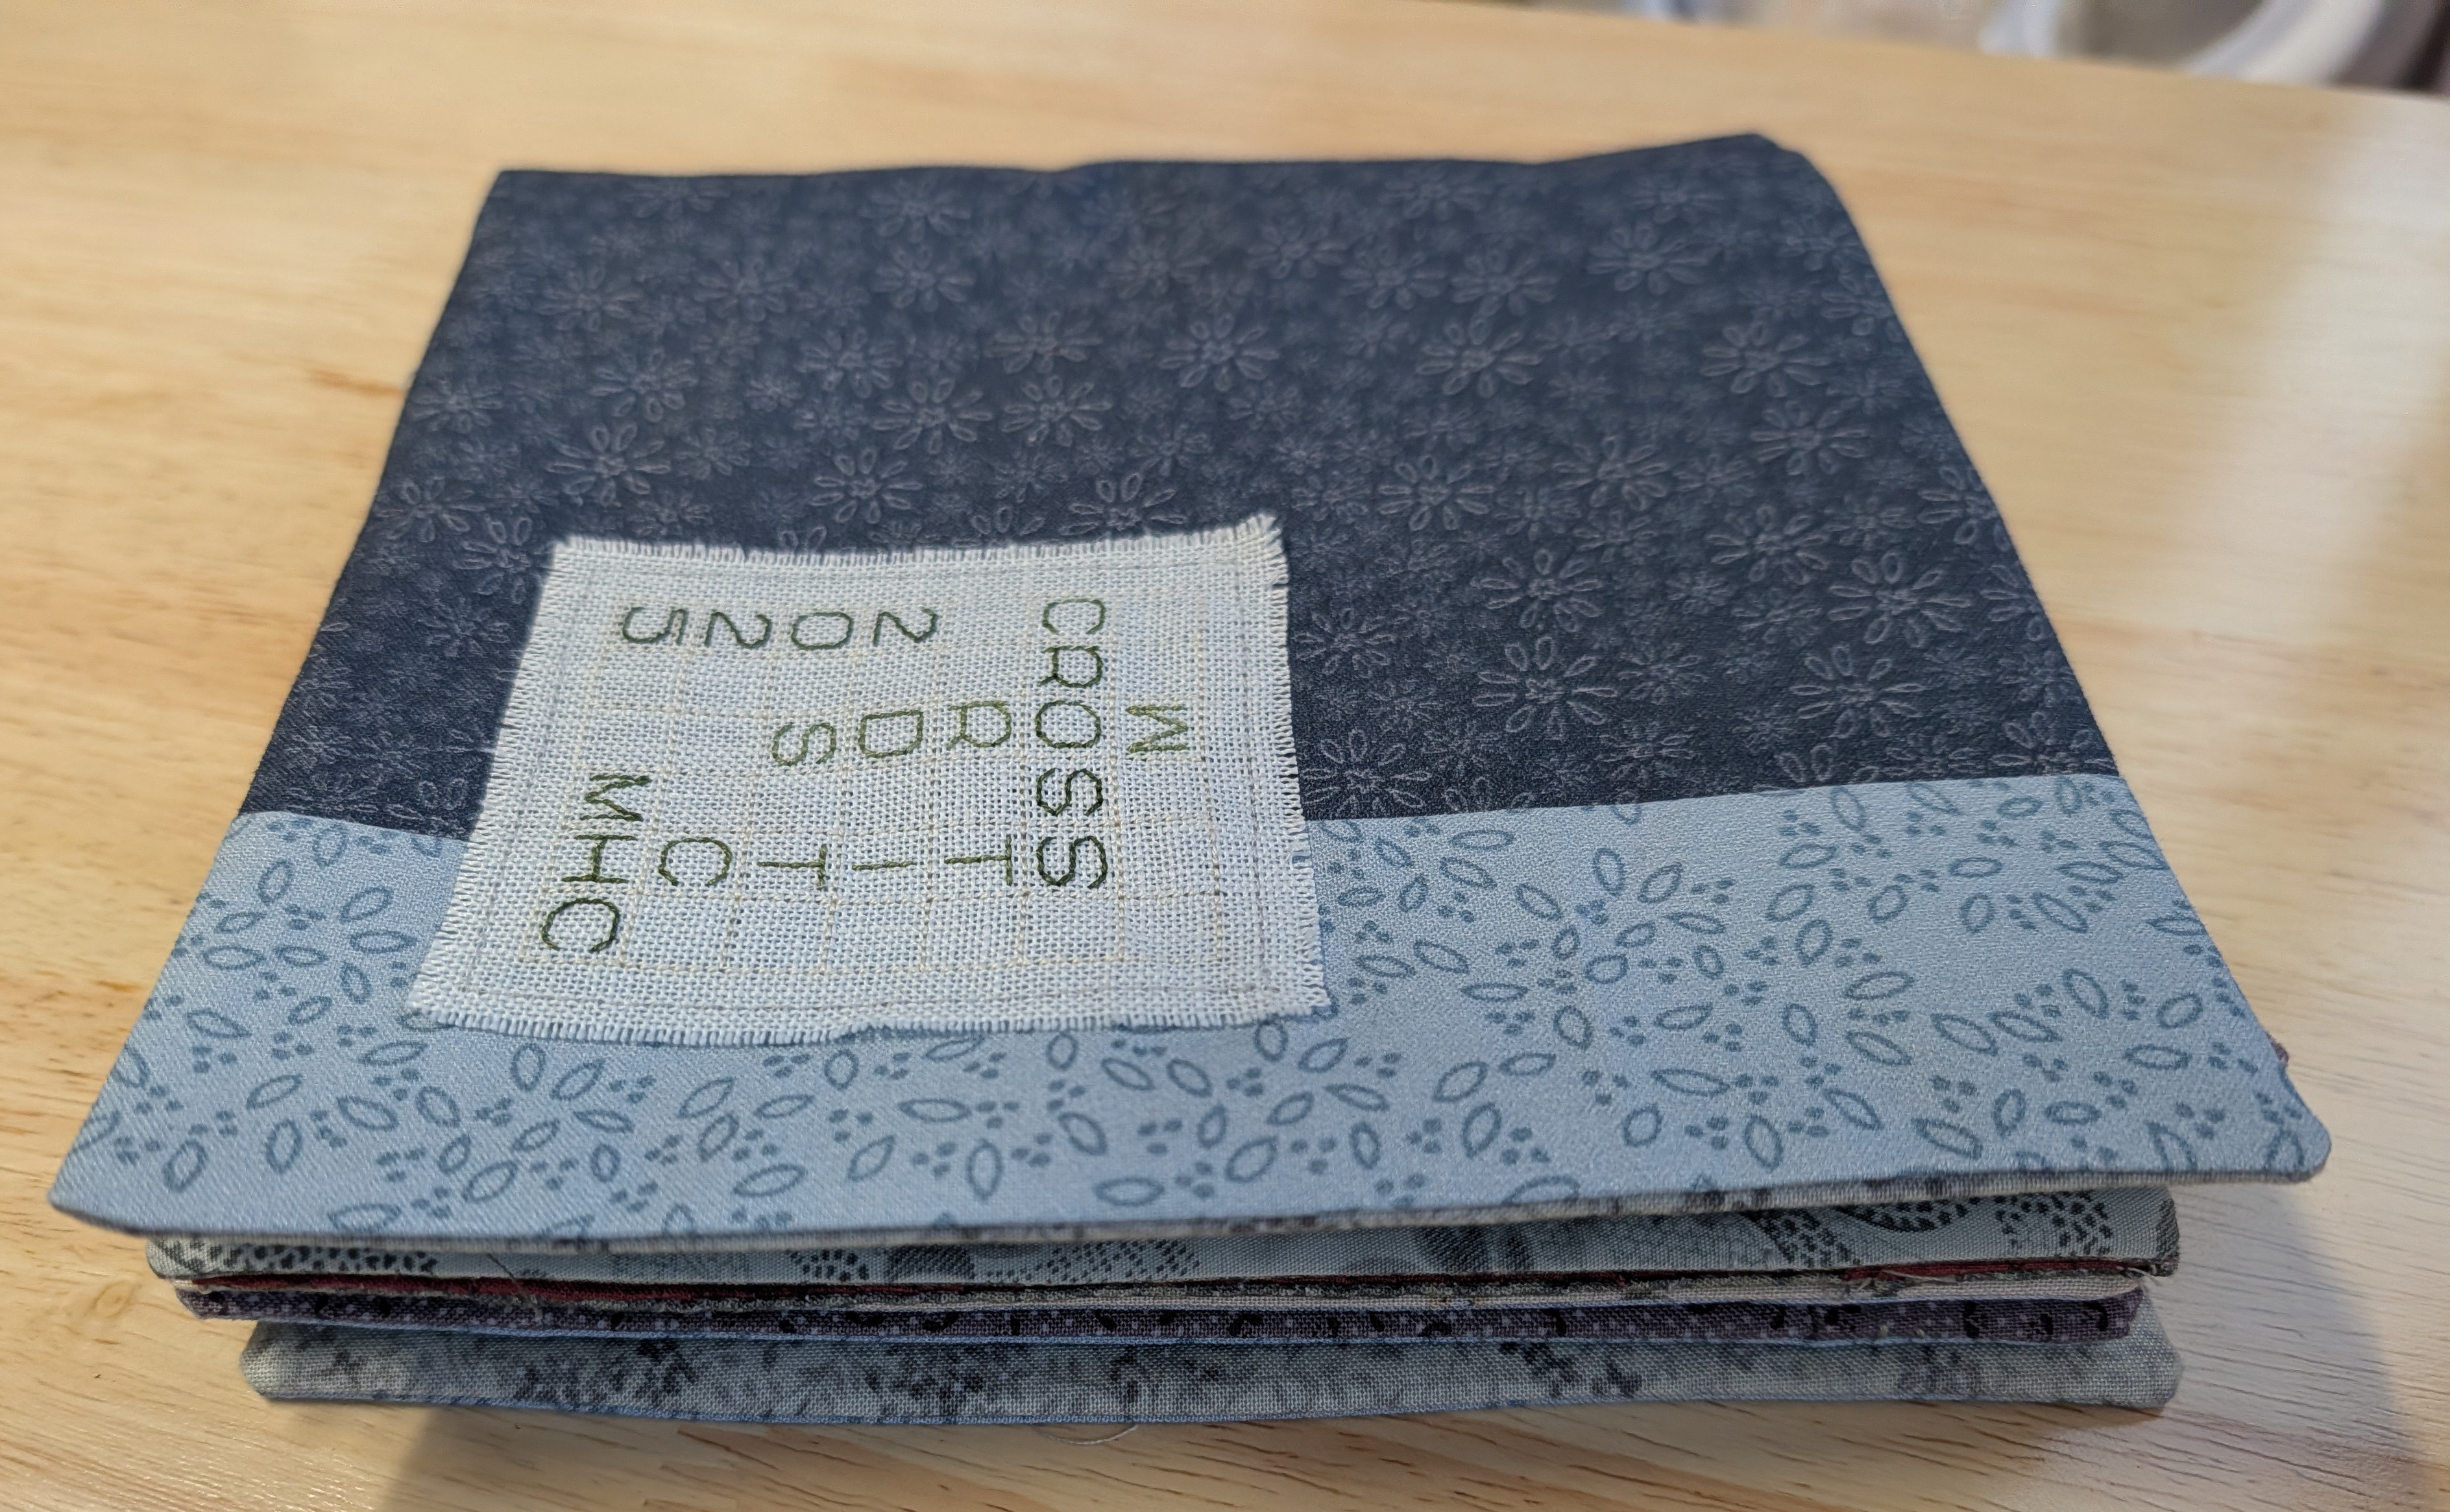
The instructions are for a book of twenty pages, four of which are taken up by the front and back cover. I would have thought you could alter the number of pages but it’s certainly beyond my brain. Having seen a comment on instagram about the books I made the front and back covers half an inch wider than the pages as they wrap around the spine a bit, it worked out well as the covers are just nicely wider than the pages when closed. I did a crossword for the front title, it’s also got the grid in ecru which is hard to see on the photos.
Having read the instructions and handled the pages quite a lot when doing the running stitch, I realised that my cheats method of bondaweb to attach the backing fabrics for the quotes was not going to survive turning the page inside out, some were already starting to lift. This may be because its quite old bondaweb, but I needed to rectify it. I used the button hole stitch on my sewing machine and a variegated green machine embroidery thread to go round each one and I think it’s worked pretty well.
To make the book you basically need three sets of pages with a slot in the centre and two sets with ‘tabs’, the tabbed one will slot into the other…
…so the top one on the photo has the slot and the bottom one will ‘slot’ into it. Easy enough! The problem is that the pages are not opposite the one where they will be when it’s put together! You will notice the tape stuck on each page, that has the page number on, so page 8 is attached to page 13…I knew I would have to concentrate!
I stitched the first set of four pages together, turned them the right side out, pressed them, happened to fold them in half…and realised one set was upside down! I had to unpick it all and start again, not great with quarter inch seams when you’ve already trimmed the corners!
After that they all seemed to go together smoothly, I hand-stitched all the openings closed and started to put it together. You have to put them together in order and when I went to slot on the fourth page I realised I had attached the two sides the wrong way round as in left to right. It was the last set of pages I stitched later in the evening so I was probably tired. This wouldn’t have been vital in some books but two quotes were opposite the wrong sheep. Out came the unpicker again!
Luckily the correct pages were backing the right page, so I just unpicked the centre seam, stitched them both closed so I had two separate pages, I could then attach them again by hand having swopped them left to right. I fixed it this morning and after a good press I put them all together…

…and everything was in the right order!
This method of making a book makes a nice soft, squidgy book, not quite so neat and tidy as books I’ve made before. I think it would be lovely for a children’s fabric book, they could even have fun taking it apart and putting it in the right order!
As I said before, I’m pleased with it, I like it…but I don’t think I’ll be making another using this method…too much brainpower for a start! I think I like my fabric books to have a bit more structure too, I like softer books for some things, but I still like the construction to be neat and for the pages to lay nicely. It was a useful exercise, I’m trying out different book constructions at the moment for my talk next autumn – I’ll certainly have plenty to talk about with this book!


Absolutely fabulous 🤍
LikeLike
That is wonderful, congratulations on the finish!
LikeLike