
When I was planning my Amber & Amethyst garden last year I wanted an arch at one end with a seat underneath, I bought a metal one which matched the gated arch at the entrance. The idea was to get a seat to go under it. The problem was I couldn’t find a seat that fitted within the arch and the arch itself wasn’t very stable.

I decided what was needed was another wooden arbour. I started pricing them, but I then discovered a quirky wooden seat on Skipton market, it’s made from recycled chairs etc. I love it, though my OH isn’t sure yet!
I now needed an arch to go over the top but I couldn’t find one the right size or price, so I started looking for instructions on making one. I like doing basic woodwork for the garden, the 2×2 lengths sort of woodwork, I’ve made obelisks and when he was younger my son and I made a chicken coop and a woodstore (summer holiday projects!)
I found a lovely looking arch on Remodelaholic, they have a video on you-tube as well as printable instructions. I can certainly recommend it, the instructions are straight forward, easy to follow and adapt. It was just what I needed, I could alter the measurements to make it smaller but wider. I ordered four 6′ uprights and found the rest of the wood around the garage, leftover from other projects. Six lengths were even rescued from the firewood pile! My plan was to make it over the Easter break!
On Good Friday afternoon I started making the sides. One design feature I liked with this arch is the ‘trellis’ bit, the design just had three long lengths, I made my arch wider so I made it with five lengths instead. It’s much easier than traditional trellis, it’ll be easier to paint and the plants will grow up it the same way! The wider wood at the top helps to stabilise it, and also supports the top. This is the bit I rescued from the firewood pile, it’s actually slats from a bunkbed – I didn’t even need to shorten them! By the end of Good Friday I had two sides made.

On Easter Saturday I concentrated on the top. The ends needed shaping, luckily I’d been able to borrow a professional jig saw off my son, it is useful when you have a son with a trade! I’d not used a jig saw before but I drew my curvy line and went for it! I was really pleased how they came out. I loved using it that much I shaped the side ends too and used the saw for cutting all the lengths to size!

The length of the top was determined by the length of wood we had left, 4.2m, so each side is 2.1m, just long enough. I cut a few battens and spaced them evenly across the top. I put them fairly close together as I knew the arch was only 6′ tall so I wanted plenty of support for the climbers along the top. The top had to neatly fit across the sides, so I lay them together whilst I was screwing them in. Yes that is a quilting ruler you can see in the middle, perfect for working out 45′ angles and small measurements!
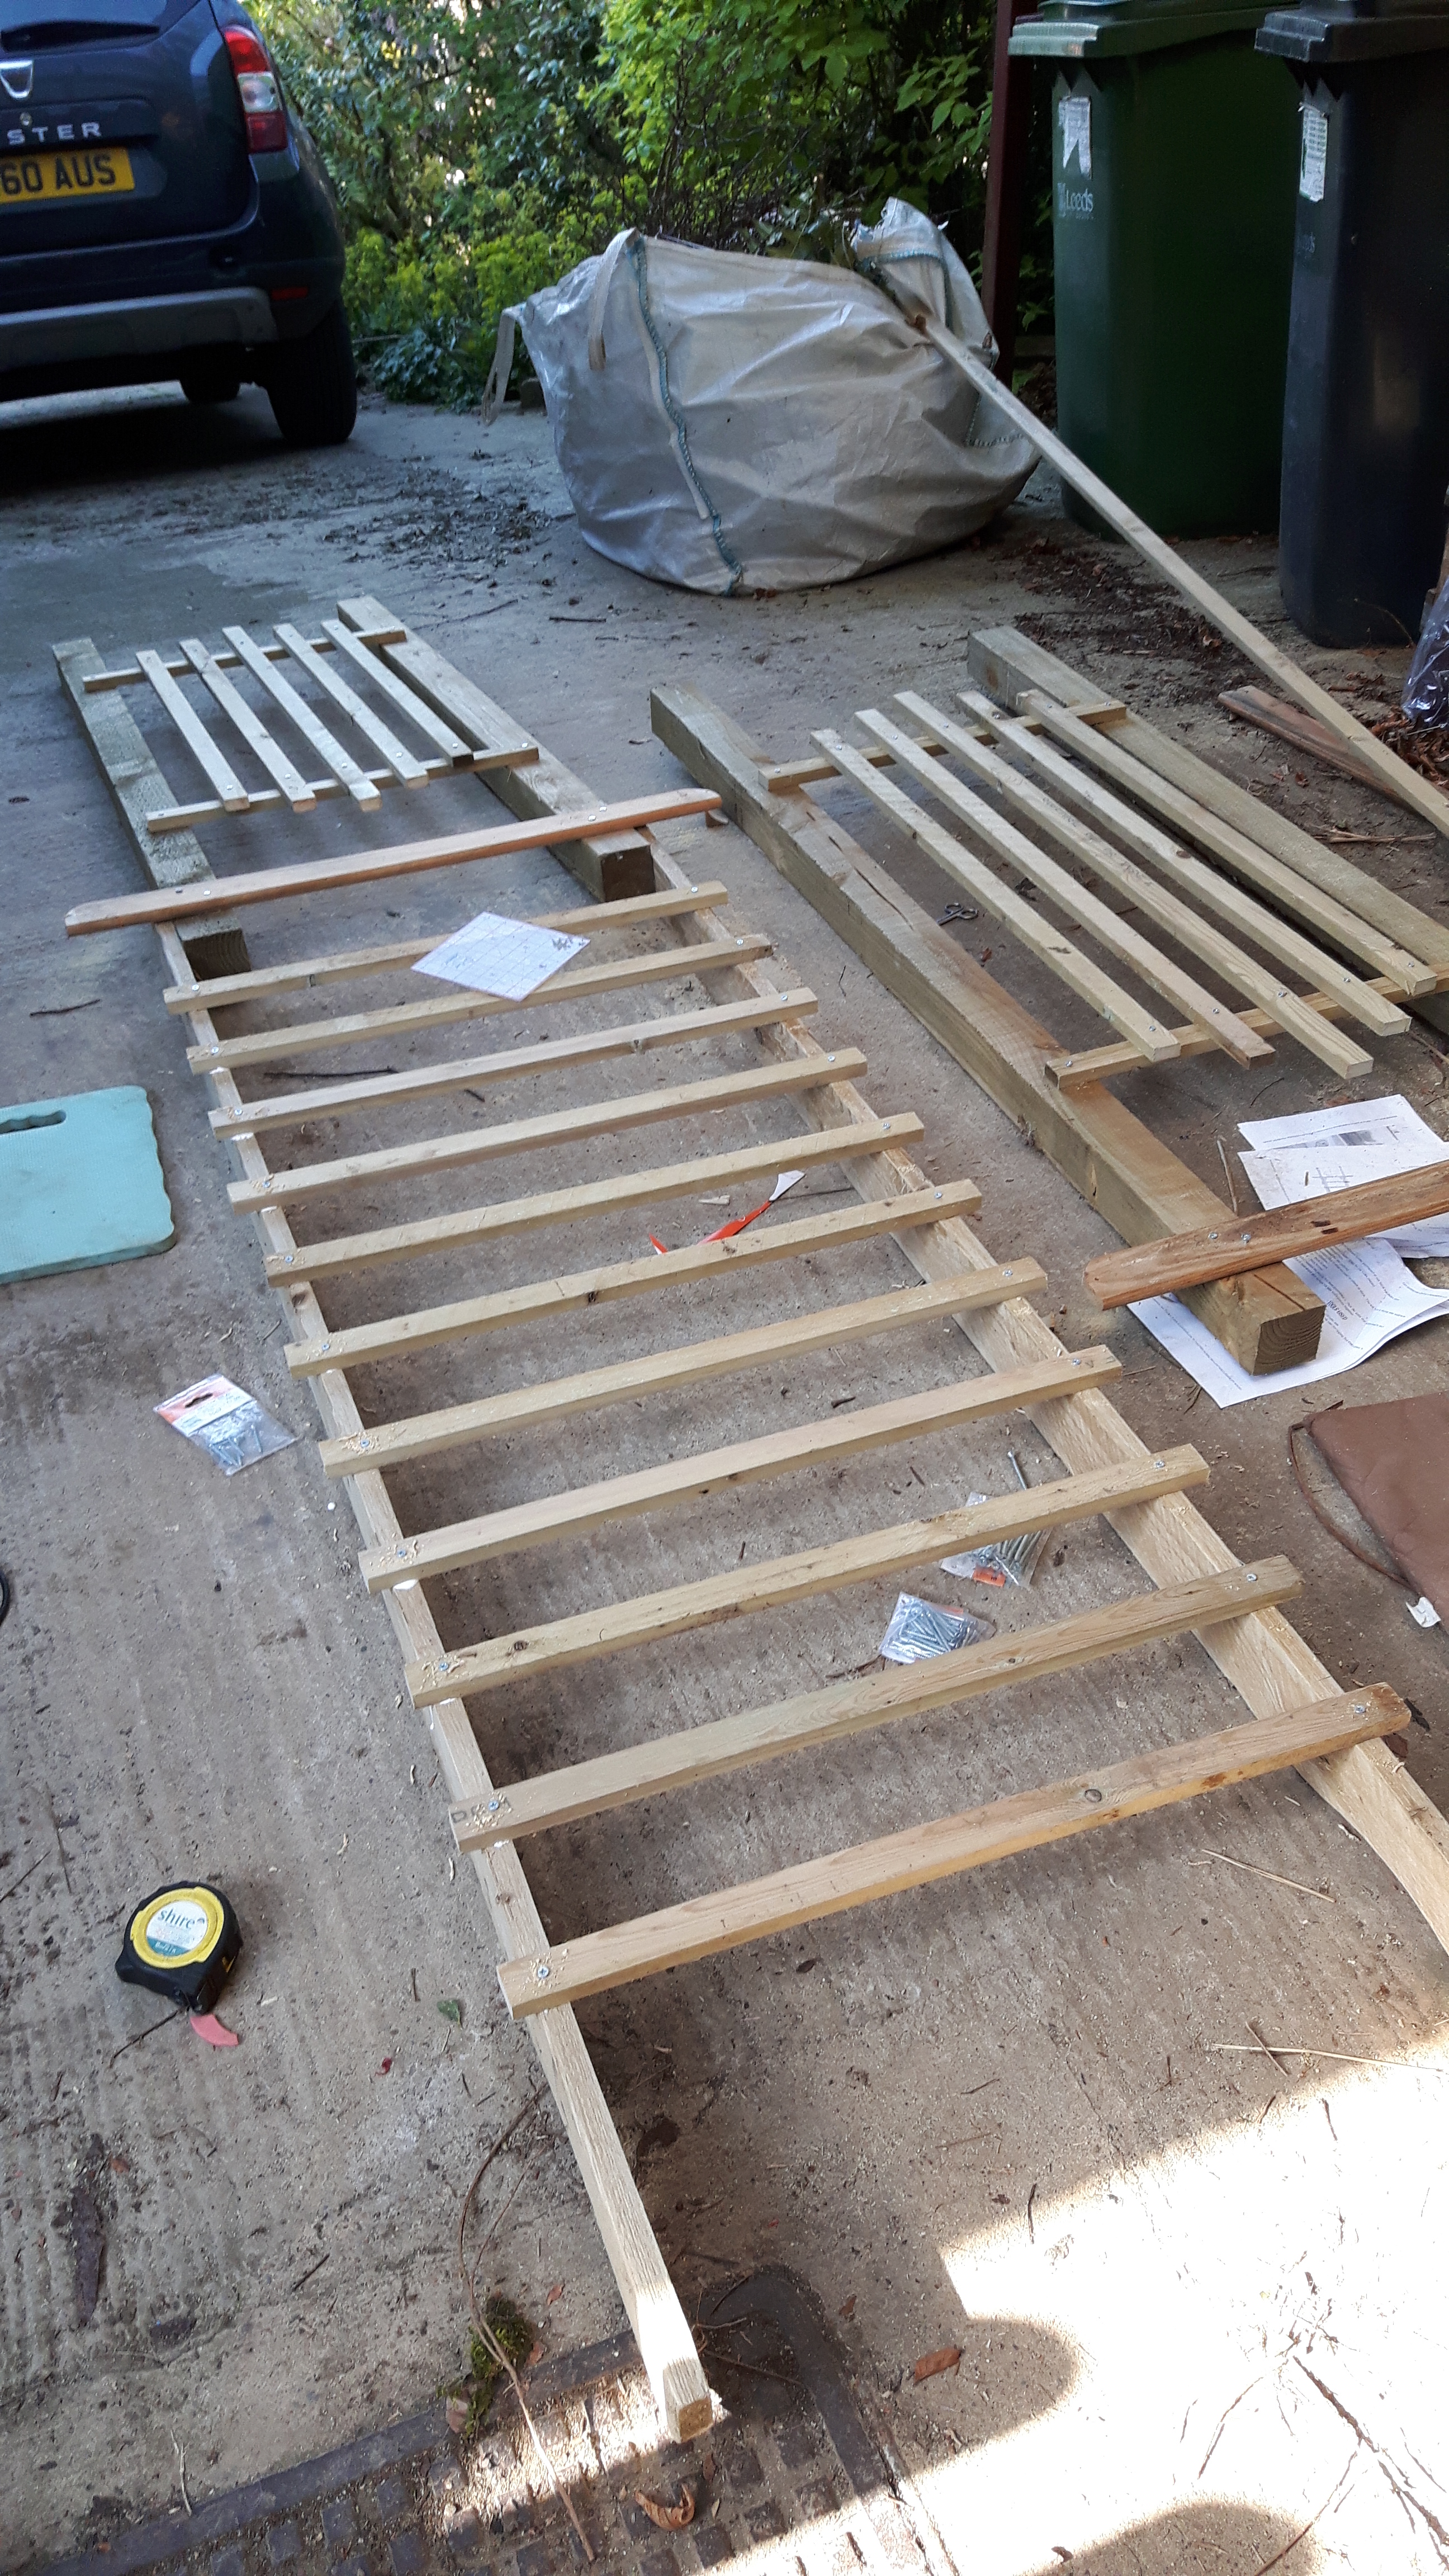
Easter Monday was putting it all together day! I’d got a set of metal spiked post holders to support it and this was the bit that caused the most hassle. Clearly the spikes had to be exactly the right width apart so the sides would slot in, there wasn’t much room for ease. I measured as I sledge-hammered them in, checked the side half way, but whatever I did one spike seemed to twist. Luckily I could just about get the side in. For the second side I decided to enlist the help of my OH, he held the side up whilst I slotted it in the spikes and then pushed them all down together. We got them about half way before I needed the sledge hammer, but one still twisted!! Luckily I could still stand the side in them. My worry then was that if the sides were slightly askew, the top might not slot down, as it was a pretty snug fit!. It took a bit of persuading but I finally got the top on and screwed together.

The last bit to do was attaching the diagonal bits on the corners (bed slats again!) I was meant to drill from the bottom corner through to the upright post. I had problems anyway as my drill wouldn’t stay on the curved edge, I made a hole with an awl, drilled the hole up to the hilt but it didn’t even come out the other side, never mind into the post! I consulted with my OH and he remembered some little metal angles in the shed and luckily it worked.

I’m well chuffed with my arbour, it feels pretty solid, it’s not bolted to the posts as I couldn’t work out how to do it, but it doesn’t feel like it will go anywhere. It just needs a coat of paint now and I can put my new seat underneath it. On Thursday we’re going to the Harrogate Flower Show, so clematis is now on my shopping list!


Well done! Things are little easier with fabric and a sewing machine, aren’t they? You must remember to take a photo when the seat’s in and the clematis has become established enough to do some climbing 🙂
LikeLike
That looks like a fun project and a complete change from the sewing room! Did you buy the quirky seat? I look forward to seeing it all set up together.
LikeLike
I was looking to see your quirky seat but alas when your beautiful arbour was in place there was no seat below it. Well done on your woodworking skills you have made a brilliant job of this. Please however, can we have a pic of the quirky seat – I am intrigued.
LikeLike
That’s amazing! I love your “can-do” attitude!
LikeLike
Good for you, WELL done!! It looks great and you have the satisfaction of making it yourself.
LikeLike
Terrific project! I look forward to seeing it painted and the quirky seat under it!
LikeLike
It looks fab, Margaret. You really are very clever. What colour clematis will you put to grow over it and are you going to paint the arbour the same colour as the obelisks? Either way, your garden is really coming into spring glory!
LikeLike
What a lovely DIY project, and it came out beautifully! I too am looking forward to seeing your quirky seat, complete with clematis climbing!
LikeLike
Well done you!!! Looking beautiful, you multi-talented woman! 🥰
LikeLike
Hello Margaret, you really are multi-talented, well done it looks lovely. A nice addition to your lovely garden and when the clematis is full grown it will look stunning. xxx
LikeLiked by 1 person
Thanks Mandy, I do like a bit of basic woodwork 🙂
LikeLike