I mentioned last week that I wanted to get a few finishes under my belt, well it’s time for a little happy dance again!
Ages ago (like sometime last year!) I bought a class on Craftsy by Leah Day called Free Motion Quilting a Sampler. I wanted to learn how to do free motion quilting properly, rather than the way I’ve just made up myself as I go along. I’d heard good reports about Craftsy classes so I thought I’d give one a go. One thing I do like with Craftsy is that once you buy something (a class or a pattern for example) it is in your library for ever, you can go back and watch it again several years down the line, as often as you want. So if you don’t get round to watching it for 18 months it doesn’t mater!
I was amazed just how long the class is, it must be about 8 hours long, over about 12 classes. Leah starts right at the beginning with sandwiching a quilt before moving on to all the techniques you need to know to fmq. She quilts a sampler quilt which you can make or buy preprinted, then you can do exactly as she does…if you like the quilt! I’d already decided to use a peacock panel which was a complete impulse buy after I saw one on facebook.
I didn’t follow Leah’s instructions to the letter, but I did learn an awful lot. I couldn’t quite bring myself to doctor my fmq foot so that it hovers, rather than going up and down with each step. I did however finally twig how to bring my threads up at the beginning and end and how to finish them, I think this is the first quilt I’ve made that hasn’t got little thread nests at the back…OK, it’s got one, but that’s a huge improvement!
Leah starts off with quilting straight lines – with a fmq foot! I must admit I’m converted to this one, I would always have used my walking foot before with all the quilt turning that involves, it’s so much easier with a fmq foot as you can go in any direction! My initial plan was to watch a lesson and then use that stitch on my peacock, so I started by quilting straight lines following the pattern on the neck.
There was then a bit of a hiatus as I was a bit disappointed with the effect on the neck and also the next stitch was stippling which I wanted to do round the bird, not in the middle. In the end I watched all the classes, making notes on the pattern and then included as many as I could on this panel!
I decided the neck needed a bit more quilting, I also changed the thread to one which blended a bit more, rather than standing out. I stitched a chain of pearls along each area on the neck, it worked brilliantly, it may not be perfectly executed but I liked the effect.
I then made the decision to quilt with the feeling of the bird, rather than sticking rigidly to the design, that was a bit of a game changer for me as it was so much easier not to be trying to fit the quilting in with the picture, instead I just let the quilting add to the picture.
His tail was a lovely area to try different patterns on. I started off with a snake paisley (or a flame as I call it), followed by some long spirals, this is one bit when I think I should have done either some smaller ones in between or echoed them as there’s not quite as much quilting here.
Below the spirals I stitched some paisleys, roughley around the eyes of the feathers. I merged these into feather fans which I quite enjoyed stiotching. I then tried ‘desert sand’ which didn’t fit in quite as well so I finished off with a few more spirals.
I used a sort of echo shell on the bottom border and a spiral chain on the top border.
All that was left was the background and the flowers. Again once I decided not to follow the picture rigidly it was much easier. I stitched a sort of flame design on the big flowers and I used a meandering clover over the little flowers, adding extra petals where needed.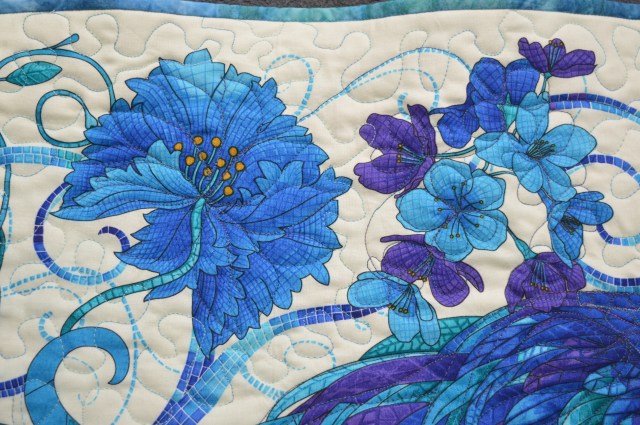
The rest of the background was stitched with stippling, or a meander as I call it, sometimes better than other times, but definitely better than before I took the class.
I’m really pleased with my peacock, especially when I look at the back, as you can clearly see the bird in the quilting.
I’m sure it will make me a bit more adventurous when I’m quilting my Splendid Sampler blocks, in fact they will be a useful revision. Using a panel to practise on also worked well, as I have something I like at the end, but I didn’t invest any time in making the panel so I was happy to experiment.
Another first for me, I machine stitched my binding on! I usually hand-stitch it as I prefer the neat finish, but I decided now was a good time to try machine stitching it down. I was quite pleased with the result, it’s certainly a whole lot faster and I only had to go back to hand-stitch one little area that had missed…but I still prefer hand-stitching for any quilt I’ve spent time on! I’m going to hang my peacock in my sewing room as I already have a peacock theme with my storage boxes!


You have every right to be pleased — it’s lovely! Is peacock-envy a thing?
LikeLiked by 1 person
Thank you, I like peacock things, I think it’s the colours!
LikeLike
Just lovely.
LikeLiked by 1 person
Thank you 🙂
LikeLike
Good for you! Quilting is an art where you can do things your way. Lovely piece!
LikeLiked by 1 person
Thanks Deb, great quote 🙂
LikeLiked by 1 person
It’s lovely. I like fmq – and have the foot – but I have to remember not to get carried away and go too fast, although too slow’s not good either. I like the idea of doing a panel or single blocks but not sure if I’d be brave enough to do anything larger.
LikeLiked by 1 person
Thanks Tialys, I still haven’t quite mastered the speed thing yet, I tend to gradually get faster and faster! I think I need a speed limiter!
LikeLike
Cruise control!
LikeLiked by 1 person
Well done, Margaret! I have watched some of Leah Day’s very early videos on you tube, and she is beyond amazing. I bet you are feeling quite brave now, after watching a whole class! She just has such a “you can do it” attitude, it is catching. 😊
LikeLiked by 1 person
Thanks Kathy, I was really impressed with her classes, she is very encouraging,but realistic too 🙂
LikeLiked by 1 person
I can see how using a panel to play with is a good idea. You have chosen the perfect way to quilt the gorgeous peacock tail.
LikeLiked by 1 person
Thanks Anne, I was happy to play and experiment with a panel, I wouldn’t be quite so keen on a quilt I’d invested time and money into 🙂
LikeLike
The Craftsy classes are brilliant and you’ve made good use of this one! Your peacock looks fantastic!
LikeLiked by 1 person
Beautiful! I love the blues in it. Wish I had half the skill!
LikeLiked by 1 person
This is so beautiful!
LikeLiked by 1 person
Thanks Kate, it’s a lovely panel
LikeLiked by 1 person
This is amazing, Margaret! I love how you emphasise all those tail feathers. Am afraid they’d have driven me round the bend!
LikeLiked by 1 person
Beautiful ☺
LikeLiked by 1 person
Thank you
LikeLike
You are welcome
LikeLike
well done!
LikeLike
Wow. So gorgeous!
LikeLike
Its absolutely stunning and bonus points to you for learning a new skill!
LikeLike
It looks great. Free motion quilting looks fun – I have tinkered with it but nothing I am brave enough to show off! Well done with yours.
LikeLike
I love the vivid colours. As a big fan of the peacock I am very impressed by this! 🙂
LikeLiked by 1 person